Subscribe to my monthly newsletter to get exclusive updates in your inbox
Subscribe Now
design

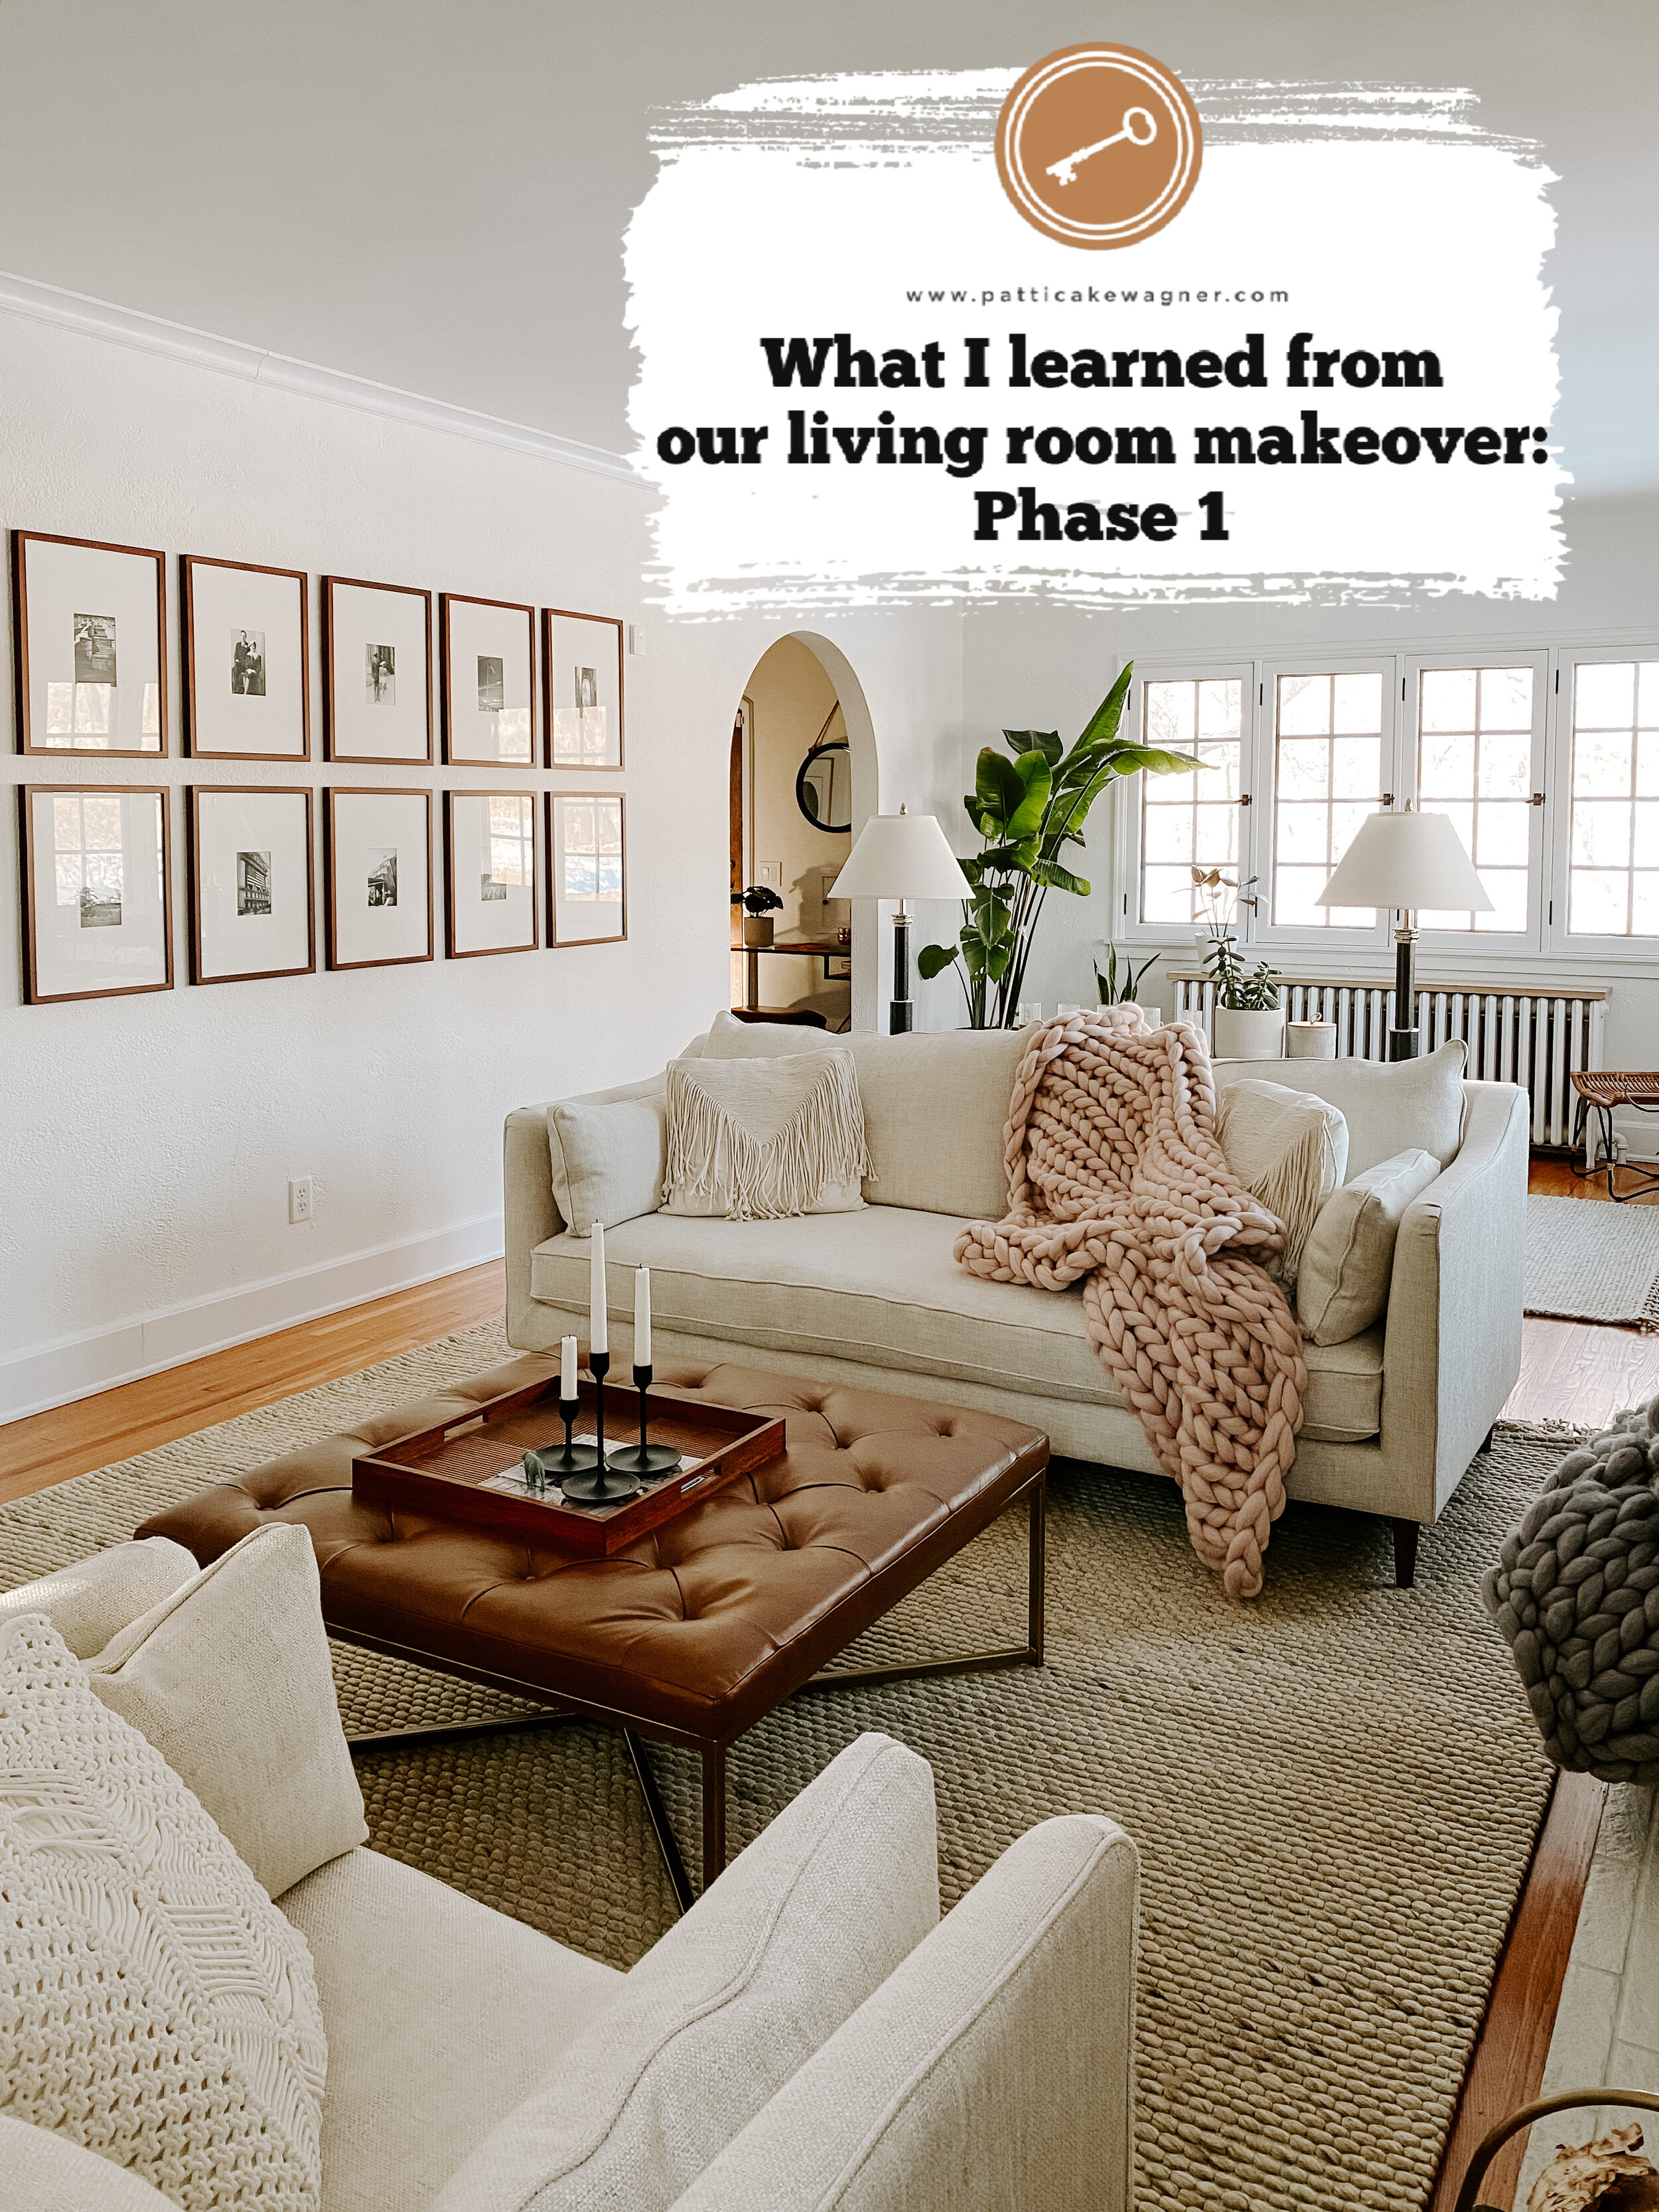
How to Maximize the Potential in a Long, Narrow Living Room

Photos by Wing Ta

See all the photos from Phase 2 of our living room makeover — and check out some seriously gorgeous pieces from Crate and Barrel’s new collection with design star Leanne Ford!

Patticakewagner_crateandbarrel_leanneford collection.jpg
Fields Accent Chair; full moon clay vase; natural wood bunching tables (NA but similar one here); natural woven baskets (NA but similar one here); dried craspedia bunch

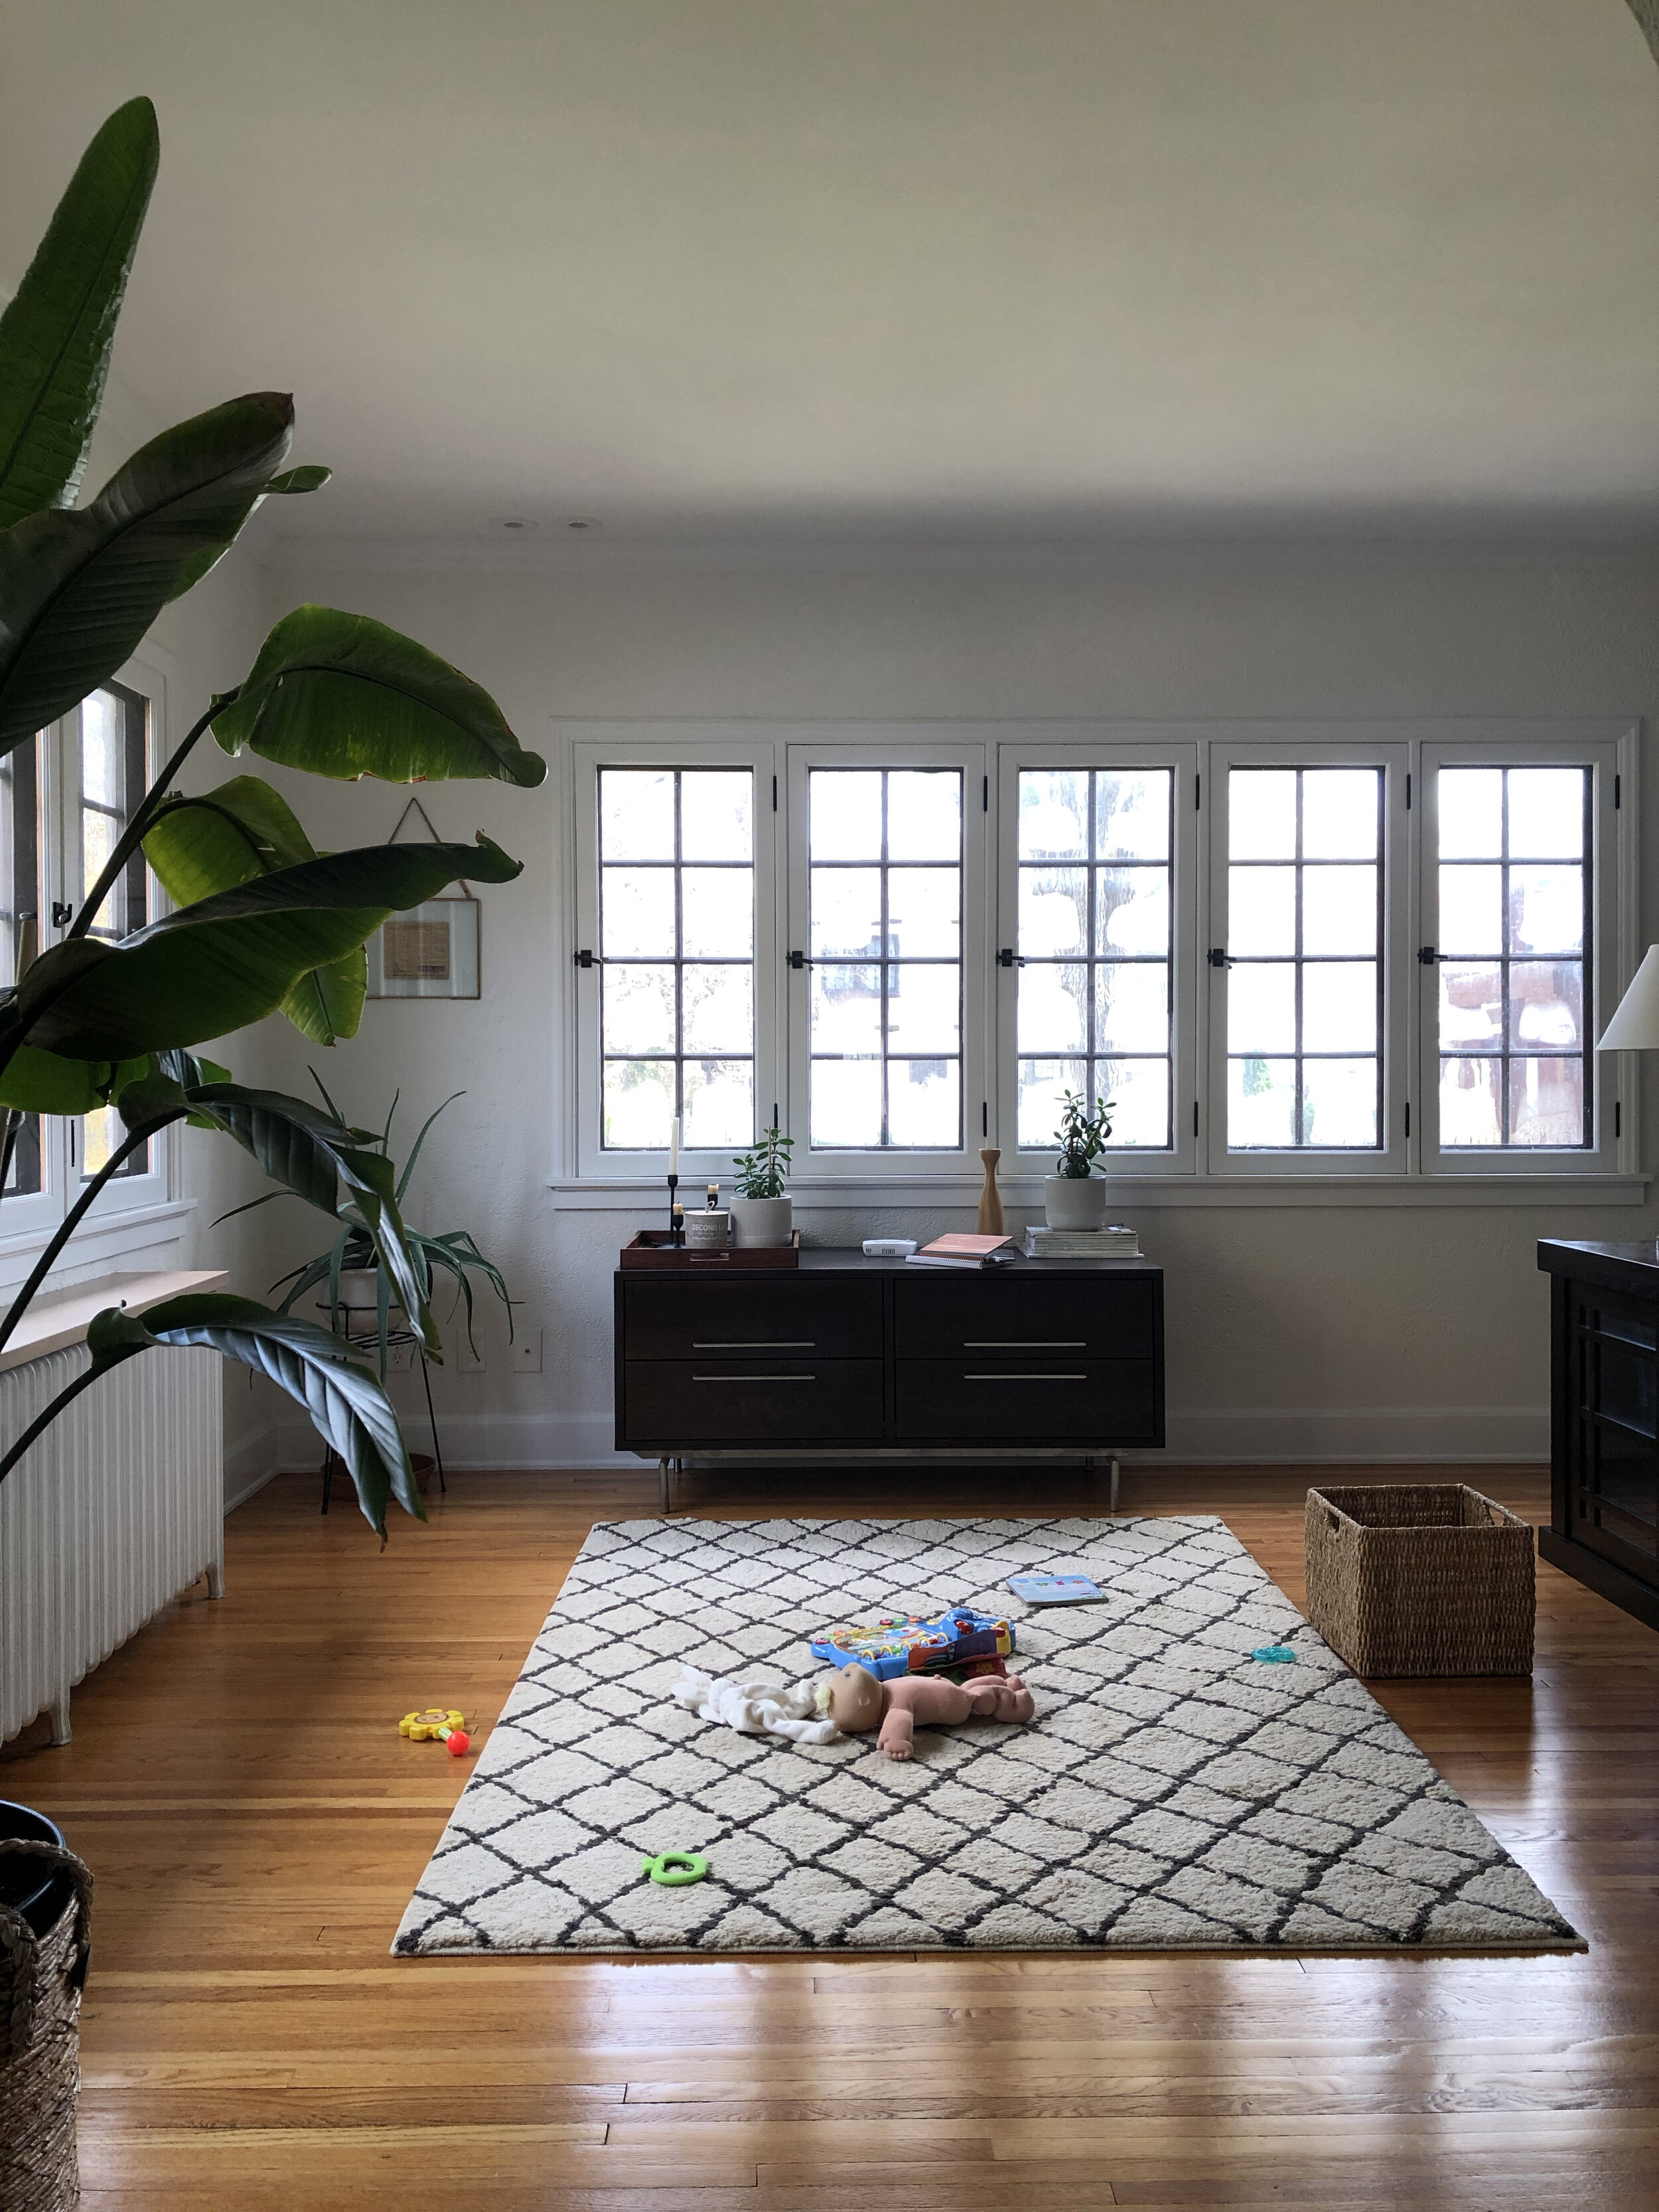
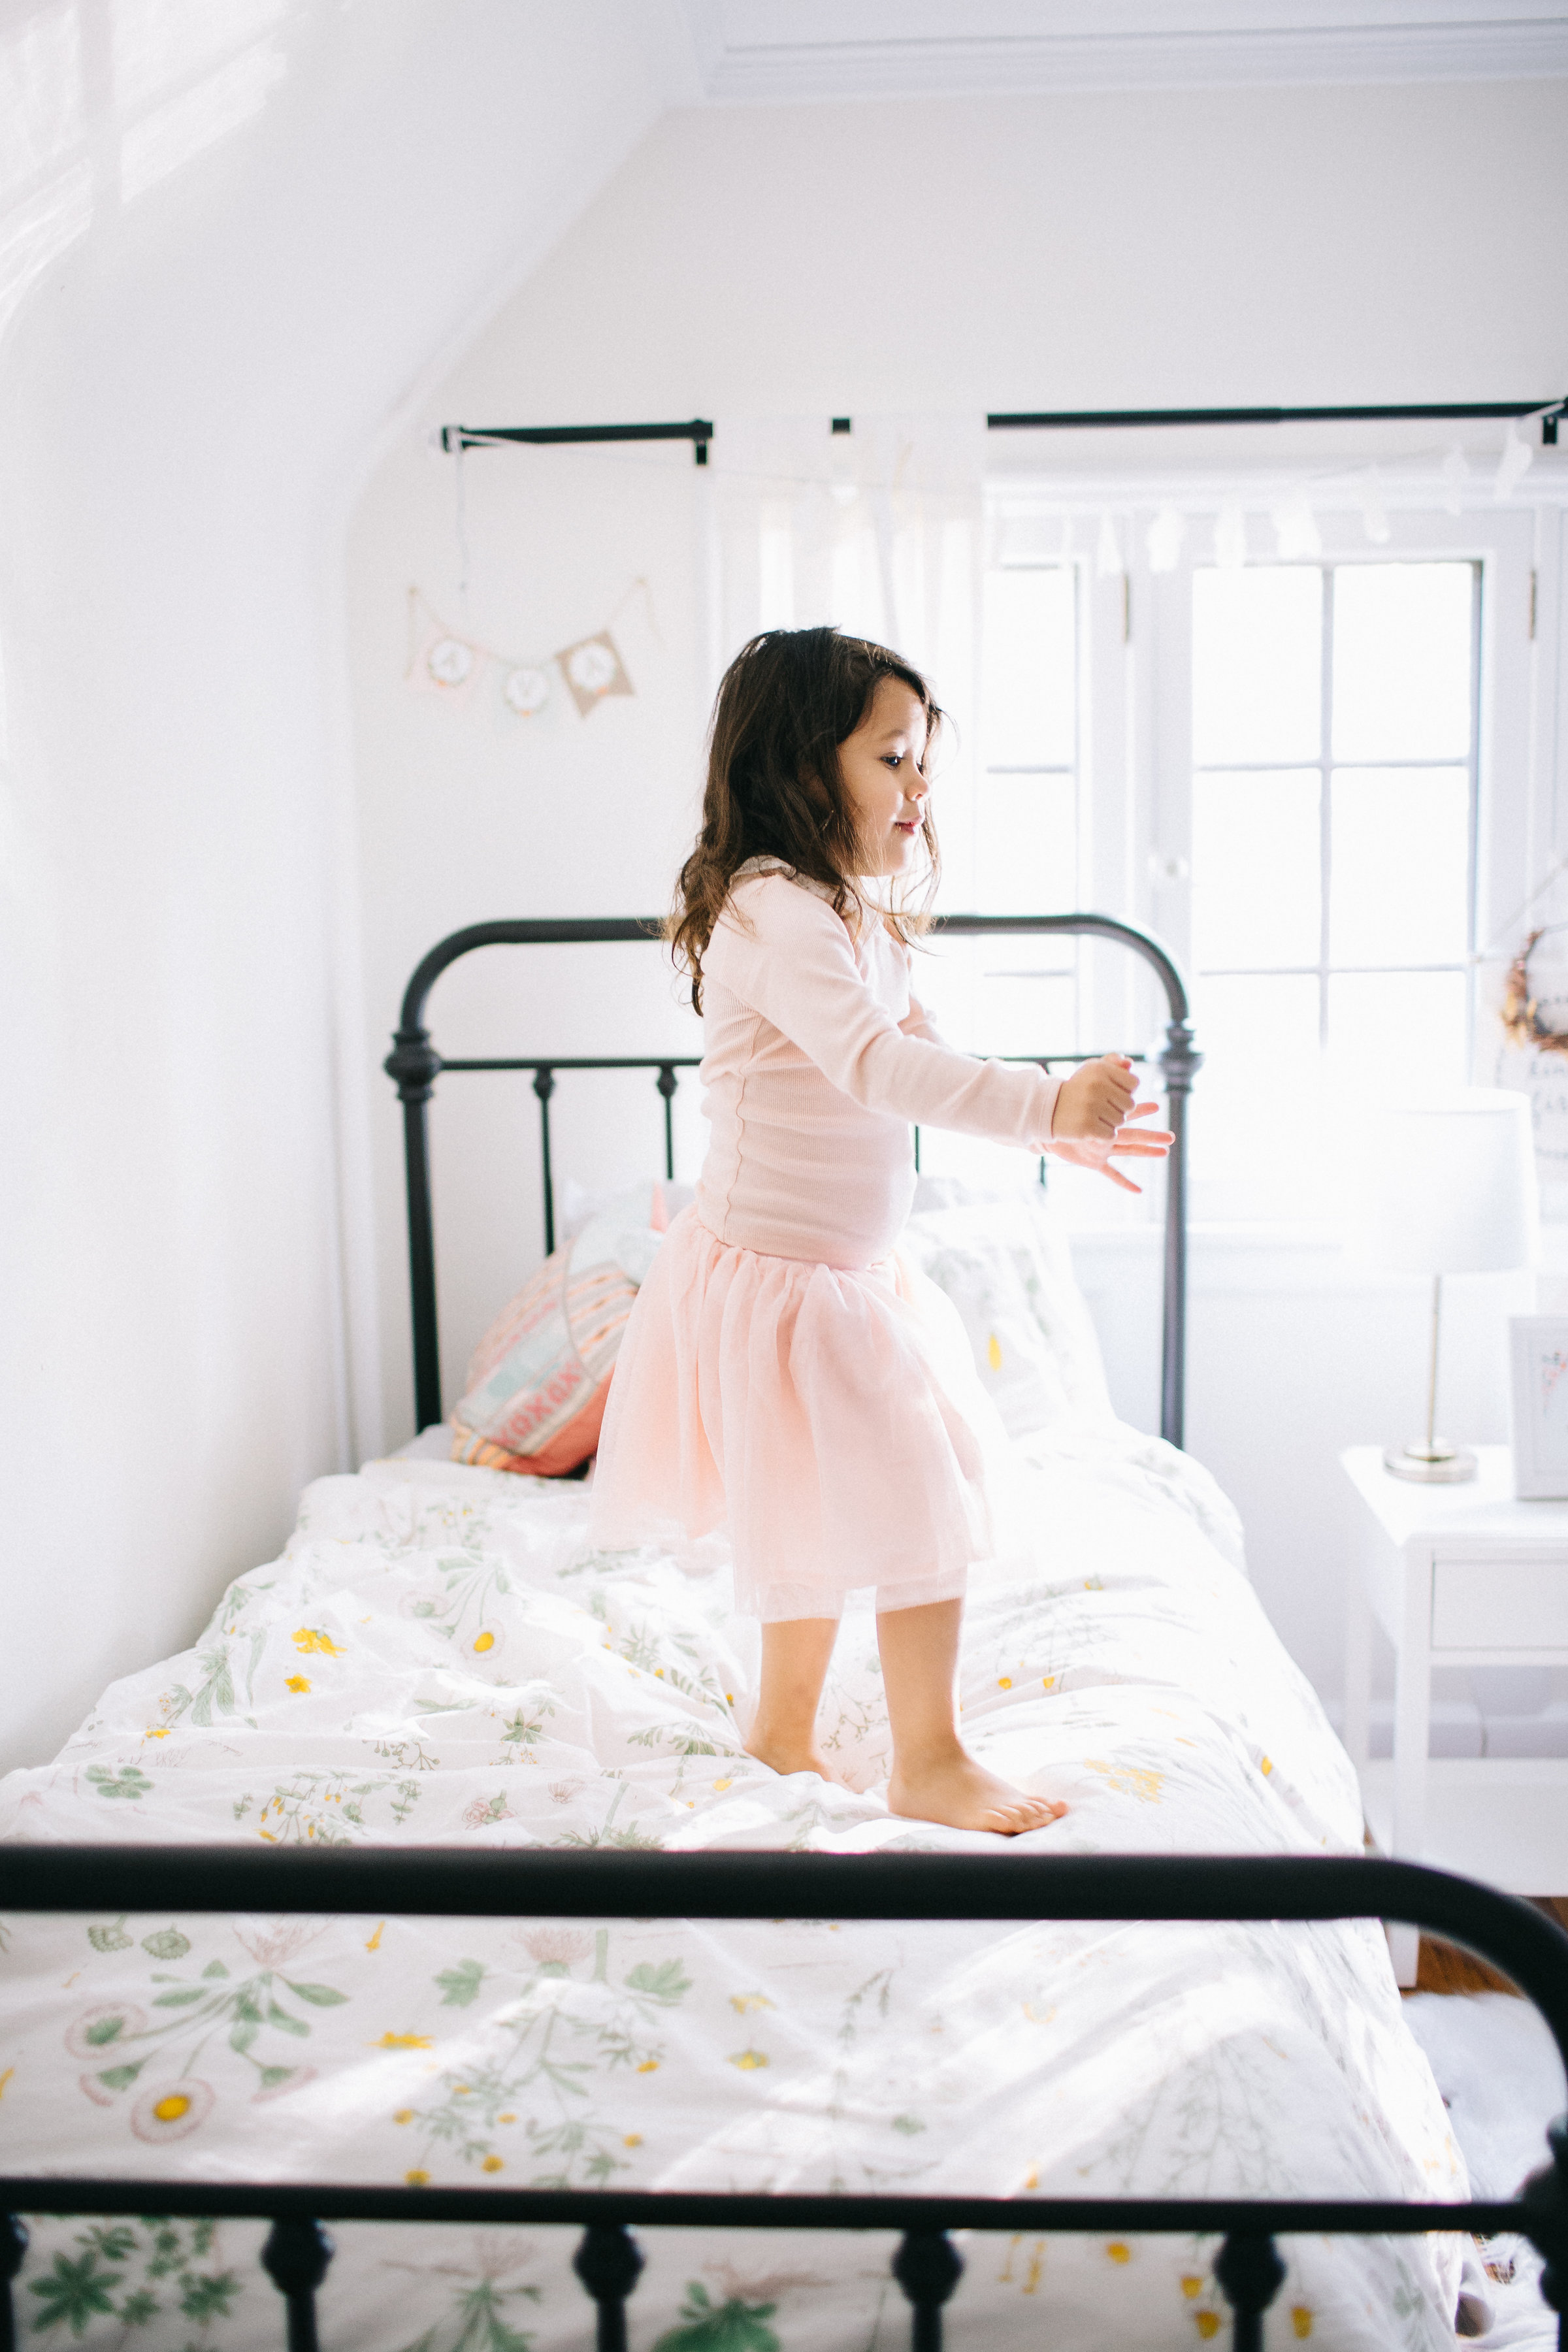
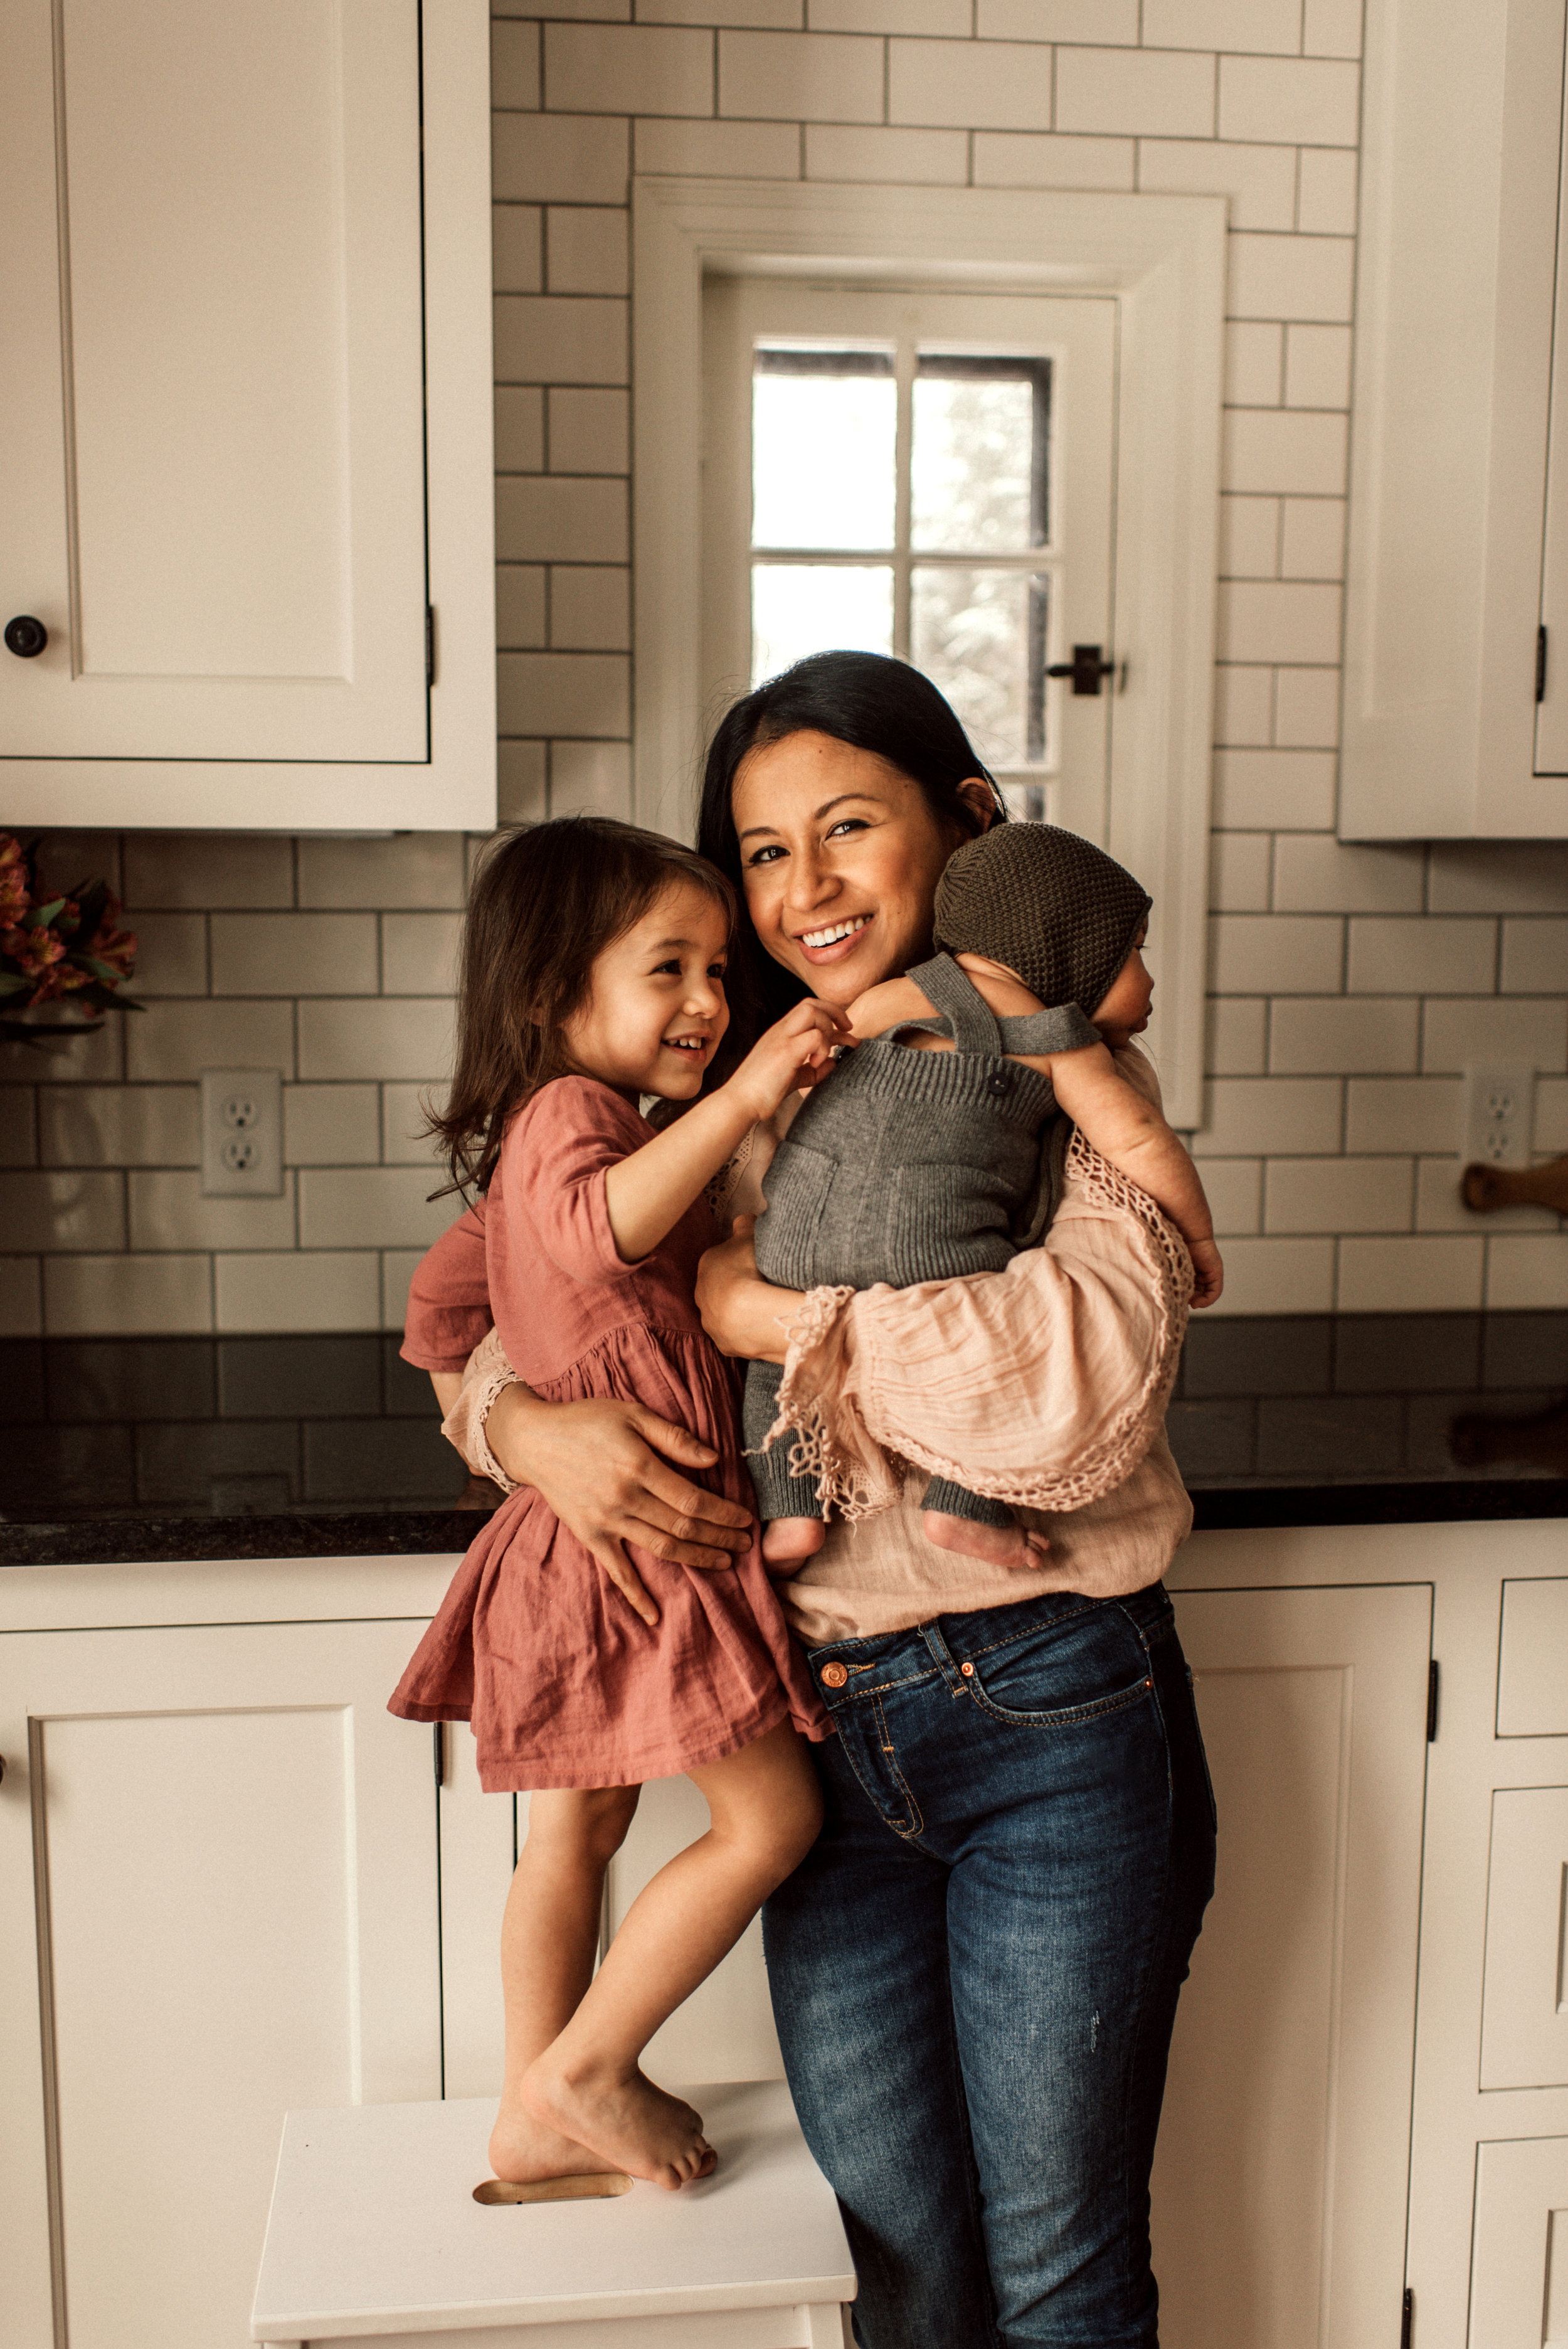
I’ve been keeping a huge secret. We got our new furniture delivered for Phase 2 of the living room makeover a few days before the stay at home order. It’s been over a month since then and this room has proven to be a place of respite for our family. Lots of conversations, block stacking, puzzle solving and dance parties here. And what’s even better is the stunning view it provides. I understand that this is a time where we’re all just trying to do our best. We don’t need to learn new skills or have new things but since most of us are spending more time at home, I do hope that your dwelling is a place of peace and comfort.

So many of you have asked for an update to this second phase of our makeover so I decided it was time to give you guys a tour and share more about how we made our long, narrow living room work for us. We had the amazing opportunity to partner with Crate and Barrel using pieces from Leanne Ford’s collection to get this space just right, and it still feels like a dream. It turned out even better than what I imagined. But before we jump in, I want to make sure everyone is caught up on our living room redesign so far.

BEFORE - we were unsure how to best utilize this space

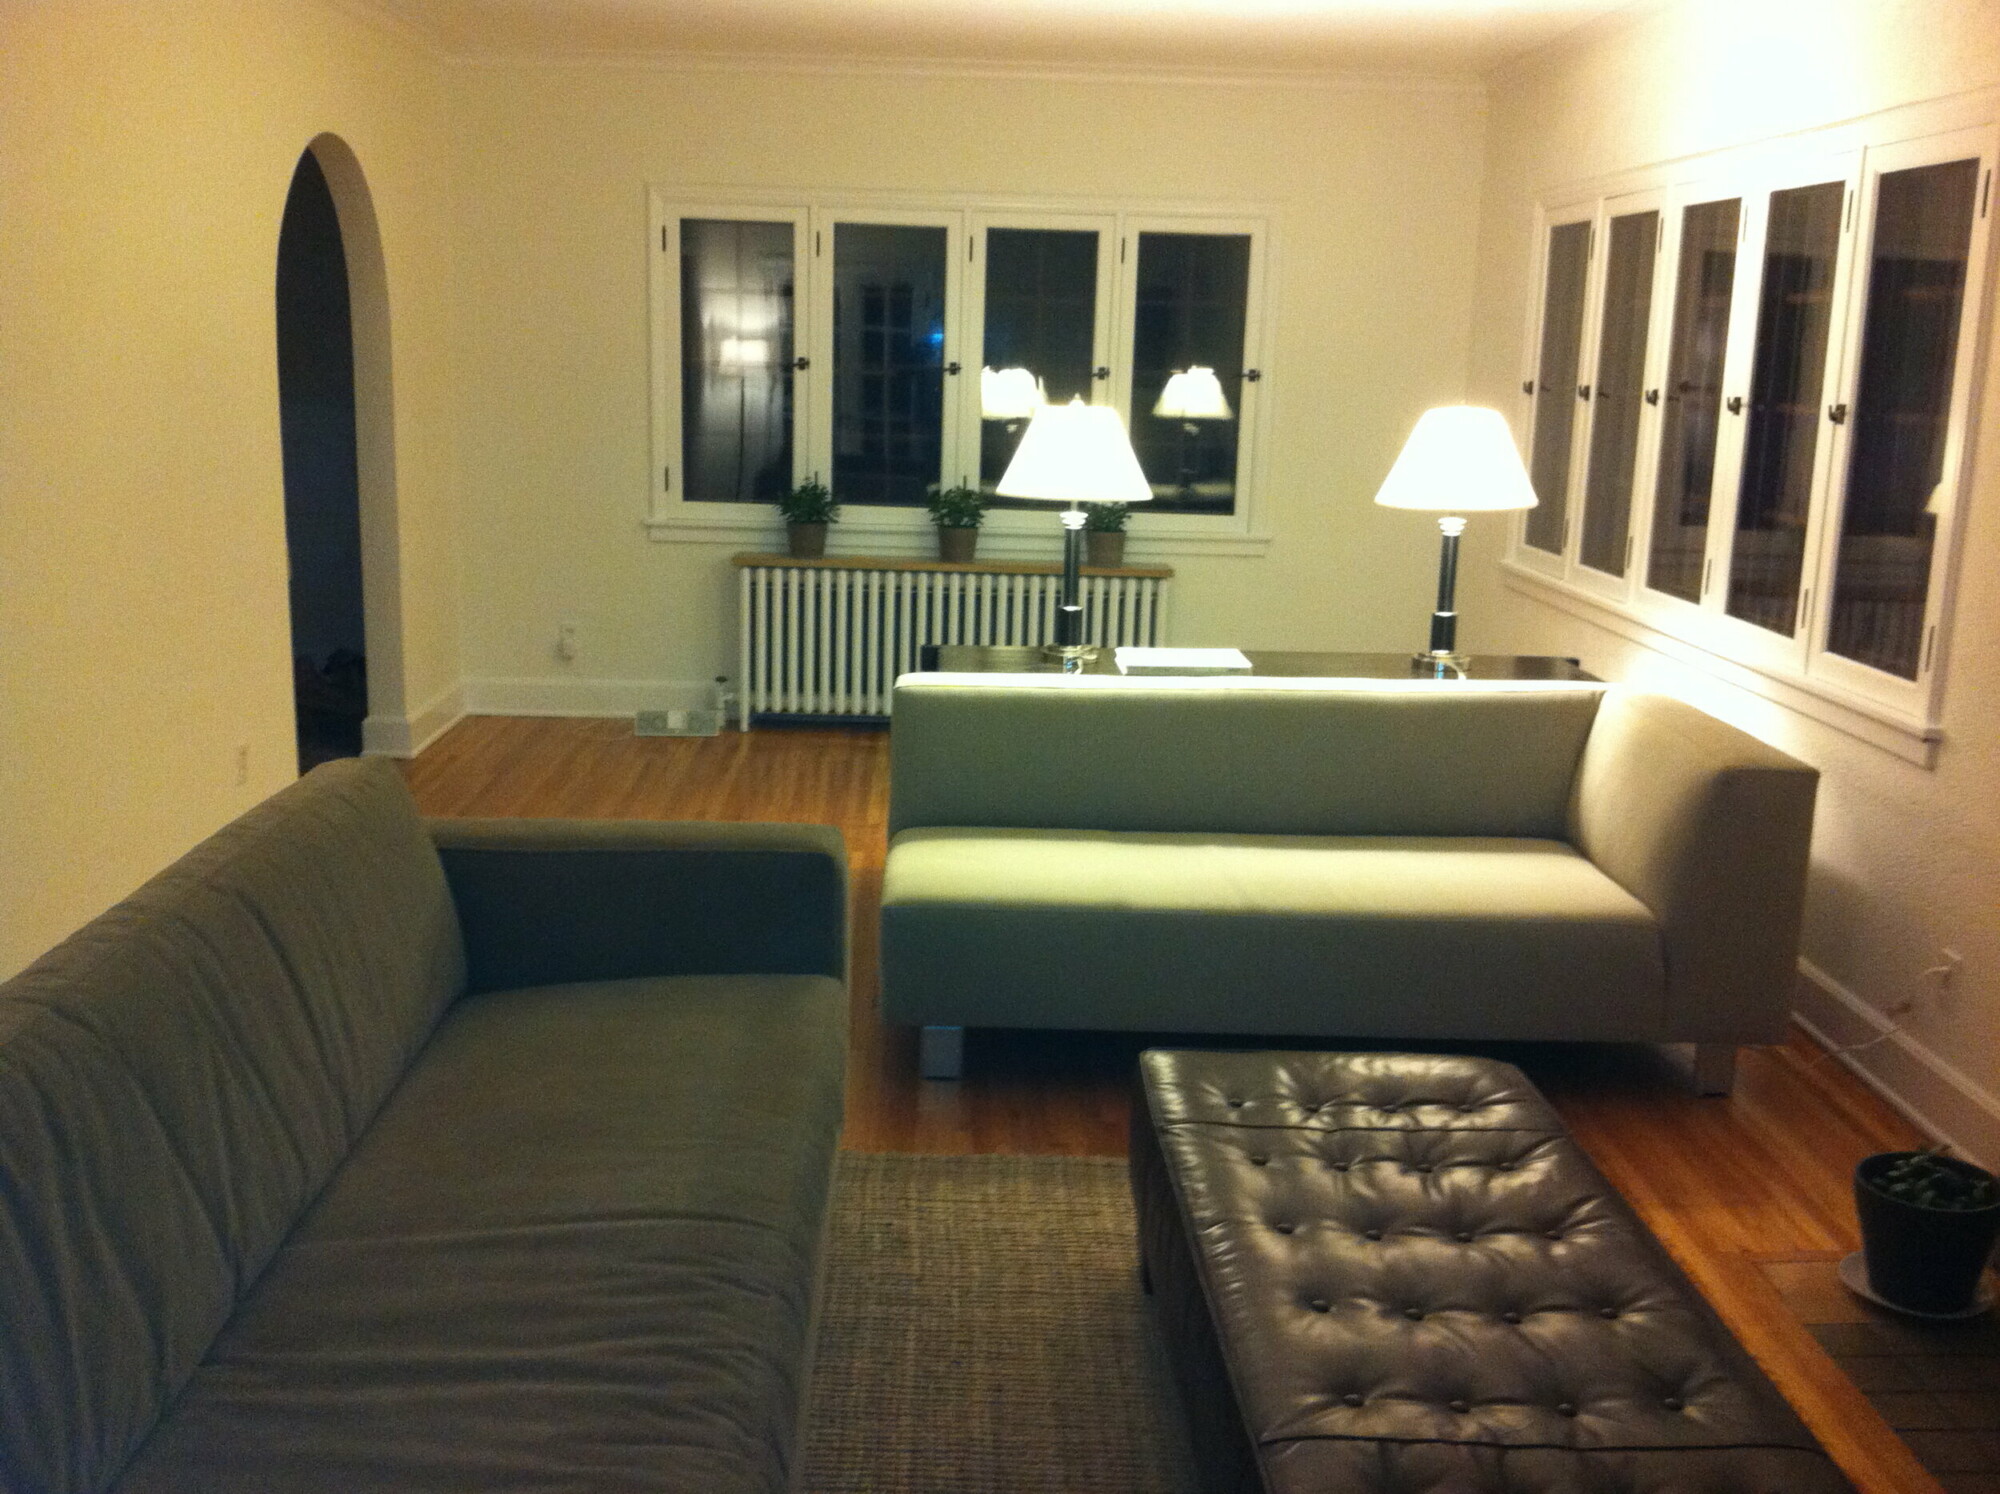
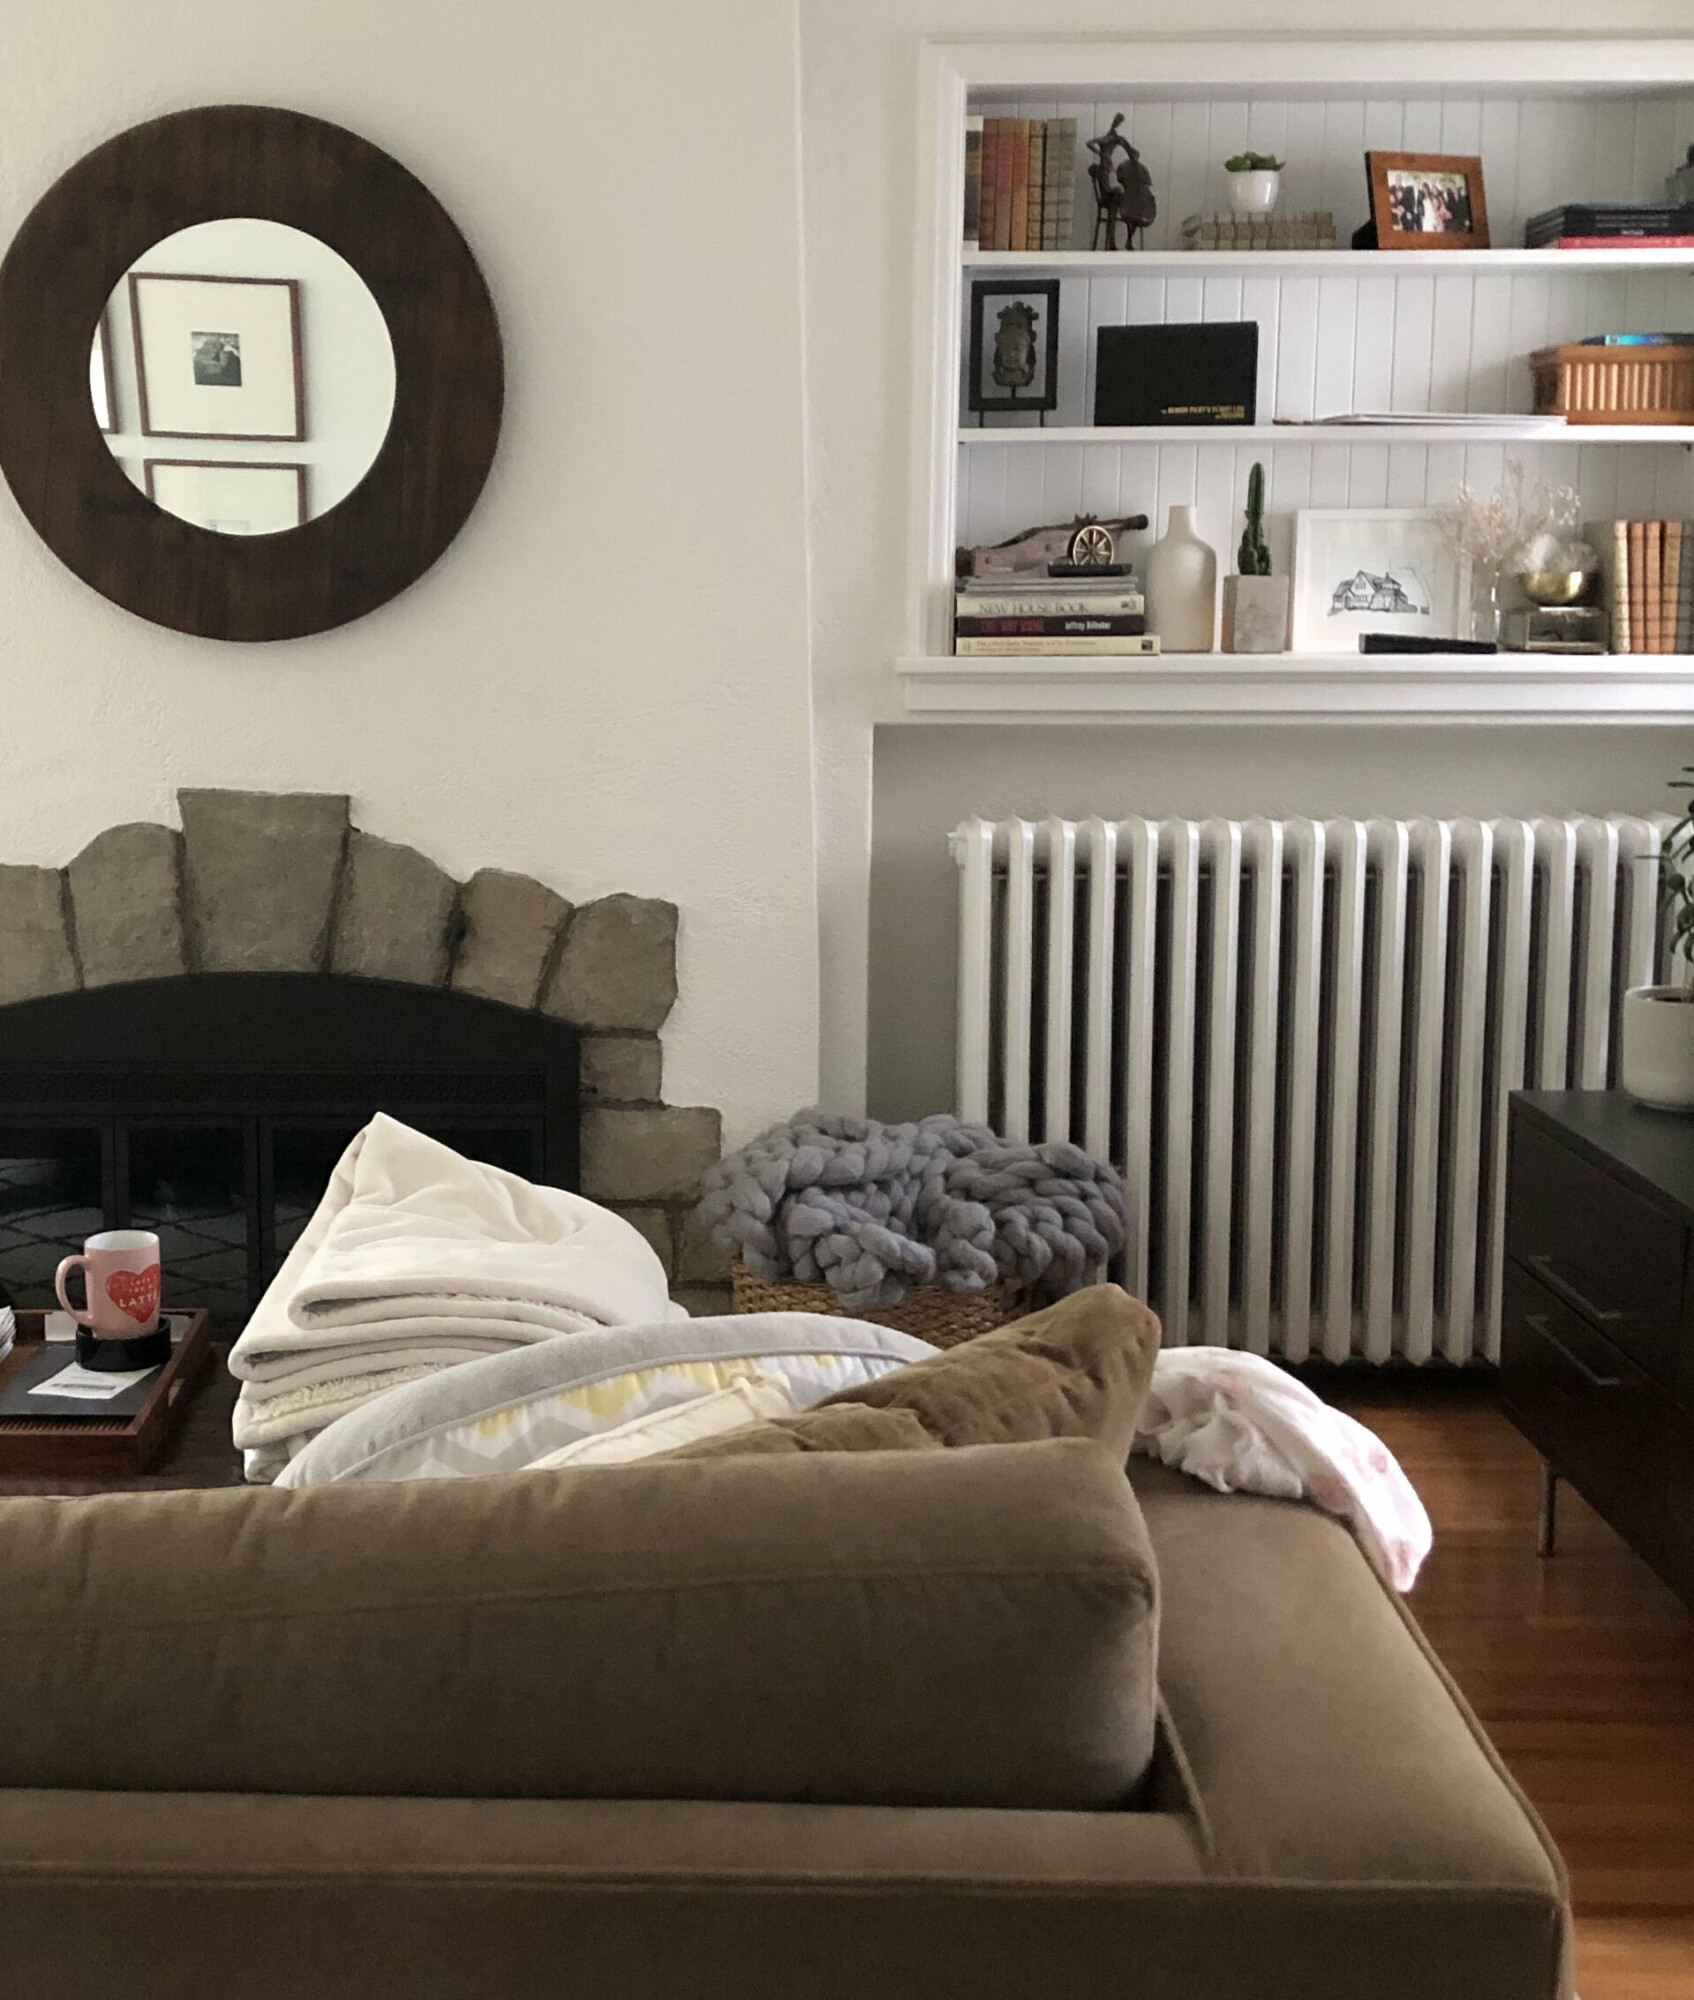
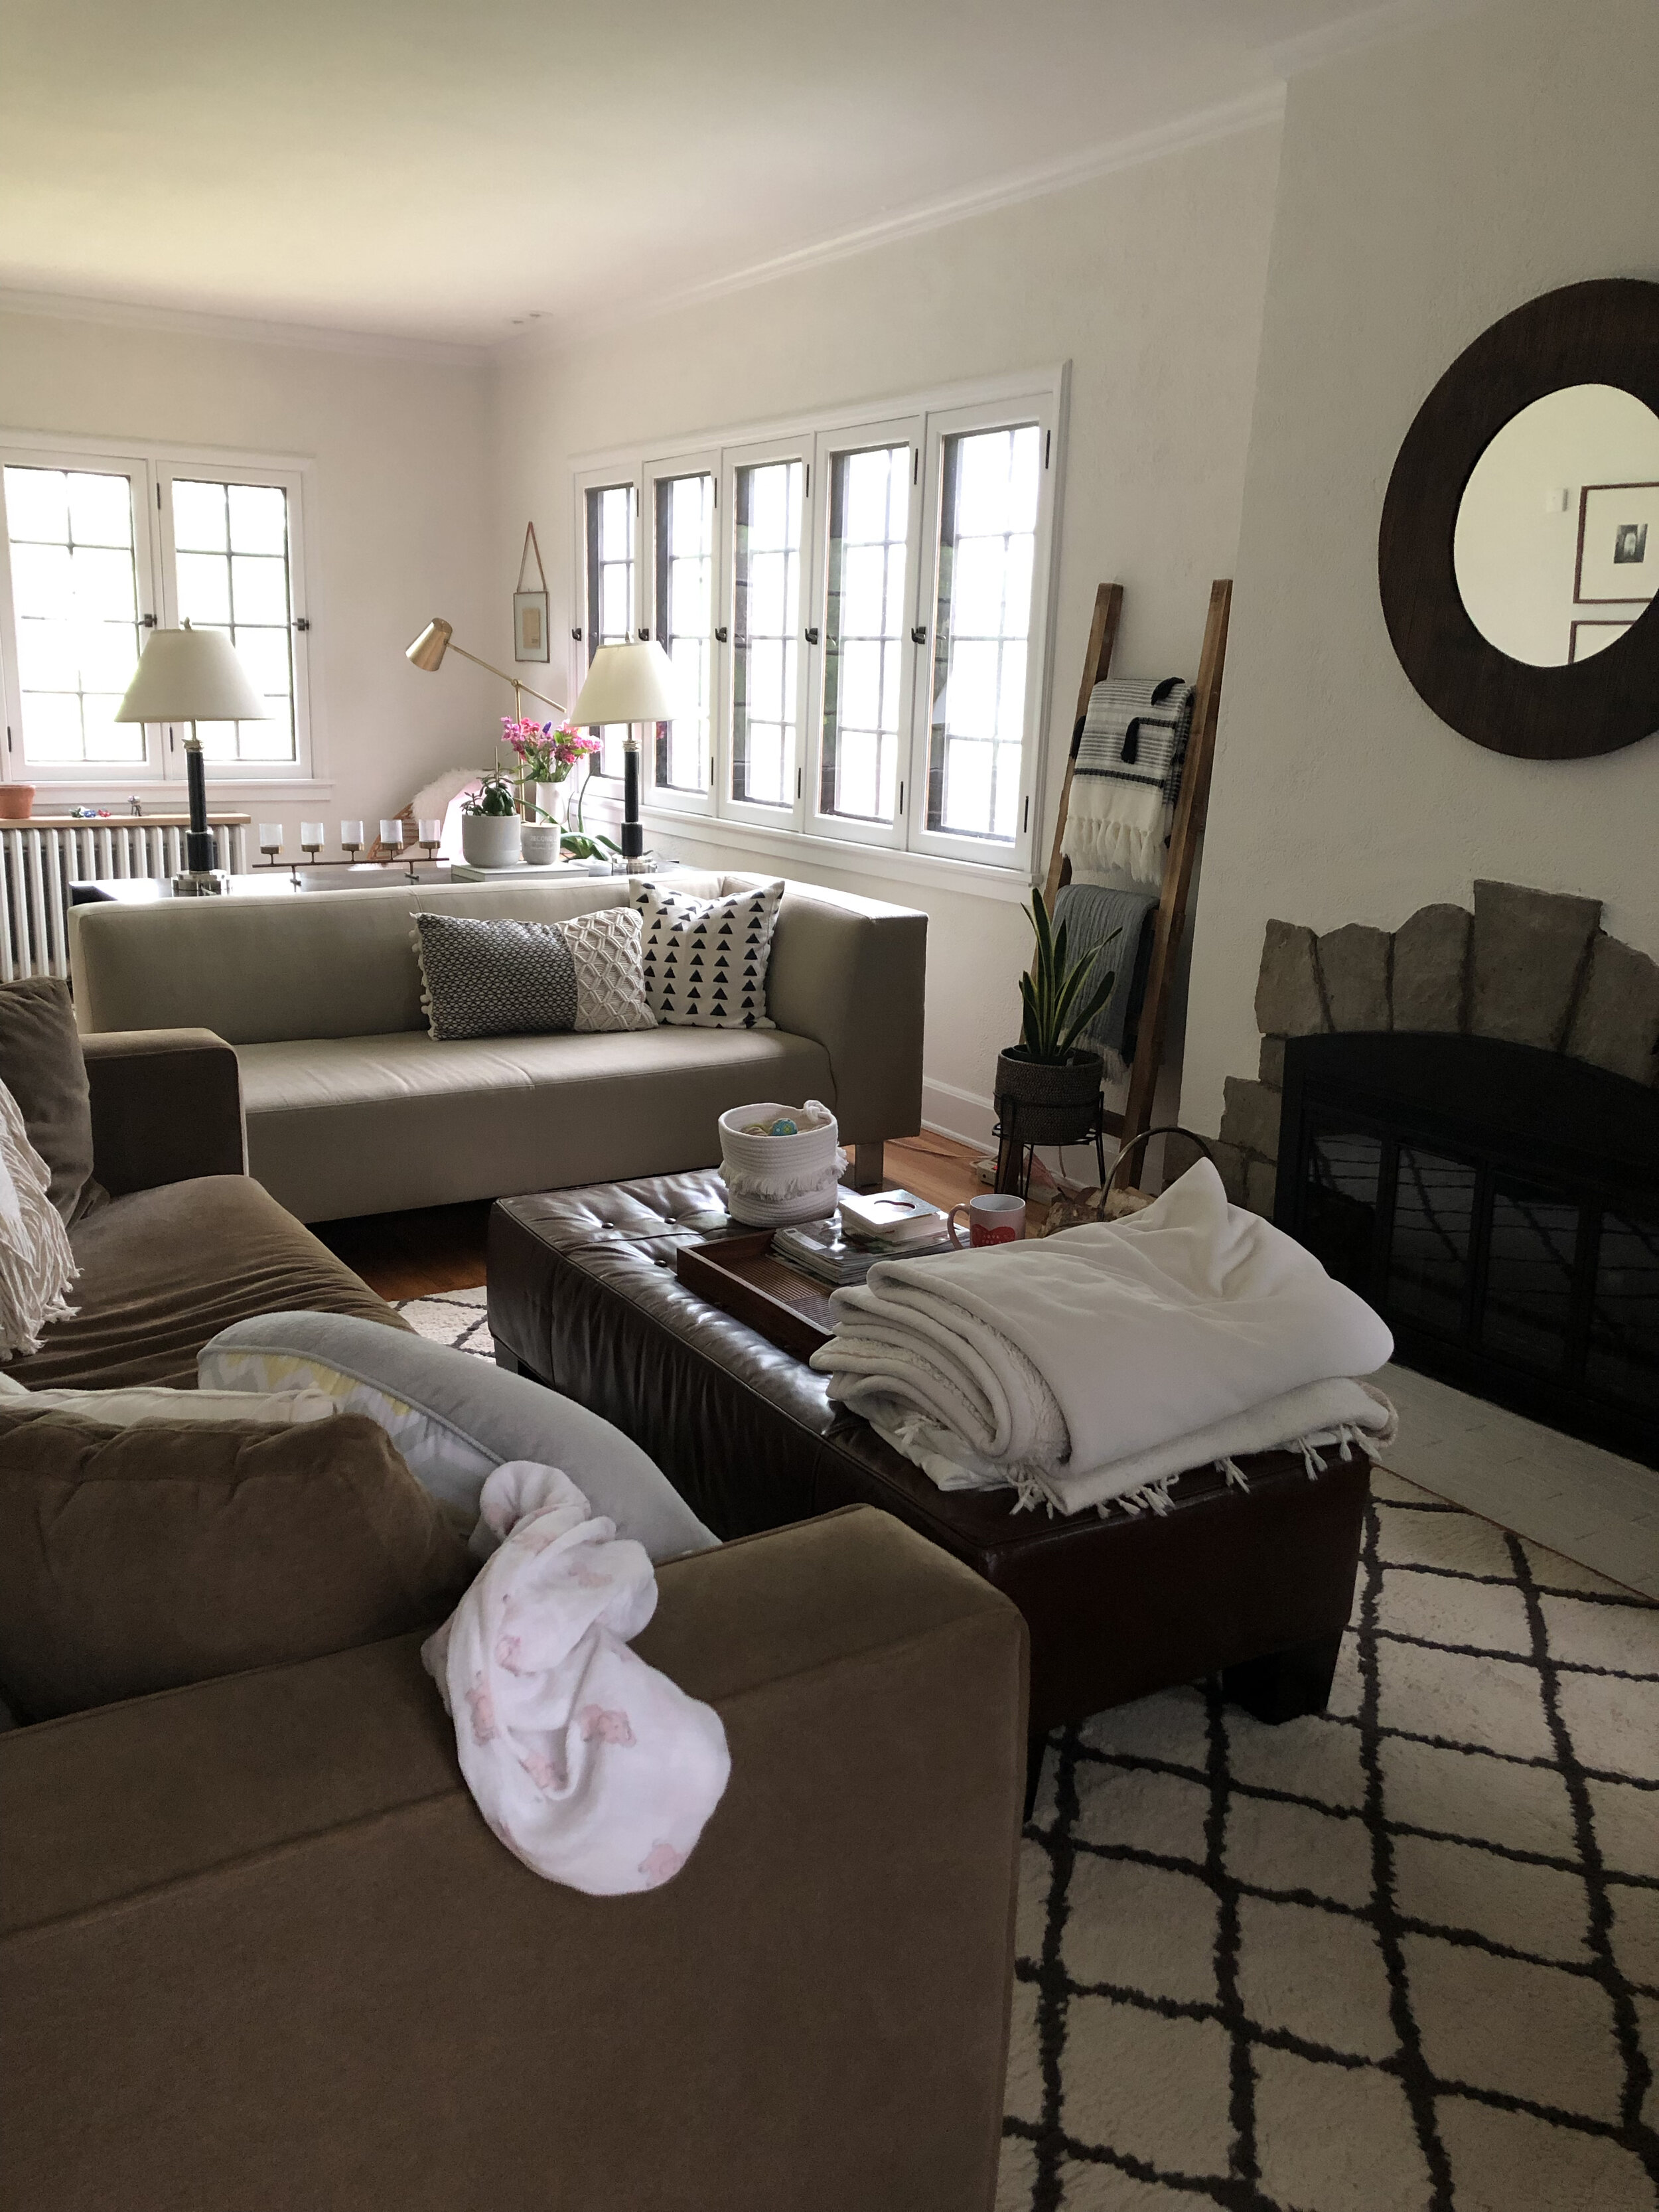
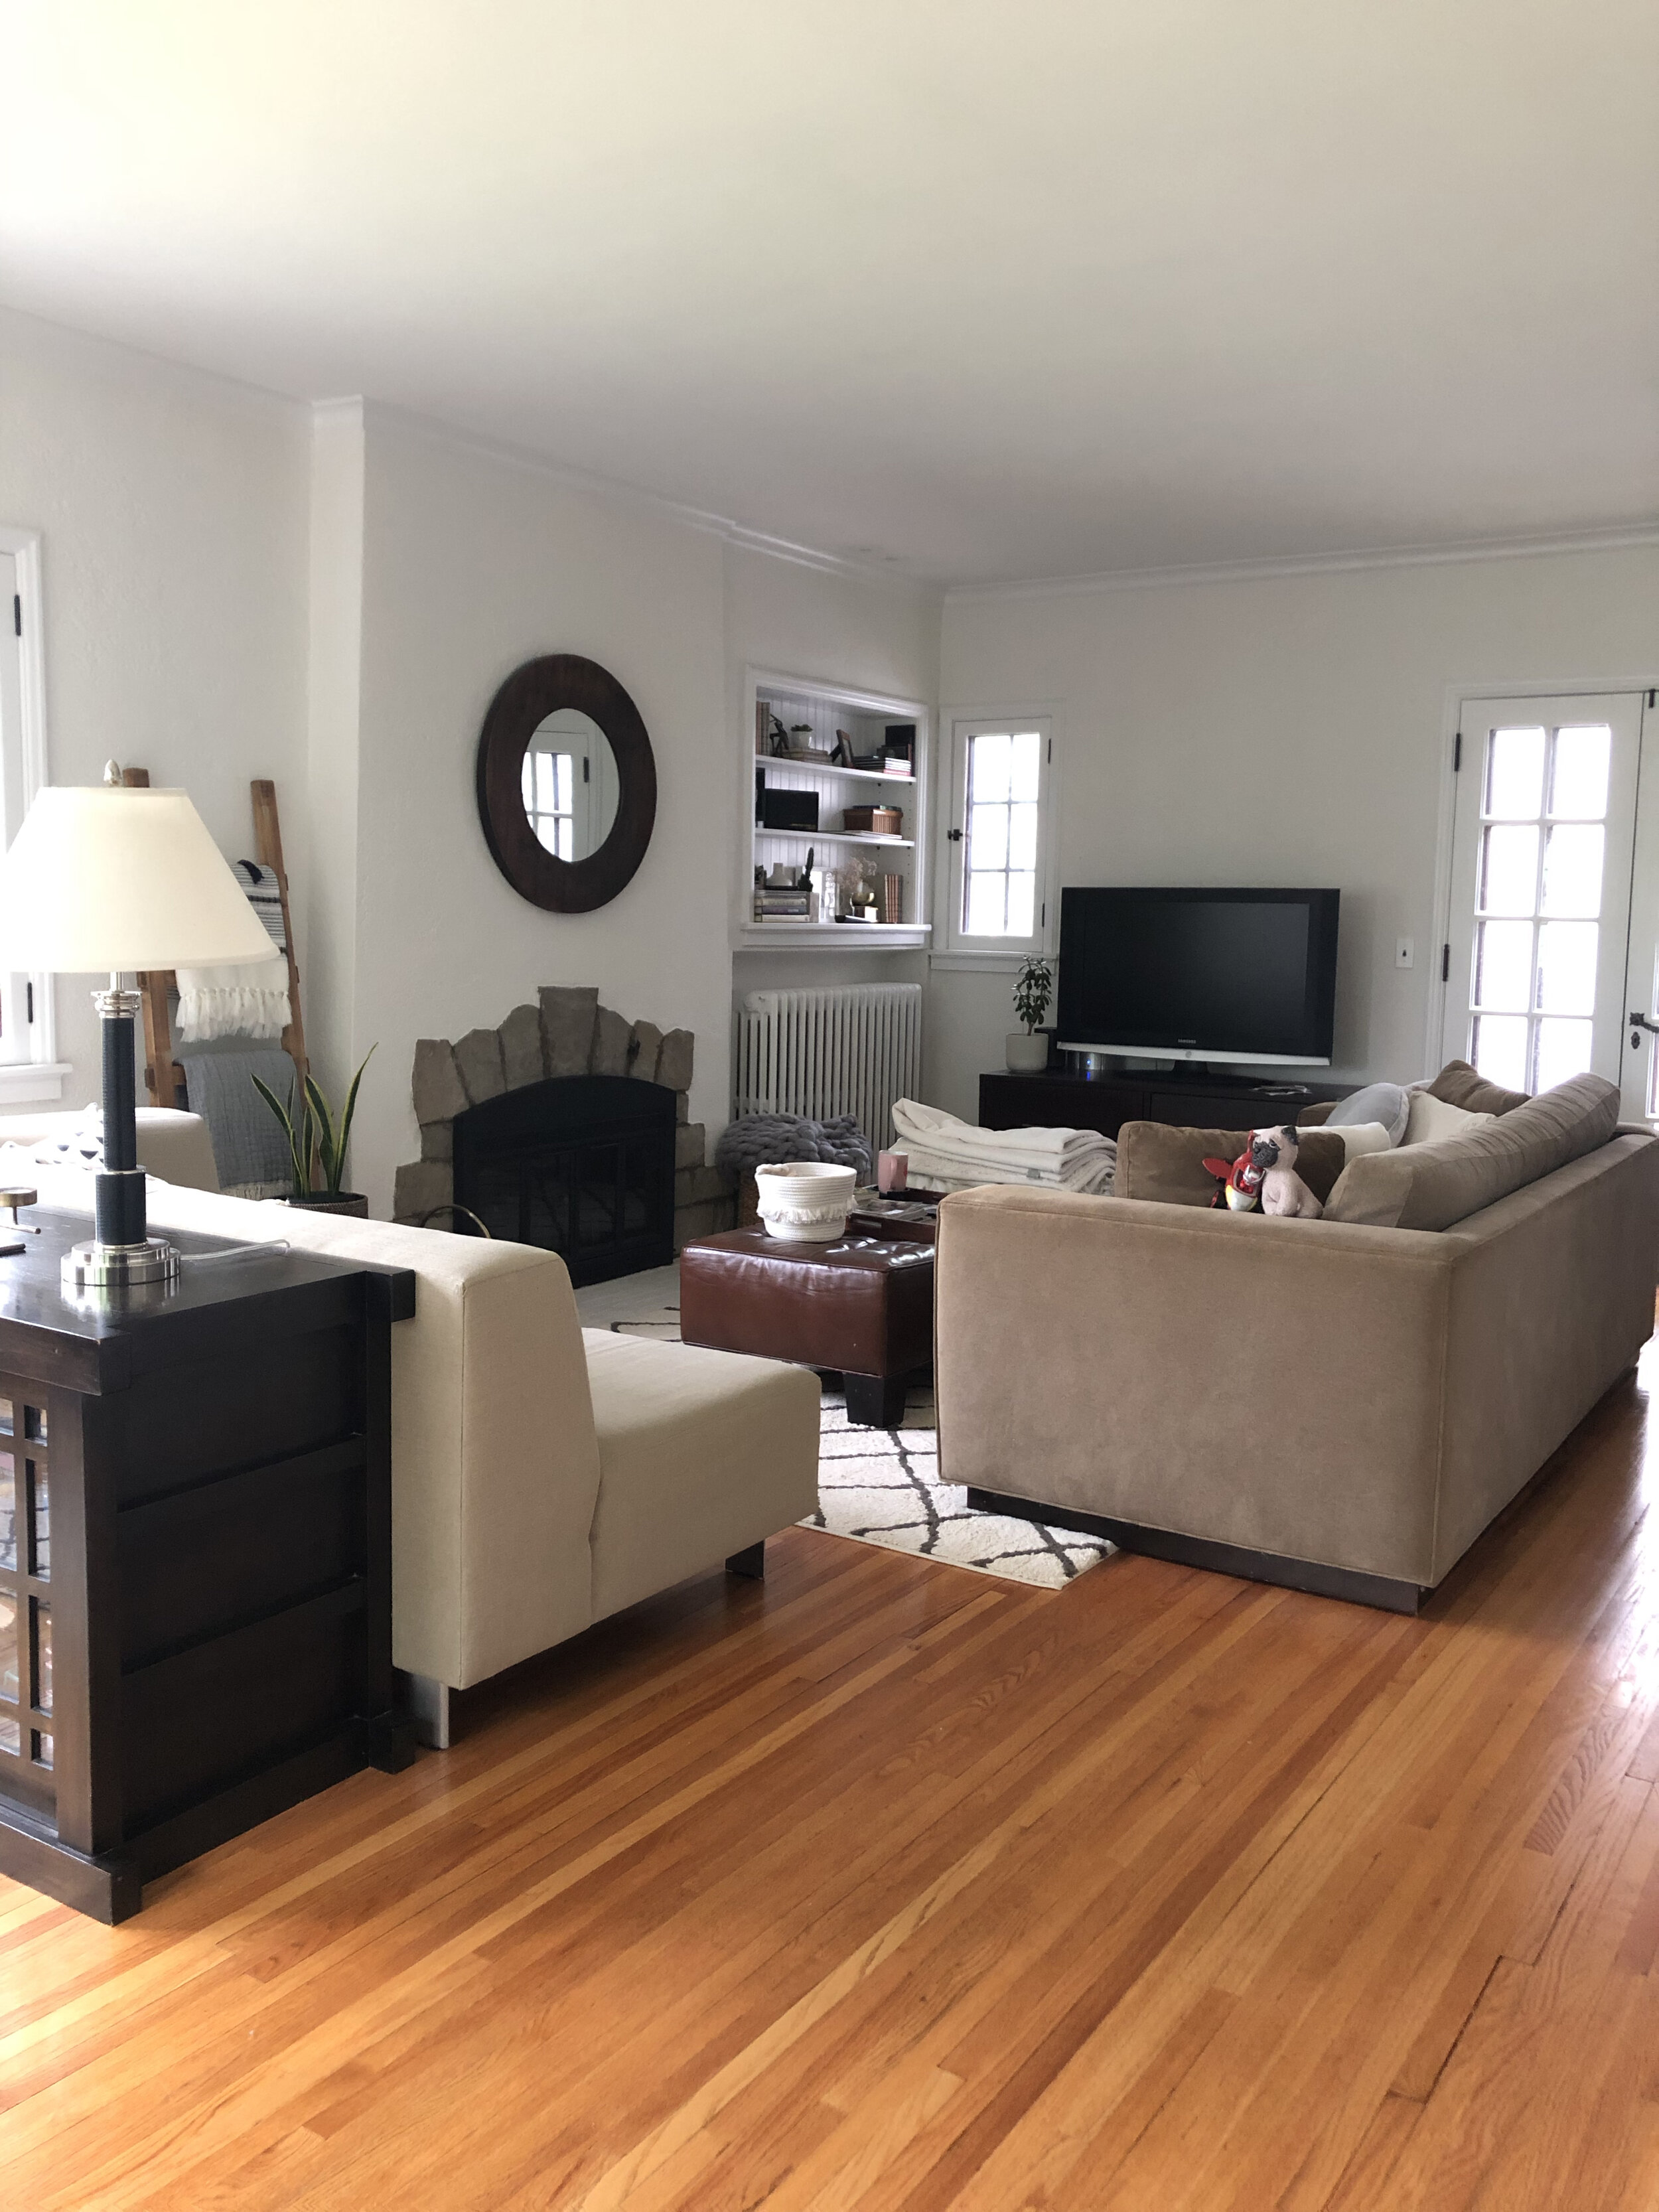
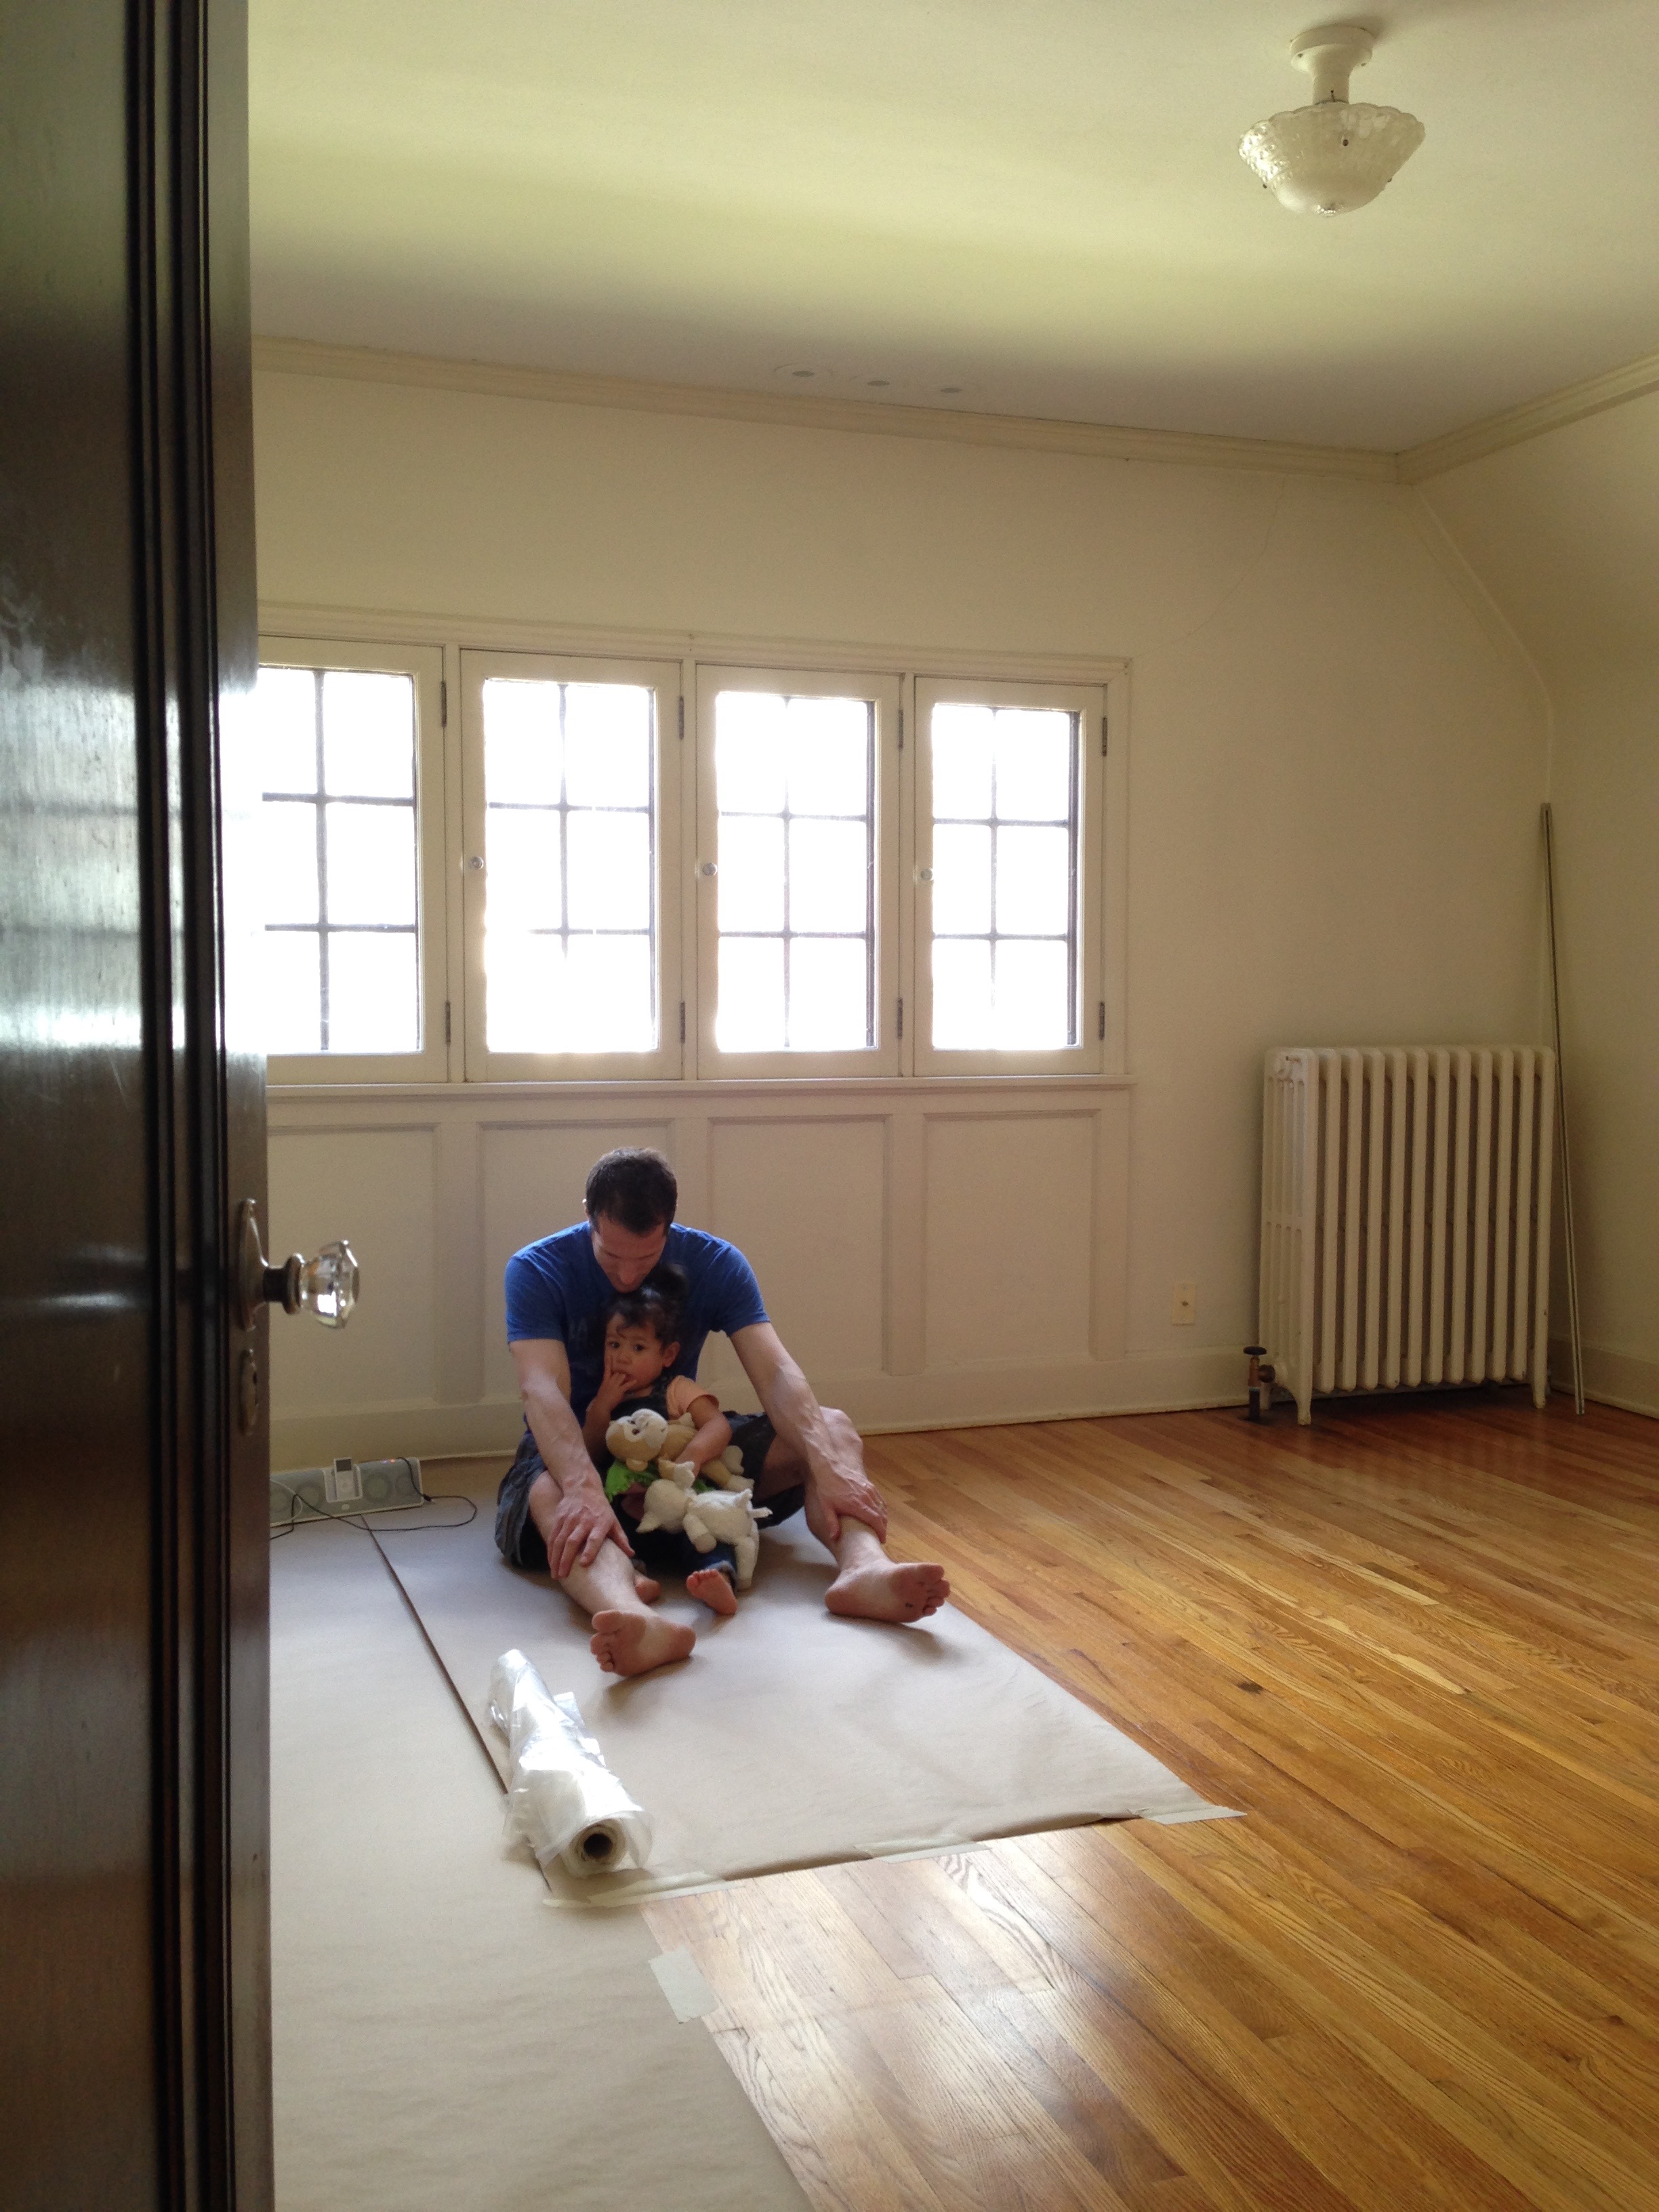
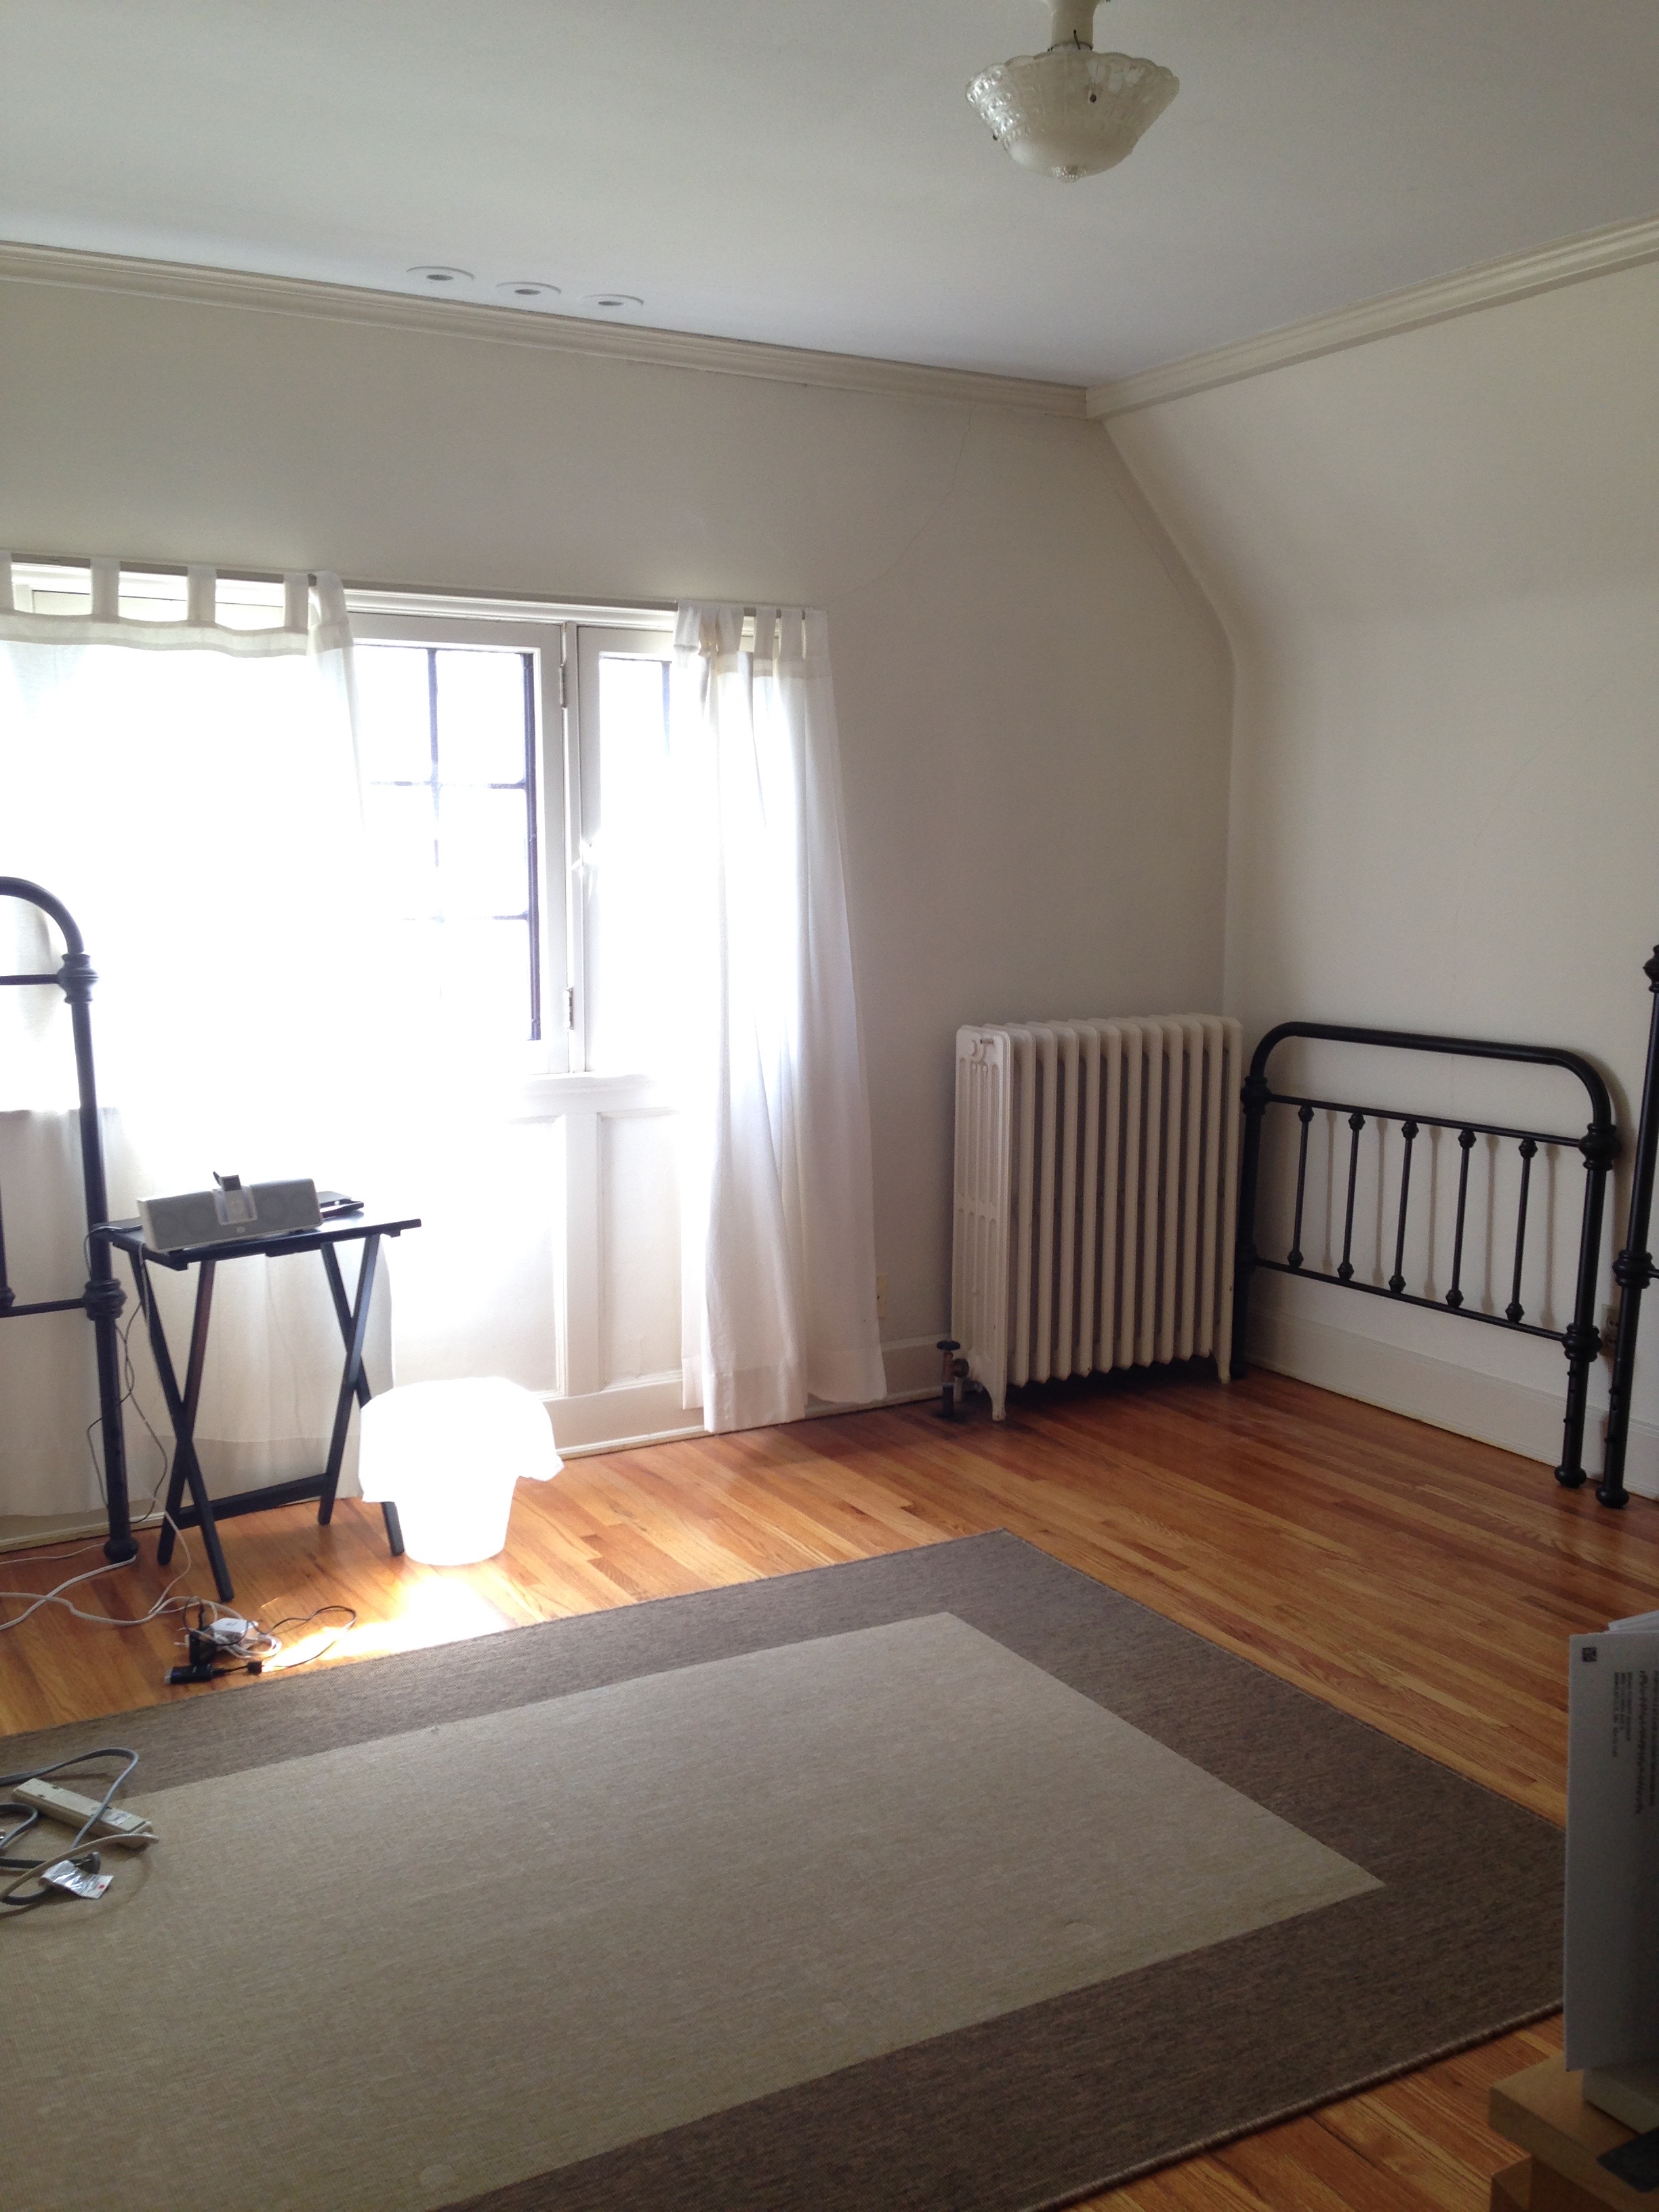
BEFORE – we were unsure how to best utilize this space

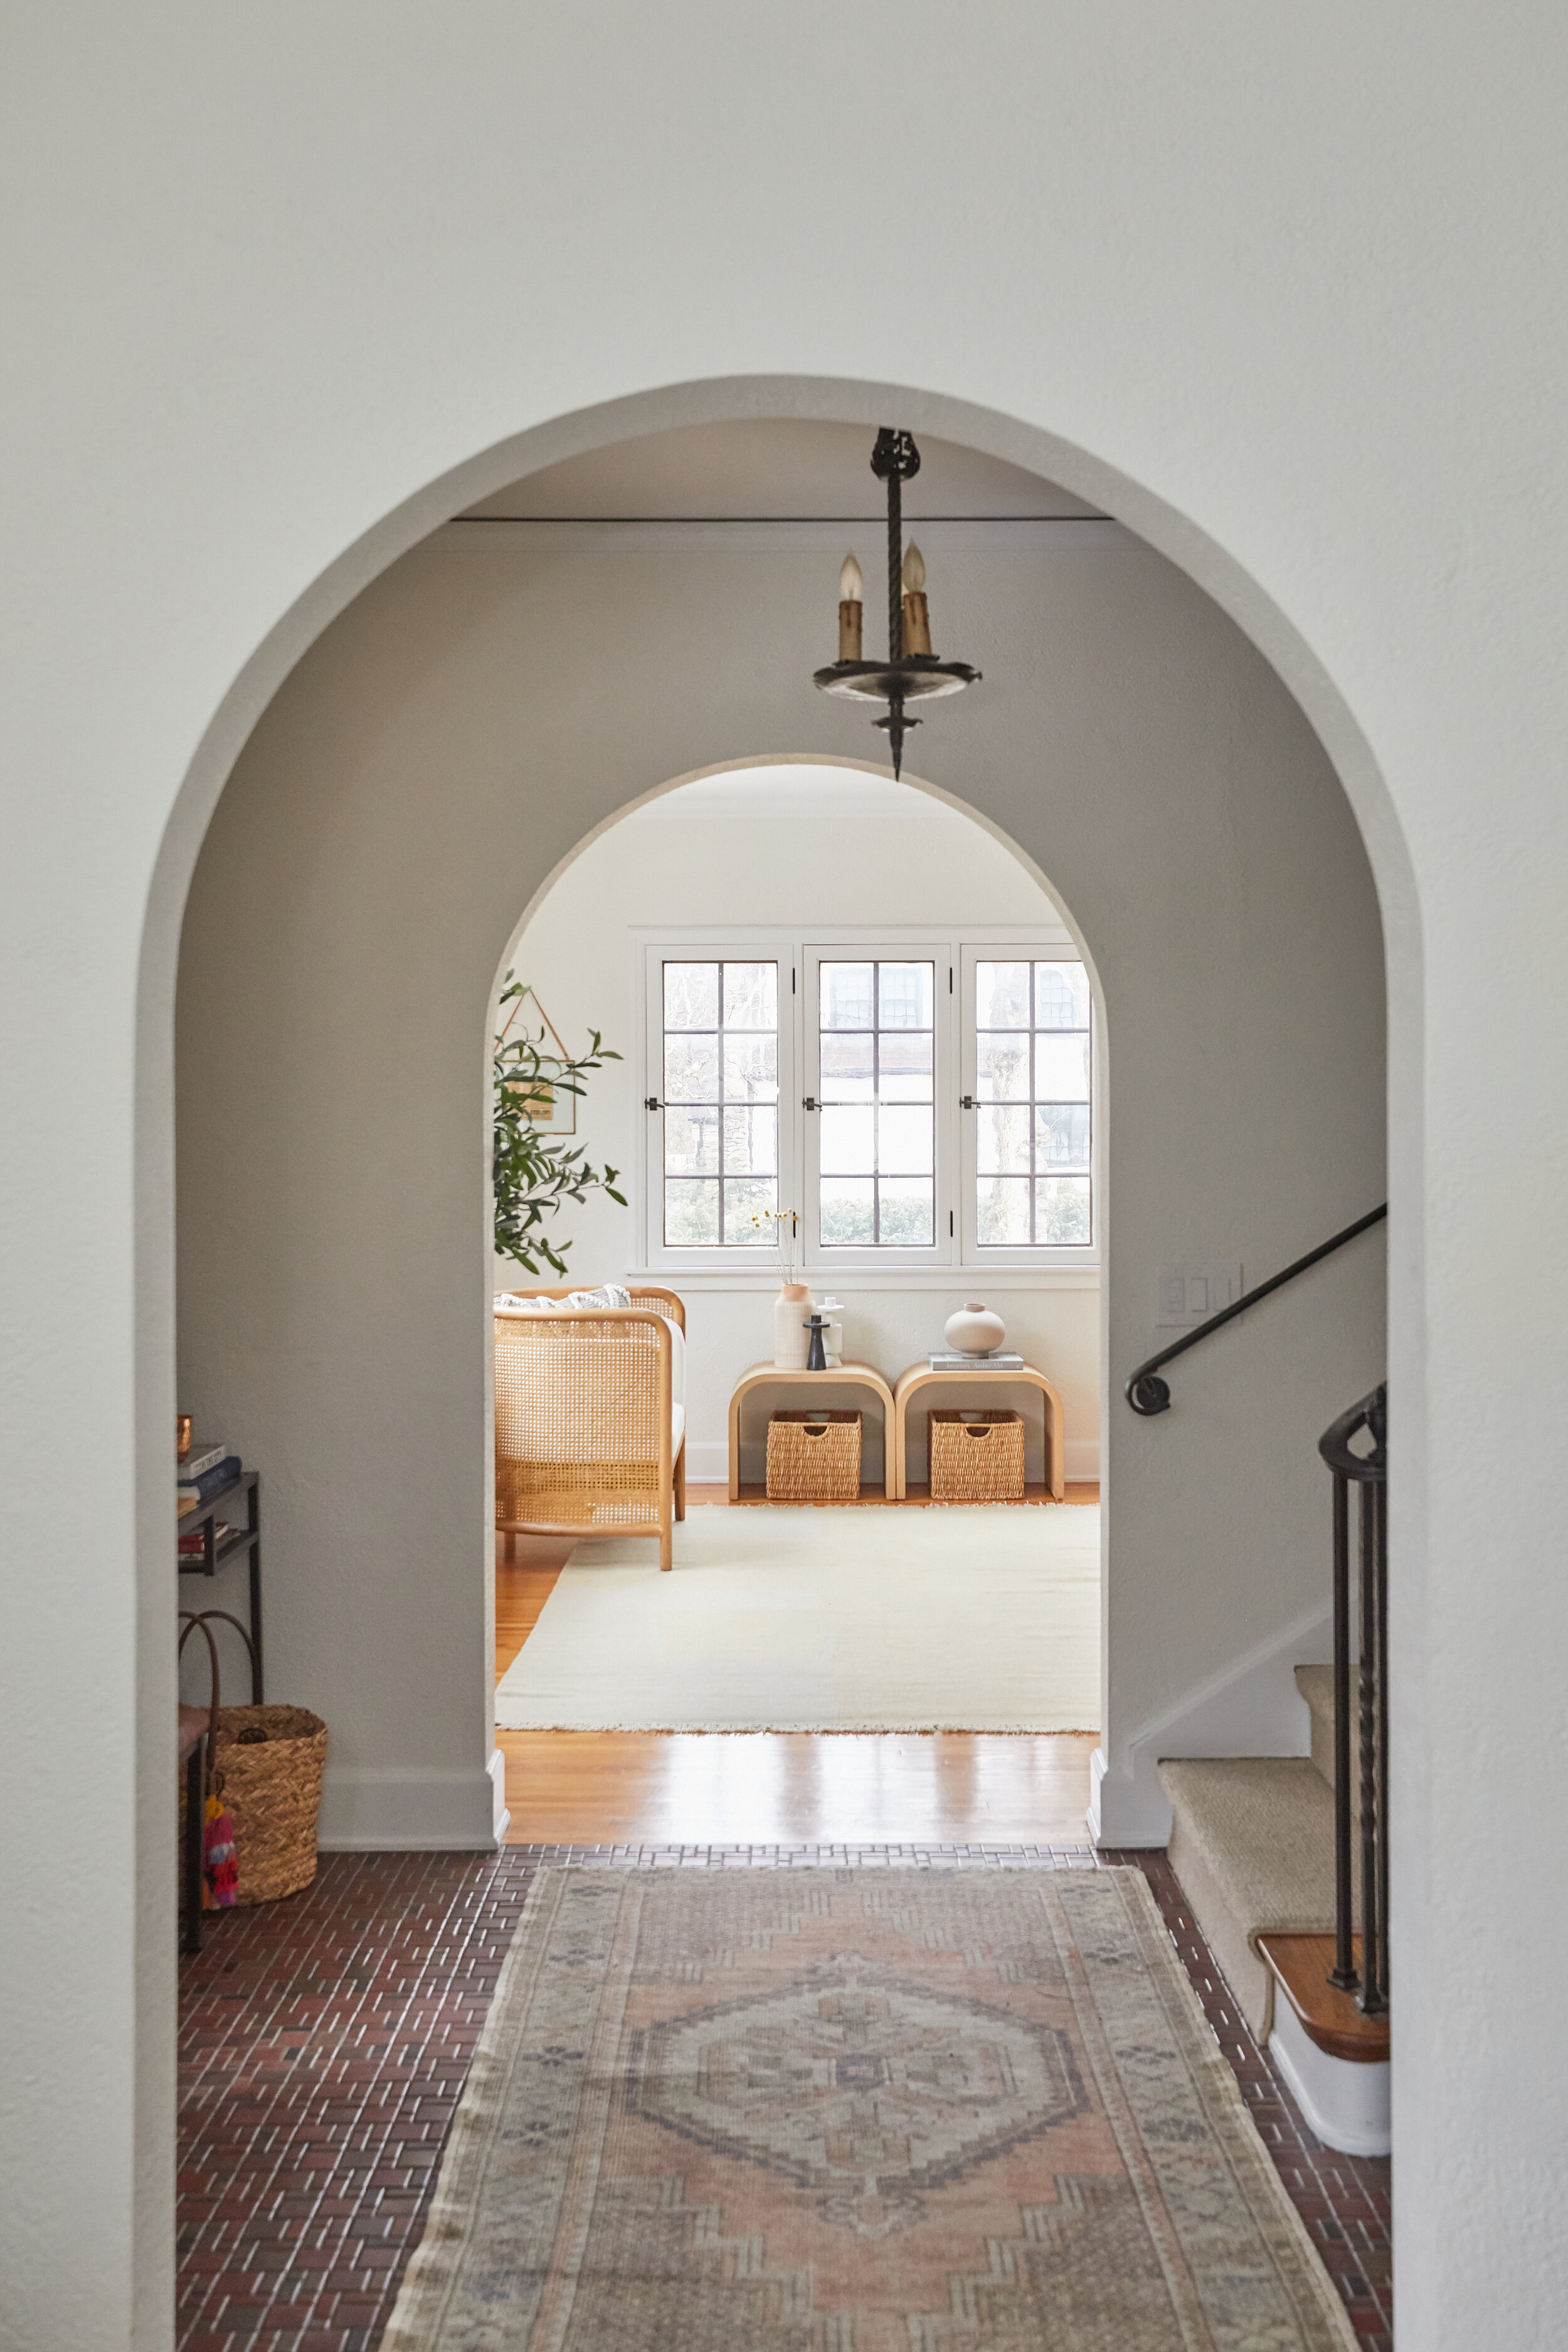
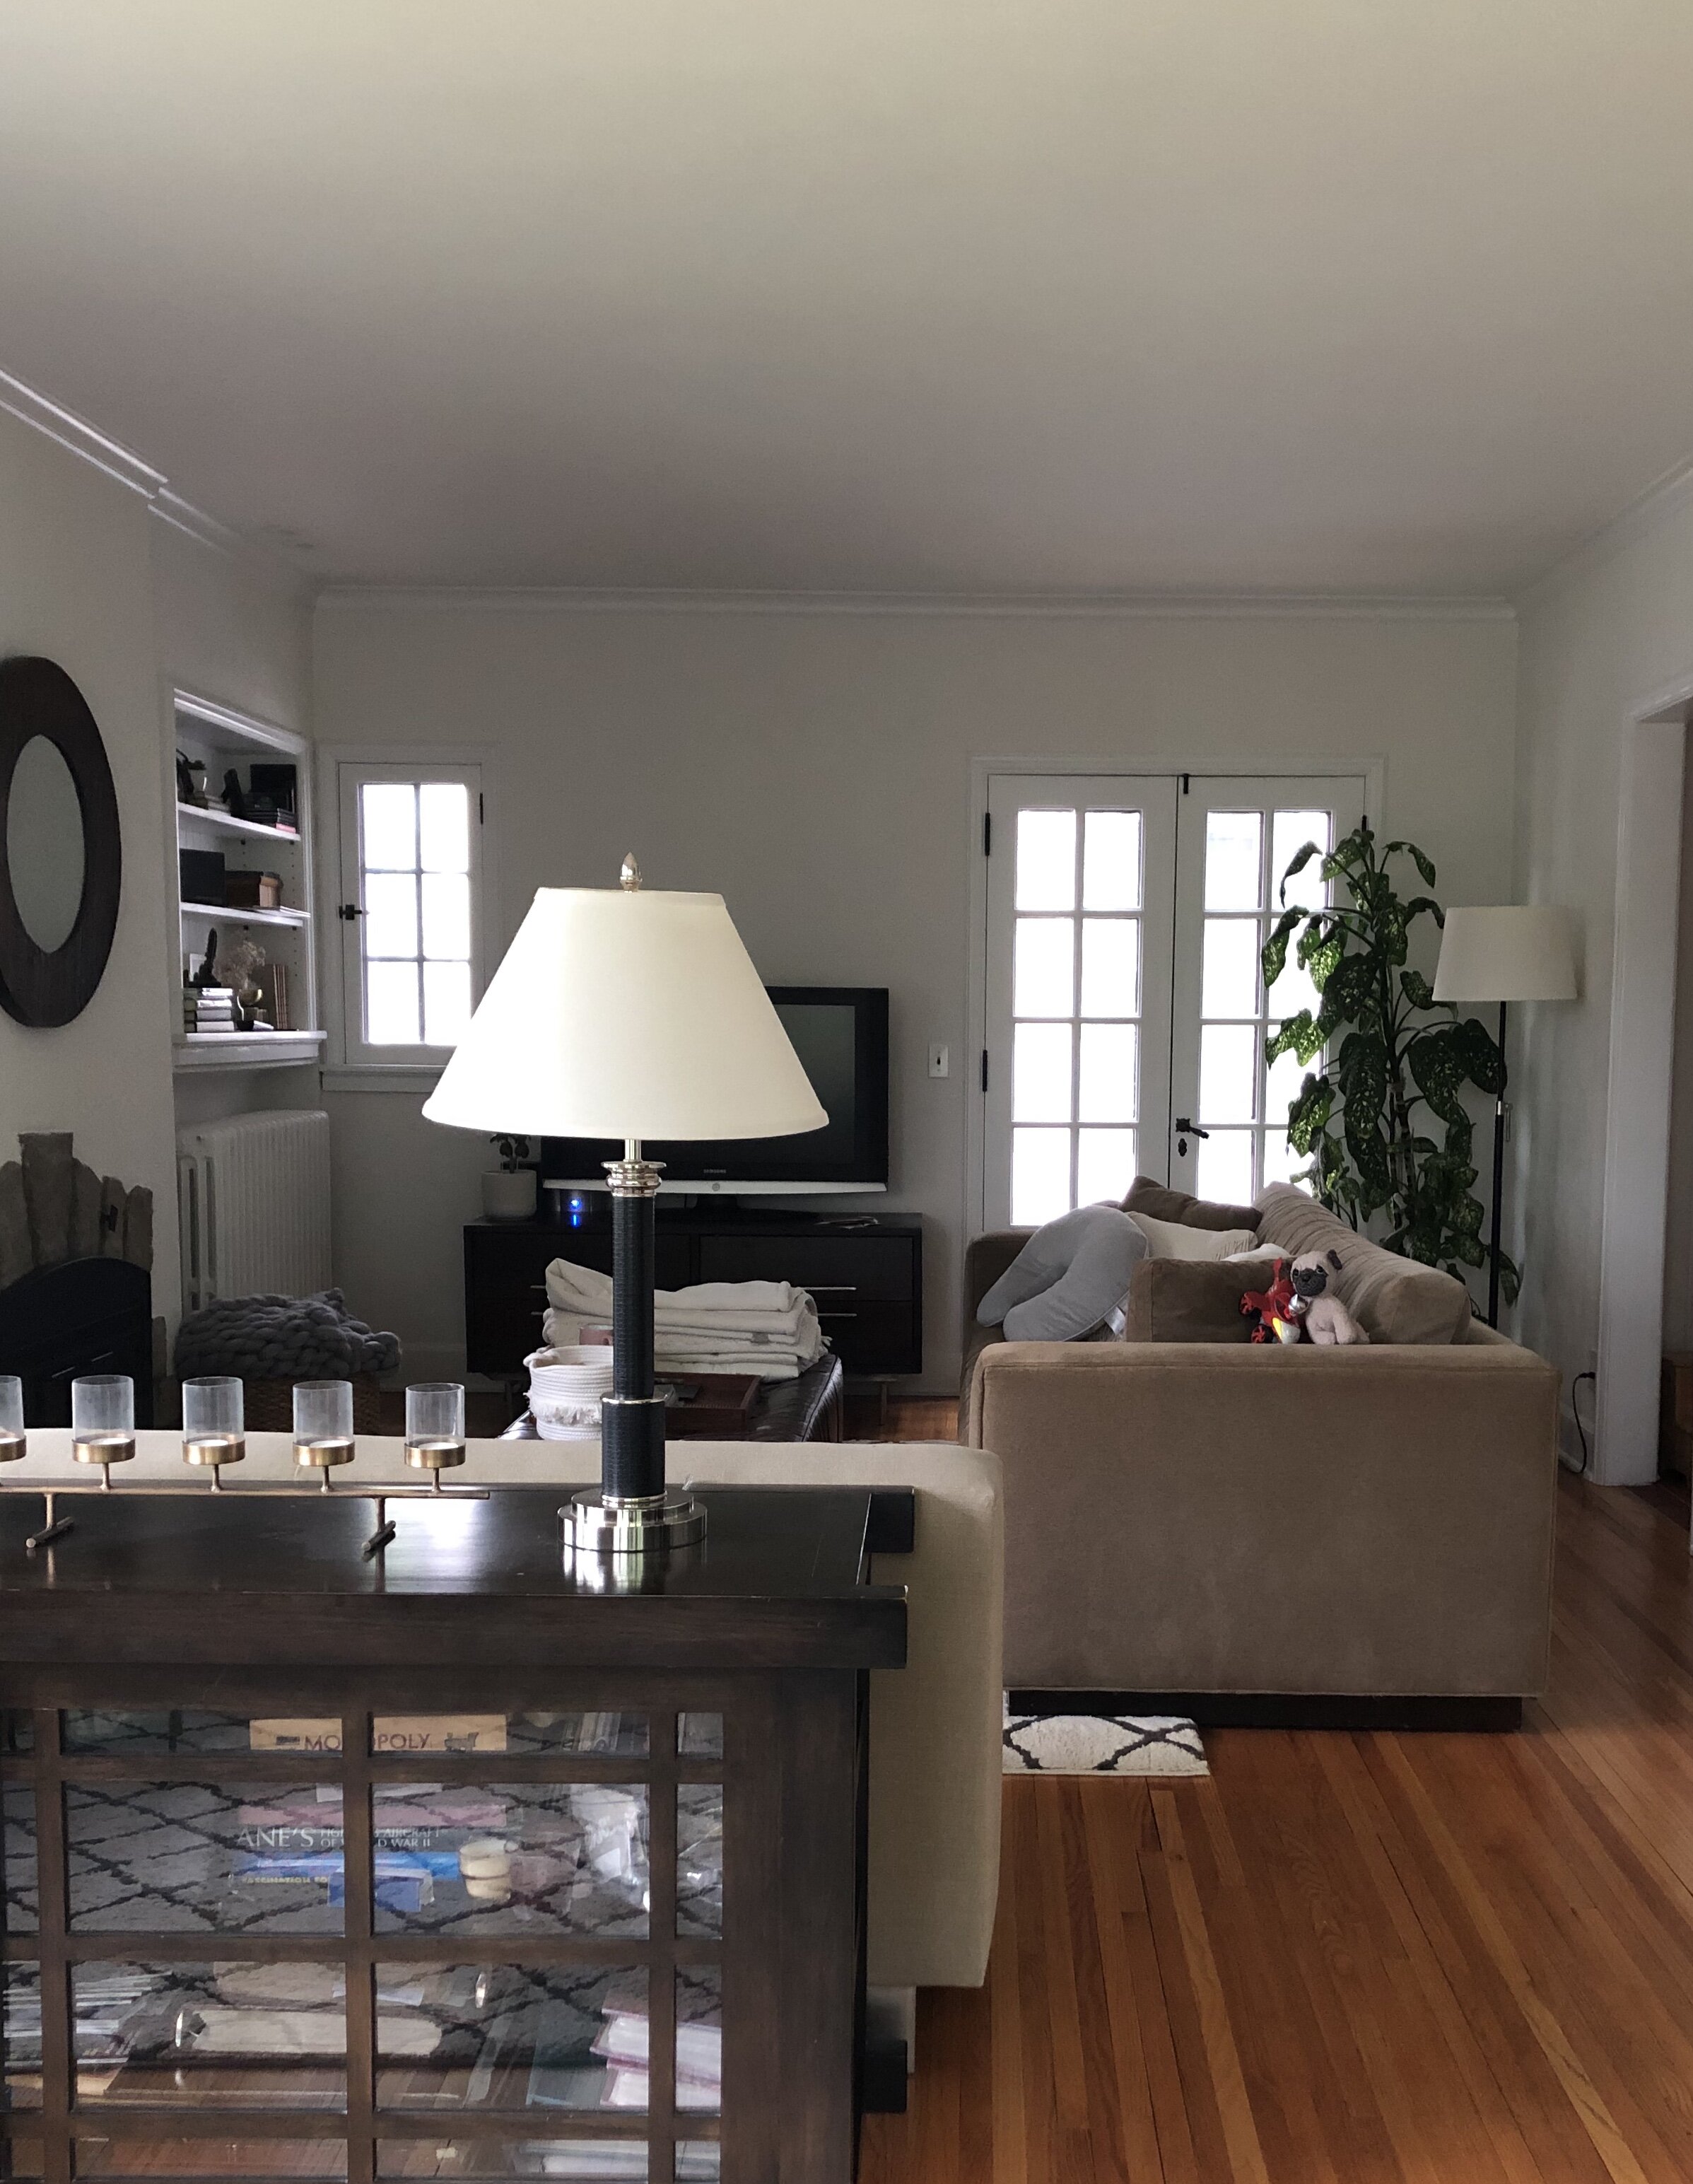
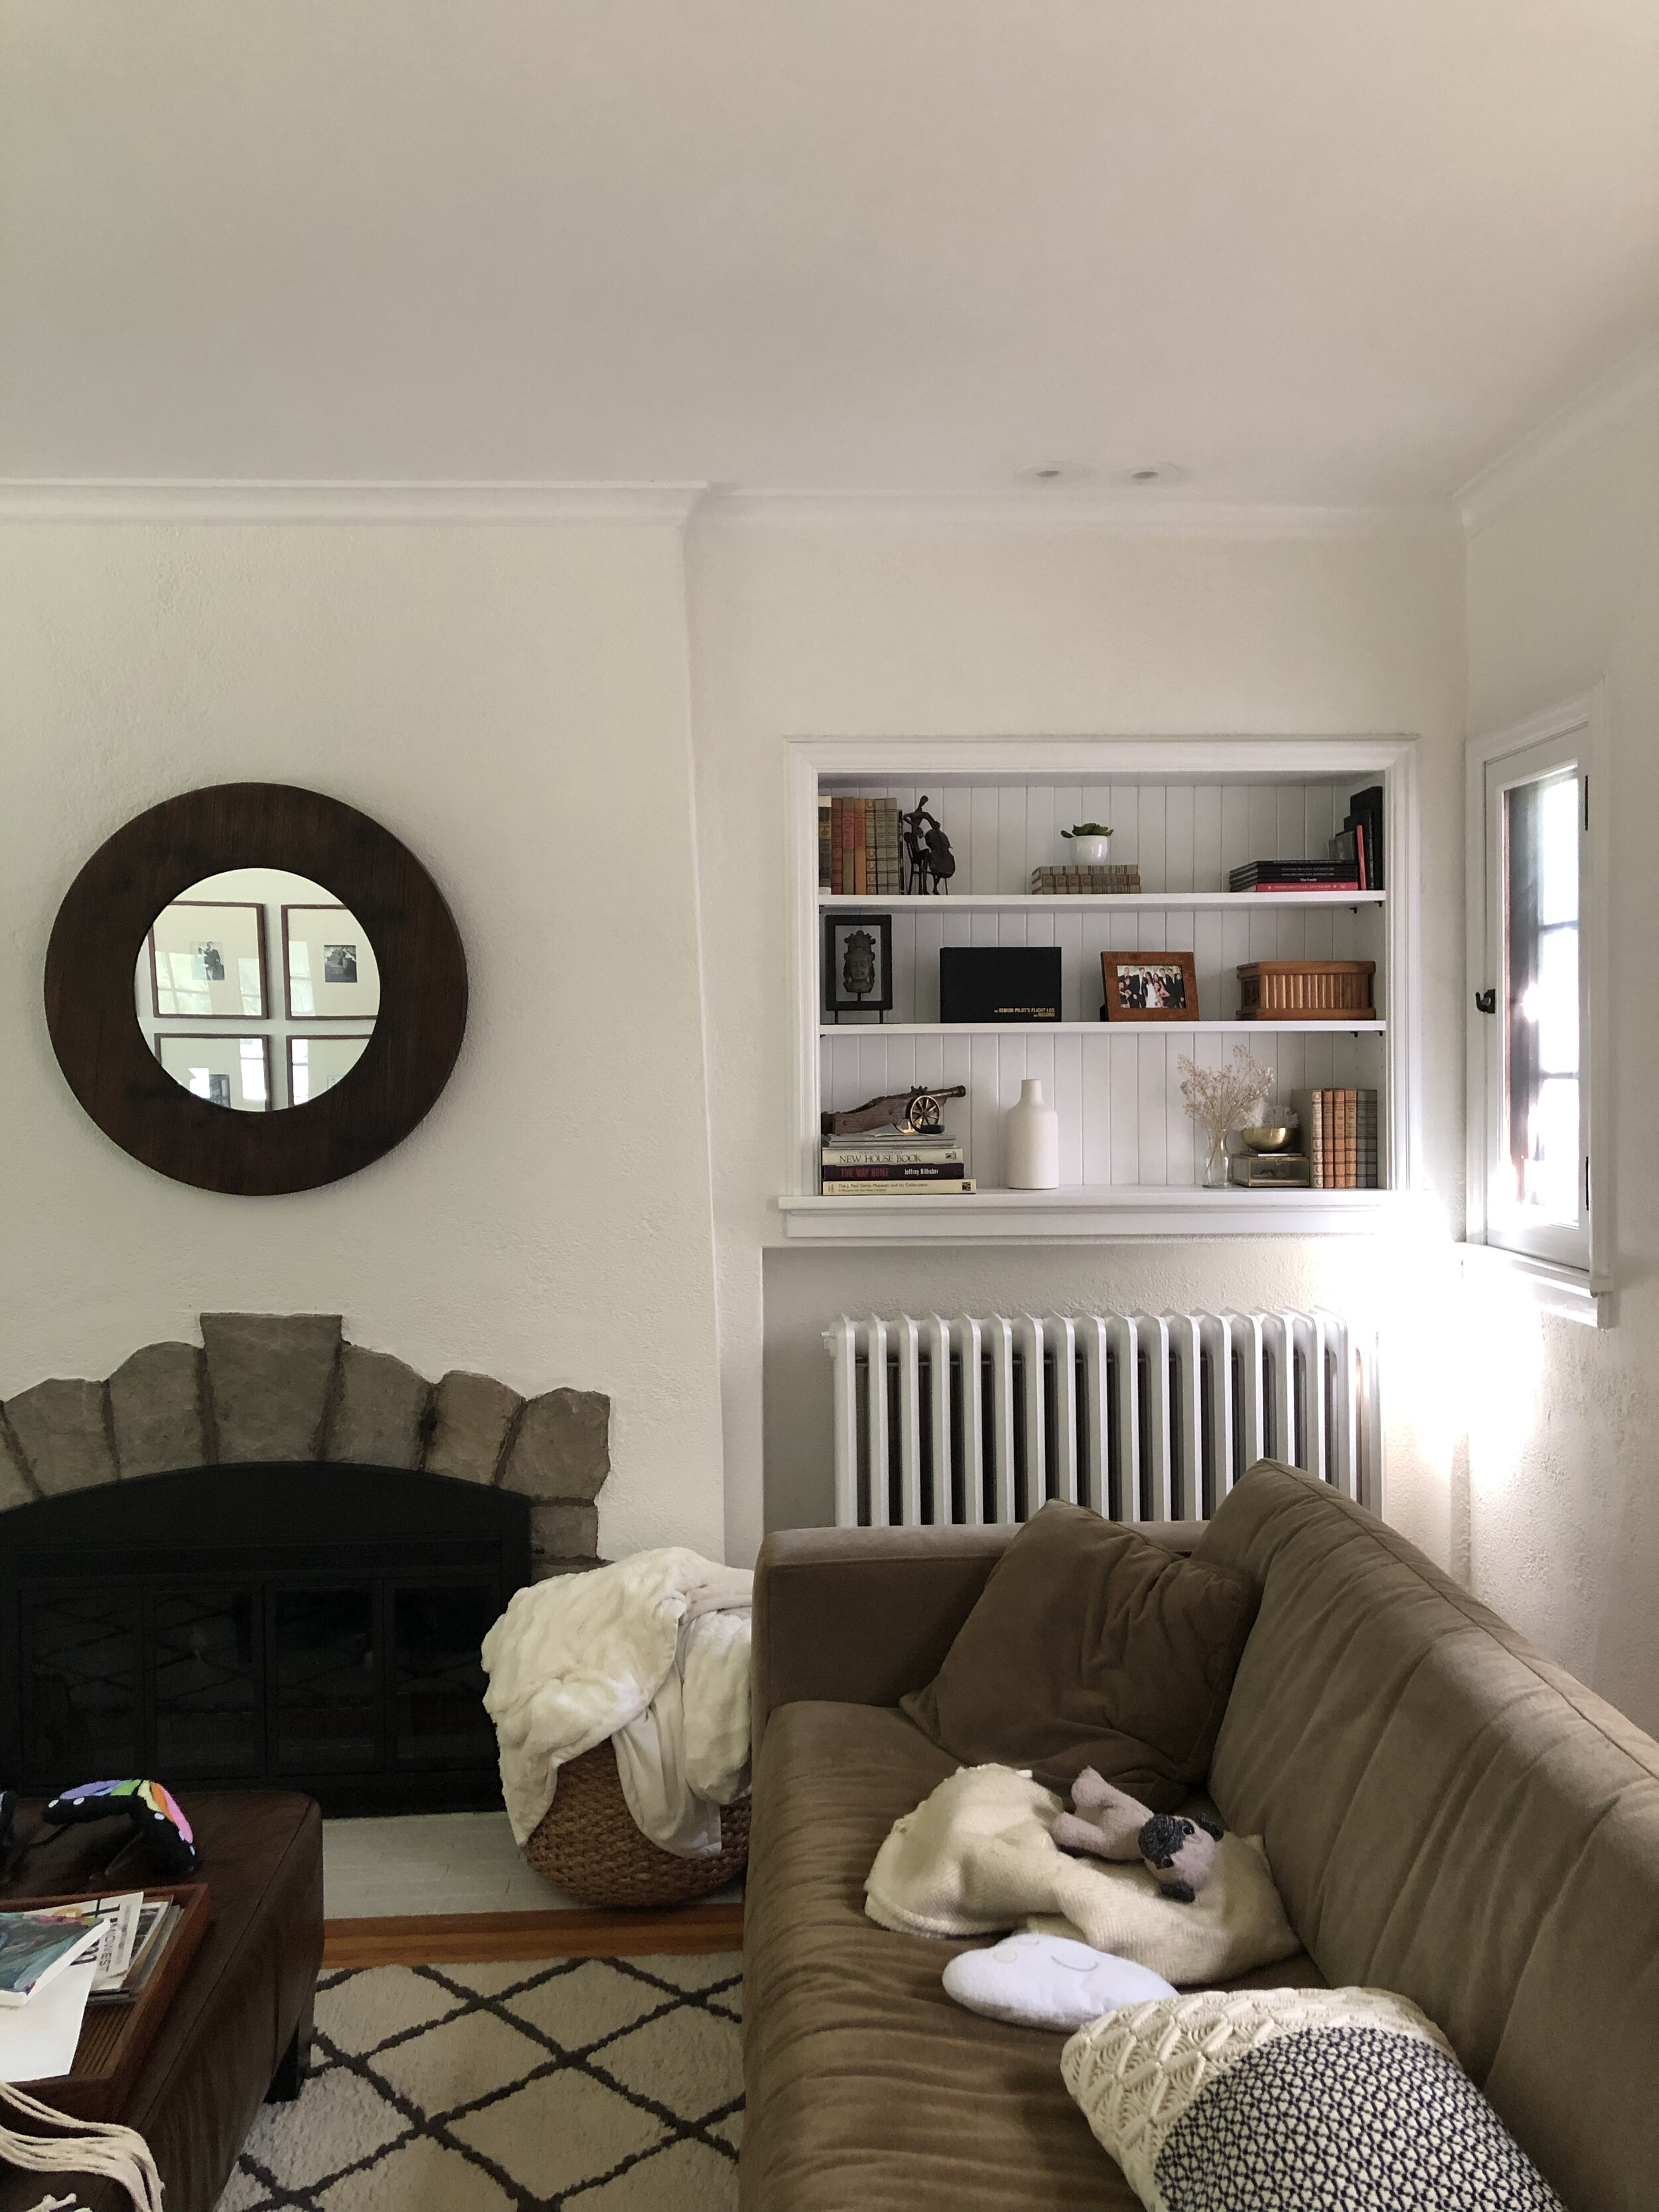
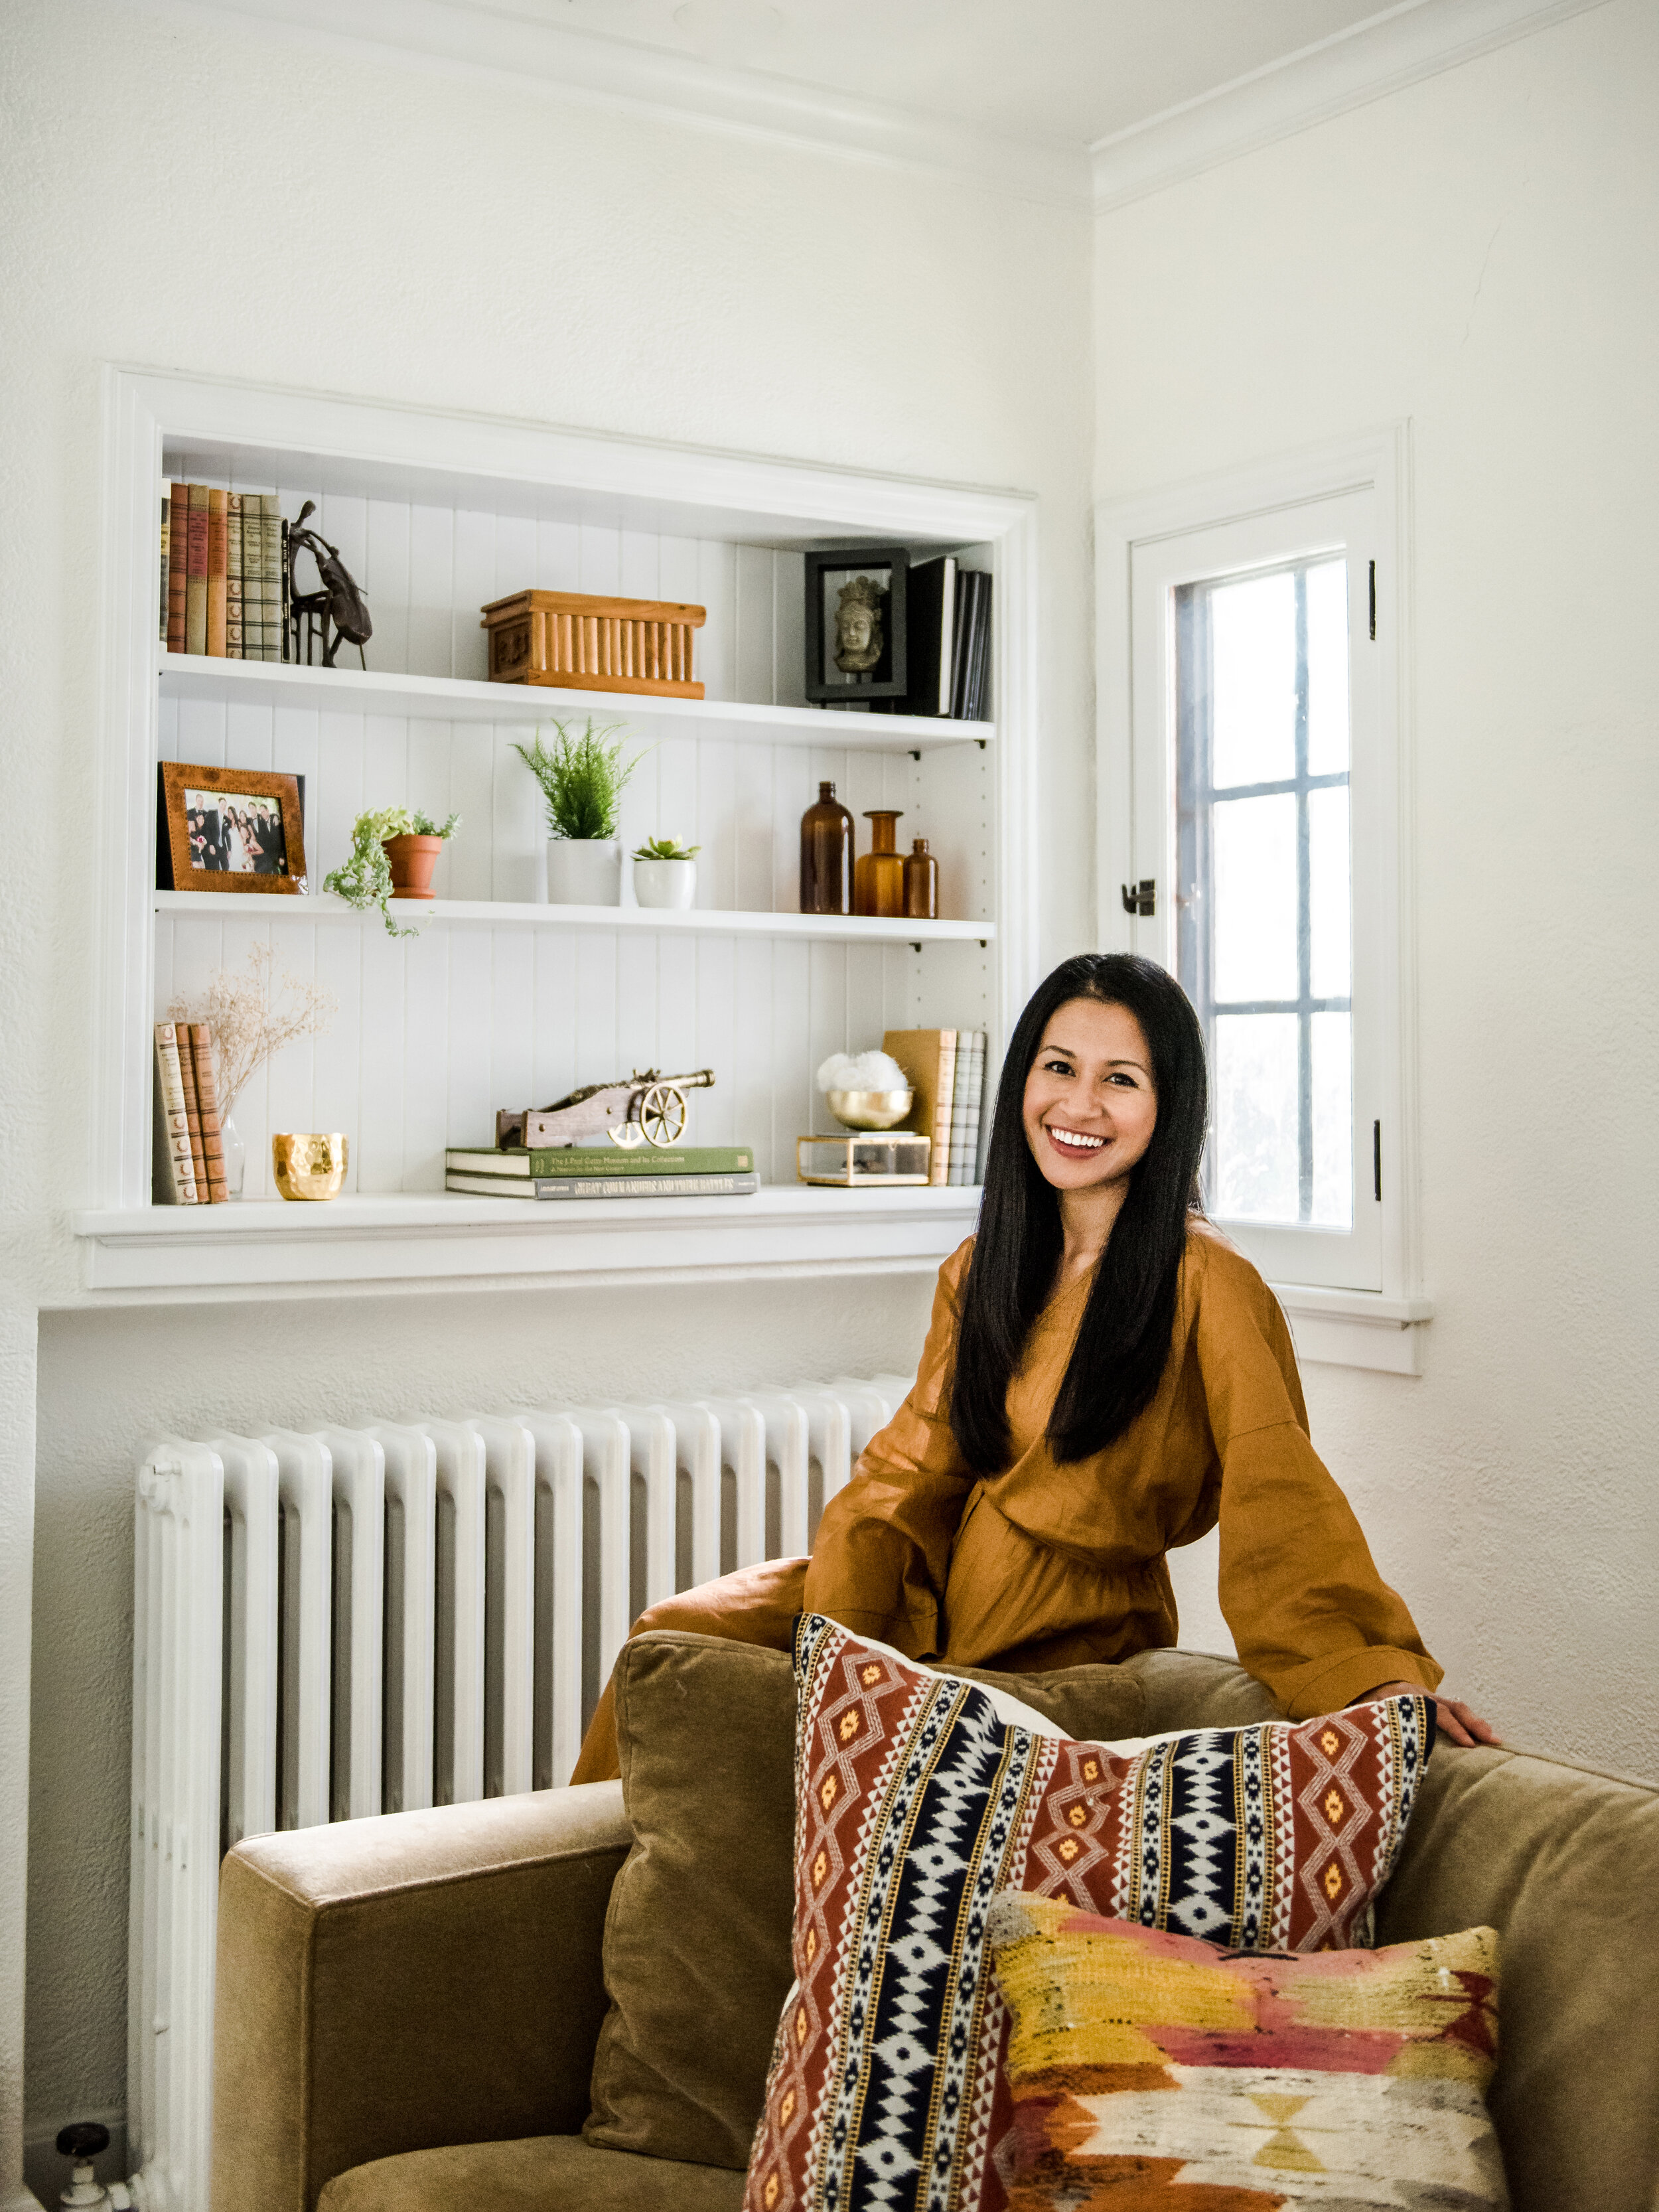
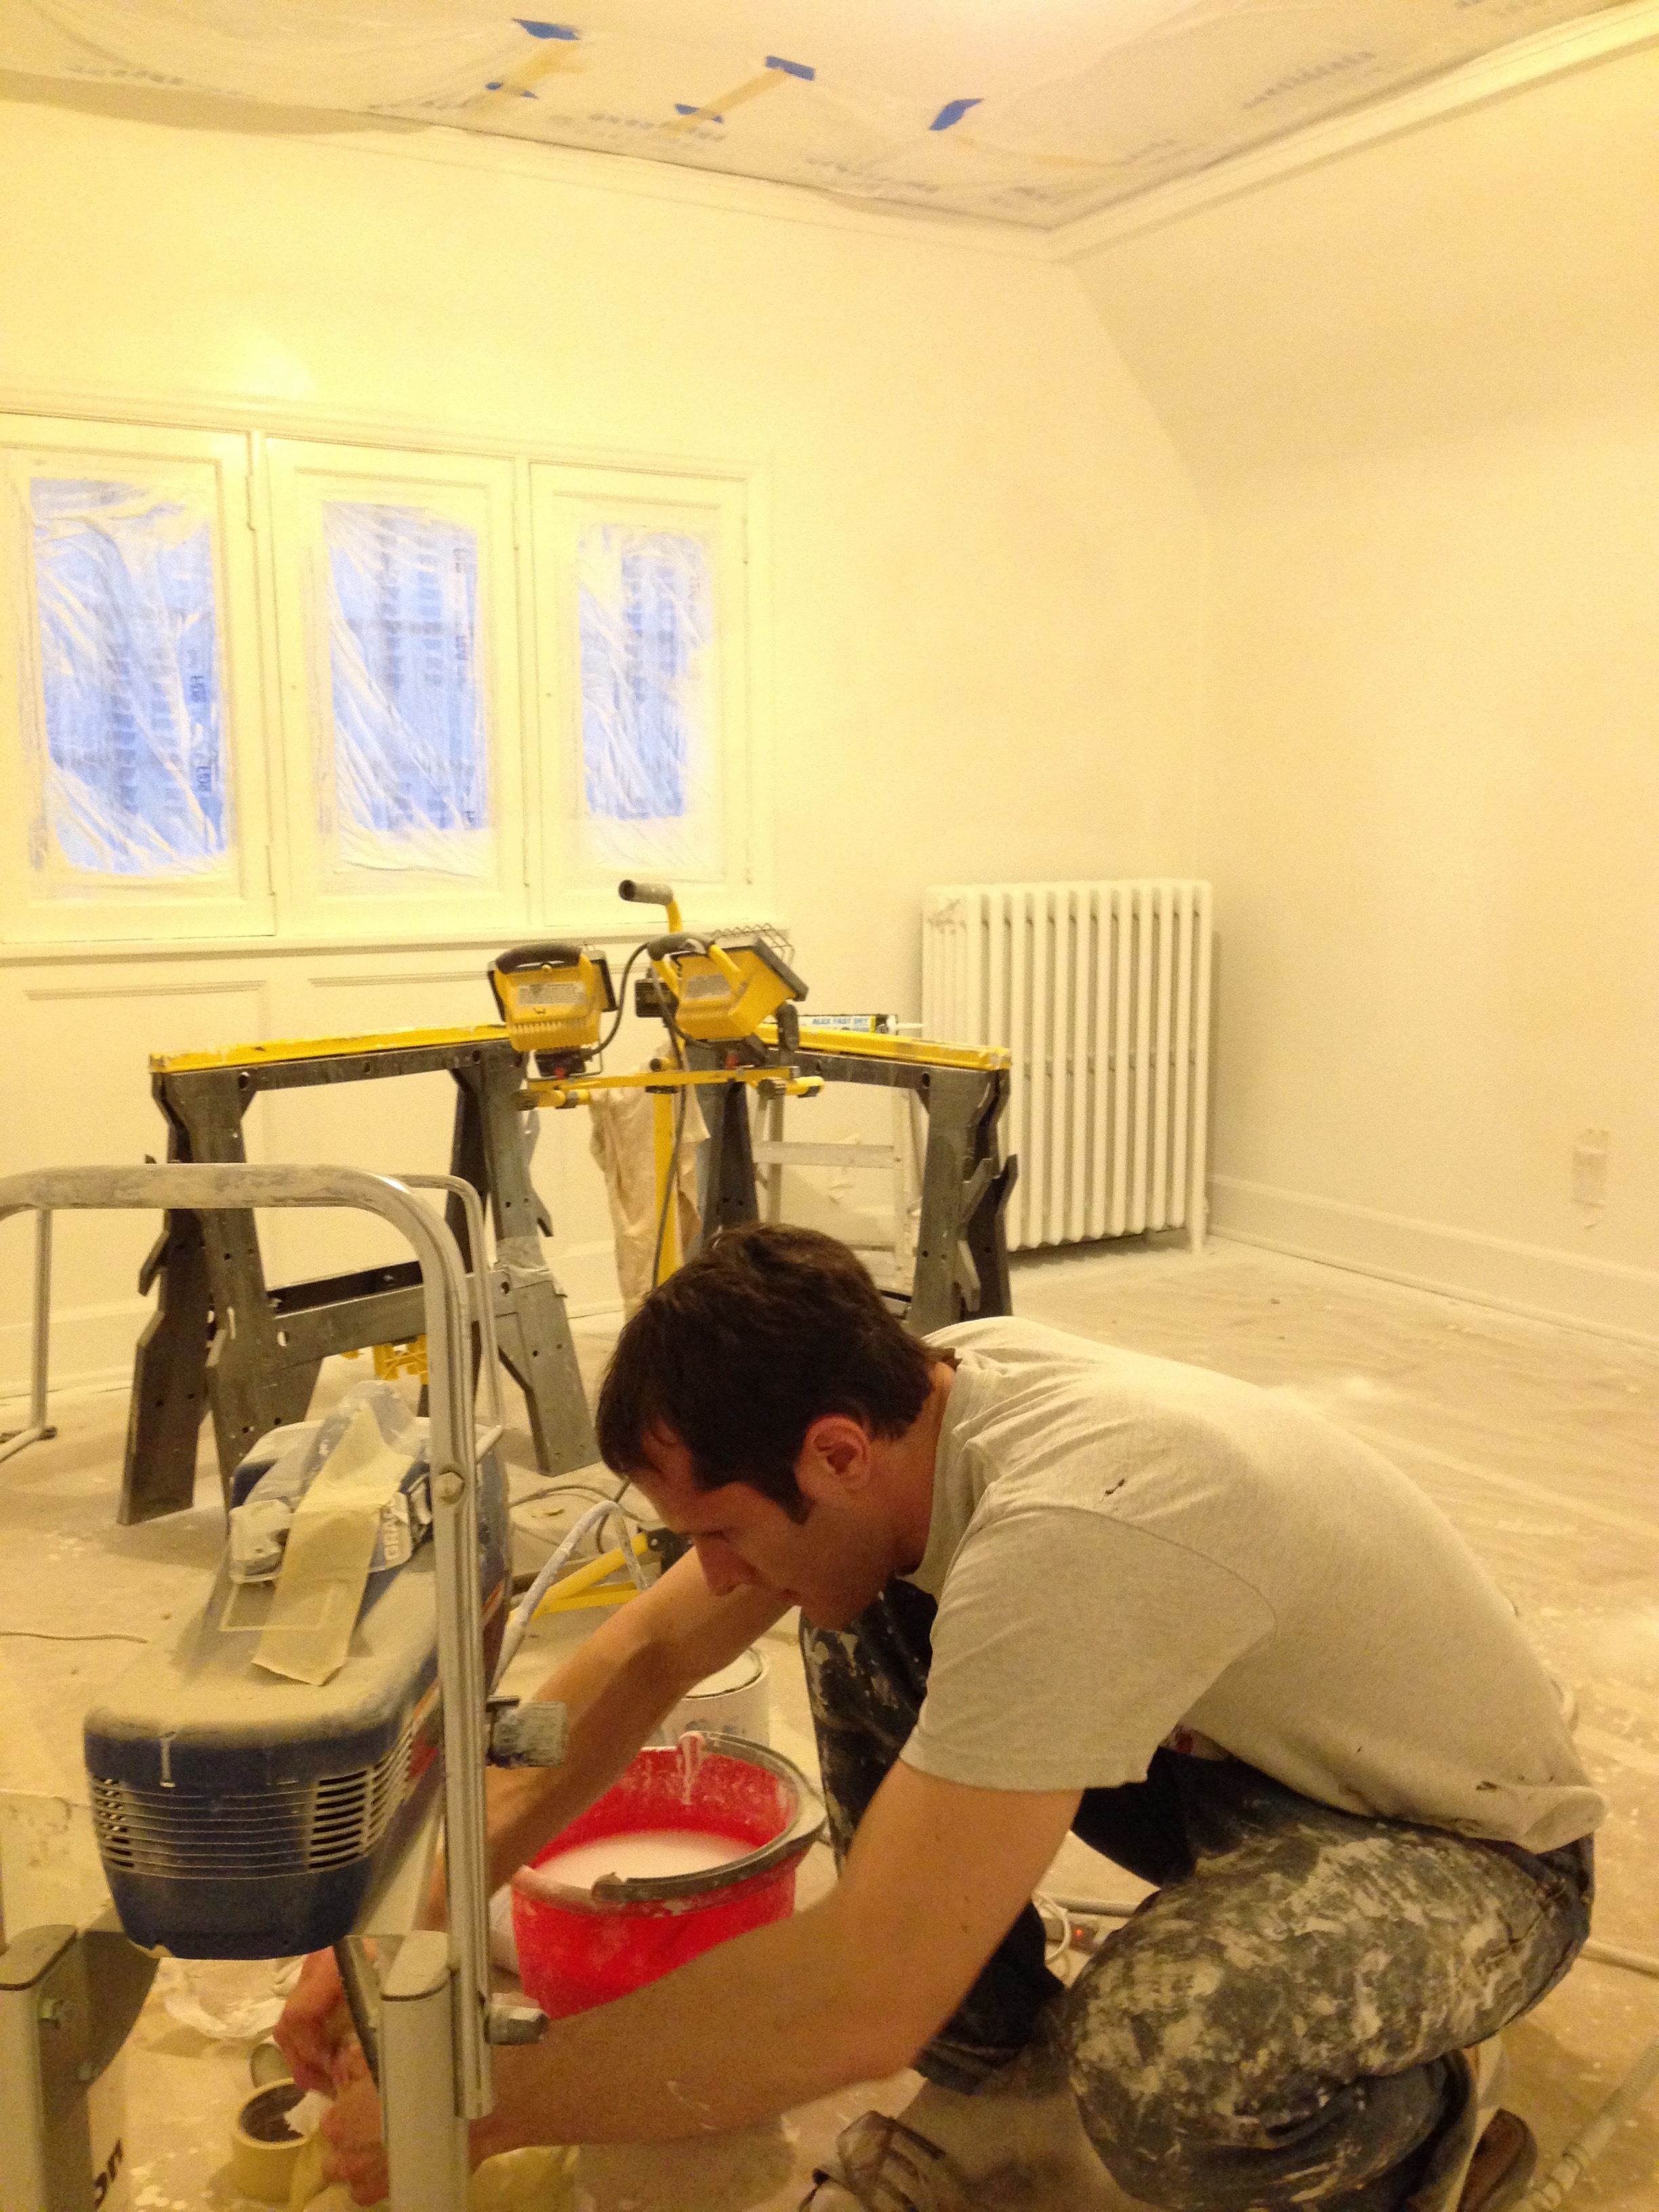
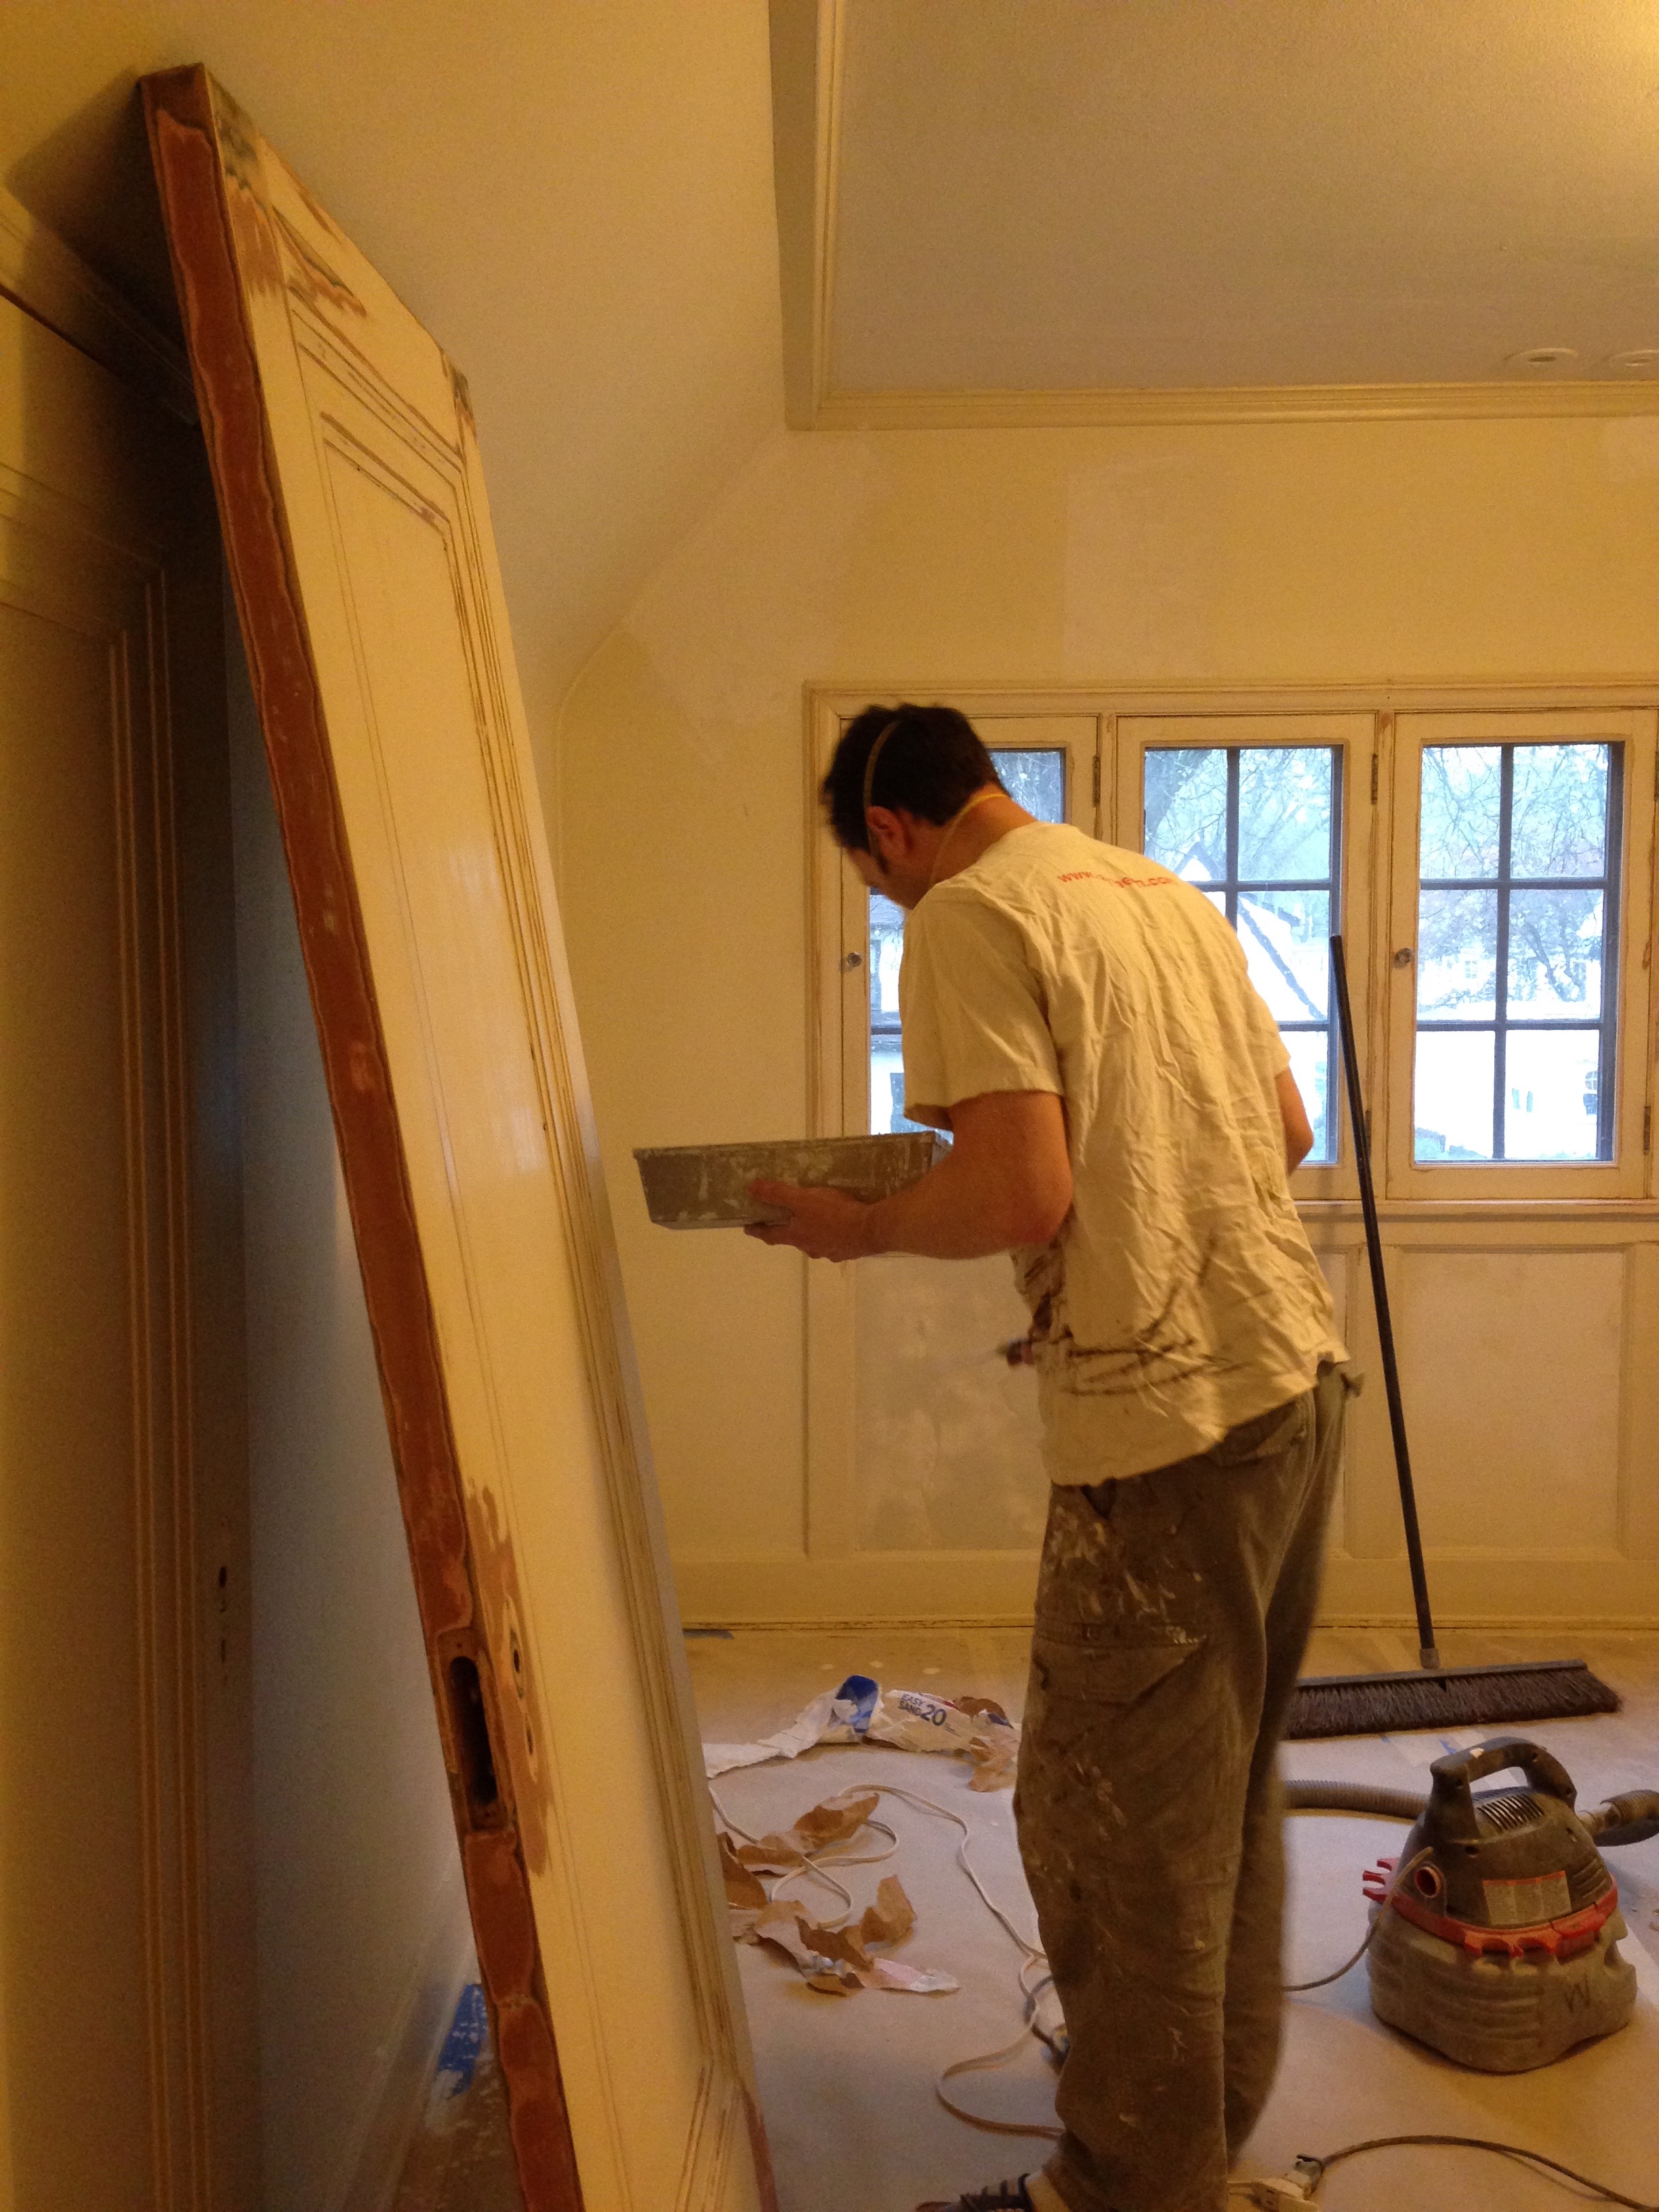
If you’ve been following along on Instagram, then you know that our Minneapolis bungalow has presented a few design dilemmas over the years. Built in 1927, our Tudor home has incredible period detail and so much charm. But, it also has few floorplan quirks that leave us puzzled every now and again when it comes to designing its unique spaces. Especially the long, narrow living room.

Wagner living room floor plan. We divided living room from one awkward space into two user-friendly ones

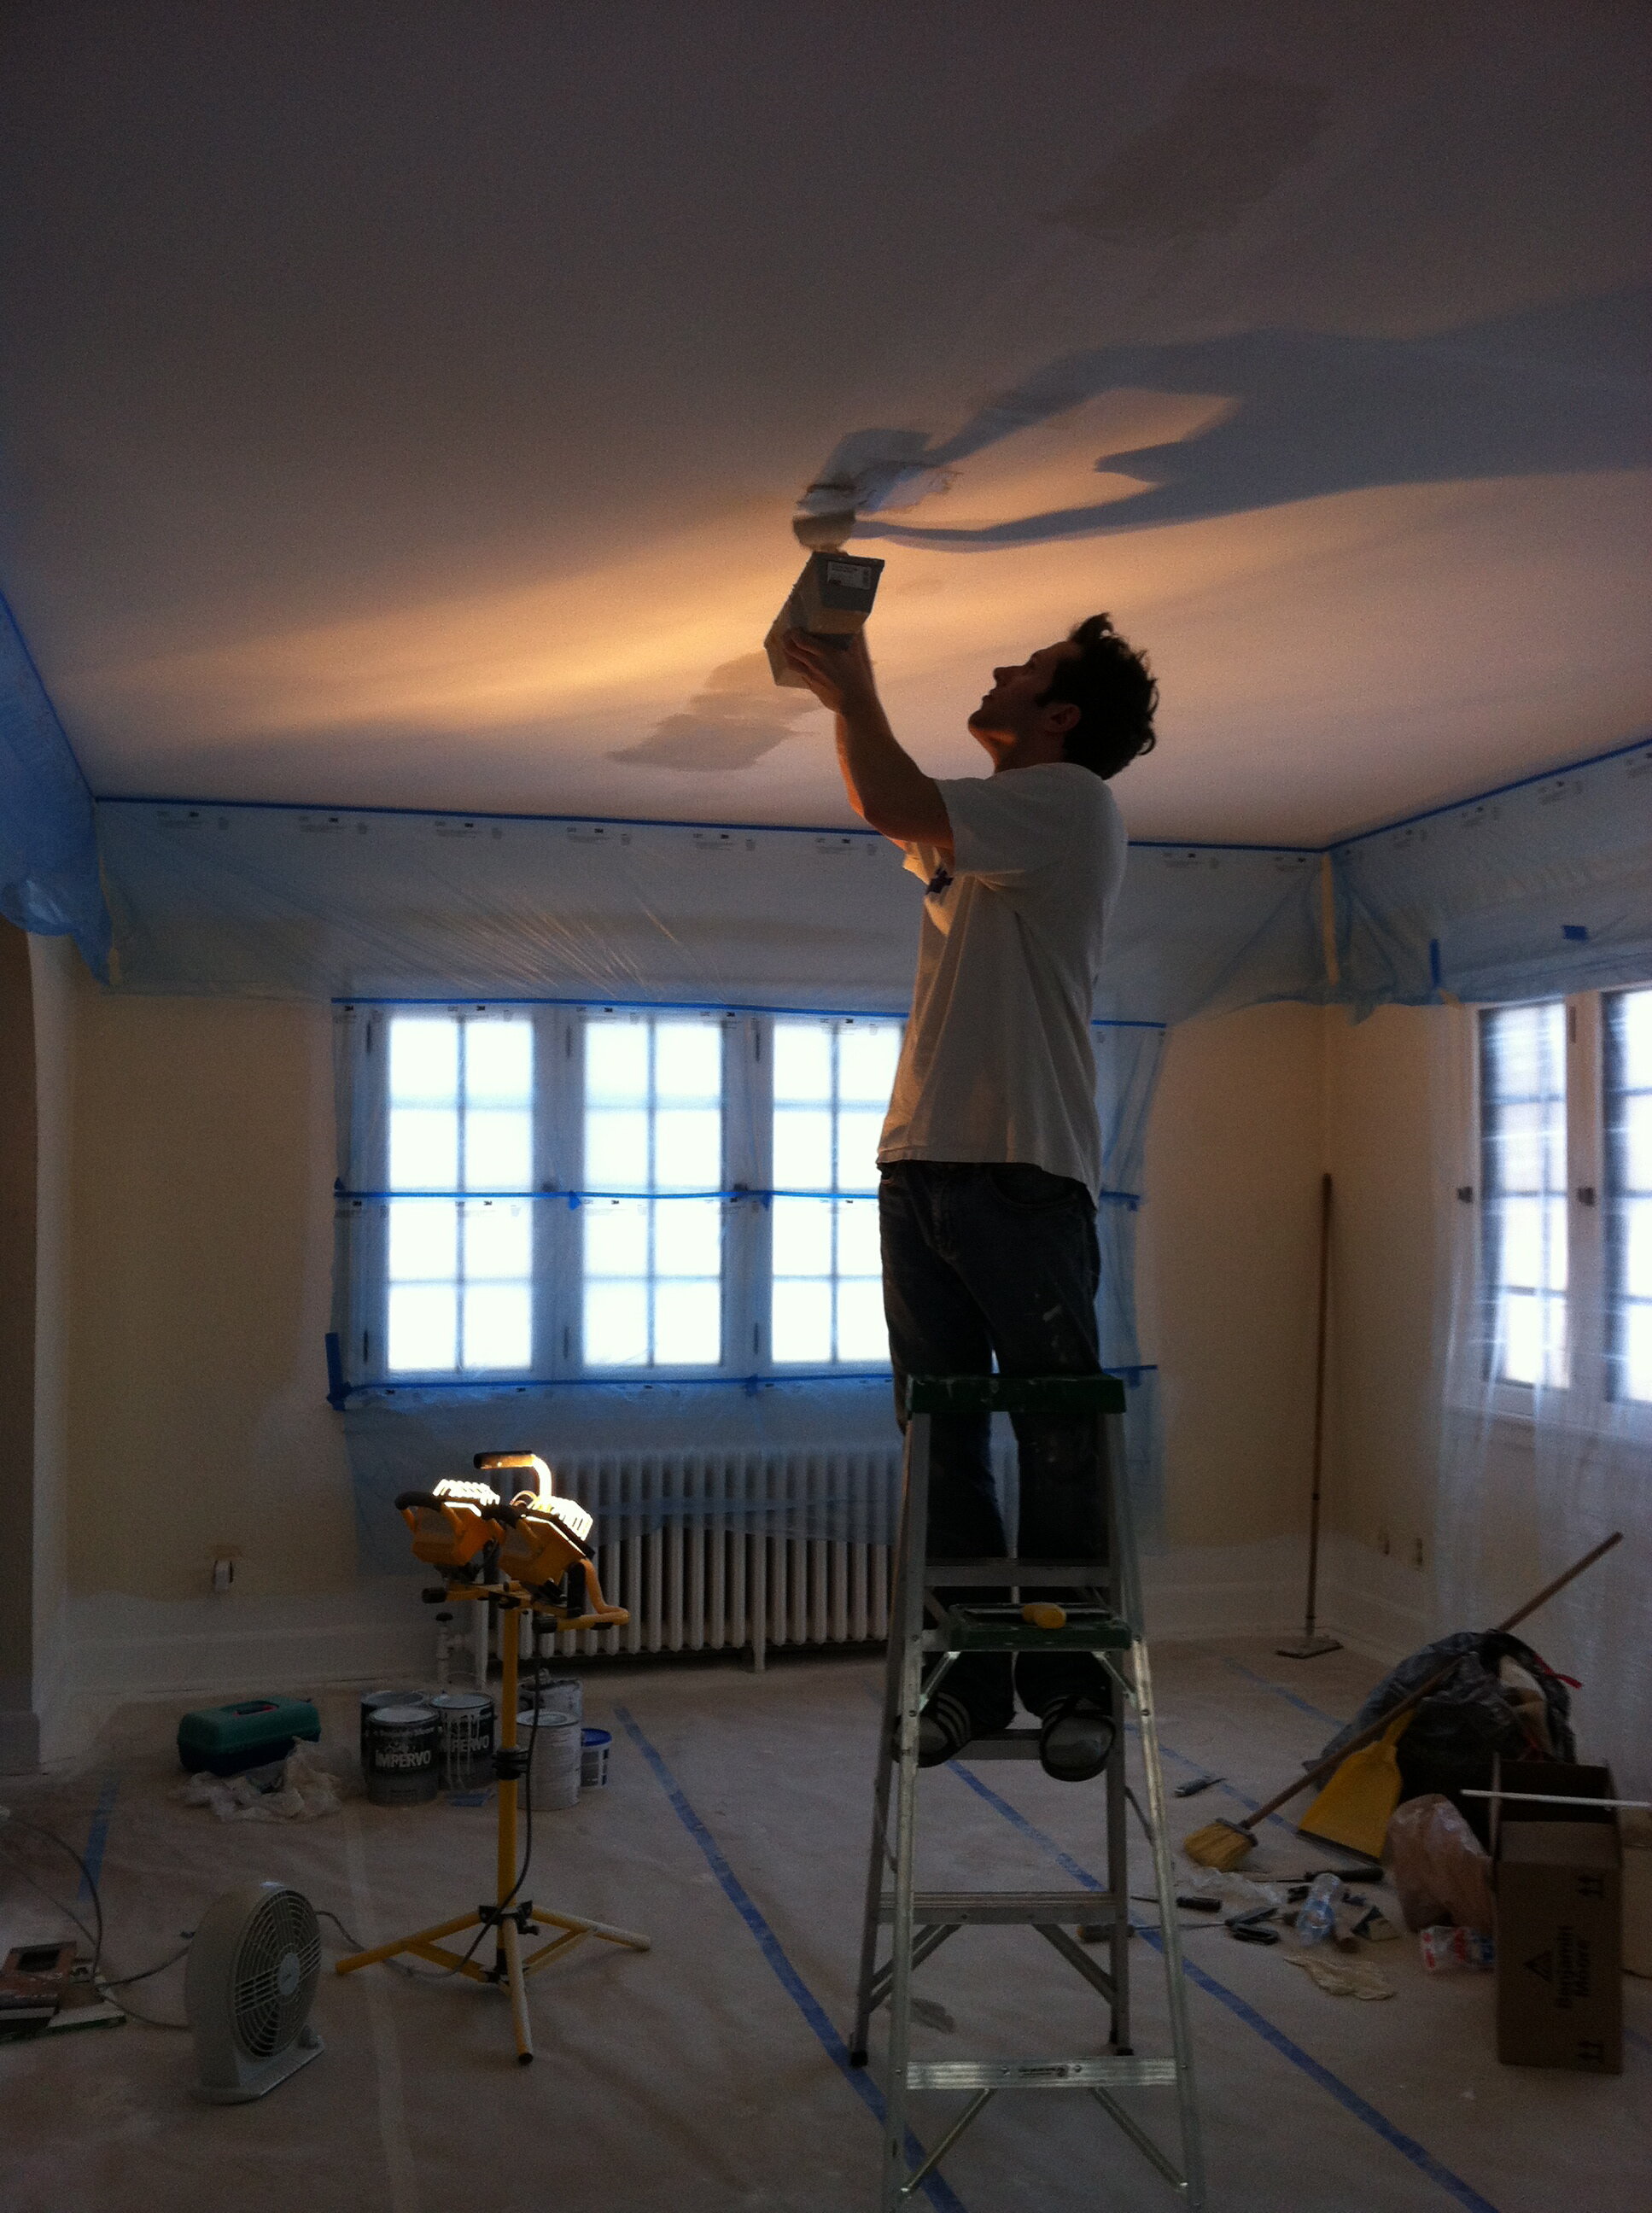
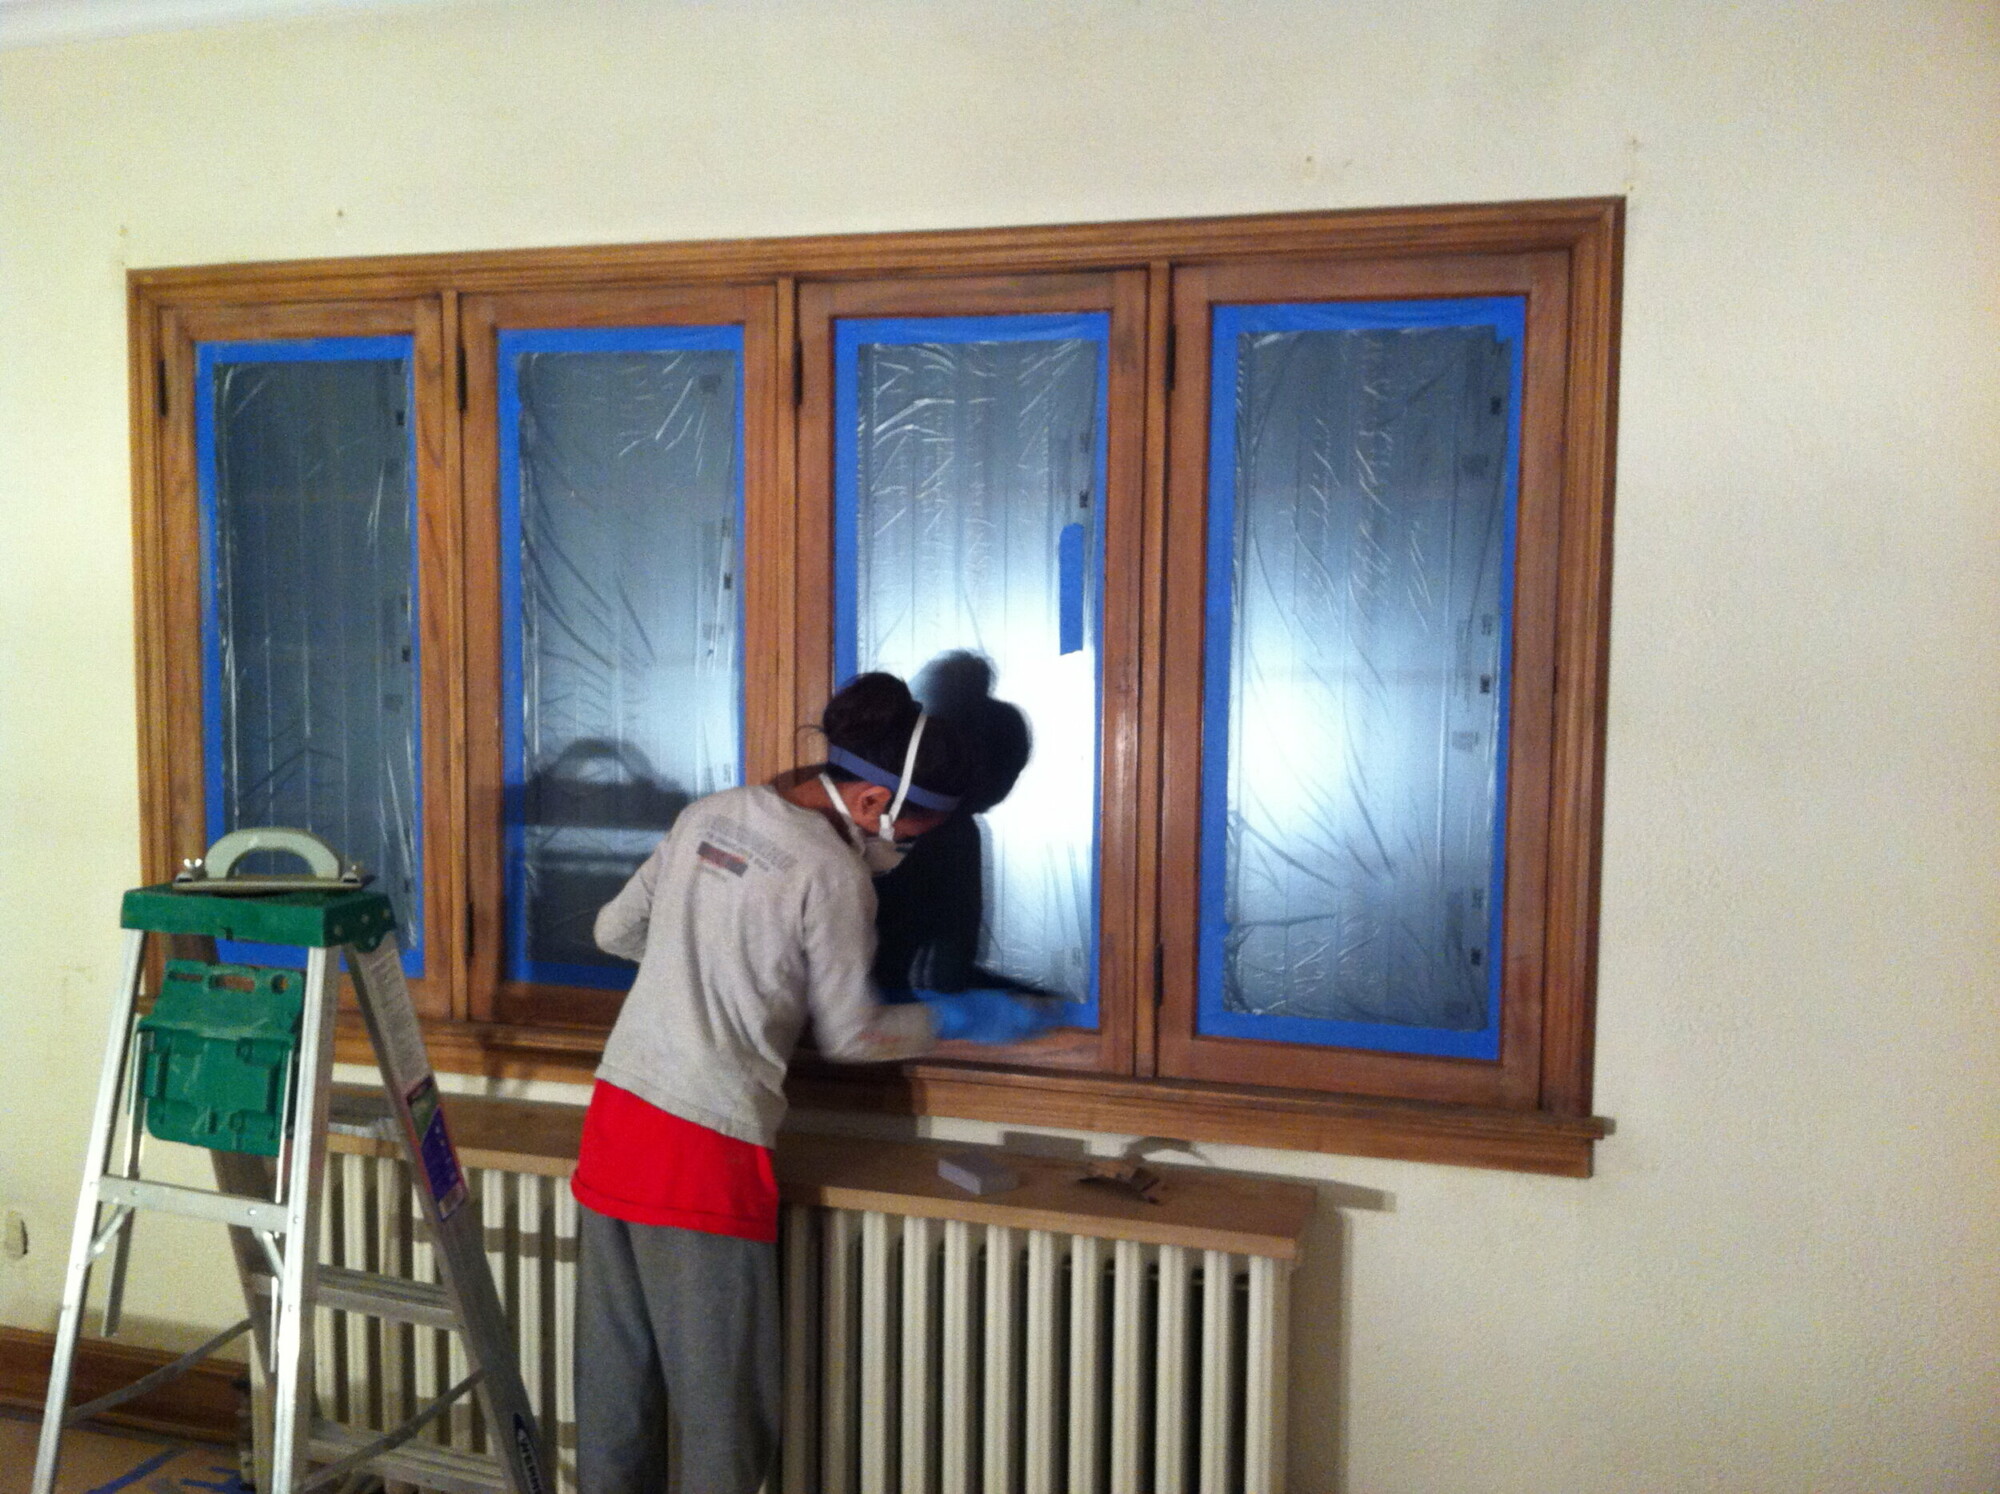
When we purchased the home 8 years ago, we worked hard to bring the living room into the 21st century with necessary improvements. Basically, we created a clean slate for a redesign. But, as any busy family with young children knows well, life happened and our dream living room kept getting put off for another day.

A few months ago, we finally tackled the project and completed phase 1 of our living room makeover focusing on overall layout and designing the second half of the room. It is so perfect for us and I’m still pinching myself!

Phase 1 of our living room makeover focused on overall layout and designing the second half of the room

Our goals for the first phase of our long, narrow living room makeover were to:

  1. Maximize the potential

  2. Optimize the layout

  3. Create a cozy gathering space

After living in the room for a few months, I’d call it a huge success!

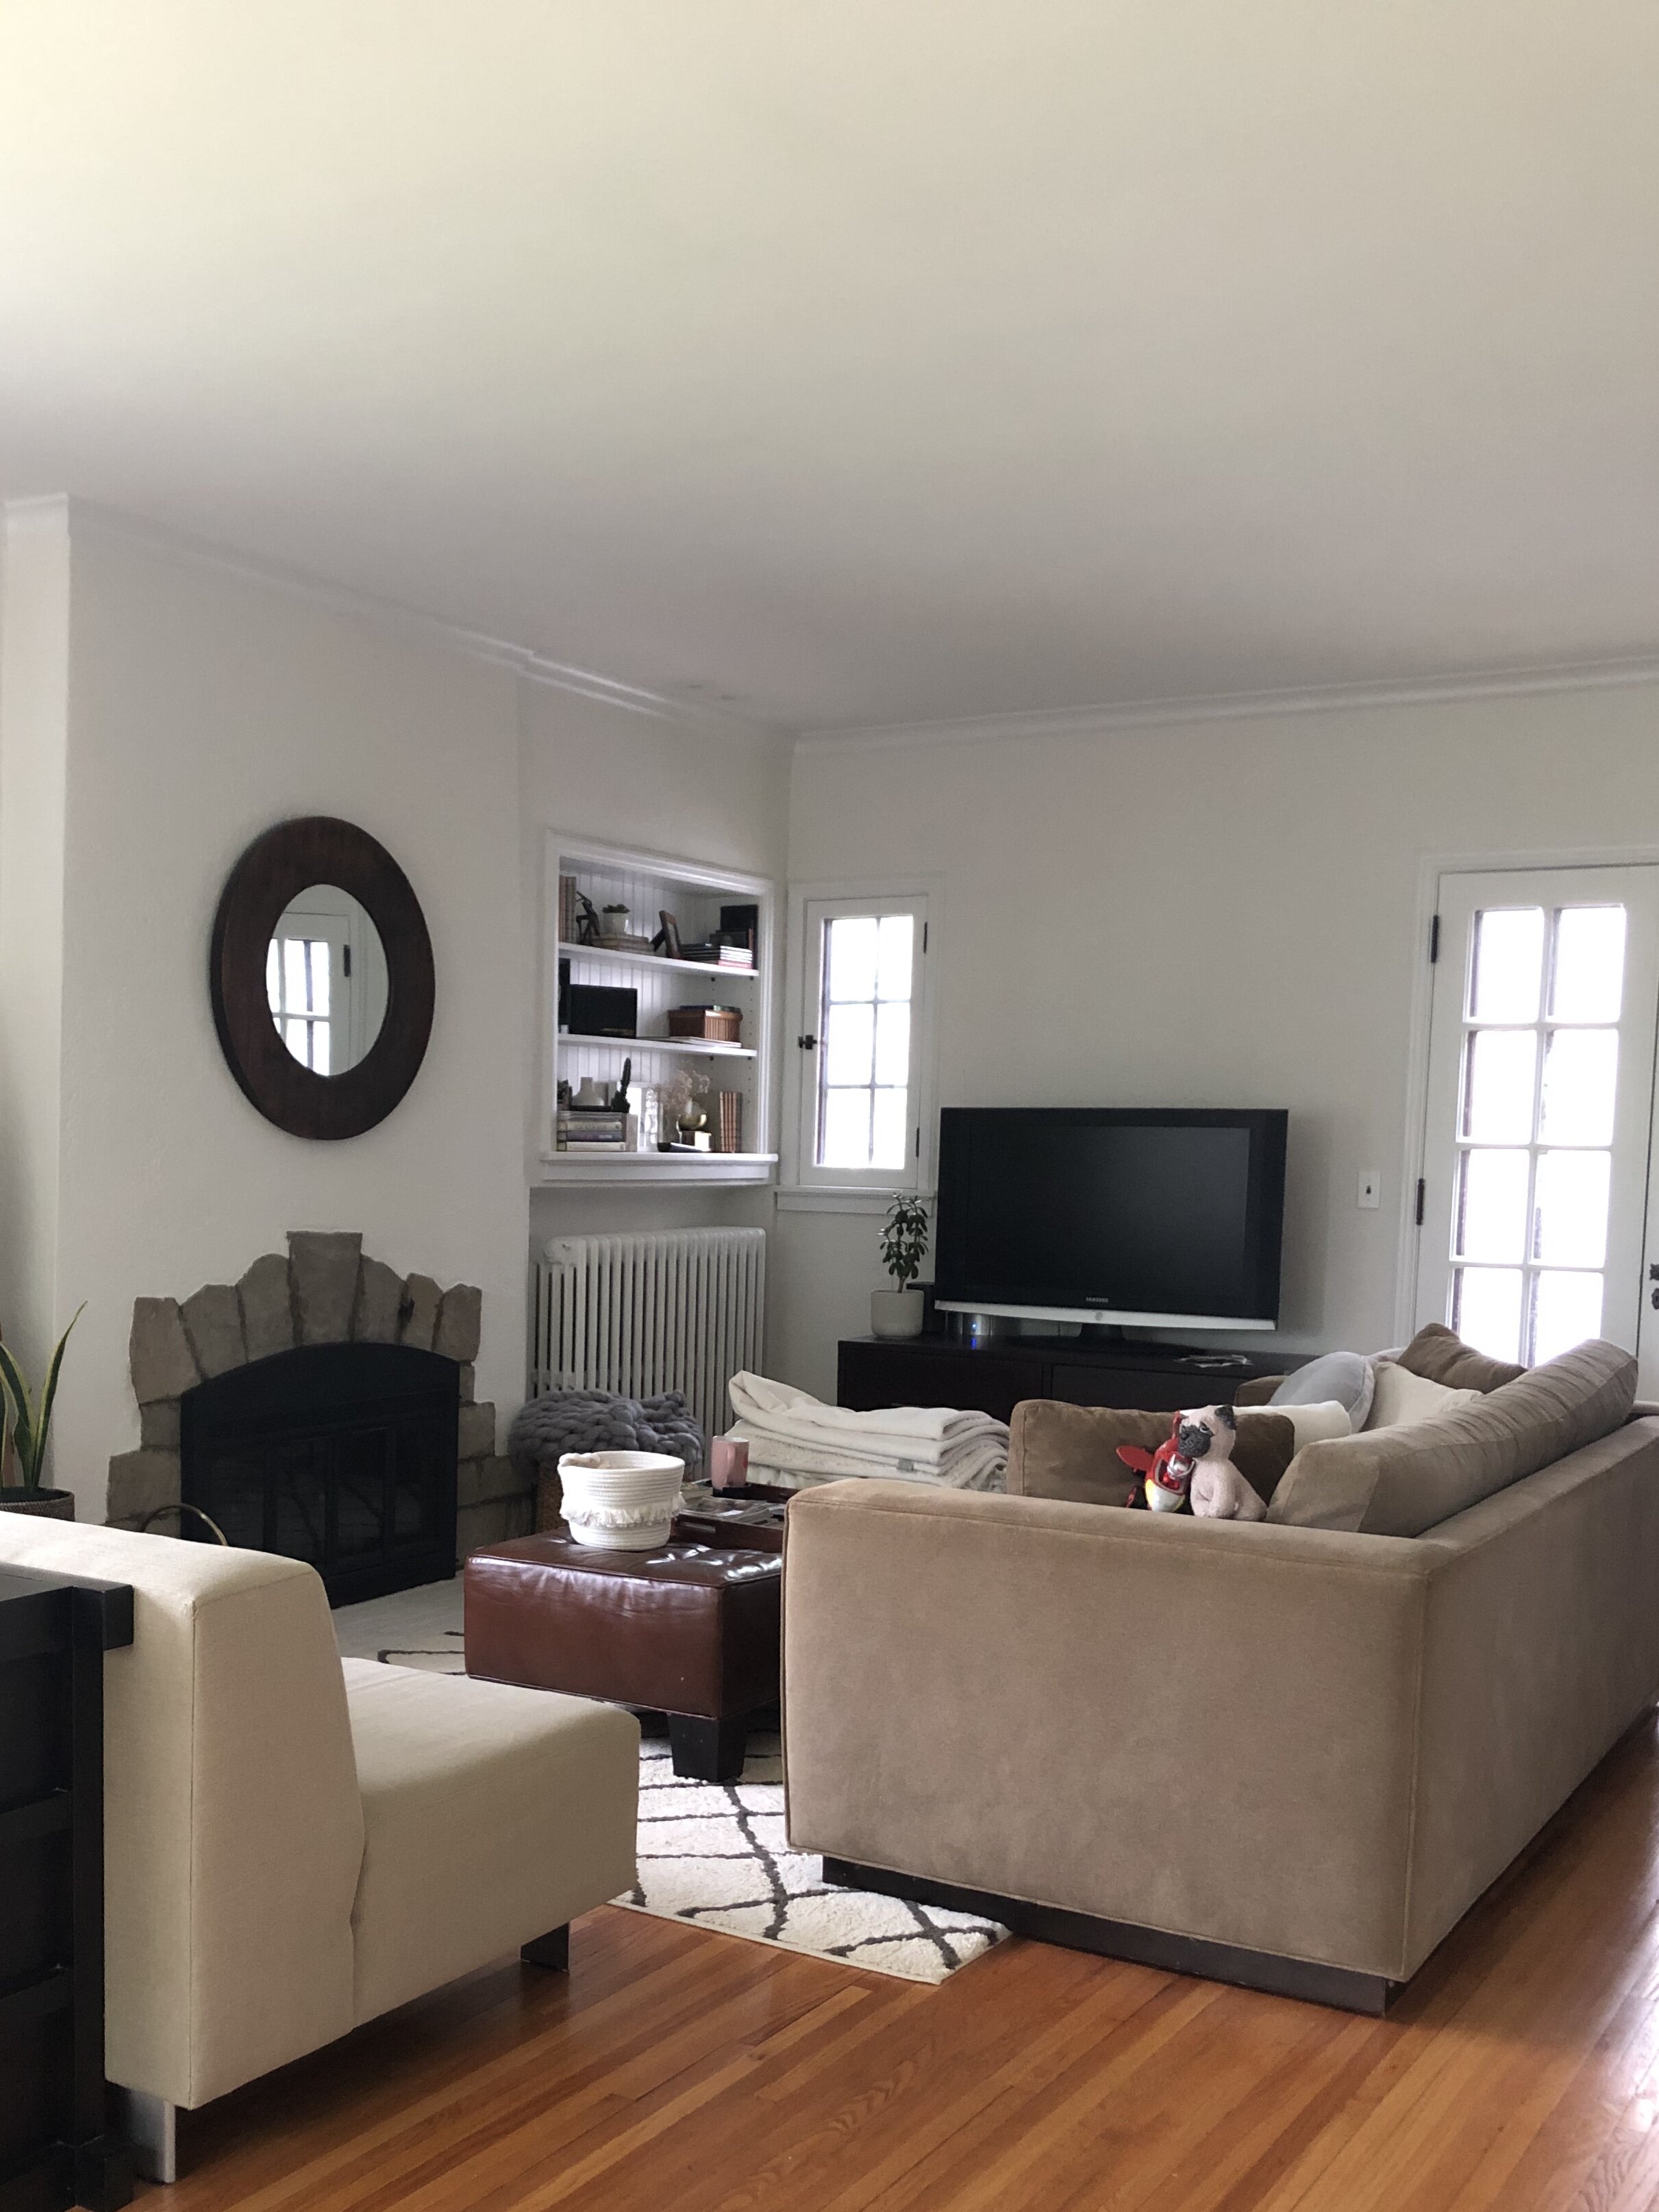
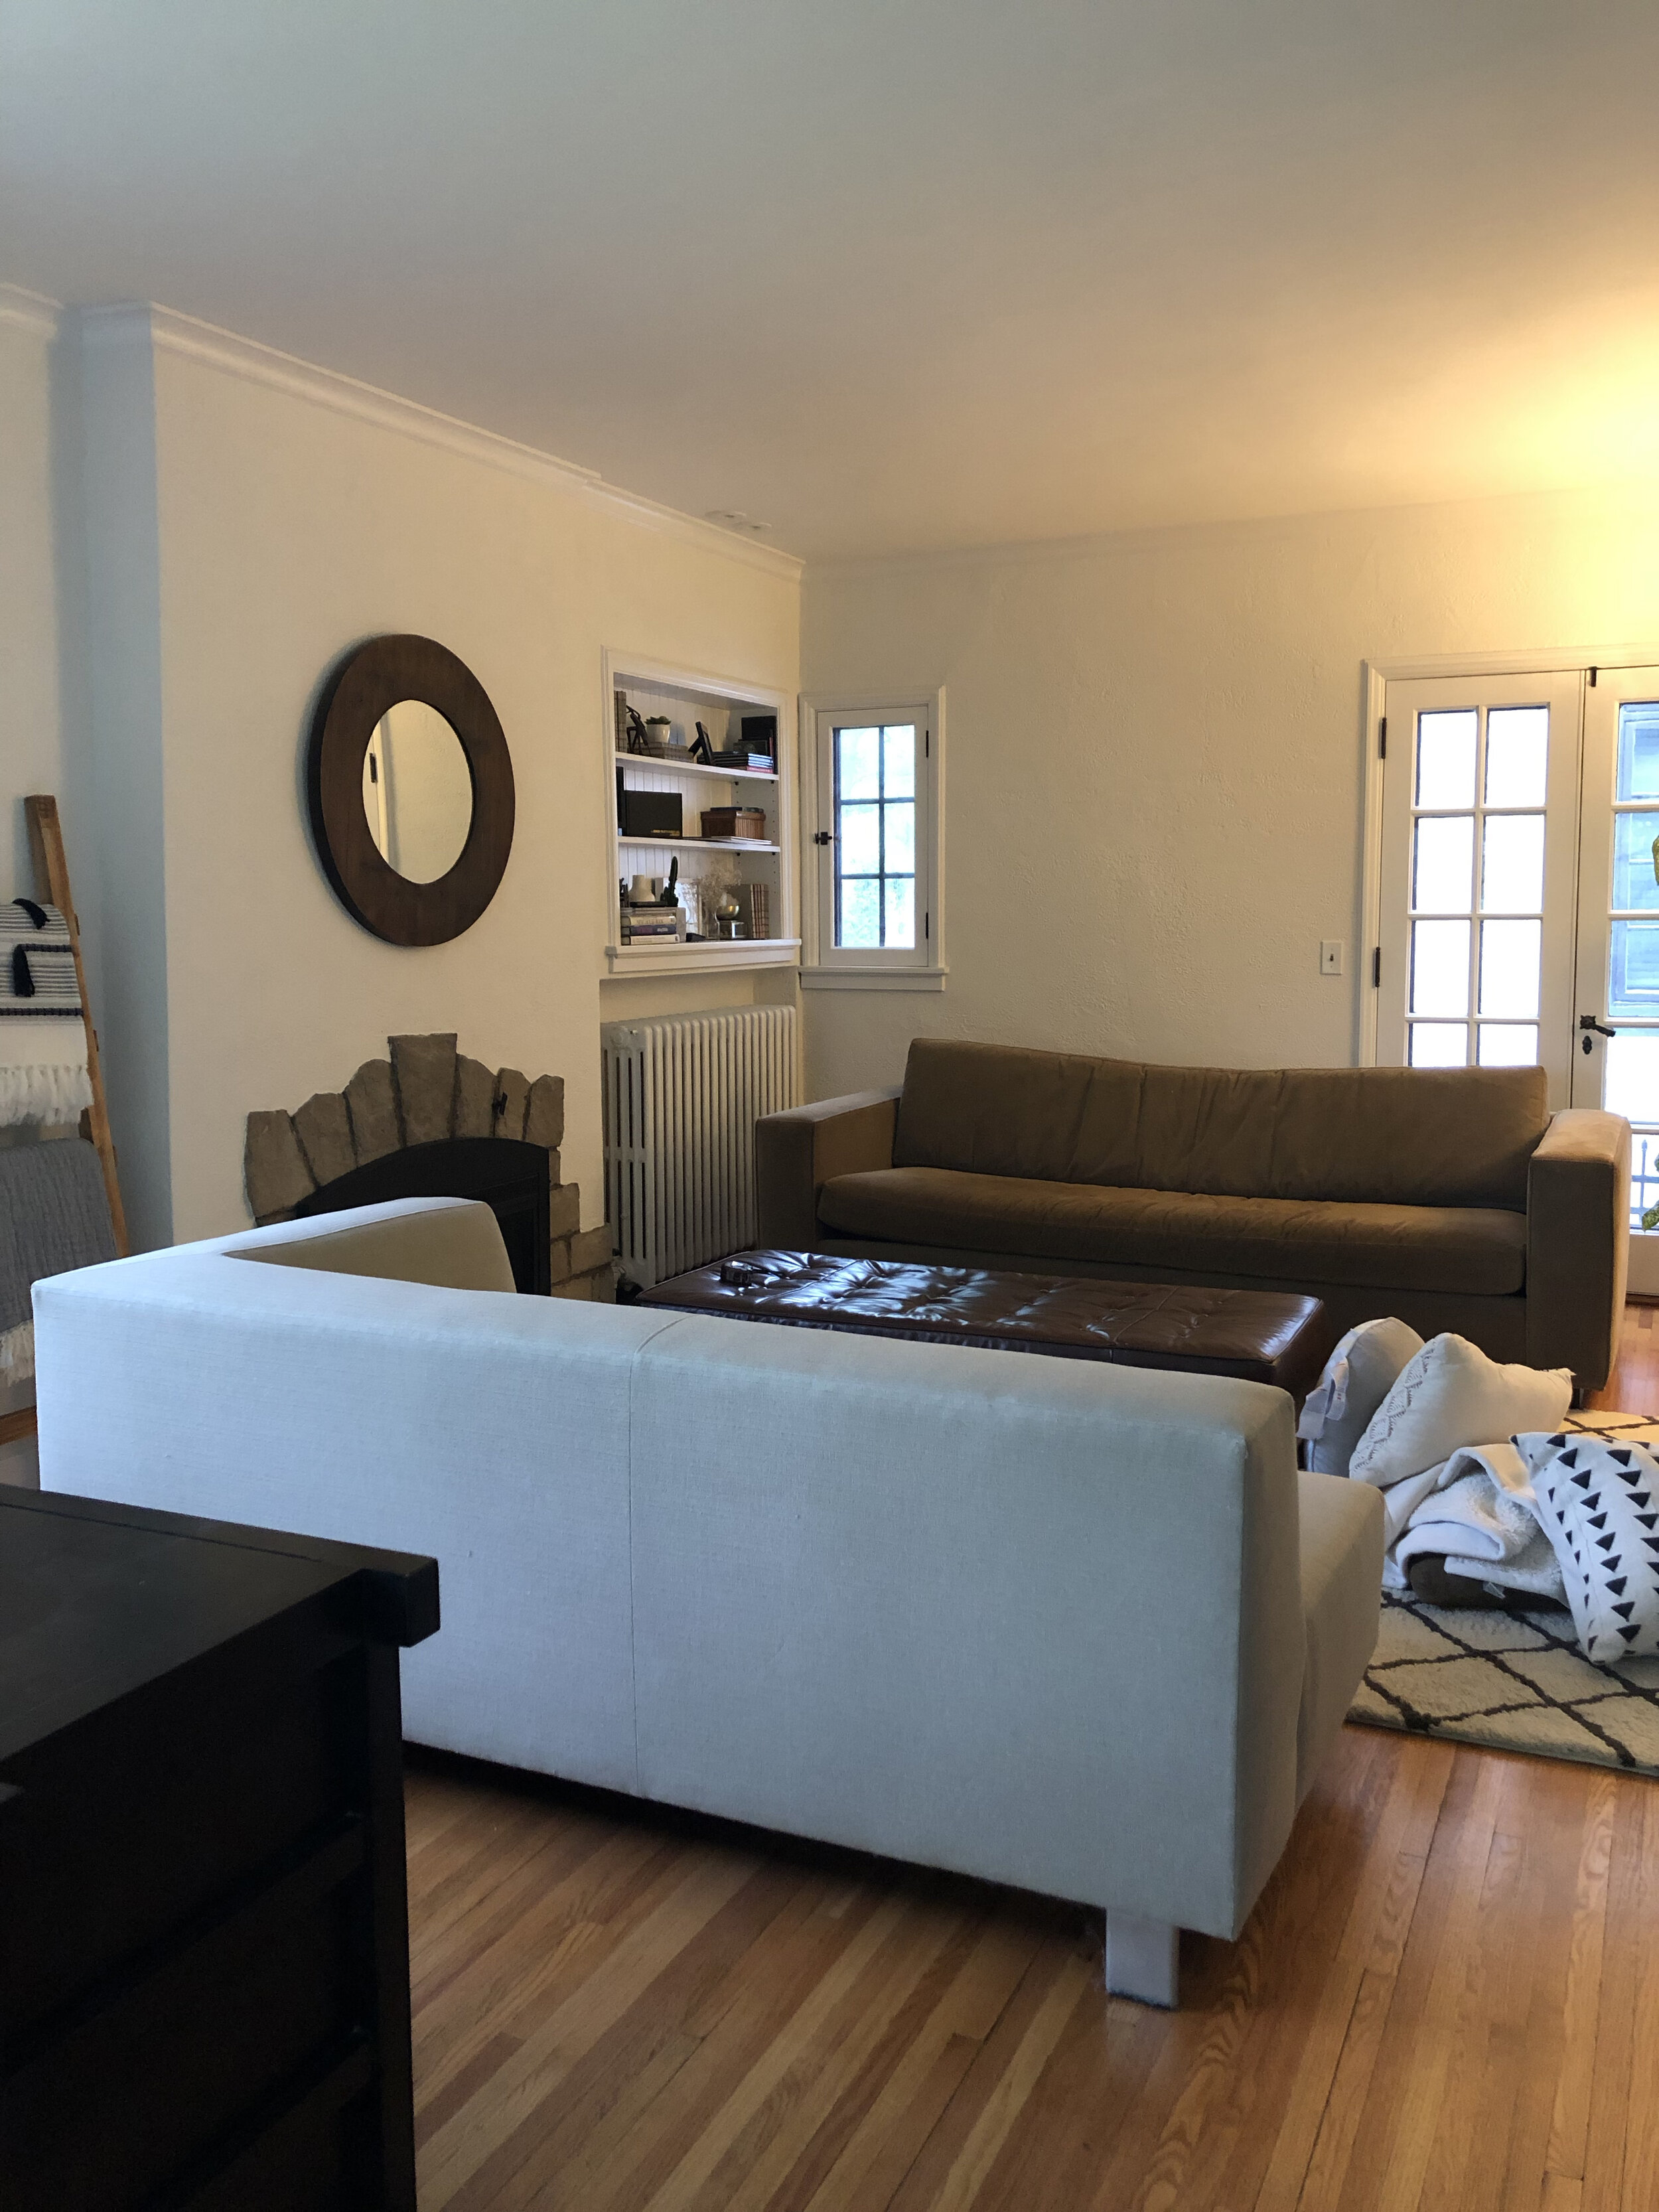
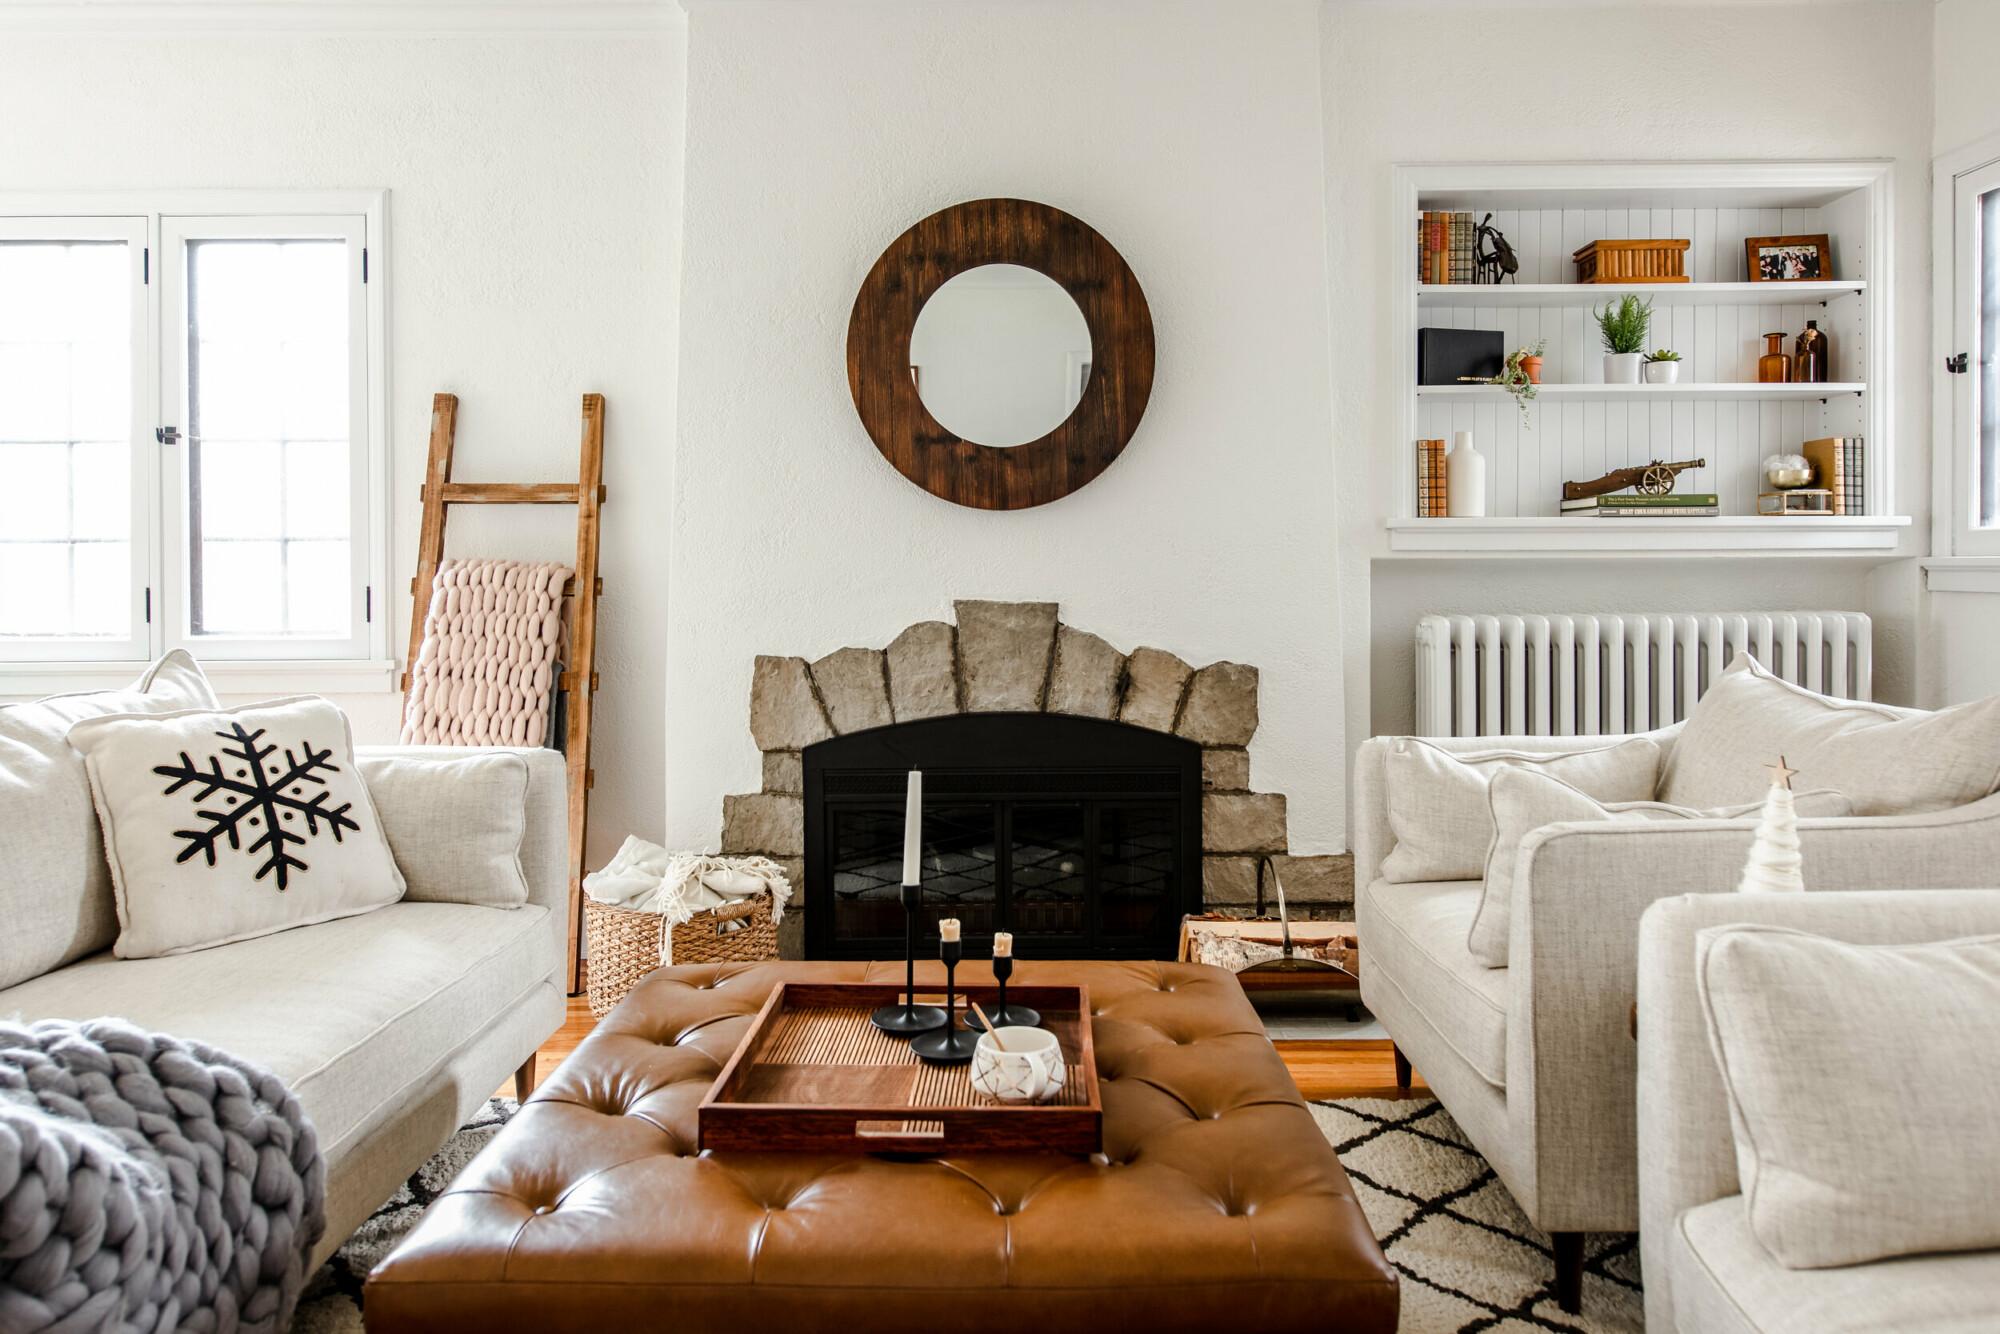
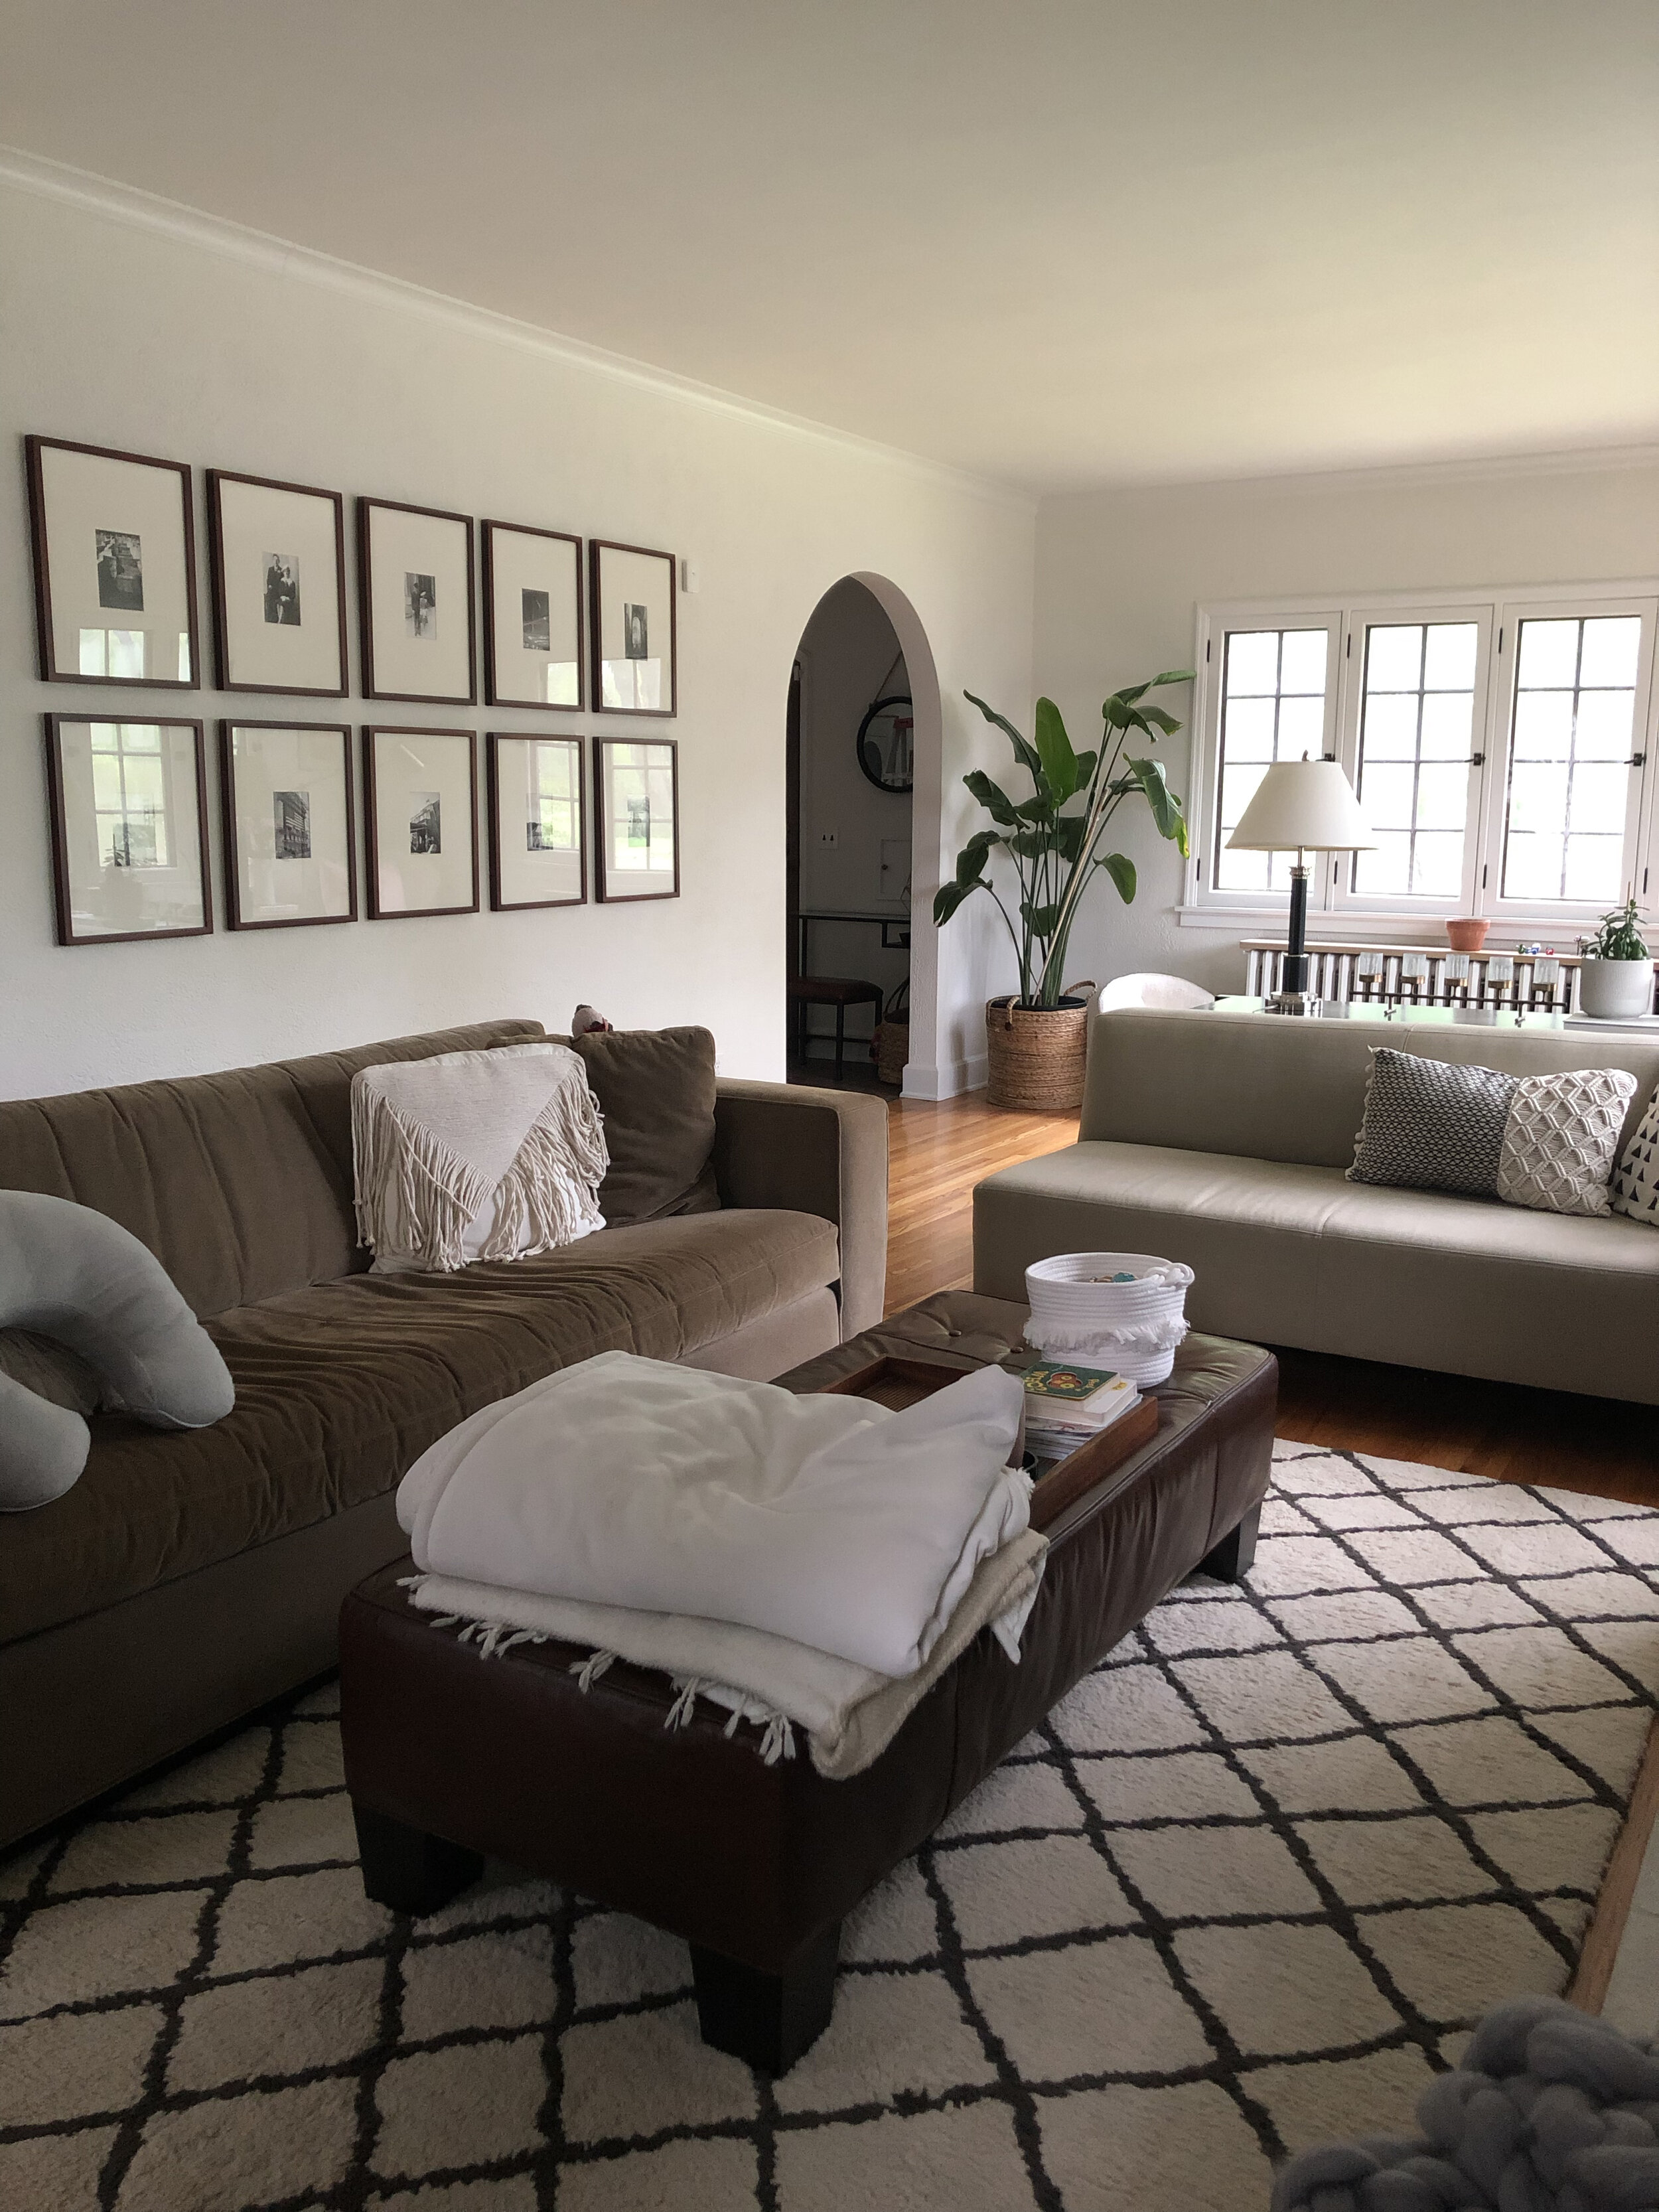
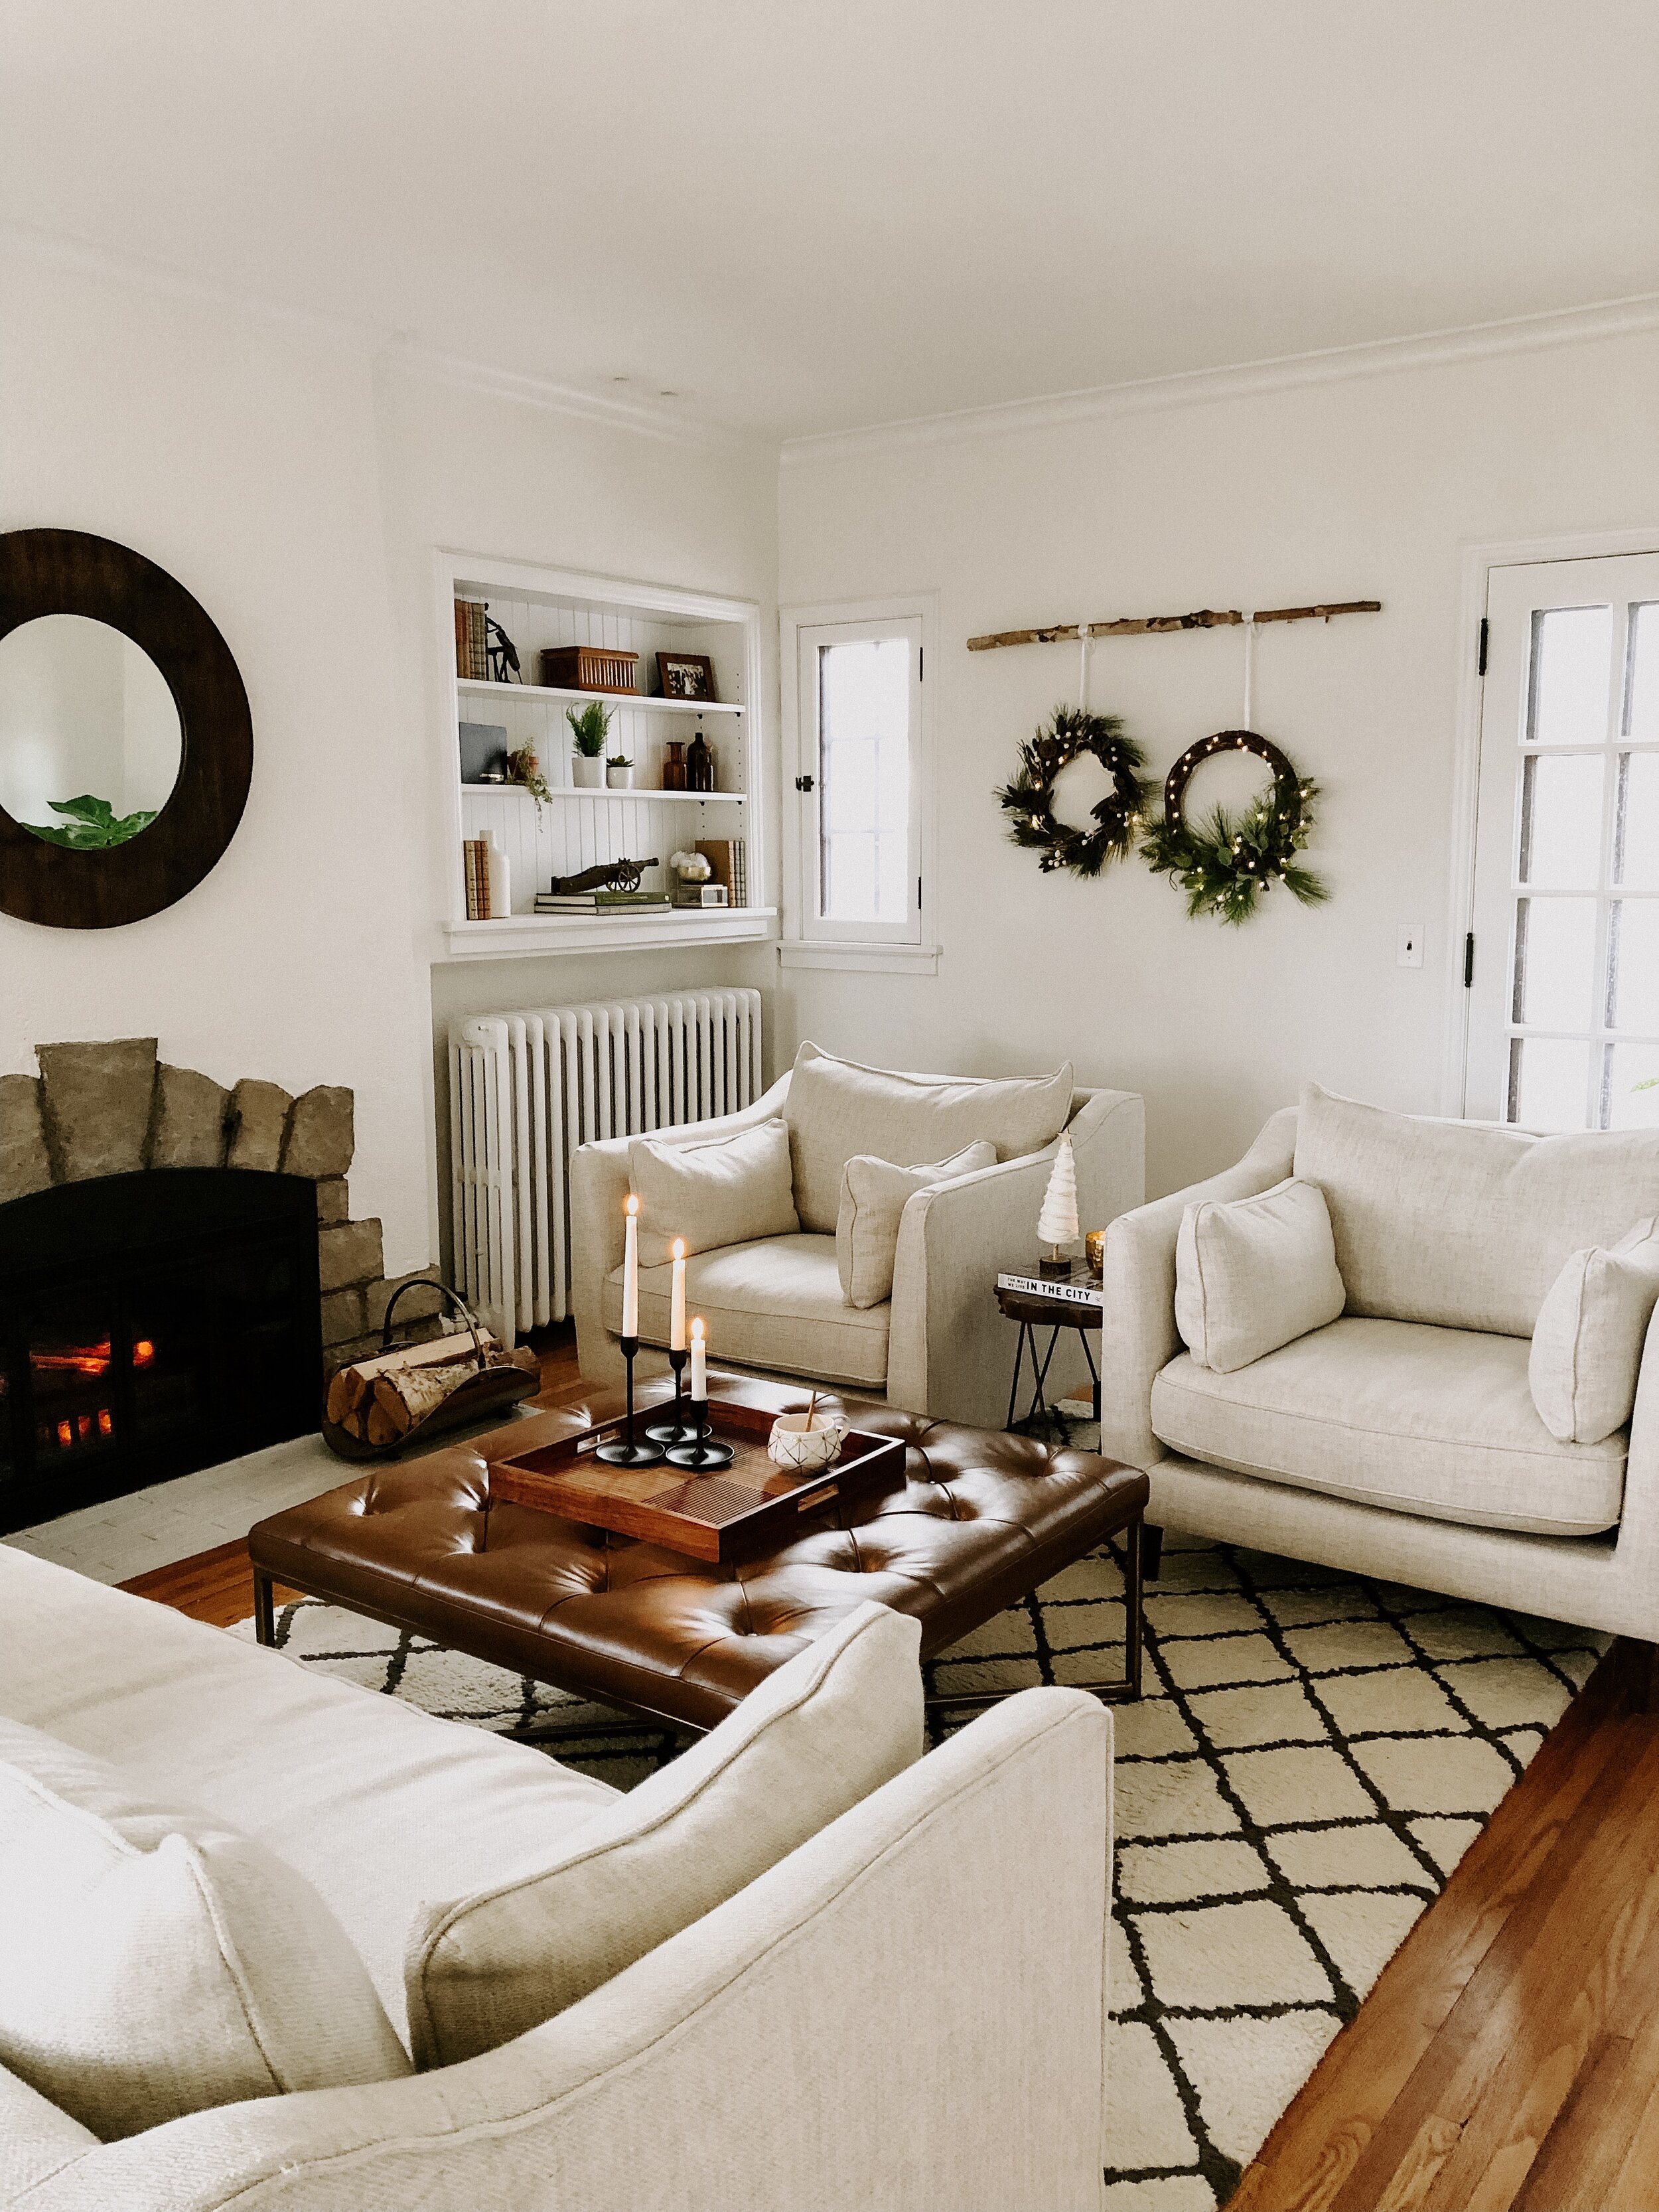
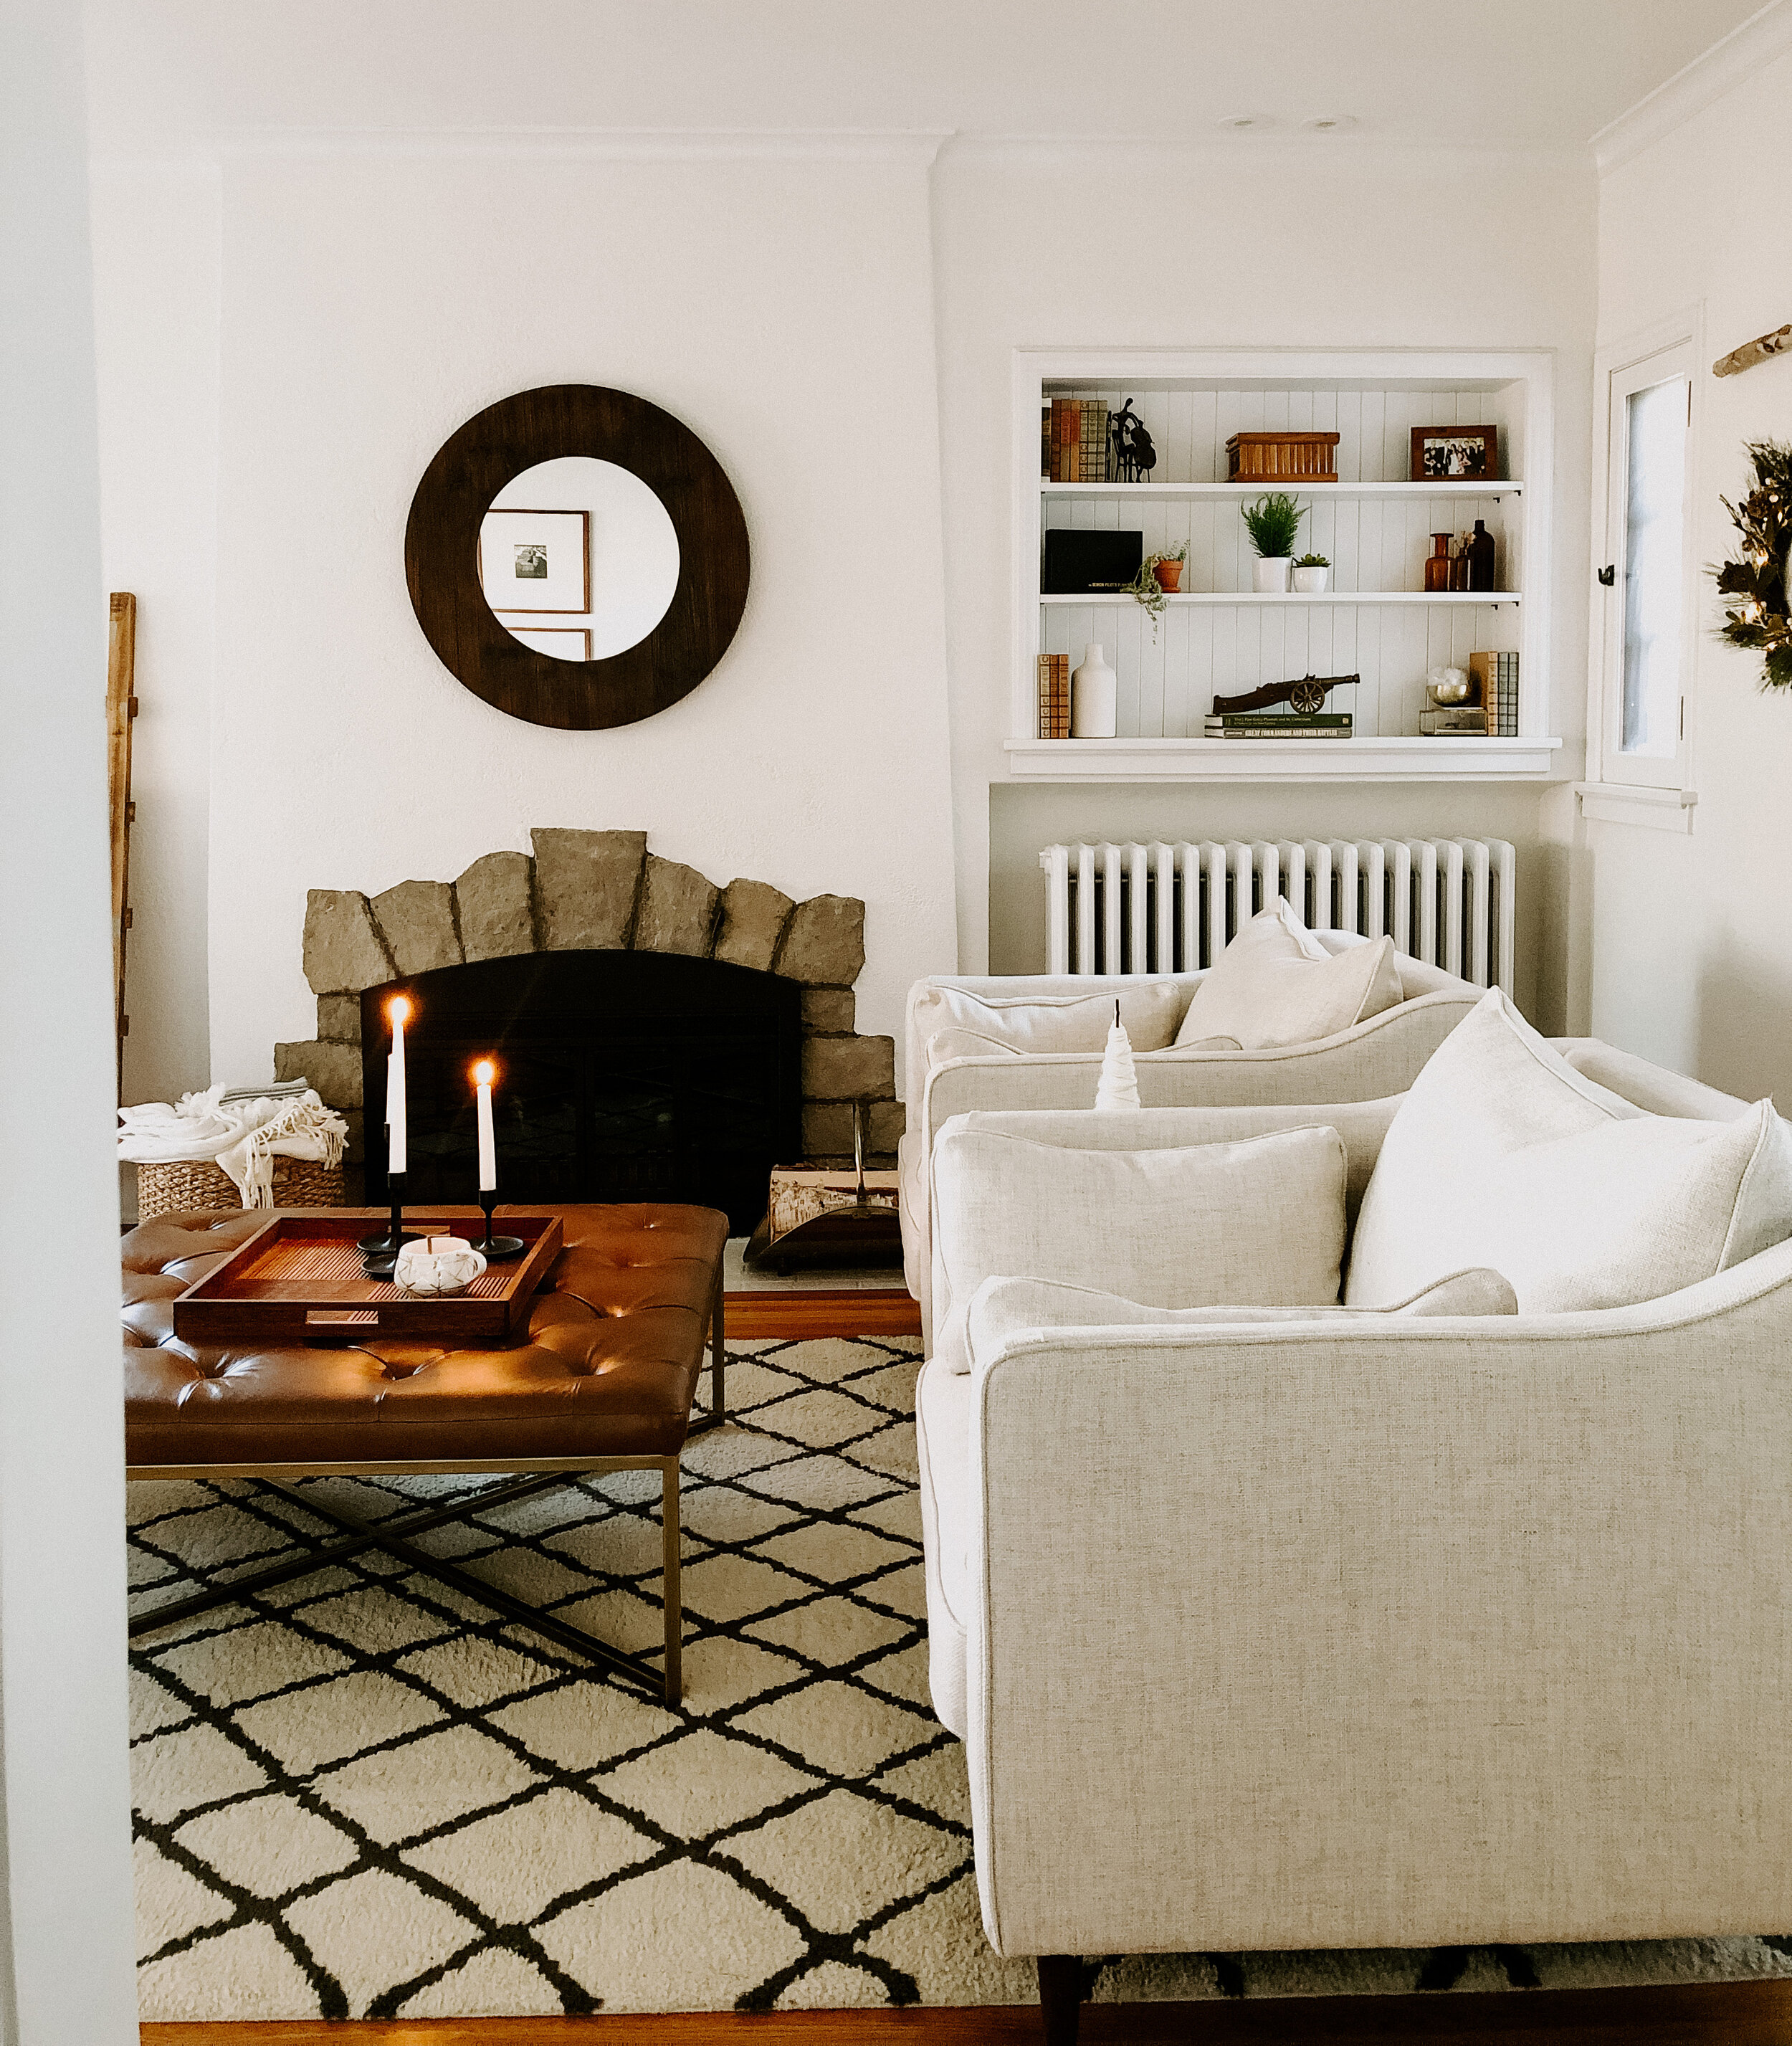
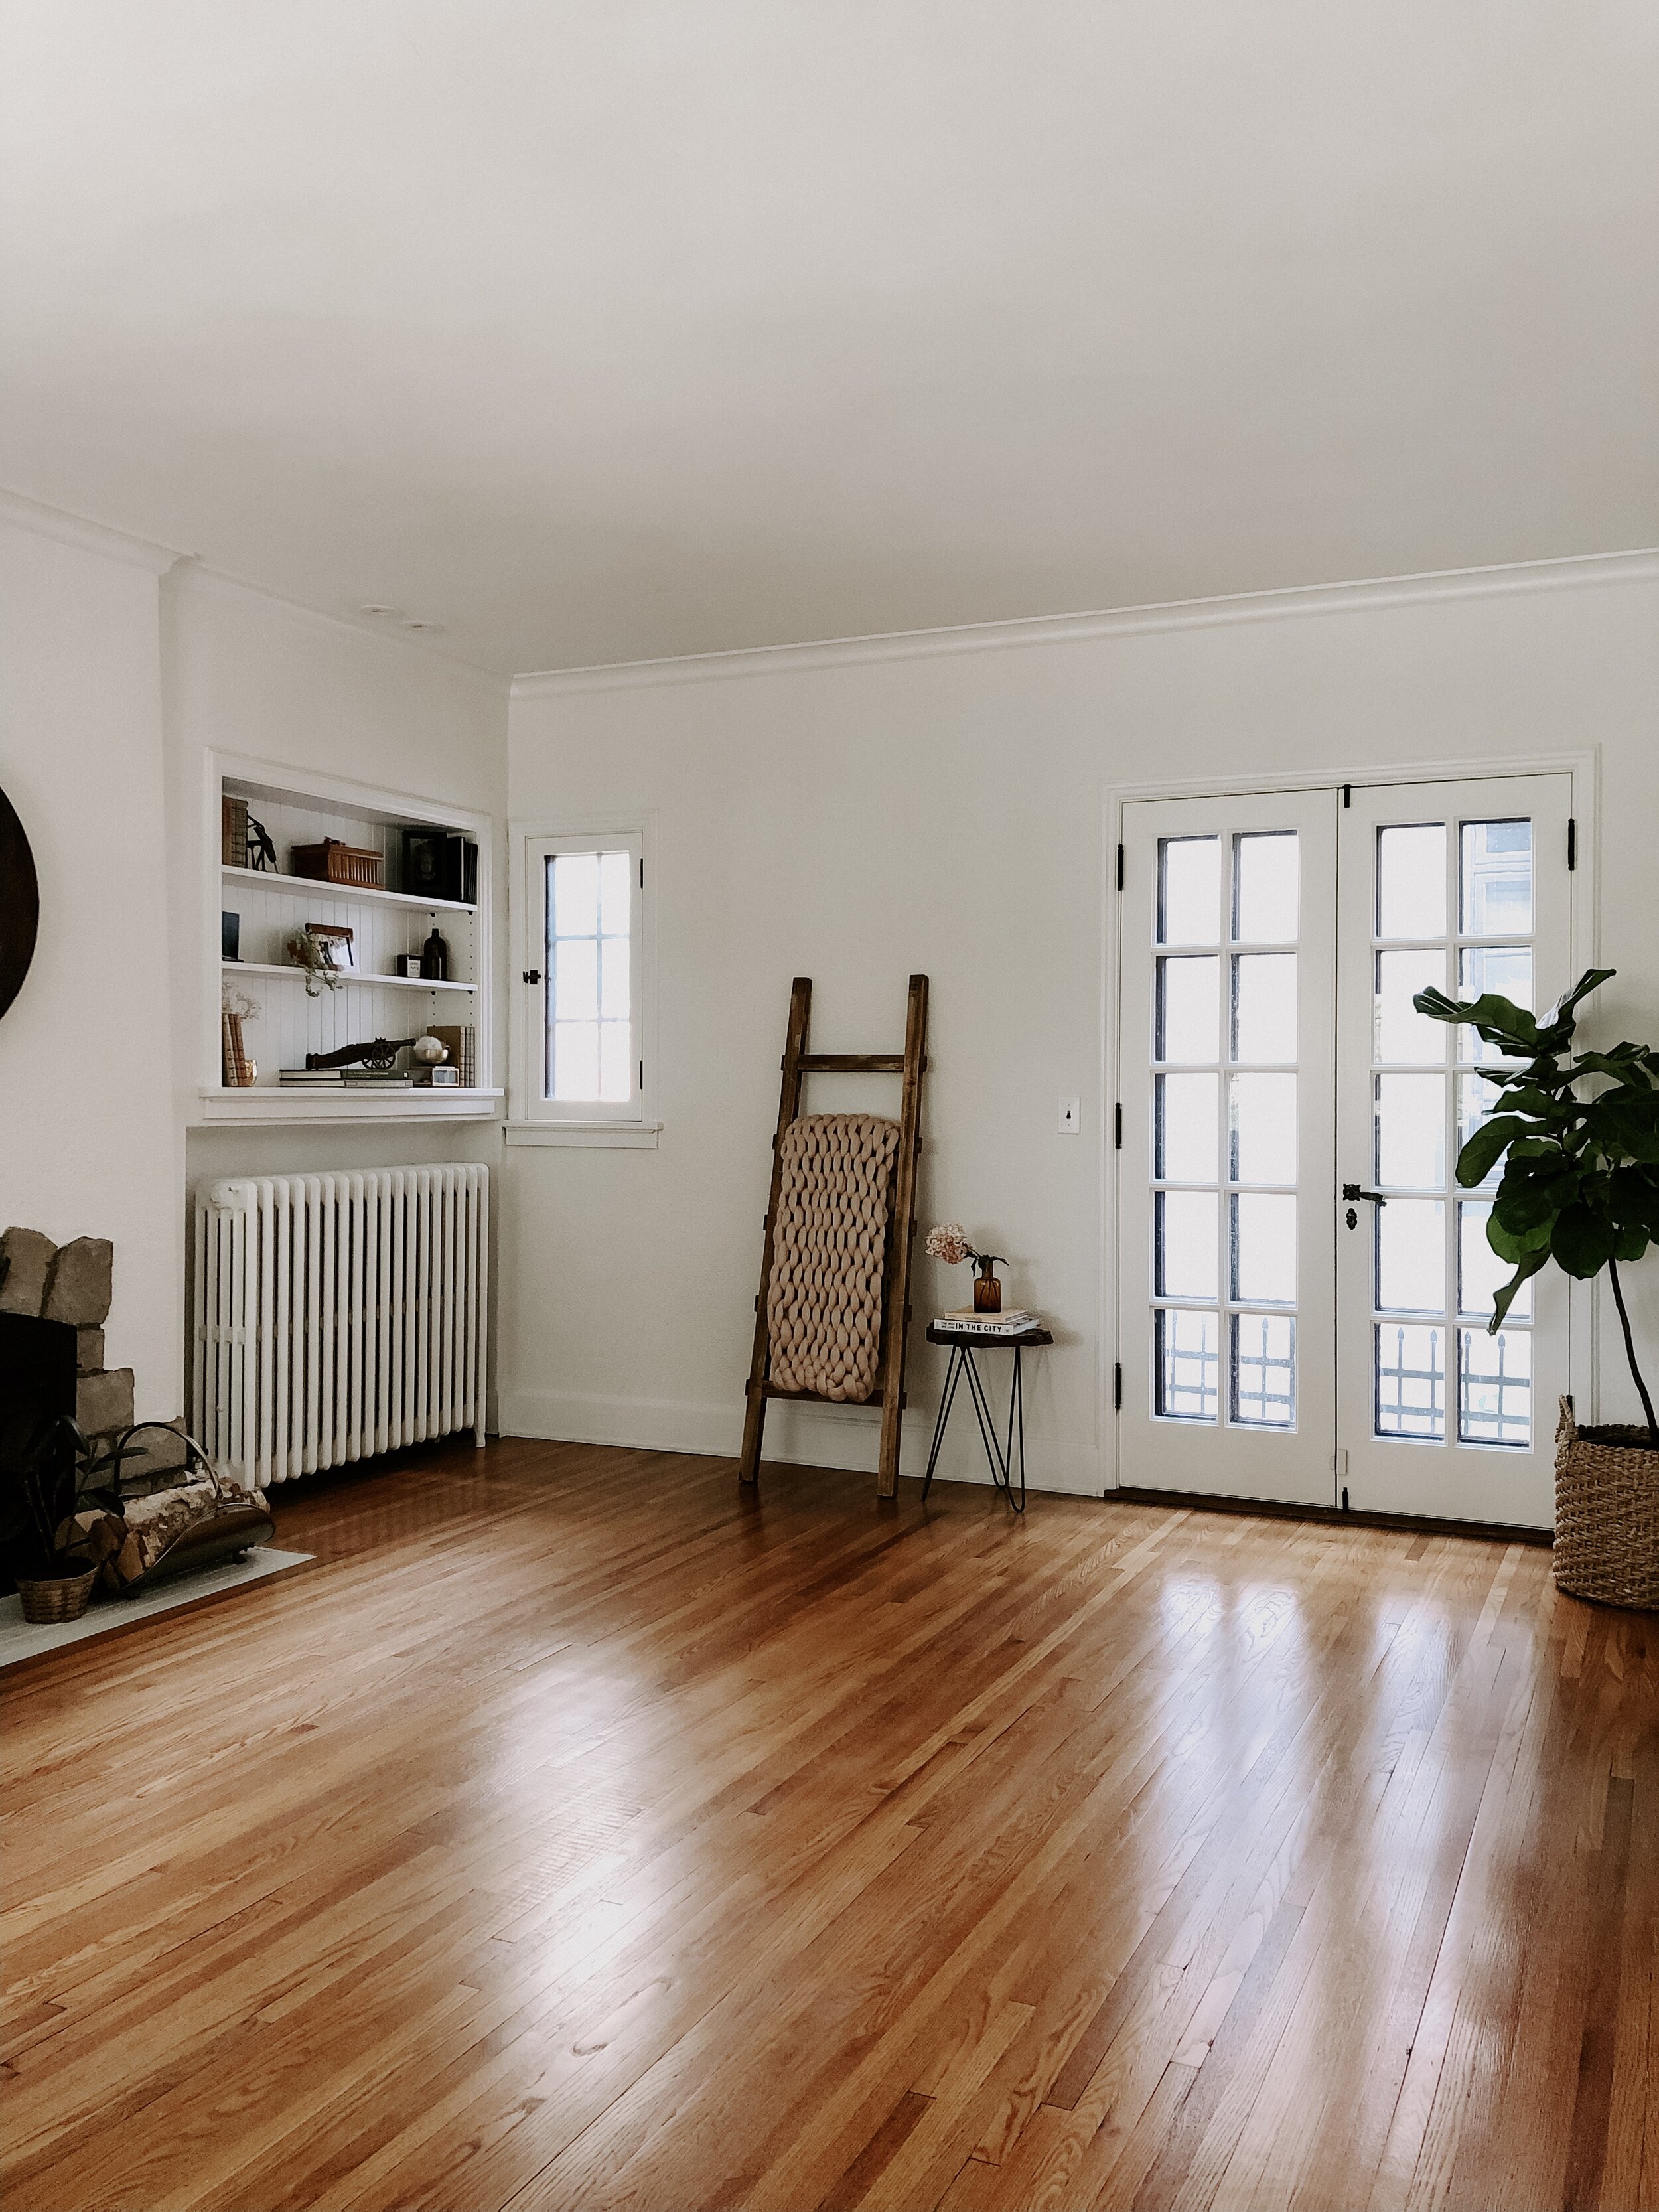
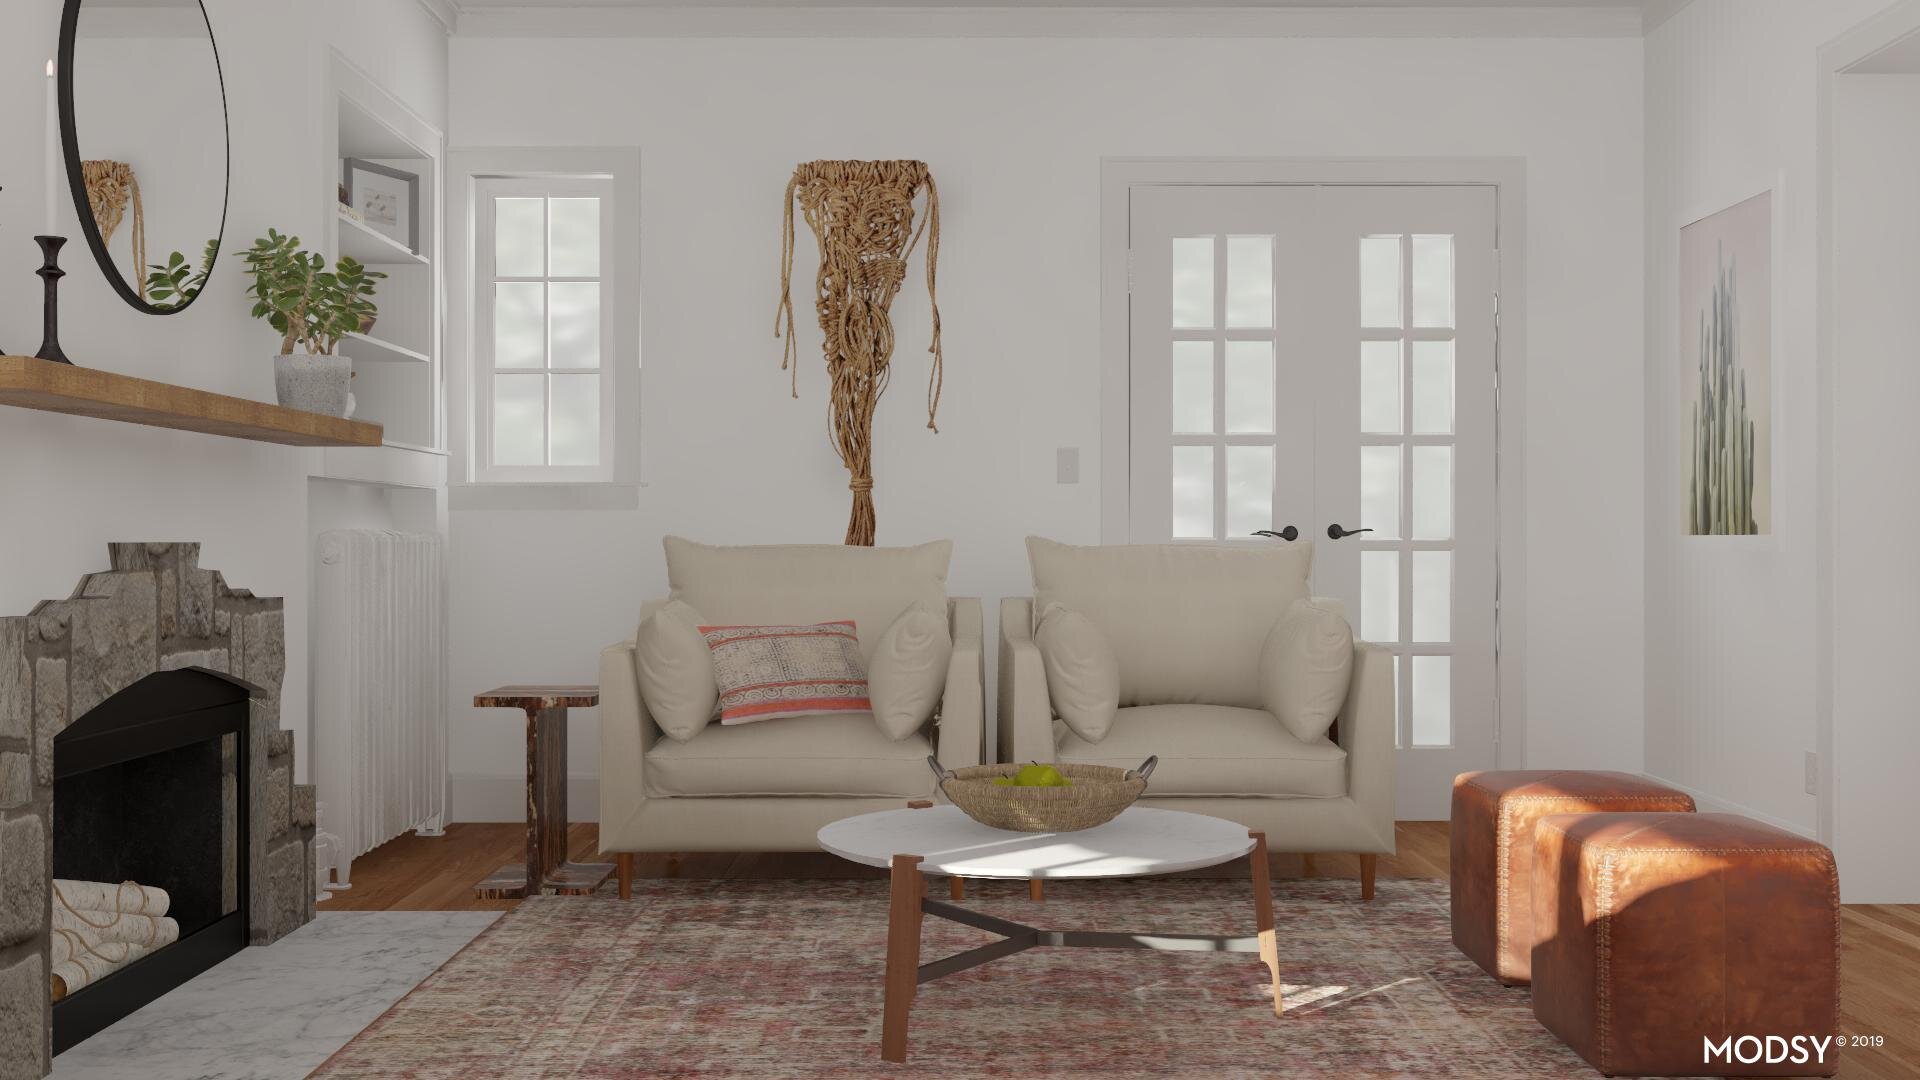
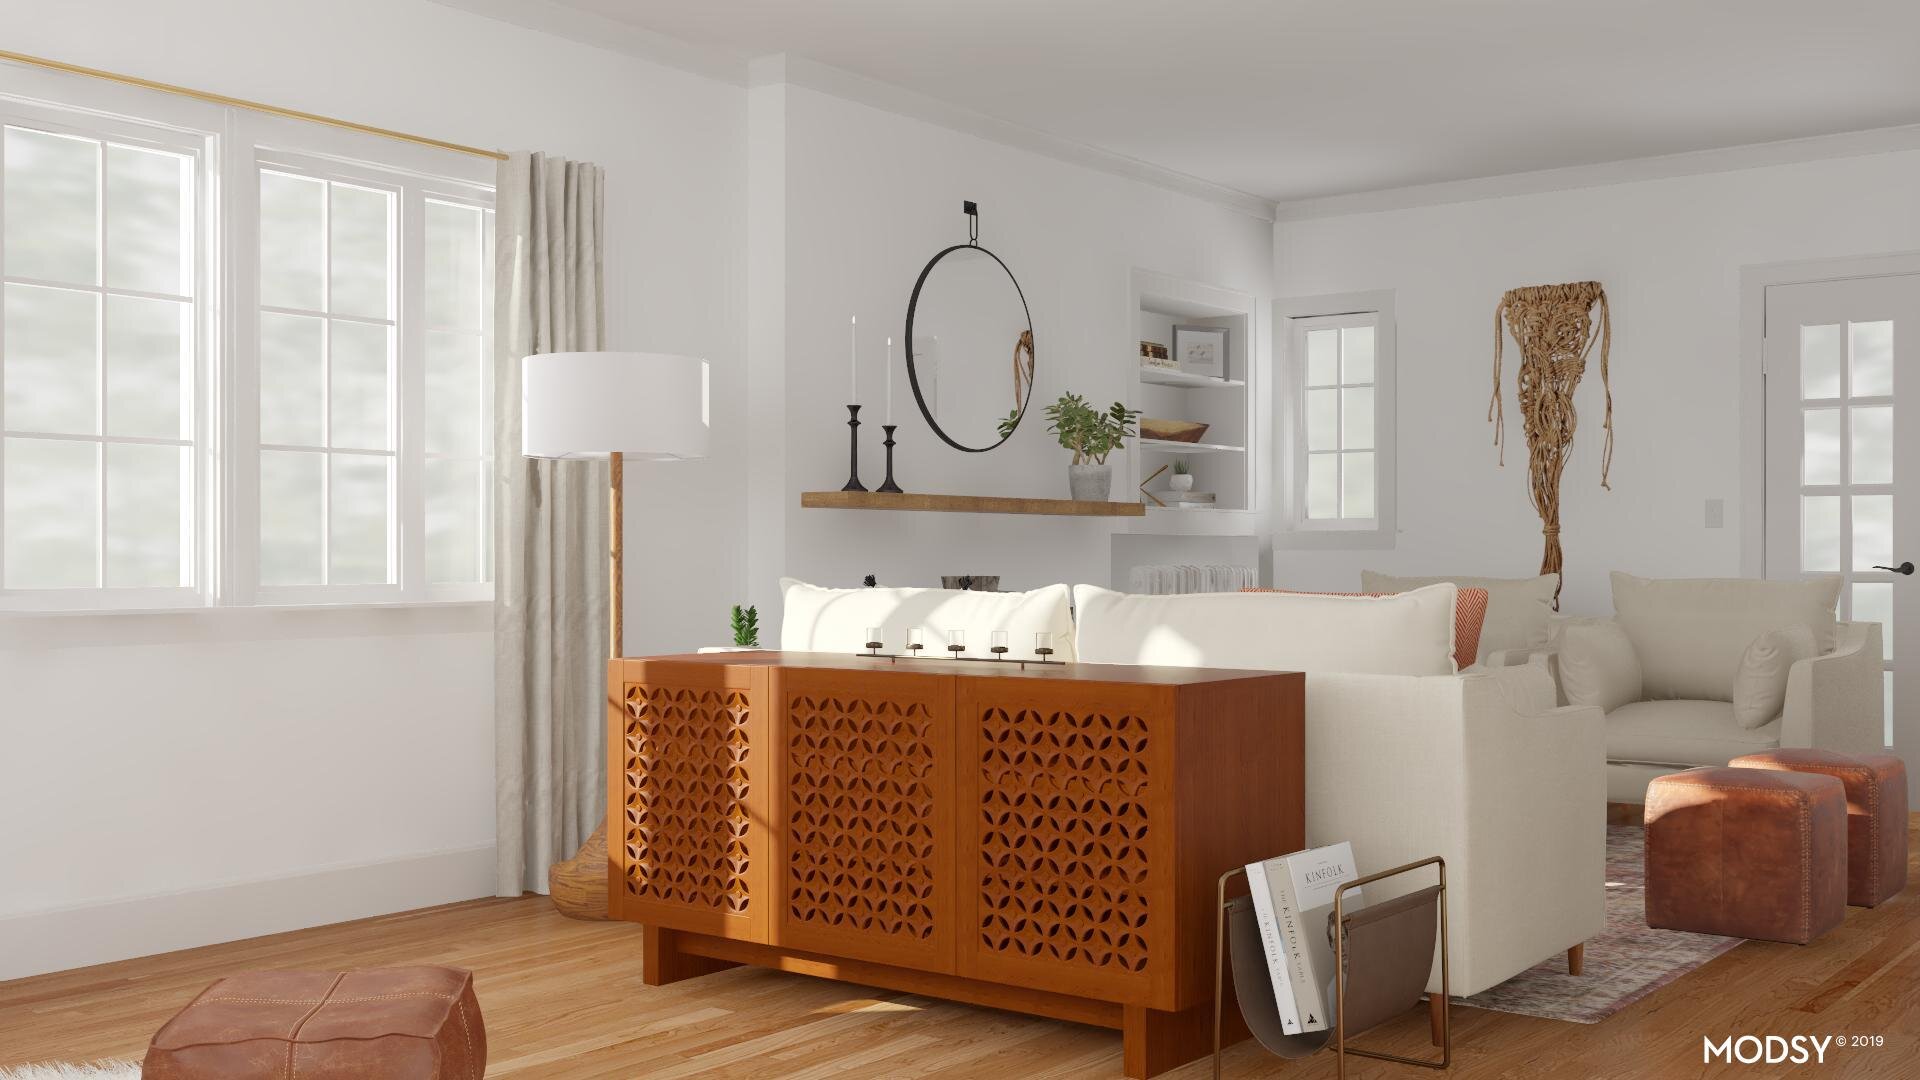
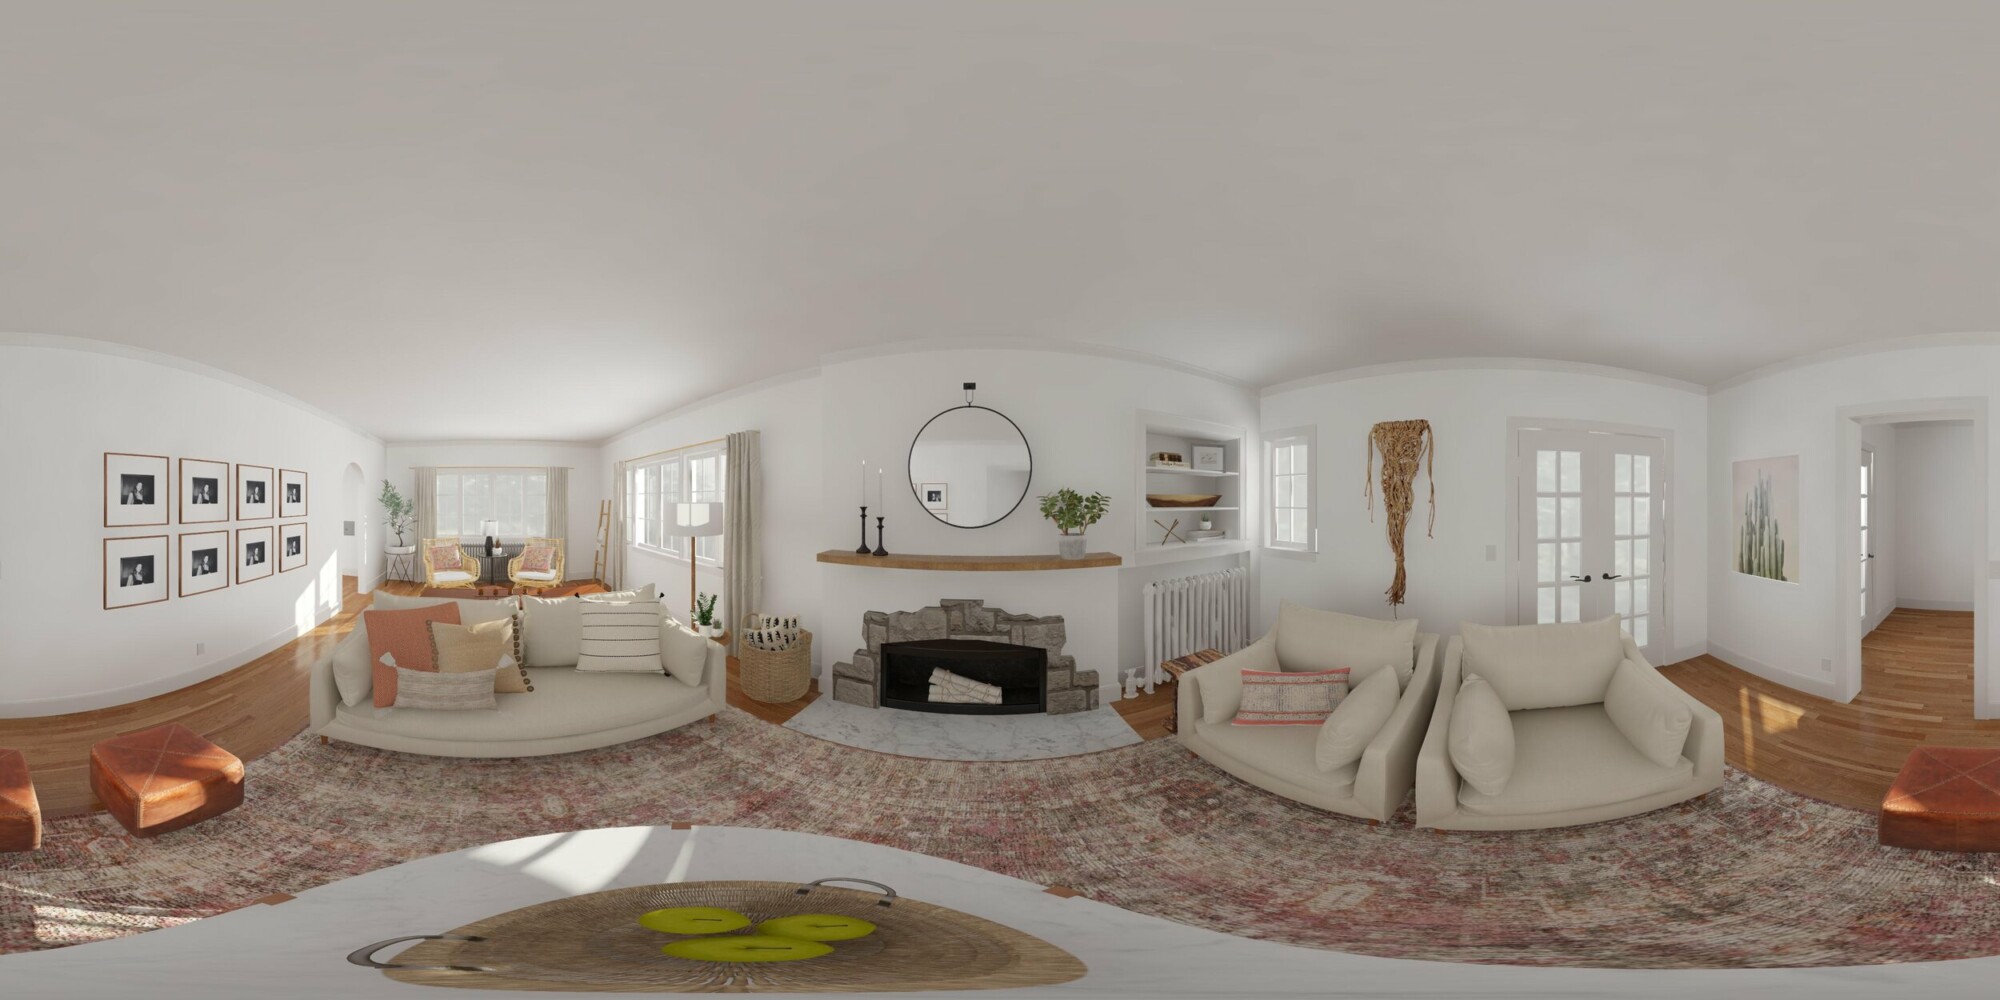
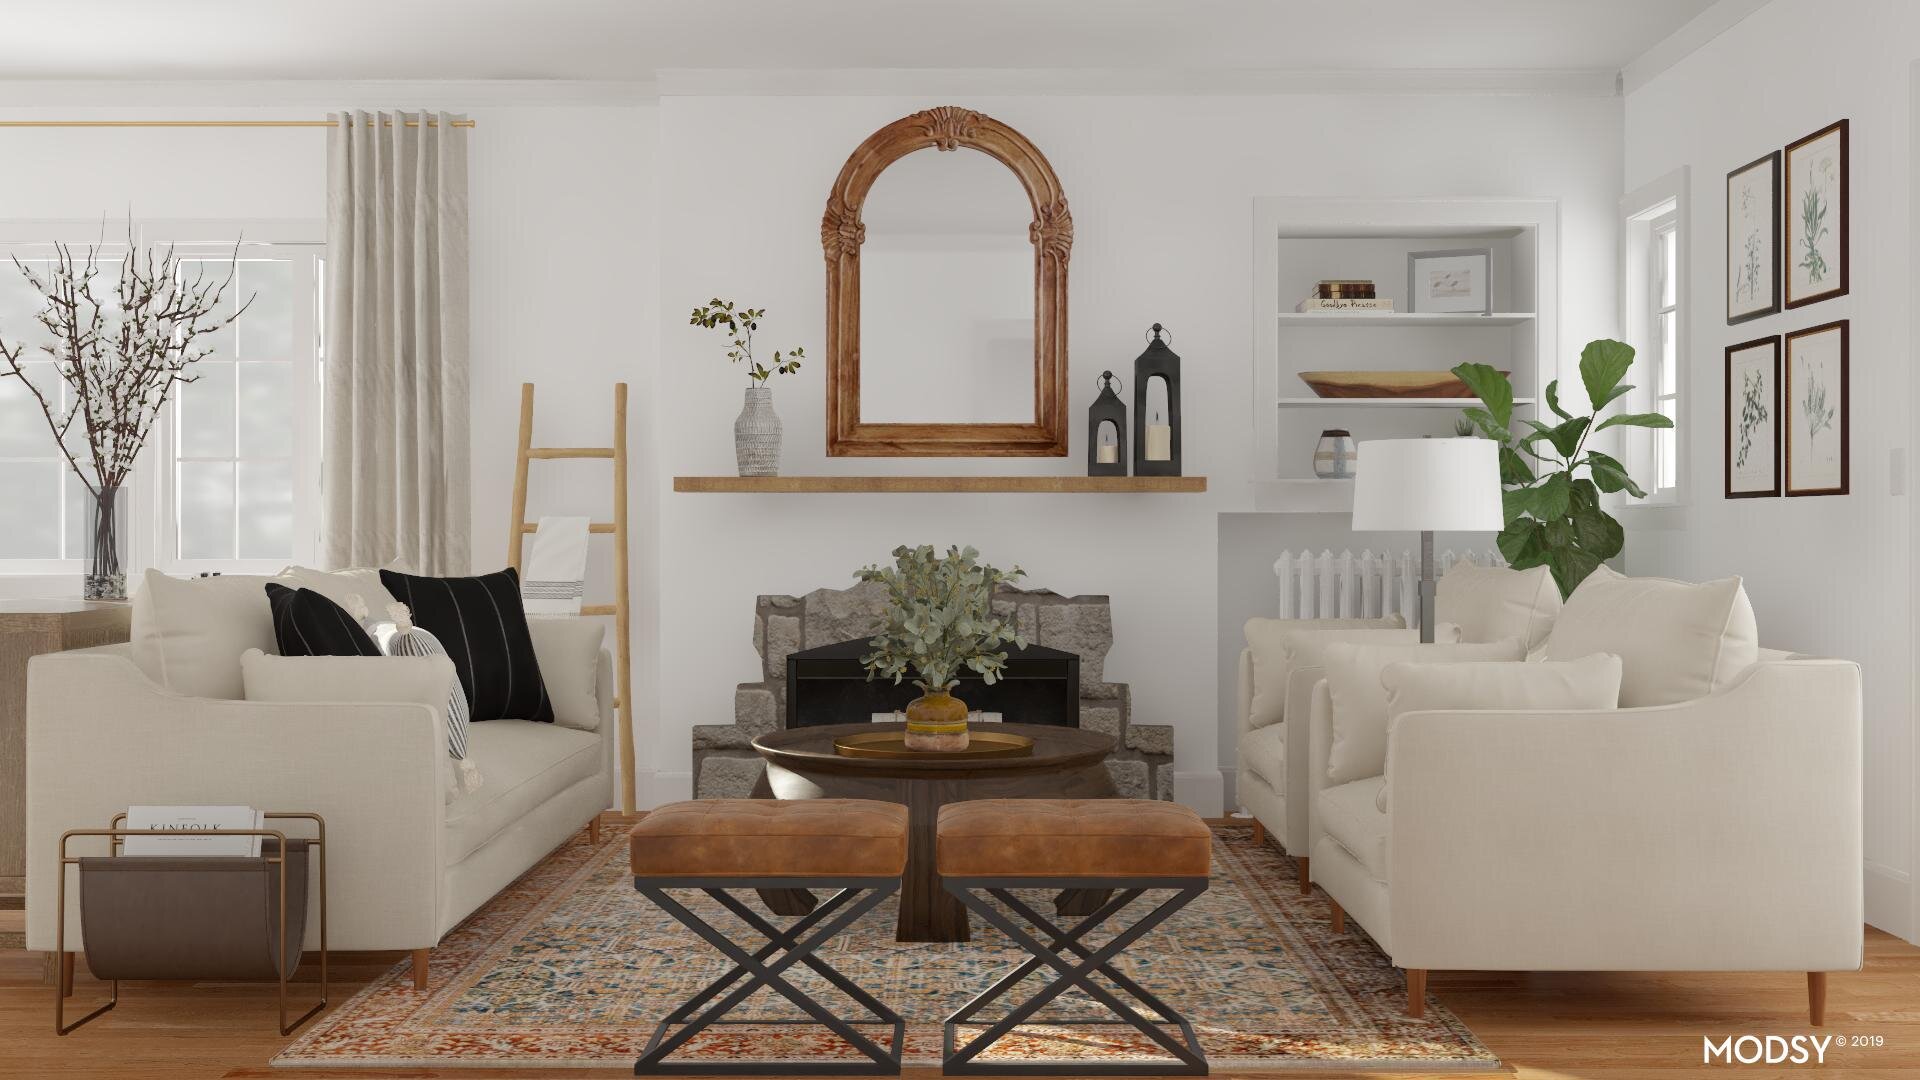
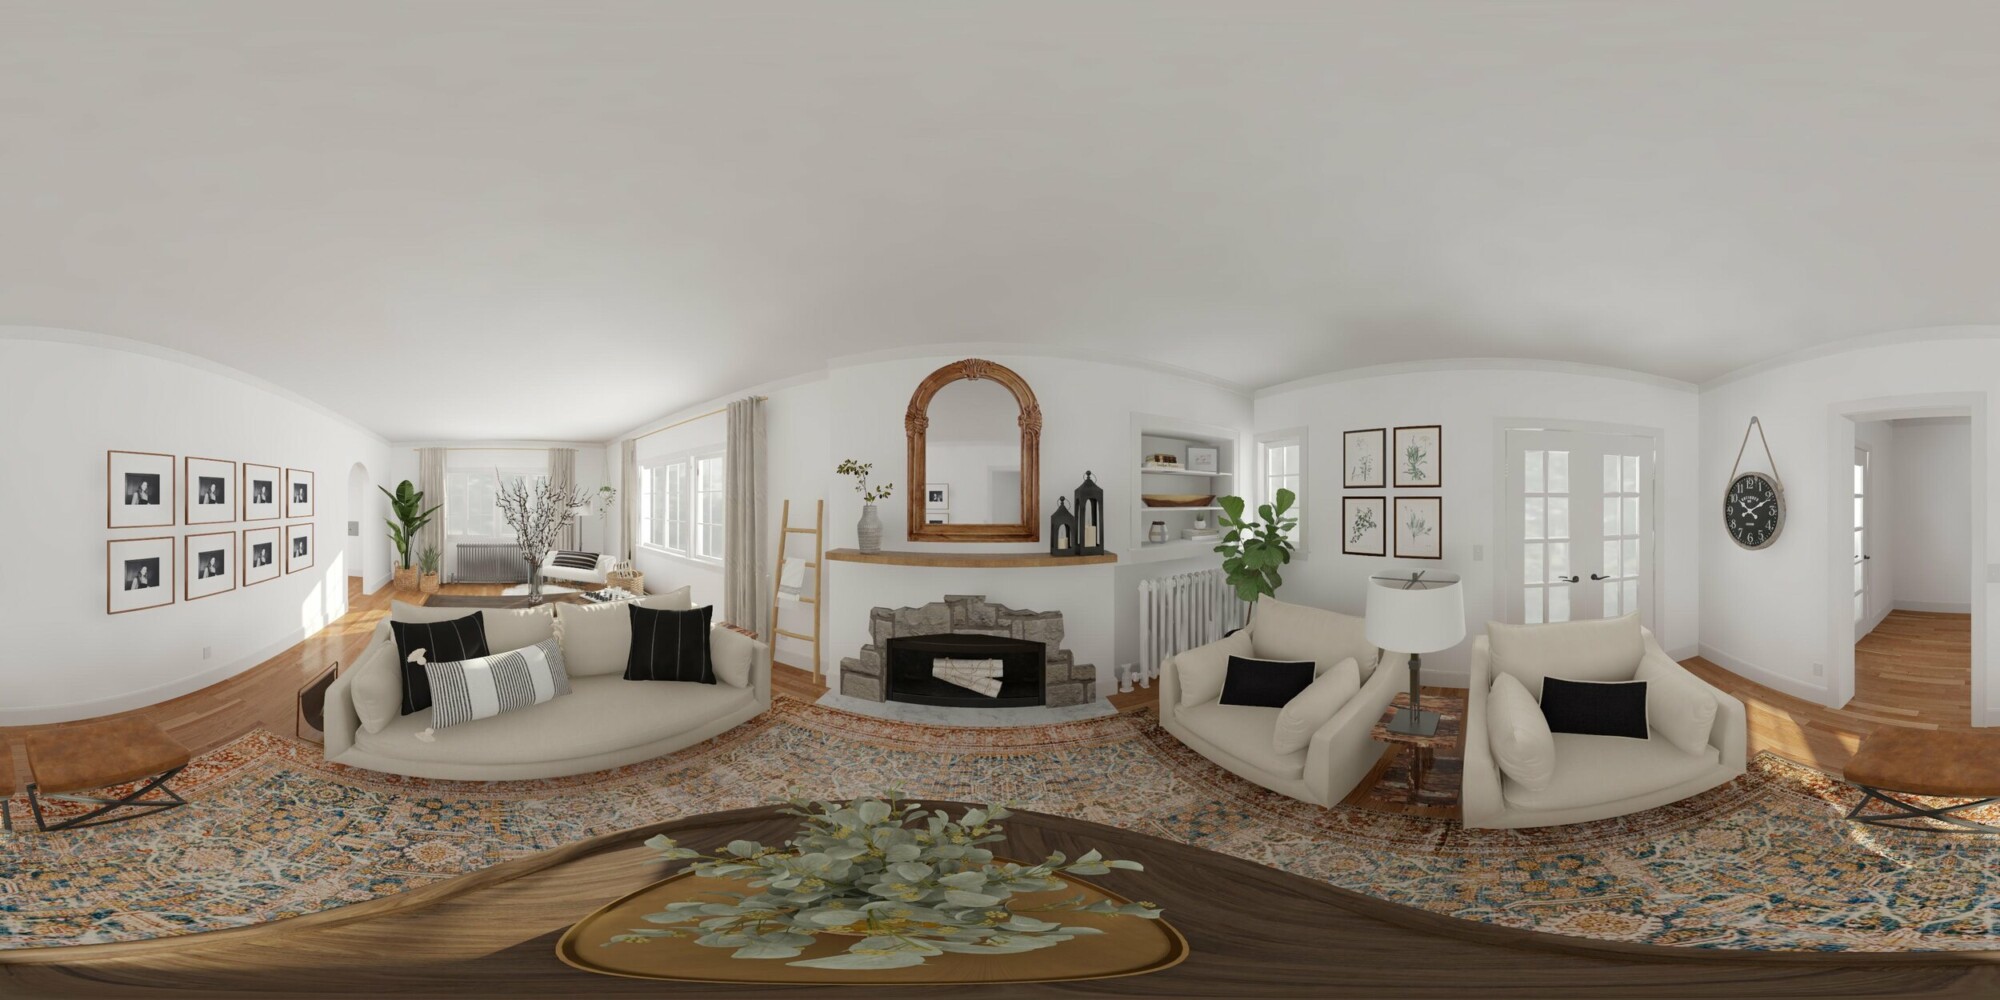
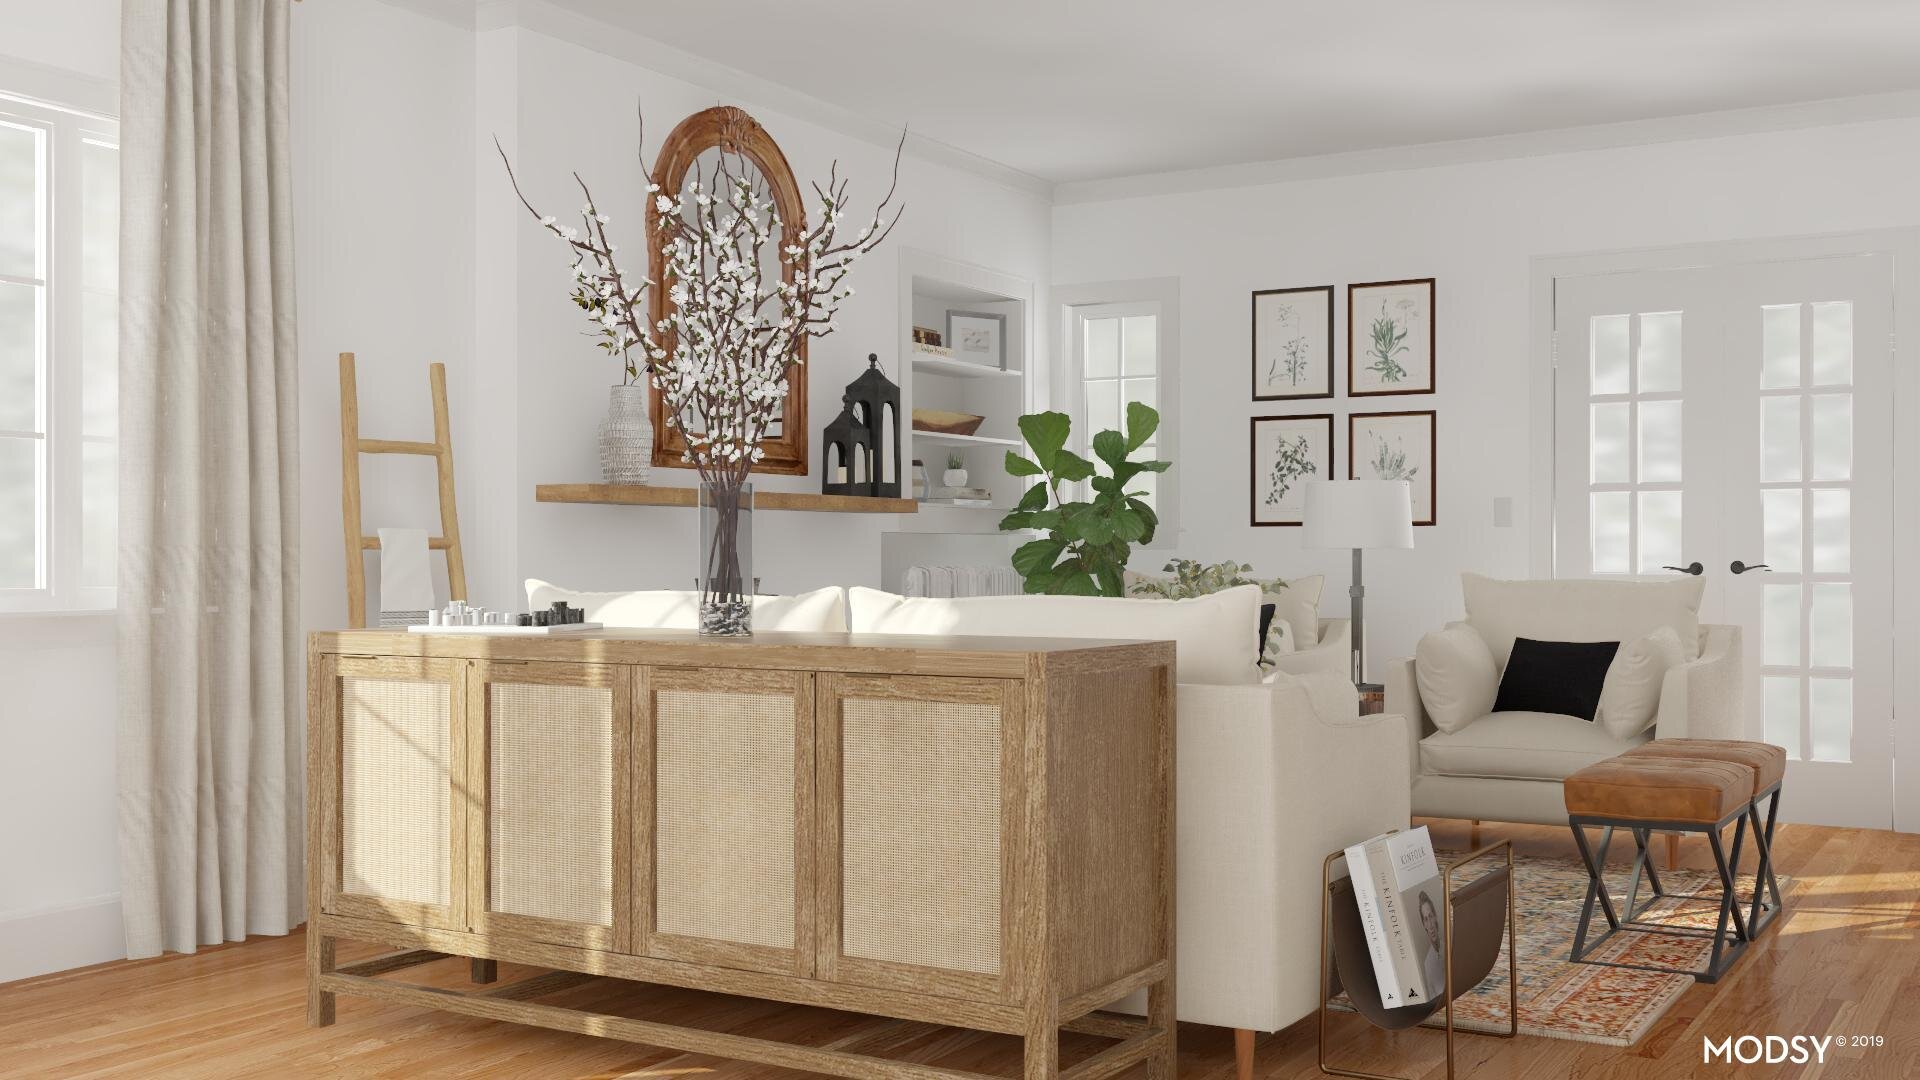
  1. The redesigned seating arrangement highlights key features like the original stone fireplace and french doors. It really shows off the best elements of our vintage home.

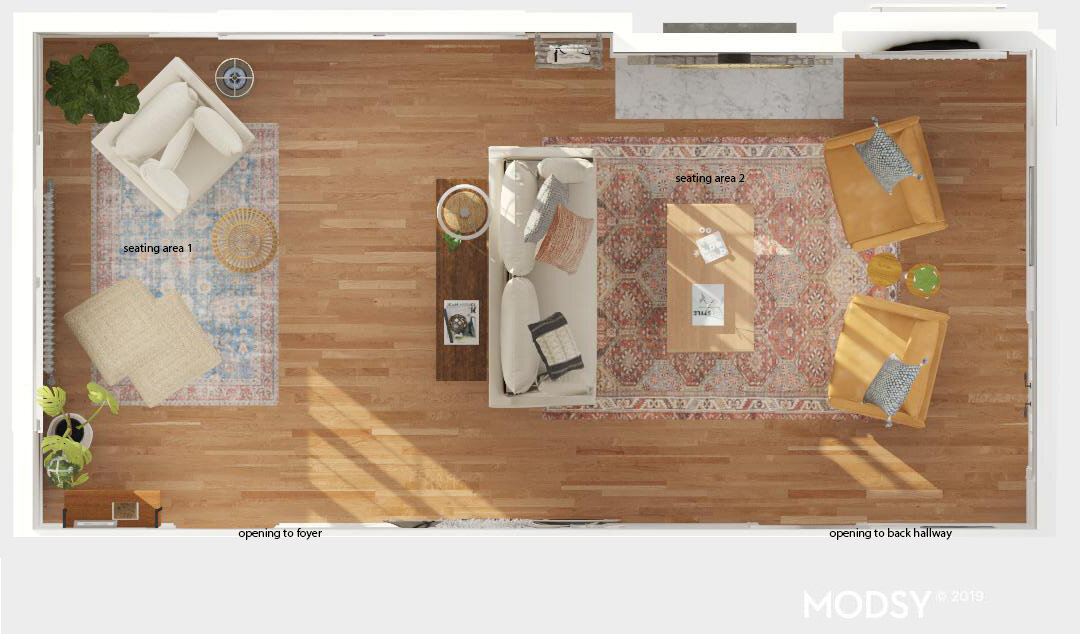
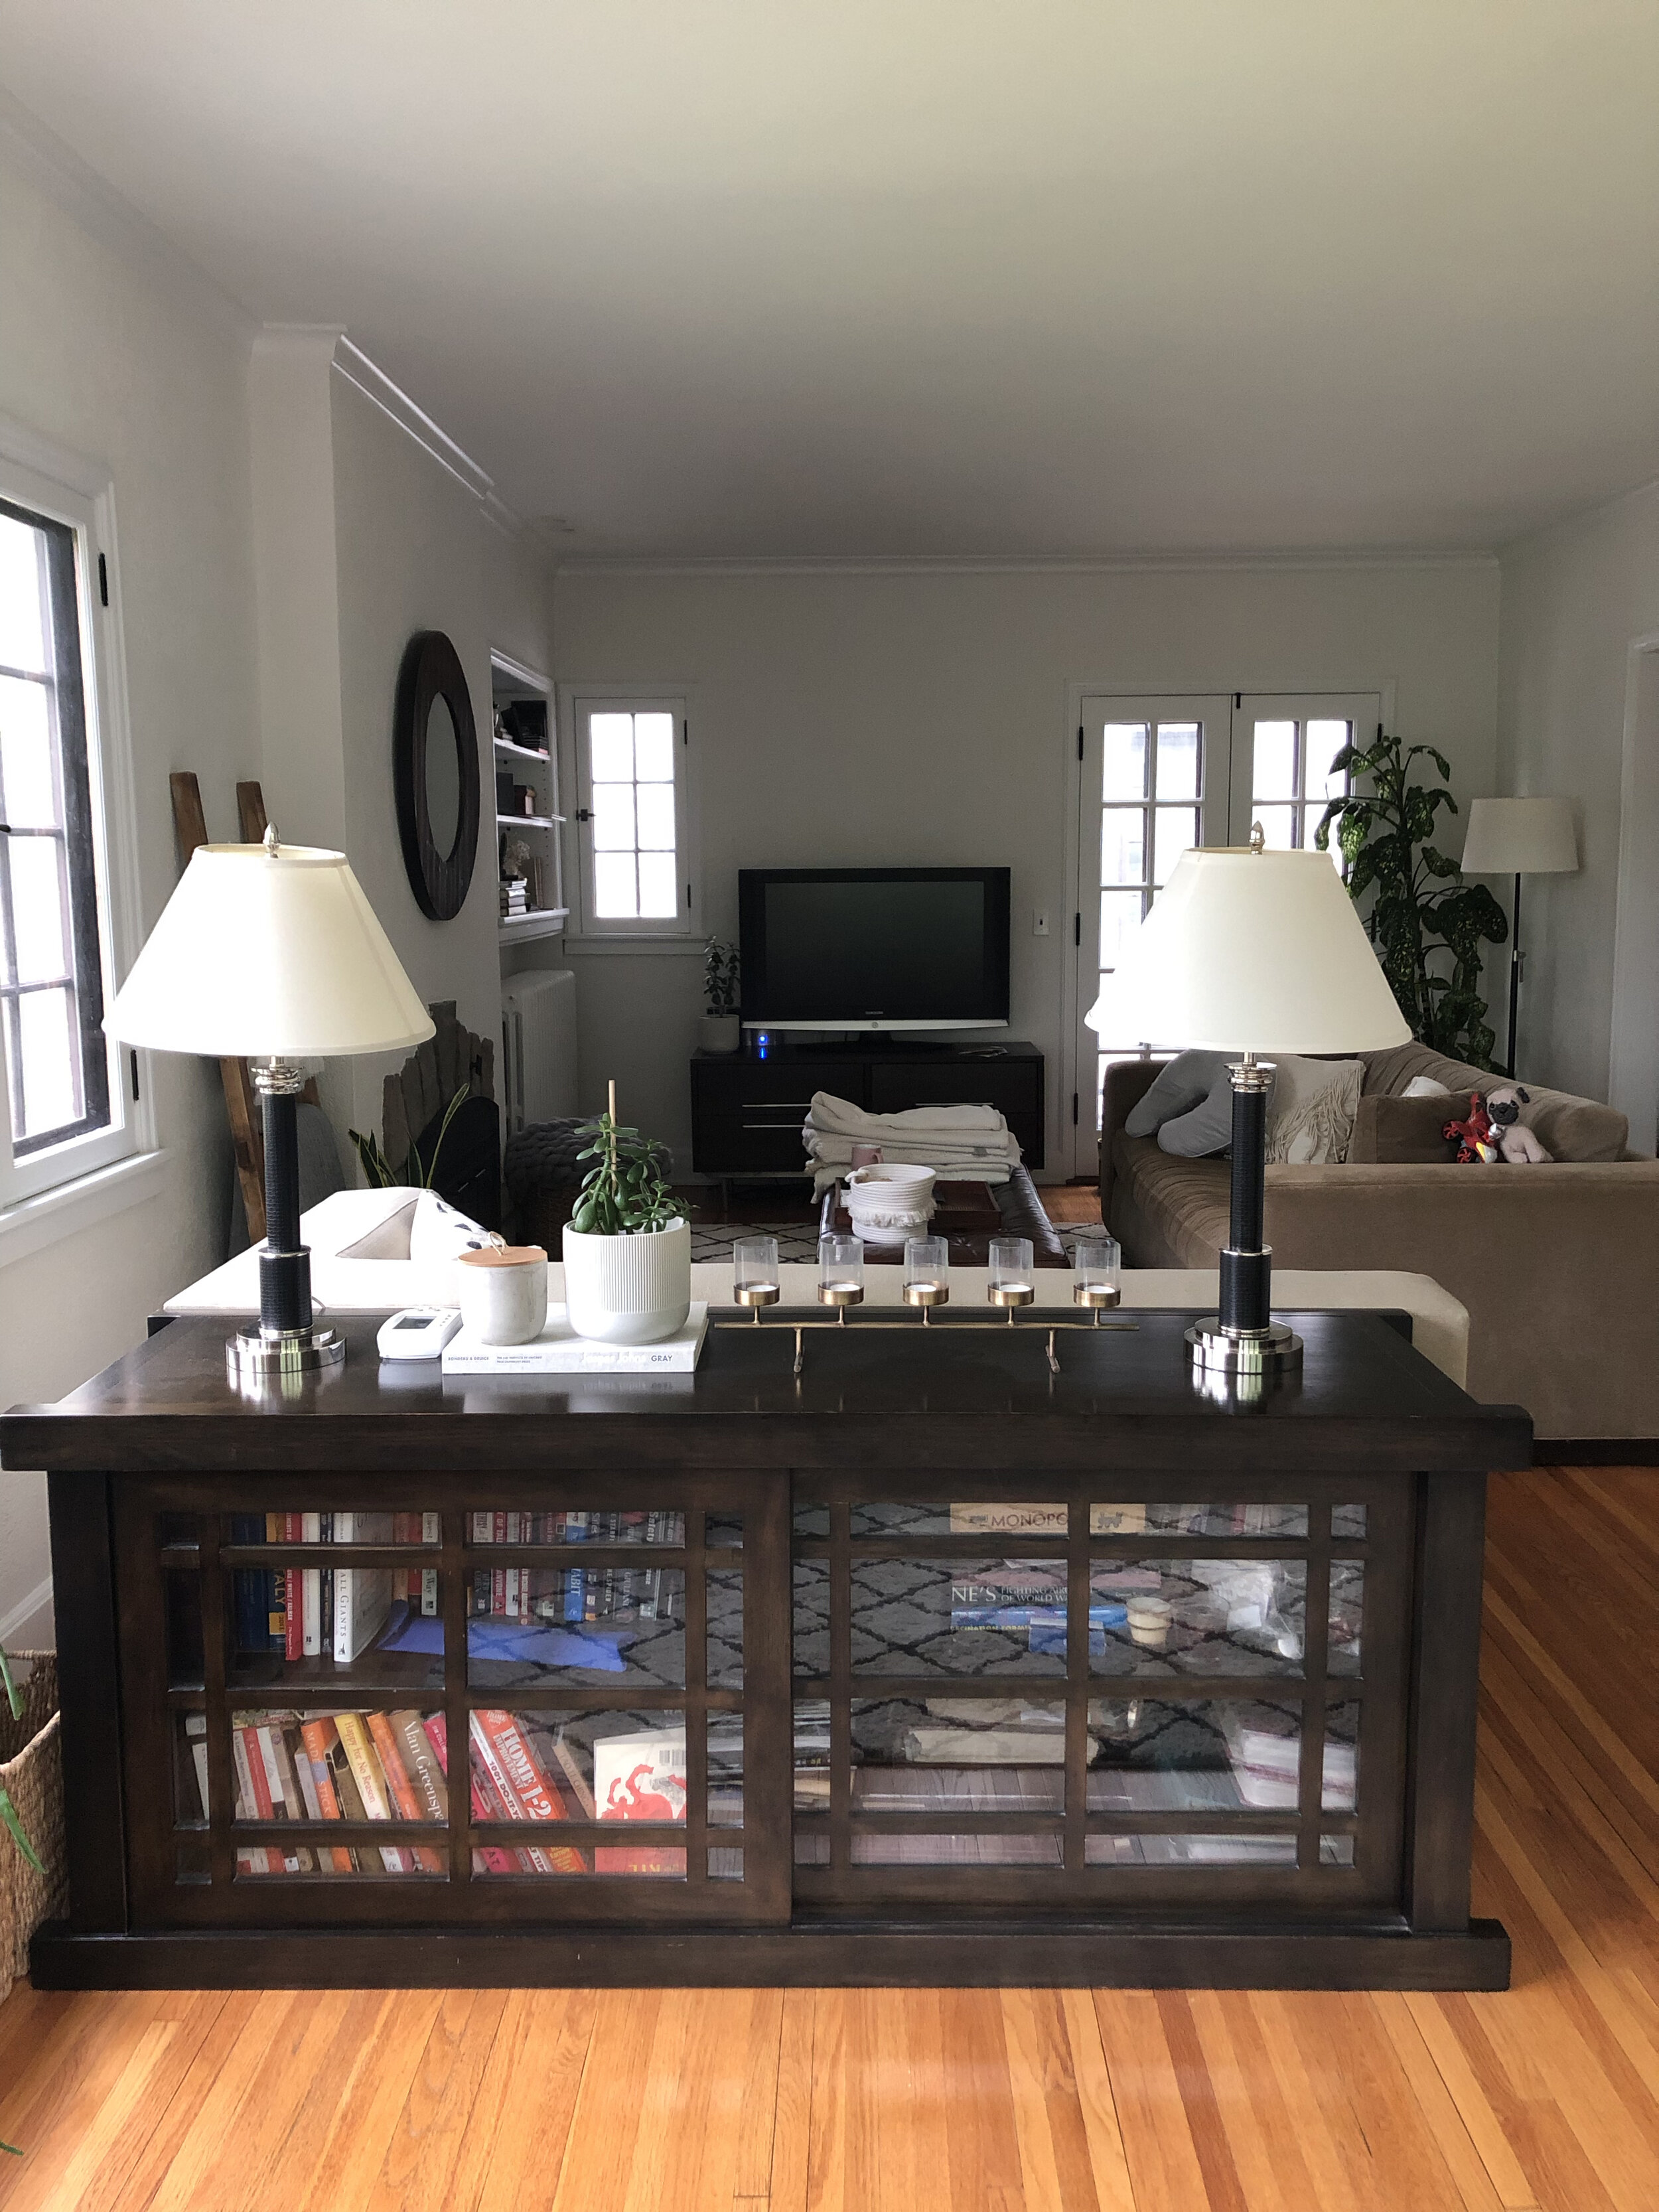
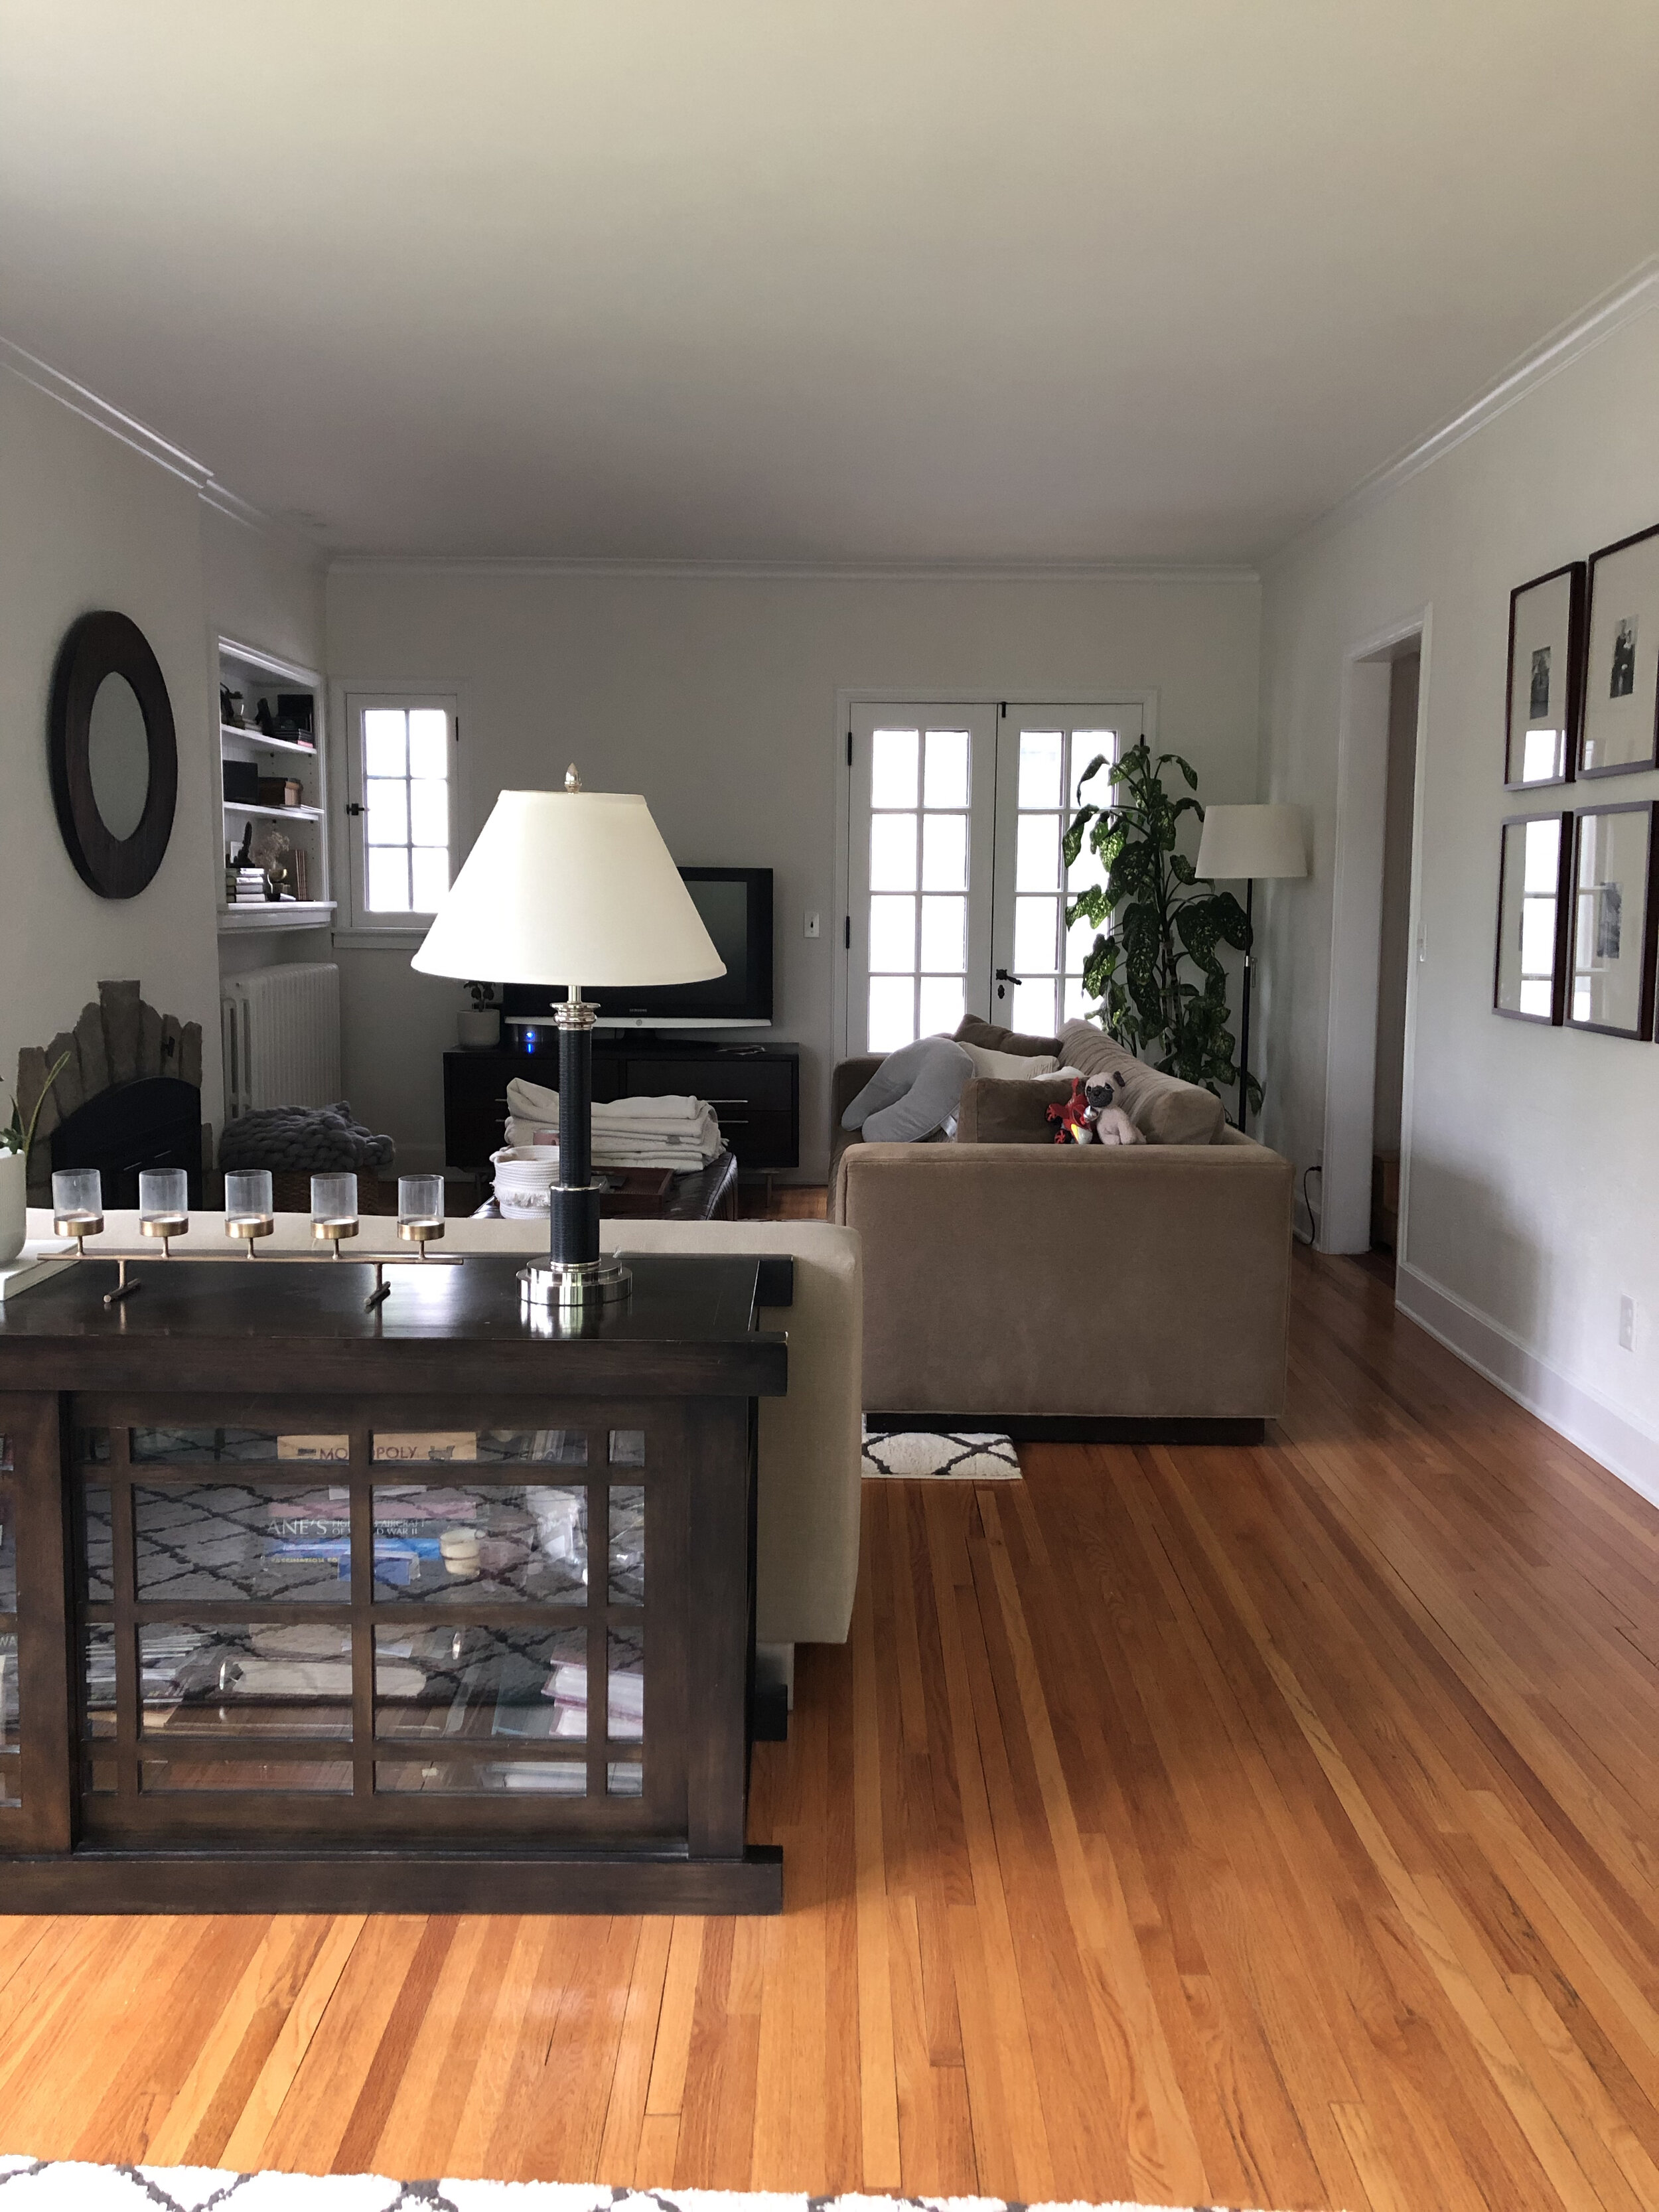
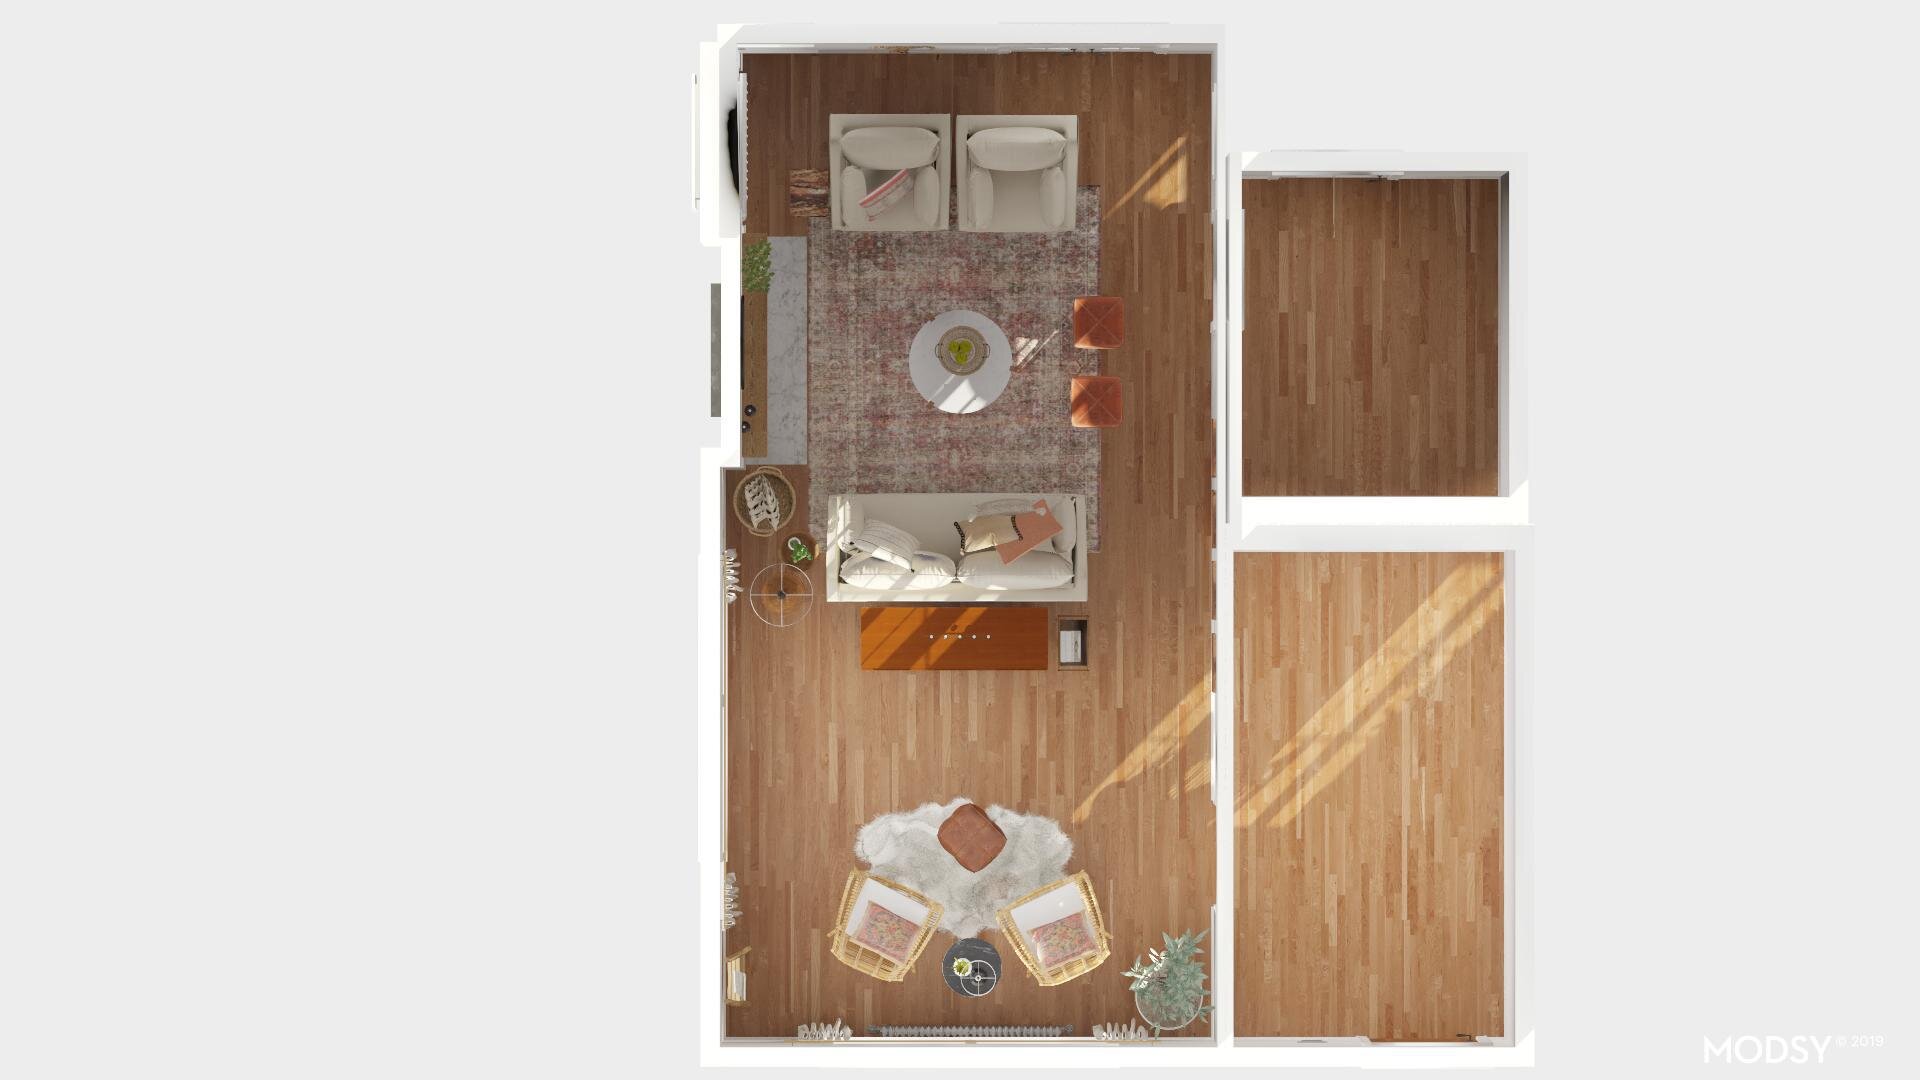
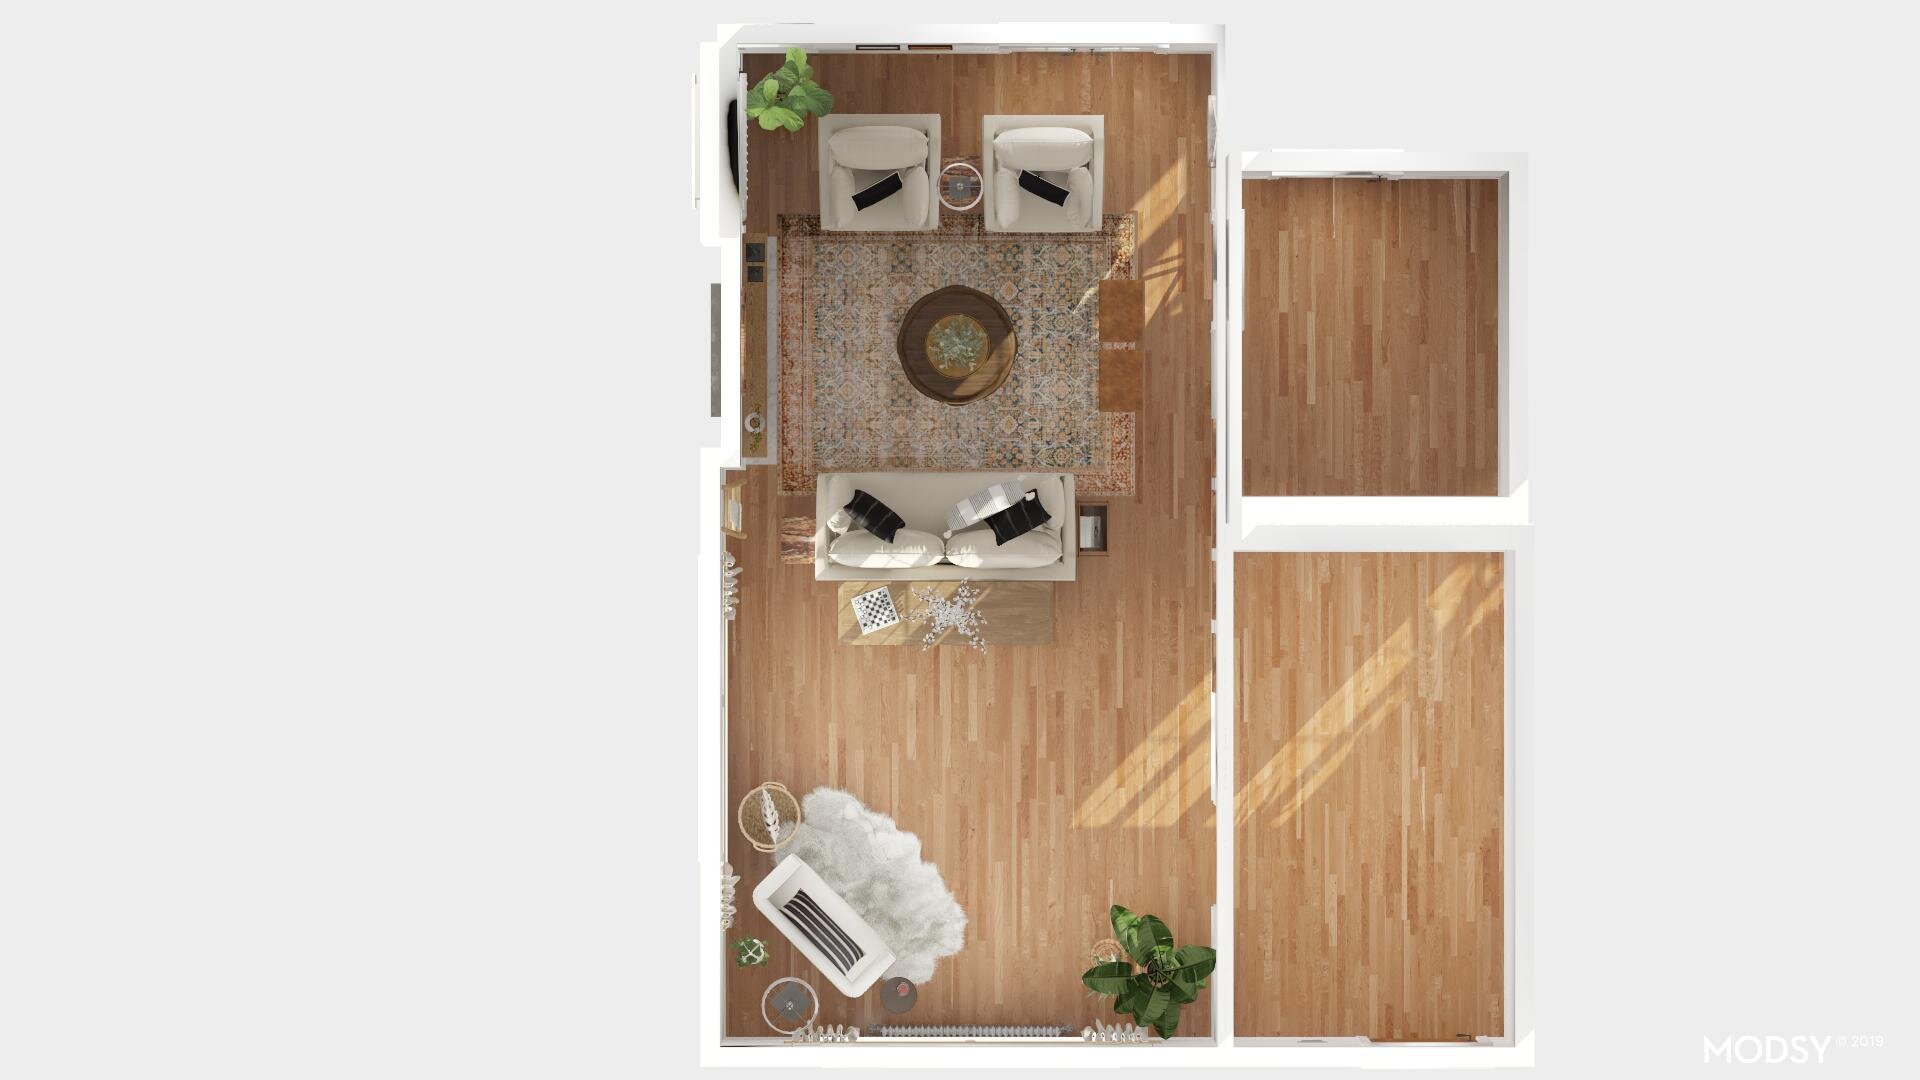
  2. Our new living room layout also divides the space into two separate zones, which I love. This transforms the living room from one awkward space into two user-friendly ones. ← My favorite kind of math!

  3. We were able to create an intimate seating area that offers plenty of cozy space for our whole family, while still having a very polished, grown-up vibe for entertaining. (And with three young children, this is no small feat!)

For this second phase of the living room makeover, our goals were a bit different.

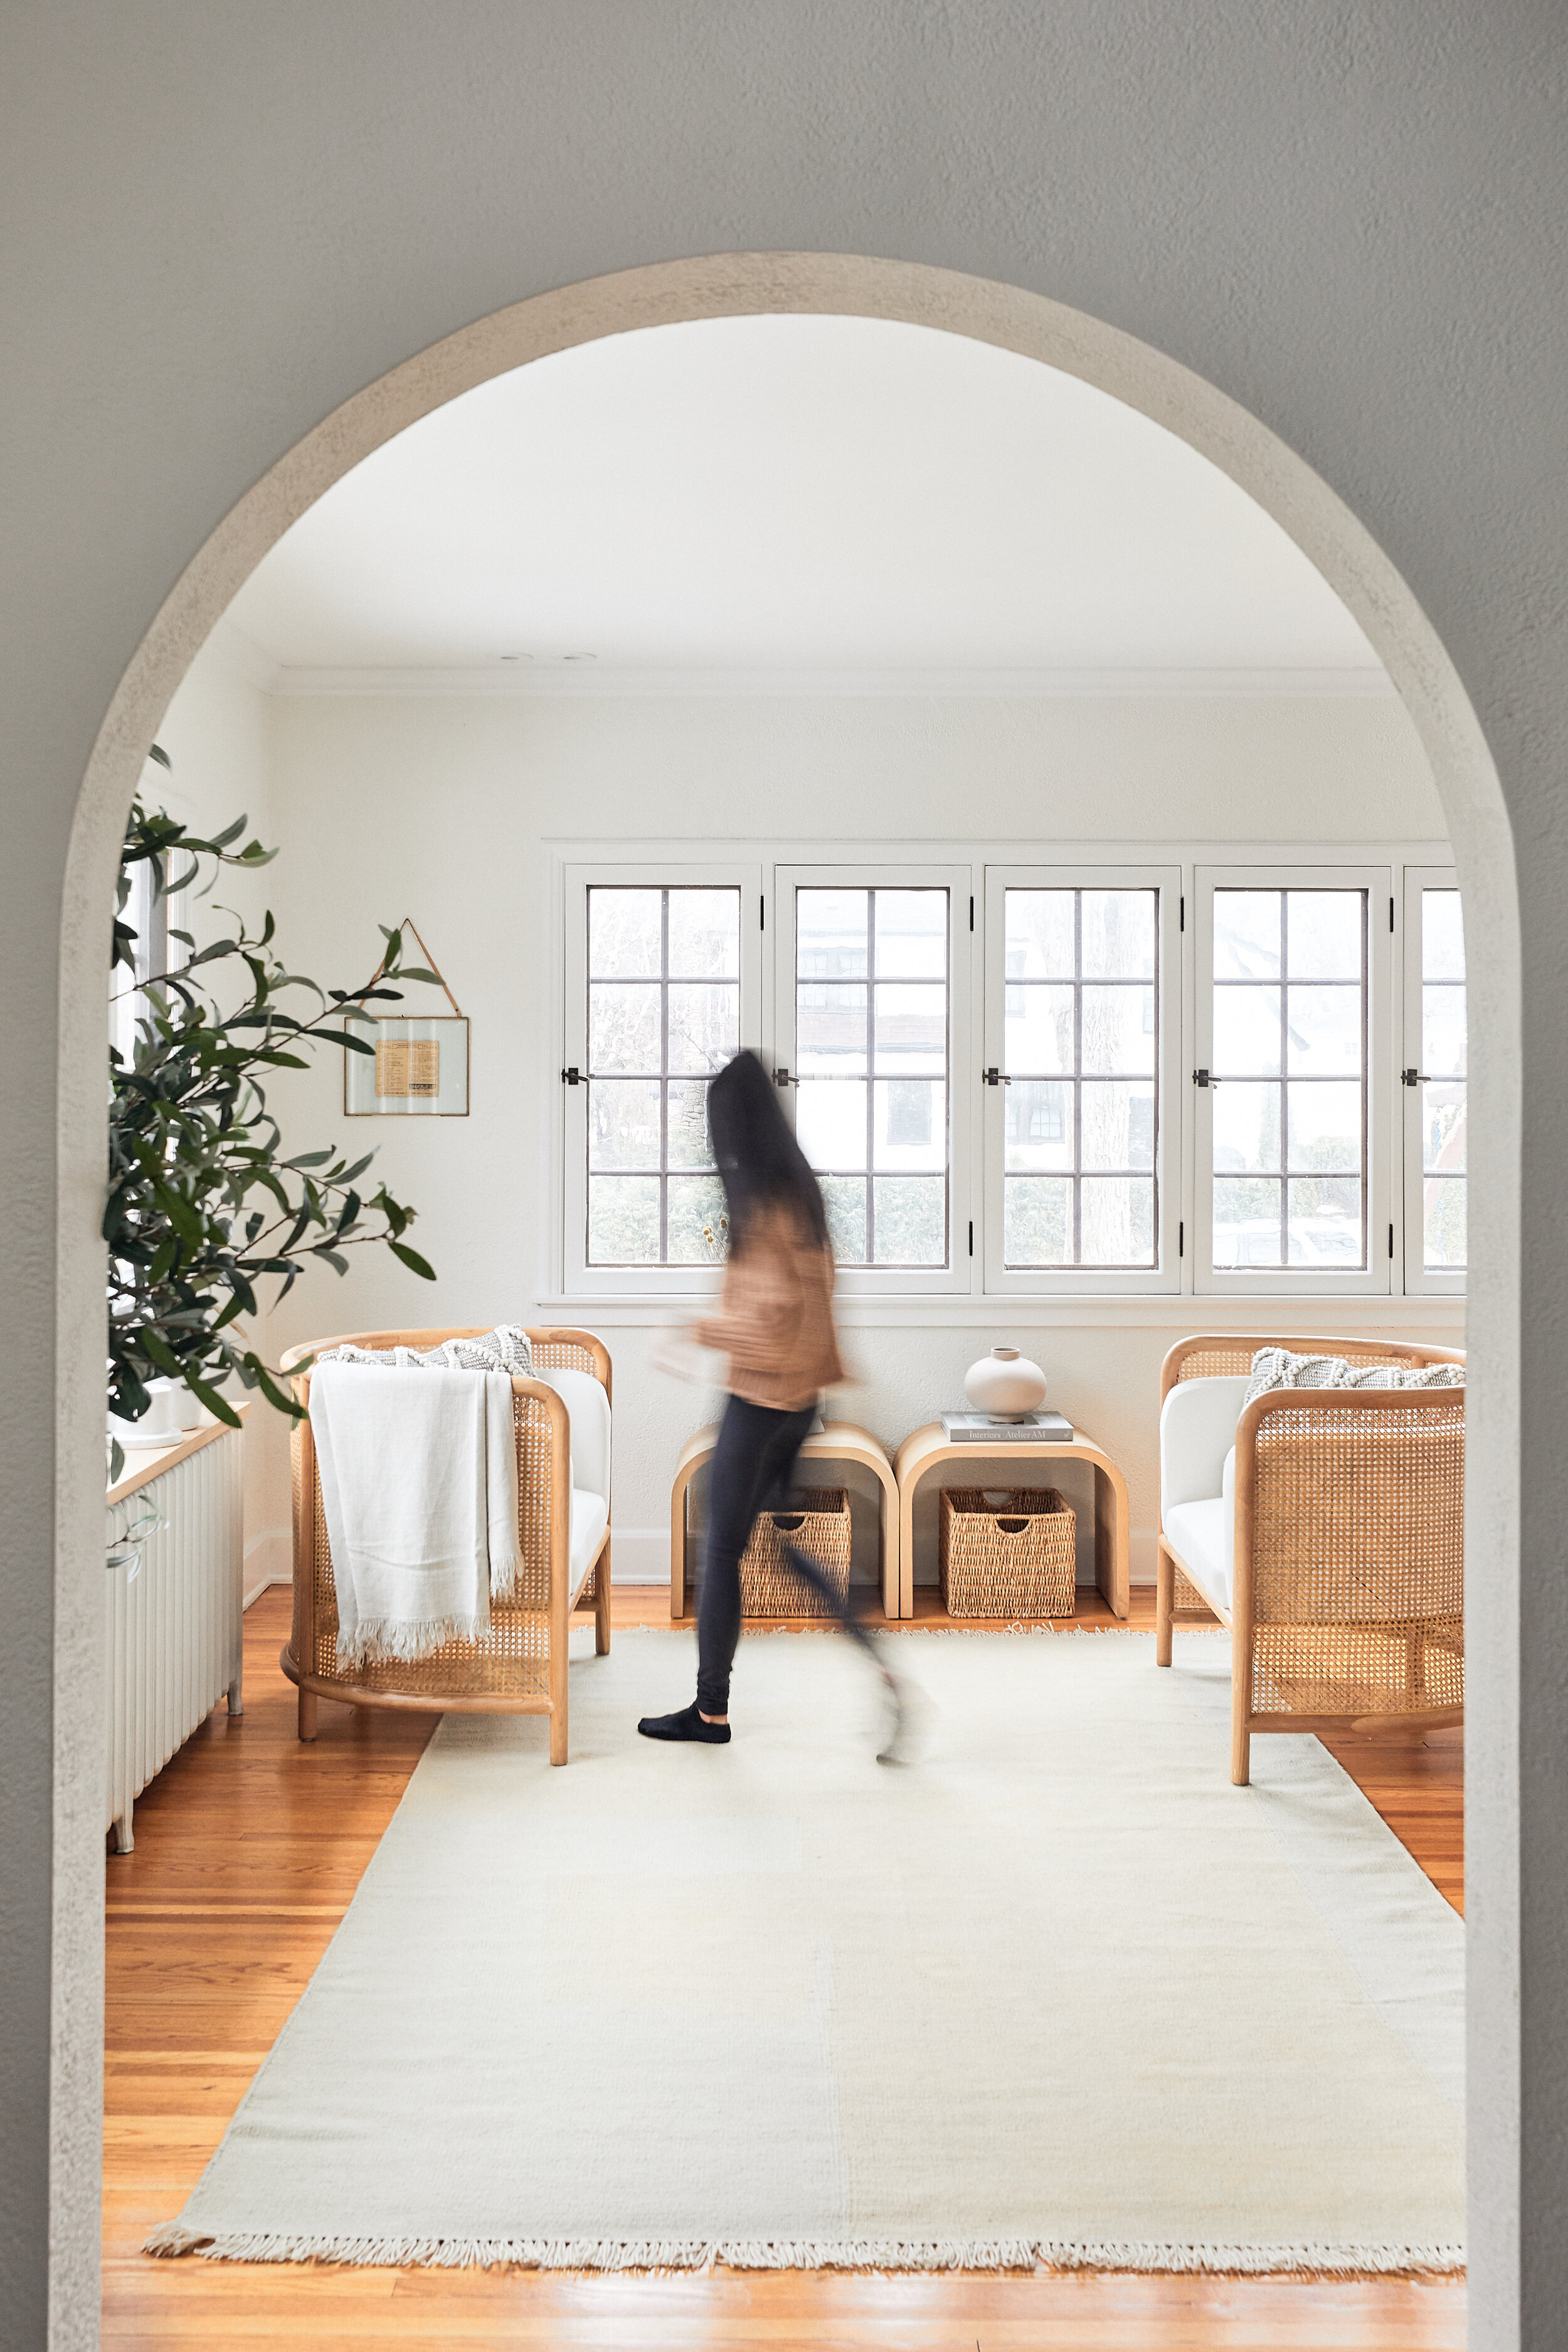
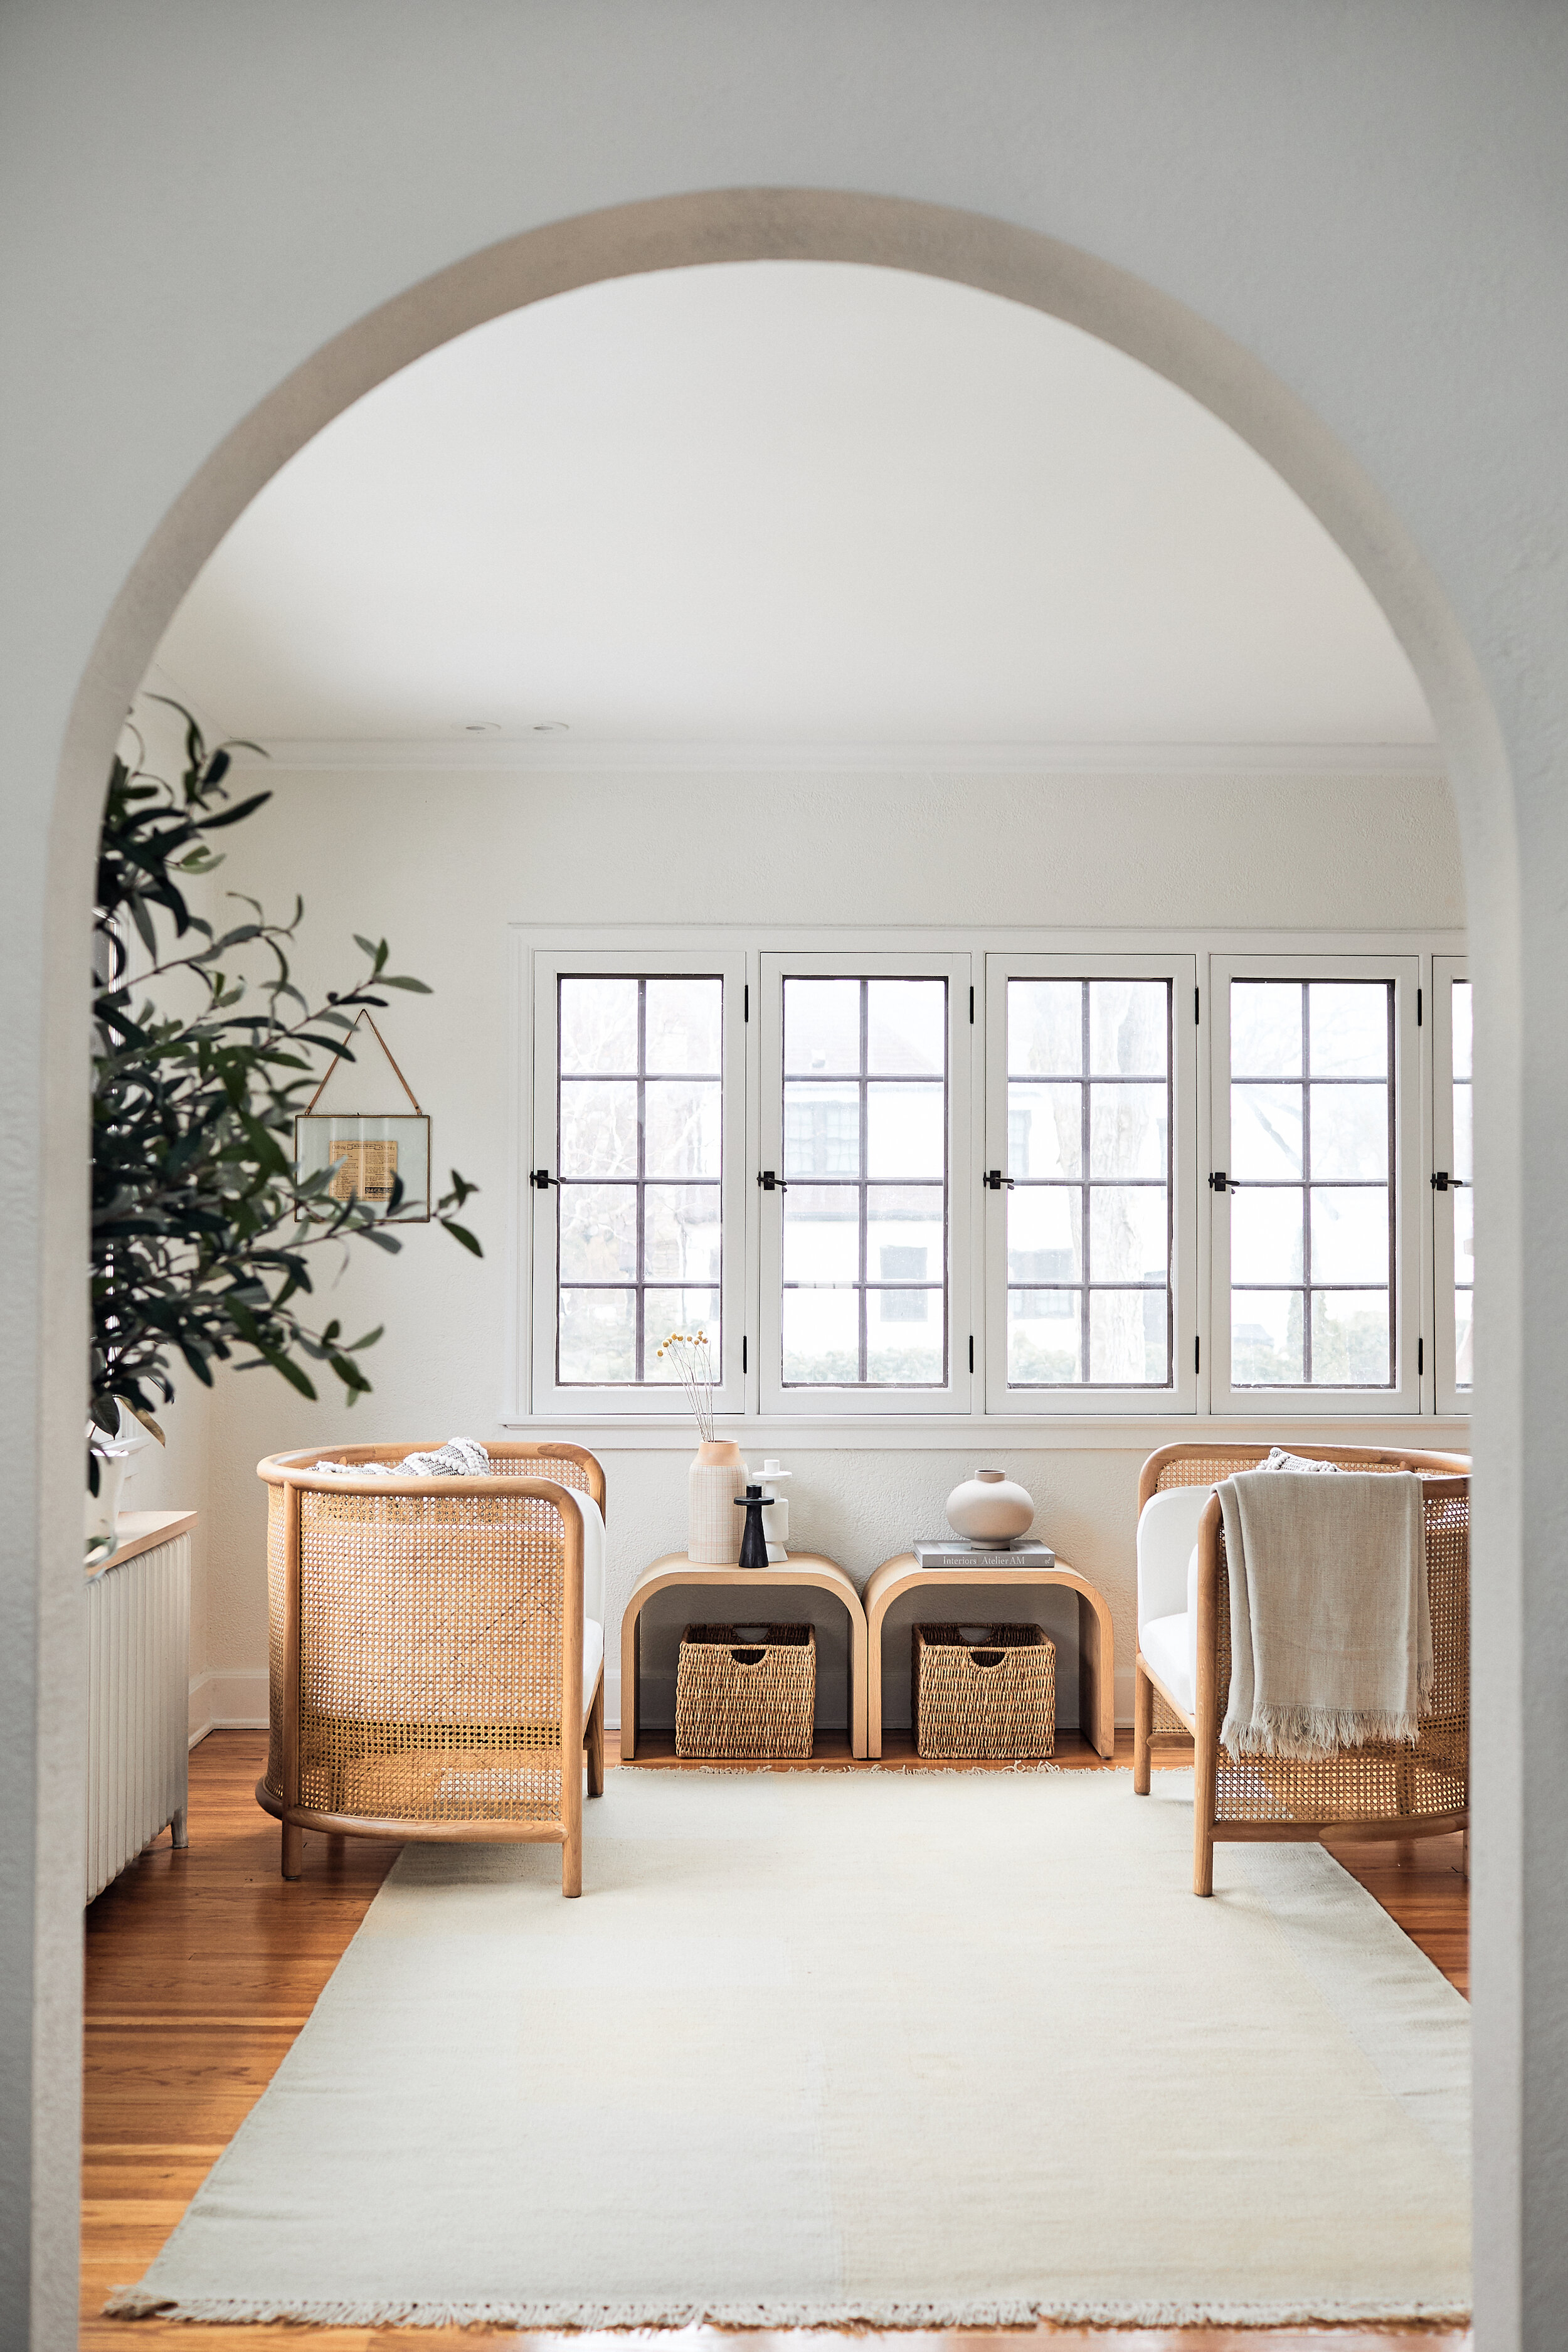
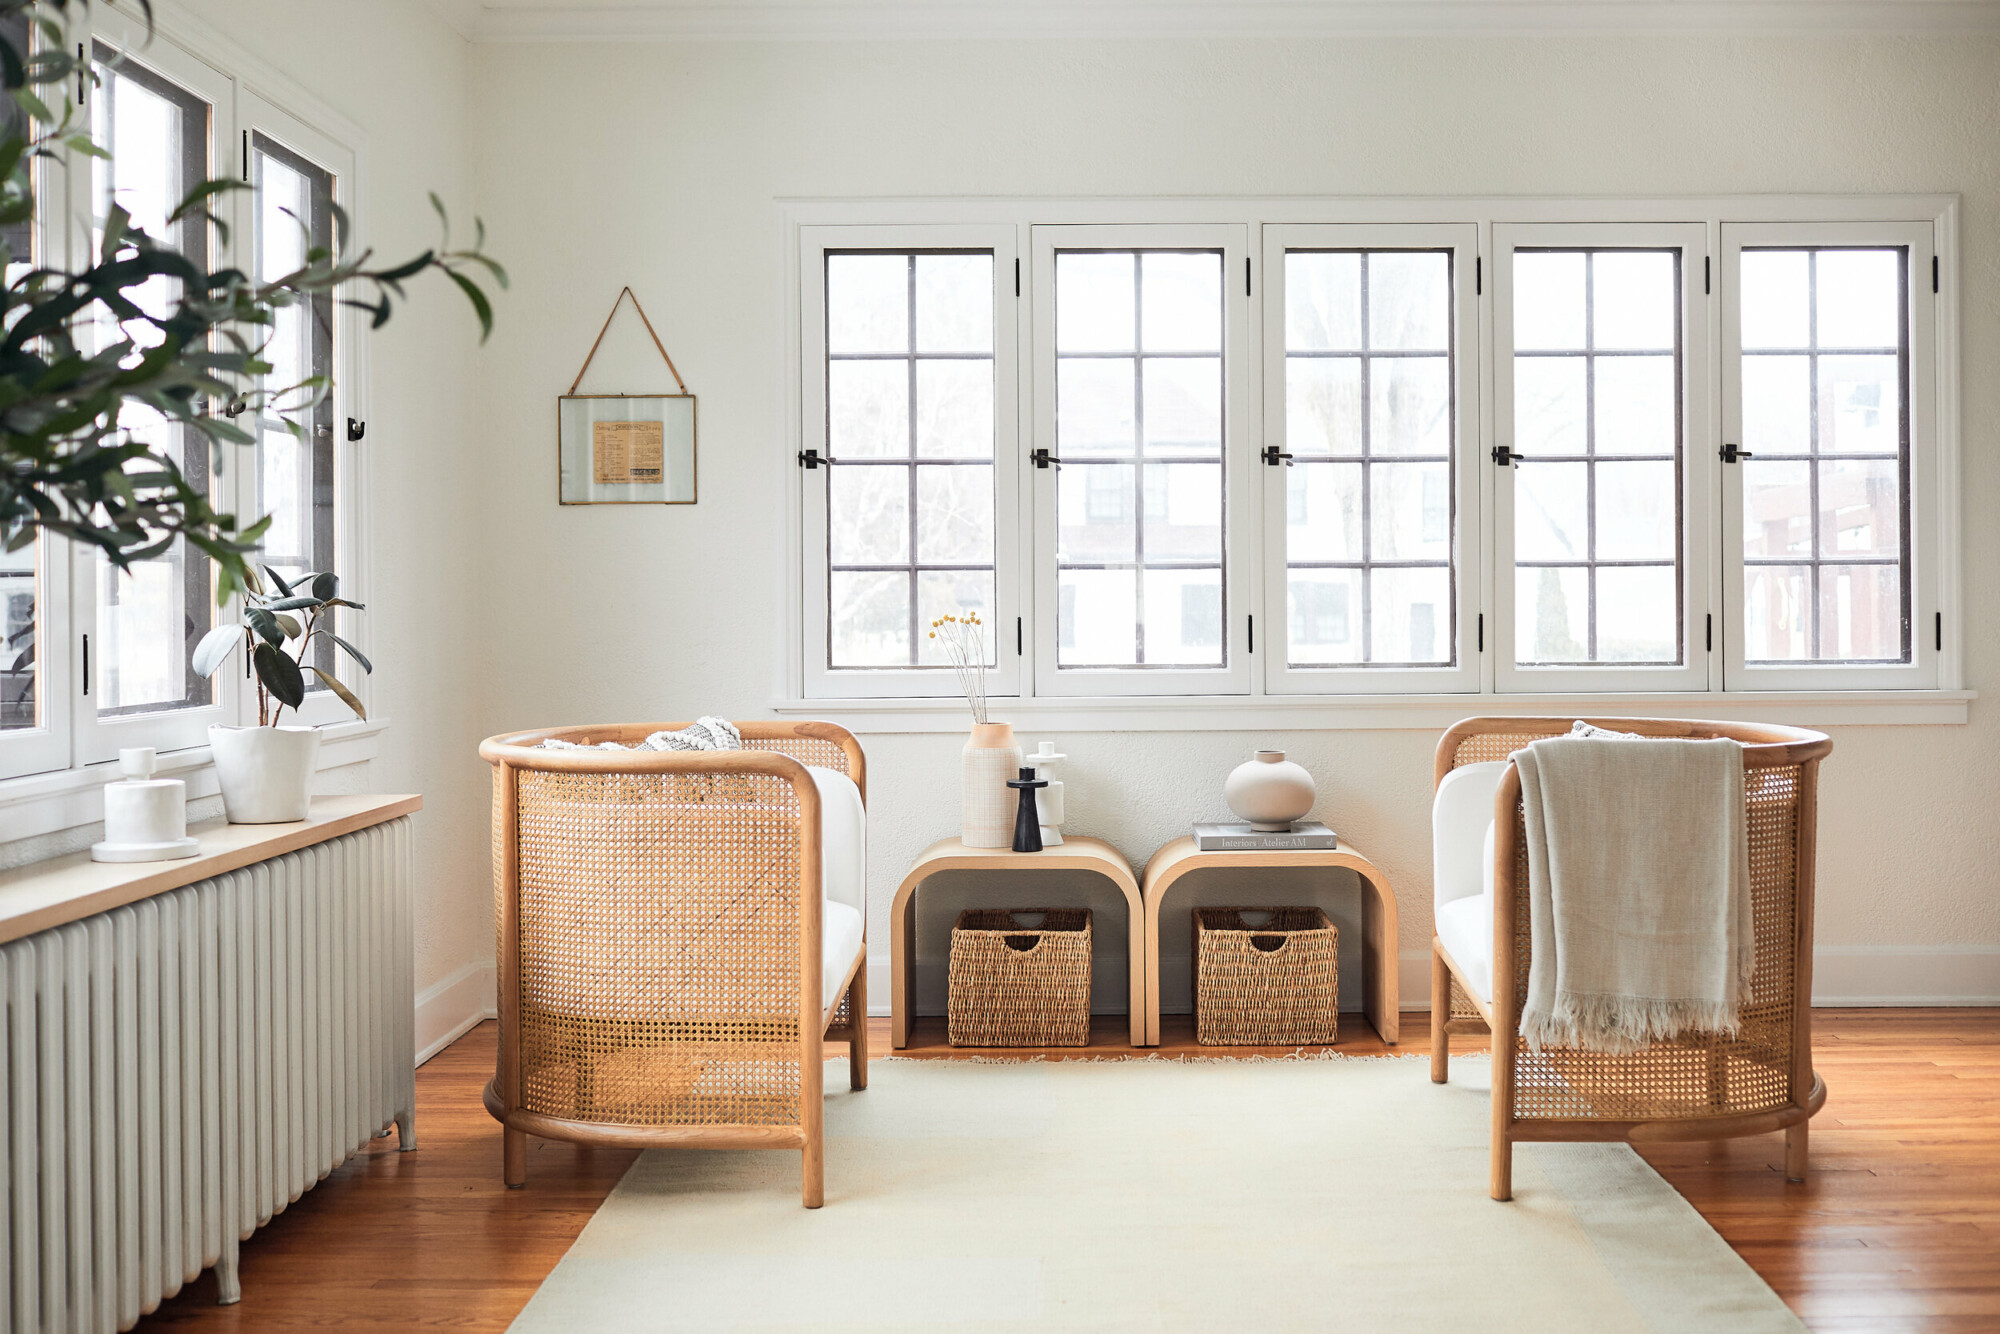
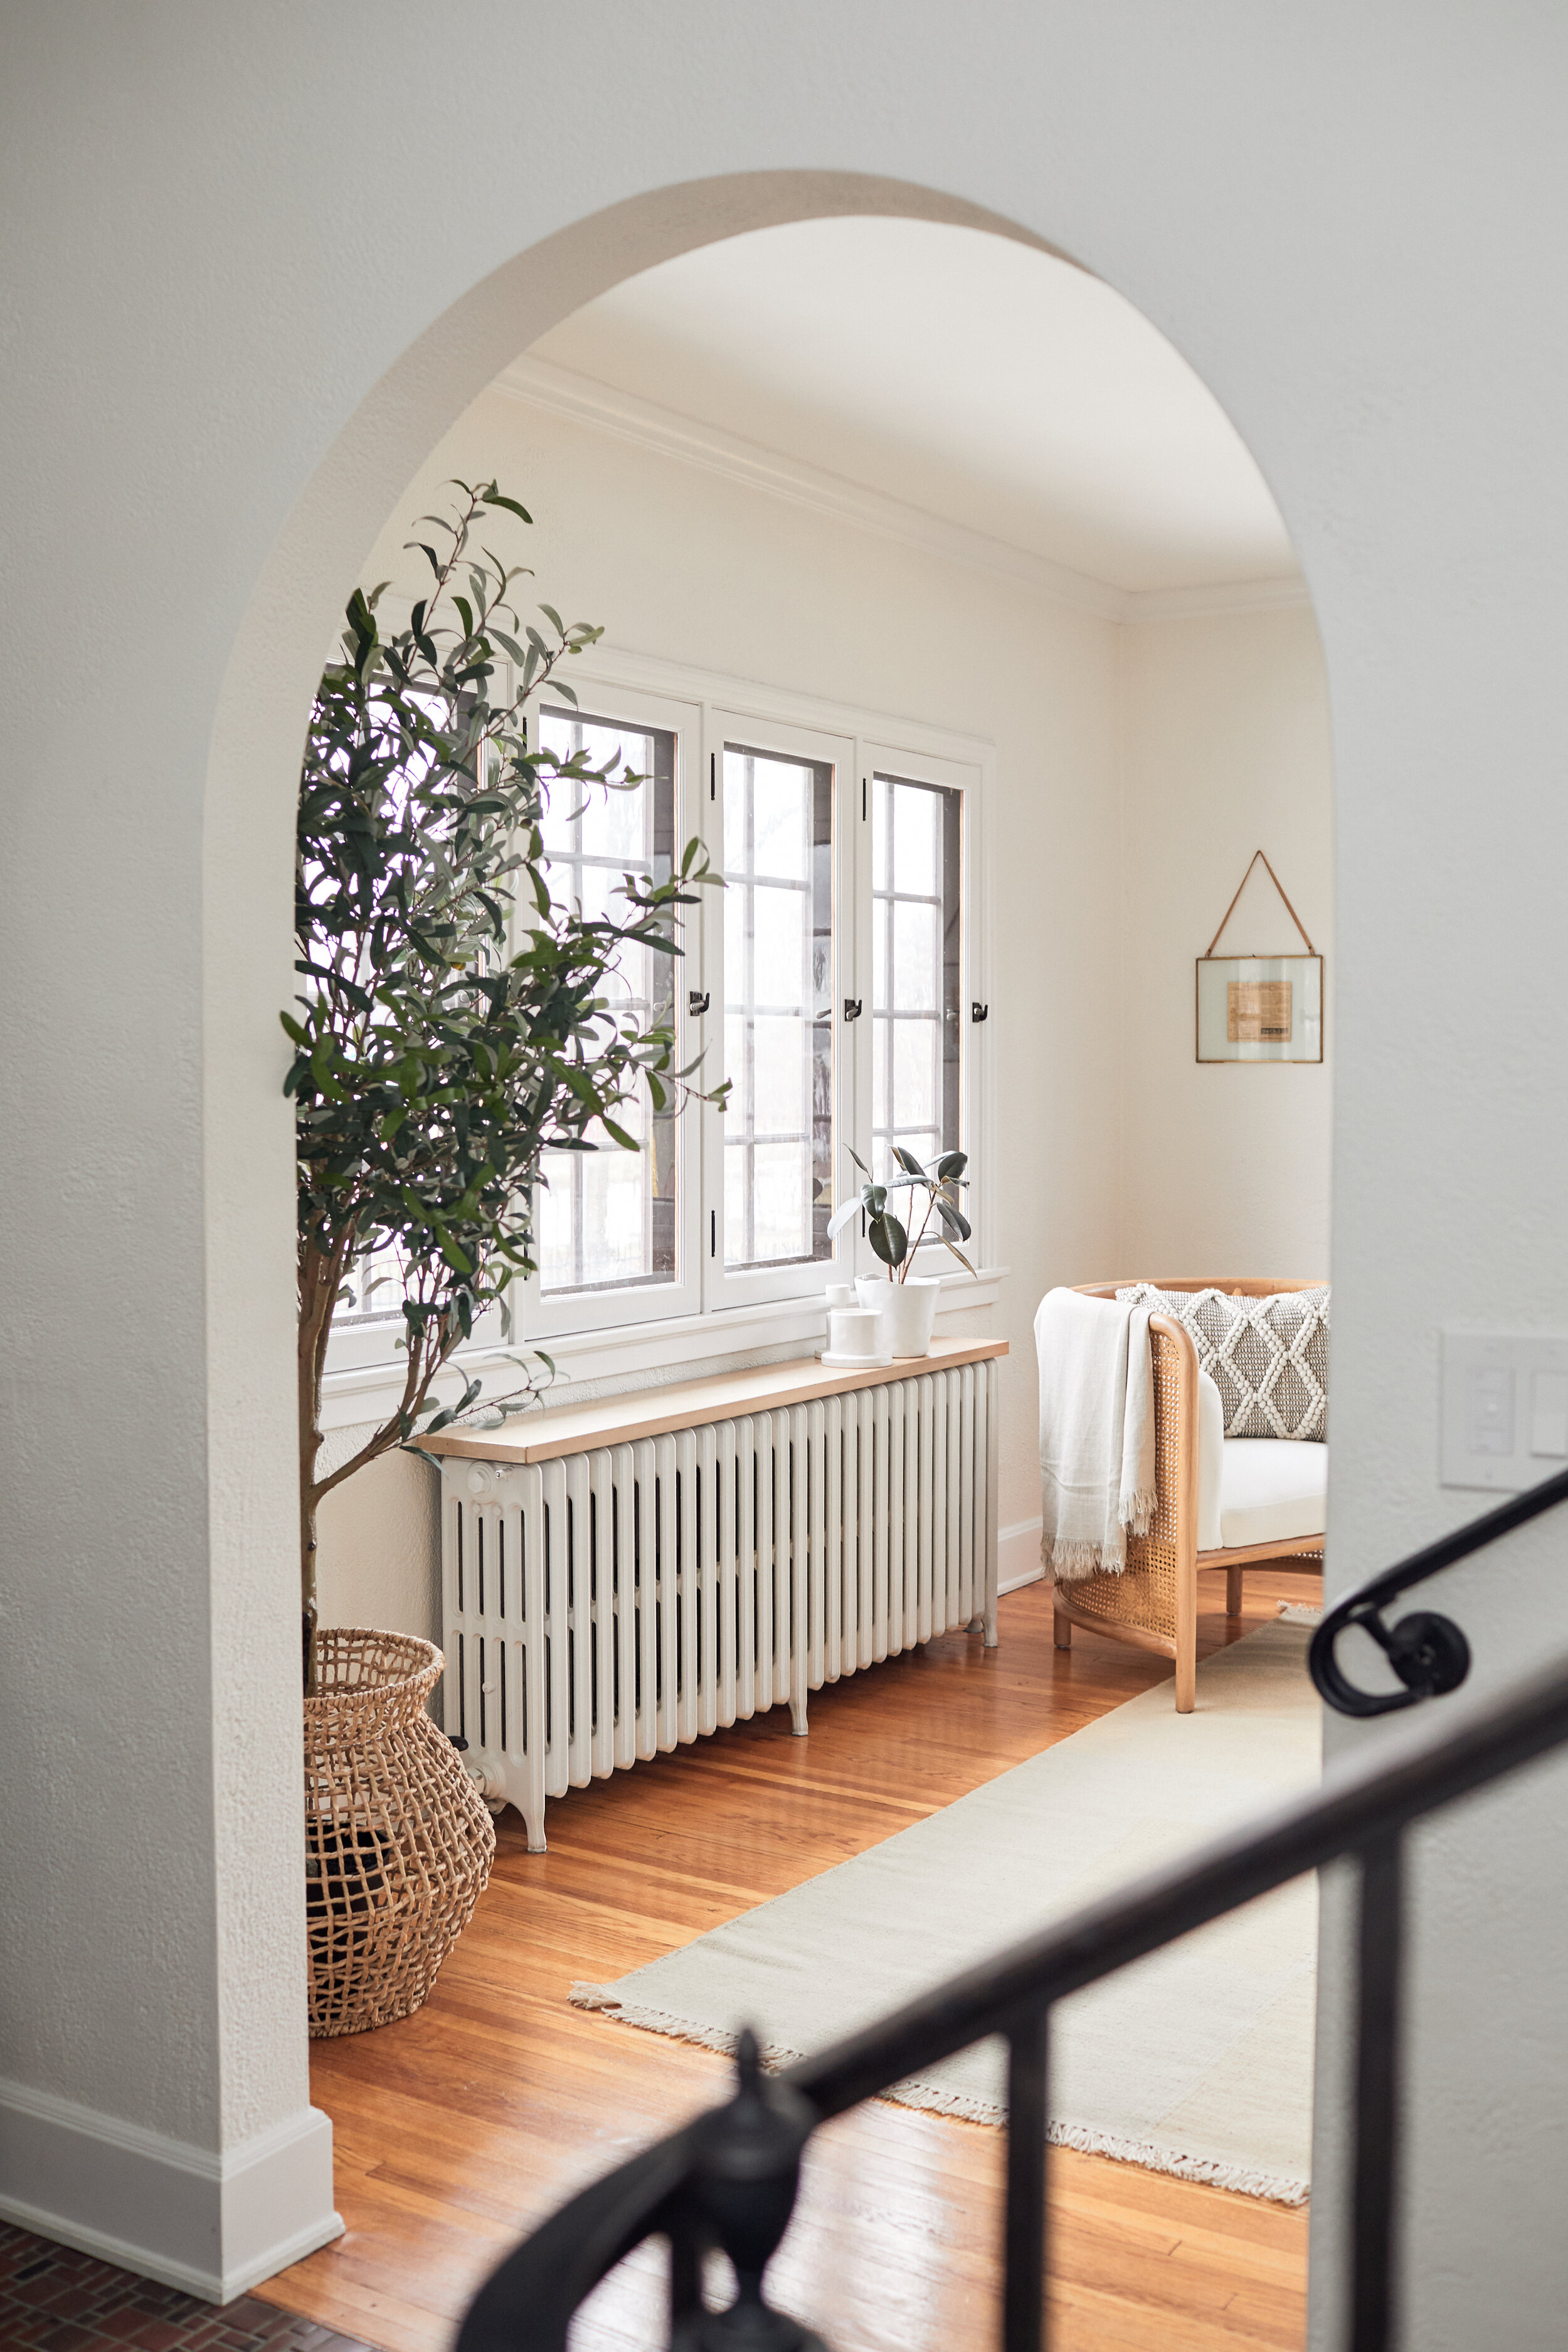
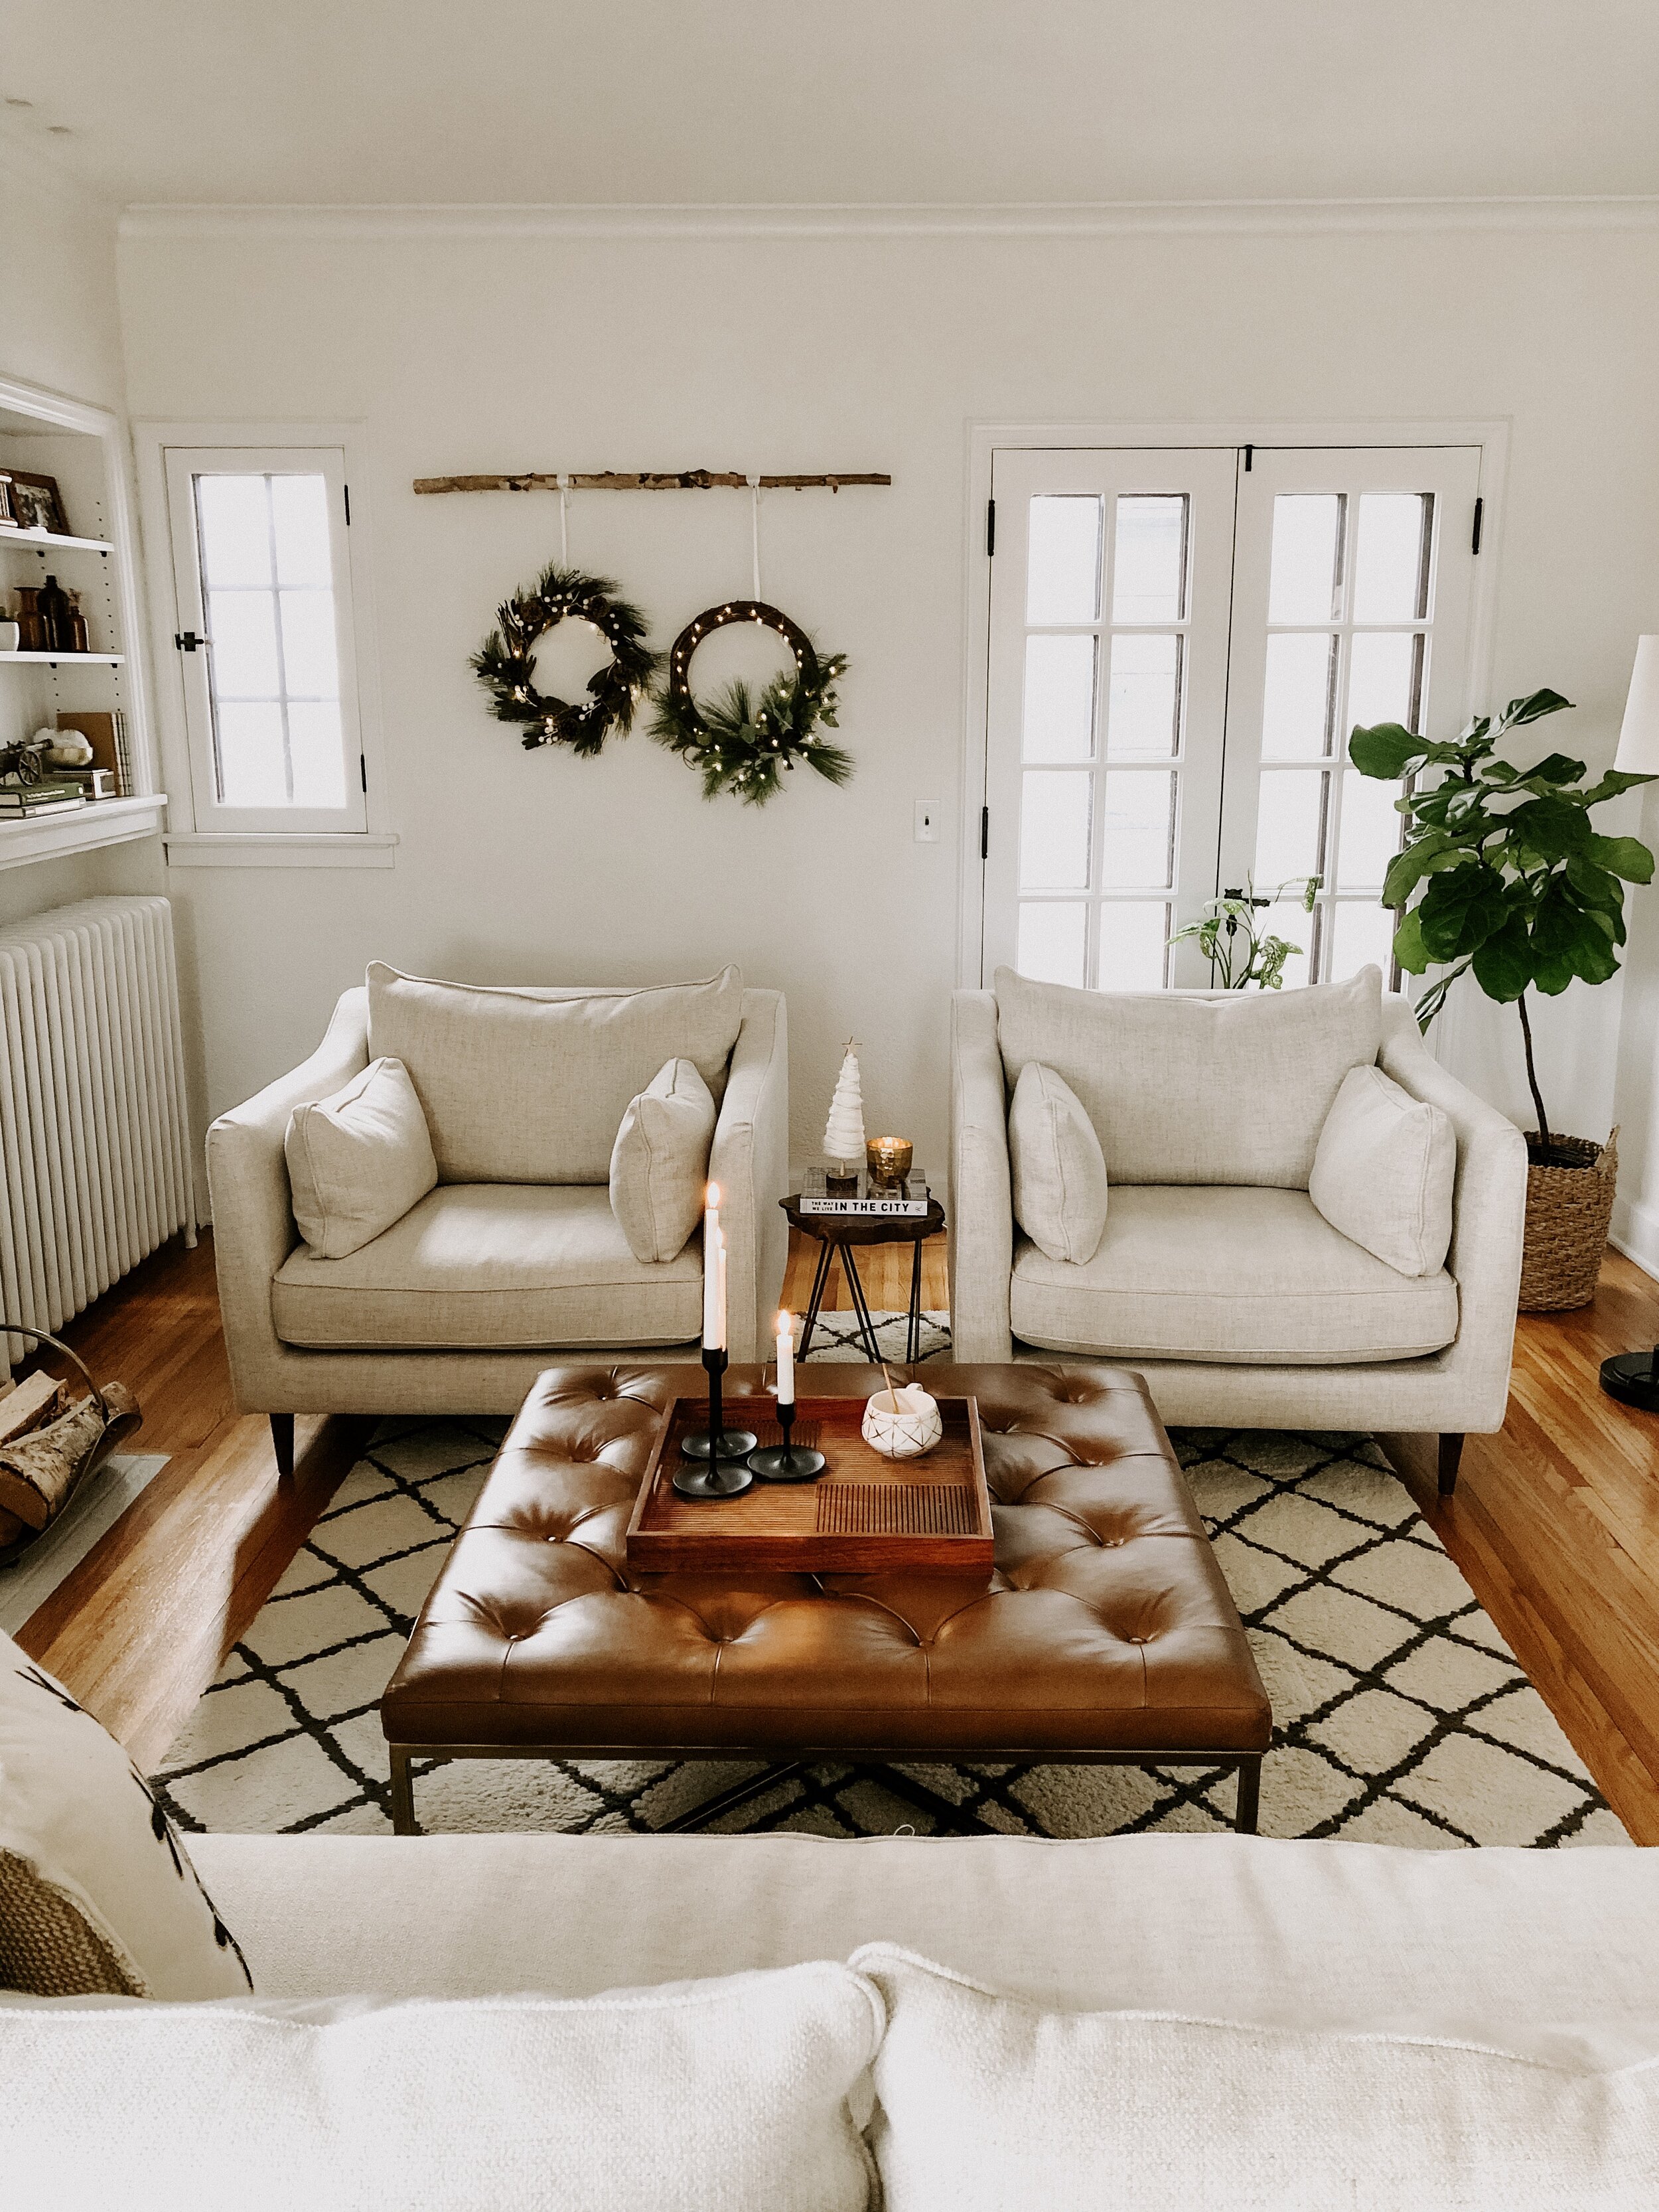
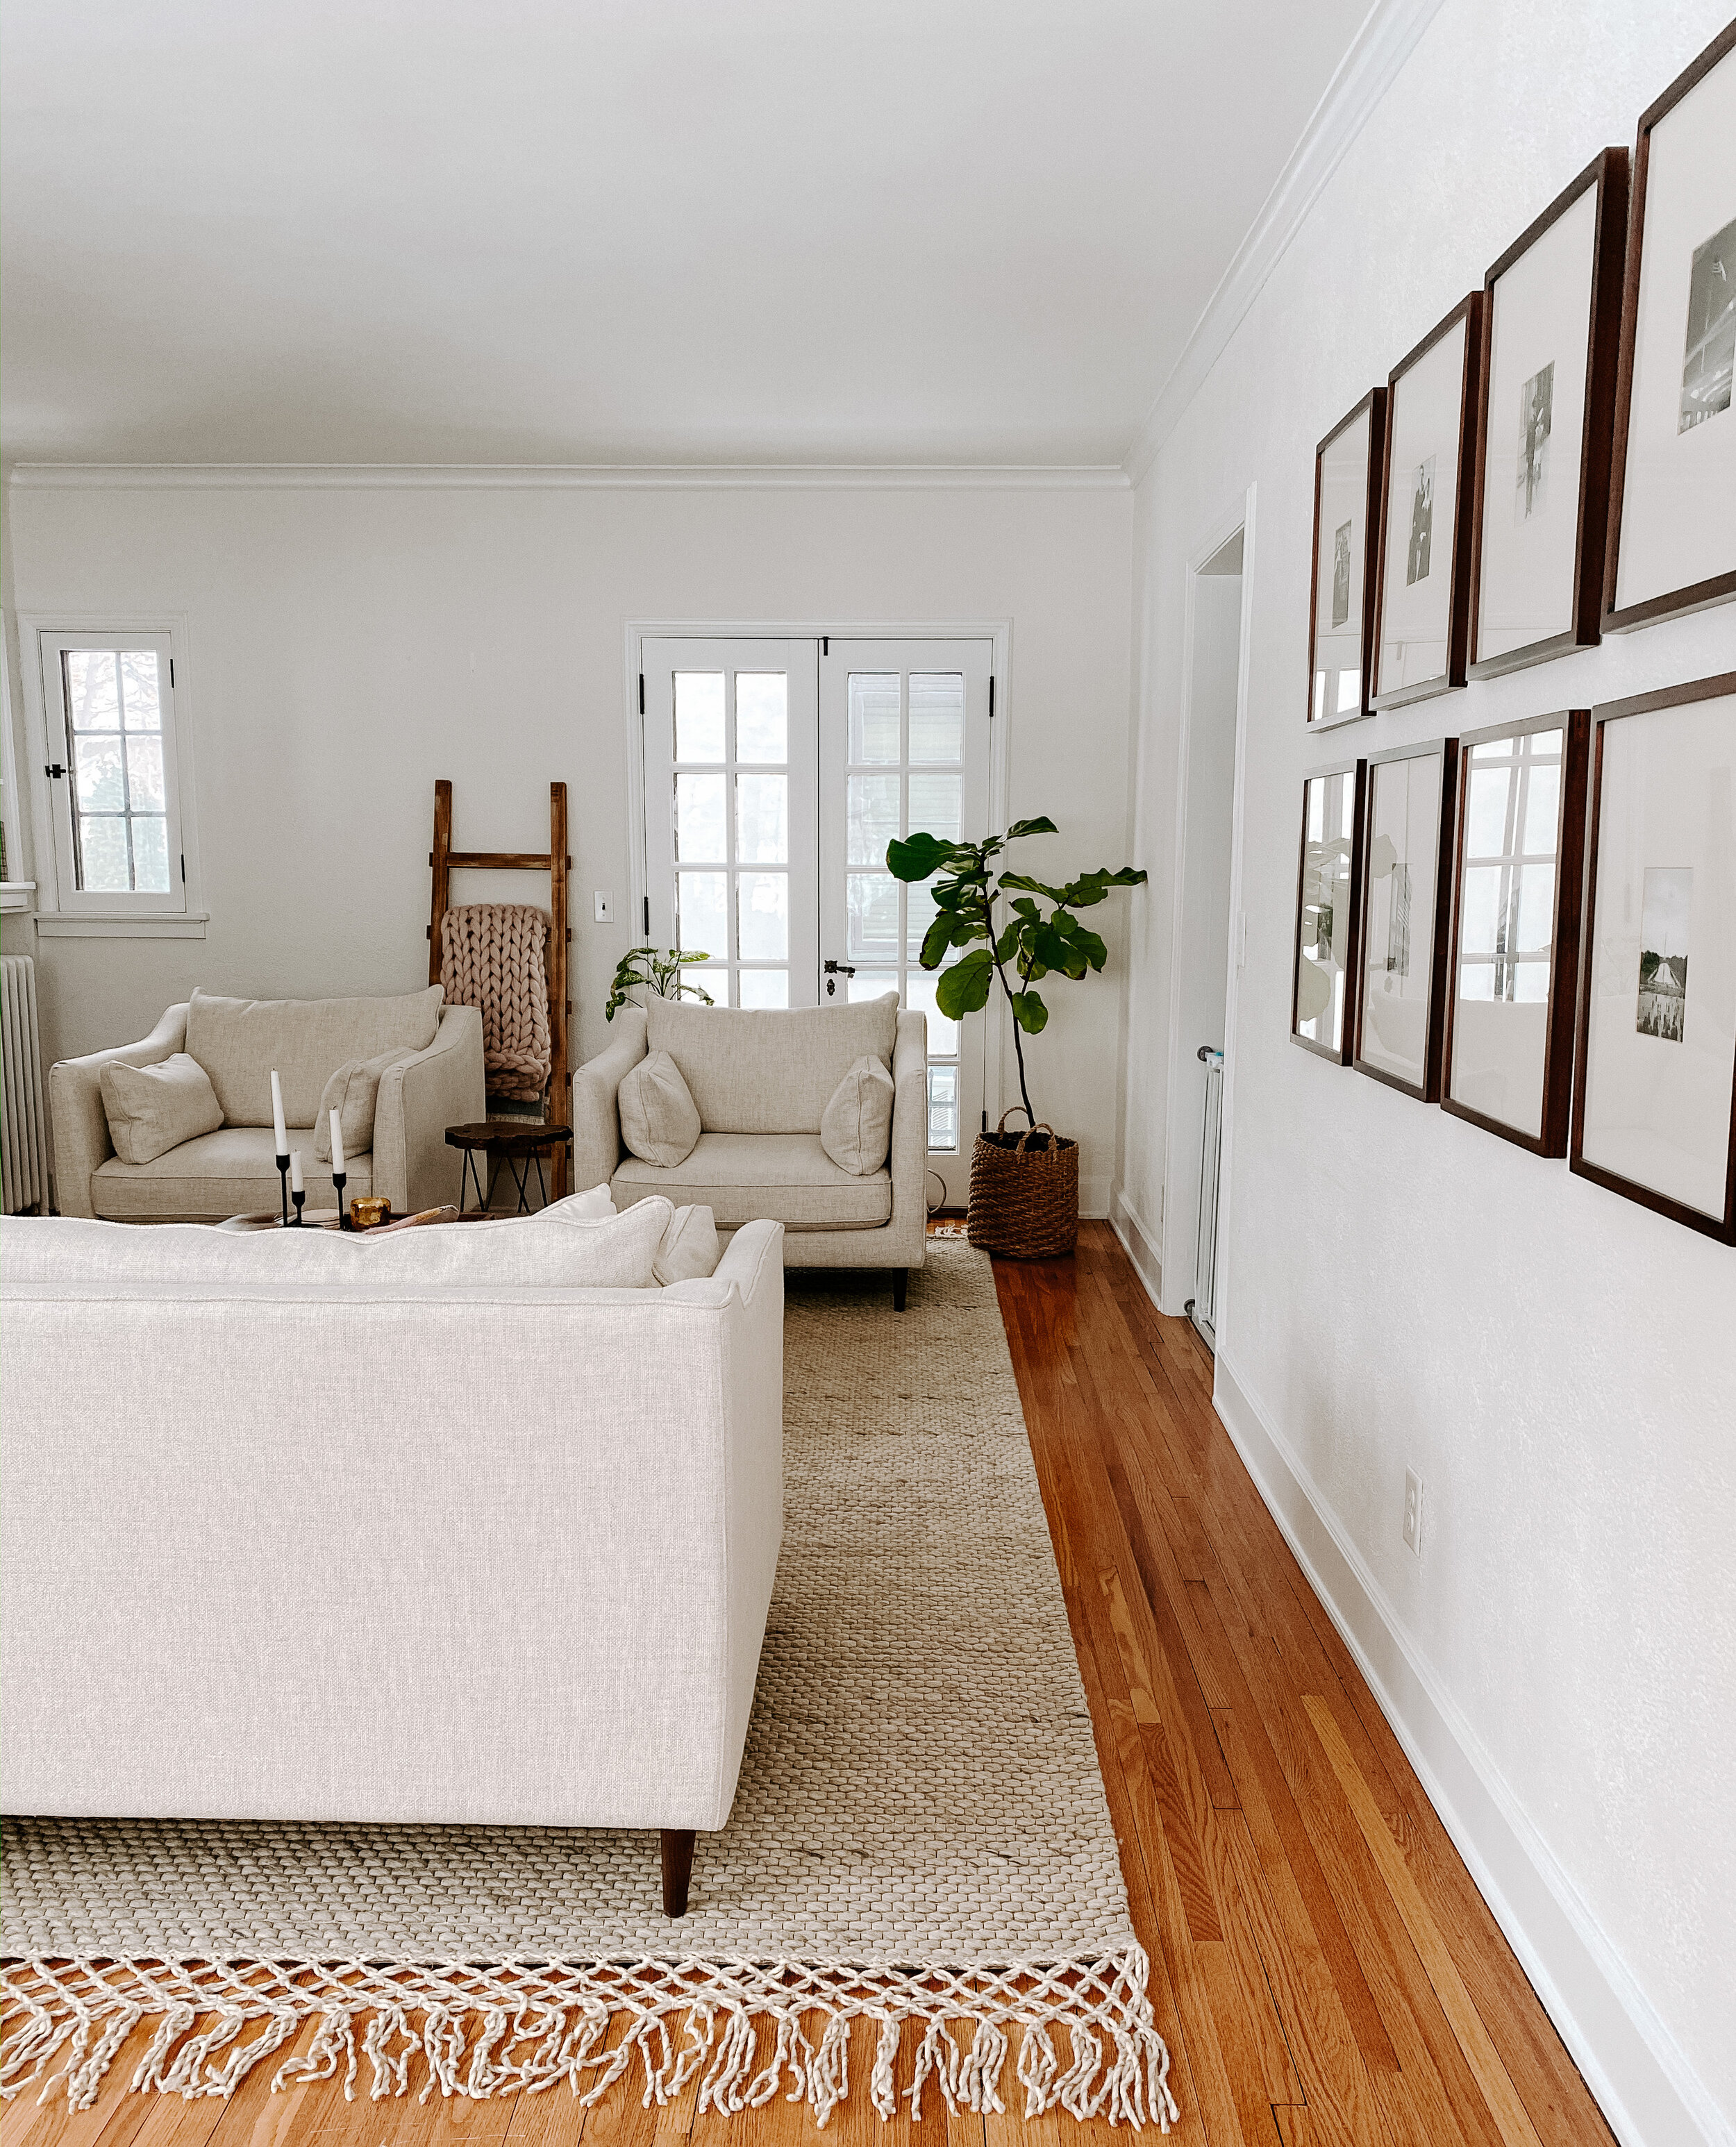
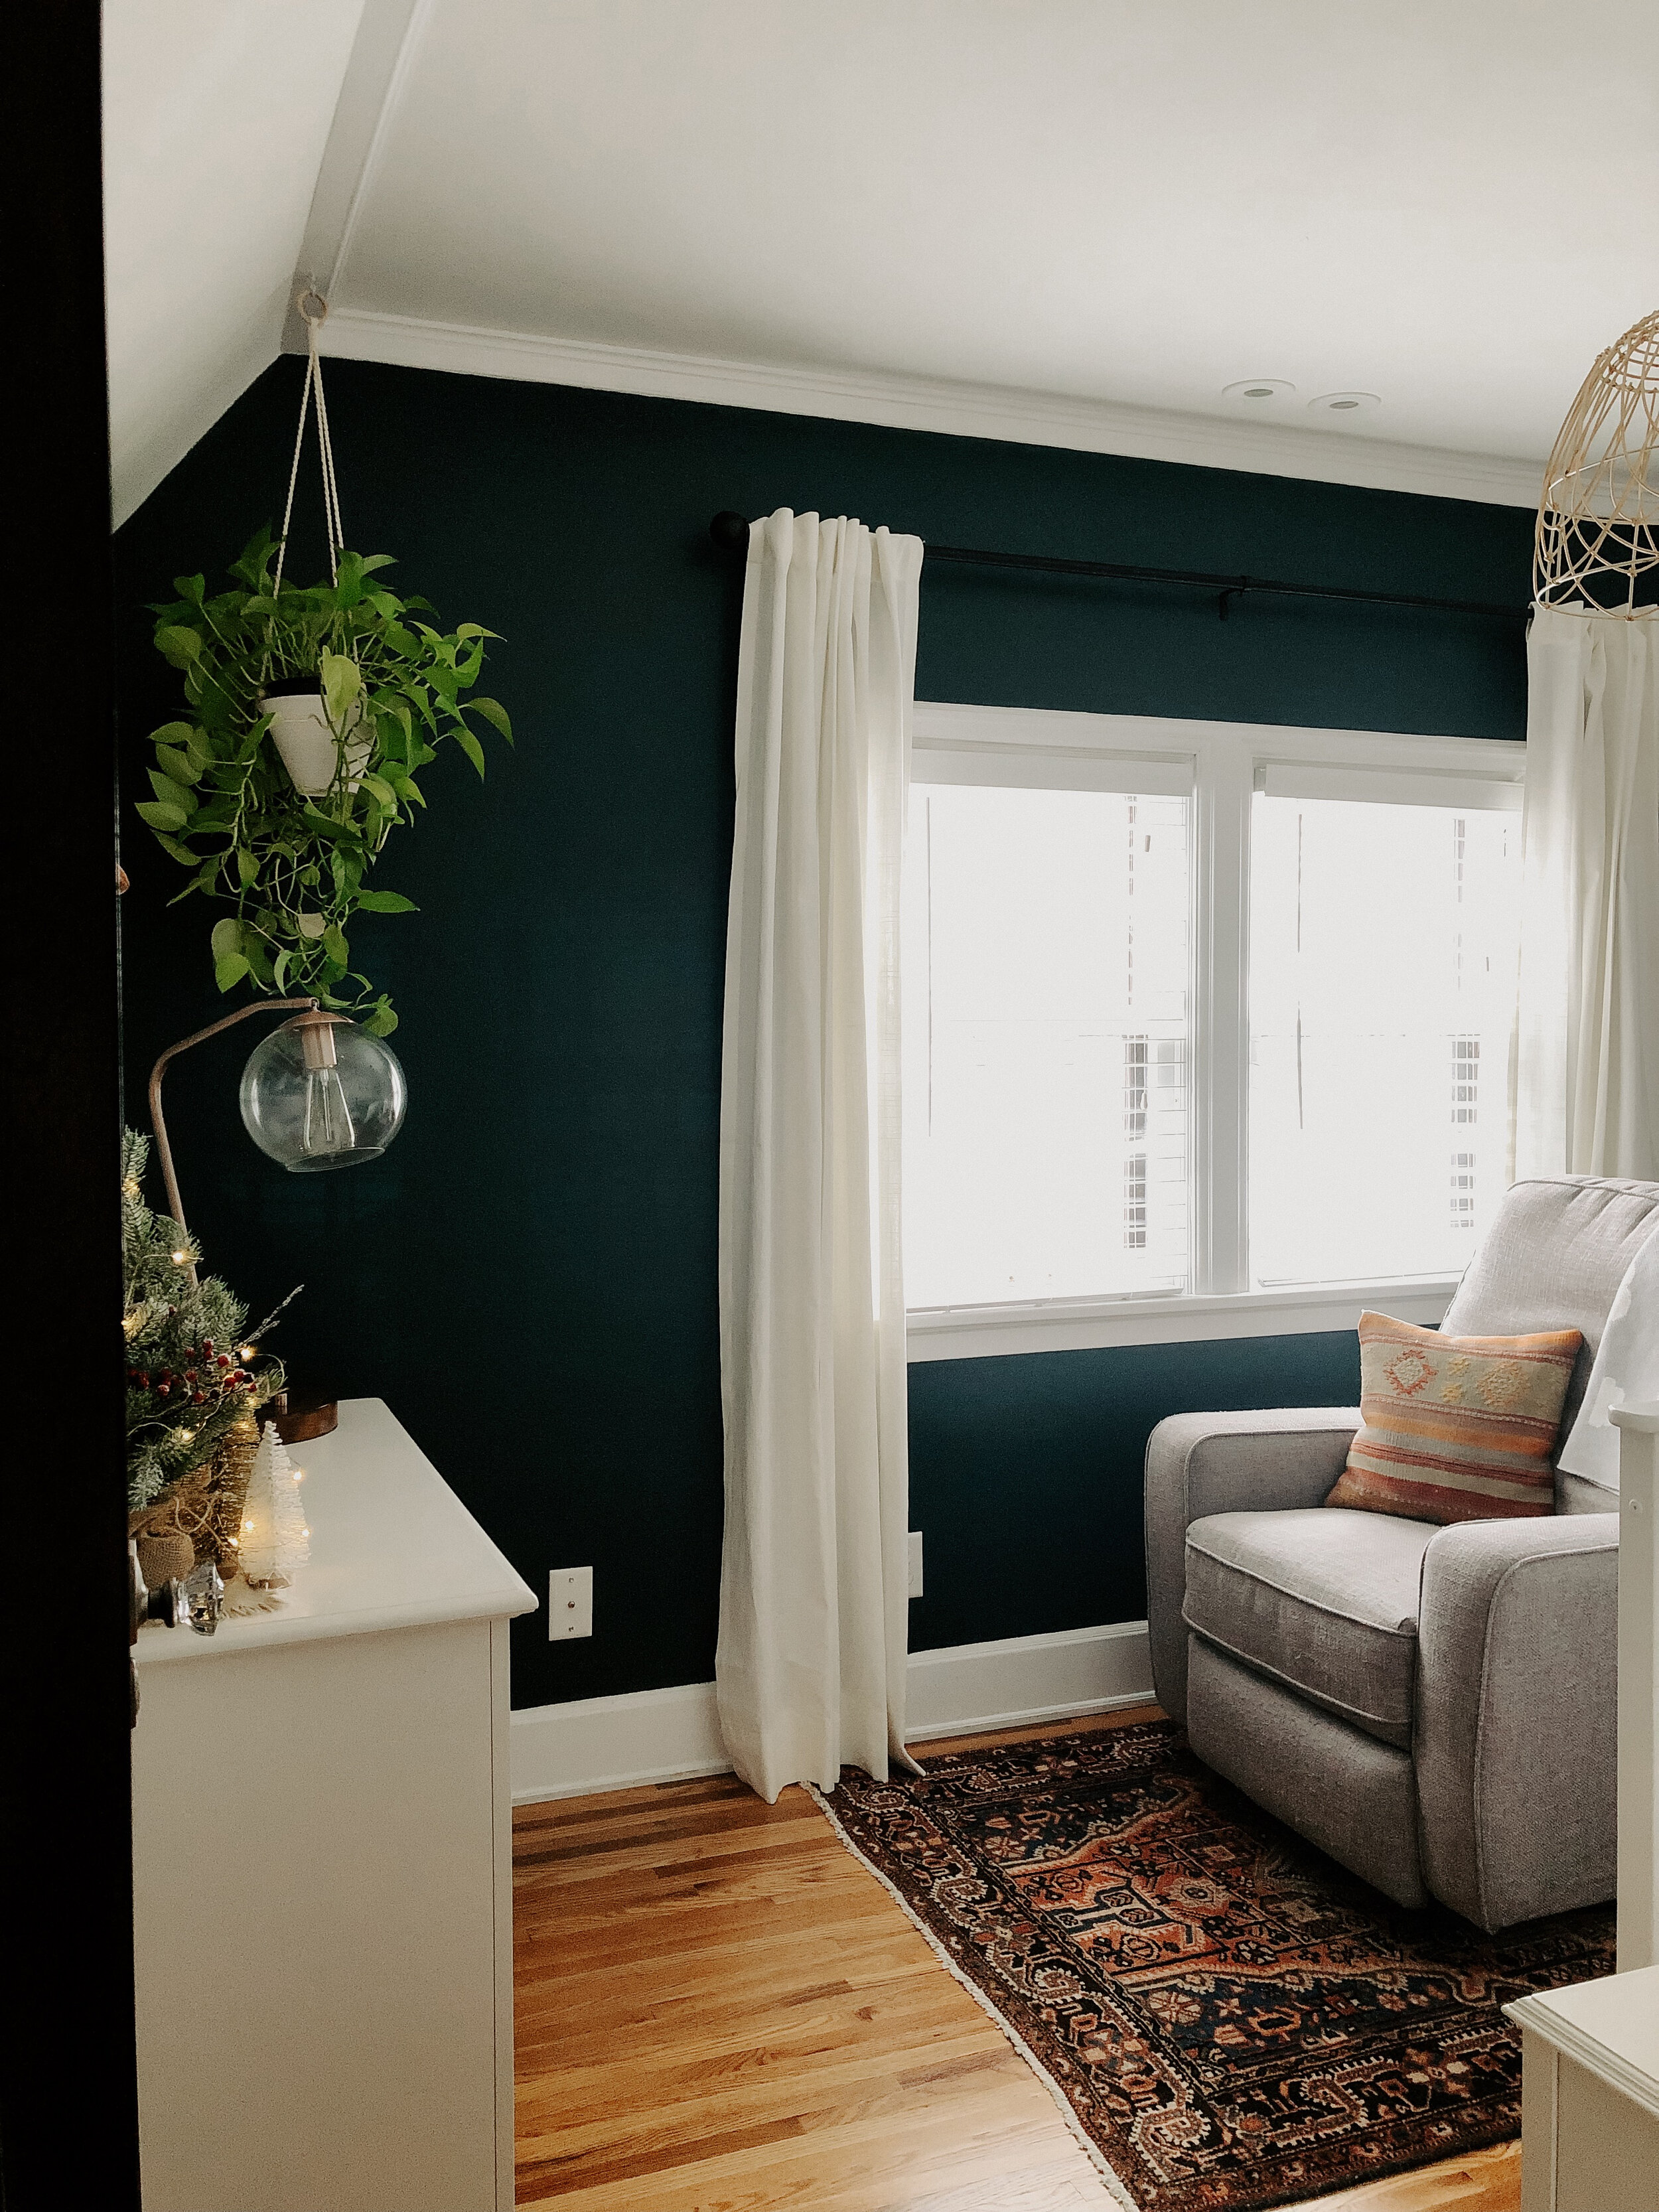
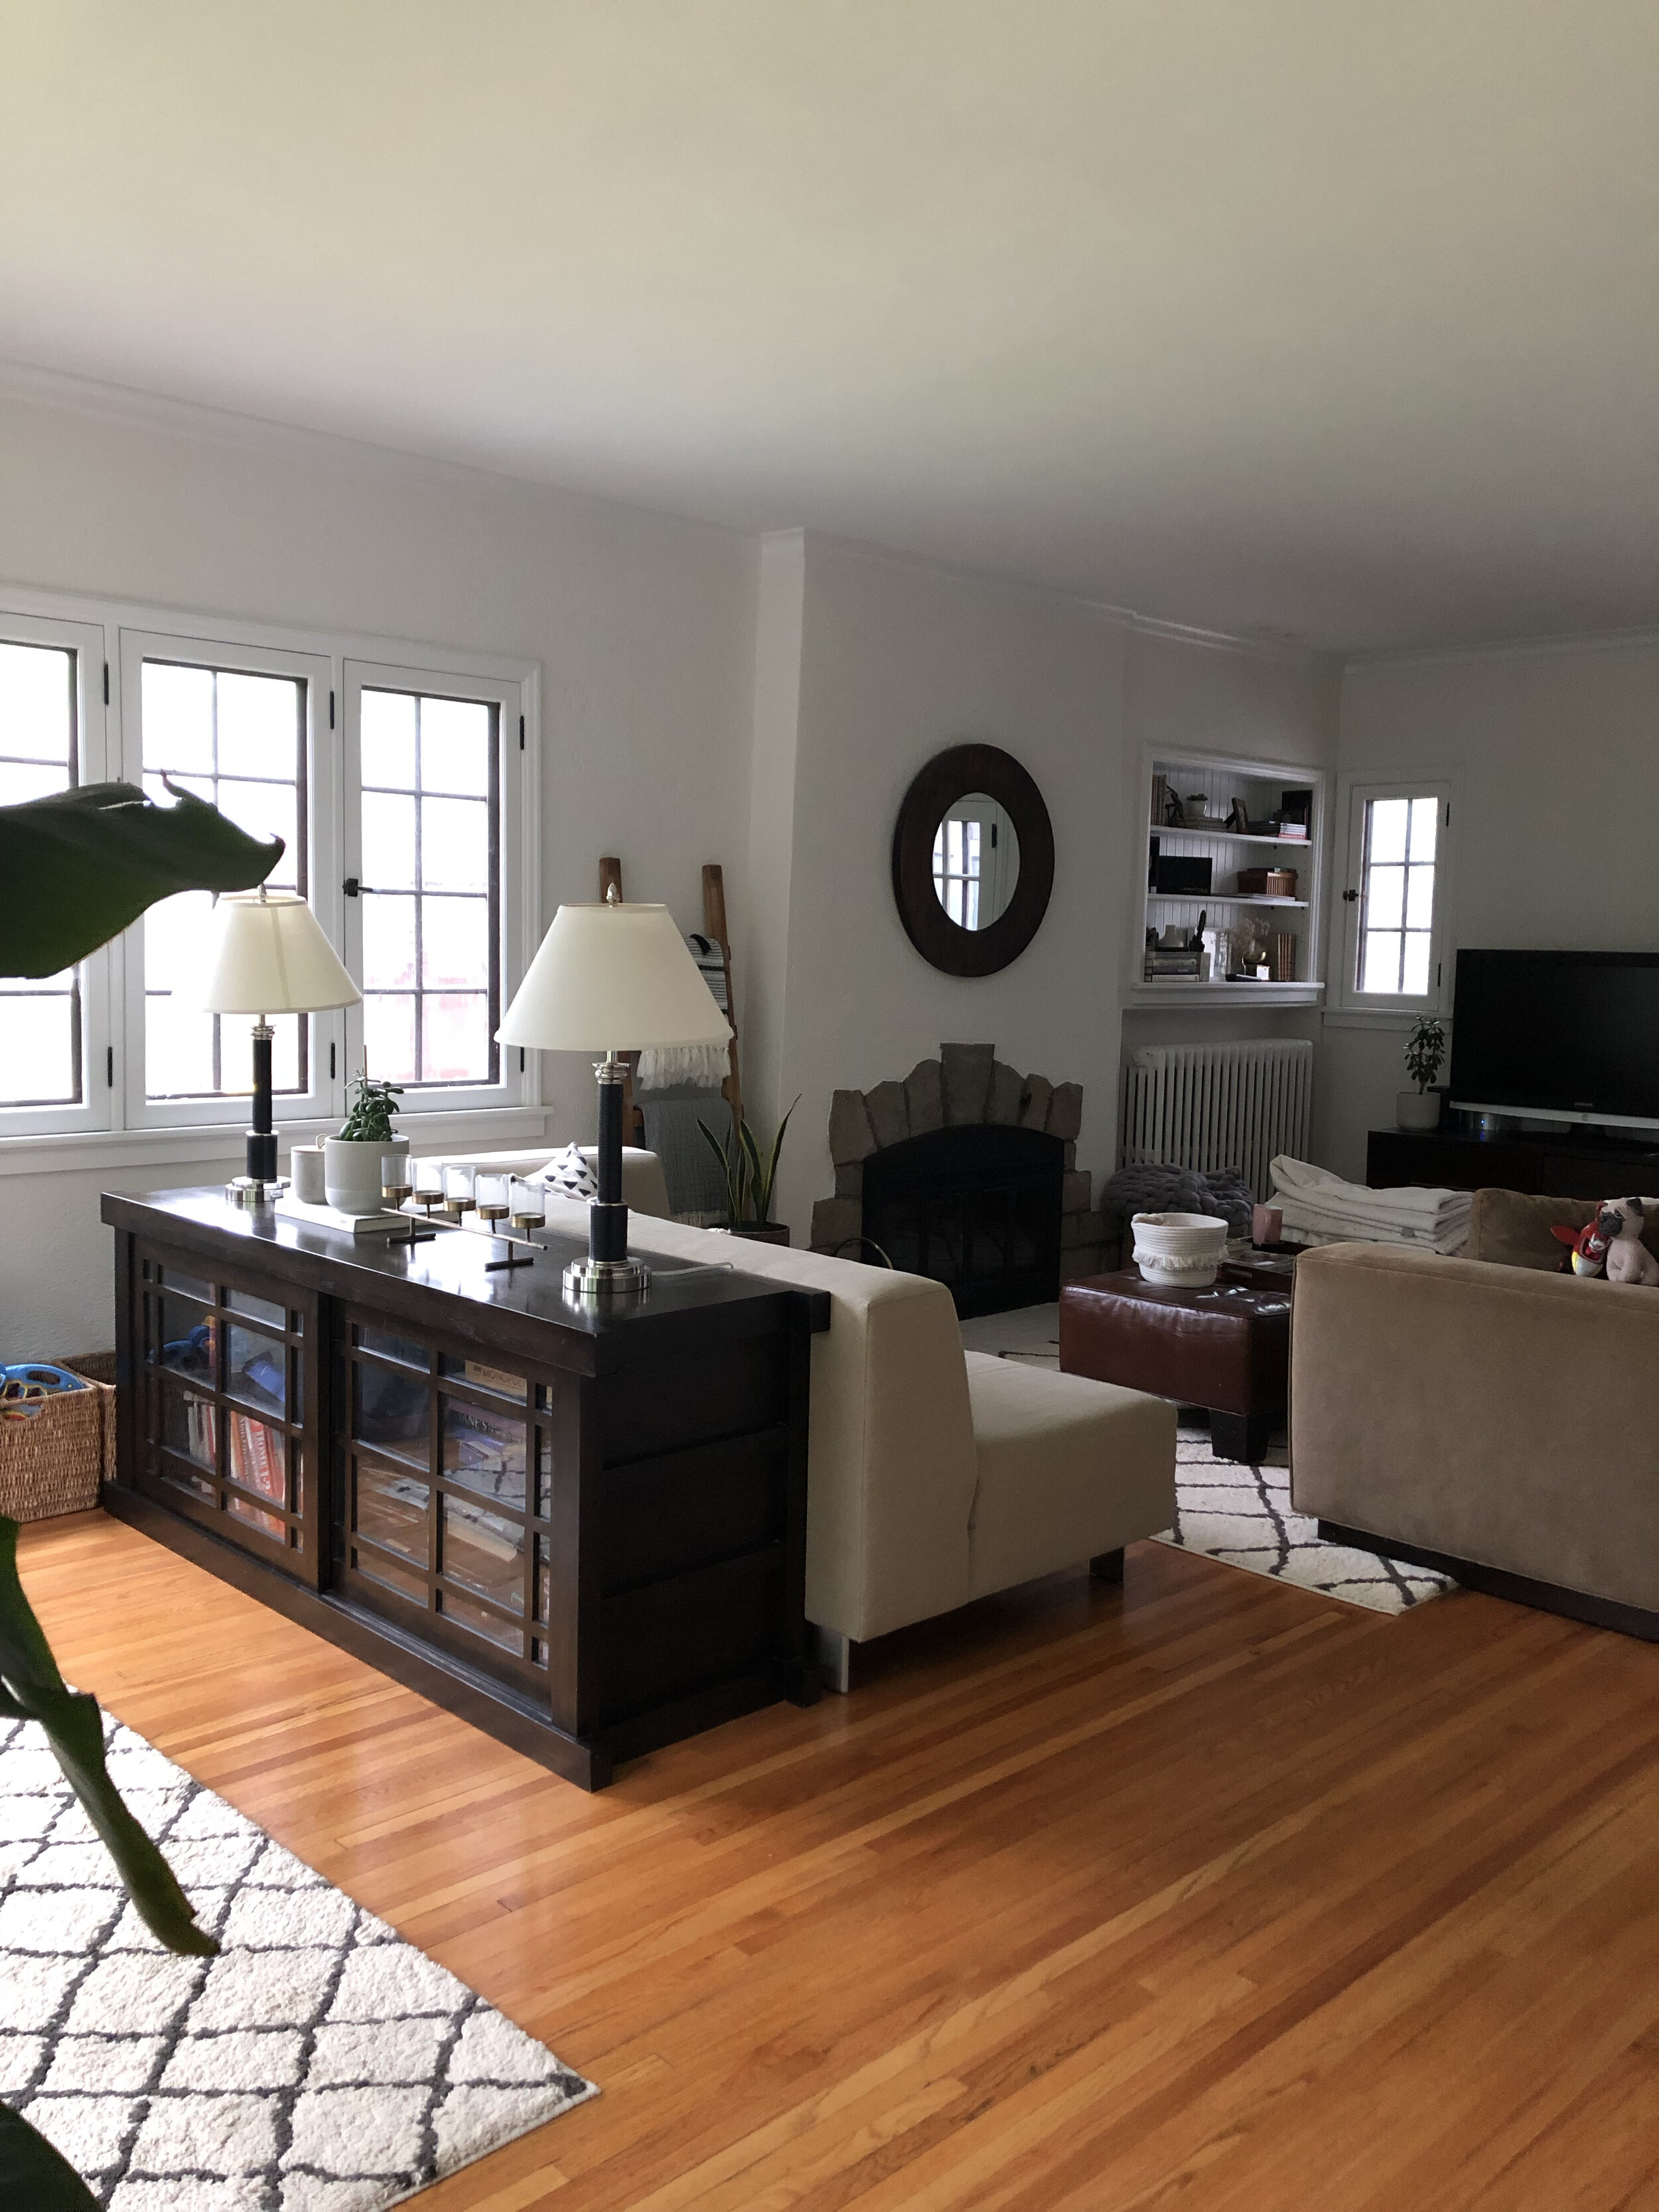
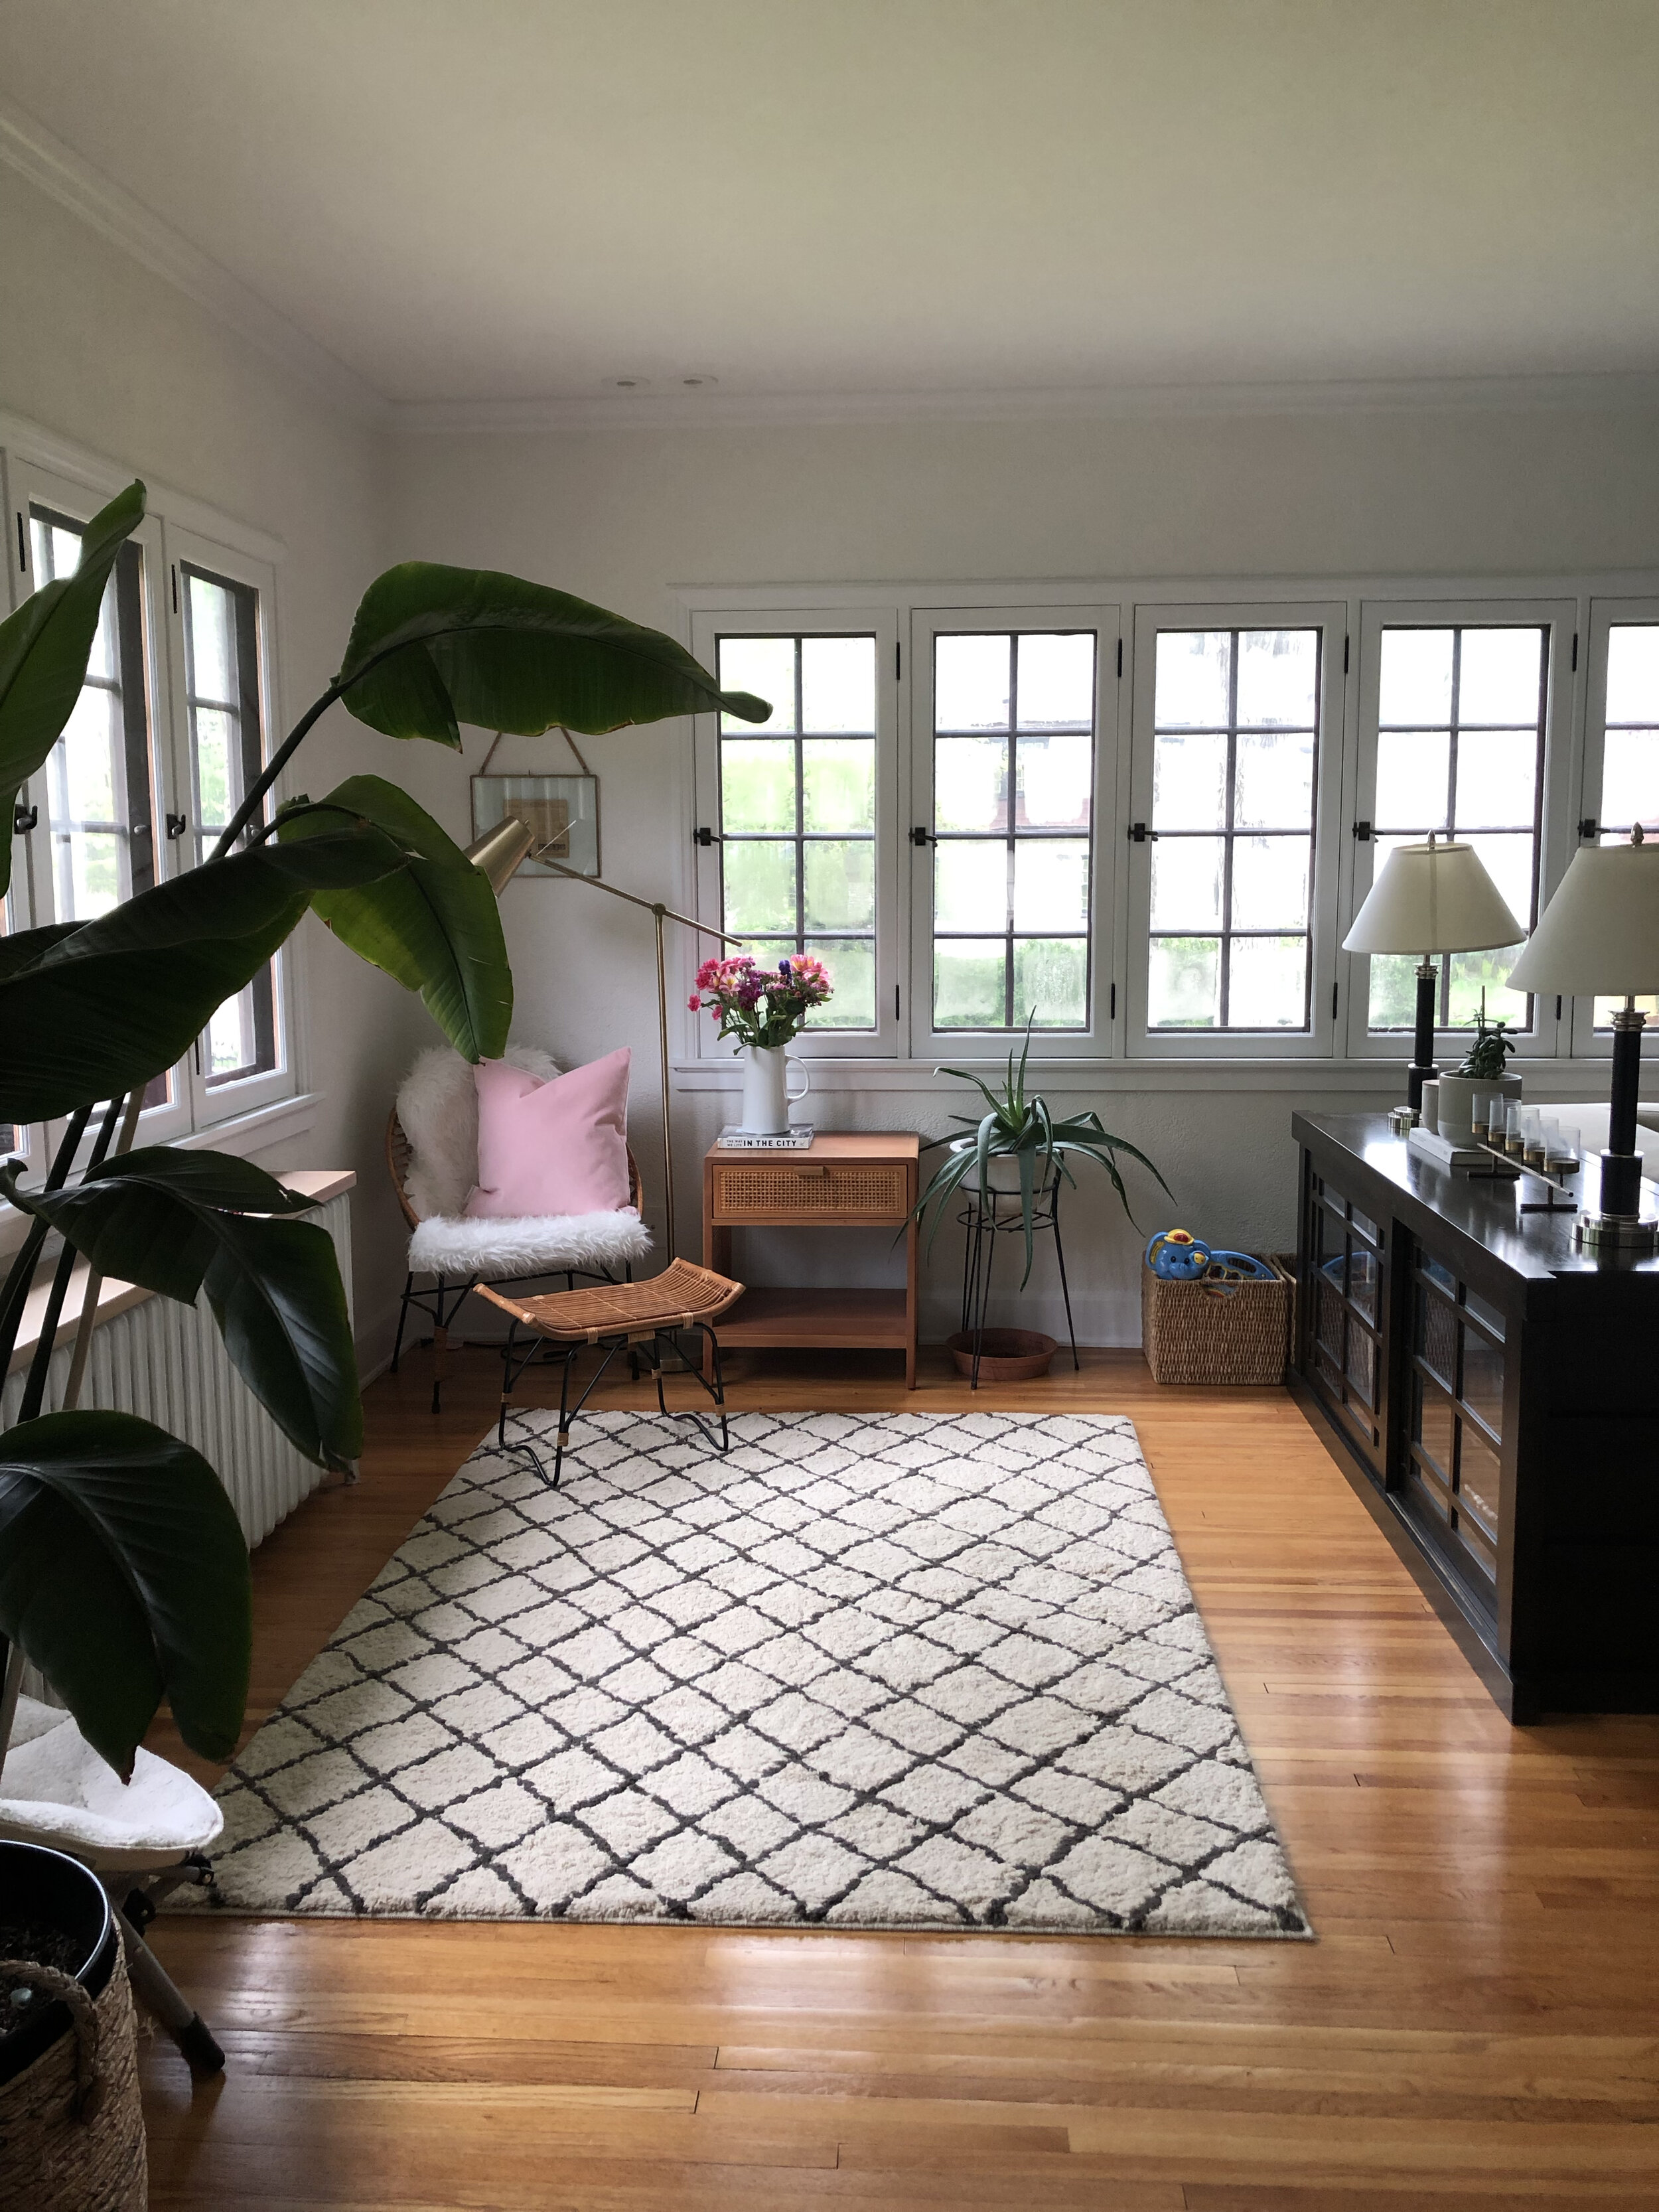
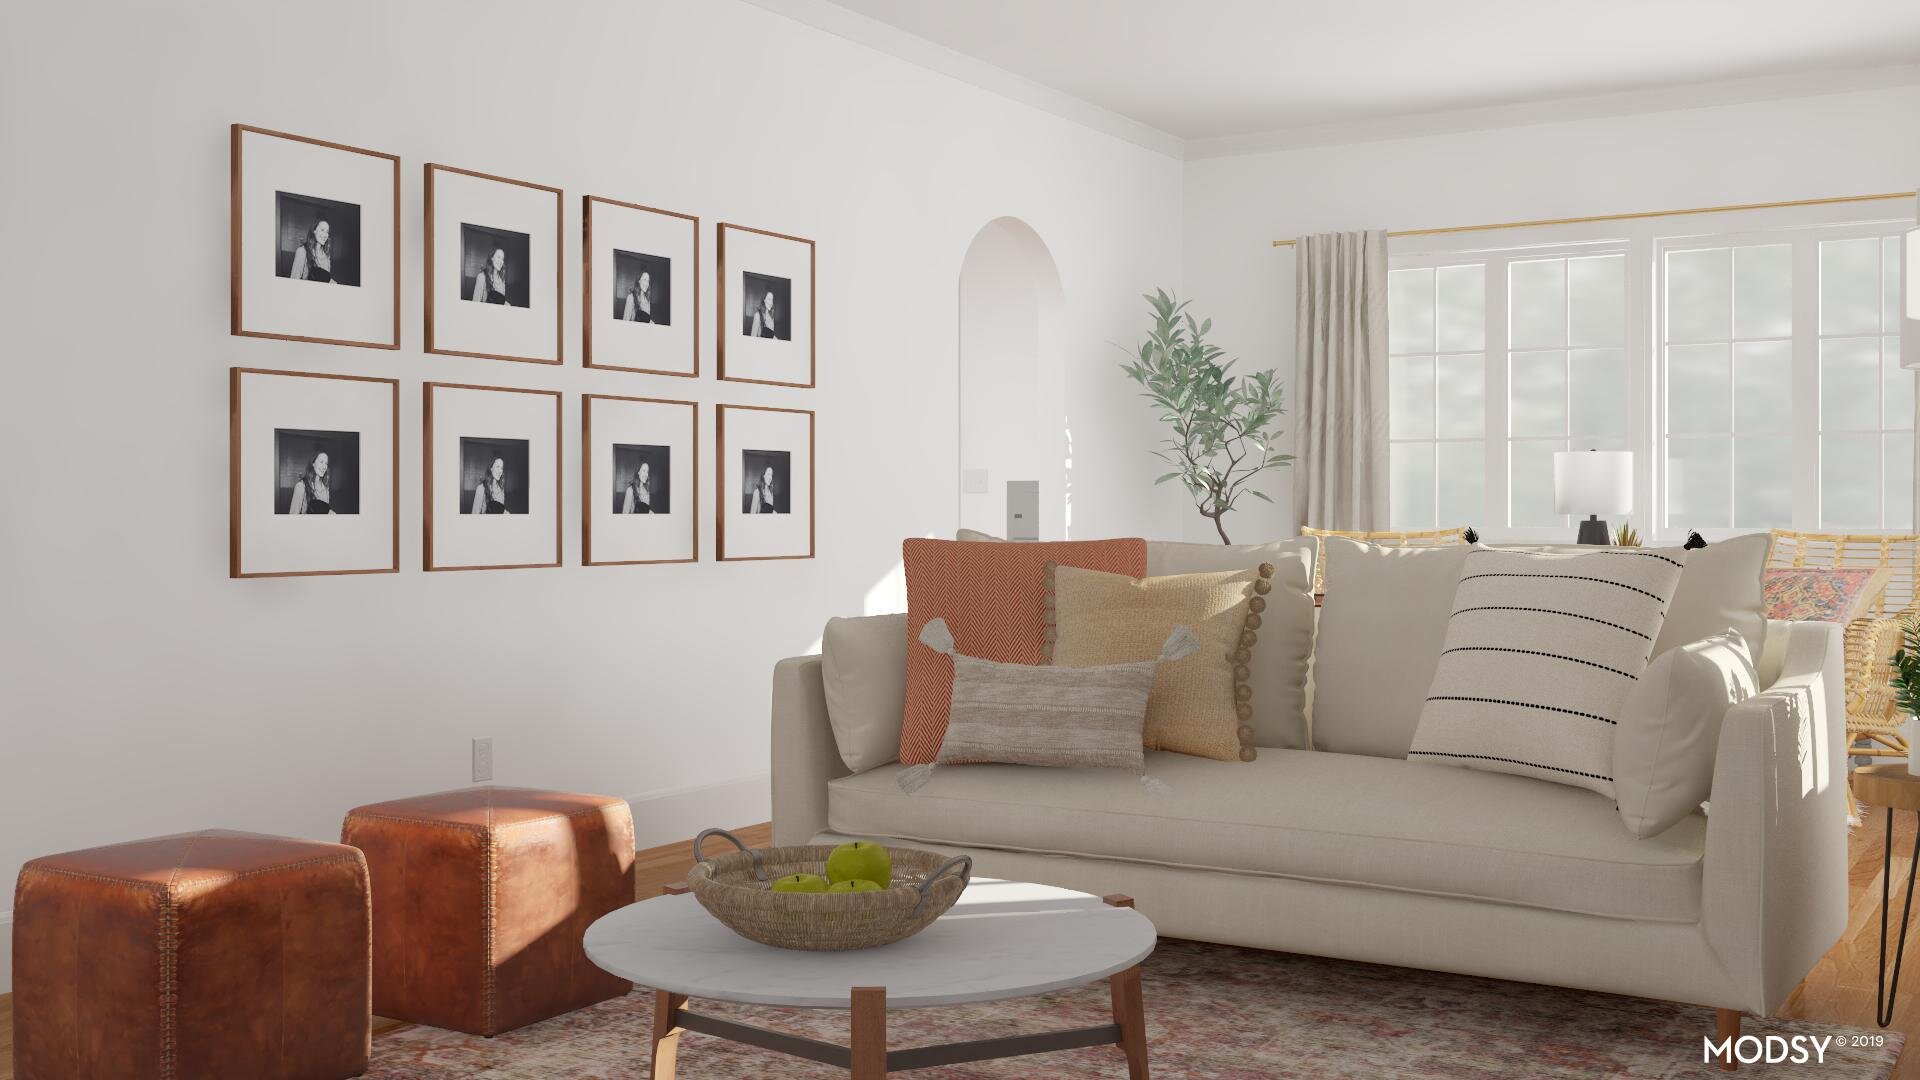
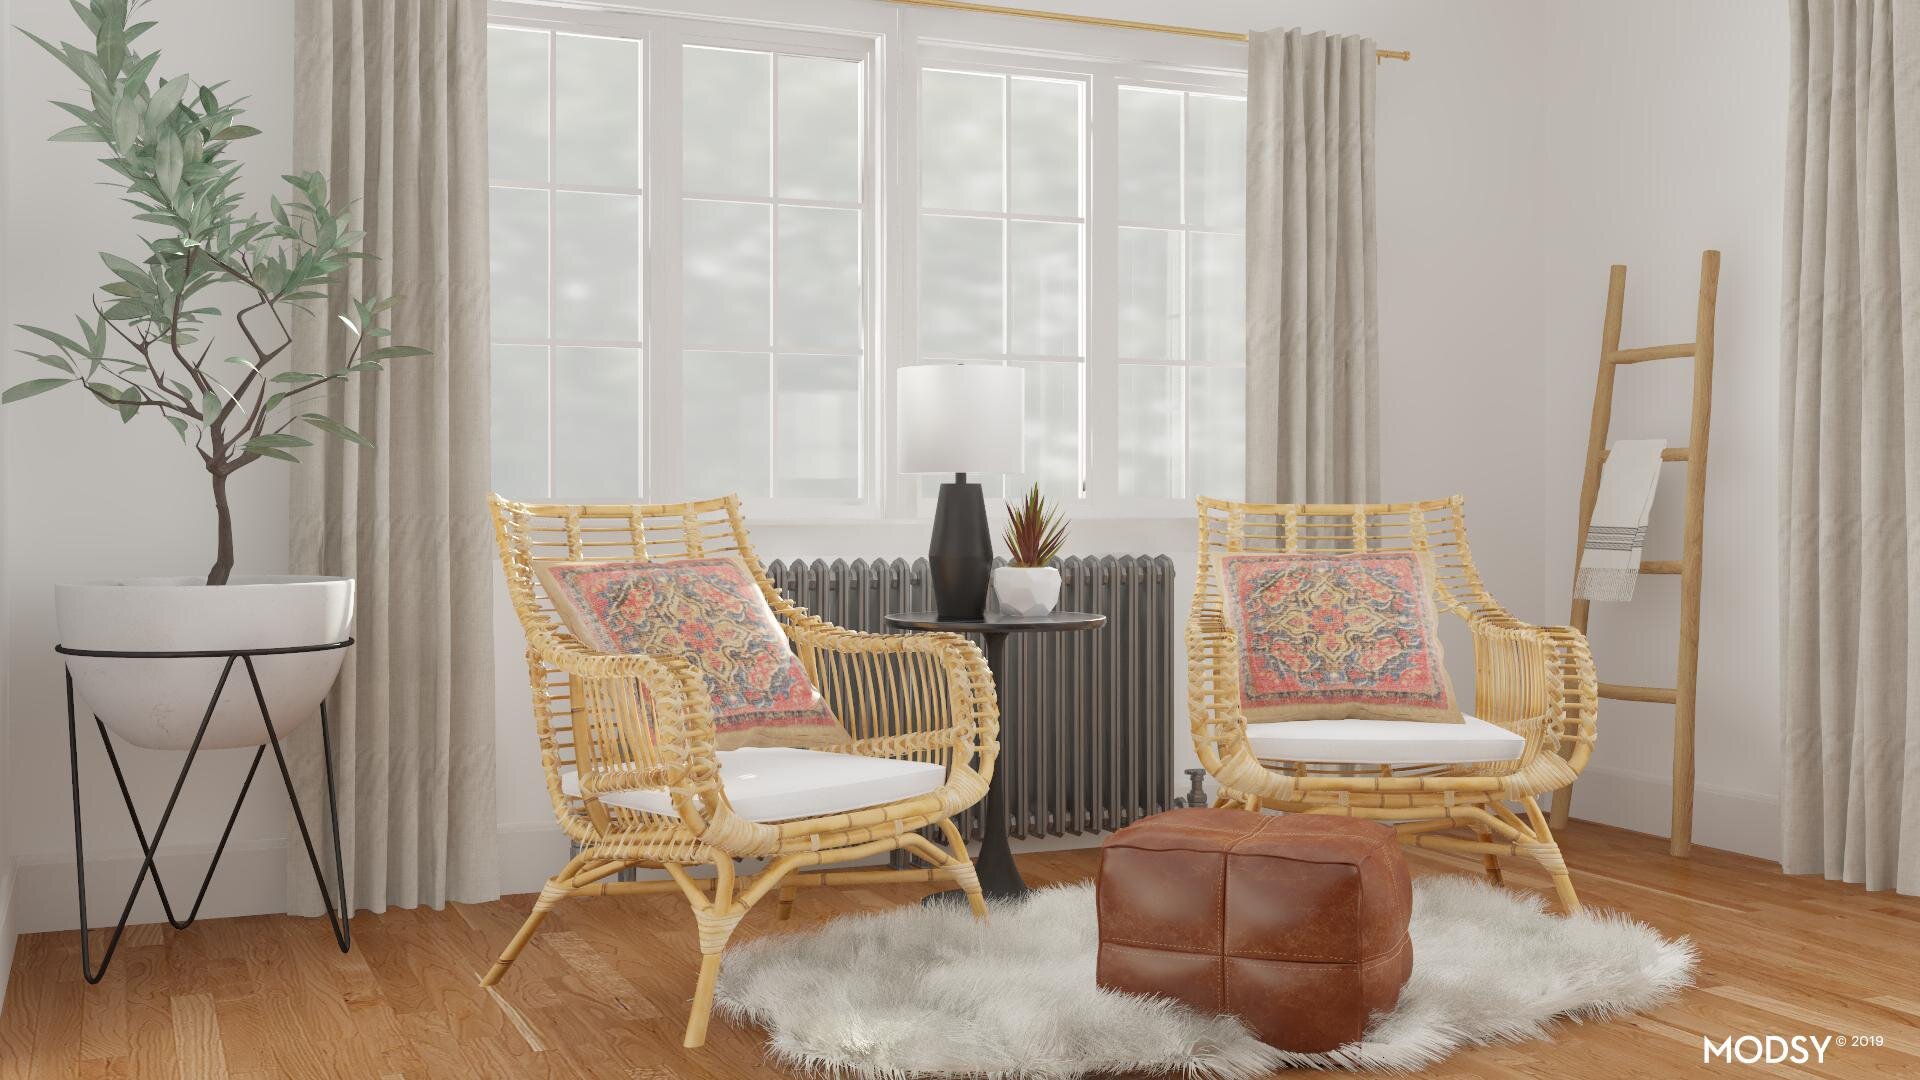
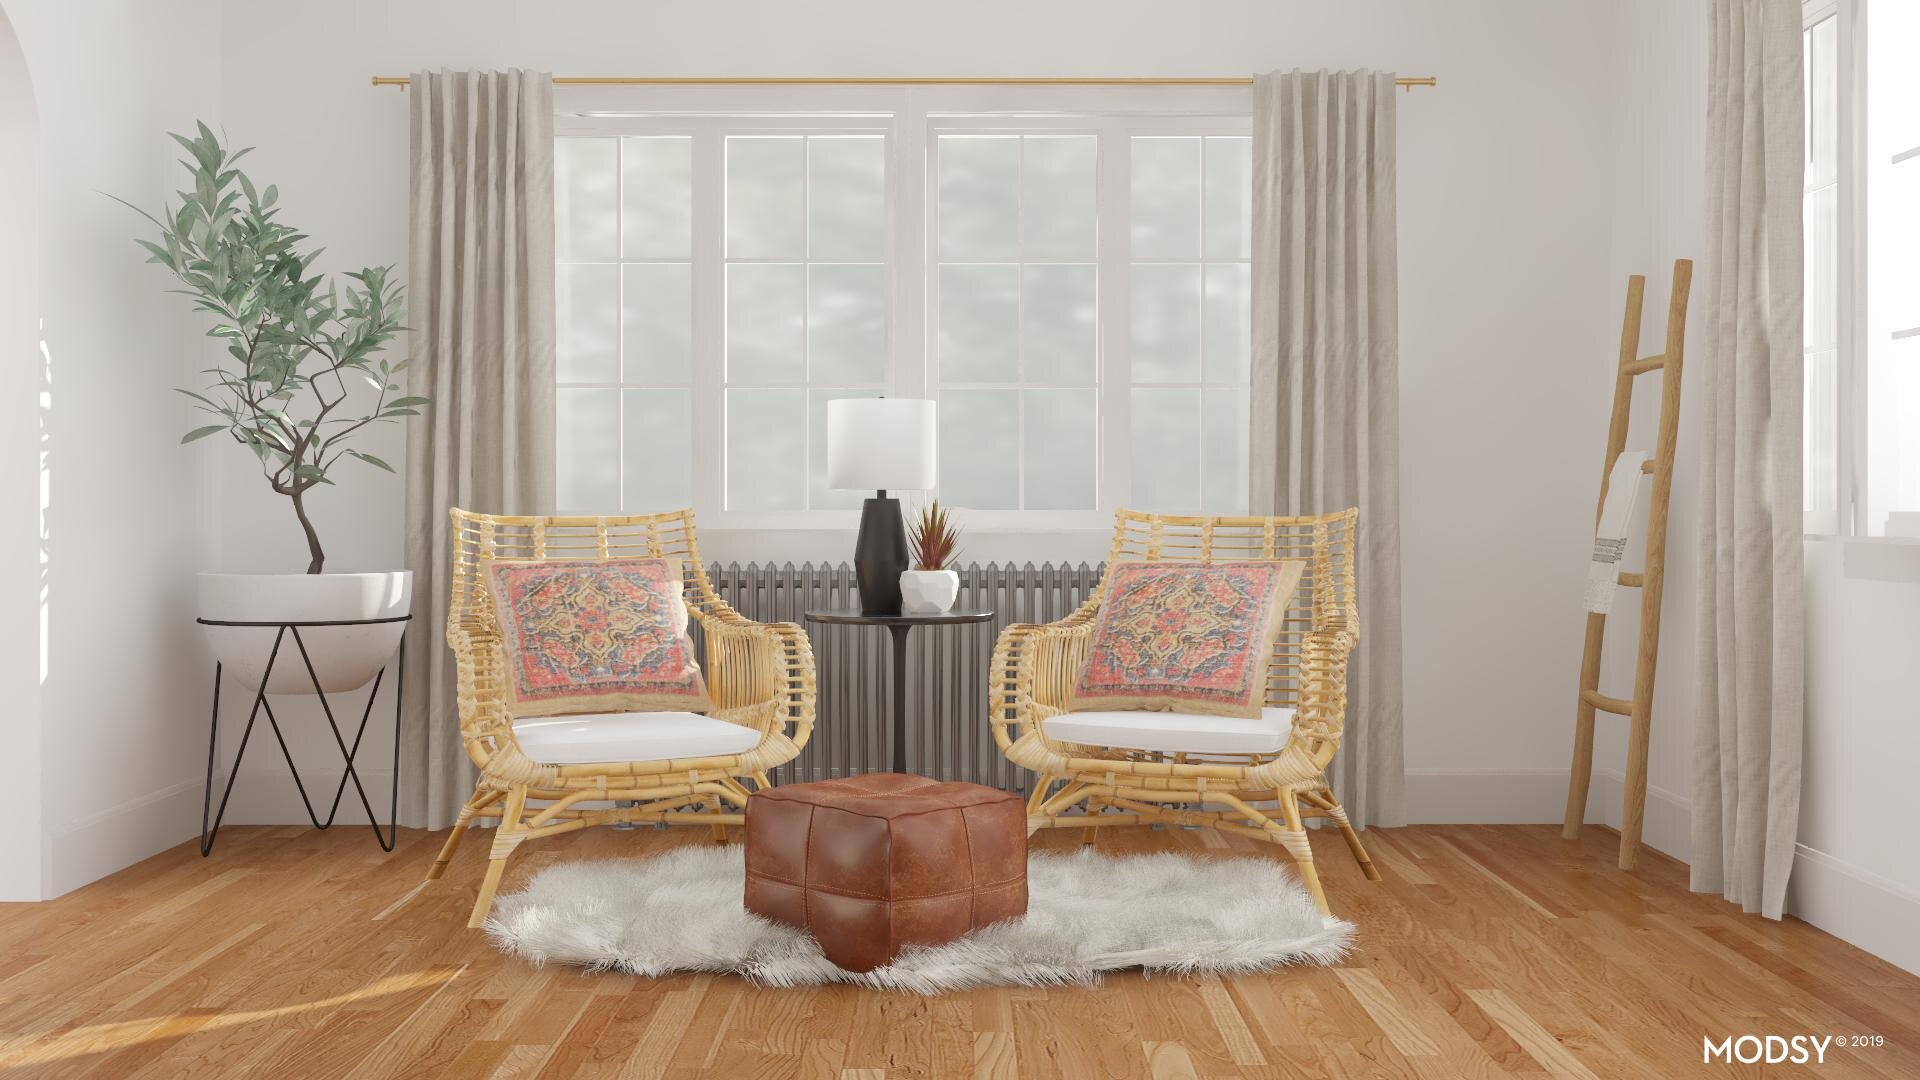
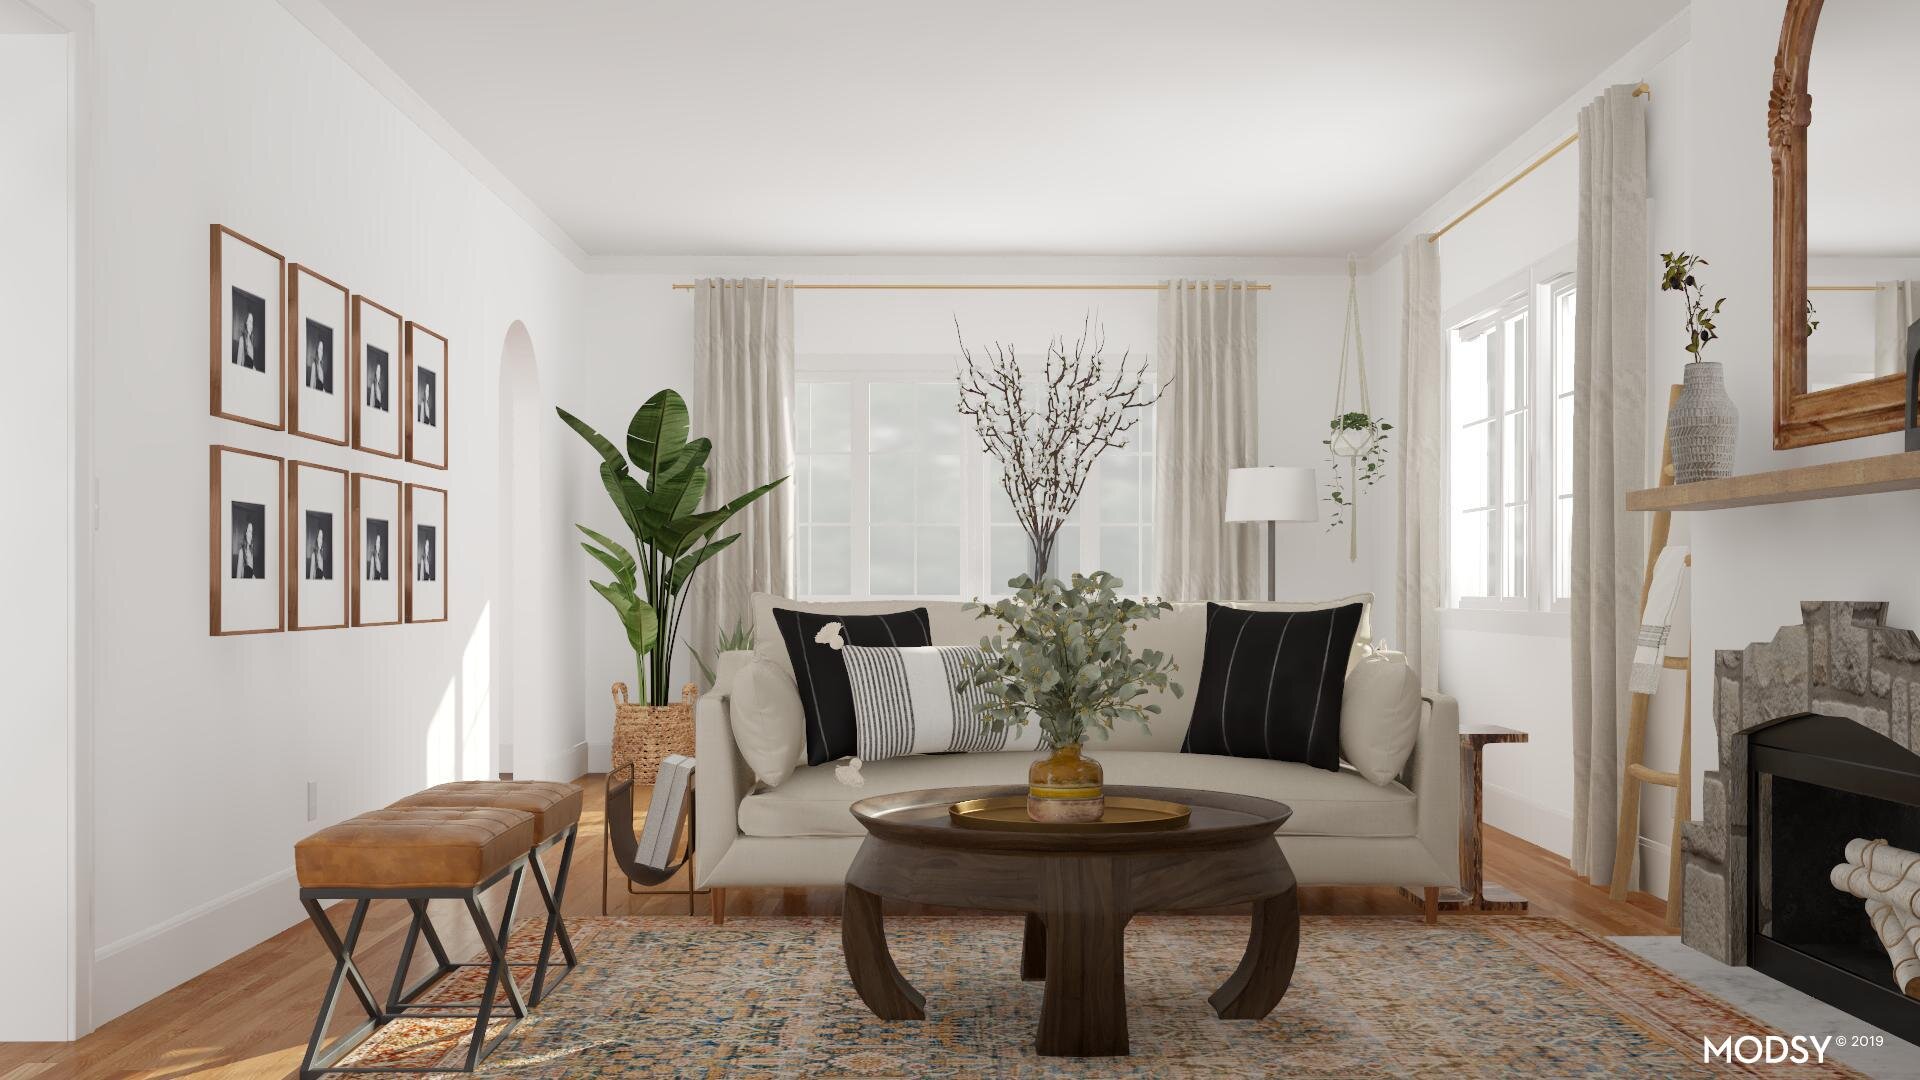
This front area is visible through our row of archways and is the first thing we see when we turn into the living room from the foyer. It is the perfect canvas to paint a stunning view and highlight the beautiful windows that are original to our home. But we also wanted it to be practical for our children to play. To help us optimize the layout, it was important to create an open space with stylish seating for Brian and me.

patticakewagner_crate and barrel_leanne ford.jpg

I’m a firm believer in slowing down and really taking your time when it comes to designing your own home. By breaking up this living room makeover into separate phases, we were able to focus on what was truly important each step of the way. We made sure each purchase aligned with our goals. Experience has taught me that forcing a space design to meet an arbitrary timeline never turns out quite right.

Plus, sometimes life is a bit serendipitous and the perfect piece comes along at just the right time. For this project, that was definitely the case! I’ve had a vision for this space in my mind for a while now, but never felt like I found the right pieces.

So when Crate and Barrel reached out about partnering on our living room makeover, I truly thought I was dreaming!

While our home has traditional architectural elements, I don’t want to be boxed into one style. The right pairing of styles can make all the difference! Crate and Barrel is one of my favorite places to shop for beautifully designed timeless and transitional pieces. Their quality is always incredible and I love their commitment to partnering with artisans and designers around the world. If you haven’t seen their latest collection, a stunning collaboration with star designer Leanne Ford, you need to check it out! .

photo via Crate and Barrel website

Each piece is so gorgeous! Effortlessly cool, edgy, and a bit unexpected, featuring shapes and finishes that are somehow both on-trend and timeless. Like the perfect leather jacket. I’ve shared Leanne a few times on my insta because she’s my designer crush! I swoon over every single one of her projects and did the same for each piece in her collection with Crate and Barrel. She takes minimalism and infuses it with the soul, warmth, and coziness that every home needs.

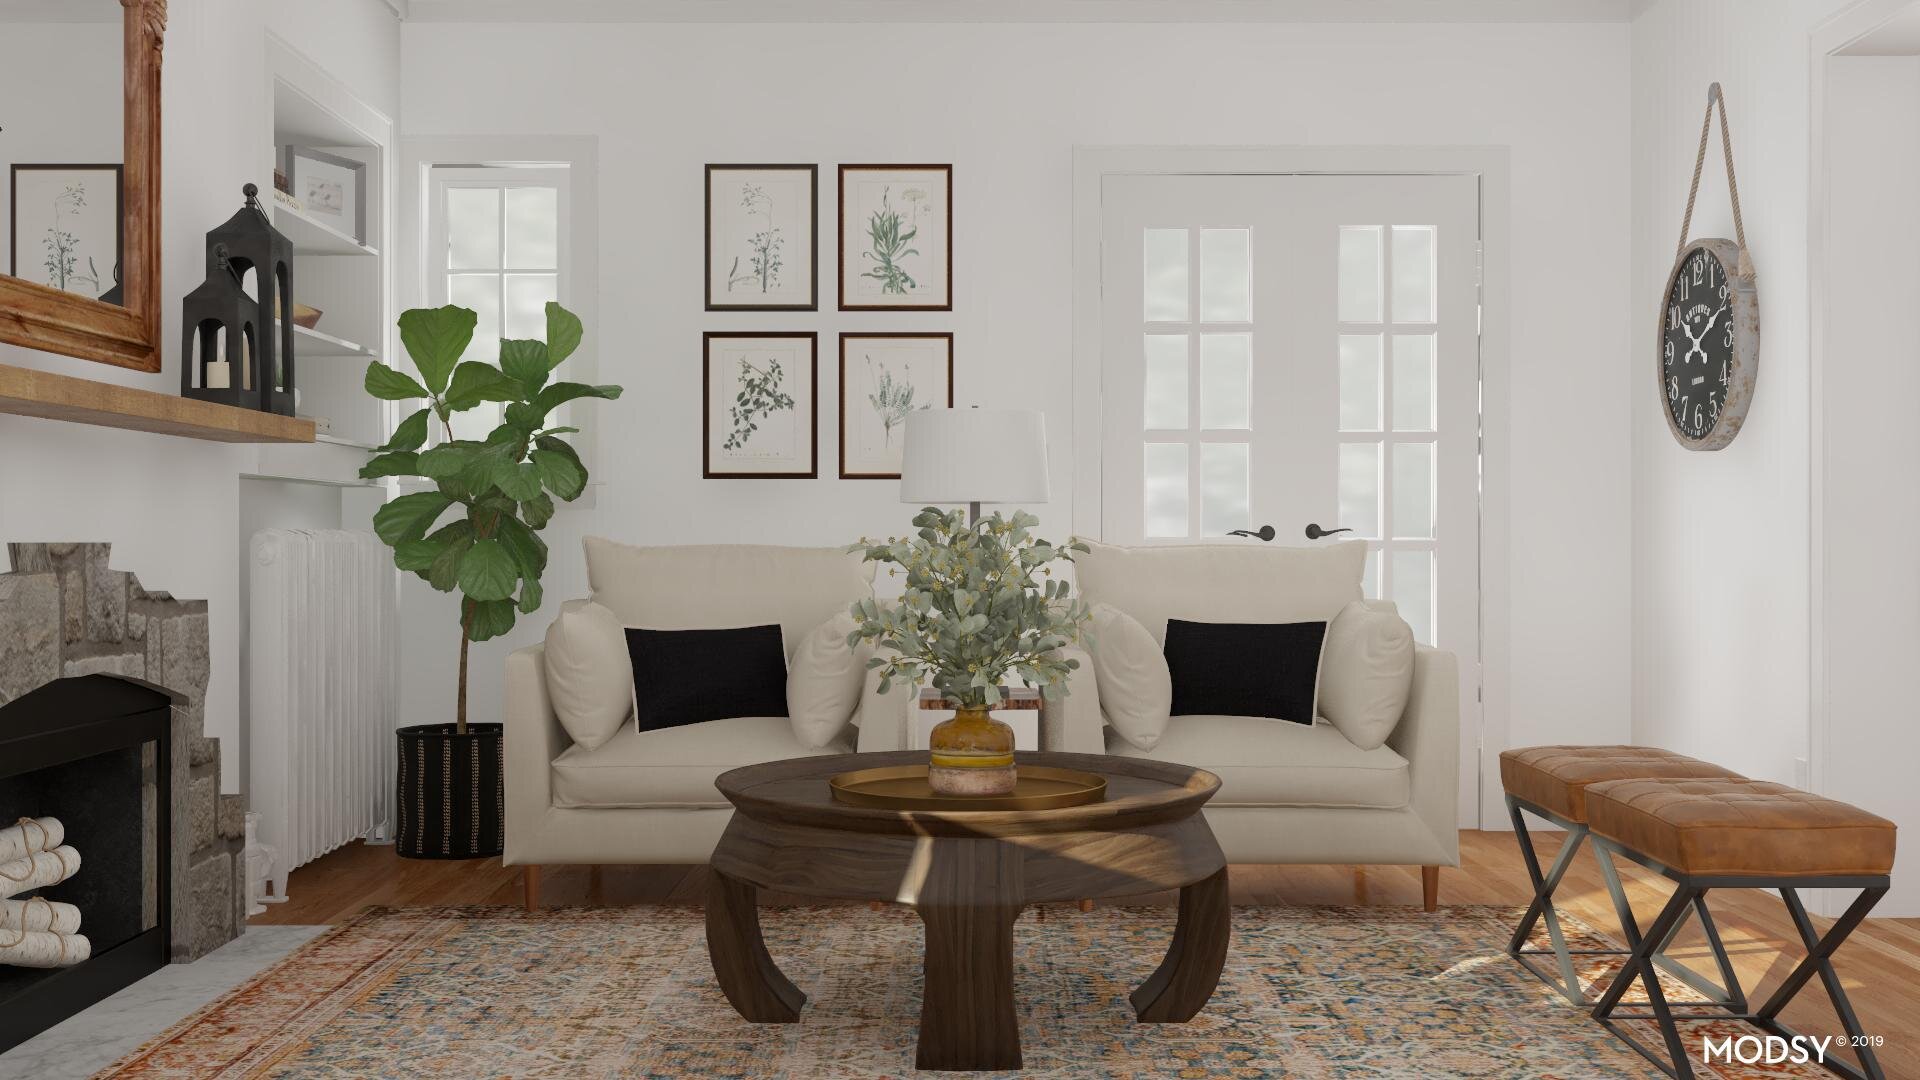
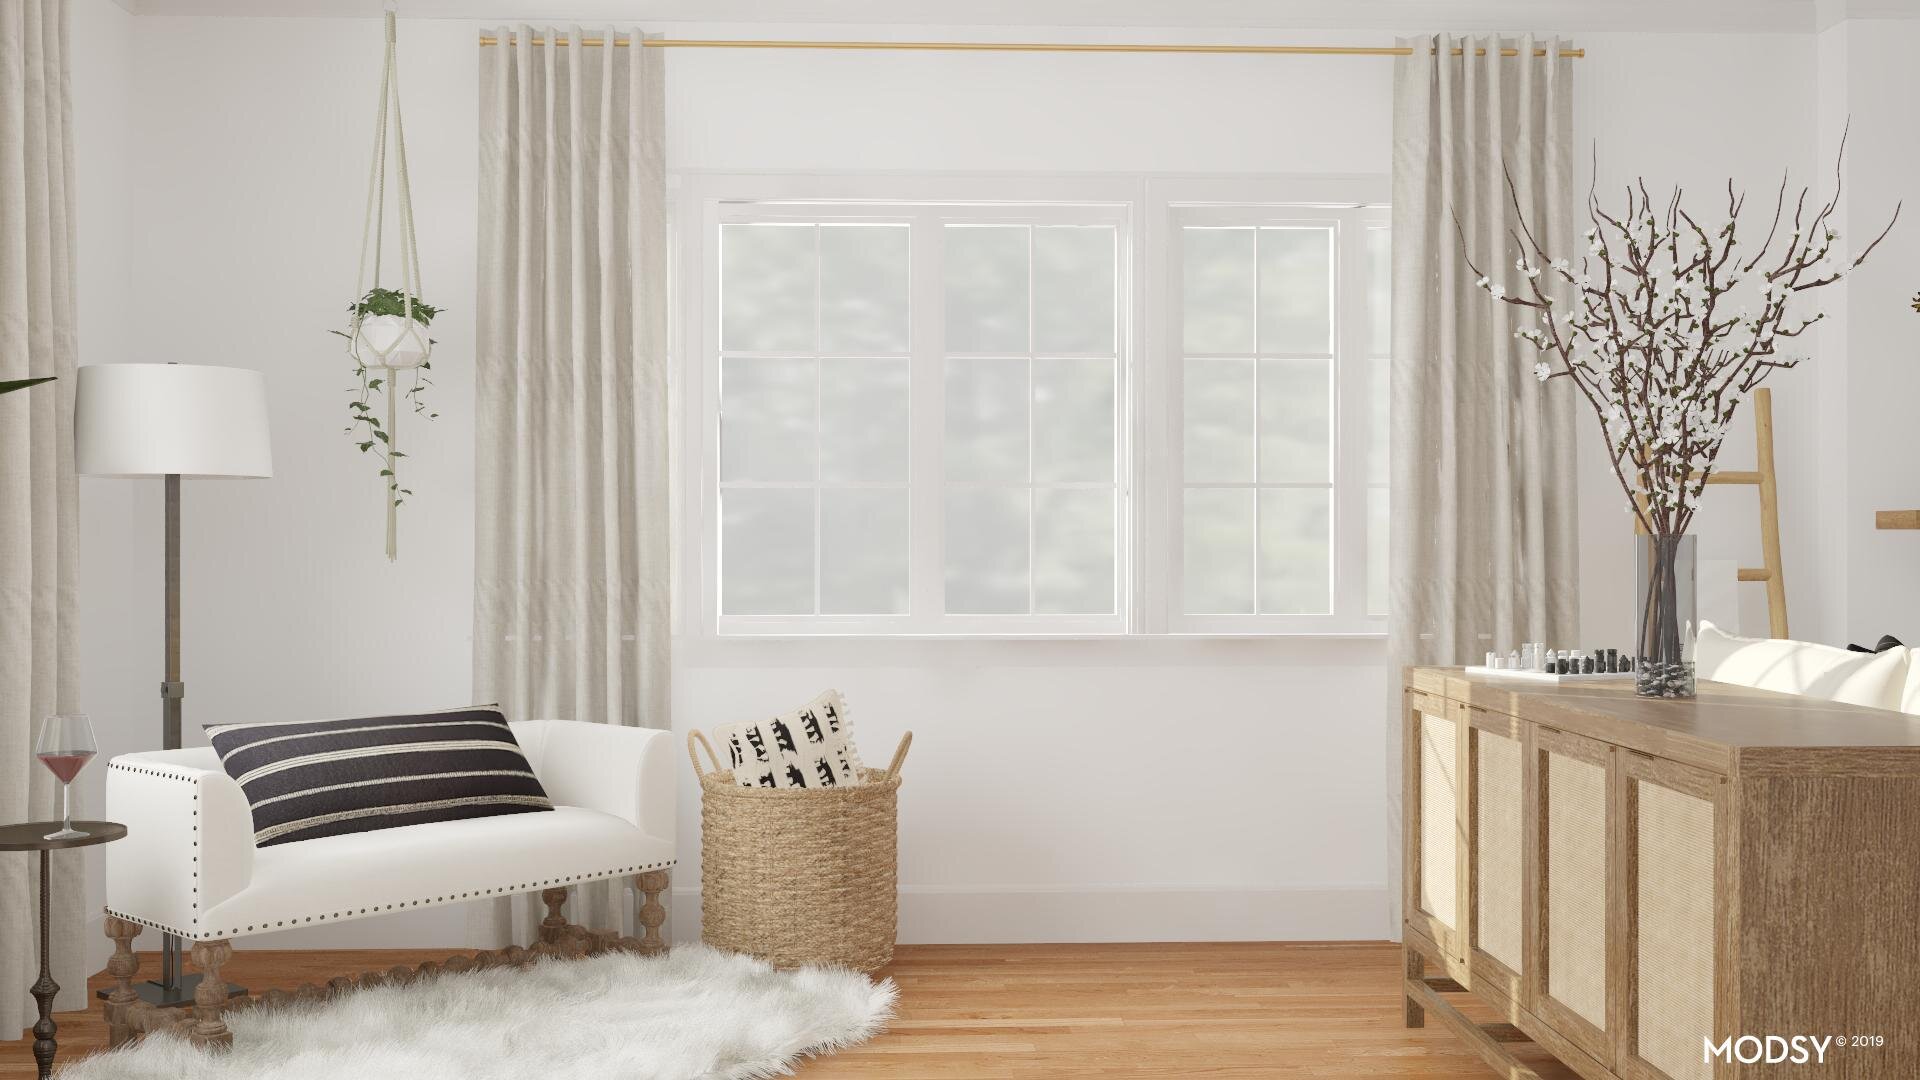
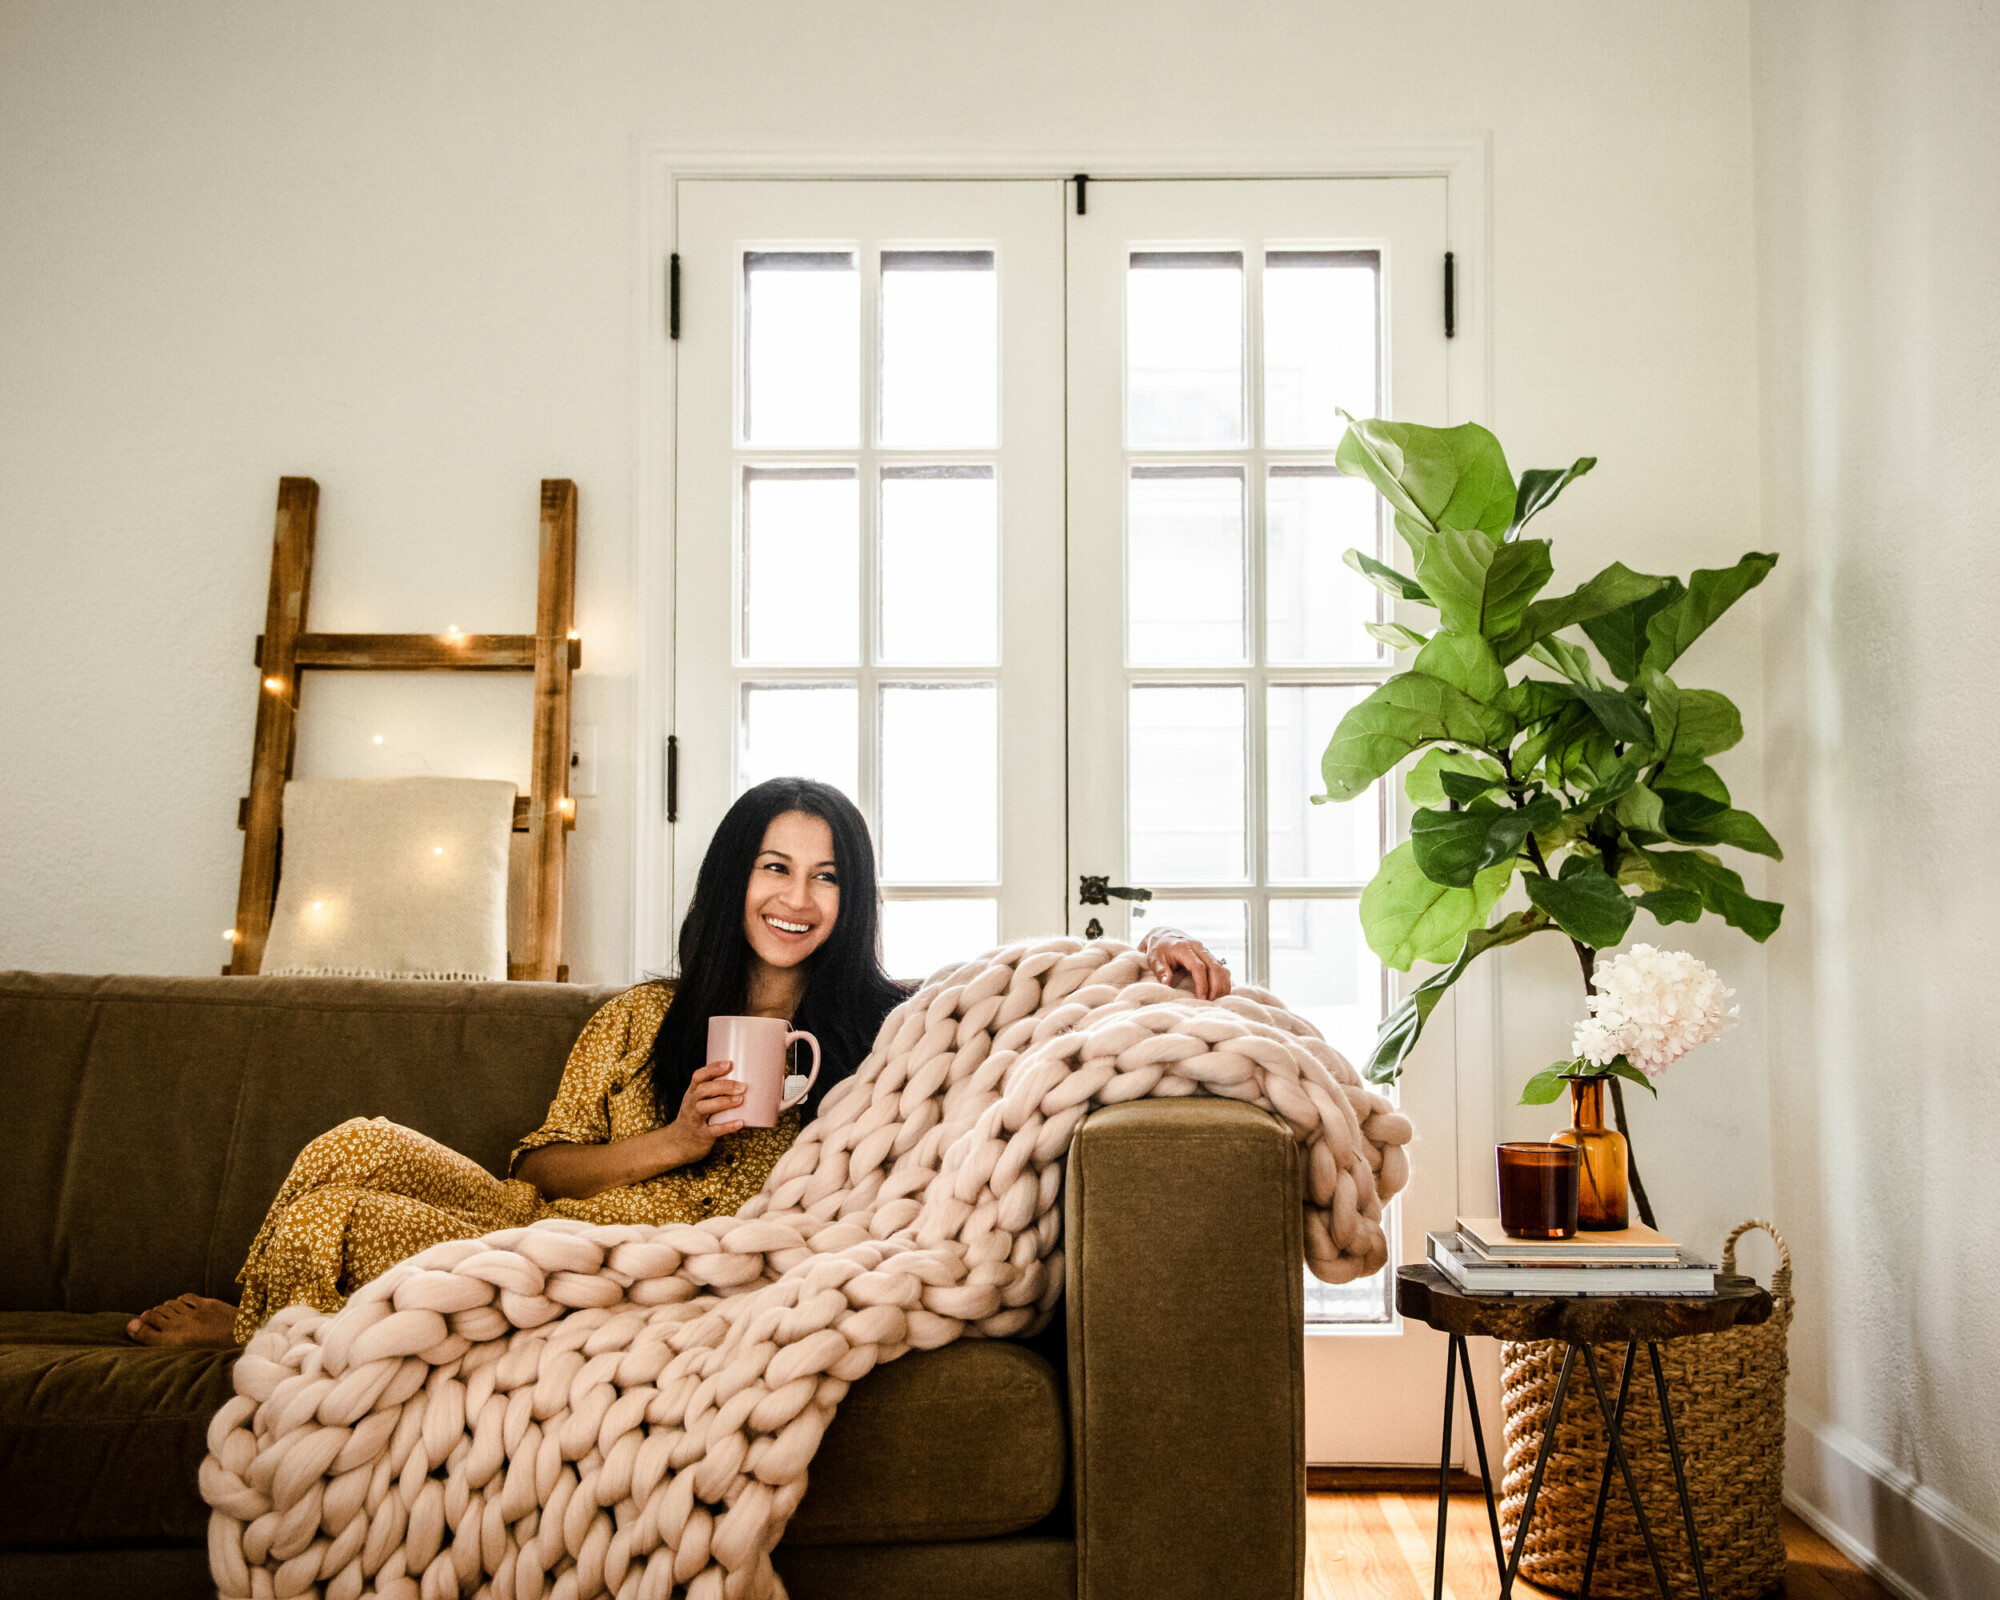
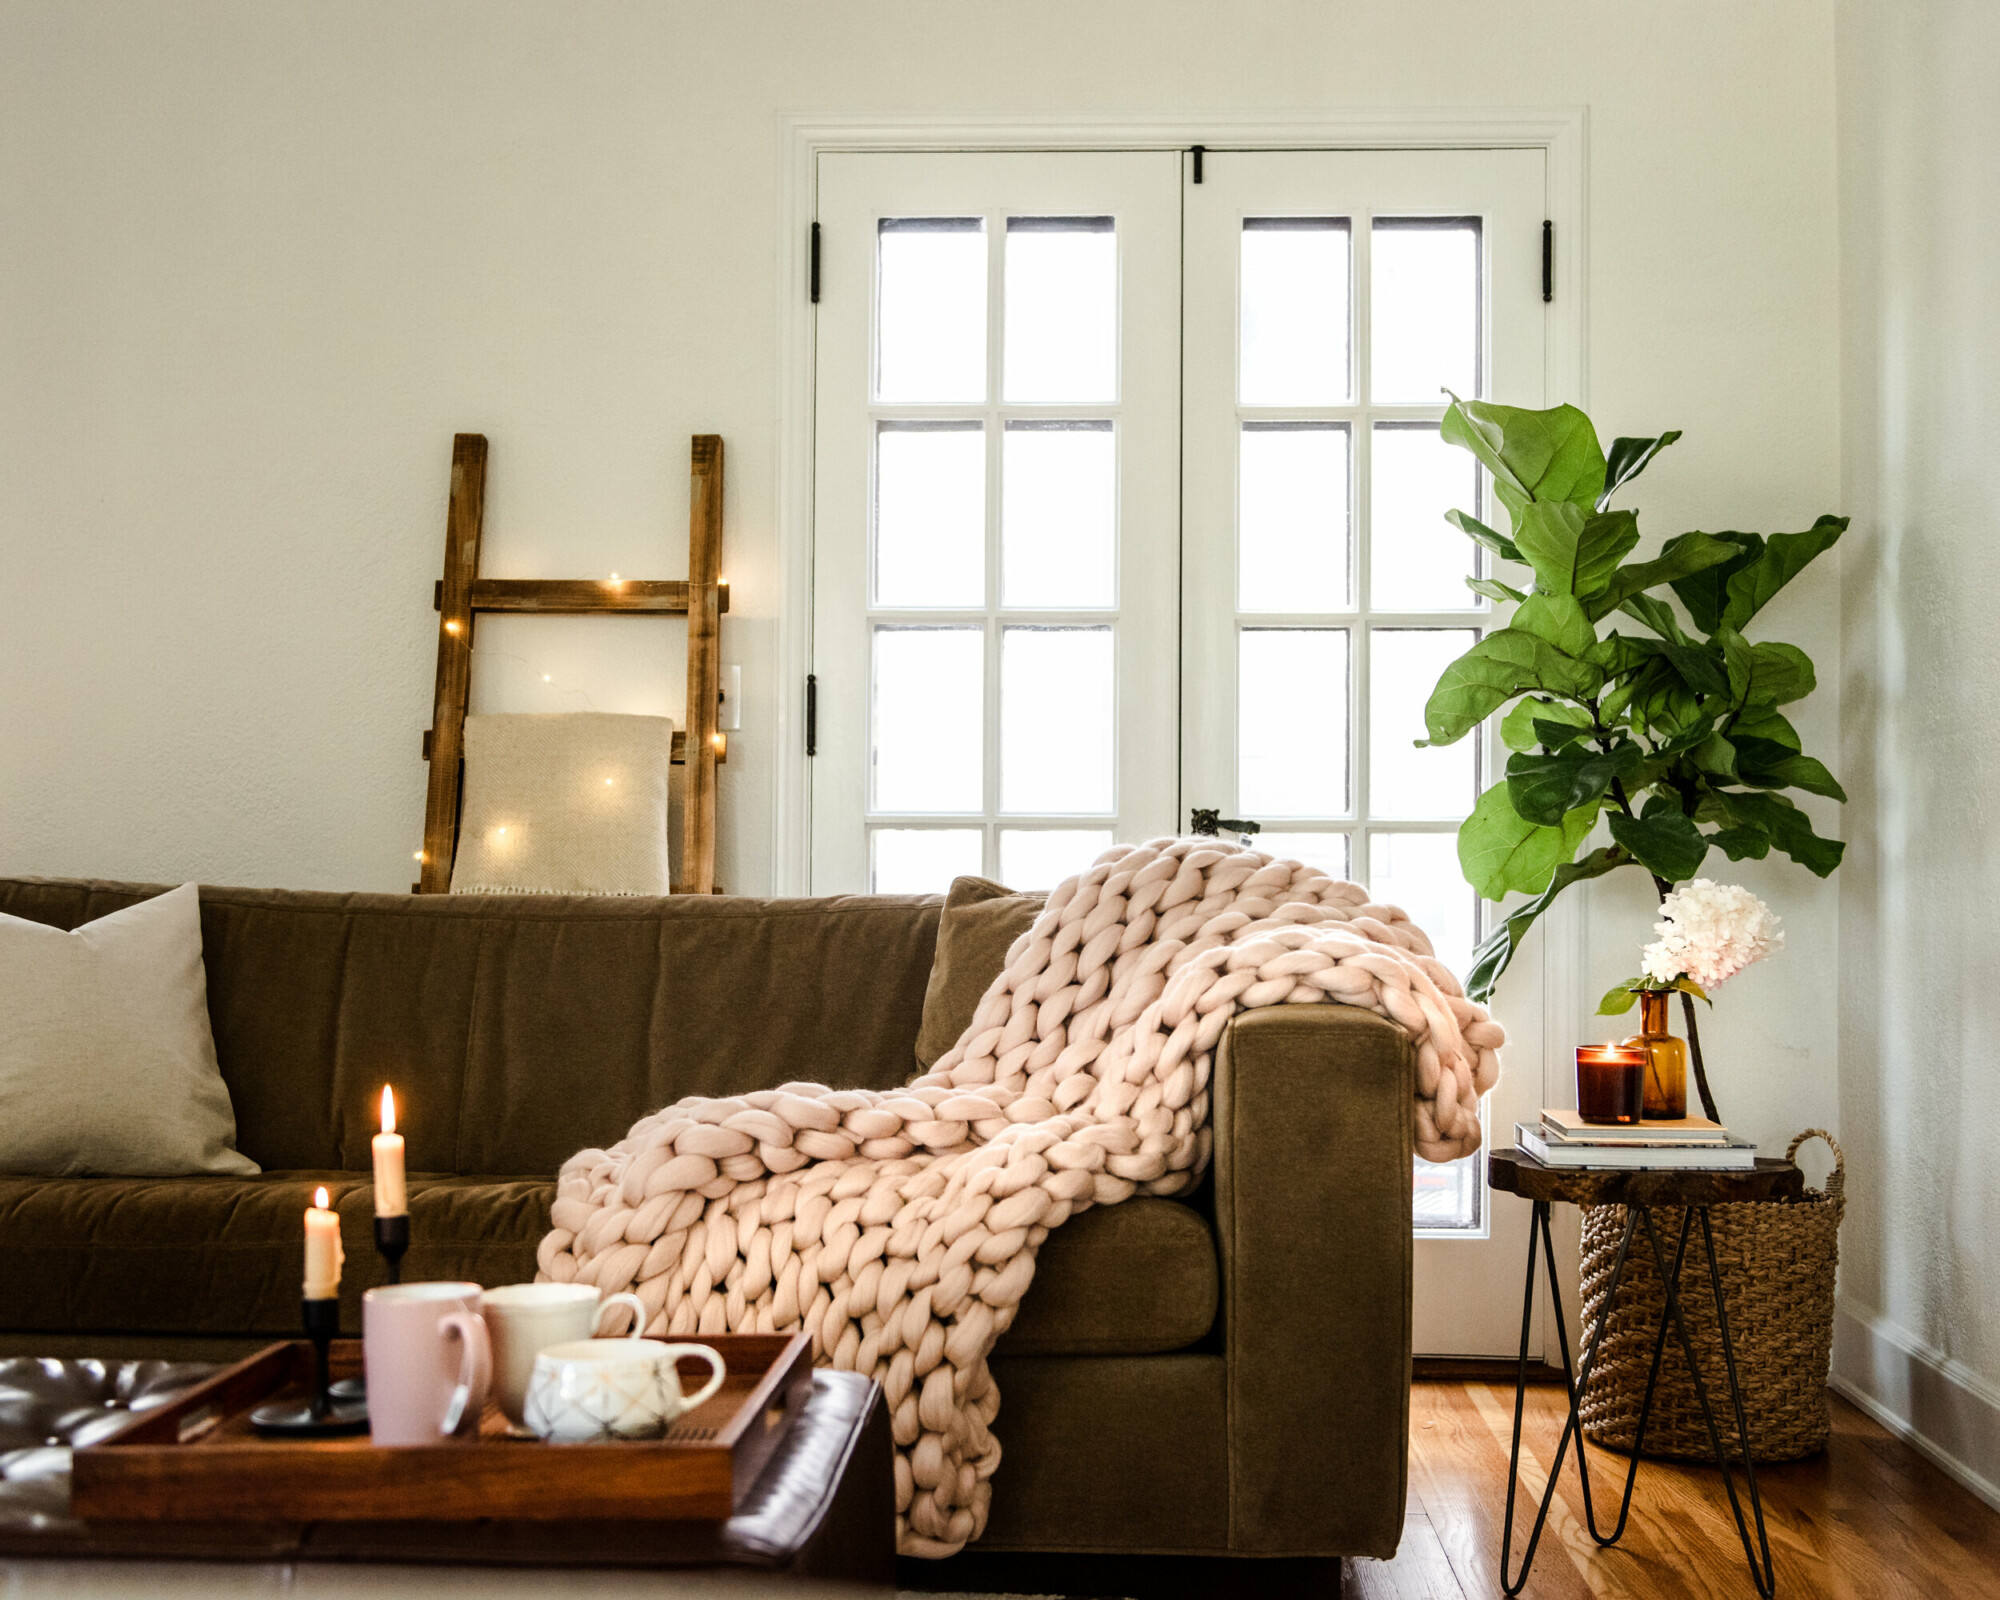
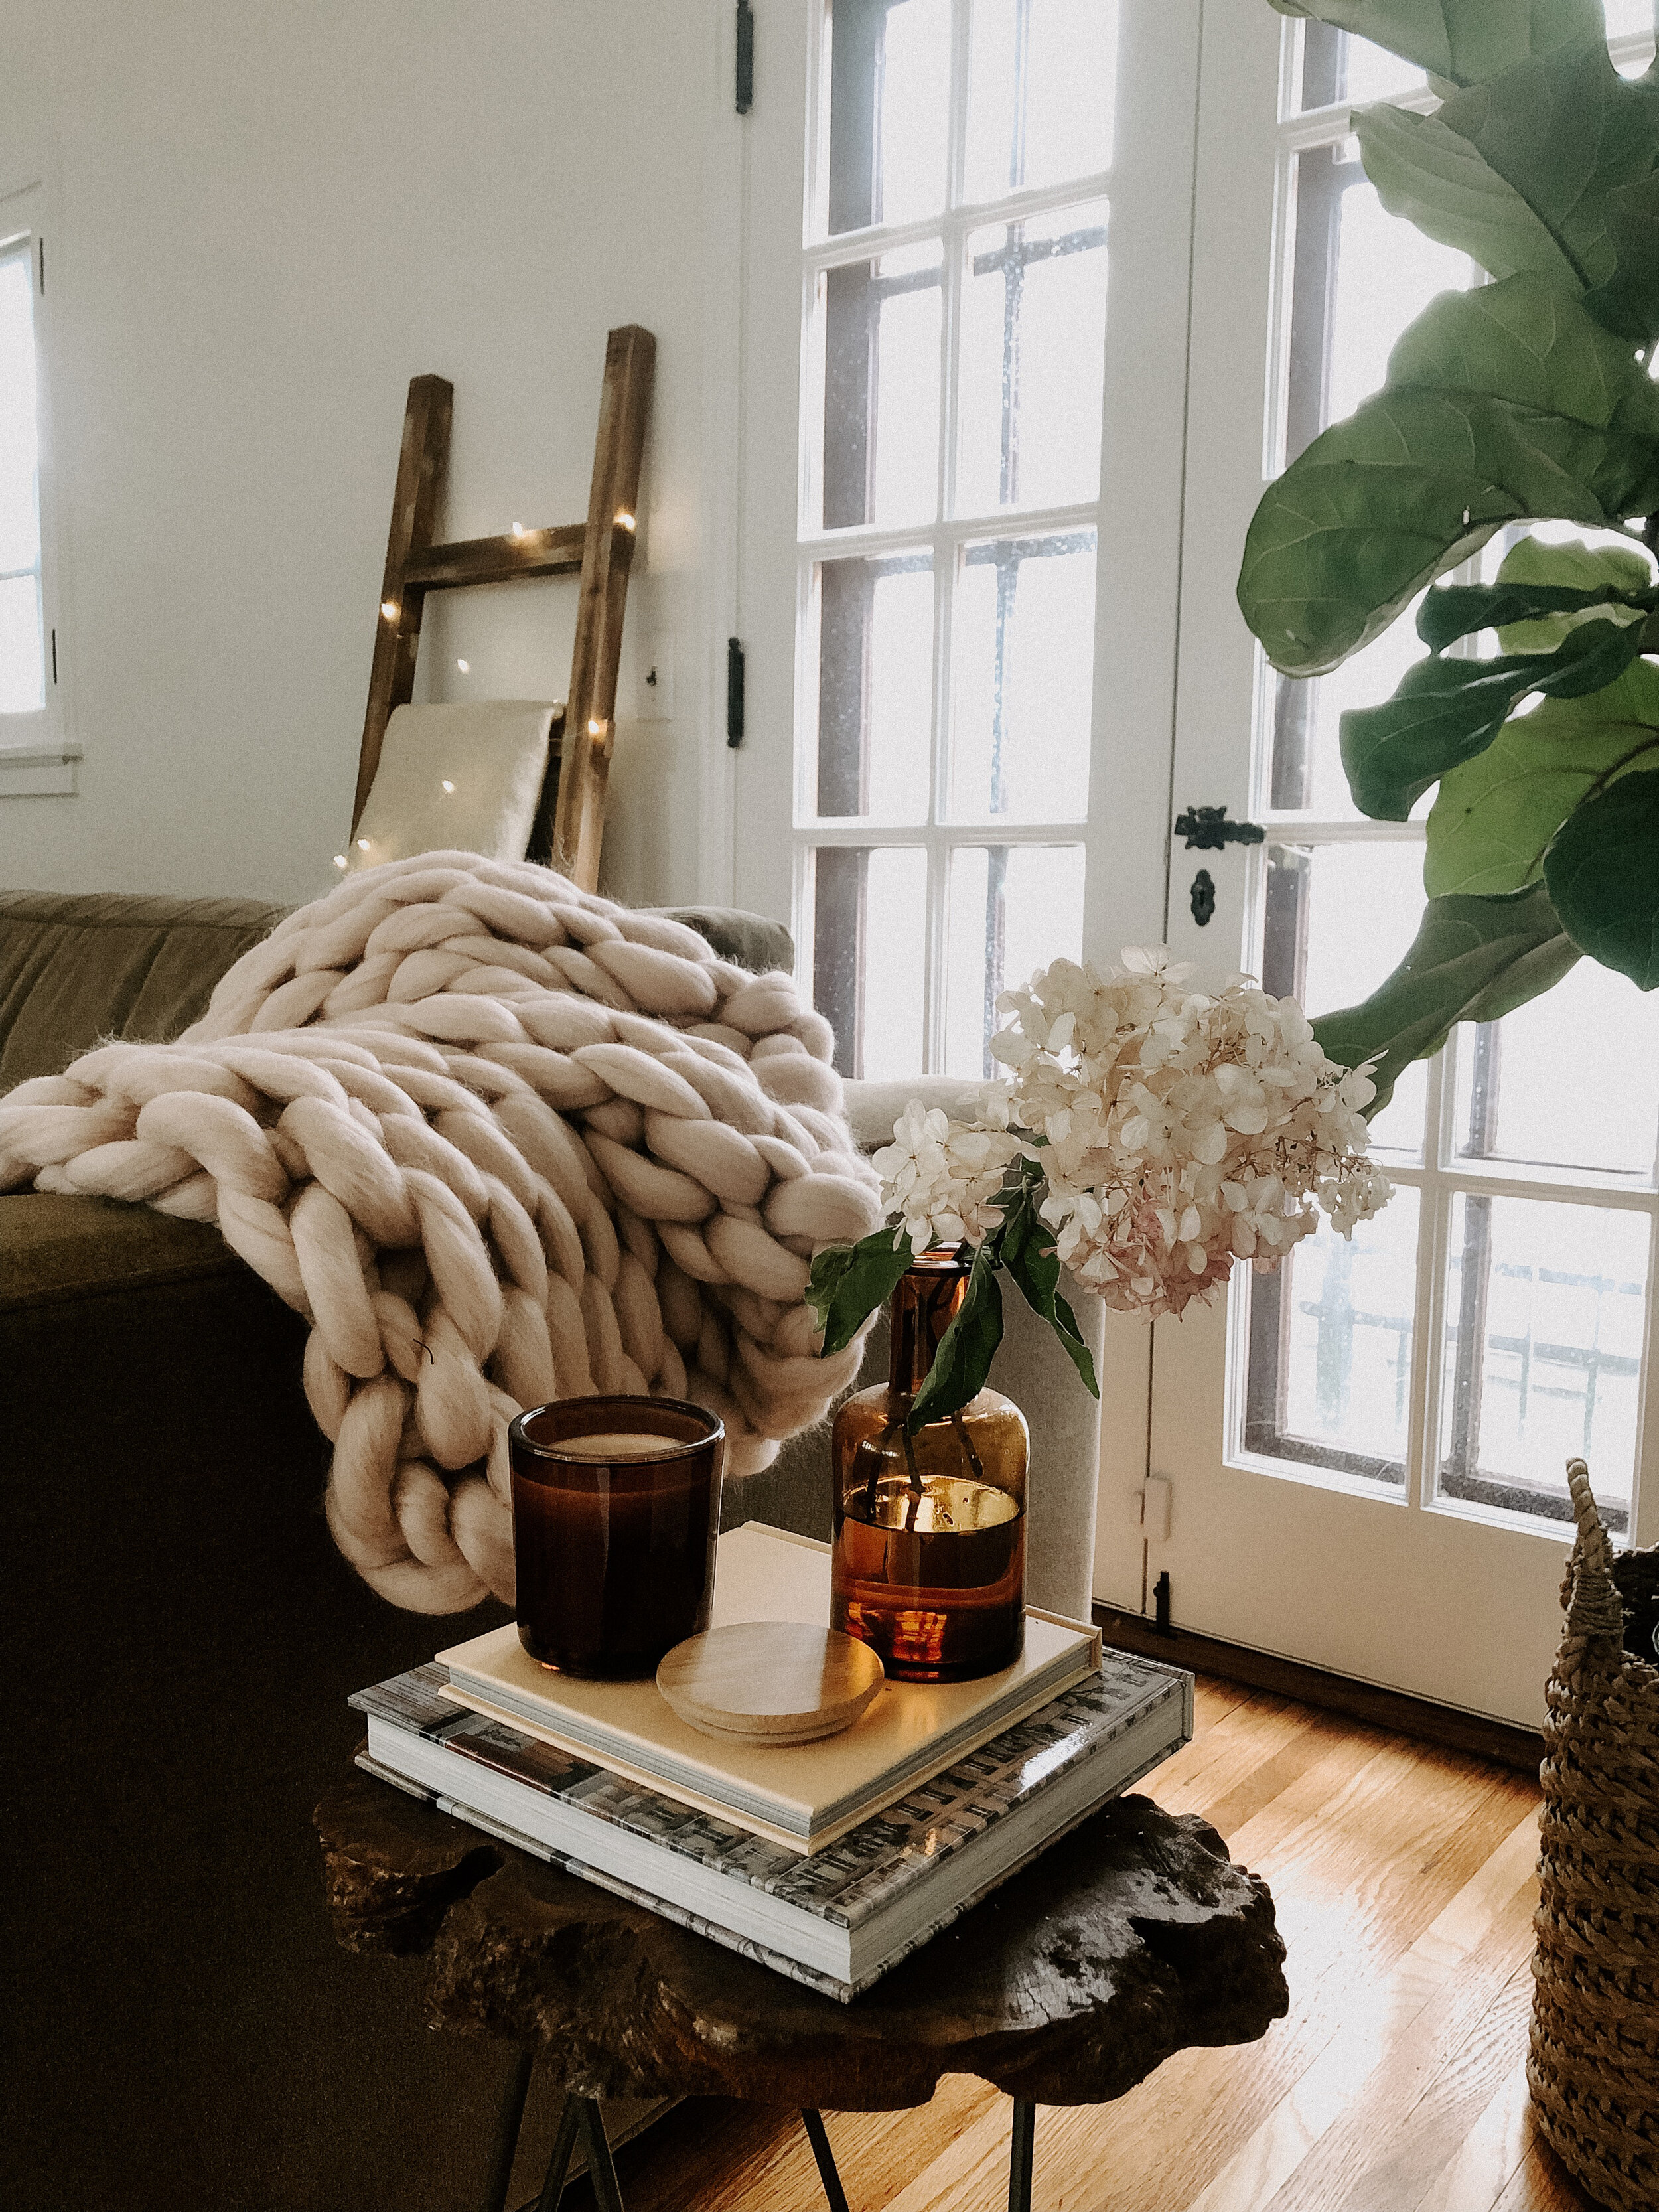
When I saw these curved cane back chairs, I knew immediately that their balance of traditional and contemporary style was exactly what our living room had been waiting for. They feel sophisticated and I love how the Austine Pillows complement its blonde wood and white fabric. Plus, the curved back creates the perfect cocoon for curling up with one of my kiddos and reading their favorite book. We tossed this super-soft yet nicely weighted throw blanket over the arm for some snuggly texture (and because we’re not quite done with chilly weather here in Minnesota).

Fields Accent Chair; Sand Fringe Throw; Ella White Candle
Fields Accent Chair; Sand Fringe Throw (NA but similar one here); Ella White Candle (NA); natural wood bunching tables (NA but similar one here); dried craspedia bunch

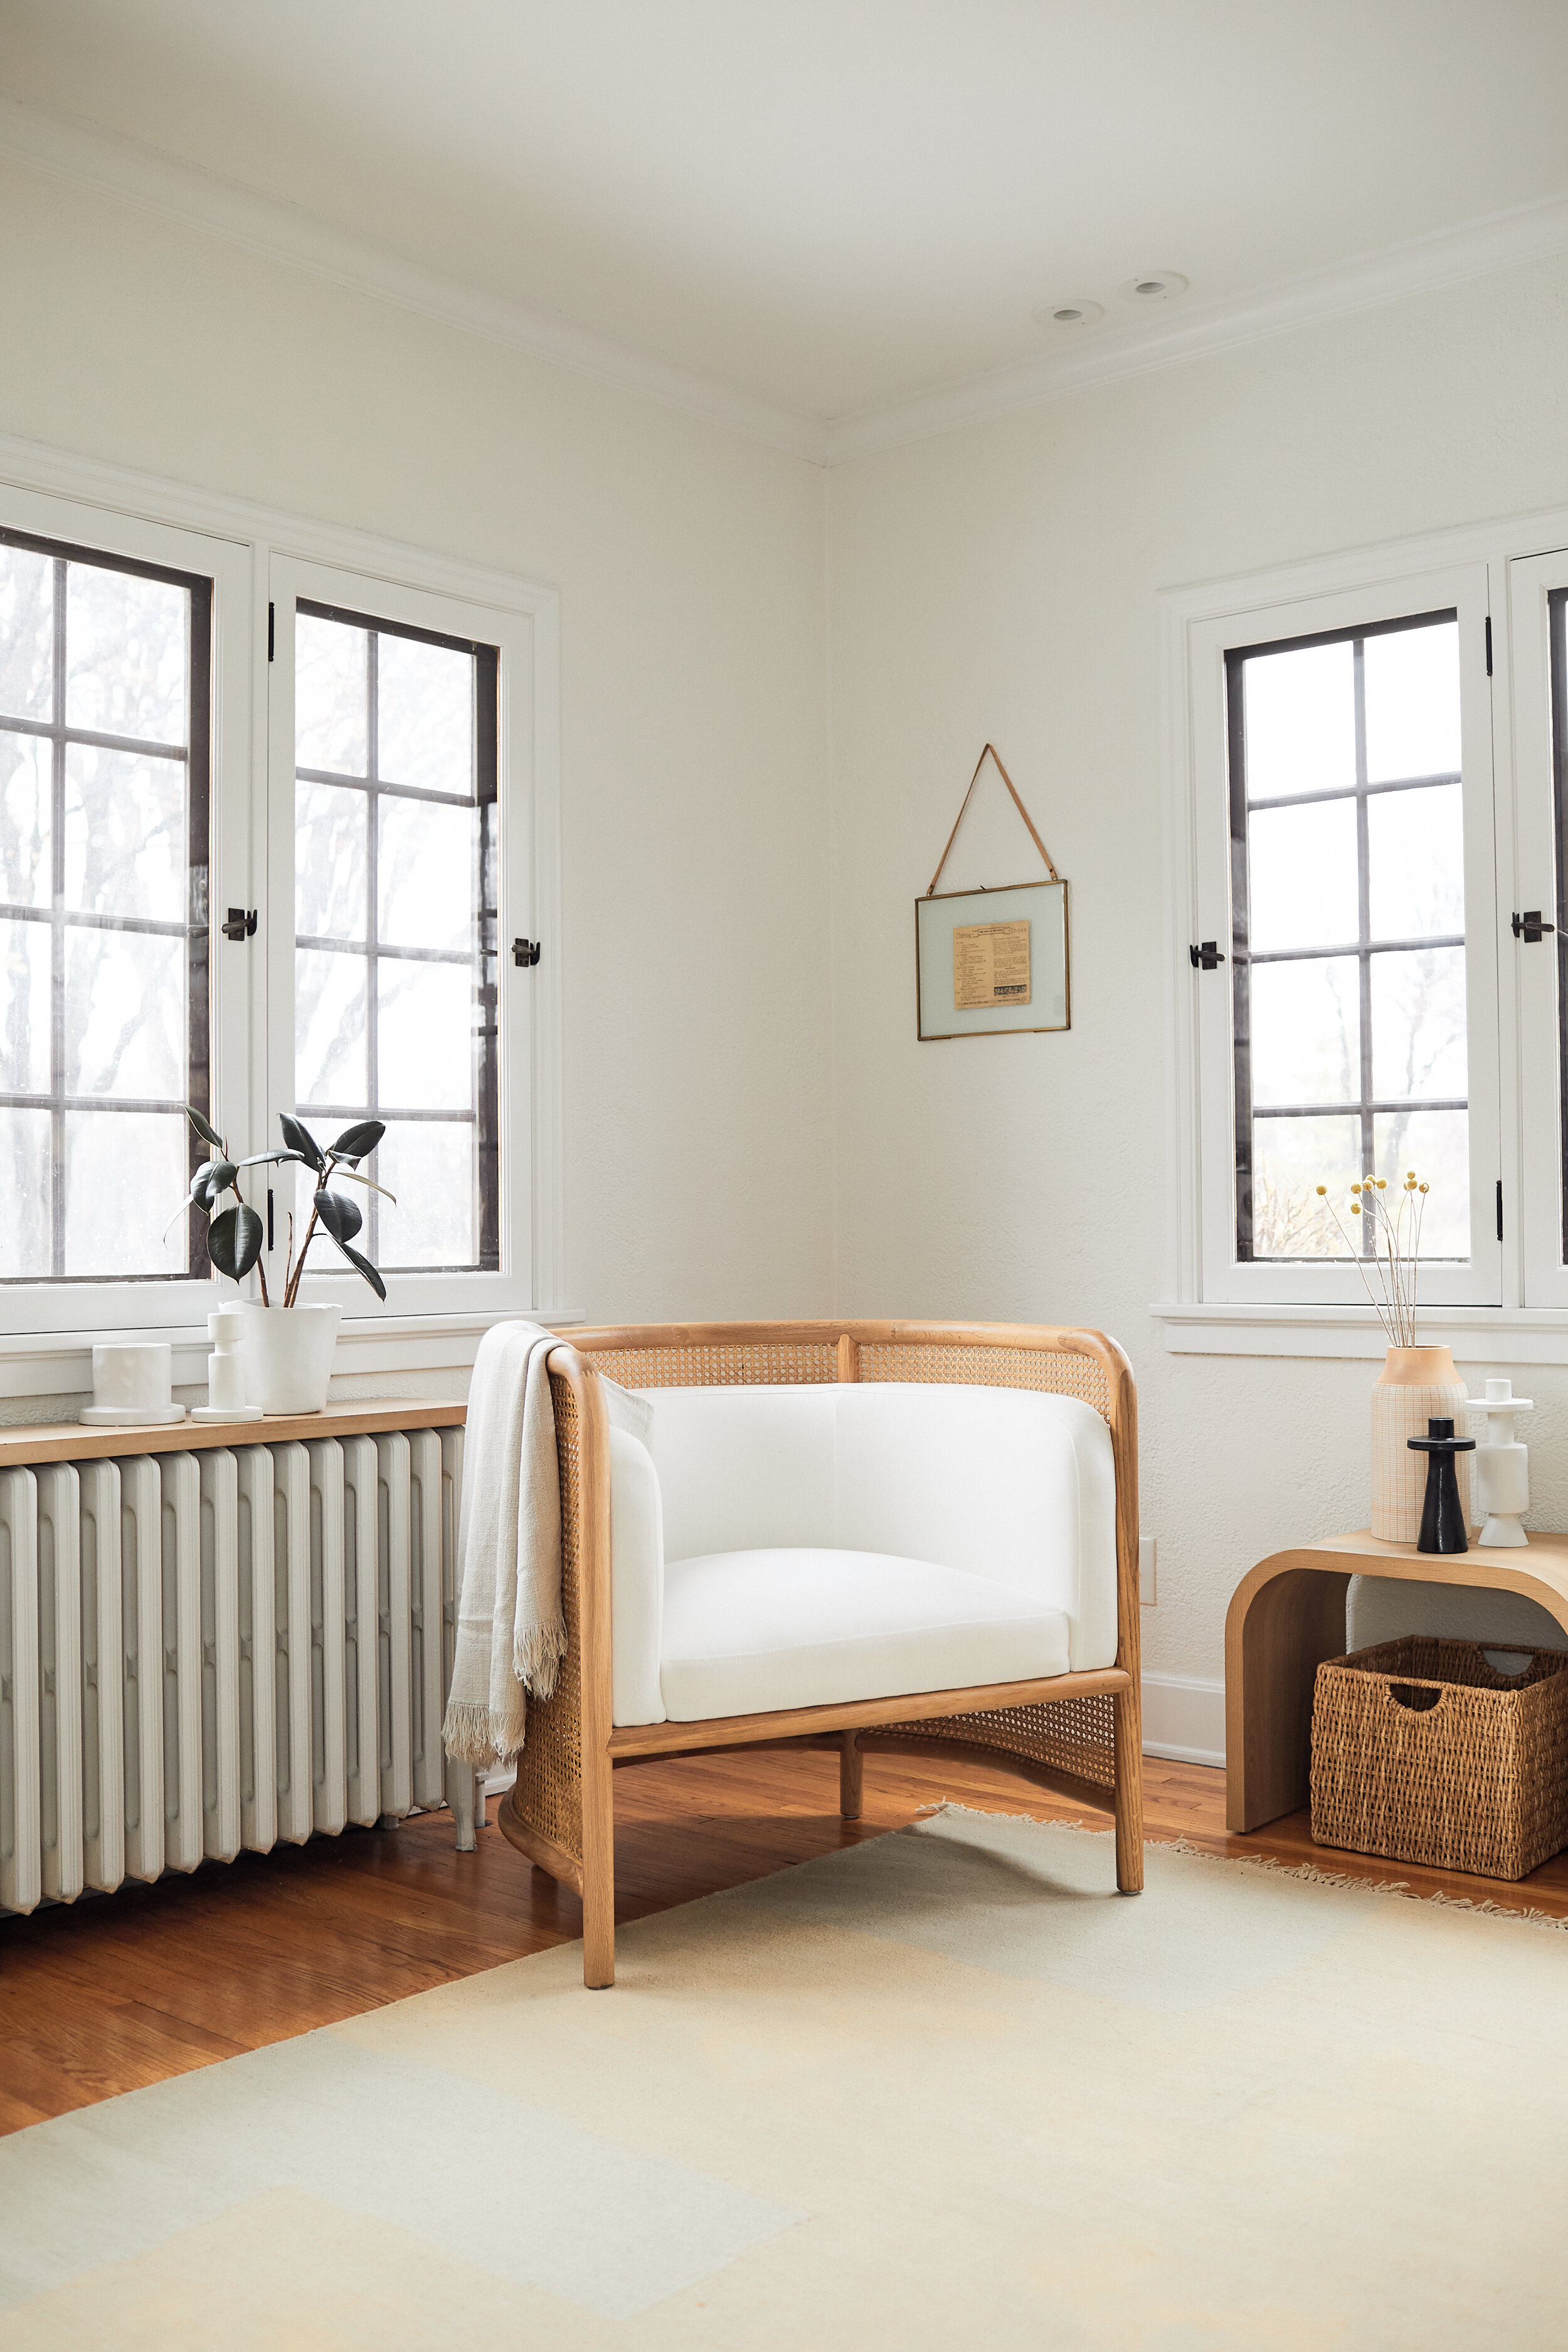
Every seating area needs a table or two for holding your coffee and styling a little vignette – bonus points if you can store baskets underneath. Because our goal was an open space, a traditional coffee table wasn’t going to work. These natural wood bunching tables (NA but similar one here) are the magical unicorn of end tables!

Happy Bunching Table; Primitive Vases; Full Moon Vase
Happy Bunching Table (NA – similar one here); dried craspedia bunch; Primitive Vases; Full Moon Vase

They’re sturdy yet lightweight and versatile, from a console against the wall to individual side tables beside each chair, or an unexpected coffee table in between. The rounded corners make them kid-friendly and I LOVE stashing these coordinating baskets underneath to corral a few toys and games. For effortlessly chic styling, we chose the Clay Full Moon Vase, the Soto White Wood Vase filled with dried Craspedia Bunch, and the Primitive Vases. I love how the different shapes and materials work together for added texture.

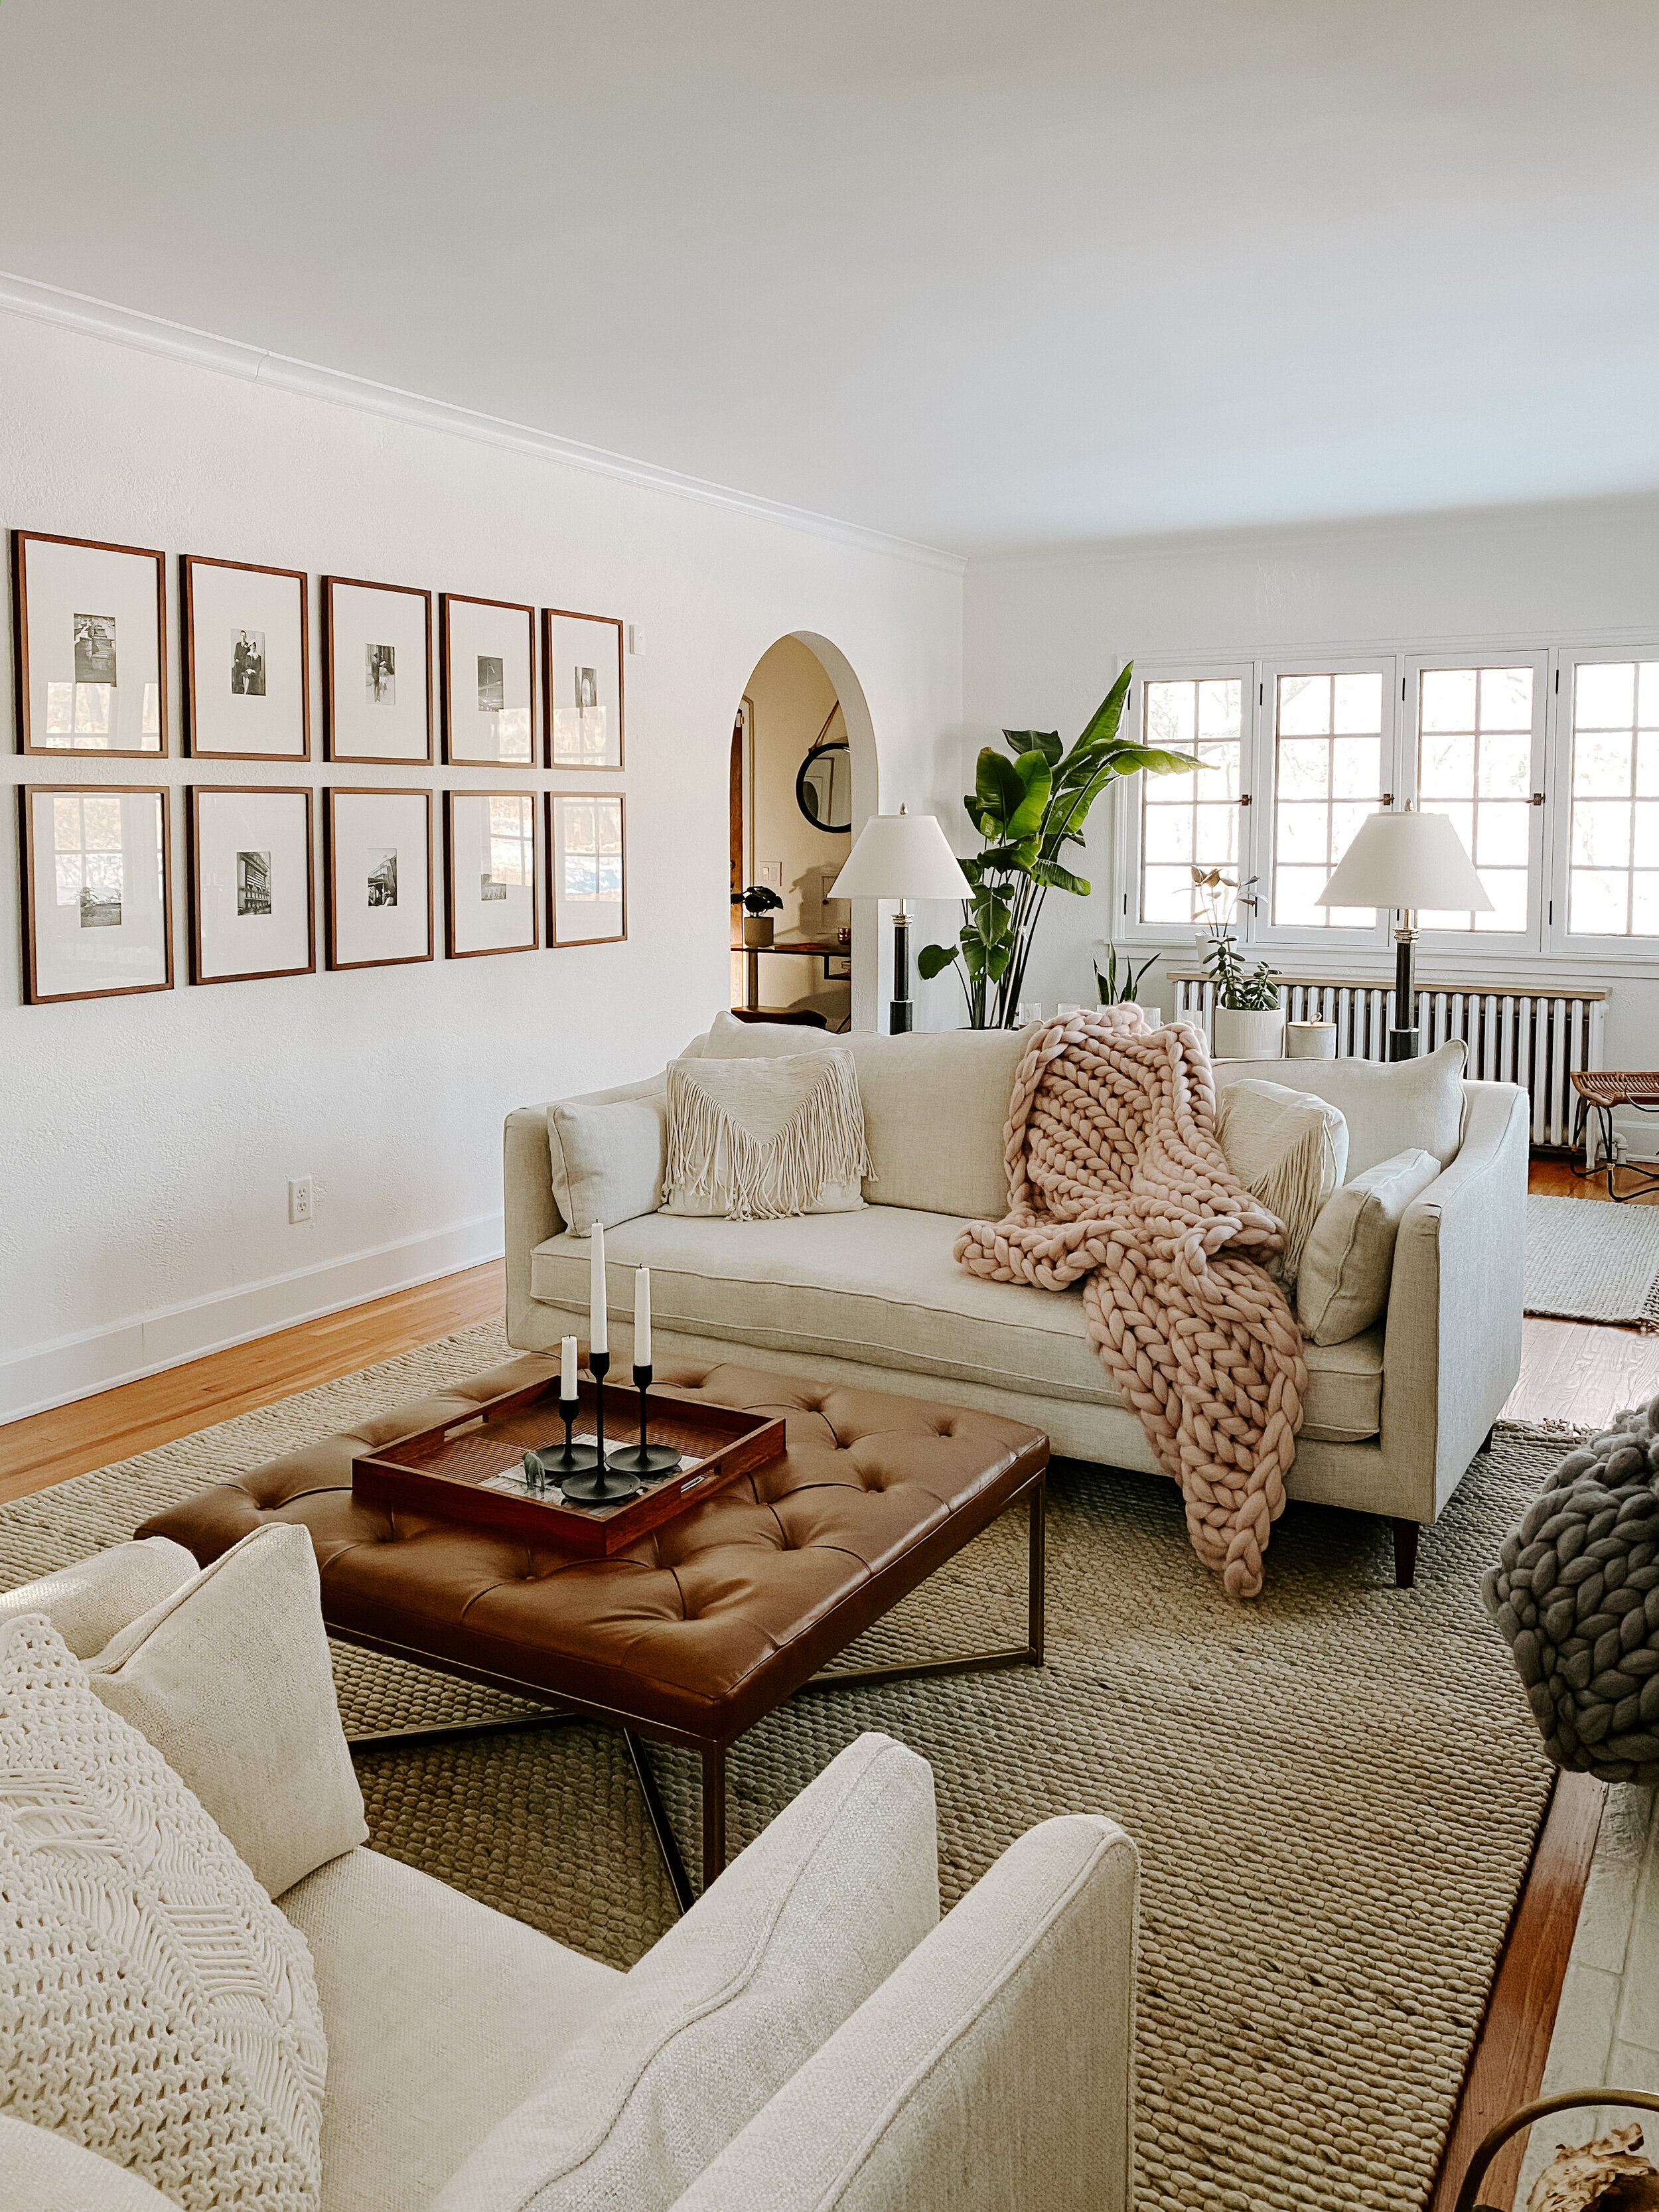
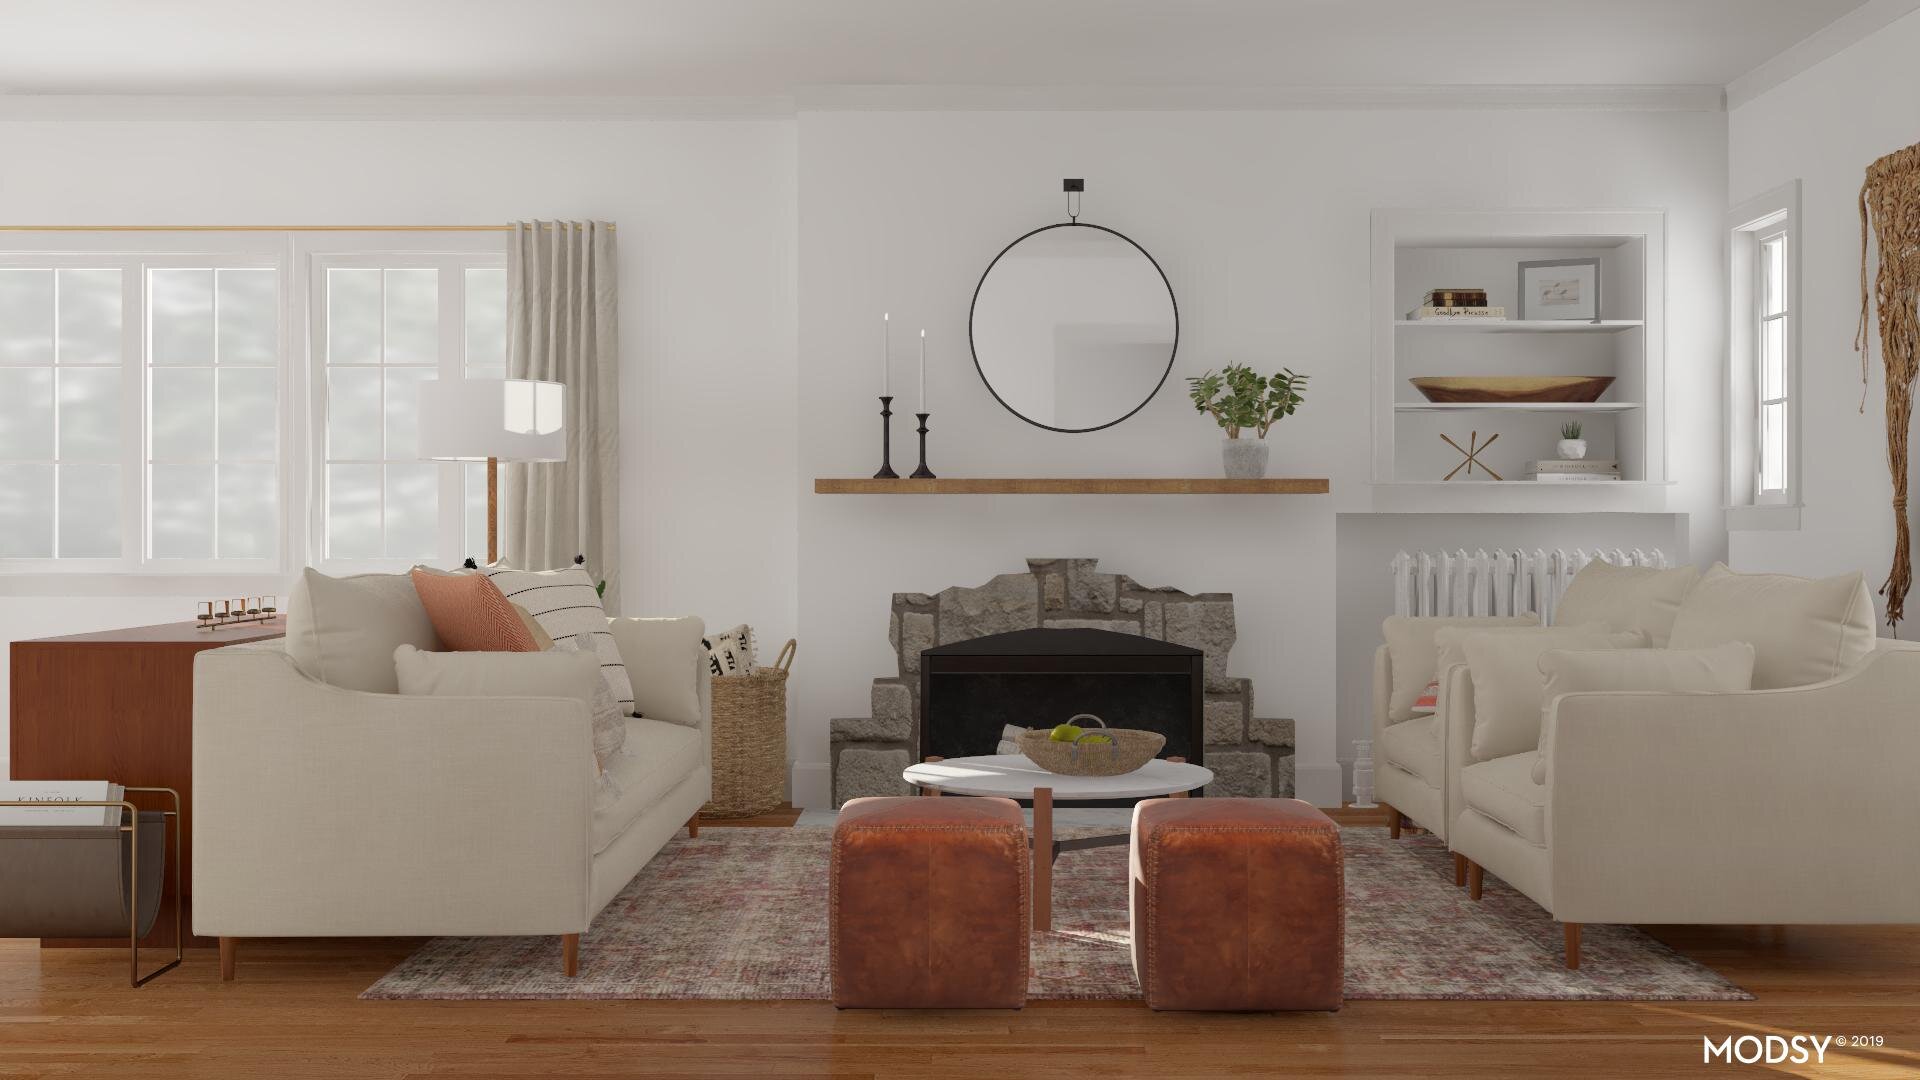
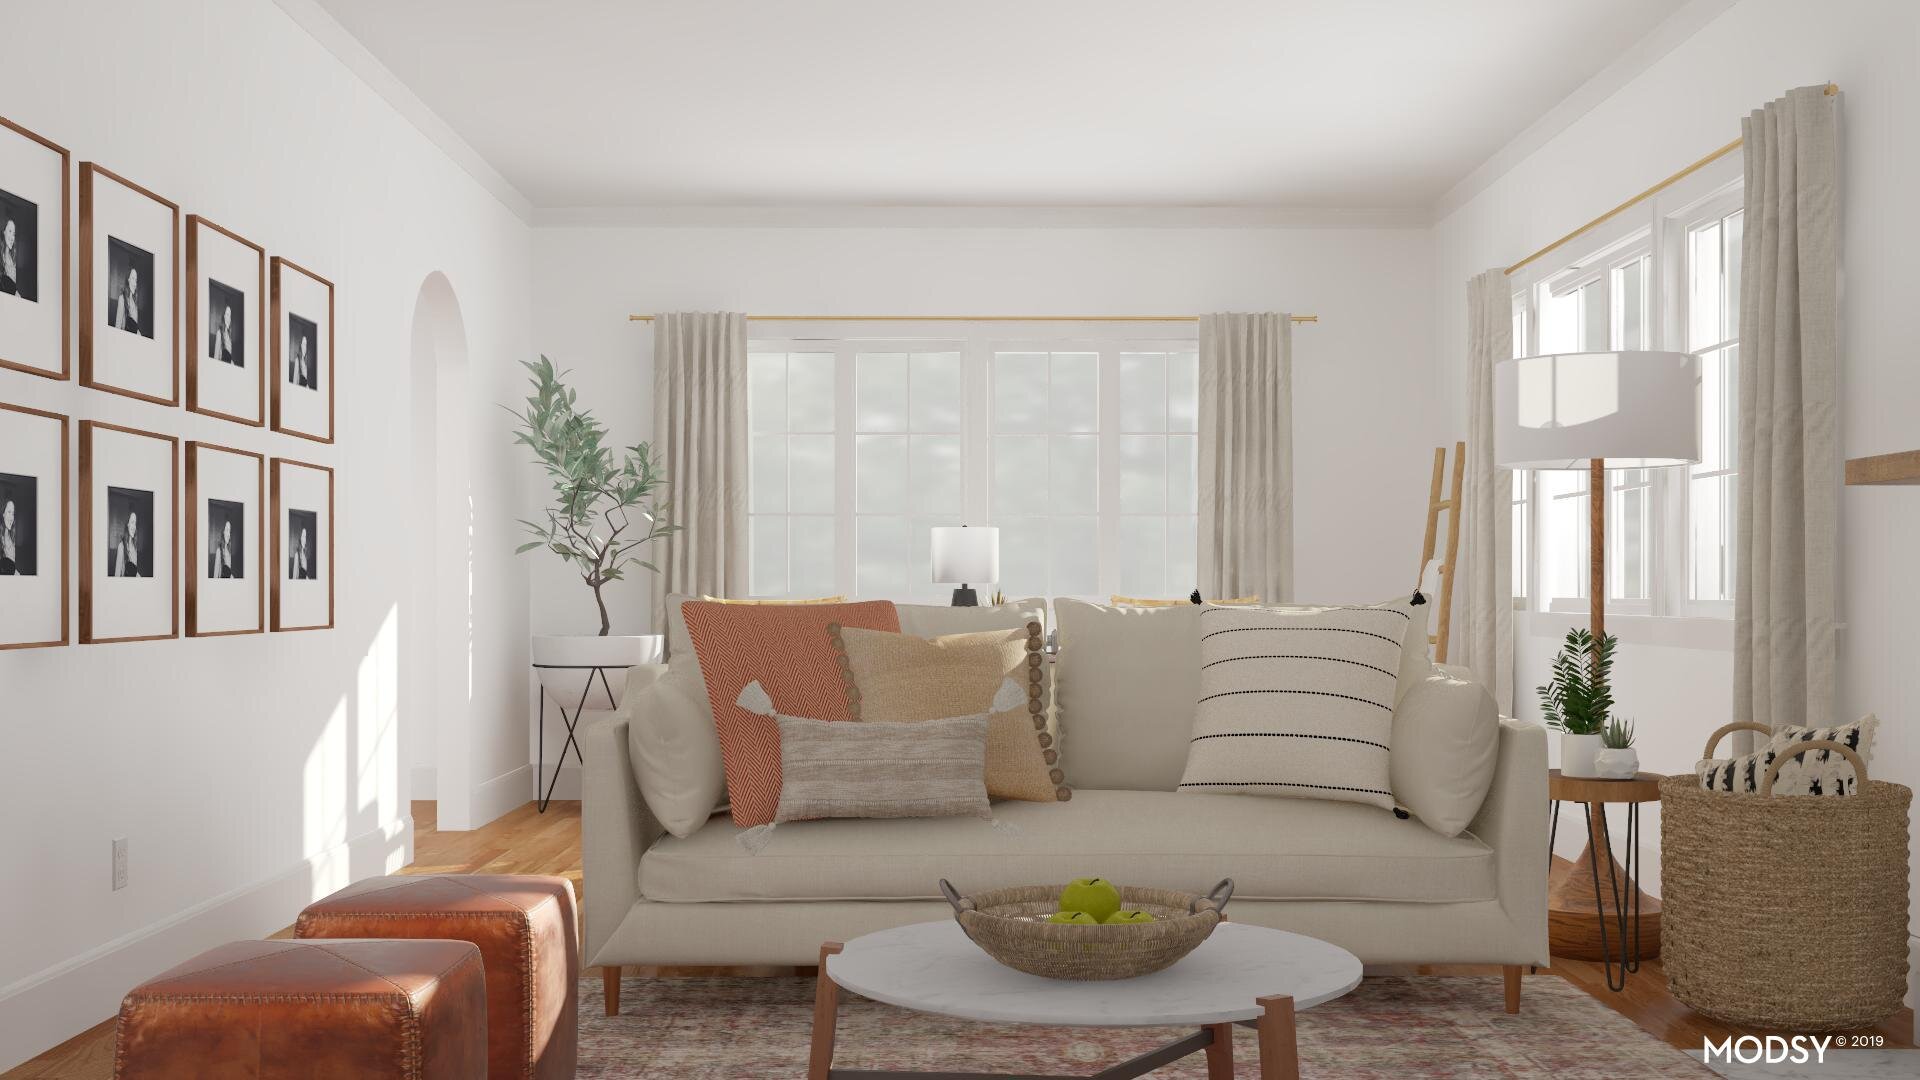
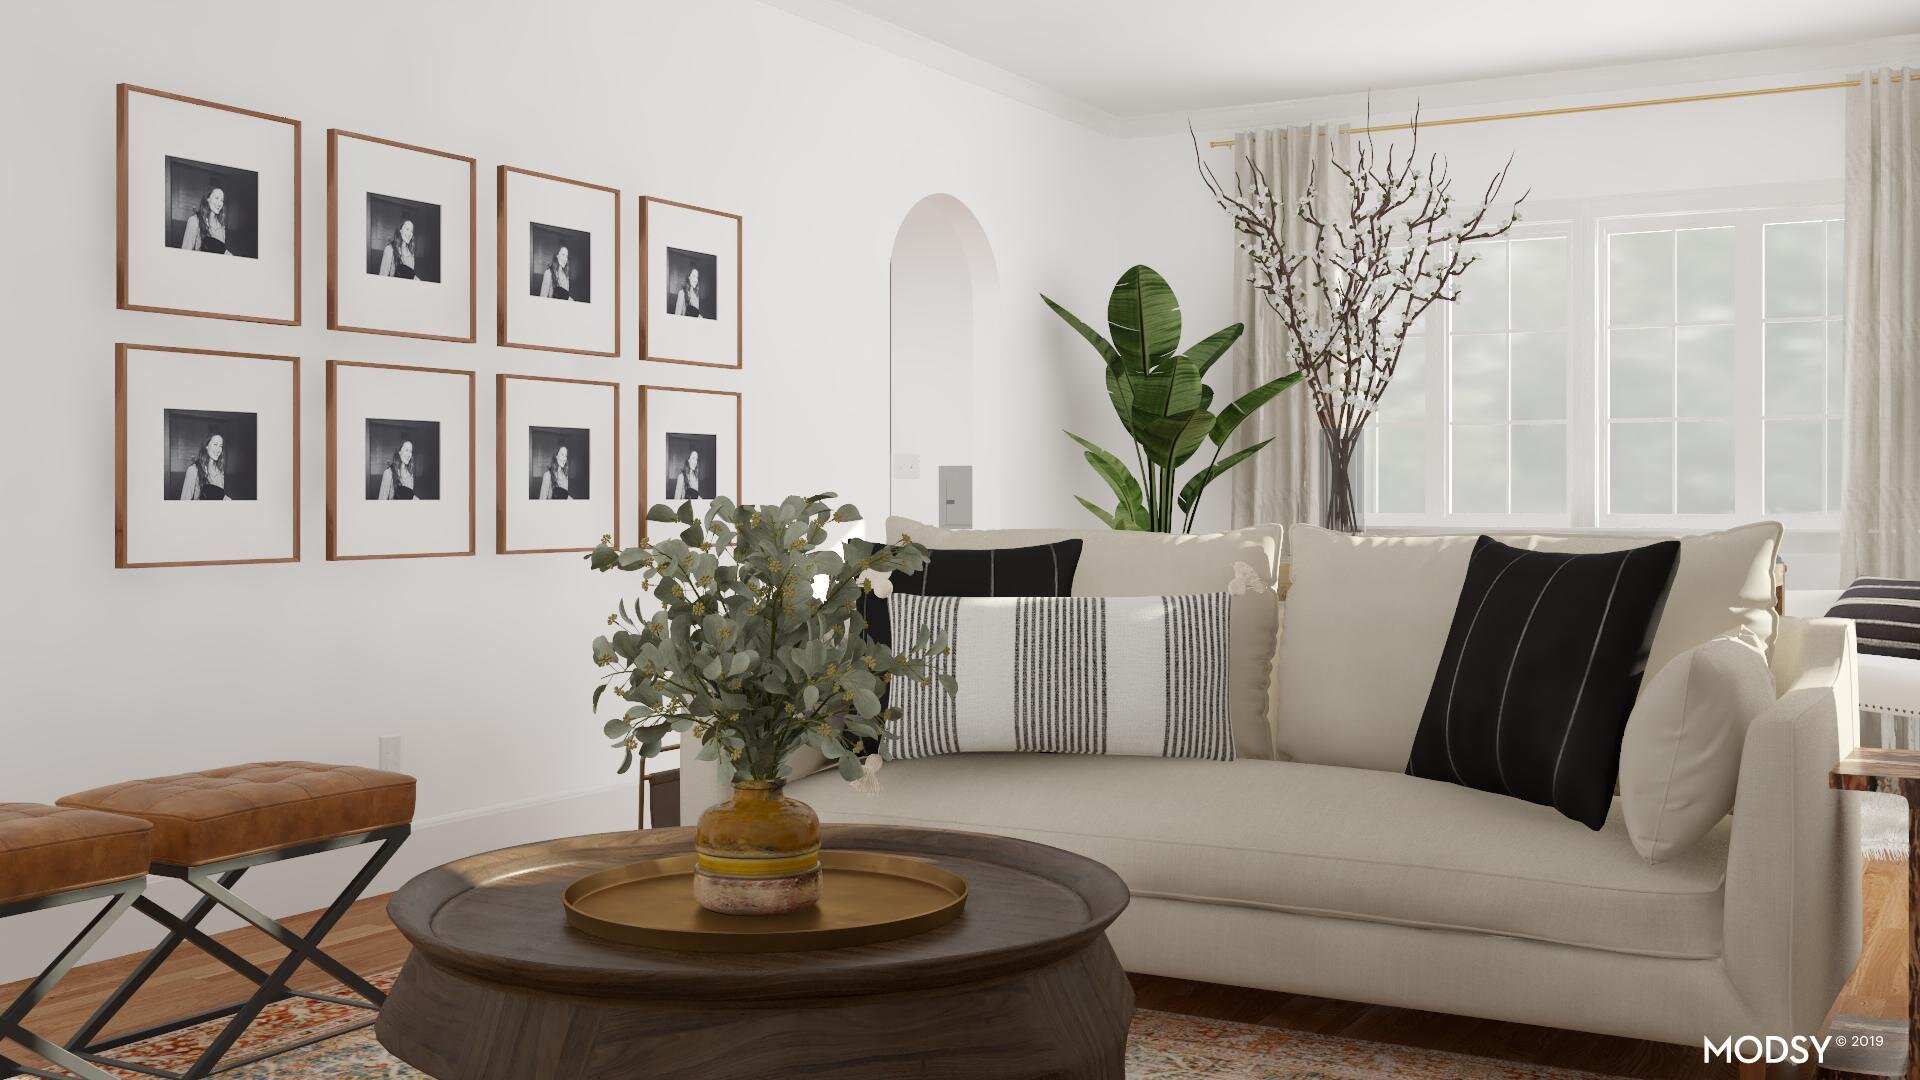
One key to designing a long, narrow living room is finding focal points in each zone. In the first seating area, the fireplace and french doors ground the space and add visual interest. For this second area, I chose this abstract print by artist Alexandra Valenti. While we’ve got a few ideas for hanging it, we haven’t quite committed to a final spot just yet. So for now, it’s leaned up against the wall near the arched doorway, which I’m kind of loving actually.

Valenti Primitive Vessel art piece by Alexandra Valenti; Natural Wonky Weave Basket; Olive Tree

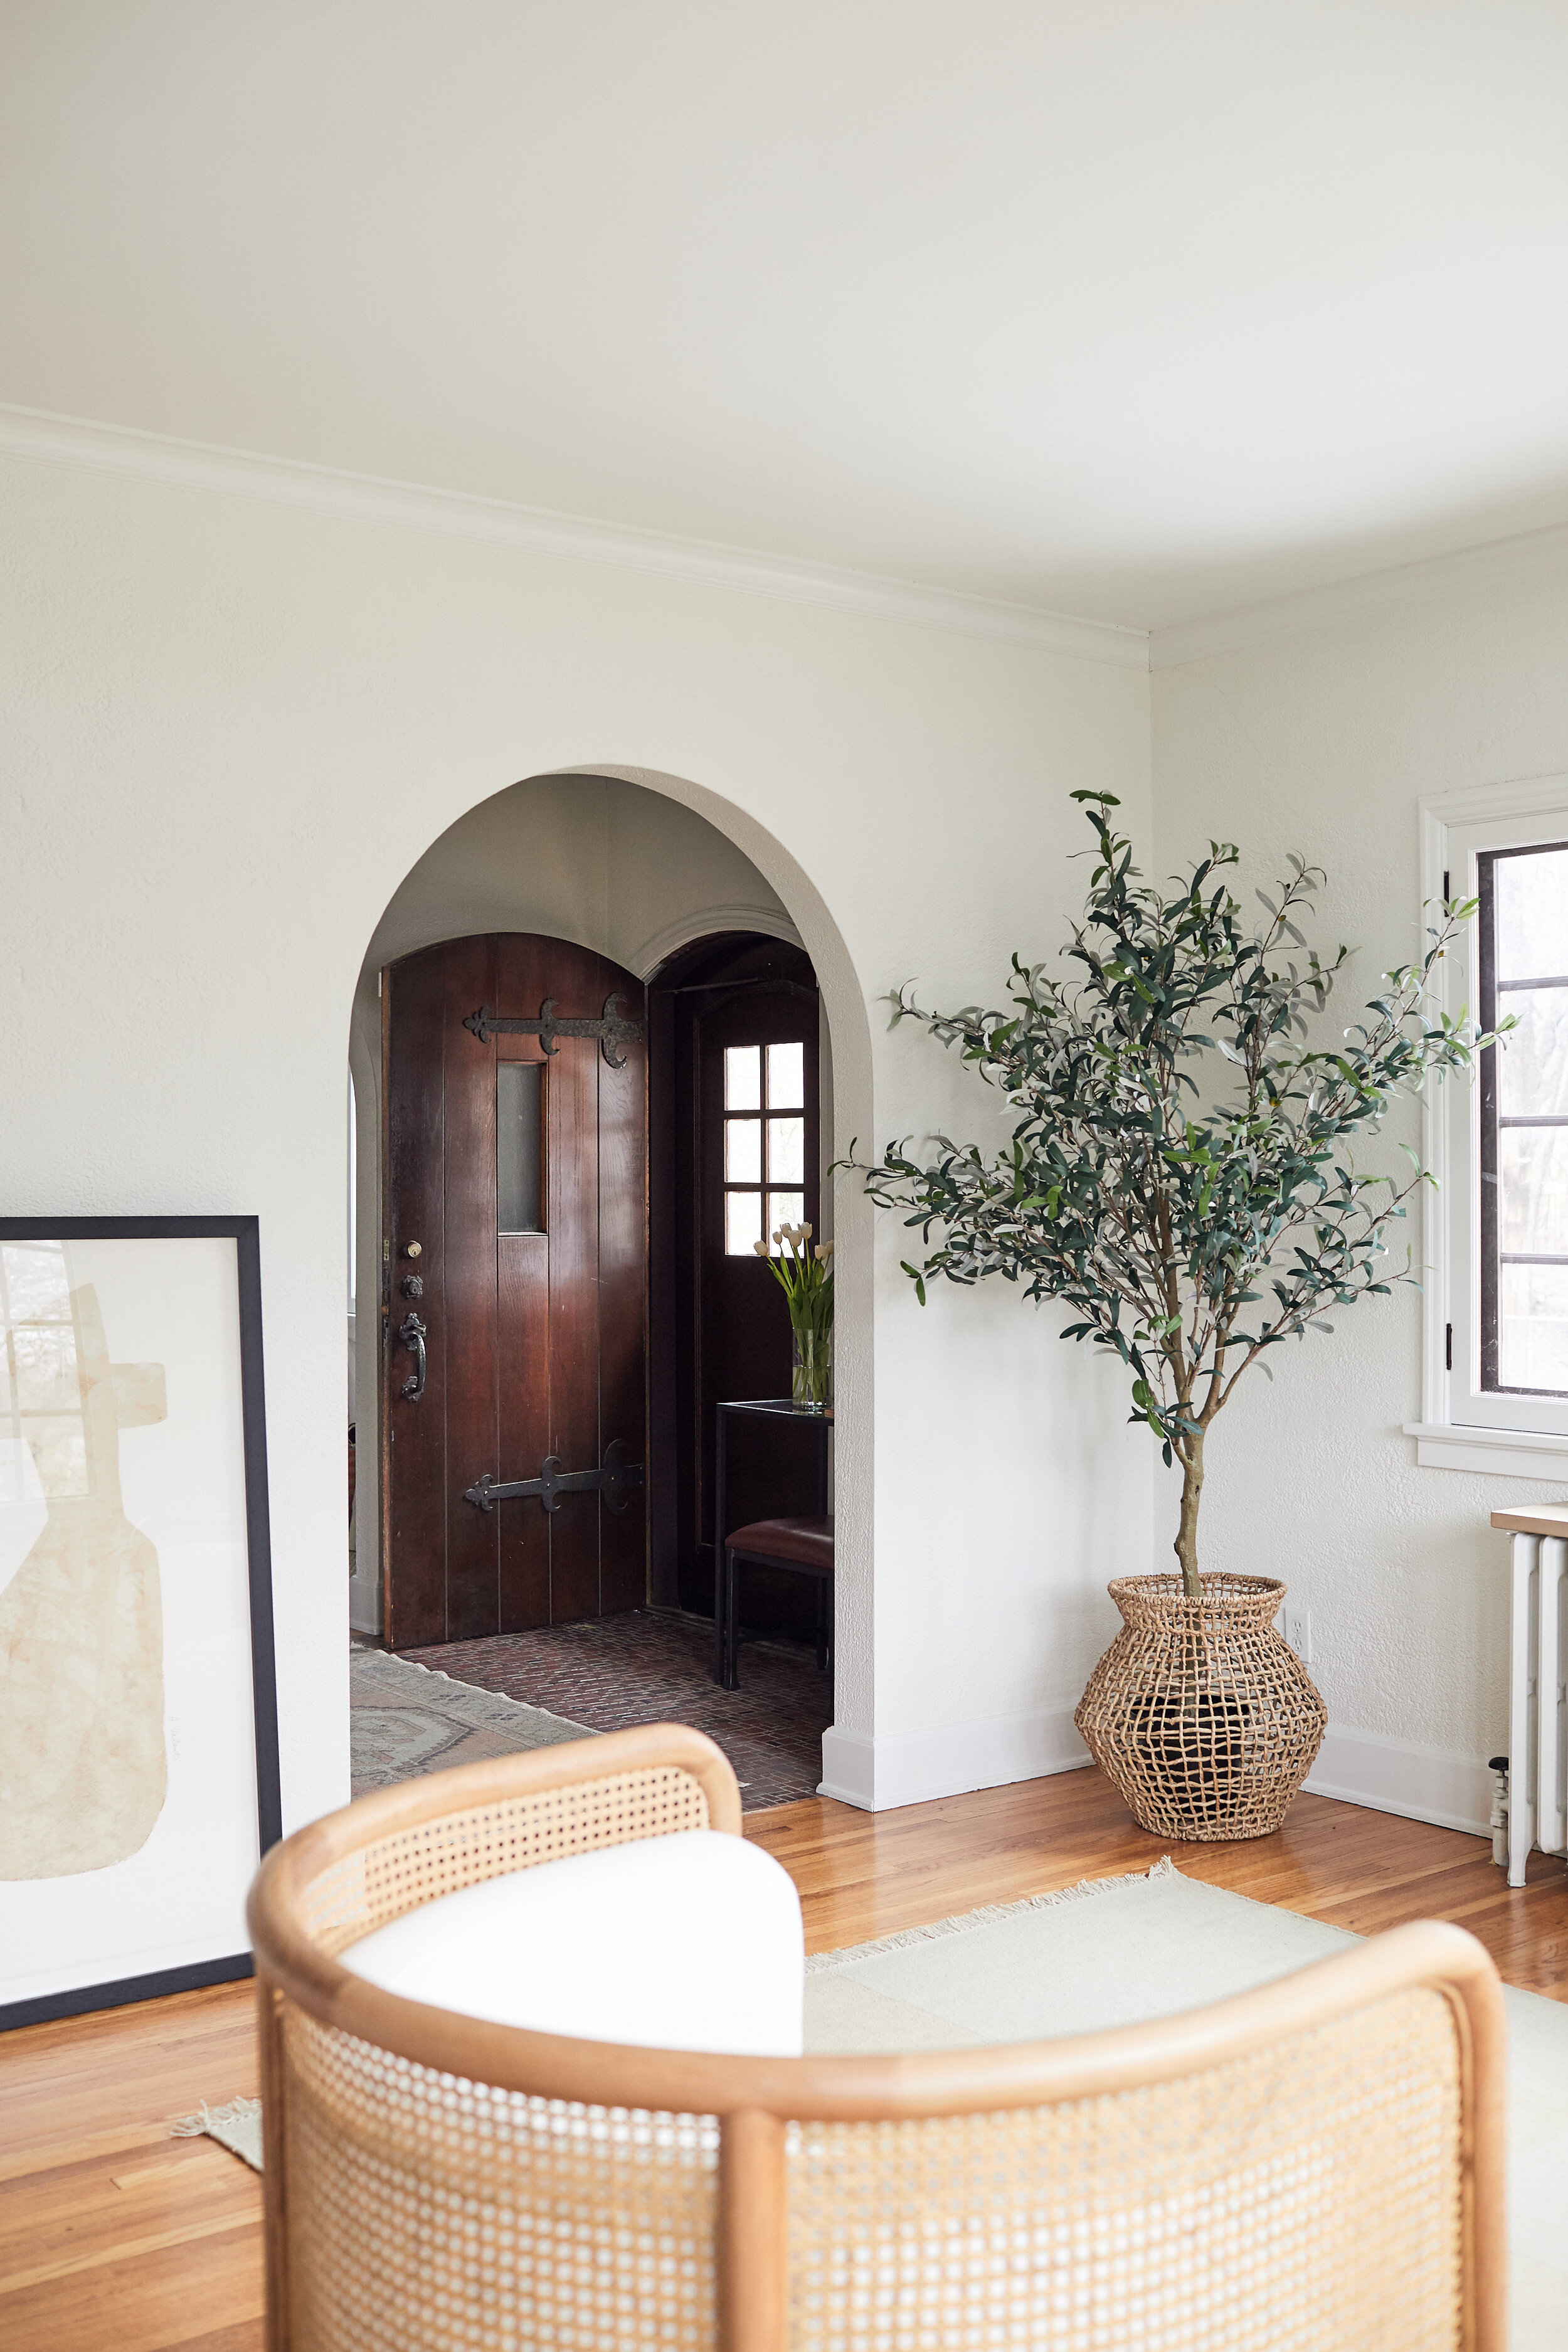
The black frame really pops against the muted color palette, and I love the scale of it so much.

Larger-scale artwork might seem counterintuitive with lower ceilings like ours, but it actually makes the room look bigger! So don’t be afraid to go big with your wall art, especially in a smaller space.

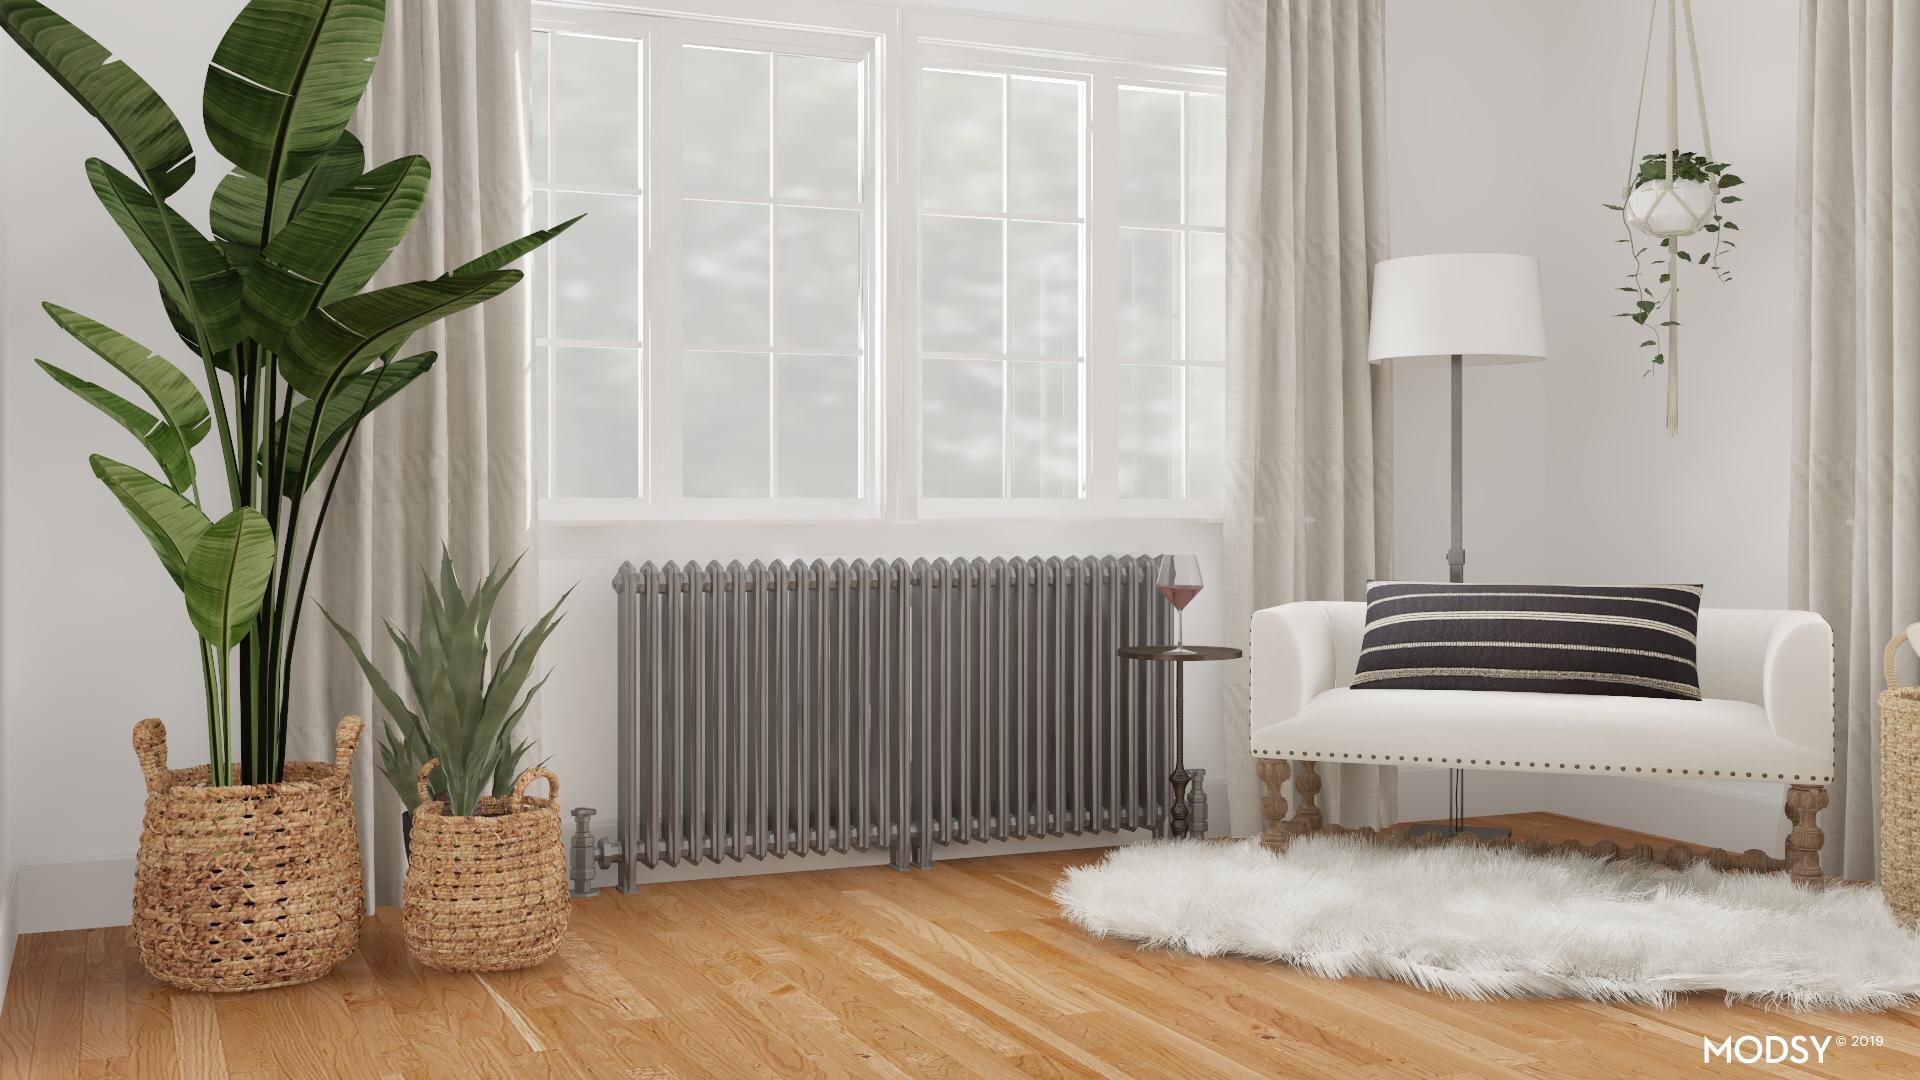
To mirror the large plant by the french doors, I chose a 7’ olive tree for the front corner. It really brings balance and ties both ends of our long, narrow room together. I’ve wanted an olive tree for so long but knew that I’d never keep one alive living in the midwest. This faux beauty is super convincing and sits perfectly in this natural wonky weave basket.

In phase 1 of our living room makeover, my three tips for a well-designed space were:

  1. Get clear on your vision

  2. Always put function first

  3. Take your time

These three lessons came in handy the second time around, too. And I’m so thrilled with how everything turned out.

patticakewagner living room makeover_crate and barrel_leanne ford.jpg
Fields Accent Chair; full moon clay vase; natural wood bunching tables (NA but similar one here); natural woven baskets (NA but similar one here); dried craspedia bunch
patticakewagner_crate and barrel_leanne ford.jpg

Natural Wonky Weave Basket; Olive Tree; Austine Grey and Cream Pillows; Fields Accent Chair; Sand Fringe Throw; Ella White Candle

Whether you’re looking to update your own space with a full-room makeover or a few fresh accessories for spring, the Leanne Ford collection at Crate and Barrel has stunning pieces at every price point. Check it out, and share your favorites in the comments!

patti wagner living room makeover with crate and barrel.jpg

Check out my living room sources here

I hope you enjoyed this second phase of our living room makeover. Thank you for following along! Sending you all a virtual hug and hope you’re staying safe and healthy.

Patti

Sweetest Regards, Patti
community

Save Our Restaurants Sunday

Supporting Our Minneapolis Food & Drinks Scene

My blog is mainly focused on home and DIY projects but community is important to me. Like I mentioned in my last post for small shops, lots of businesses and industries have been negatively impacted with the current events and are in dire need. But for this post, I wanted to touch on our local small food & drinks establishments. Some could be shutting their doors for good but others have pivoted to protect the safety of customers and find ways to still serve our community through takeout, curbside pickup and delivery. With so many facing financial uncertainties, it’s not my intent to ask anyone to open up their wallets. But rather, this is to encourage those who still feel fortunate and want to find ways to help.

A lot of my readers and IG followers have also asked for a restaurant guide during this time so I put a call out on my IG stories for submissions. We’re all feeling the weight of this situation right now but it gives me hope with how much kindness is being spread. I’m unsure of the impact this post will yield but figured it doesn’t hurt. Restaurants have provided us with date nights, milestone celebrations, family bonding time and just a great experience when we’re tired of being in our kitchen. But beyond that, this pandemic means millions could lose their jobs and that breaks my heart. For my fellow Minneapolis residents, below is a list of local restaurants, coffee shops and breweries who would greatly appreciate our support.

patticakewagner save our restaurants sunday.PNG

These establishments have been narrowed down from my Instagram submissions (submitted by owners or nominated) along with some of my favorites. See websites for hours as most have been adjusted.

Restaurants

Naviyas Located in the Linden Hills neighborhood, this is our favorite Thai restaurant! Their Pad Thai, Pho Noodle Soup and Red Curry are some of our favorite dishes. *Takeout, curbside pickup.

Red Wagon Modern American Pizza but also serving pastas & appetizers. *Delivery and pickup.

Quang Family-owned and one of my favorites for Vietnamese food. Love their vermicelli noodle salads and classic Banh Mi sandwiches! *Delivery and takeout

Hello Pizza A true neighborhood gem. Offering full menu except pizza by the slice.  Their New Yorker pizza is a family favorite. *Takeout and delivery.

The Lynhall Can’t wait for them to open up again because besides their amazing food, their space makes the in-person experience incredible. *Curbside pickup and delivery.

Blue Door Pub Home of the Blucy Burger – one of Brian’s favorite! *Takeout and delivery at their Longfellow and Como locations

Grand Cafe Take and bake meals for two for $30, as well as bagged lunches for $7. For every dinner for two ordered, they will donate a bagged lunch to someone in need. *Curbside pick up

Turtle Bread Offering full selection of baked goods and deli items. This is a neighborhood staple and we always enjoy their baked goods. *Takeout

Nico’s Tacos We’ve not tried them out yet but have heard great things! We want to try their taco boxes (offering full menu as well). *Takeout and free delivery

Spoon and Stable Gavin Kaysen’s restaurants all have heart. The food and atmosphere is incredible and I can’t wait for a date night here when it opens back up. New menu is posted at 11:00am each day. *Takeout

Mill Valley Kitchen I’m a big fan of their simple menu and this is a great place for a girls’ dinner! Highly recommend the salad and Salmon. *Curbside pickup and delivery

Tilia This is is our go-to for impromptu date nights in the ‘hood. I will miss their shrimp appetizer but excited to see their Brussels sprouts with caramelized onions on the to-go menu. *Curbside pickup

Coffee Shops

Penny’s Coffee Love their Salted Caramel Latte and Golden Latte! *Pickup only

Northern Coffee Works Coffee beans available online. *Delivery and free shipping with code WORKFROMHOME on coffee beans

Breweries (21+)

Headflyer Brewing We’ve already ordered four crowlers and while all are great, I highly recommend Candy Paint! This hazy IPA is so good! *Pickup and delivery

Minneapolis Cider Company I’m a huge cider fan and have heard great things about them so I can’t wait to try them out! *Curbside pickup

Finnegans Brew Co. Love their mission of doing good for the community. I have not tried their beers yet but the Armory Laker Blonde sounds fantastic! *Curbside pickup


Thank you to everyone who submitted! I wish I could include them all but had to narrow down due to time (got three kids who constantly need snacks over here!). You can also check out Eater Twin Cities for their restaurant guide of where to order for delivery and to go from independent restaurants during MN’s ‘Stay At Home’ order. And if you’d rather not leave home, purchasing gift cards is another great way to help!

While this is a weird time for all of us, I hope you are doing your best to enjoy the time at home. And for those essential workers who don’t have a choice to stay home, I thank you every day.

Wishing you all good health and safety!

Sweetest Regards, Patti
community

Small Shop Saturday

Showing Support From A Distance

Lots of businesses and industries have been negatively impacted with the current events. I won’t repeat what you already know but instead, encourage all of us to find ways to help one another if we can. If you are feeling financially fortunate during these times and thinking of ways to lift others up, I wanted to share some small shops + businesses that could use our support. A little can go a long way. If you are unable to purchase, there are small ways you can still help by visiting their social media pages to like + save a post or leave a comment. These small actions help drive traffic to their pages.

I’m not sure of the impact by me sharing this info but figured it doesn’t hurt. I’m an empath and it’s in my nature to care about others and find ways to help.

patticakewagner small shop Saturday

These shops are narrowed down from my Instagram submissions (submitted by owners or nominated) along with some of my favorites. Listed by category with promo codes + delivery info if applicable.

Baby & Kids

Oh Baby! A Twin Cities kids boutique with some of the cutest high quality clothes and products! Order online and curbside pick-up is available to locals.

Pacifier A Twin Cities kids boutique that we’ve enjoyed shopping in. They carry the best brands and most adorable clothing. Order online and their current promo is buy one, get one 50% off using code DOUBLETROUBLE.

Peshh A small husband and wife team based in Minnesota selling beautiful 100% Turkish cotton blankets & towels. Gorgeous selections and currently offering 20% off your entire order using code PATTI20 – hurry though because this offer expires Sunday at Midnight (3/29)!

Bumbelou A Baby/kids goods shop based in MN that gives back to help empower children around the world – 10% of their profits supports children through sponsorships at Compassion International. Free domestic shipping on orders of $25 or more.

Pip & Pal A thoughtfully curated children’s shop with so much charm. Free domestic shipping on orders offer $50

The Little Red Shop A boutique for home and baby filled with vintage goods and fine gifts.

Briar Baby Cutest baby bonnets ever! We’ve purchased several of these for our babies. Take 20% off all bonnet with code BRIGHTSPOT all through March + free domestic shipping on orders $30+!

Nomies Kids Handmade genuine leather shoes for your little ones. These are the cutest shoes you’ll ever find. We have a handful and can’t even with the cuteness! This weekend only, buy a pair of shoes get the second HALF OFF with code BOGOHALF

Colored Organics Adorable baby basics. Jack and the girls own a few outfits and we love them! Use code WELCOME20 for 20% off your 1st order. Free shipping on orders $25+ and free returns.

Apparel & Accessories

Fisher + Baker A functional and stylish menswear company based in Minnesota with superior quality. Fast free domestic shipping with a lifetime warranty on all outerwear!

Aloe Riviera Little jewelry shop owned by my friend Kellie (we worked together as designers at Target HQ!). She offers beautiful 14k gold filled, 18k & 24k gold dipped jewelry with free U.S. shipping on orders over $75 with code FREESHIP75.

Eljay Ties Stylish and affordable ties offering worldwide shipping. Get one dollar off each tie with code DOLLAROFFELJAY

Parc Shop Brick & Mortar shop with thoughtfully curated minimalistic pieces and unique goods from independent designers + makers. Now offering free shipping on all domestic orders!

Grethen House Thoughtfully curated women’s designer collections. Offering 25% off site wide with code 25OFF

Home

Projects In Person Provides DIY experience through workshops + other services but currently offering new DIY kits to keep you busy while at home. Their PIP’s Build Box supplies you with all the materials you’ll need for a fool-proof, no-experience-necessary, fun night in!

Rebecca and Genevieve Small collections of one of a kind vintage rugs and textiles owned by my friend Valeria. The selections are GORGEOUS! She’s currently offering 20% off with code BRIGHTSPOT

Polders Old World Market Old World quality goods for the kitchen. Each piece of Dreamware is hand carved by the Polder family in their Virginia farm. Use code PATTICAKE for 20% off any size order of Dreamware!

Swoon Rugs Vintage rug online shop owned by my friend Tabi. I can attest that her one of a kind finds are one of the best! The rug in Jack’s nursery is from her shop and it’s absolutely stunning. You can receive 10% off if you sign up for email and free domestic shipping!

Art for Everyone If you’re looking for pet portraits, you should check them out! They provide free U.S. shipping for any pet portraits ordered.

KaeKoo One of a kind + soulful handcrafted goods. 10% off your first order with email sign up!

Golden Rule Gallery A local favorite shop of artful pieces for you and your home. Take 30% off sale with code SPRINGCLEANING for a limited time.

Photo from Golden Rule Gallery’s website

Photo from Golden Rule Gallery’s website

If you are local to the Twin Cities, check out this list from Mpls St Paul Mag for more shops.

These are unprecedented times as we know and the actions that we take, whether big or small, can have an impact on someone’s livelihood.  We are all in this together and we’ll make it through. Wishing you all good health and safety!

*Note: I wished I could post all the shops submitted but had to narrow down due to time. If you don’t see your shop listed and would like to be considered again, please email me with your business name, website and any promo codes you are offering. A promo code will increase the chances of driving traffic to your site.

Sweetest Regards, Patti
organization

What You Should Know Before Deep Cleaning & Organizing Your Fridge

The grandparents were coming into town to care for our three kiddos while we took a couple’s vacation. Prior to this, we had not left the kids overnight in almost five years! Bless my in-laws for volunteering to watch them. They are kind, loving and SUPER CLEAN + TIDY kind of people. So as I was picking up the house, I immediately thought about our fridge which had not been deep cleaned in years and panicked.

Took this photo with my remote tripod after deep cleaning and feeling a sense of accomplishment! I shared my process on Instagram and got so many reactions that I decided to write a blog post.


Took this photo with my remote tripod after deep cleaning and feeling a sense of accomplishment! I shared my process on Instagram and got so many reactions that I decided to write a blog post.

If you’ve been dreading this task, I promise you that you will feel 100% relieved once it’s done! You have no idea what is lurking in there. Expired foods, sticky messes with upside down turned bottles (so you can squeeze that last bit of sauce out) and probably a few spoiled food items forgotten in the back. While we periodically clean our fridge, it’s been a long time since we’ve actually deep cleaned it.

To make this task as efficient as possible, I skimmed through a few articles and rounded up six steps to efficiently and effectively deep clean and organize our fridge. Here’s what you should know before getting started!

Our refrigerator BEFORE the clean out

Our refrigerator BEFORE the clean out

patticakewagner fridge deep clean.jpg

Step 1: Take Everything Out

If you truly want to deep clean, just like any effective organizing project, you’ll need to take everything out. This way you can evaluate each item and identify any that have expired. I did by sections to avoid the food being out for too long. You’ll want to be super fast with this method. If you want to clear the entire fridge at once, you can transfer items to a cooler and unplug it.

Found this goodness expired almost three years ago!

Found this goodness expired almost three years ago!

Step 2: Prepare for the Wipe Down

Use reusable cloth. You may go through a lot of paper towels so it’s best to use a microfiber cloth (If you want more neutral colors and larger pack, I recommend this one here) or a reusable cleaning rag to wipe all the surfaces clean. Also, don’t forget to wipe containers, jars and bottles. If you’re able to remove the bins, pull them out and wash in the sink. Ours were so gross that I felt I couldn’t get it truly cleaned without washing them.

I’m showing the cleanest of the three bins - too embarrassed to post the other ones!

I’m showing the cleanest of the three bins – too embarrassed to post the other ones!

Have small bottle brush or clean toothbrush ready. You’ll need them to tackle those hard to reach crevices.

Use food safe cleaner. I used a concentrated Thieves cleaner mixed with water in an amber glass spray bottle. You can also simply use vinegar or baking soda mixed with warm water.

Step 3: Line Veggie Bins and Areas with Condiments to Avoid a Sticky Mess

I read about this on organized-home.com and it made so much sense to me! It will reduce your cleaning time the next time around. I lined our veggie bins with linens and used paper towels to line the doors where we store our jars and bottles of condiments. Just remember to change them out every 2-3 weeks.

patticakewagner fridge deep cleaning

Step 4: Use Bins and a Swivel Organizer

I’m not sure why we waited this long to use bins and a swivel organizer! They have made a huge difference with keeping things organized. We originally ordered this set of bins which had great reviews. Except, we forgot that we have a shallow fridge so they didn’t fit but otherwise were great. Don’t make our mistake and make sure to check dimensions first!

We found a solution with these pantry size bins (below) and they are perfect for our shallow fridge. What I have found to be most helpful with reducing food waste is designating an “Eat Me First” bin, a tip I got from simplyss.com.

Also love this swivel organizer for our smaller jars of condiments! No more knocking things over trying to grab ones way in the back.

Step 5: Organize Accordingly

Knowing where to store certain foods is important. Condiments, sauces, butter and other less-perishable items are perfect candidates for door storage according to simpyss.com. Do not put eggs or milk here! Some fridge have the egg organizer built into the door so it can be misleading. For more tips on where to store certain fruits or vegetables, visit this article from thekitchn.com.

Our refrigerator AFTER the clean out! Click here for all the sources to help you tackle deep cleaning & organizing your fridge.

Our refrigerator AFTER the clean out! Click here for all the sources to help you tackle deep cleaning & organizing your fridge.

Step 6: Keep Your Fridge Smelling Fresh

Last, store a small bowl or open container of baking soda inside. I’ve been doing this for years! Just putting a box of baking soda with the flap open isn’t enough to neutralize odors based on this article I read.

If you want to take your deep cleaning to the next level by cleaning the condenser coils and drip pan, check out marthastewart.com.

Fridge is Thermador. It was a floor model and purchased from Craigslist. Check out my Kitchen page for more sources.


Fridge is Thermador. It was a floor model and purchased from Craigslist. Check out my Kitchen page for more sources.

I hope this gave you some motivation to not only deep clean your fridge but organize it as well! Good luck!

Product Sources:

*This post contains affiliate links

Sweetest Regards, Patti
before and after

What I Learned From Our Living Room Makeover: Phase 1

Check out our living room before and after pics — plus important design lessons we learned in the process!

patticakewagner living room makeover

If you’ve been following along on Instagram, you’ve seen snippets of the first phase of our living room makeover. But I’m so excited to share all the behind-the-scenes details with you — and some tricks we discovered along the way — here in one place!

The living room is one space in our home that we just haven’t paid much attention to after our DIY to fix it up since moving in eight years ago. We worked our butts off to fix the cracks on the walls + ceiling, reglaze the windows, sand + paint the trim work and walls and refinish the radiators.

patticakewagner living room makeover

Once we settled in, we did our best to enjoy it using our existing furniture. But it’s always been on our minds that some day we would refresh the space. (The sofa was from Brian’s bachelor days, you guys!) It’s been a busy year and we’ve got a lot of other projects going on — not to mention three small kiddos running around — so it just kept getting pushed farther down the list.

But, we’ve finally begun the process and I’m so excited about it! Before we reveal all of the after pics, I wanted to share our three main priorities for the space. I think it’s always important to have a good “why” or two in place before you start a project to give you some focus.

BEFORE - using existing furniture from Brian’s bachelor days!

BEFORE – using existing furniture from Brian’s bachelor days!

So here were our top priorities for our living room makeover:

Maximize the Potential

Our home was built in 1927, and it has all of these really amazing architectural details like arched doorways, crown moldings, and built-ins. Our former furniture pieces and layout just weren’t doing them justice. Most were from Brian’s bachelor days! Though we loved them, and they’d served us well over the years, we were excited to choose new pieces that fit our life and style as a family. The living room has gorgeous french doors that I fell in love with when we first looked at the house, but they have mostly been hidden behind the sofa for years. We wanted to find a better solution to show off our home’s best features.

Optimize the Layout

The room is long and narrow which makes it challenging to configure but understanding our purpose for the room, was a good starting point. Sometimes, that can only be achieved by actually living in it for a while. We love using this room for reading, games, conversations with our children and just relaxing. Once we identified that, the easiest first step was rearranging our existing furniture to get a new feel for the space. That gave us a better grasp on selecting the types of seating that would work best here. Also, we never watch tv in the living room, so that needed to find a new home and free up some space.

Create a Cozy Gathering Space

We like to host friends and family in our home. A flexible space that works for both our family of five and a full house was an important factor in the design.

Once we identified the main goals of our living room makeover, it was easier to focus on what we needed to do to achieve them. The layout stumped us, so I asked the Instagram community and partnered with Modsy to help us gain some clarity. The recommendation was to break the long narrow room into two seating areas and we agreed. If you have a similar room, this may be a good solution to consider!

proposed layout from Modsy

proposed layout from Modsy

Then we were able to pare down what no longer worked and sold some pieces online, so they’re living their best life in new homes now. With a blank space, we could focus on furniture.

We ended up selecting the Caitlin sofa and chairs from Interior Define, and you guys, I’m in love. Even one of the delivery guys decided he needed to order one for his own home after seeing it! They are soft and cozy, the perfect spot to sink in and snuggle up as a family, yet still have those clean lines we wanted. The walnut legs add a touch of modern style that I love, too. They’re just perfect for the room, and the linen colored fabric we chose lightens up the space and really allows all of those architectural details to shine through like we’d hoped.

photo by Sage E Imagery

photo by Sage E Imagery

One piece of feedback we received from savvy Instagram followers was that so much of our living room furniture was rectangular in shape and we should diversify the size and scale of our pieces. And you all were totally right! So we swapped our bench-style coffee table for this leather beauty from Houzz/Wayfair. It achieves absolutely everything we need. The square shape offers tons of room to style or serve up a cheese board when we entertain. It has soft edges so it’s kid-friendly, and it’s the perfect spot to put your feet up and relax at the end of the day. I’m still swooning over it.

patticakewagner living room makeover

Now that we’ve got our main furniture pieces in place, we’re so excited for what phase 2 of our living room redo is going to bring! But before we jump in, I wanted to stop and reflect on three main lessons this project highlighted for us:

1. Get clear on your vision for the space

It can be hard for two people with different visions to get on the same page, and this definitely caused some tension for us as we began reimagining our living room. Brian always appreciates when I can provide a lot of images to help him visualize my ideas. So round up images of furniture pieces and decorative items you really love. Maybe create a Pinterest board (you can follow me on there) of similar room layouts or make a design inspiration board to share. Sometimes a quick sketch can really help layout the room clearly in your mind. I always create a mood/inspiration board first and once we agree on that, I put together our style guide which is more directional.

Our Living Room Style Guide

Our Living Room Style Guide

2. Always put function first

While we obviously wanted a space that was more visually appealing, it’s super important to us that our living room is comfortable and the furniture pieces work for the way we live. No matter how beautiful a room looks on a social media post, if it doesn’t work for your actual life, it’s not good design, and you won’t be happy in the long run. Consider the size, shape and configuration of your pieces. We had to really think about the type of seating because there are so many options (like sofa, sectional, chairs, chaise, bench, loveseat) and this decision will make a big impact!

3. Take your time

It’s so tempting to jump in and buy everything at once so you can enjoy a fresh, finished space. I totally get it! But we’ve found that going slowly and making thoughtful, intentional design choices always leaves us with a better result. So try breaking your progress up in phases and identify what you want accomplished in each phase. Phase 1 should involve trying current pieces in a different arrangement (which we did) to get a new feel for the space — you never know until you try, right? Take the time to really consider what you want for each phase before you jump in. You won’t regret it!

Hope our journey provided some before and after inspiration, and some helpful tips to consider in your own room makeovers. Stay tuned for the next half of the room refresh which is underway like adding in this rug below. We have some exciting things in store that you won’t want to miss!

Click here for the sources to this photo


Click here for the sources to this photo

Click the items below to shop this room! *Affiliate links used

Other Room Sources:

Paint Color: Benjamin Moore White Dove

Trim: Benjamin Moore Satin Impervo Enamel

Floor: Original Hardwood floors refinished and applied with a coat of poly

Windows: Original to the house. Reglazed by Brian and repainted with Benjamin Moore Satin Impervo Enamel

Radiator Shelf: Limestone Slab (it was part of the house when we moved in)

Here are more before and after photos! It’s amazing how a different layout and some new seating can change the feel of a space.

Check back in a few weeks and follow along on my Instagram for glimpses of Phase 2. Don’t forget to sign up for my list of exclusive followers here and be among the first to receive blog updates, my favorite design tips, and products I’m loving right now.

Thanks for reading, friends. Talk soon!

Patti

Sweetest Regards, Patti
before and after

Jack’s Nursery Finally Feels Complete!

Jack is almost one years old and his nursery never felt complete. Actually, it never felt complete when it was Ava’s or Livy’s nursery either. Funny thing is that I sort of knew what the room needed but never had the energy to get it started.

patticakewagner nursery makeover

The nursery is a cute small room and needed something more than decor to make it stand out. Wallpaper or accent color would make this room go a long way. But since Ava was born, five years ago, we’ve slowed down a bit on doing house projects because even a simple task like testing paint colors can seem overwhelming. It’s just the season in our lives with three young kids, our rental business and a long list of to-do’s. The idea of picking out swatches, testing out colors, putting down a drop cloth and cleaning up stopped me from ever starting the project. So when Home Depot reached out to have me try out their Colorful Experience Paint Kit, I jumped on board to partner!

patticakewagner nursery makeover

The kit includes peel and stick paint swatches with curated palettes inspired by Pinterest! Their non-damaging adhesive backing are repositionable and easy to remove. Which makes picking out our paint color quick and easy with no painting + no clean-up! I picked the Trend Colors Sample Kit because it came with paint colors that I had in mind based on these three images I had pinned.

First Photo Source Here | Second Photo Source Here (DIY in PDX) | Third Photo Source Here (Brepurposed)

Also, these wall colors would nicely compliment the pair of artwork and pom-pom garland that are my favorite pieces in his room. That would be one of my tips in choosing a paint color. If it’s already a furnished room, pick your favorite pieces and choose a paint color that would compliment those pieces.

Pair of rainbow artwork from my friend, Sara Gardner Etsy Shop | Pom Pom Garland from Sheep Farm Felt Etsy Shop

It took a few short minutes for me to peel and stick up the paint swatches! Based on the inspiration images and my favorite items from the nursery, we narrowed down to two paint colors – Night Watch and Blue Willow. After going back and forth, Brian and I made the decision together to go with Night Watch. We headed to the Home Depot as a family to pick up the paint which was quick and easy! We decided on a flat finish.

While I watched the kiddos, Brian prepped the space and went to work painting. Prepping is a very important step to make sure your paint lines are clean and to prevent color bleeding on the trim. Although, with dark colors, that may still happen and you’ll have to touch up after.

patticakewagner paint color nursery .jpg

Brian has done A LOT of painting so is much faster and more meticulous than I am. I’m totally capable of painting but move like a snail to have it perfect. A little confession – I was a bit nervous about the color after we picked it up and even second guessed it.

patticakewagner nursery paint color makeover

However, the instant Brian brushed on the paint, I knew right away that I would love it! The girls were in awe. We did two coats of paint and let it dry overnight before putting back the curtain rod. I was so excited to put things back the next day. The only additional decor we added (besides the little Christmas trees for a seasonal update) was the hanging planter with a trailing pothos plant. I’m just in awe with what paint can do to a room! Are you ready for the color reveal???

Dresser | Vintage Rug | Hanging Planter | Curtains | Curtain Rod | “Night Watch” Paint color from Home Depot | Picture Ledge

Dresser | Vintage Rug | Hanging Planter | Curtains | Curtain Rod | “Night Watch” Paint color from Home Depot | Picture Ledge

Swivel Glider Recliner | Peg Hook | Lighting from Target but no longer available - similar one here

Swivel Glider Recliner | Peg Hook | Lighting from Target but no longer available – similar one here

patticakewagner nursery makeover

Here’s a side by side of the before and after.

Jack’s nursery finally feels complete and all it took was some painting. The Home Depot Paint Kit with the peel and stick swatches definitely made it much more convenient to jump start the project. I’m all about convenience these days! Of course, the girls loved seeing the nursery painted and now they want their room painted too! I hope this gave you some inspiration to get started on a paint project or if you just couldn’t put your finger on why a room feels incomplete. Paint can truly transform a space and now testing out colors got a whole lot easier!

*If you’re on Instagram, I saved the entire paint project in my highlights on my Patticakewagner page. Head on over to watch!

Sources (Also, see the original nursery project here):

Paint Color: Night Watch from The Home Depot

Dresser

Swivel Glider Recliner

Hanging Planter

Trailing Pothos Plant

Vintage Rug

Rattan Ceiling Pendant from Target but no longer available – similar one here

Peg Hook

Pom Pom Garland

Custom Pair of Rainbow Artwork from Sara Gardner Etsy Shop

Wood Frames

White Curtains

Curtain Rod

Picture Ledge

Table Lamp from Target but no longer available

Sweetest Regards, Patti
before and after

How We Found Guidance on Our Living Room Makeover

This post is a sponsored by Modsy but all opinions are my own. You can try them out for 20% off design packages (not including Luxe) using code PATTI20. I used the Premium package and was very happy with the service provided. You don’t want to miss the direction we are headed for our living room!

We’ve been talking about re-doing our living room forever and finally pulled the trigger earlier this year! I put a style guide together, we discussed layouts, sold off furniture and have had many late night conversations about our vision. So many possibilities…

patticakewagner living room makeover

I have a degree in interior design, worked in both residential + commercial design firms and have designed our rental spaces like this one. However, when it came to our own living room, I’ve been a bit paralyzed with decision making and time constraints. While my style guide was a great starting point, there were moments of tension when Brian was unable to visualize certain aspects of my design vision for this space and there was no way that I was going to find time to photoshop my ideas. I’m pretty sure this kind of tension is common between couples when it comes to home & design.

Which is why Modsy was such a great resource for us.  They helped me and Brian come together on a design plan and got us closer to finishing up our living room makeover. Modsy is an online interior design service that delivers highly realistic 3D designs of your exact room filled with shoppable pieces of furniture from top retailers – so you can virtually “try on” products and designs before you buy. How amazing is that??? Keep on reading to get a glimpse of where we’re heading for the living room!

From the Modsy Website


From the Modsy Website

Our Living Room Floor Plan: Built in 1927, our living room has great windows and French door but it comes with a challenging layout with its long rectangular shape and further complicated by the placement of fireplace and openings. Our two main goals were 1) get recommendations on furniture pieces that would collectively come together and 2) recommendation on the most ideal layout.

livipatticakewagner living room makeover.jpg

BEFORE PHOTOS (CLICK THROUGH SLIDESHOW)

Getting started was super easy!

  • We answered some questions pertaining to the room we wanted designed, styles we were drawn to and selected the Premium Package. Read about the different packages here.

  • Once we selected our package, we provided the room dimension and answered a style quiz to help our designer provide the best recommendations.

  • Then we sat back while they went to work to put everything together and create the 3D renderings.

When the 3D renderings came back, we were beyond impressed! We loved seeing the design options our Modsy interior designer provided and it was what we needed to have a more robust conversation about our plan. With the Premium Package, we received two designs to start from and an unlimited number of free revisions. Here is Design Option 1 to give you a sampling.

Design Option 1: They kept our gallery wall, added window treatments, worked with our existing fireplace to add a faux mantle using a floating shelf, suggested furniture pieces and gave the best recommendation for how to lay out the room. We thought it was a great start and loved the layout! Best of all, it really helped Brian see the full picture.

The Winner: After just a few revisions, we landed on something that Brian and I both loved! This version has the right amount of contrast and furniture style that we had in mind. Also, if you’ve ever seen our kitchen, you’ll notice that this design flows well with it. We won’t use all of the exact elements that you see here but it definitely gave us great guidance! Make sure to click through the slideshow below to see all the amazing 3D renderings and get the full picture of this space.

This layout and the furniture selections made our living room feel more spacious! It looks bright and cozy. Just gazing at these renderings make me happy. Can’t wait to share more soon IRL!

patticakewagner living room makeover

It was important that Brian and I made the decisions together in order for this space to reflect us both. With the help of Modsy, we are making great progress AND I am so thrilled that they are offering you all a discount! While I do think there is value in using traditional interior designers for certain projects, I also feel that Modsy is an excellent low-cost alternative for those looking to re-do an existing space. I highly recommend them!

Here are some other features that you’ll love about Modsy:

  • Modsy’s 3D Style Editor and new Live Swap feature makes it easy and fun to change layouts and furniture in your 3D room anytime. You can also work directly with Modsy Stylist to ensure you land on a design you love.

  • Modsy makes it easy to shop. Love the items in your design? Click add to cart and they help take care of the rest. You can shop multiple retailers – all from one easy checkout process.

I get lots of direct messages on my Instagram and email asking if I’ll do a design consultation or e-design. I wished that I could but with three little kids, my blog and managing our rental properties, it’s just not possible. Which is why I’m excited to share my Modsy experience and have you try them out. If you’re ready to give your space a facelift, make sure to use code PATTI20 for 20% off design packages (not including Luxe) until 12/1. Happy designing!

Sweetest Regards, Patti
before and after

Organizing for the Holidays | Don’t Wait, Start Now!

Is having a disorganized house and clutter keeping you up at night? It definitely was for me. Yet, I couldn’t pin-point what it was at first. But as the clutter grew worse, I couldn’t push it off any longer and knew exactly what was stressing me out – especially since we’re having guests stay with us for the holidays. Our laundry room in particular was the main culprit. It was a huge eyesore and since it was a pass through to so many parts of our house, there was no way to avoid seeing it.

View of our laundry room from the dining room

View of our laundry room from the dining room

“The problem with clutter, is that it only gets worse.”

— Lindsay, organizing expert and one of the duos from Style and Dwell

Every year that Brian and I have lived in this house, we’ve waited to clean and organize until the last minute before guests arrive. Often shoving things away and not really organizing at all.  Does this sound like you? If so, my advice is don’t wait any longer.  “The problem with clutter, is that it only gets worse,” says Lindsay, organizing expert and one of the duos from Style and Dwell who helped me tackle this project.  She’s absolutely right. Don’t wait and if it’s overwhelming, it’s okay to ask for help.  I met Ashley and Lindsay from Style and Dwell at a local moms event last year. After admitting my frustration with having a disorganized house on my Instagram, they offered a helping hand and I accepted. As ambassadors for The Container Store, they know a thing or two about organizing and I’m delighted to have them share all of these tips they provided to me with all of you.

1. Don’t Wait! Set Time Aside and Commit

This doesn’t mean get everything done at once. It’s good to focus on one space at a time. For this post, I wanted to focus on our laundry room.  As you can see above, it was CRAZY! How can the girl with the clean kitchen on Instagram, be this disorganized lol??? What can I say. I’m not perfect or even close. I think it’s important on social media, that we share both the good and the bad. So, here’s my dirty laundry literally. I decided to commit two half days to really tackle this room. My main goals were 1) reduce clutter 2) truly organize and not just shuffle things around.

patticakewagner laundry room makeover.jpg

2. Take EVERYTHING Out and Take Inventory

Be intentional and avoid just shuffling things around. Make sure to take everything out of the cabinets, drawers, closets, etc. Then take inventory, categorize and only put back what you know you’ll use. Donate the rest to someone who’ll use it. While I love our cabinet glass panels, the challenge with putting things back in them is that you could see all the clutter. The solution was using these large woven baskets from The Container Store. They fit perfectly in the cabinets and nicely hide the items while still being easy to access.  Also, love these labels to help make it easier to identify each basket.

BEFORE

BEFORE

3. Simplify

Our laundry detergents in their plastic containers, were not aesthetically pleasing. Ashley suggested one way to simplify and be more visually appealing was to decant them. We decided to repurpose my beverage dispensers which I hardly used, to store and dispense the detergents. We also used glass canisters to hold our wool dryer balls.

BEFORE

BEFORE

4. Declutter – Make Sure Everything Has a Home

Clutter just adds up over time and it’s easy to unintentionally create junk drawers. Ashley’s advice to avoid this is to “make sure everything has a home”. She suggested these bamboo stackable drawer organizers and it’s been a life changer! She also suggested using a battery organizer because these can really junk up a drawer fast! I had no idea that such a product existed and my mind was blown!

BEFORE

BEFORE

5. Make the Best Use of Any Storage Space

As you can see, we didn’t tap into our cleaning closet’s maximum potential. With some simple shelf and rod installation using the Elfa system from The Container Store and this expandable wall mounted organizer, we totally transformed the storage capability of this closet! Items are no longer leaning on each other taking up floor space.

BEFORE

BEFORE

patticakewagner laundry room makeover

Tackling this project has lifted a huge weight off my shoulders! I’m so glad to have this done early before our guests visit for the holidays. We no longer need to close the swinging door from the dining room to the laundry room or be embarrassed by the chaos. My favorite part of this process was discovering a new found appreciation for this room. It used to be our old galley kitchen and has beat up cabinets, laminate countertop and dated hardware + fixtures. We repurposed into our laundry room after the new kitchen was built. Sometimes we wait to love a space until we remodel it to our standards but it’s nice finding beauty in what we currently have.

A huge thank you to Ashley and Lindsay from Style and Dwell and The Container Store for gifting the products recommended by Ashley and Lindsay to organize our laundry room! Make sure to stop by their Instagram as well for more tips and tricks to staying organized. And of course, The Container Store is your go-to place to make it happen!

IMG_9974.JPG

Here are some more before and after photos for inspiration! I hope by sharing this, it can inspire you to get a head start. Sometimes seeing someone else do it can spark the motivation. Thank you for stopping by and let me know if you have any questions!

-Patti

BEFORE | AFTER

BEFORE | AFTER

BEFORE | AFTER

BEFORE | AFTER

Shop all items used in this project below:

*note: affiliate links used and as always, all opinions are my own

Sweetest Regards, Patti
design

3 Easy Steps to Styling Your Shelves

Photography by Sage Imagery

I used to style vignettes for presentations all the time when I was a product designer for Target.  Read more about my product design days here.  Lately, with three young kids (five yrs and younger), I’ve been finding it difficult to tackle extra house work outside of our daily tasks.  Needless to say, styling our built-ins was never a priority.  So I recruited my friend, Lea @creekwoodhill, for a fun styling session.   Lea is a super talented interior and product stylist who makes the process look effortless.  I invited Lea over and wanted to share her three easy steps to help you pull your shelves together using what you already have.

1: Take Everything Out and Take Inventory

Just like what I was doing with my laundry room clutter (read about that here), I found that I was just moving things around my shelves and it was not turning out how I wanted.  Pulling EVERYTHING out and starting with a blank slate allows you to only put back what you love and donate what you don’t.

Patti&LeaStyling-58.jpg

2: Pull Things Together That are Cohesive

When you’re able to group things together that feel cohesive, you can create nicer-looking individual vignettes.  A good vignette makes the shelf aesthetically pleasing.  Here are some tips to keep in mind for creating individual vignettes:

  • Have a variety of materials to create some depth and interest. For example: You can see that Lea used glass, terra-cotta and a moth ball for the top vignette in the photo below.

  • Play with scale to create some dimension. Varying the scale of the items will help your vignette not fall flat

  • Always incorporate meaningful items where you can. It’s important to me that our house tells a story so I love showcasing belongings that have meaning vs. being filled with just pretty stuff.

Remember to shop around your home! As you’re putting things back to create the individual vignettes, make sure to have fun and play around with placement.

similar glass vases

similar glass vases

3: Step Back to Ensure All Vignettes Look Cohesive as Whole

Creating the individual vignettes is a starting point but making sure it looks cohesive as whole will make your shelves really stand out.  Here are some more awesome tips:

  • Try removing the book jacket off your hard cover books. Chances are, they’ll look much better! I had no idea until Lea shared this with me! We were able to pull more books from my cabinets and they helped so much visually.

  • Ensure there’s a balance in contrast and color scheme.

  • Keep odd numbers in mind. Groups of 3, 5 or 7 will make the vignette look + feel most balanced. You don’t have to stick to this rule but if you’re struggling to get it right, see if this helps.

Step 3: Step Back to Ensure All Vignettes Look Cohesive as Whole

Step 3: Step Back to Ensure All Vignettes Look Cohesive as Whole

Let’s take a look at the before and after of my dining room built-ins using the tips Lea shared.

*Apologies in advance that I didn’t think to take a picture of them opened for a better comparison.

Dining Room Built-in 1

BEFORE

BEFORE

AFTER

AFTER

Dining Room Built-in 2

BEFORE

BEFORE

AFTER

AFTER

Living Room Built-in Shelf

BEFORE

BEFORE

AFTER

AFTER

I hope you found these simple tips helpful. It’s pretty amazing what we can do to a space with some changes using what we already have. Having the ability to create an aesthetically pleasing vignette can really enhance a room. Special thanks to Lea from Creekwoodhill for the styling tips and Jen from Sage E Imagery for the amazing photos. Thanks for stopping by!

-Patti

dress from Winsome Goods

dress from Winsome Goods

dress from Winsome Goods

dress from Winsome Goods

Sources:

Paint Color: Benjamin Moore White Dove

Trim: Benjamin Moore Satin Impervo Enamel

*affiliate links may be used


Sweetest Regards, Patti
design

Fall Living Room Refresh: 6 Must-Haves to Cozy Up Your Room

We’re in the process of making over our living room but that didn’t stop me from updating it for the fall season using what we have. As the temps start to drastically drop, I want our living room to feel cozy but not in your face screaming FALL YA’LL. Take a look at how I did a simple update.

make it cozy

Pull out those blankets. The chunkier, the better like this knitted one. It’s my fav and handmade with merino wool and feels buttery soft. I’ve been really loving the blush/rose color this season.

PattiWagnerPINKthrow5.jpg
photos by: sage imagery | chunky blanket here (mine is 40x52in)

photos by: sage imagery | chunky blanket here (mine is 40x52in)

set the mood

Twinkle lights and candlesticks can change your mindset about it getting darker earlier. I saw lots of photos on Pinterest with twinkle lights before I finally decided to add some in our home. And guess what? It makes the space feel so cozy and the kids love it! I wrapped mine around the blanket ladder but have seen them hung around windows, on mantles, etc. Amber glass also helps to set the mood and I incorporate this through vases and votive holders for simple styling.

twinkle lights here | amber glass vases here | amber glass candles here | live edge wood table here

twinkle lights here | amber glass vases here | amber glass candles here | live edge wood table here

this photo by Sage Imagery of Jack puts a big smile on my face! his cable knit sweater here; suspenders here

this photo by Sage Imagery of Jack puts a big smile on my face! his cable knit sweater here; suspenders here

velvet touch

One thing that I’d like to add is a velvet accent pillow. These ones from Mulan Designs by Ellen on Etsy are stunning! I’ll probably order the mauve or gold color.

photo via Etsy from Mulan Designs by Ellen | velvet round pillows here

photo via Etsy from Mulan Designs by Ellen | velvet round pillows here

This living room will look different in a few months but in the meantime, we are enjoying what we have. For those not familiar, almost all of our furniture are from Brian’s bachelor days. They are very nice quality but it’s time for us to update our furniture that fits us BOTH. If you’re excited to do a little refresh for fall, here are six must-haves to cozy up your room.

Other Items: similar rug | blanket ladder | live edge side table | woven baskets

Let me know if you have questions and follow along on my Instagram page for more daily happenings, projects and BTS! Thank you for reading!

-Patti

note: affiliate links used

Sweetest Regards, Patti
before and after

Girls’ Bedroom Tour

photos by Melissa Oholendt for Glitter Guide

I get a lot of questions every time I share the girls’ bedroom on my instagram. So I wanted to give a tour here, provide a little background and answer all of the FAQ’s.

Before – See the Behind the Scenes

We lived in this room when we first moved into the house and started our renovation process. There were cracks all over the plaster walls and ceiling which Brian had to fix. See slideshow for all the photos!

Really love looking back on these photos of Ava watching dad at work. She was almost two years old here.

Progress – Don’t Forget to Document It!

Cracks fixed and walls painted! Don’t forget to document the progress. We painted the walls with Benjamin Moore’s White Dove to tie in with the rest of the house and give it a fresh, yet warm clean look. We used Benjamin Moore Satin Impervo Enamel for the trim. Also, we kept the mushroom ceiling light. Some would probably replace it but we kept it for a little history.

IMG_9465.jpg

After – The Perfect Room for Our Girls

Once Brian finished up with the cosmetic changes, we searched high and low for the bed frames. After looking all over on Craigslist, garage sales and FB Market Place, we discovered these ORB metal bed frames and the price was right. They became the foundation for this room. We love the ORB against all the whites and added color through fun prints on the bedding and rug.

The duvet was purchased from Ikea and is no longer available. The reversible rug was purchased from Target and is also no longer available. I’ve linked similar items if you’d like to re-create this look.

We kept the decor simplistic and there’s opportunity for the girls to add their personal touches as they grow older to match their personalities.

On the other side, we hung a canopy and added two kids wardrobe closets since the closets in their room are rather small with super duper low ceilings.

Ava wasn’t quite two years old yet when we moved her into this room but she was ready for a big girl bed. She now shares it with little sister and they have a great time together here. We were also very intentional about making this space a relaxing place to read and rest and kept toys to a minimal. The girls get a basket each to keep their toys and the rest we store in the playroom. They still do lots of talking, reading and imaginary play here so there is no lack of fun in their room!

photo by Meg Cooper

photo by Meg Cooper. Bed frames: Target; Wayfair

I hope you enjoyed the tour. I’m linking sources below. For items that are no longer available, I linked similar items. If you have any questions, please leave them in the comment. Thank you for stopping by!

Sources Below:

Paint Color: Benjamin Moore White Dove

Trim: Benjamin Moore Satin Impervo Enamel

Bed frames: Target; Wayfair

Wardrobe Closet: Ikea; similar ones Wayfair; Wayfair; PBKids; Target

Canopy: Target – no longer available; similar ones PBkids

Bookshelf: Passed on from our neighbor

*Affiliate links used in this post

Sweetest Regards, Patti
family

Wagner Family Intro

photos by Paisley Anne Photography

Hello!

We are the Wagners. You’ll mostly find me, Patti, steering this ship but Brian helps a lot with the handy work to bring our projects to life. We live in Minnesota with our three adorable kiddos where we’ve been renovating our 1927 Tudor Revival and have found joy in sharing the process on Instagram.

We also have a side business renovating vintage properties in Minneapolis, MN to turn into boutiquel rentals. In June of 2019, I left my career as a Product Designer for Target (after 13 years) to stay home with our children and manage our rentals full time. To keep my creativity flowing, I wanted to launch this site for a more in depth look into our projects and whatever else is shared on my Instagram.

Wagner family: Patti, Brian, Ava, Livy and Jack

Wagner family: Patti, Brian, Ava, Livy and Jack

A little background about me

I love Pho, Thai food and long strolls around the neighborhood. Okay, okay, let’s back it up a bit. I was born in Laos but my family fled the war torn country when I was around four yrs old. We lived in two refugee camps in Thailand, and one in the Philippines before going through the vetting process to arrive in the US when I was about seven. I used to feel shame with this story but now I tell it proudly. I daydreamed and drew a lot as a kid. Although we didn’t have much money and rented throughout my childhood, I would decorate our house with things I made to make it feel like home. I guess that’s why I’m a believer in good design for all.

I grew up in California but attended college in Virginia at Virginia Commonwealth University, earning my BFA in Interior Design before moving to Minnesota after graduating. I’ve worked at a design-build firm and an interior design studio. Due to company acquisition, I was laid off from my design studio job and found that to be a blessing. Because of it, I landed my dream career at Target HQ as a product designer!

patented bath hardgood collection that I helped designed for Target

patented bath hardgood collection that I helped designed for Target

Shop some of the products that I’ve designed below (*affiliate links used):

About Brian

I had no intentions of staying in the midwest for long but met Brian shortly after moving and you know what they say…the rest is history lol (read the short story of how we met here)! Before Brian became a banker and President of Flagship Bank, he did landscaping work for his brother doing some hard labor jobs. Love hearing stories of days he used to drive dump trucks and being outside sweating all day – whew! Although he is a banker by profession, he went to Aviation school to become a pilot. This guy can do everything I tell ya. He plays bass guitar, is a great cook, has a vast knowledge of finance, can pretty much fix anything, isn’t afraid to get his hands dirty like cleaning sewage from a clogged pipe, is a super hands-on dad and yea, can fly airplanes. You know, simple things…

patti wagner patticakewagner family.jpg

How we got started in the rental business

Brian’s first real estate investment project started in 2006 when he and his brother purchased a 1926 six-unit building. They converted the apartments into nice condos doing a lot of the work themselves. From demolition to refinishing floors to painting, Brian learned a ton. In total, he has renovated 13 units to date. His knowledge in finance + real estate investments + building codes combined with risk taking, has grown our small business into what it is today. I’m happy to be his right hand person who lays out the designs elevating them from other rentals, sources the products, finds partnerships and styles them to make our listings as attractive as possible. We currently manage six rental units and have dreams of growing it. It’s been an adventure filled with highs and lows but we are so proud of all the work we have poured into reviving these old properties. We’re always learning and intend to make this space a place of encouragement.

Exterior of six-unit building that Brian and his brother turned into condos. Photo from Zillow

Exterior of six-unit building that Brian and his brother turned into condos. Photo from Zillow

One of the bathrooms inside the building that Brian and his brother turned into condos in 2006. Photo from Zillow

One of the bathrooms inside the building that Brian and his brother turned into condos in 2006. Photo from Zillow

New Chapter

I am now managing our rentals and it’s been bittersweet starting this new chapter in my life. Target HQ was truly a great place to work BUT I’m thrilled to spend more time with my babies. This will be a new adventure because I’ve always had a job with a steady paycheck since I was 15. It definitely won’t be easier but it feels right for our family, right now and I’m very grateful for this opportunity.

Thank you!

Hope this gives a glimpse into who we are and how we got started. This site will be an extension of my instagram account at Patticakewagner. I get so many questions on there and it’s nearly impossible to read + answer them all. I truly love sharing our work and knowledge so this also serves as a one-stop resource guide for all the FAQs. While I’m happy to share all of this, please know that this takes a lot of time and work on my part. Most of the content that I share are not paid so in order for me to continue to give my time, I will take on paid sponsorships/partnerships on a limited basis when I see fit. I strive to be transparent with this. Everyone’s time is valuable and we should all use it wisely. With this said, I’m so glad you’re here! This is a place to focus on family, renovation, design and community. I hope you find it as a guide in making your home a little sweeter – wherever that may be. Thank you so much for your continued support. I am truly appreciative to have you follow along.

Warmest Regards,

Patti

Sweetest Regards, Patti
This @sandbergwallpaper brought the charm and coziness to our mudroom/entryway 😍. It makes me incredibly happy! 
Your entryway is the first impression of your home’s interior so go ahead and make it your style. Comment “Benjamin” for the direct link to this wallpaper. 
Sandberg Wallpaper in Benjamin Sage Green
#sandbergwallpaper #ad #mudroominspiration #entrywayidea
My robovac-obsessed son said Rocky is better than a baby “bruddah” lol. The newly launched @Roborock Saros 10R is unlike any other. 
It vacuums AND mops! Plus washes & dries its own mops and auto empties the trash 🤯 . With all the smart cleaning features like dual anti-tangle system (we have 3 long-haired girls in the house), obstacle avoidance, FlexiArm riser side brush to clean corners/edges, 176ºF Dynamic Mop Washing for deeper cleaning + more, Rocky helps our family free up time so we can spend more quality time together and less time deep cleaning.
It’s currently $200 off until Feb 16th. See my stories + link in bio. 
#roborock #robotvacuum #saros10r #cleaningreels #homeinspiration
Filling one room at a time with @mackenziechilds Mocha Check pattern 😍! This may be the longest we’ve had our holiday decor up. It feels good to refresh for the new year and I’m over the moon to share this newly launched Mocha Check collection! From the darling tea kettle to the fabulous squashed pot that I used for my cotton balls + q-tips, there’s something so sweet and charming about this new collection from MacKenzie-Childs. 
Comment MOCHA and I’ll DM you the link to everything you see here!
#MCPartner #homedecor #homerefresh #interiordesign #nancymeyersaesthetic #MCMochaCheck https://liketk.it/53VrW