
Easy Vertical Paneling Installation
We have been making SO much progress on our garage attic transformation with the installation of the easy vertical paneling. We are excited for this multi-use space (storage, exercise, office, band practice). It has been a slow but steady work in progress and it feels like it is finally coming together! I wanted to give you a step-by-step on how we installed the wall paneling. It is pretty simple and adds a nice design touch.
Before diving in, here’s a back story on our garage attic. When we converted our old attached garage into a kitchen (the old small galley kitchen turned into the laundry room), we built a new detached garage. The garage design + materials had to be approved by the city to tie in architecturally with our 1927 Tudor home and we were working with limited space. It backs right up to the neighbor’s garage and is adjacent to the alley.
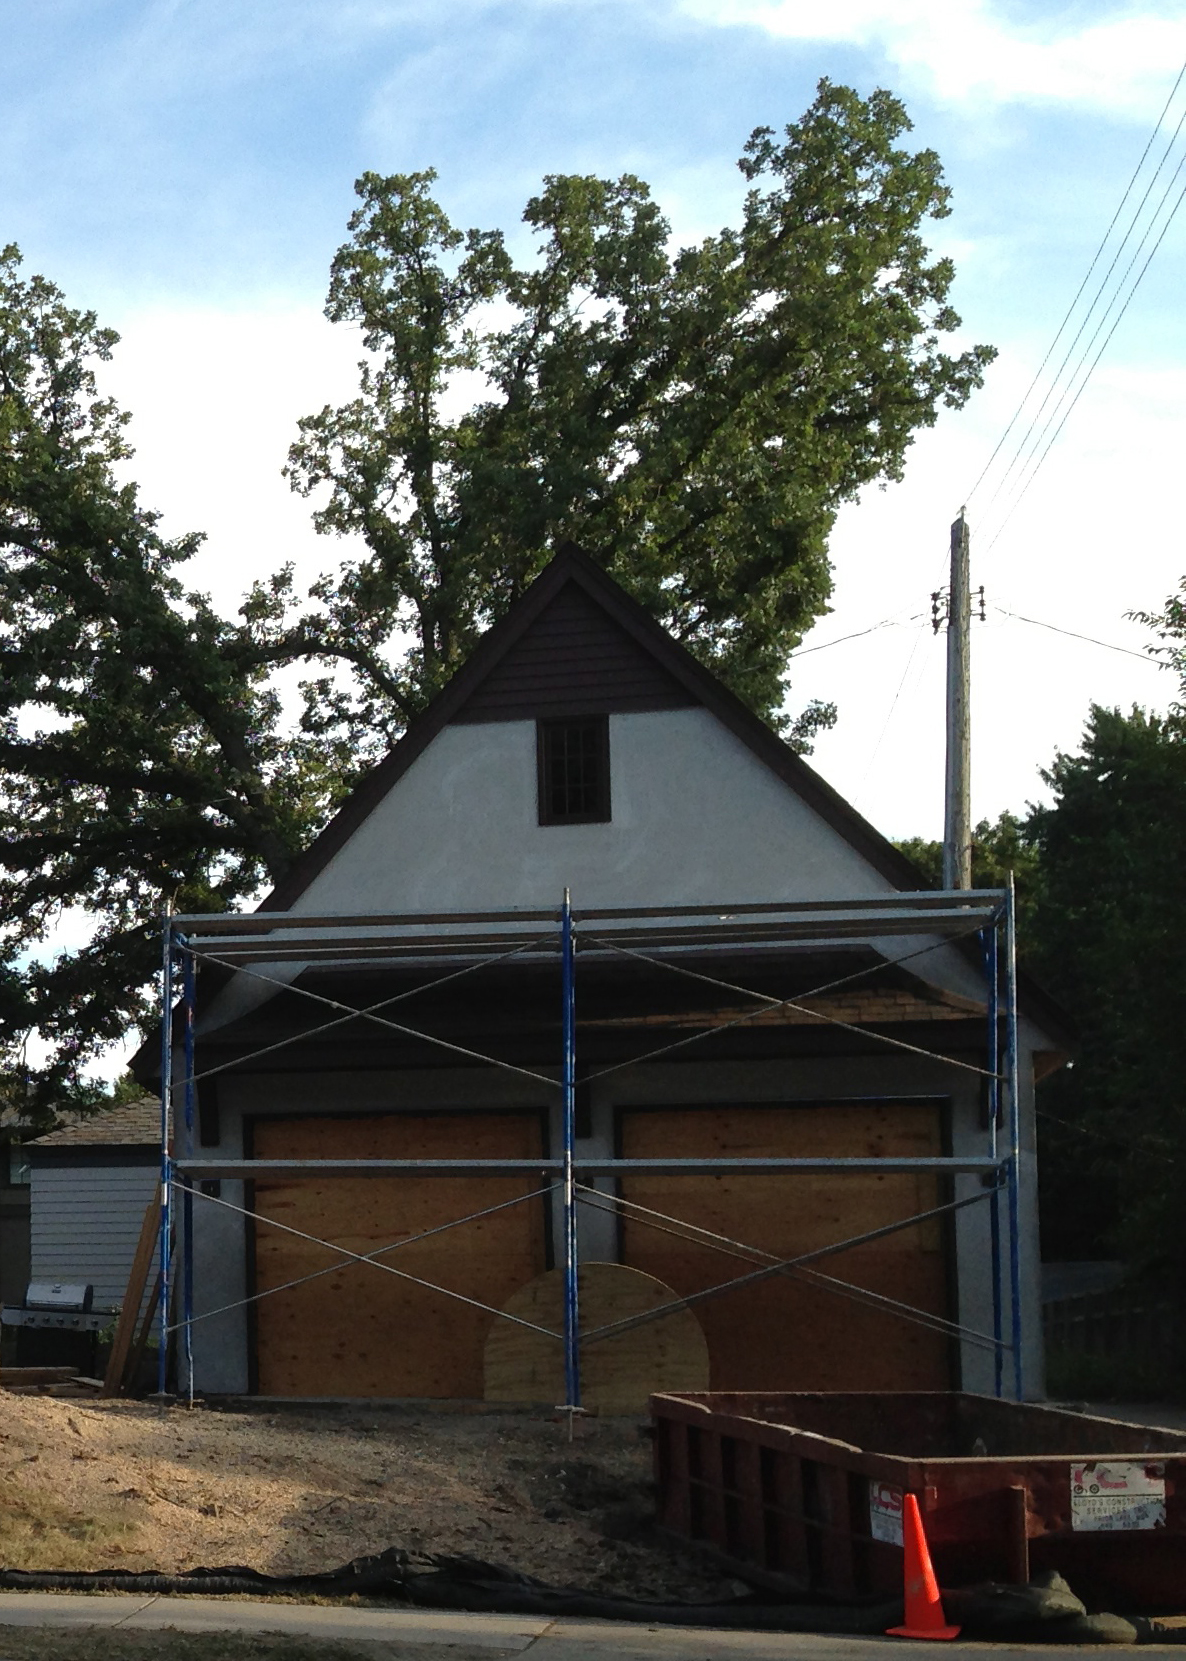
We tried to make the most of it by including the unfinished attic vs. one big open space. Can you spot the little attic window from the outside?
![]()
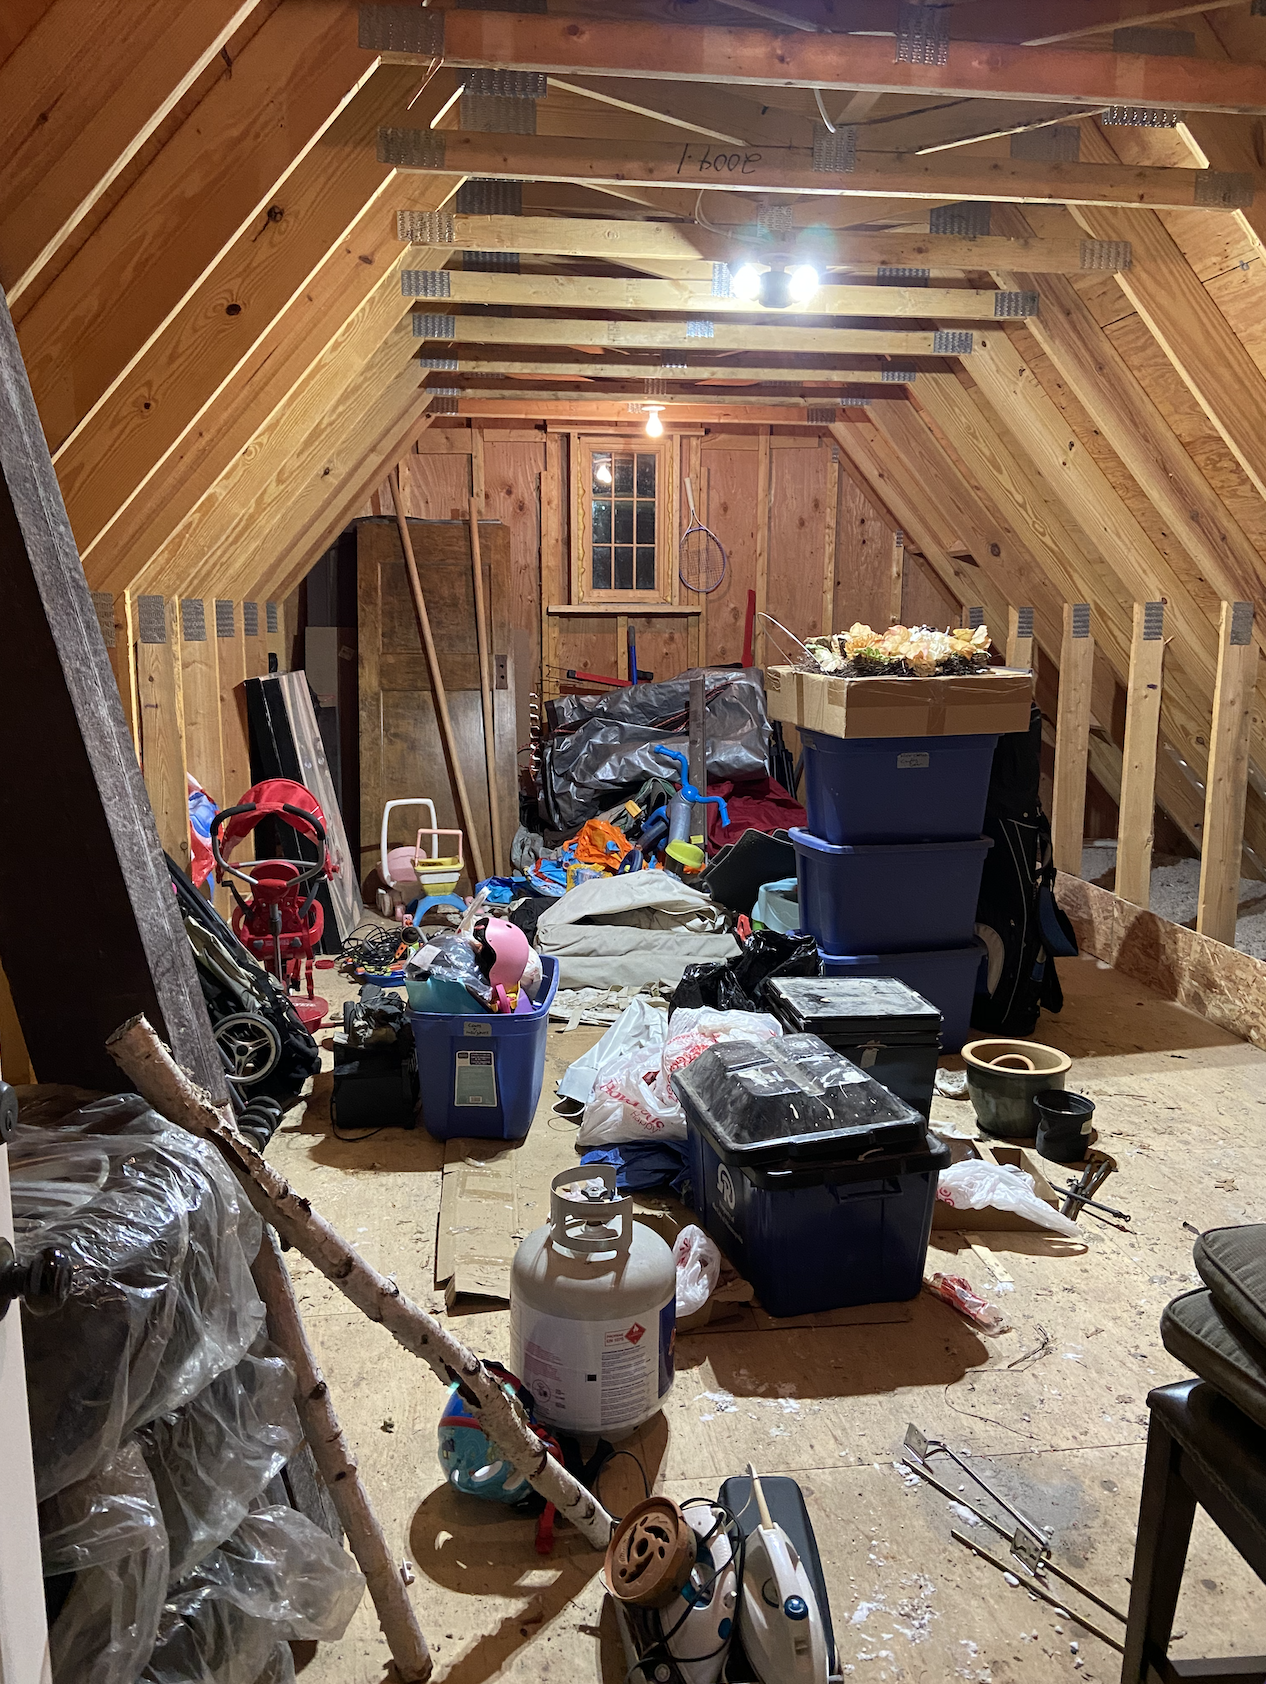
We had been using the unfinished attic for storage. It wasn’t pretty and Brian had this dream of one day diy’ing it into a band practice room with storage space. In December of 2020, he started putting his dream into motion…
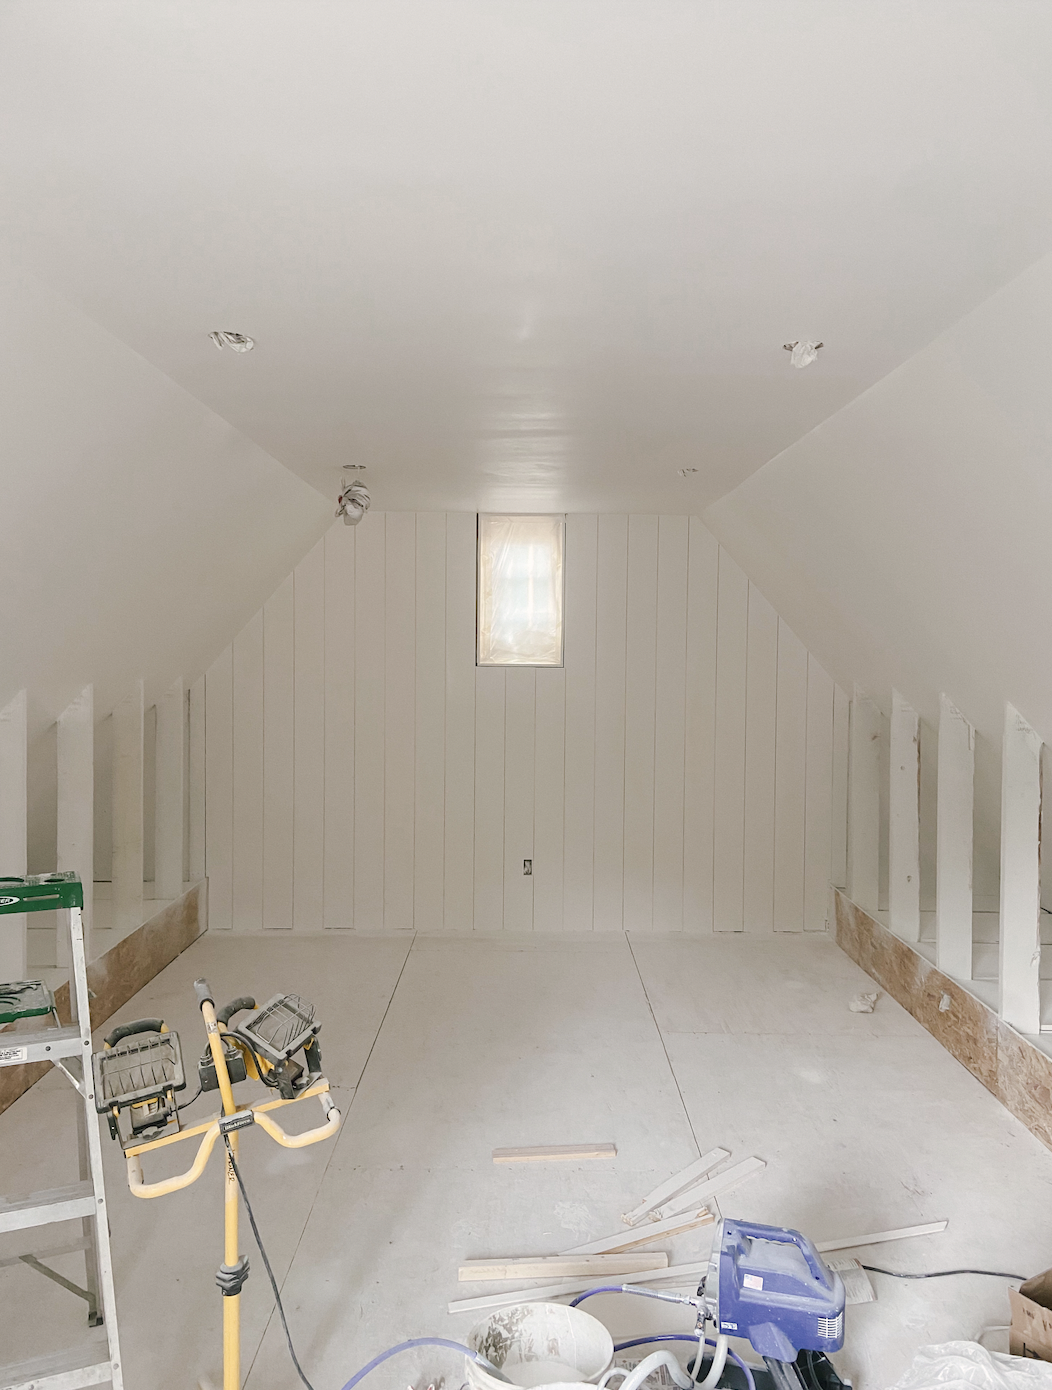
After adding insulation, drywall, soundproofing barrier, wall paneling and laying the LVP flooring, the room is almost completed!
Wall Paneling Decisions
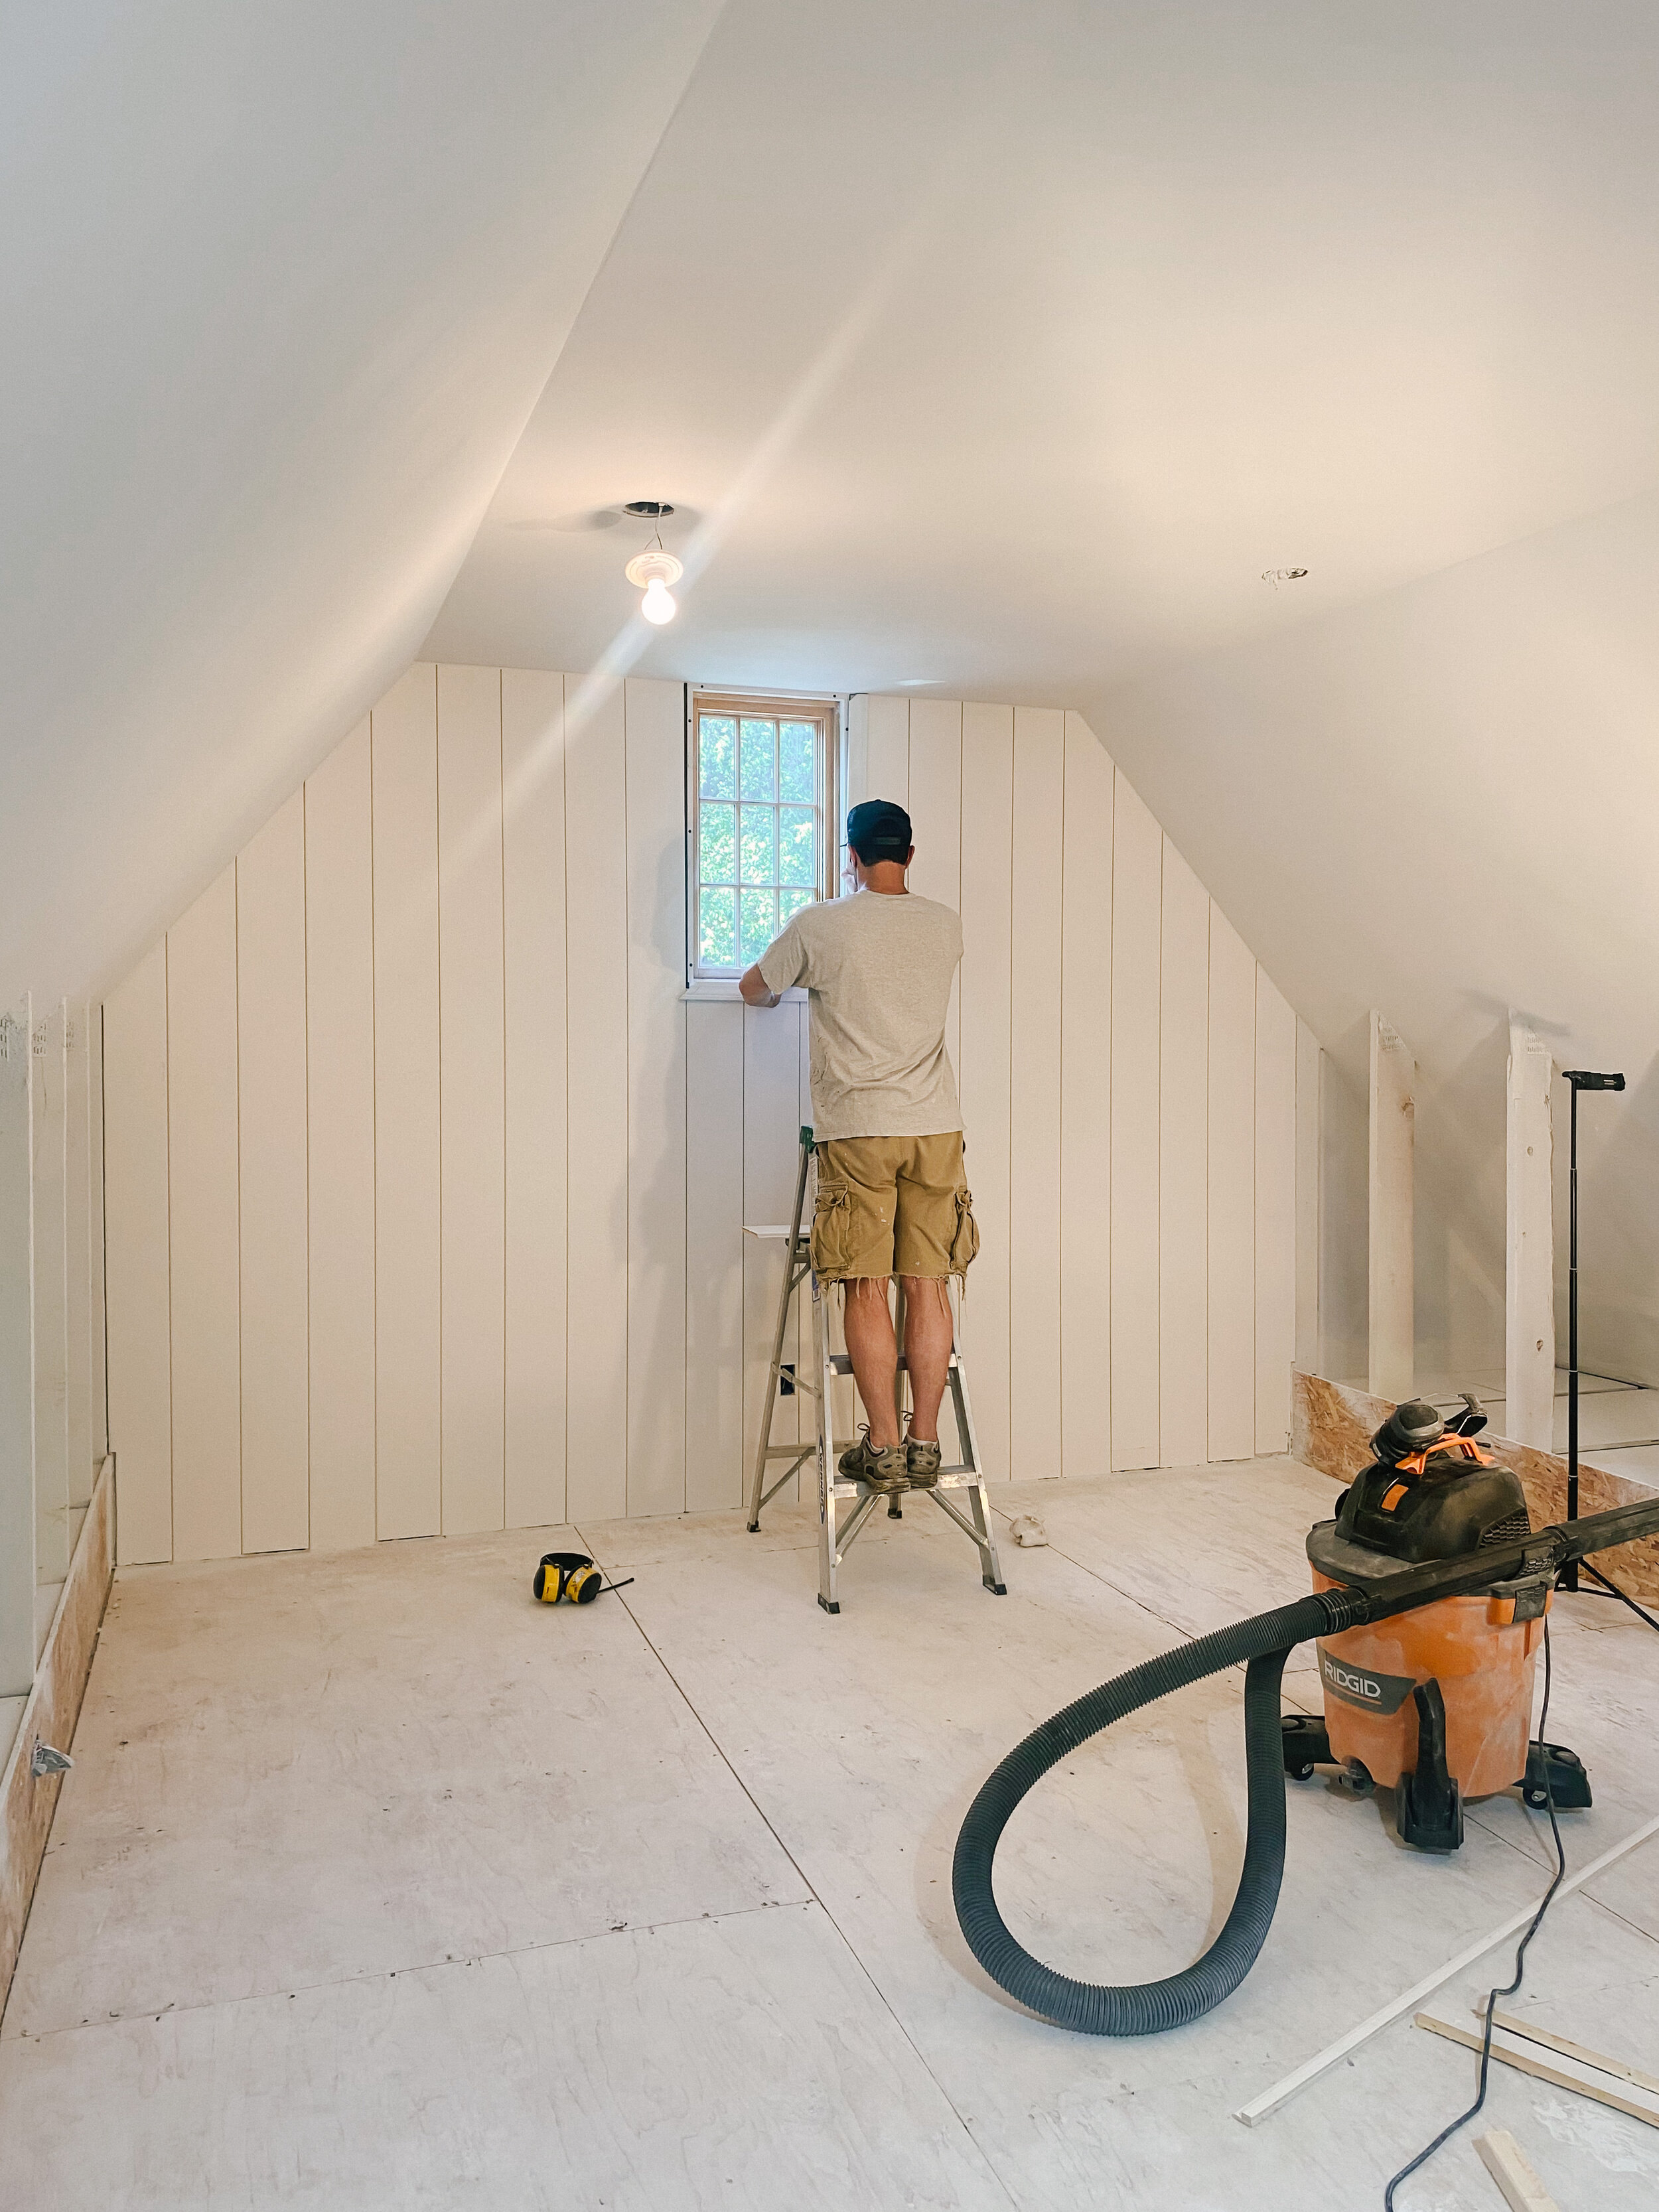
Prior to installing the paneling, we trimmed out the window. It was not Brian’s first rodeo with window trimming but it was his first time installing this specific type of paneling. We used painted shiplap MDF. Something I really admire about Brian is his willingness to learn new things, and dive right into it! He is super precise when it comes to these types of projects and handles everything he does with so much care.

Initially, we were deciding between having vertical or horizontal panel placements. I put a poll on Instagram and the results were split!
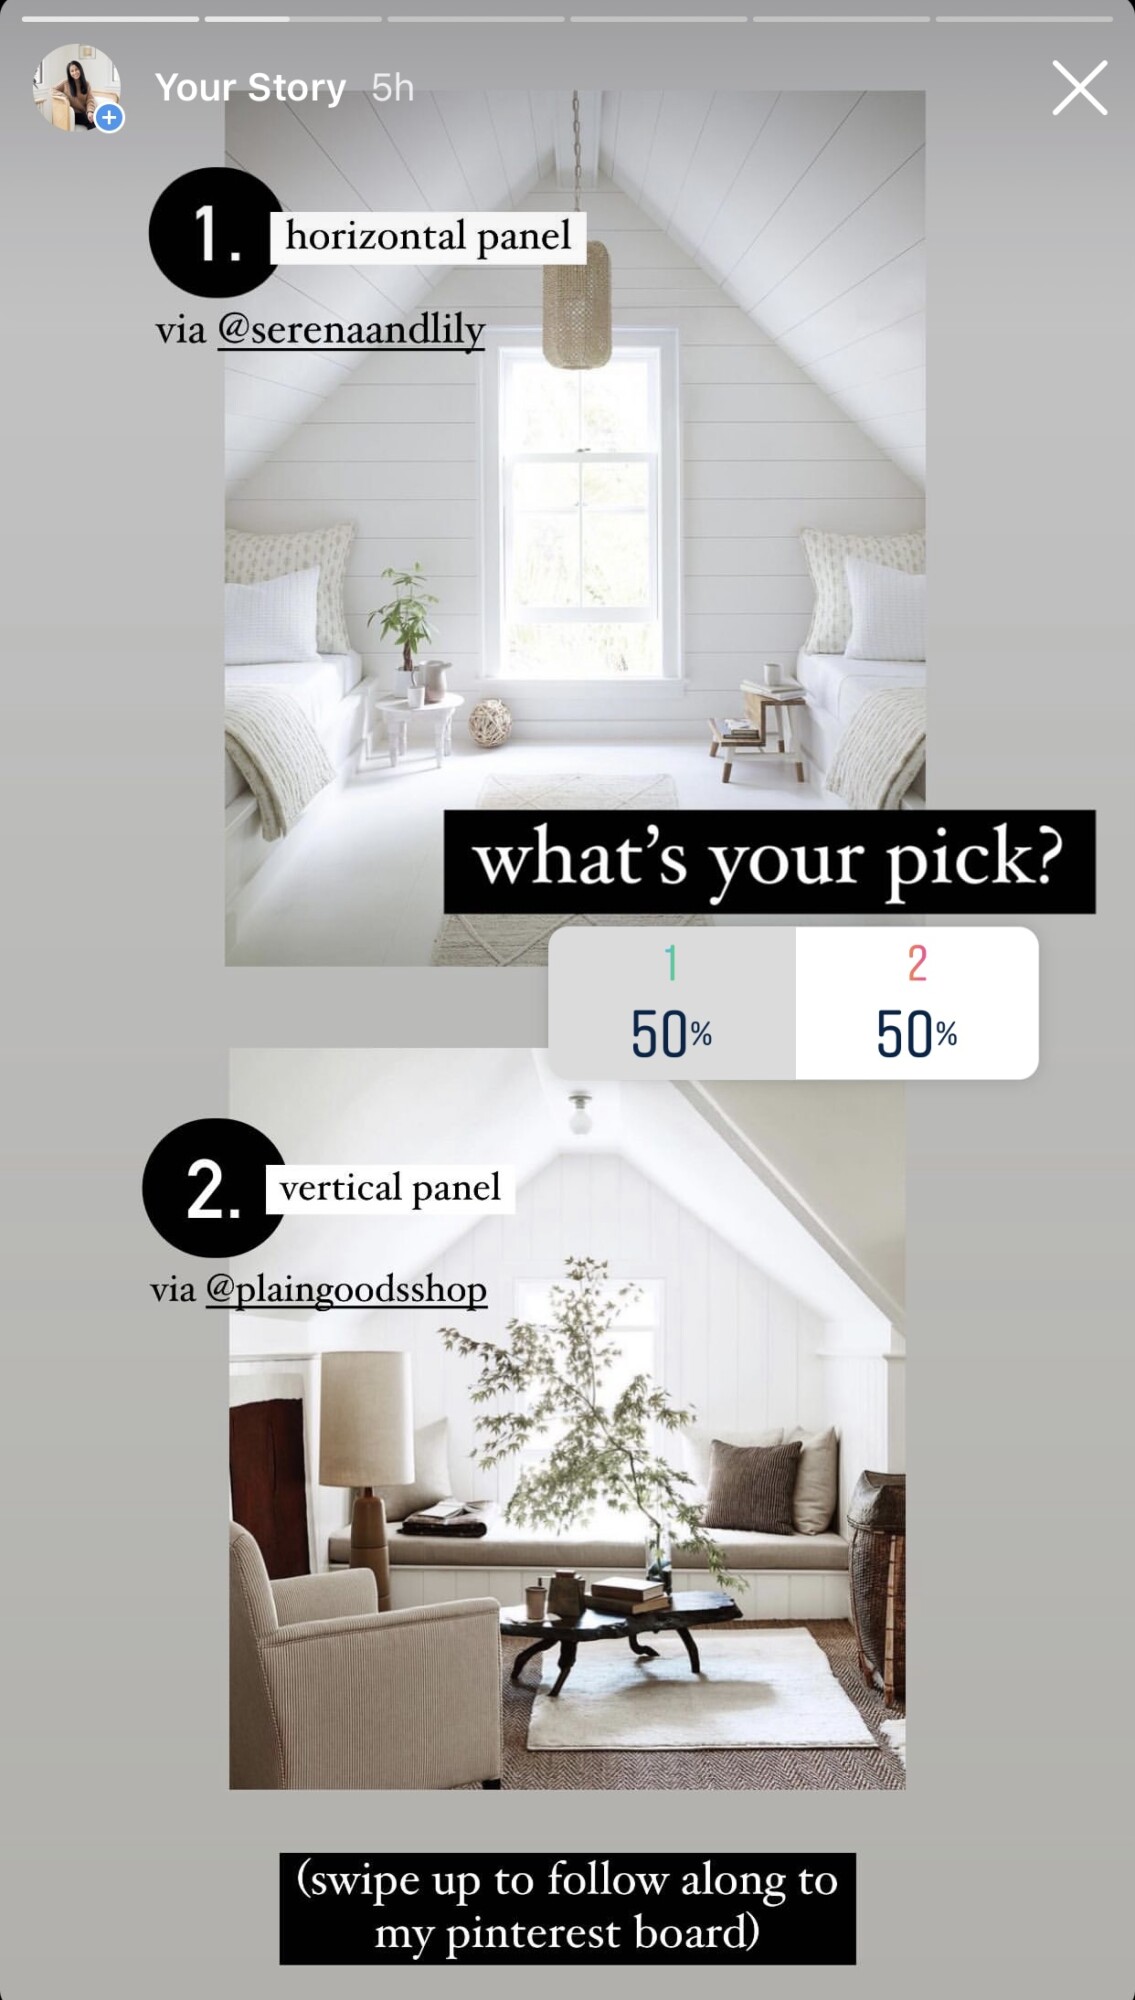
Ultimately we went with vertical because it gave the illusion of more height to the room. Now let’s get to the step-by-step for our easy vertical paneling installation!
How to Install Vertical Paneling
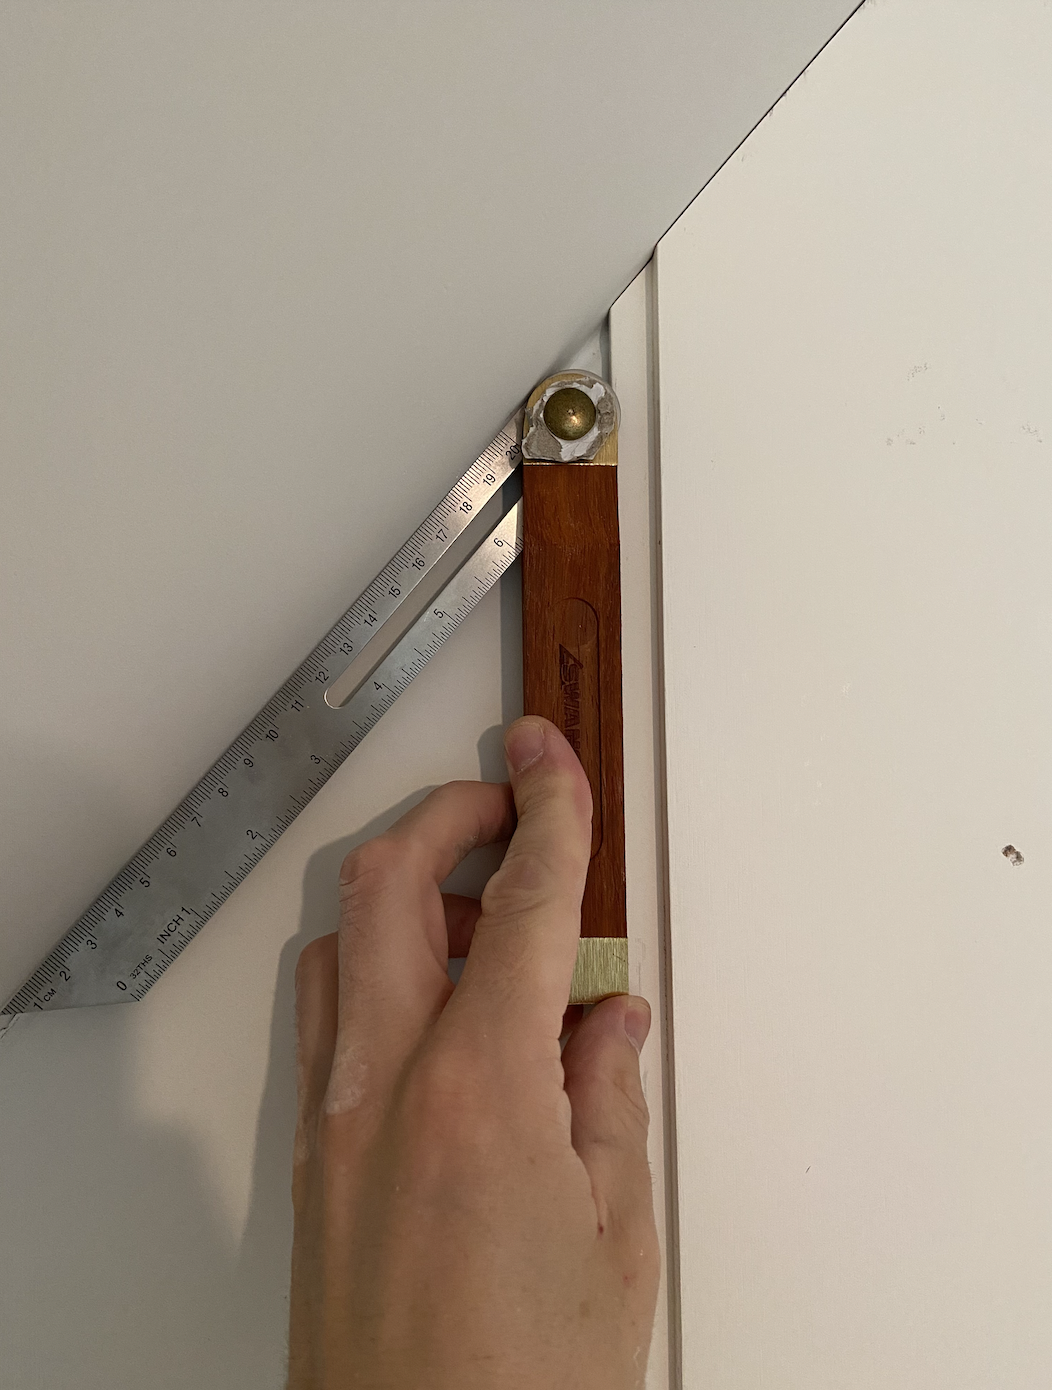
Step 1: Cut the panel at an angle in order to fit in the slanting wall. Brian was able to cut the panel at an angle with his T-Bevel/Angel Finder pictured and linked below. To use the angler all you have to do is place it at the angle you want (based on the wall angle) and mark it on the panel. Then take the marked panel and cut it with a miter saw.

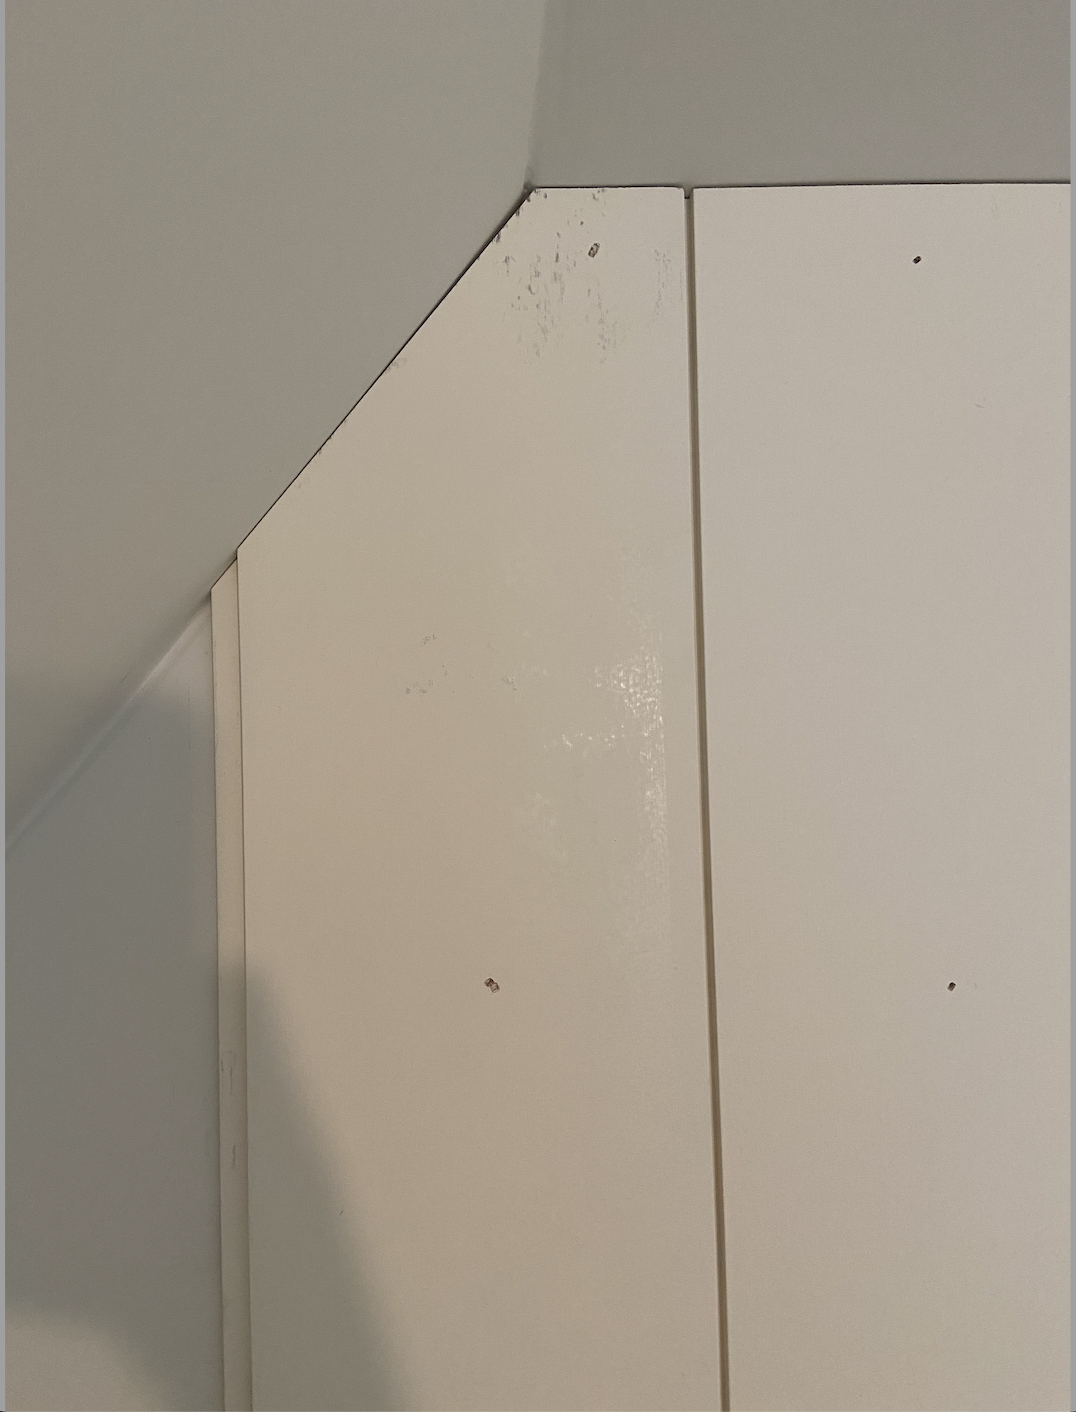
The cut angled panel should look like this on the wall:
Step 2: Once you have your cut angle pieces, the next step is to install them. Use construction adhesive on the back of the panel, lay the panel on the wall, tap it with a hammer, and then secure the panel on the wall with a nail gun. It is that simple!
*Pro tip: use a scrap piece of wood when tapping in the panels with a hammer. This helps you to not leave any markings on the panel.
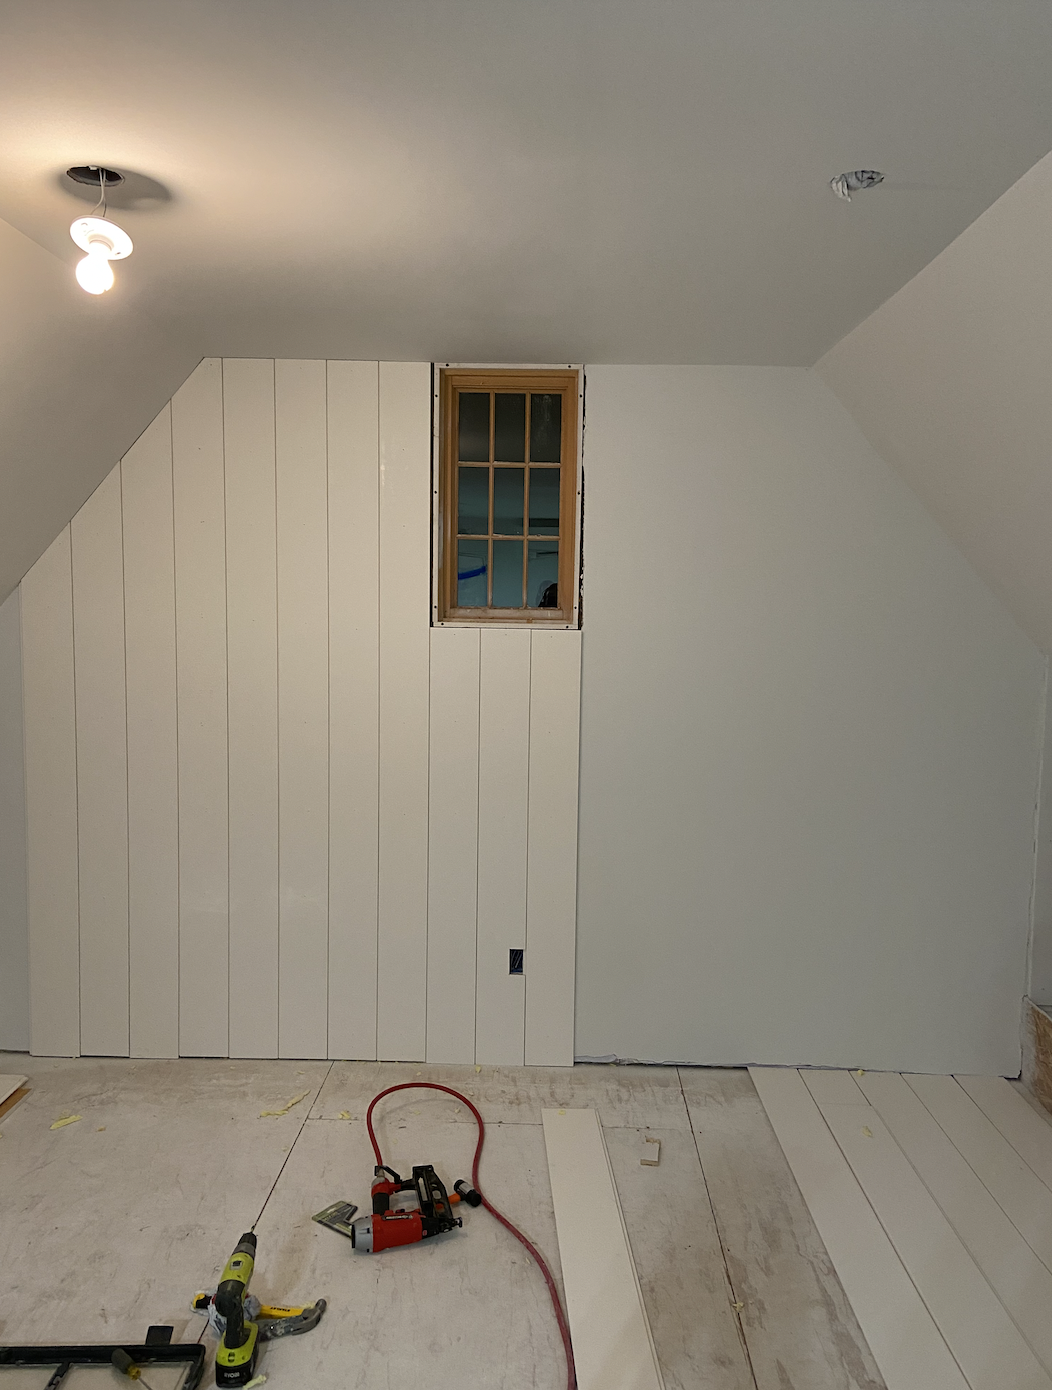
Step 3: Install final panel. We purchased three extra panels just in case. Luckily it went smoothly and we did not need to use the extra panels. It is always better to be safe than sorry, especially when you’re installing it late at night when stores are closed and you just want to knock it out.
Step 4: Last, paint the wall panels. We made sure to do two coats of paint using a paint sprayer for a smooth finish. This is the sprayer we recommend for the value: Graco Magnum 262800 X5 Stand Airless Paint Sprayer
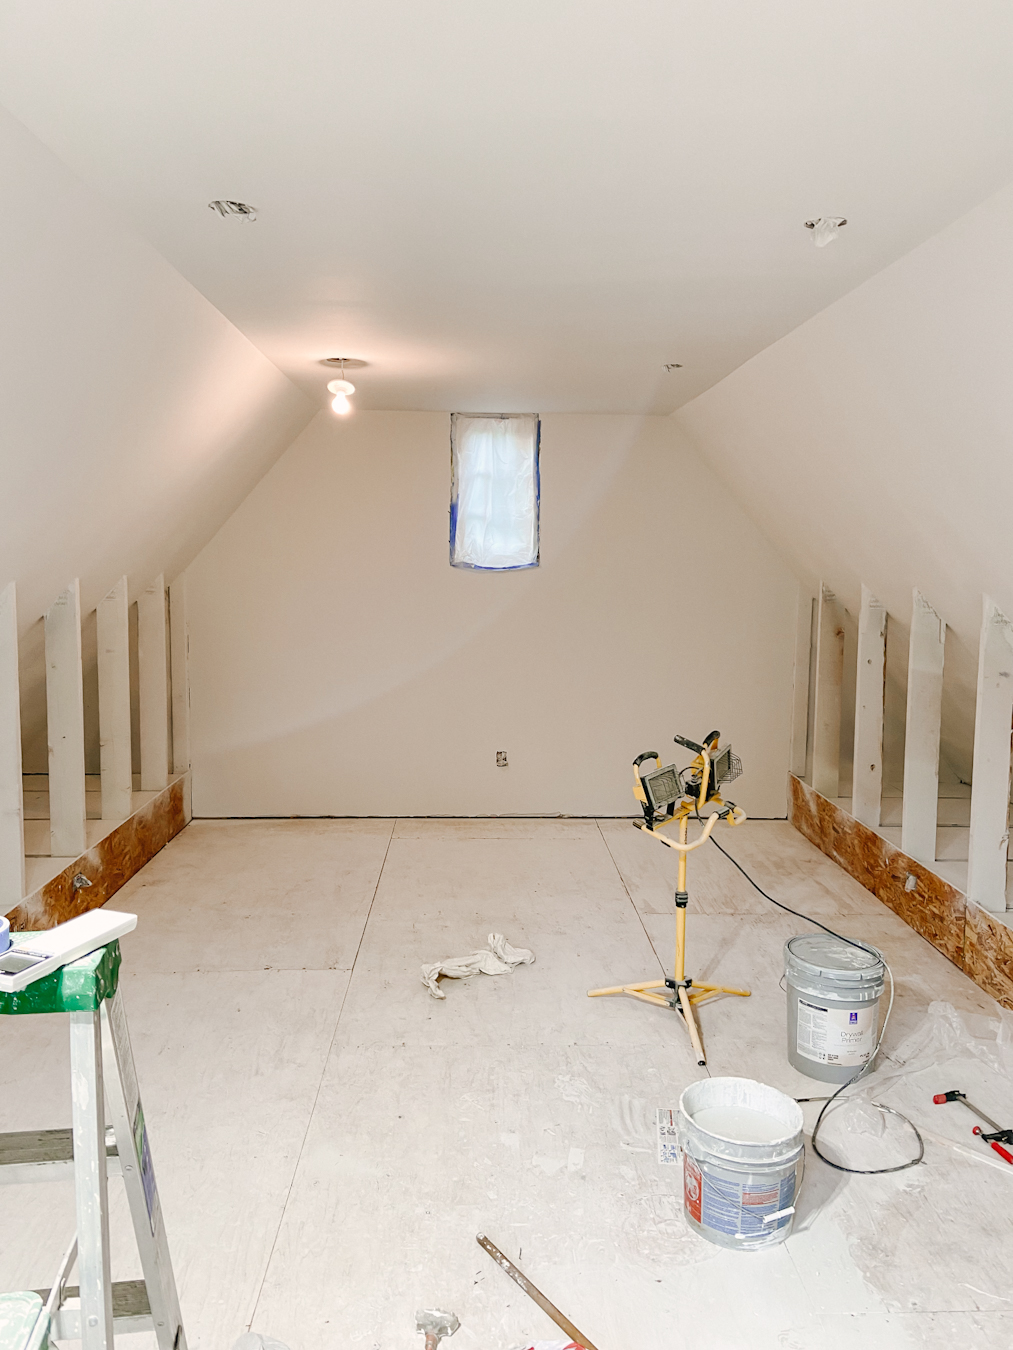
 Brian just finished laying the flooring which took him two evenings to complete. Are you ready to see how it all looks??? Just a reminder, here’s what the attic looked like before starting the project.
BEFORE
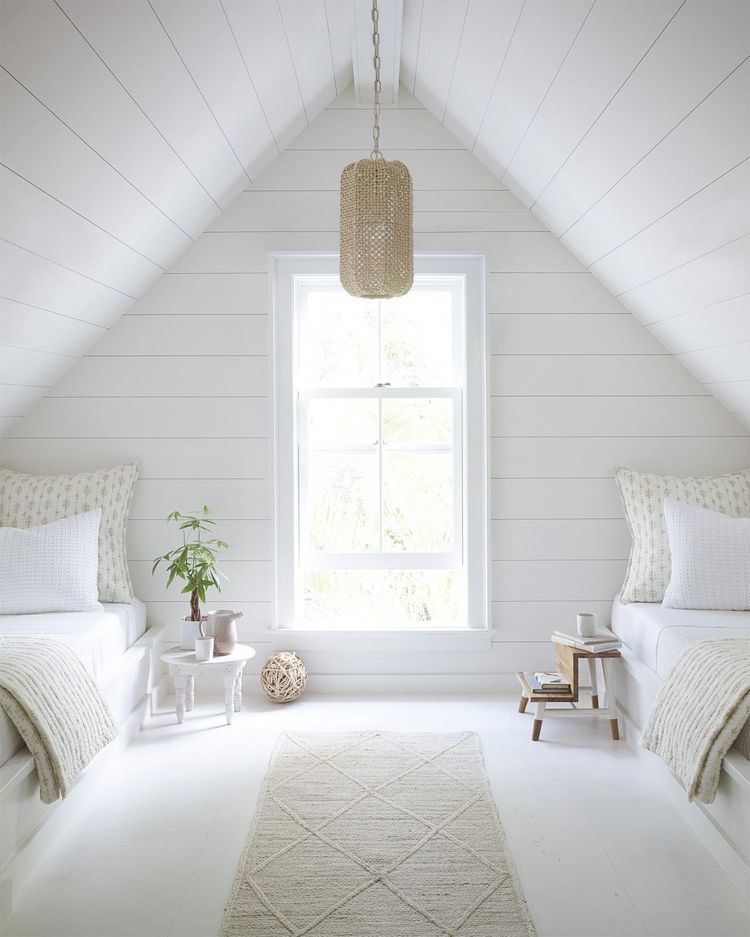
AFTER
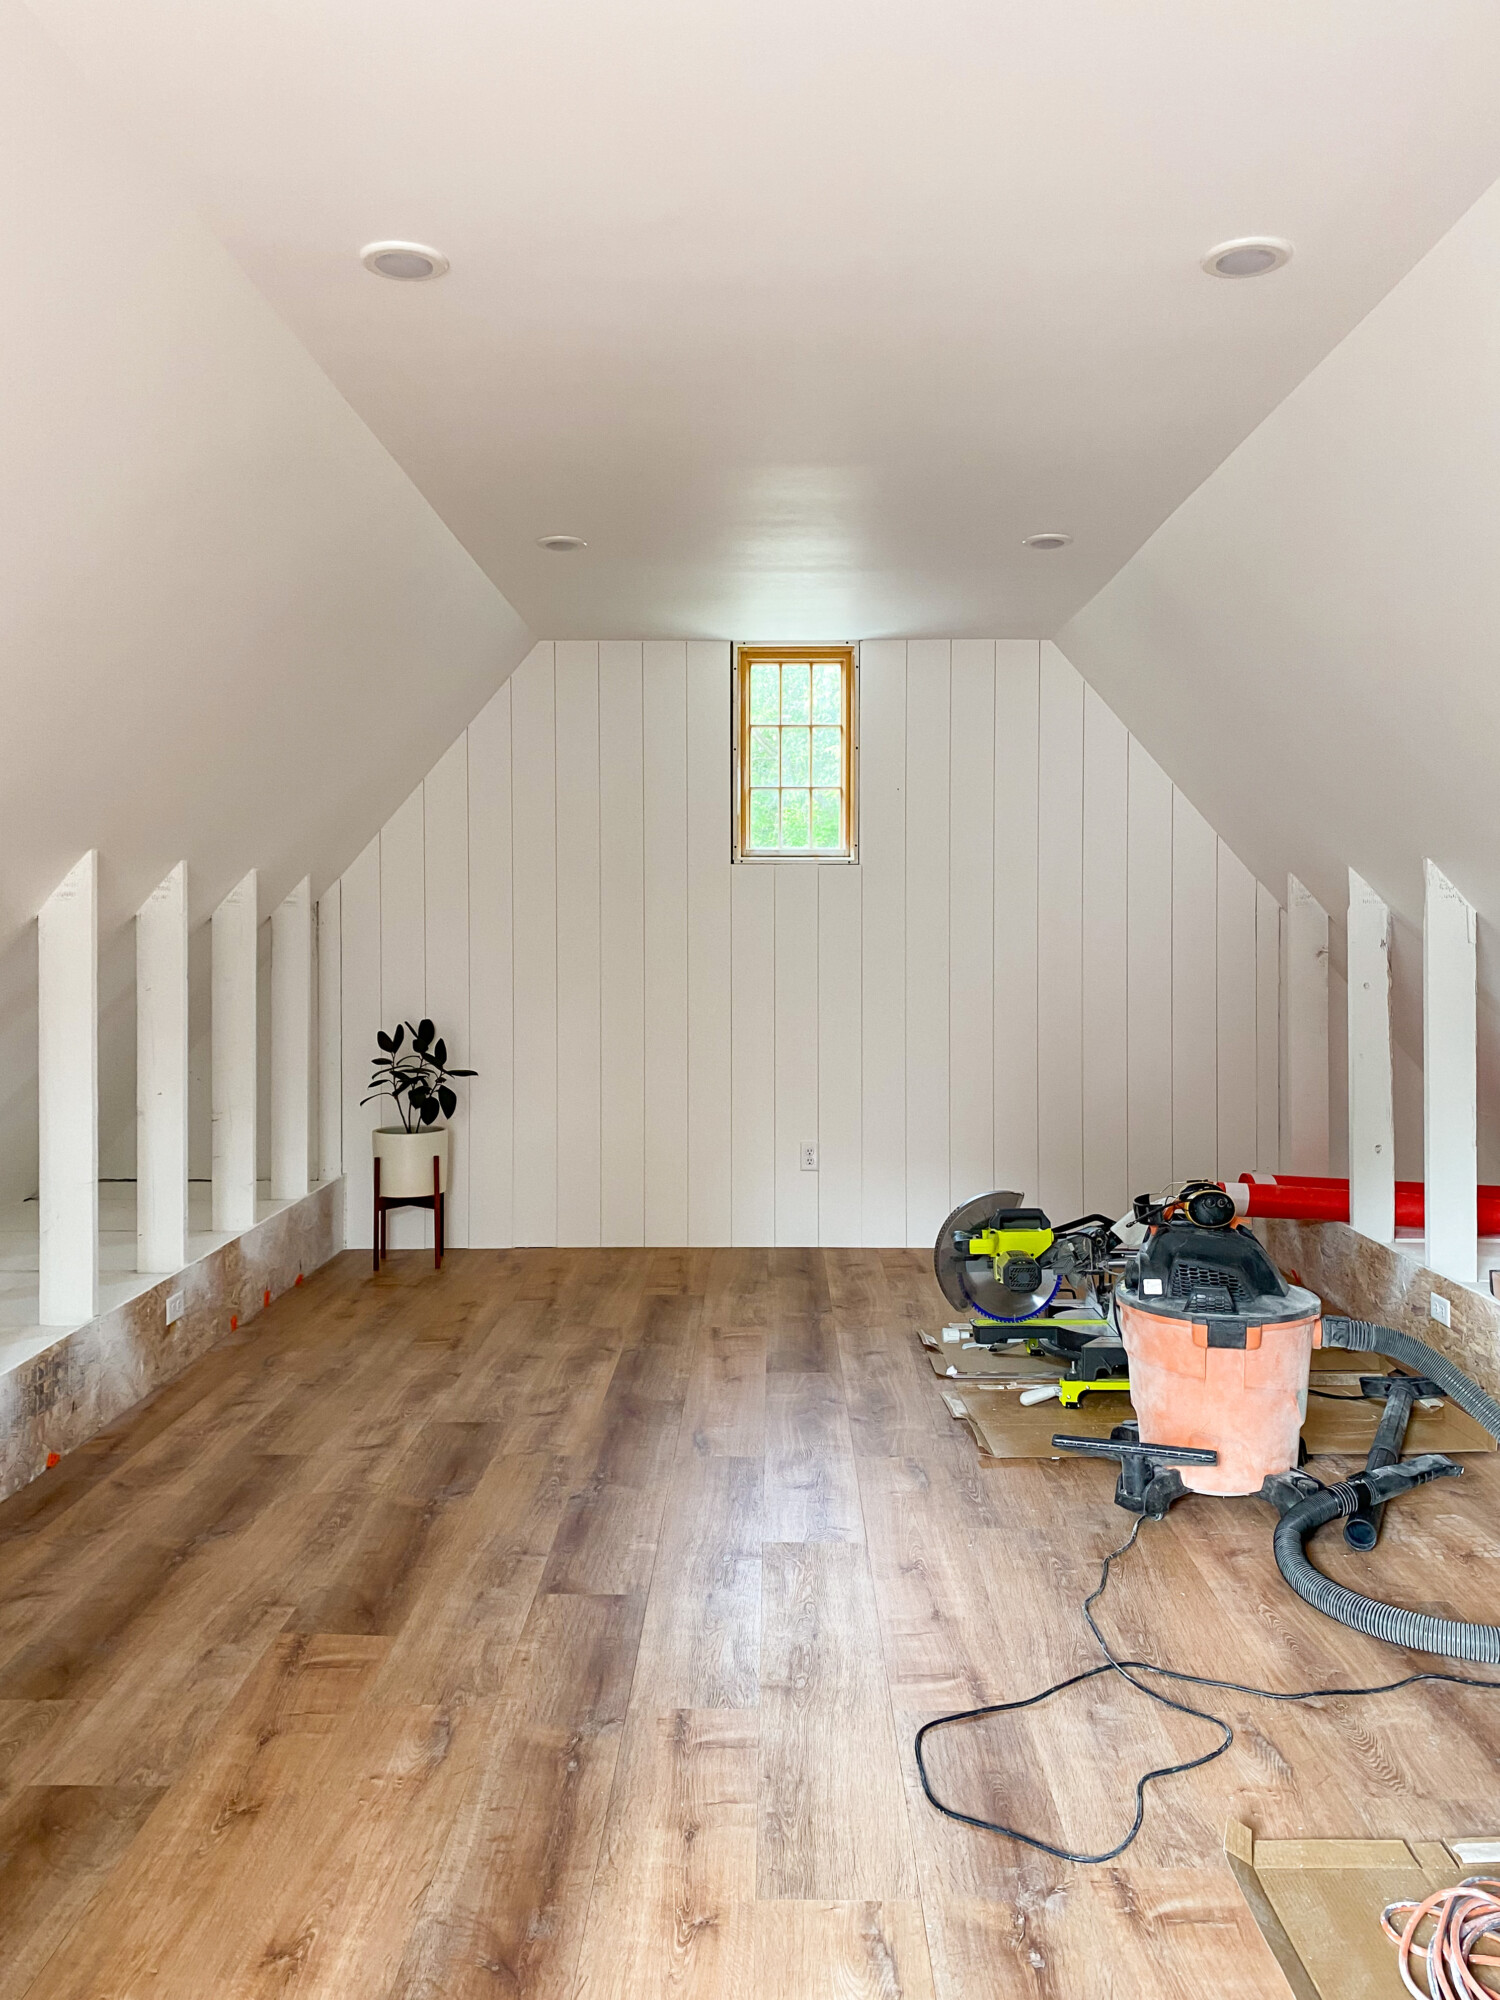
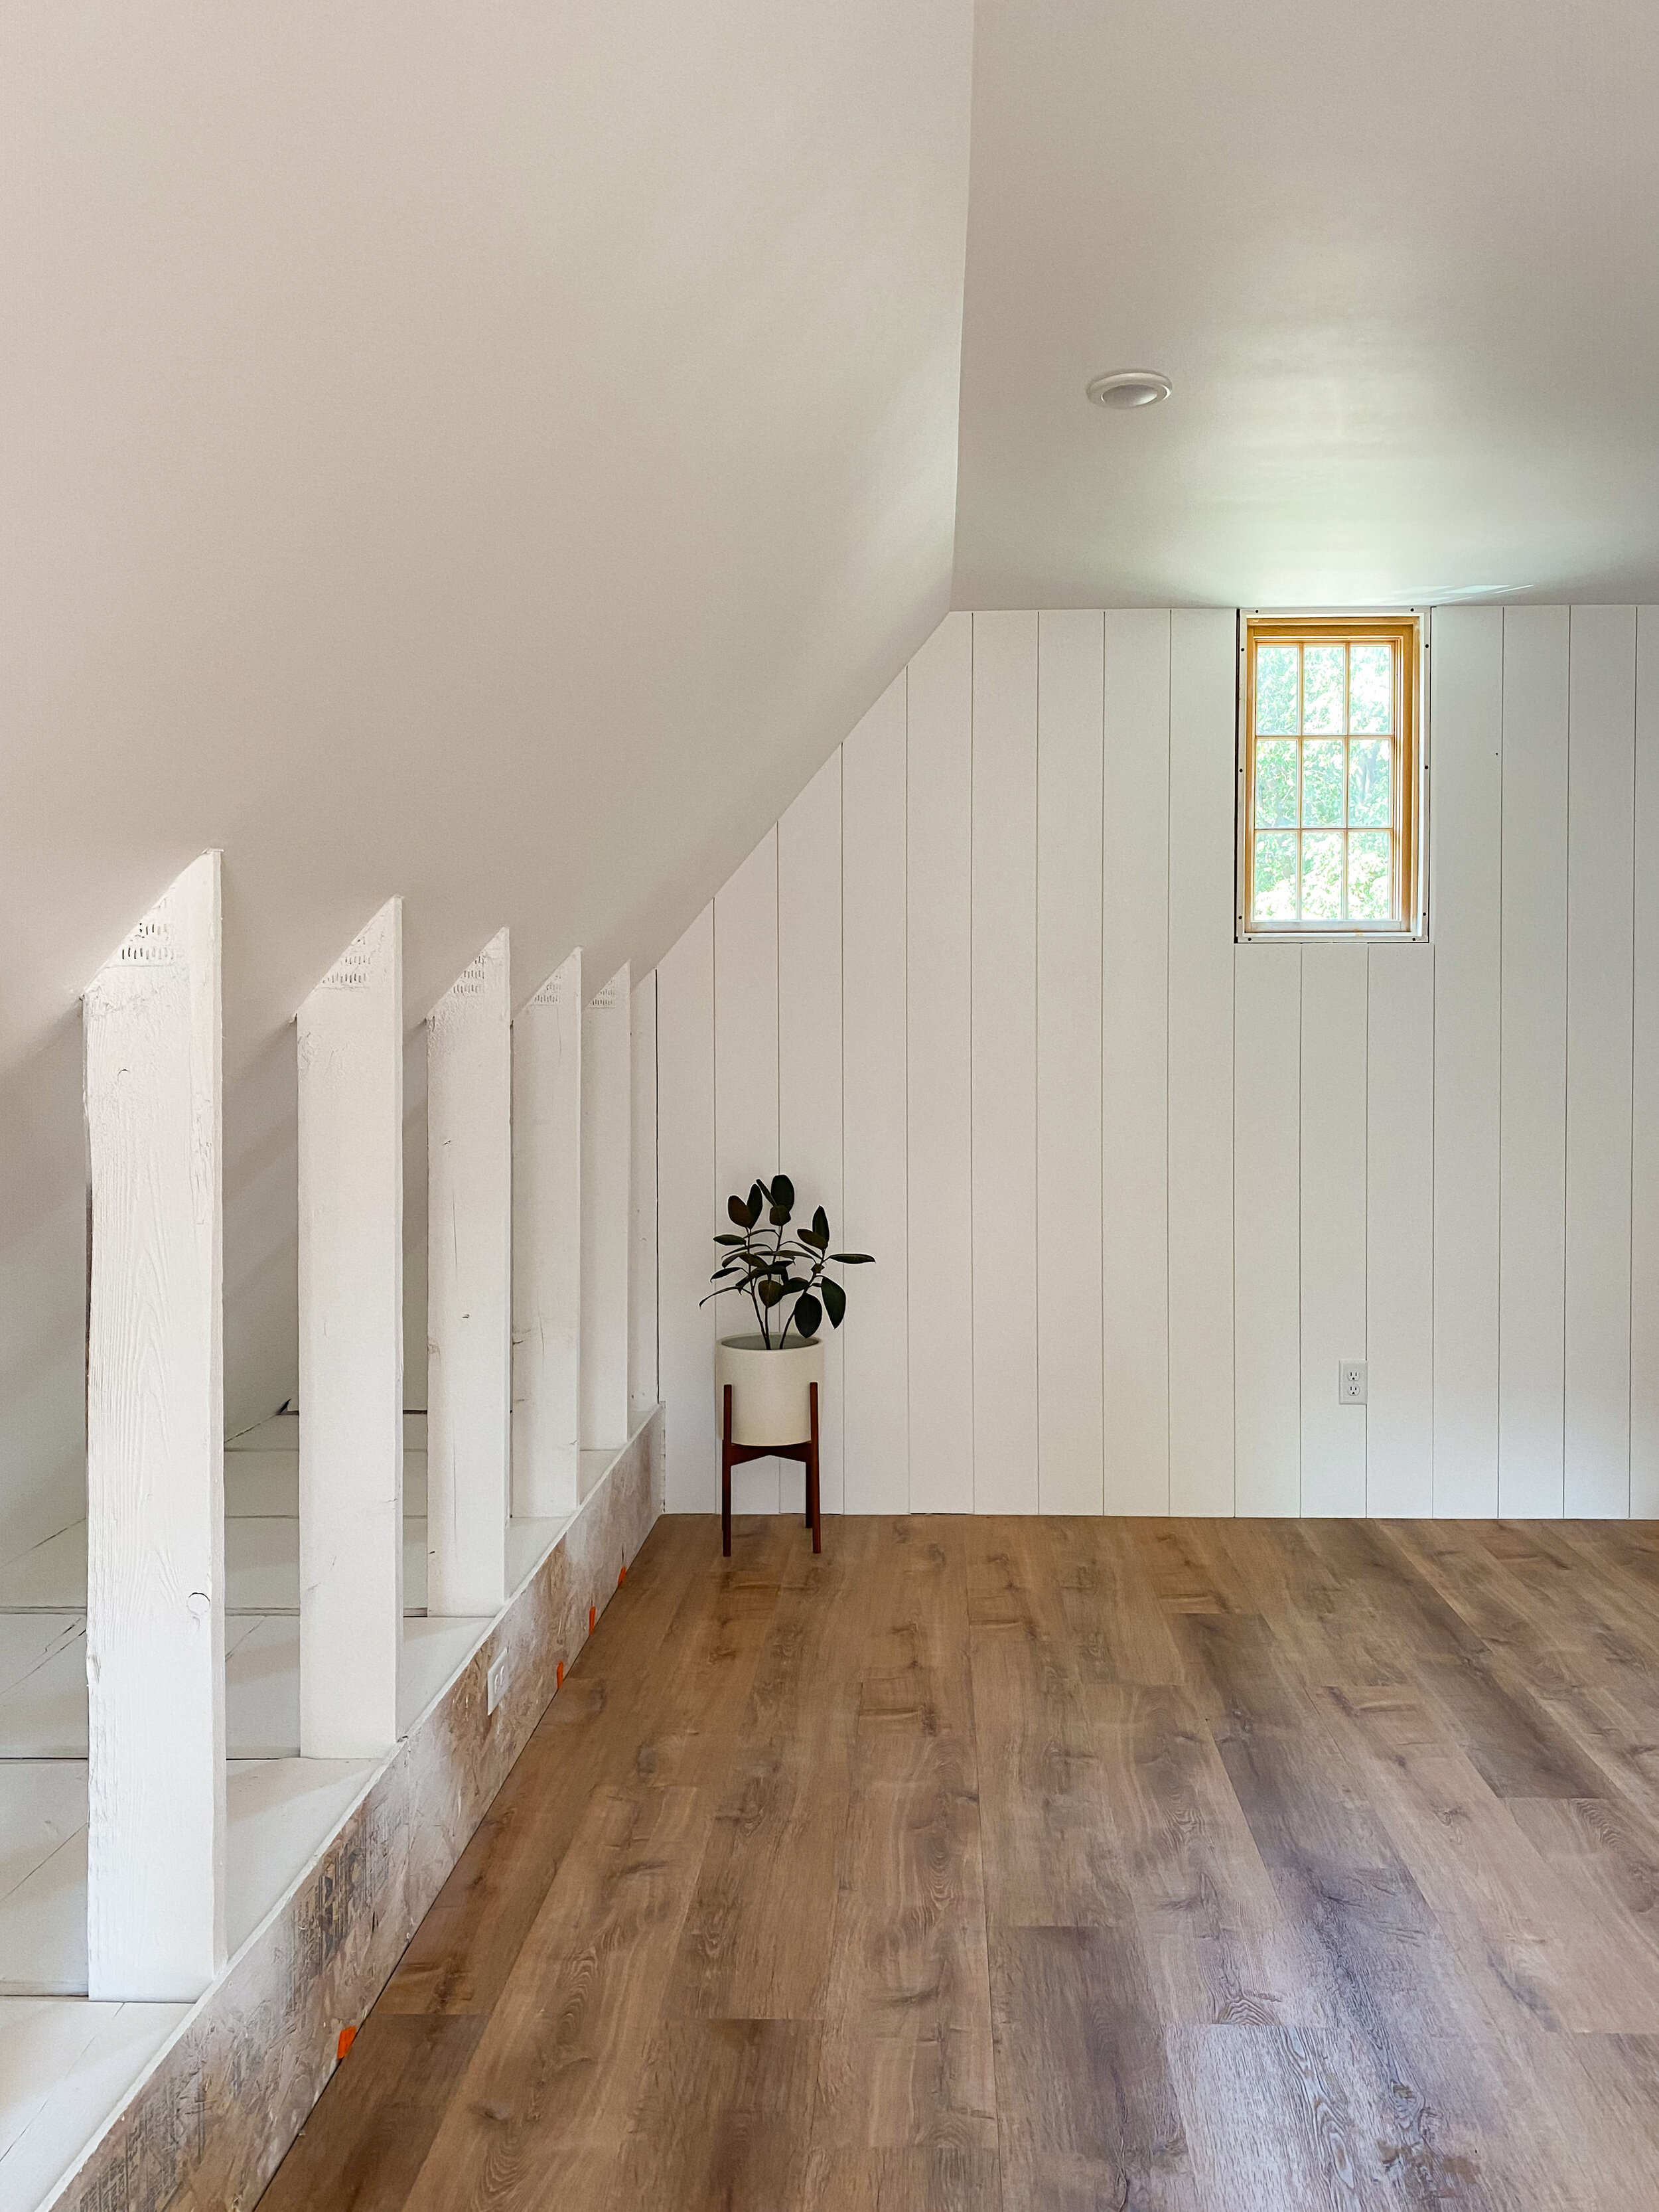
It looks amazing! Unbelievable. Next up, we will install knee wall storage cabinets, paint and then will be on our way to wrapping up the project!Update: Read here for the installation of the knee wall storage cabinets
Tools Checklist:
Miter saw
Construction adhesive
Hammer
Scrap wood

