
How I Easily Painted Our Fiberglass Door
With so many different house projects that are taking a long time to complete, I wanted to do a quick but satisfying project in our home. And this one was so satisfying!
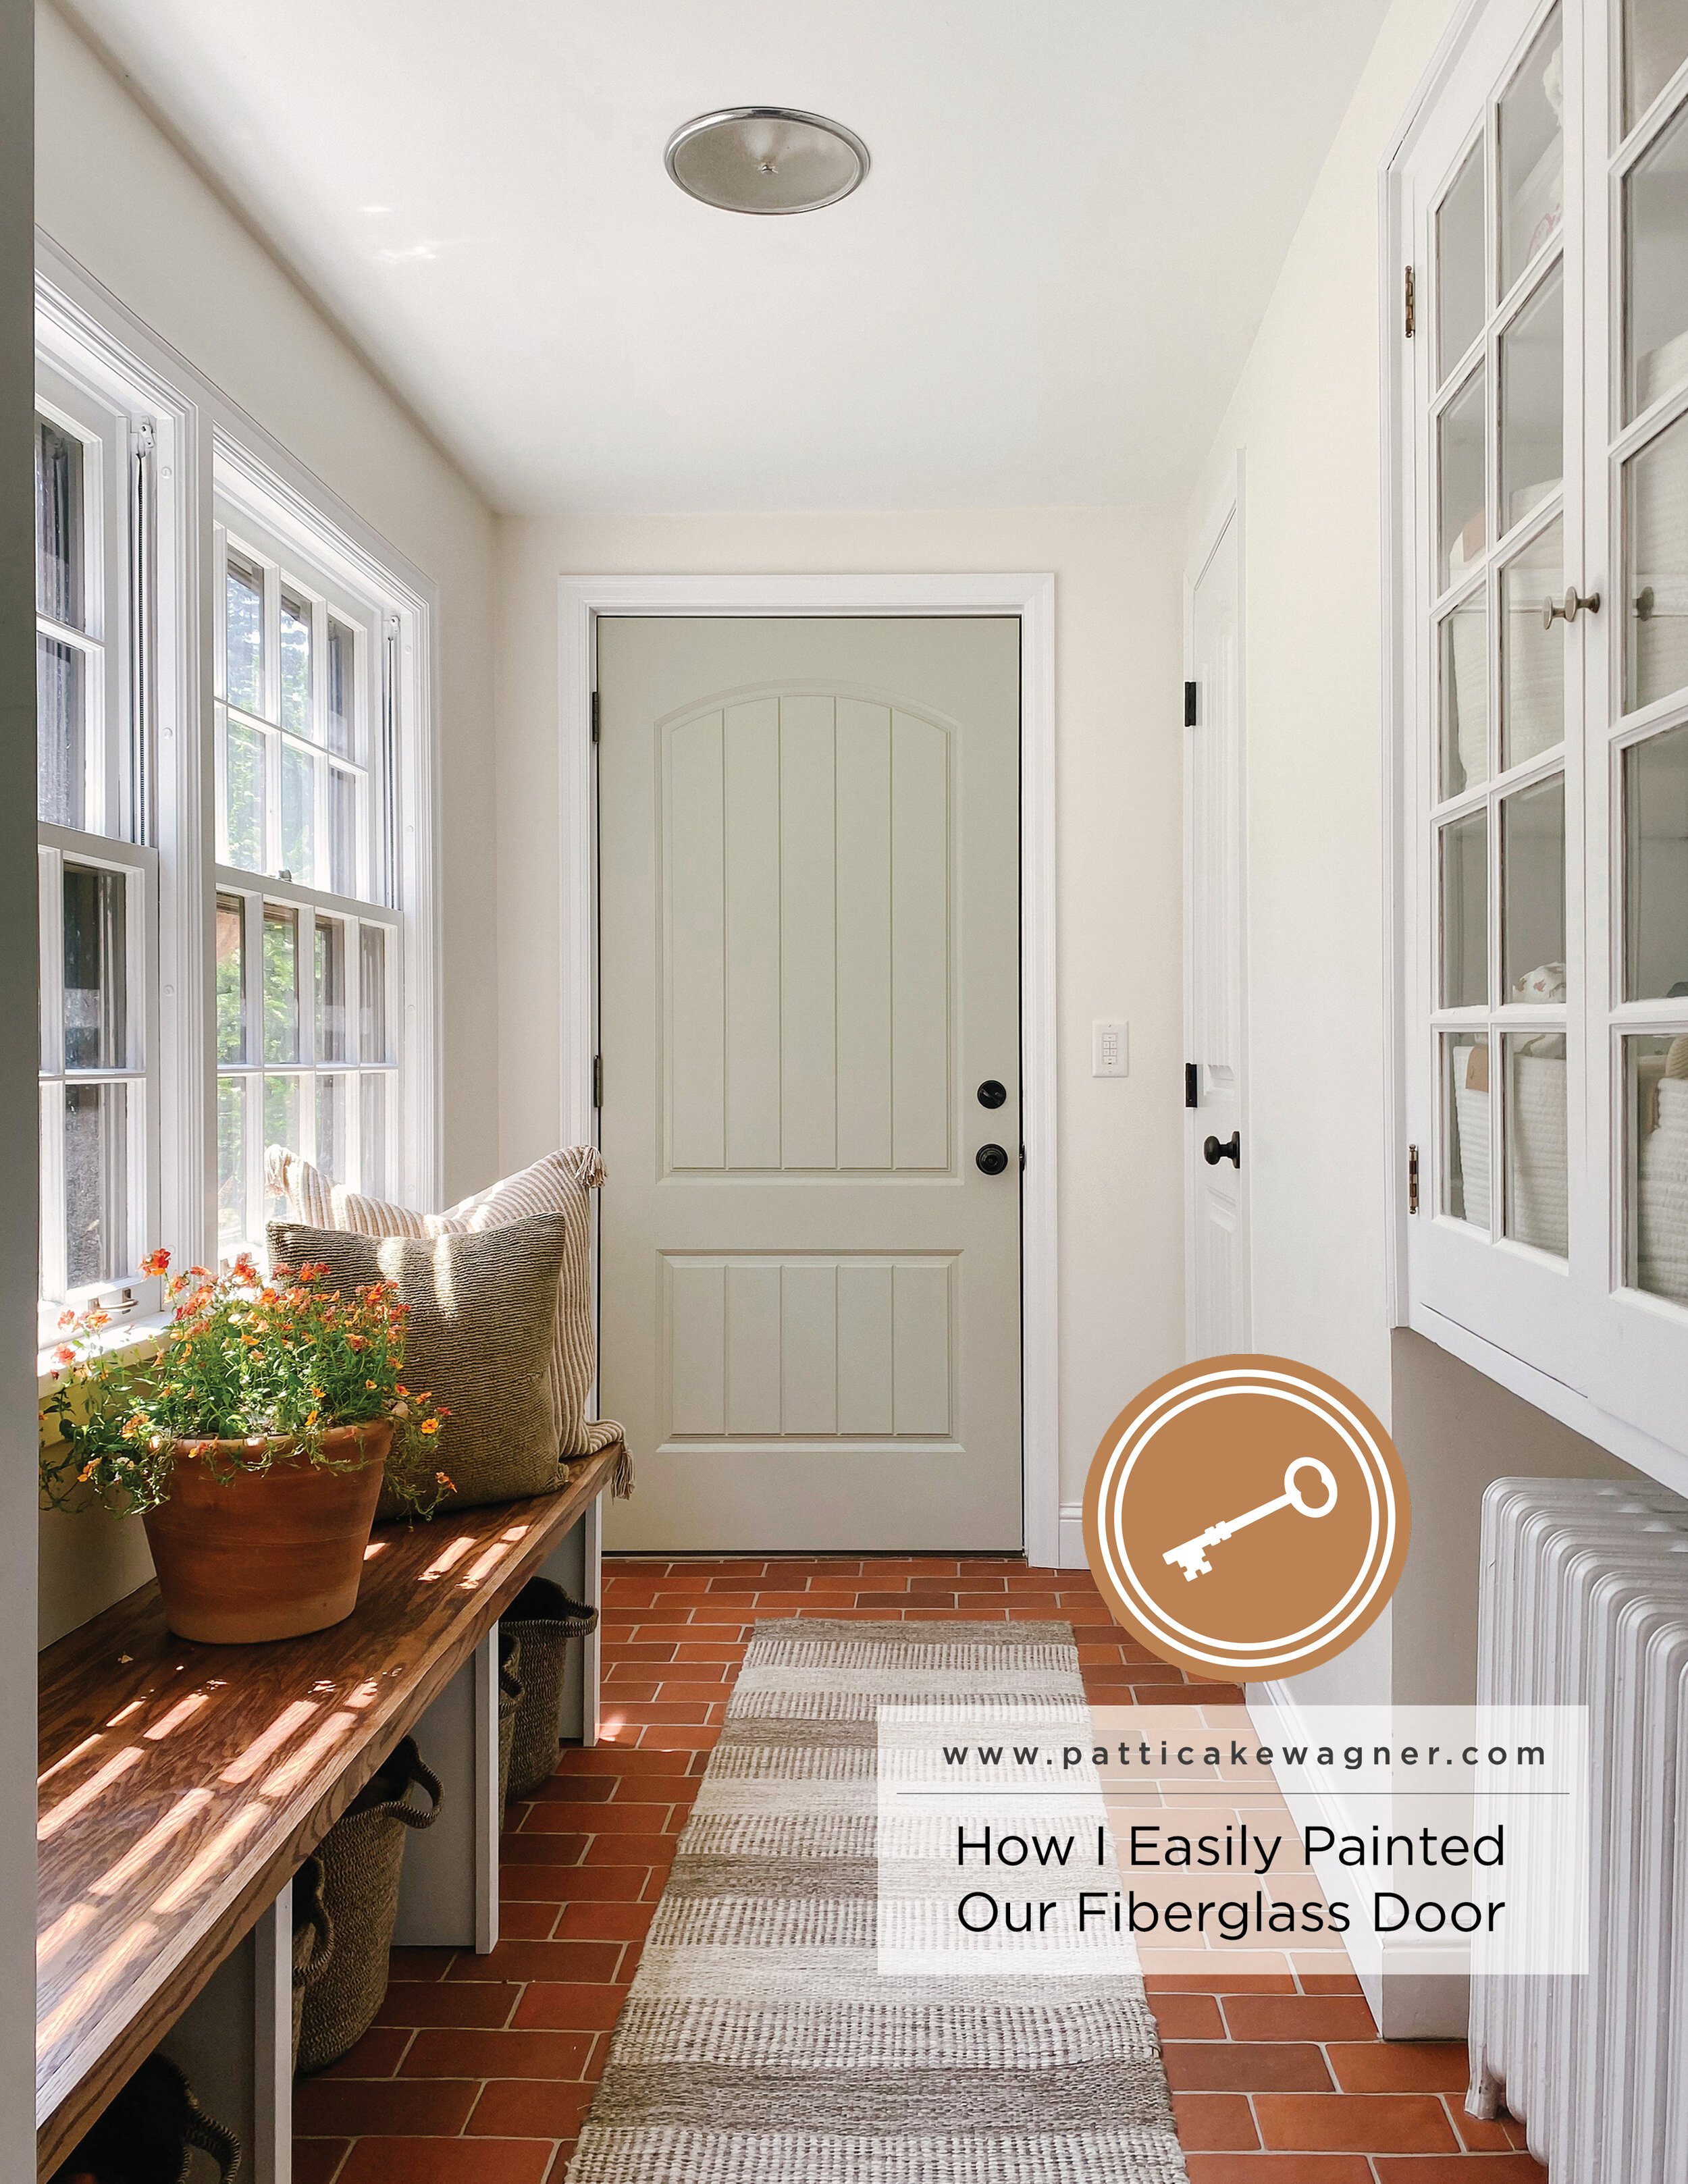
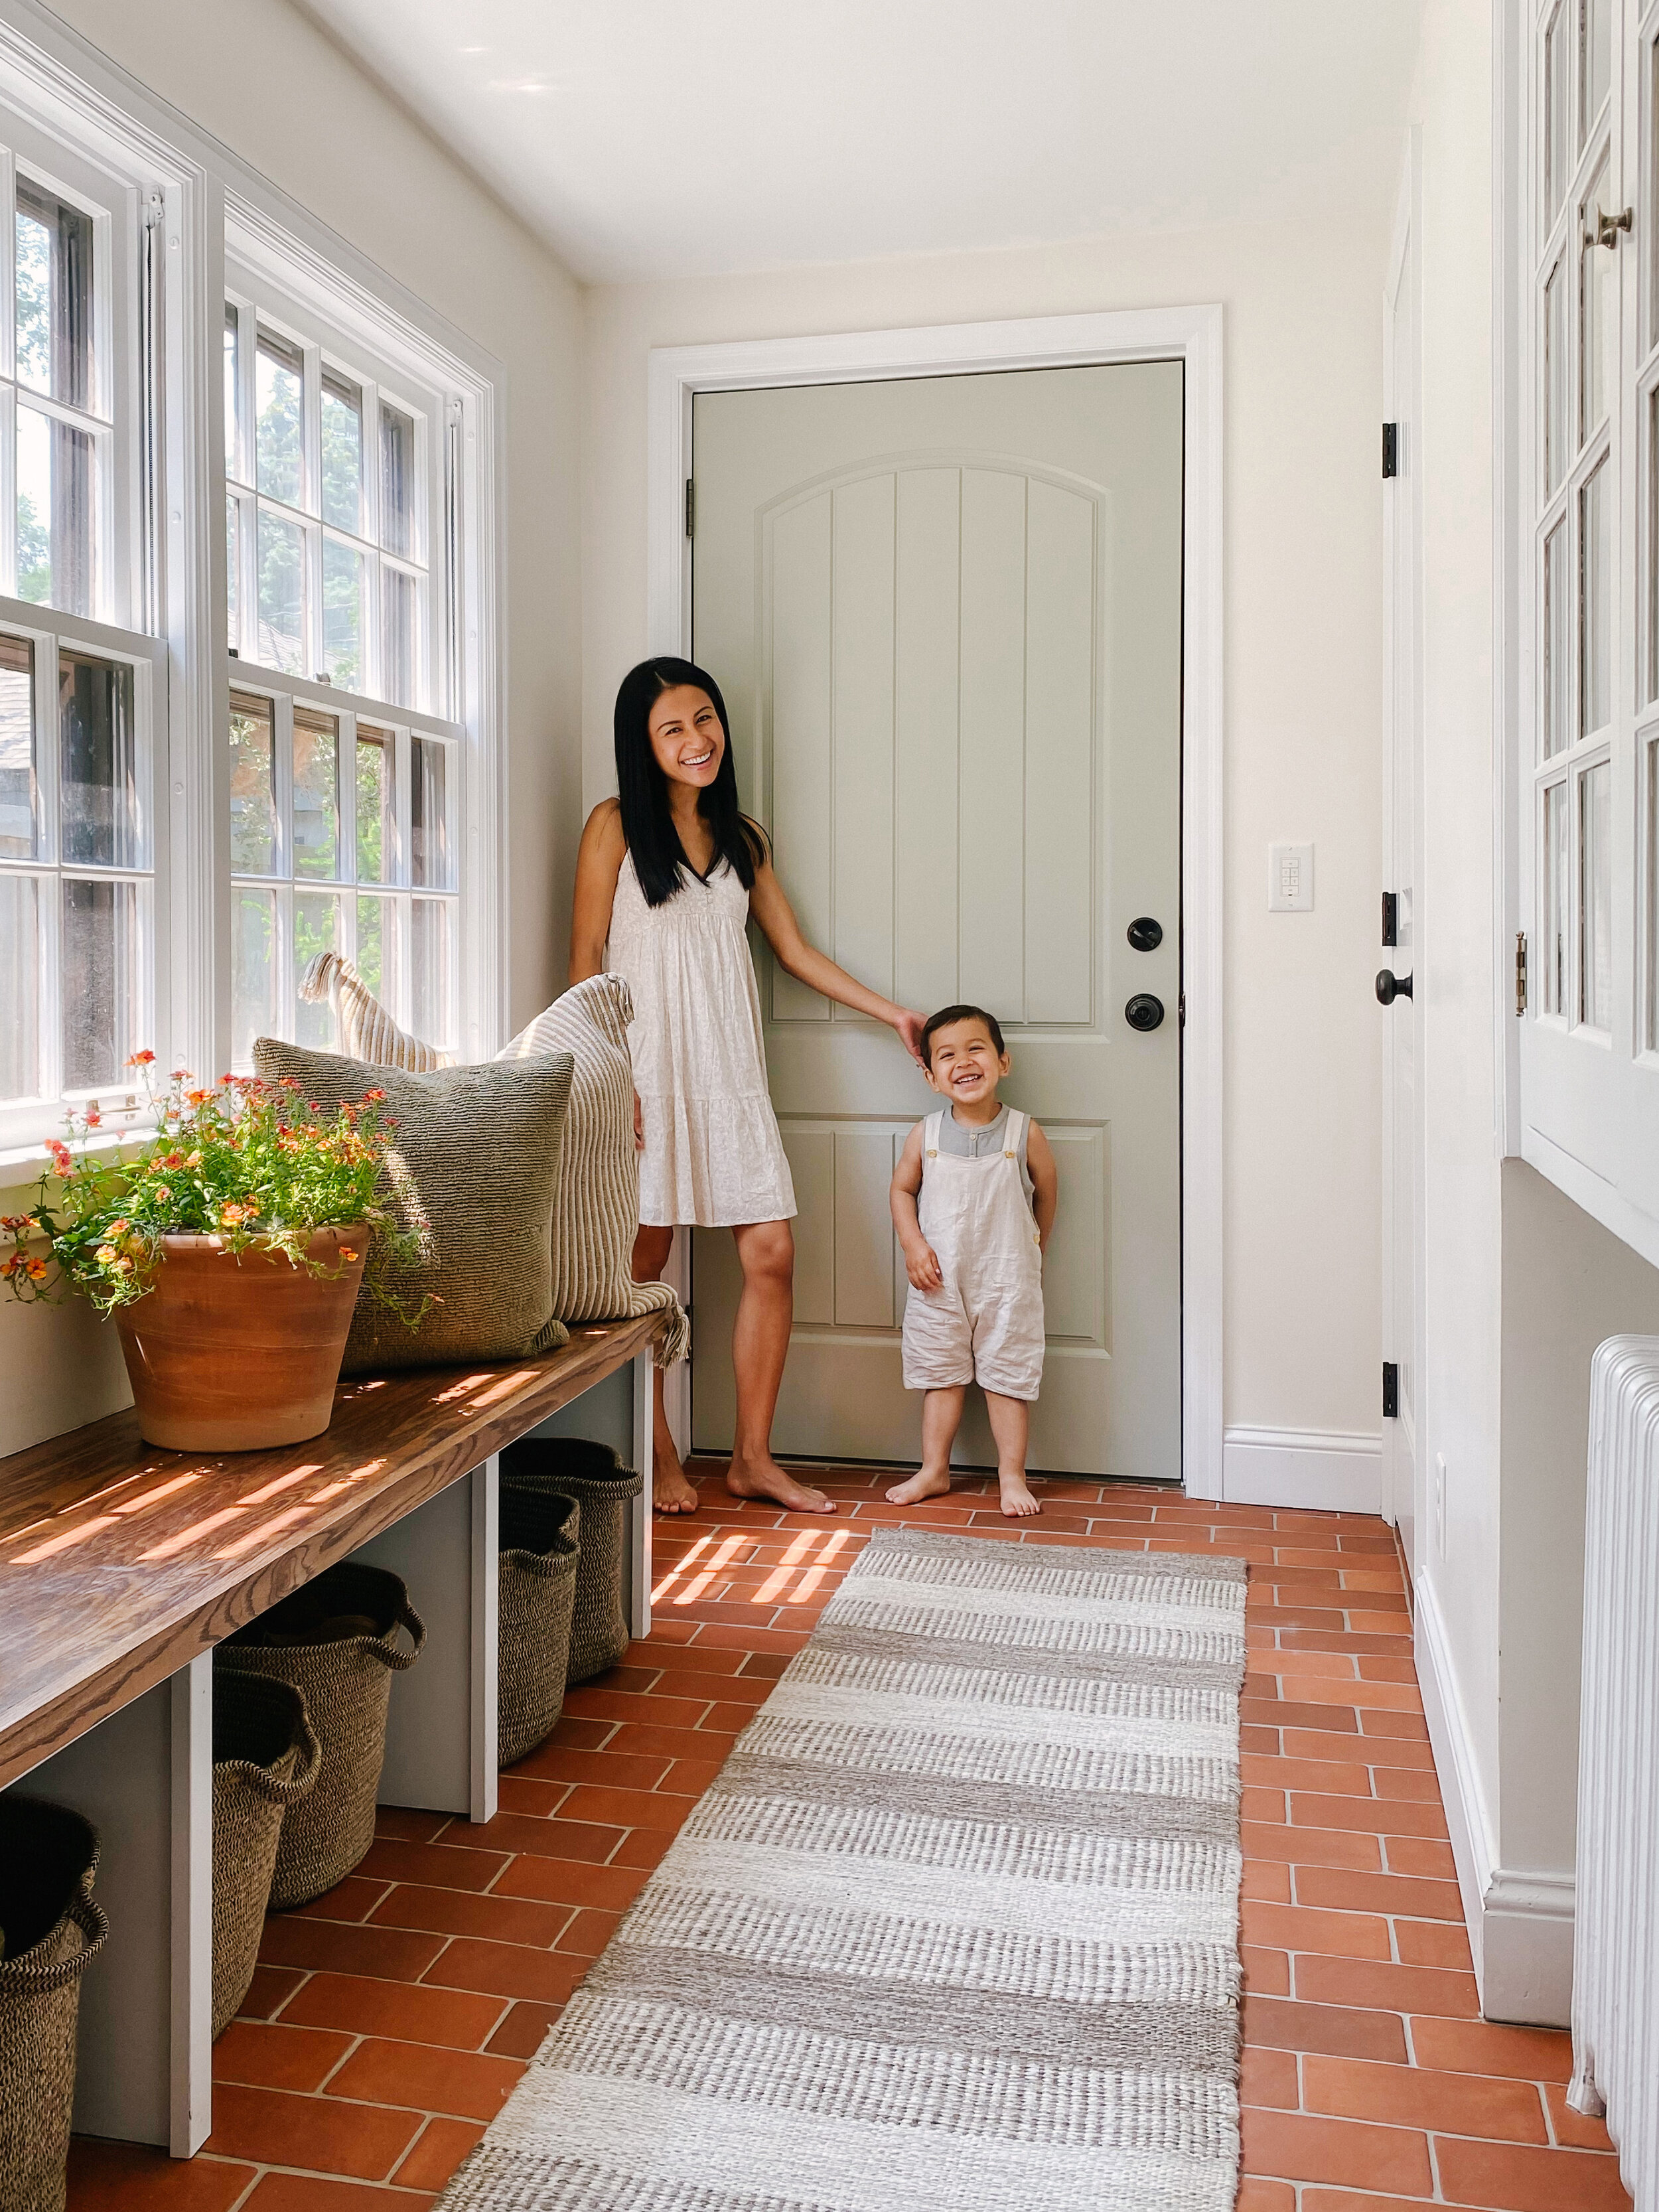
We have a fiberglass door in our mudroom that I don’t love. There is nothing wrong with it. It just never looked right for our space and an easy update was to paint it! If you’ve been wanting to paint your fiberglass door but have been scared to, I hope my experience can ease that fear.
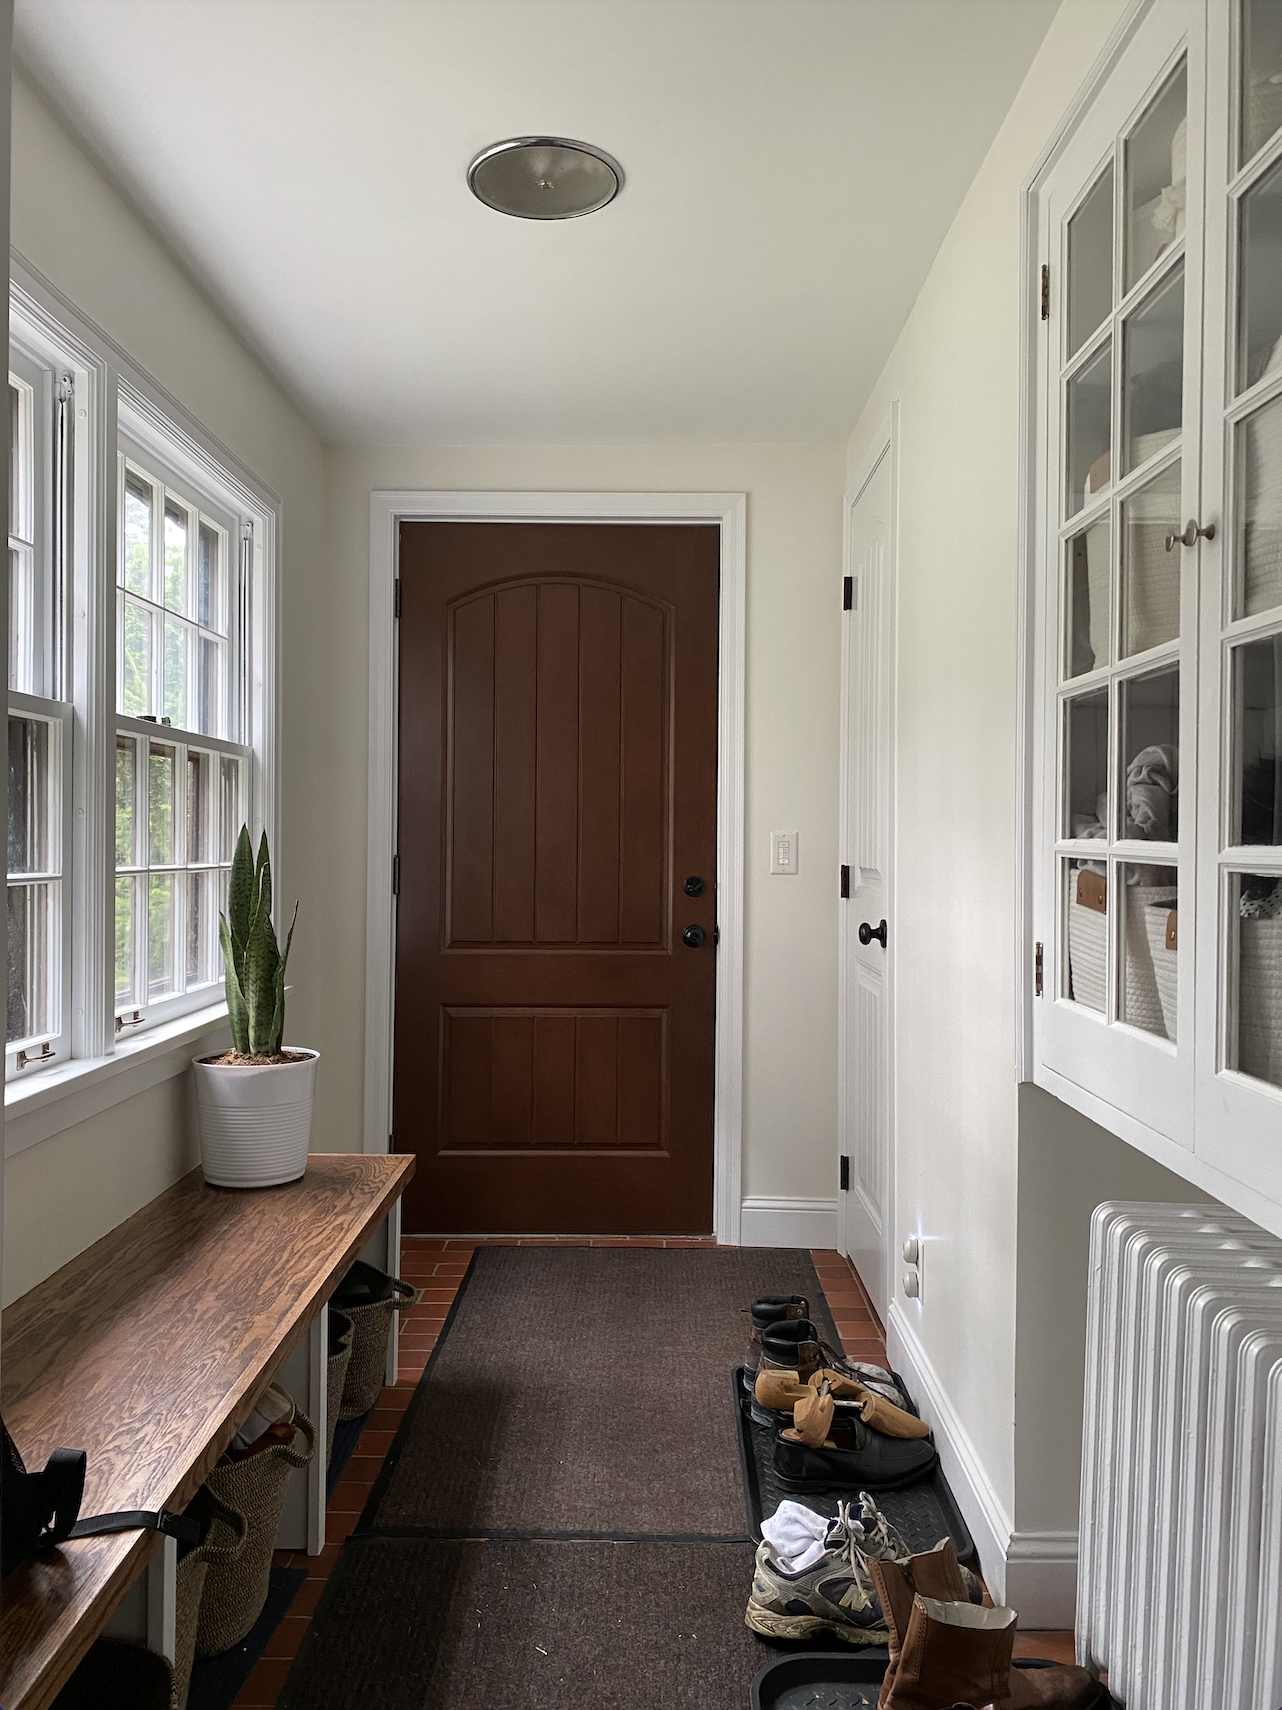
before: fiberglass door in faux wood finish
I have thought about painting this door for years but was afraid to do it. My new motto is to stop dwelling and start doing and this was the perfect project to jump into!
Backstory: When we originally bought our home this room was actually a breakfast nook that we turned into a much-needed mudroom. Living in Minnesota, the winters are, to say the least, very cold and snowy. We wanted a functional space to unload our winter attire and neatly store our shoes.
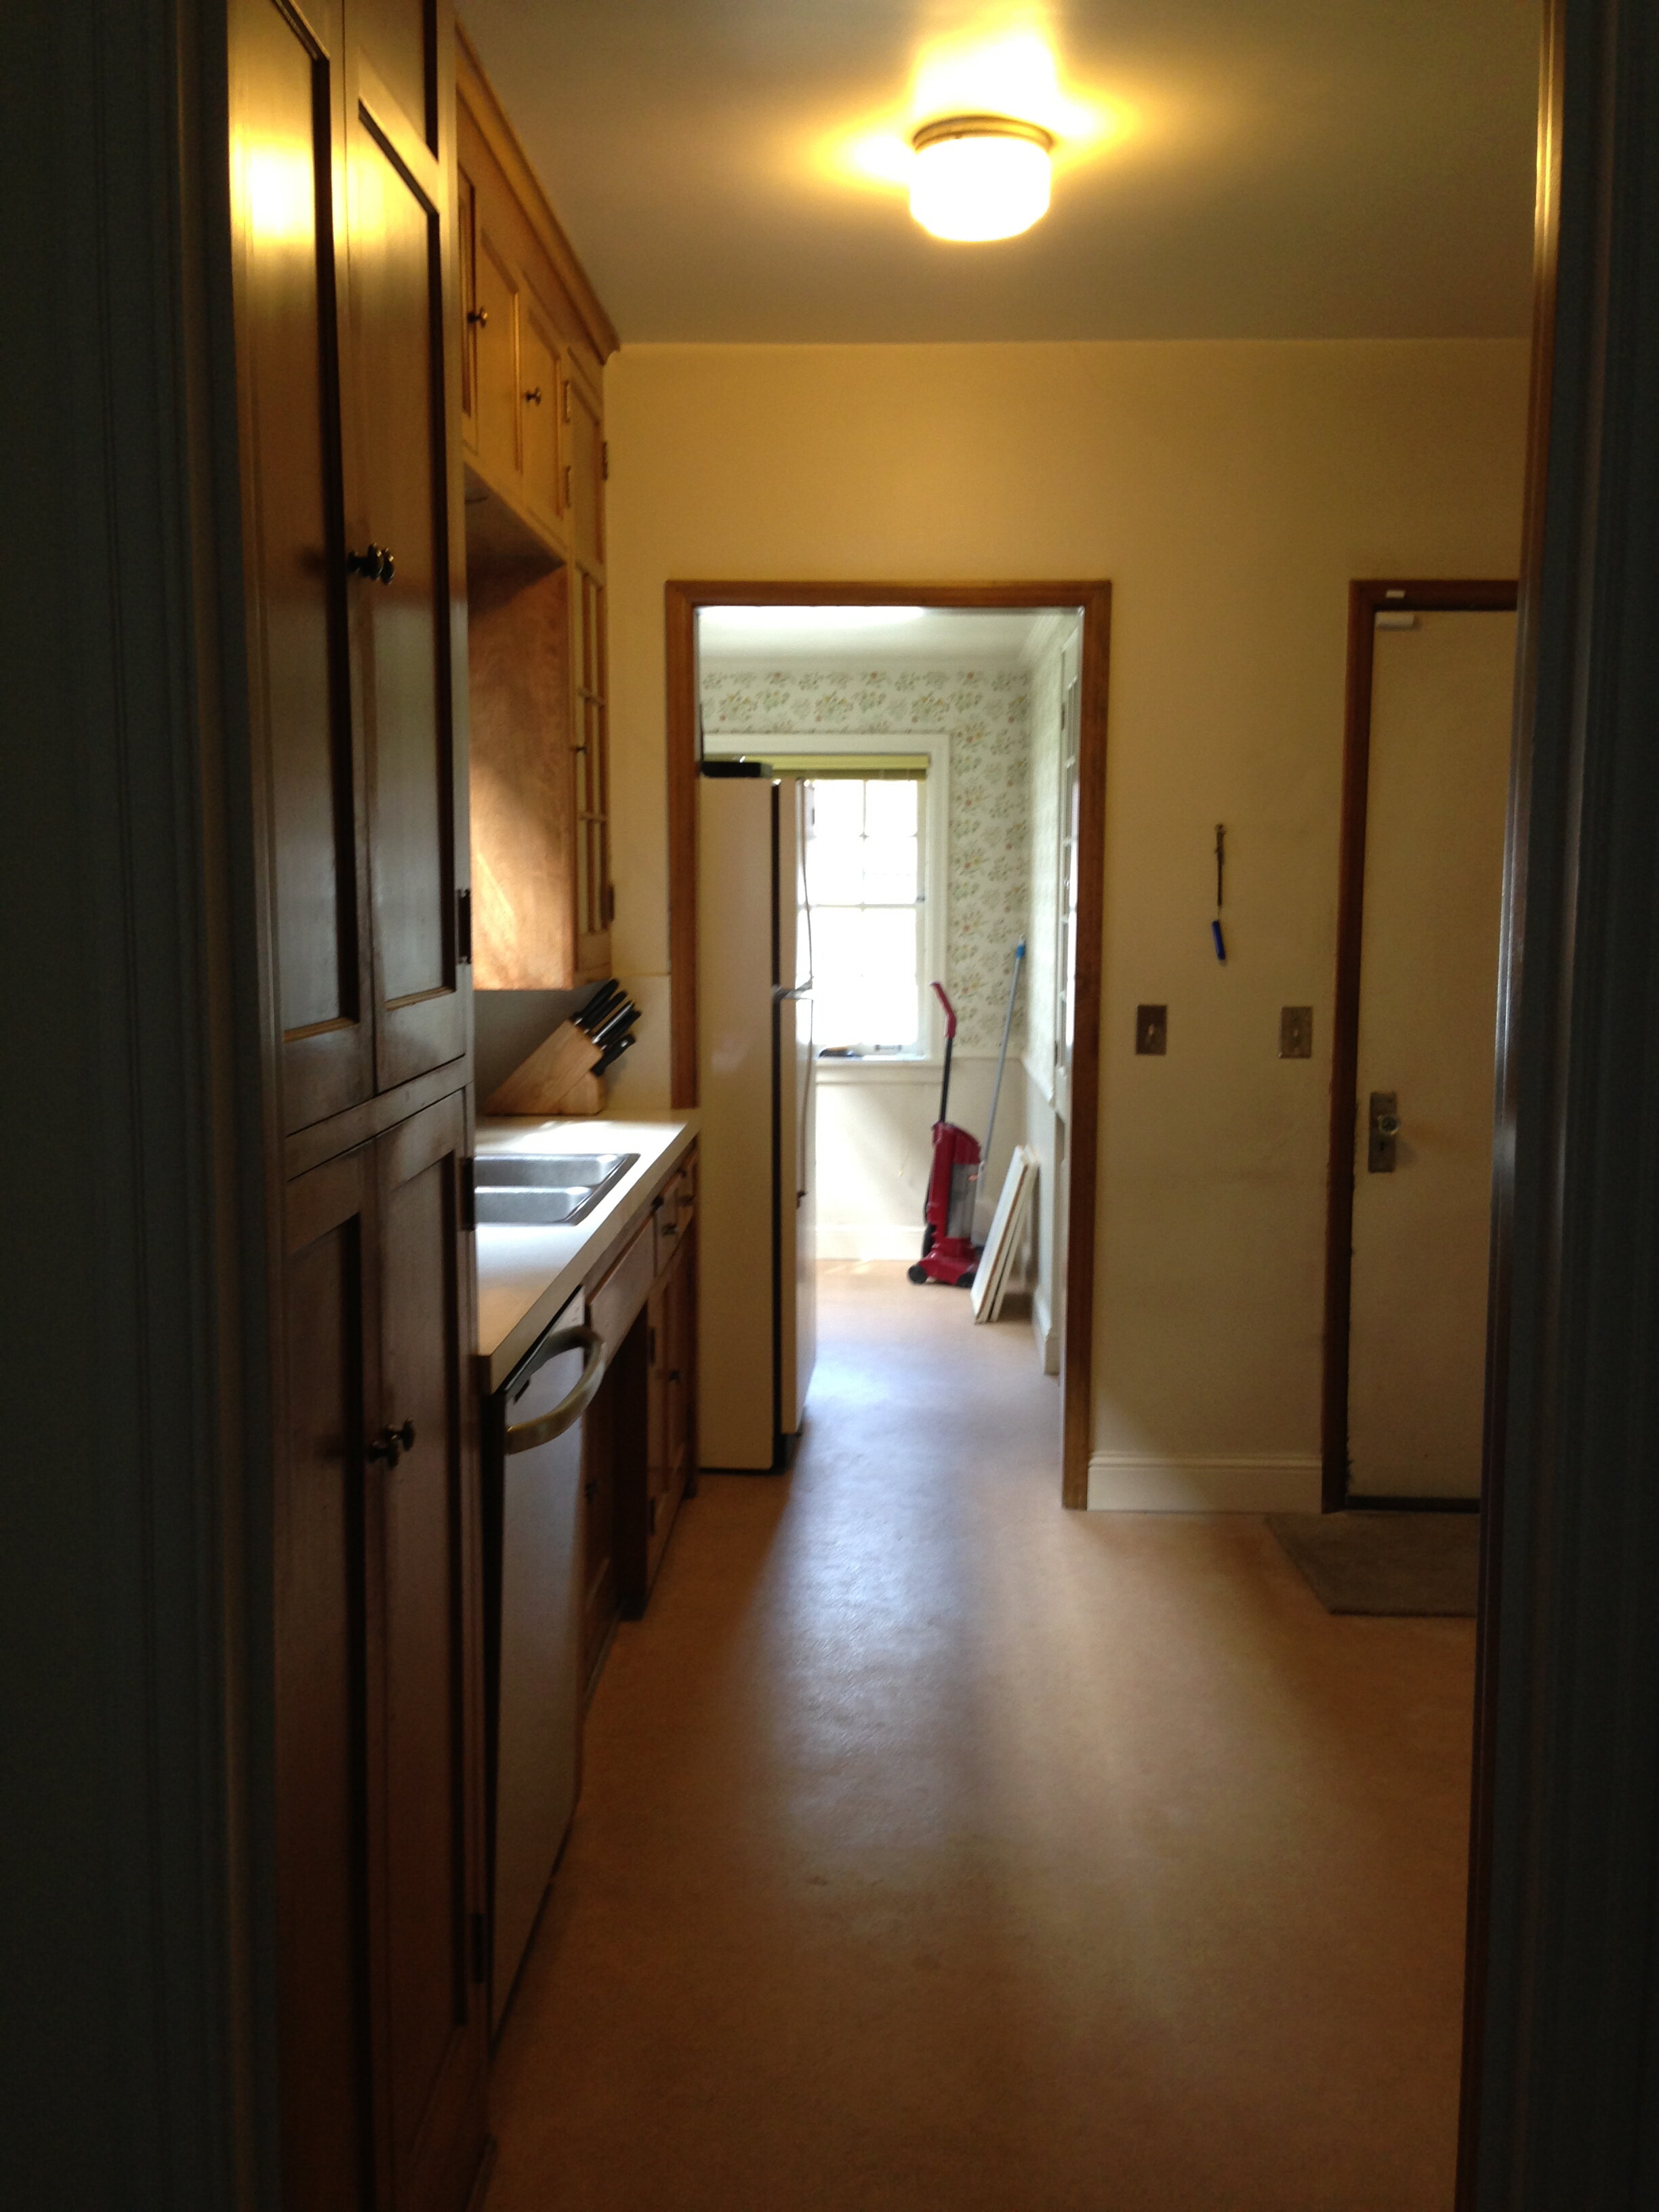
before: mudroom used to be a breakfast nook w/ a fridge
We all know keeping anything neat with kids is an everyday practice. We were always picking up this room and needed a better storage solution. About three years ago we DIY’ed a built-in bench that has helped us with organizing all our stuff! You can read an article here for my tips to organizing a small mudroom.
Before the renovation, there was actually a window where the door is now. During the reno in 2013, we went for a more cost-effective door because our budget was slowly but surely shrinking. For eight years I thought about painting it and this was the year to finally do it!
After visiting my friend Jason’s Warmhouse Story studio, I fell in love with the cabinet color and it became my jumping off point for our door. Our #1927WagnerTudor has an attraction with the color green…hello little vintage green bathroom!
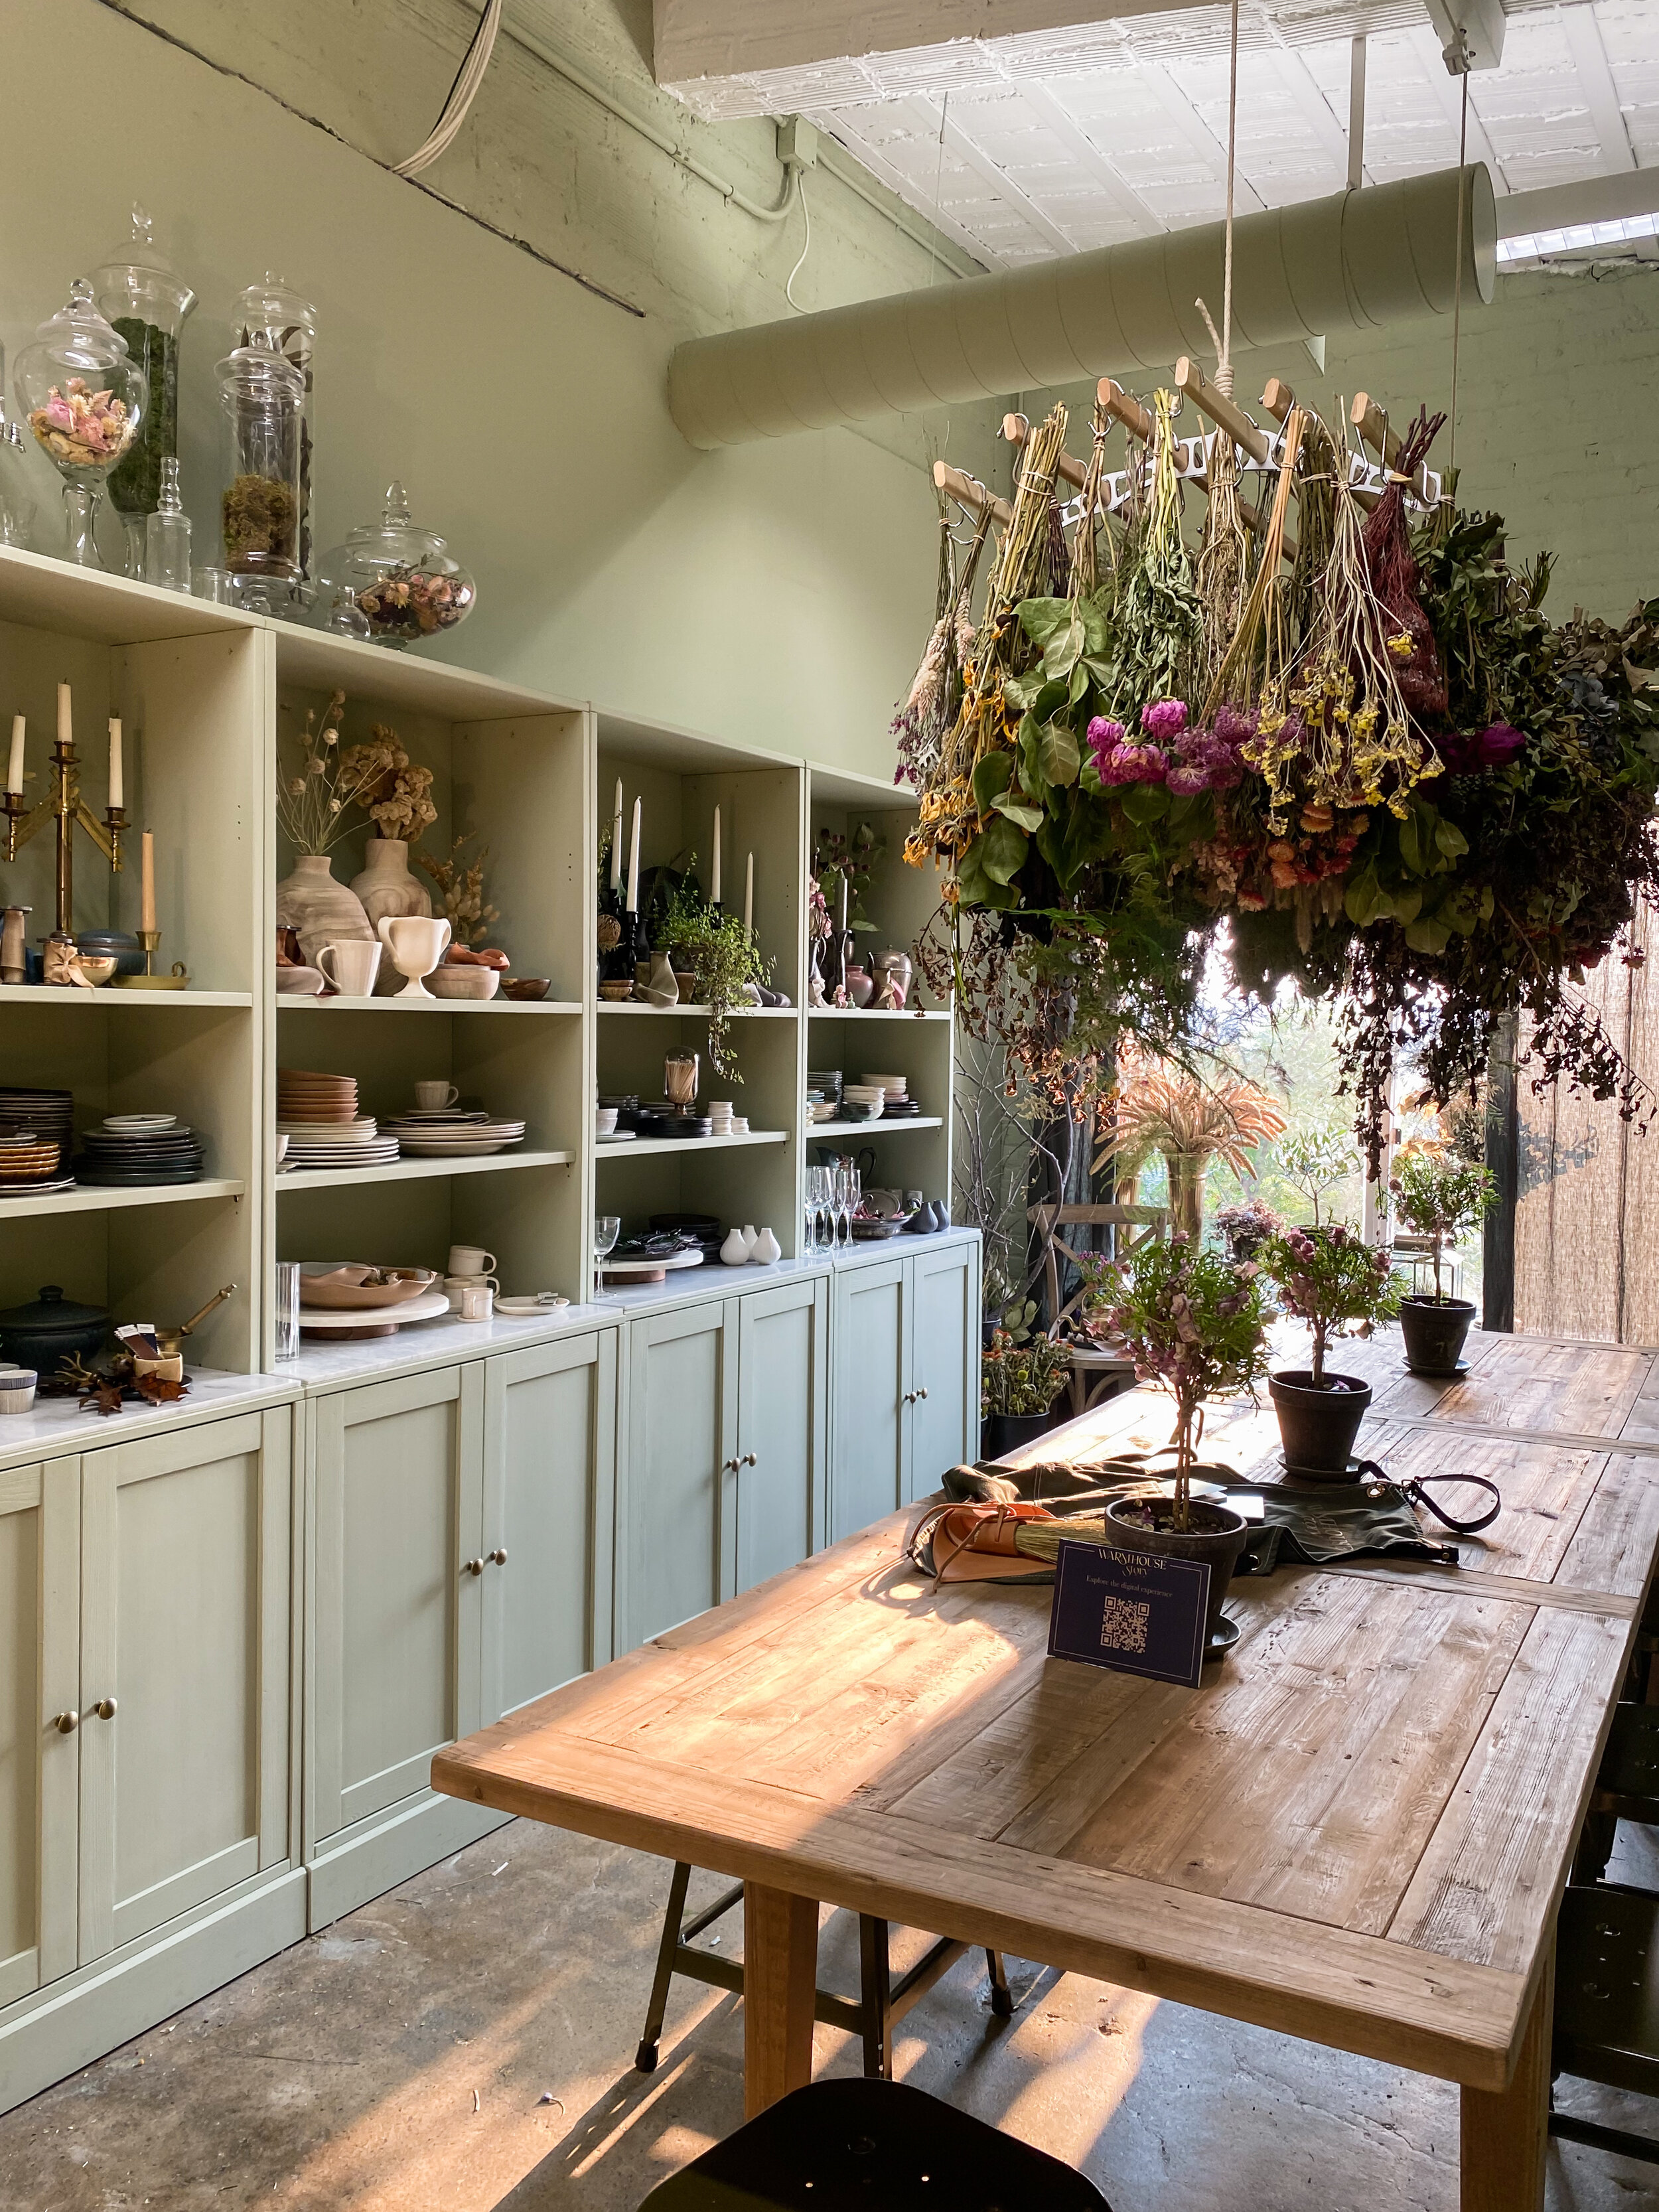
My friend Jason’s Warmhouse Story studio using Farrow and Ball Vert de Terre
Here is my process for painting the door – please note I’m only painting the interior side. *Disclaimer: this is my first time painting fiberglass door
Tools You’ll Need:
Dish Soap + Warm Water
Mini Paint Roller (I liked the foam roller for this)
Paint Tray
Paint
Wet Rag (to wipe off any unwanted paint splatter)
Step 1: Clean the door with a mixture of 2 cups of warm water + 2 tablespoons of dish soap. *Our door was already pretty clean and in good shape but some articles suggest adding 1/4 cup baking soda to this mix to help scuff off doors that are very dirty. Other suggests using a combo of white vinegar + water. After it has fully dried wipe with a tack cloth to catch any extra debris.
Step 2: Tape off the casing/frame, hinges, threshold and floor to protect from getting paint on them. I found it easier to take off the door hardware instead of trying to tape or paint around them. It may be best to take the door off the hinge if you’re painting both sides.
Step 3: Prime the door. I used Zinser Water-Based Primer for All Surfaces. I used a paint brush for edging and the mini foam roller to roll the surface. For step by step on how to prime, see below for how I painted. It’s the same method to priming, except I did only one coat of primer.
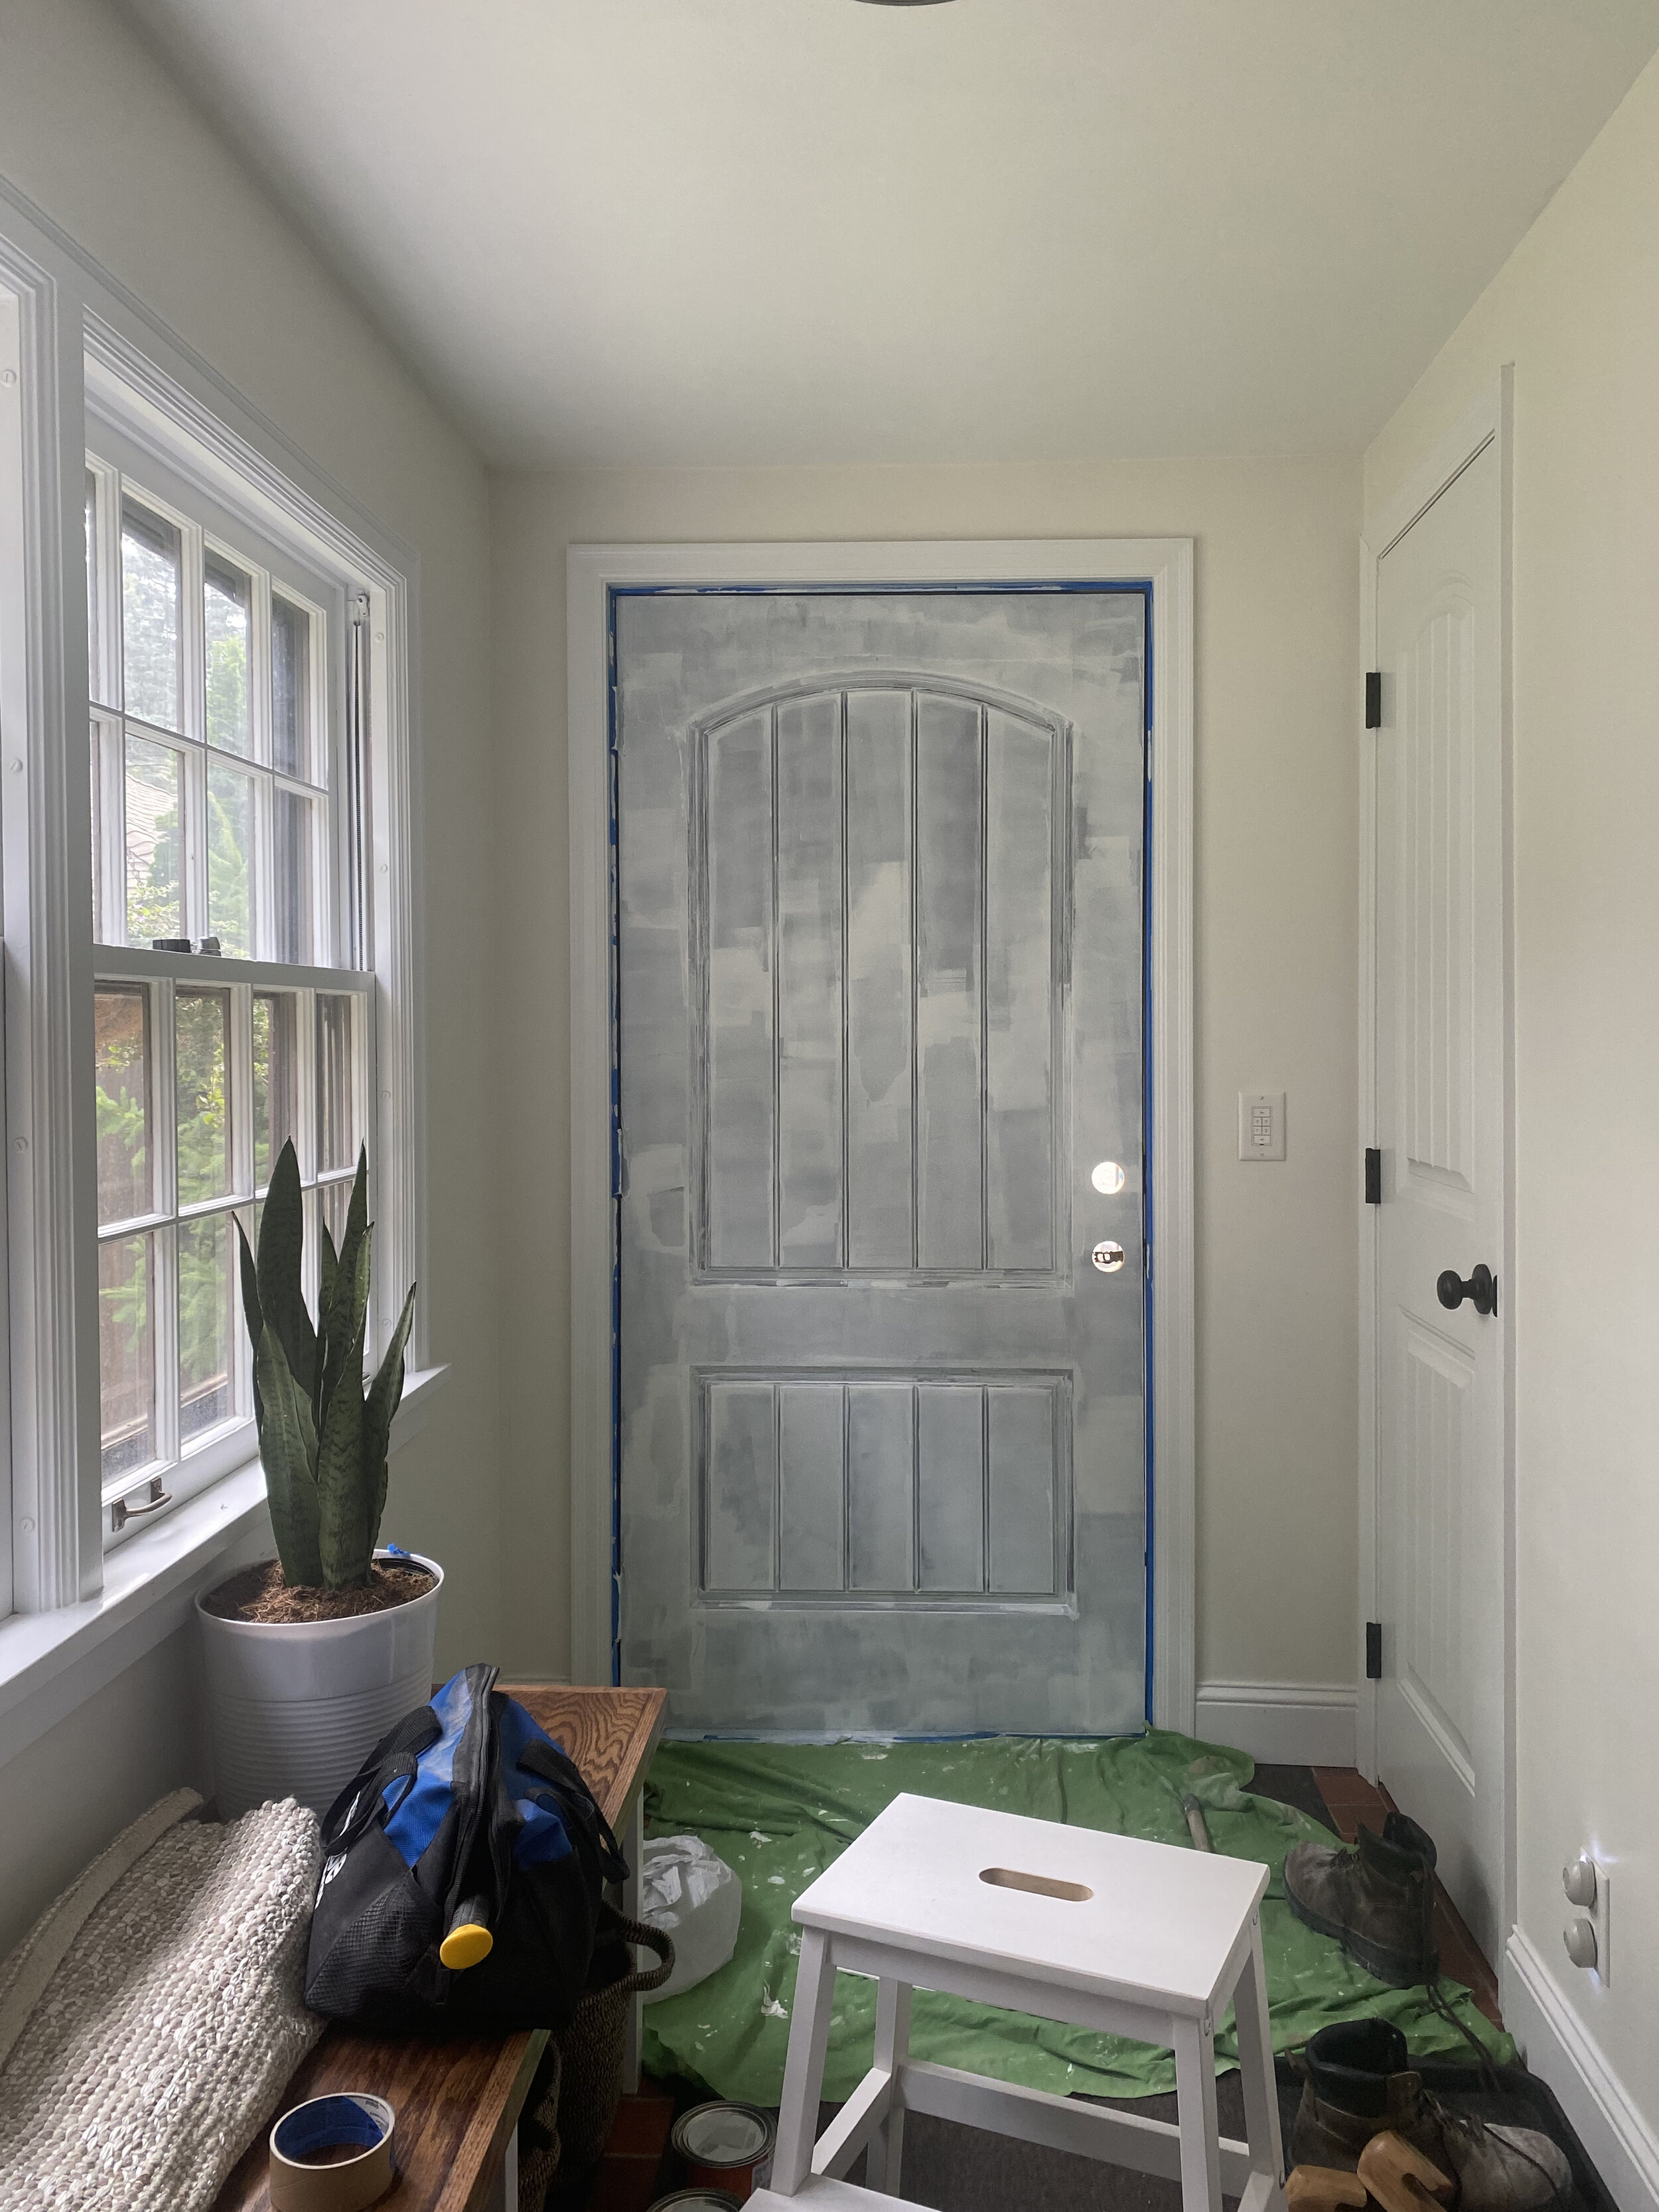
I was nervous after priming it. I always trust my design instincts but get super nervous when I am actually implementing it.
NOW IT’S TIME TO PAINT!
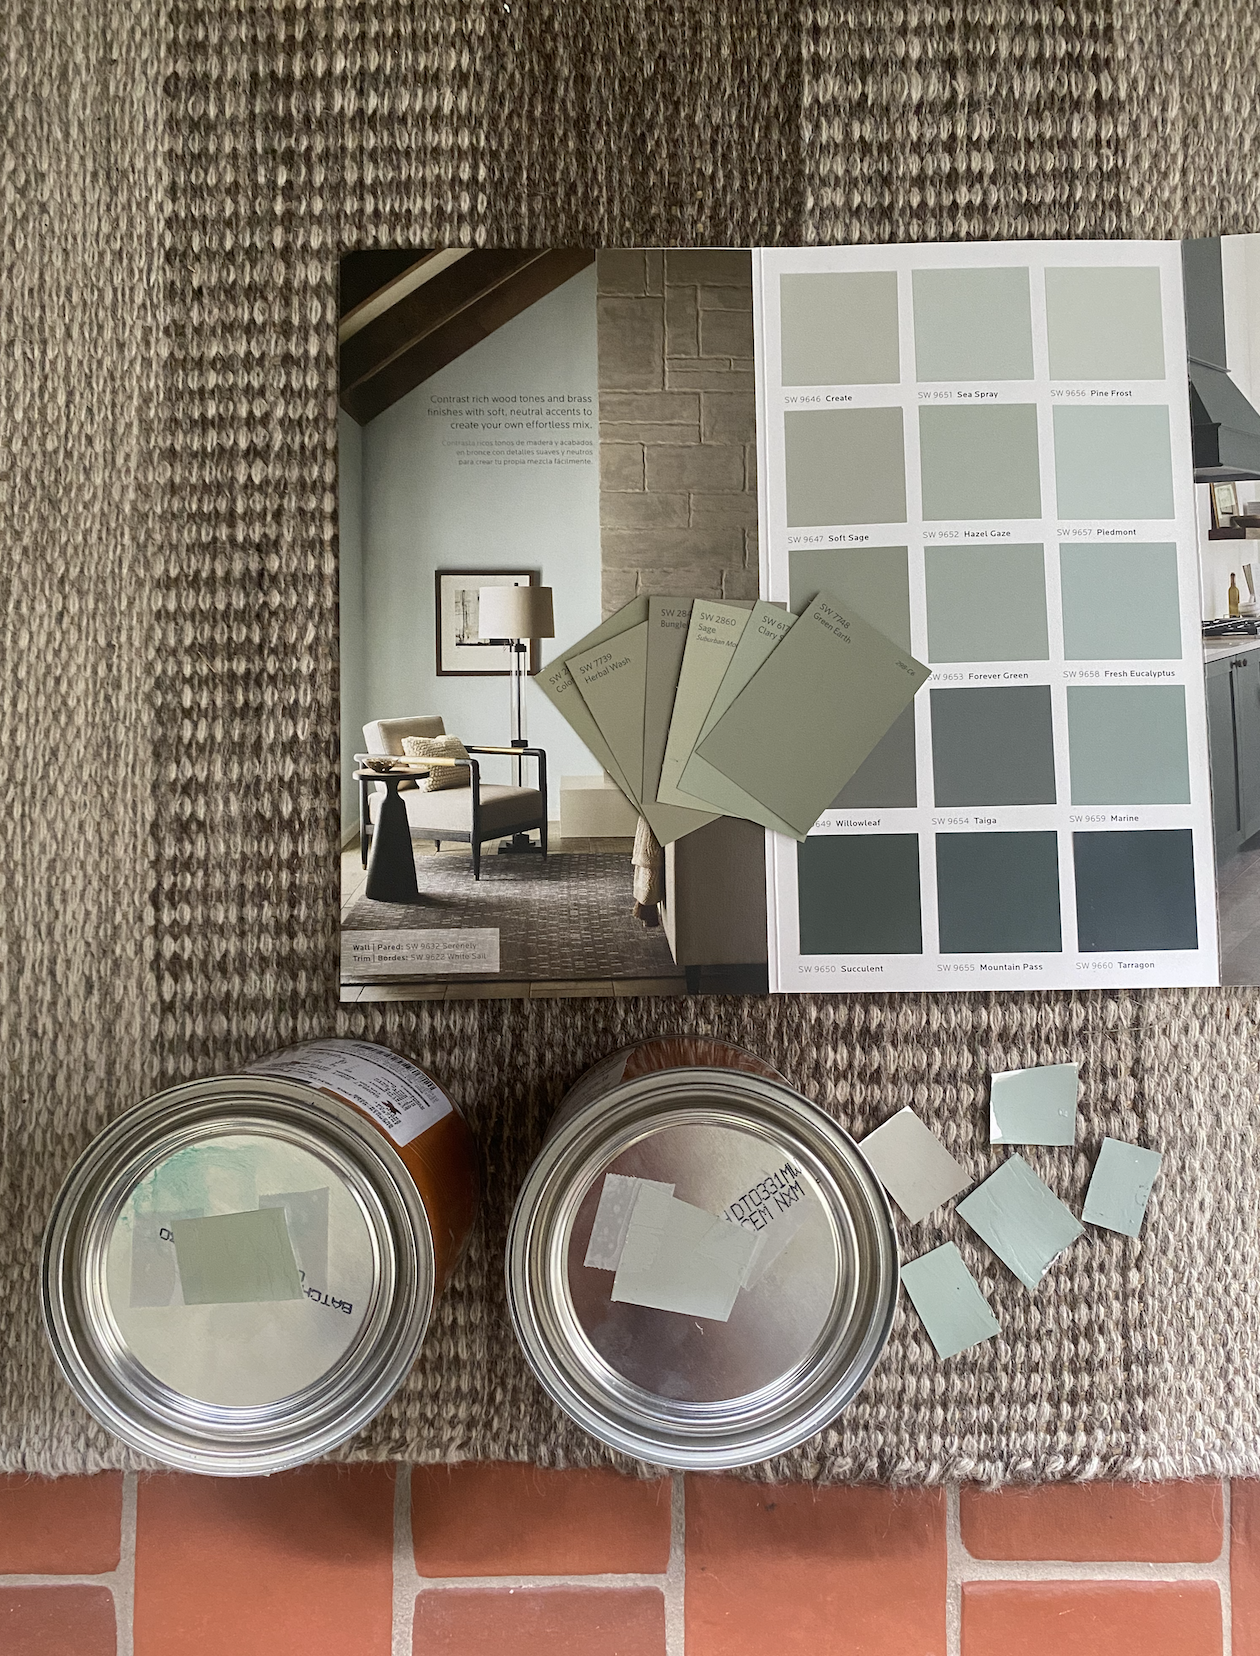
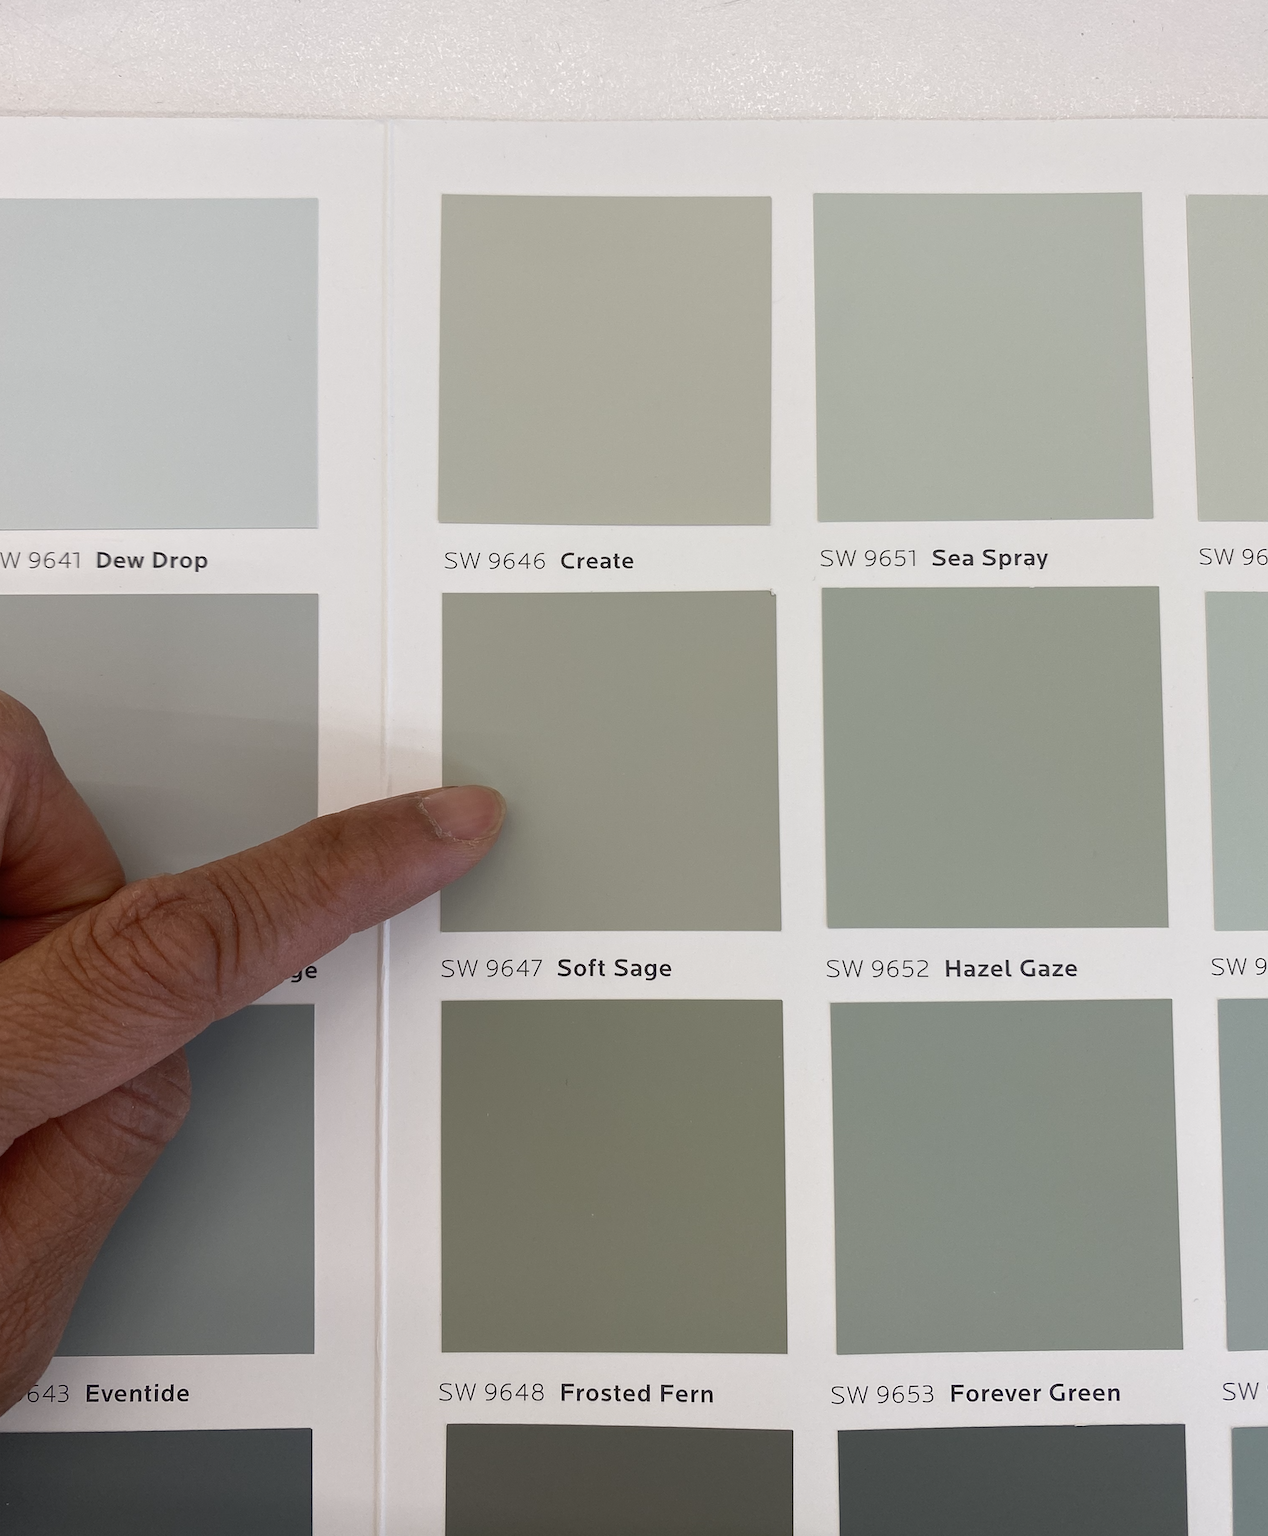
After reviewing numerous sage and olive color swatches against the door and mudroom, it was time! It’s important to review swatches in your actual space throughout the day and would even recommend getting pint size samples to try. Unfortunately, most paint stores around us were out of samples due to the paint shortage.
I spoke to someone at the paint store who recommended the Sherwin Williams SnapDry Door and Trim Paint. I picked up two quart size samples in satin for the sheen. One was a custom color that was similar to Hazel Gaze (SW-952) and the other I had them color match to Designer Color Collection Soft Sage (SW 9647) which I ultimately used.
Step 4: Roll the side of the door. It went on very smoothly and in my case, it doesn’t touch the door frame/jamb when shut.
Step 5: Edging around the hinges and painting all of the grooves first.
Step 6: Roll the surface with paint. Wait about two hours between each coat.
Step 7: Depending on your door color, you may need either 2 or 3 coats of paint for full coverage. I ended up doing 3 coats!
I was nervous after the first coat because it looked kind of blotchy. After the final coat, I knew I made the right choice!
Step 8: Wait for paint to cure before installing back door hardware and removing tape.
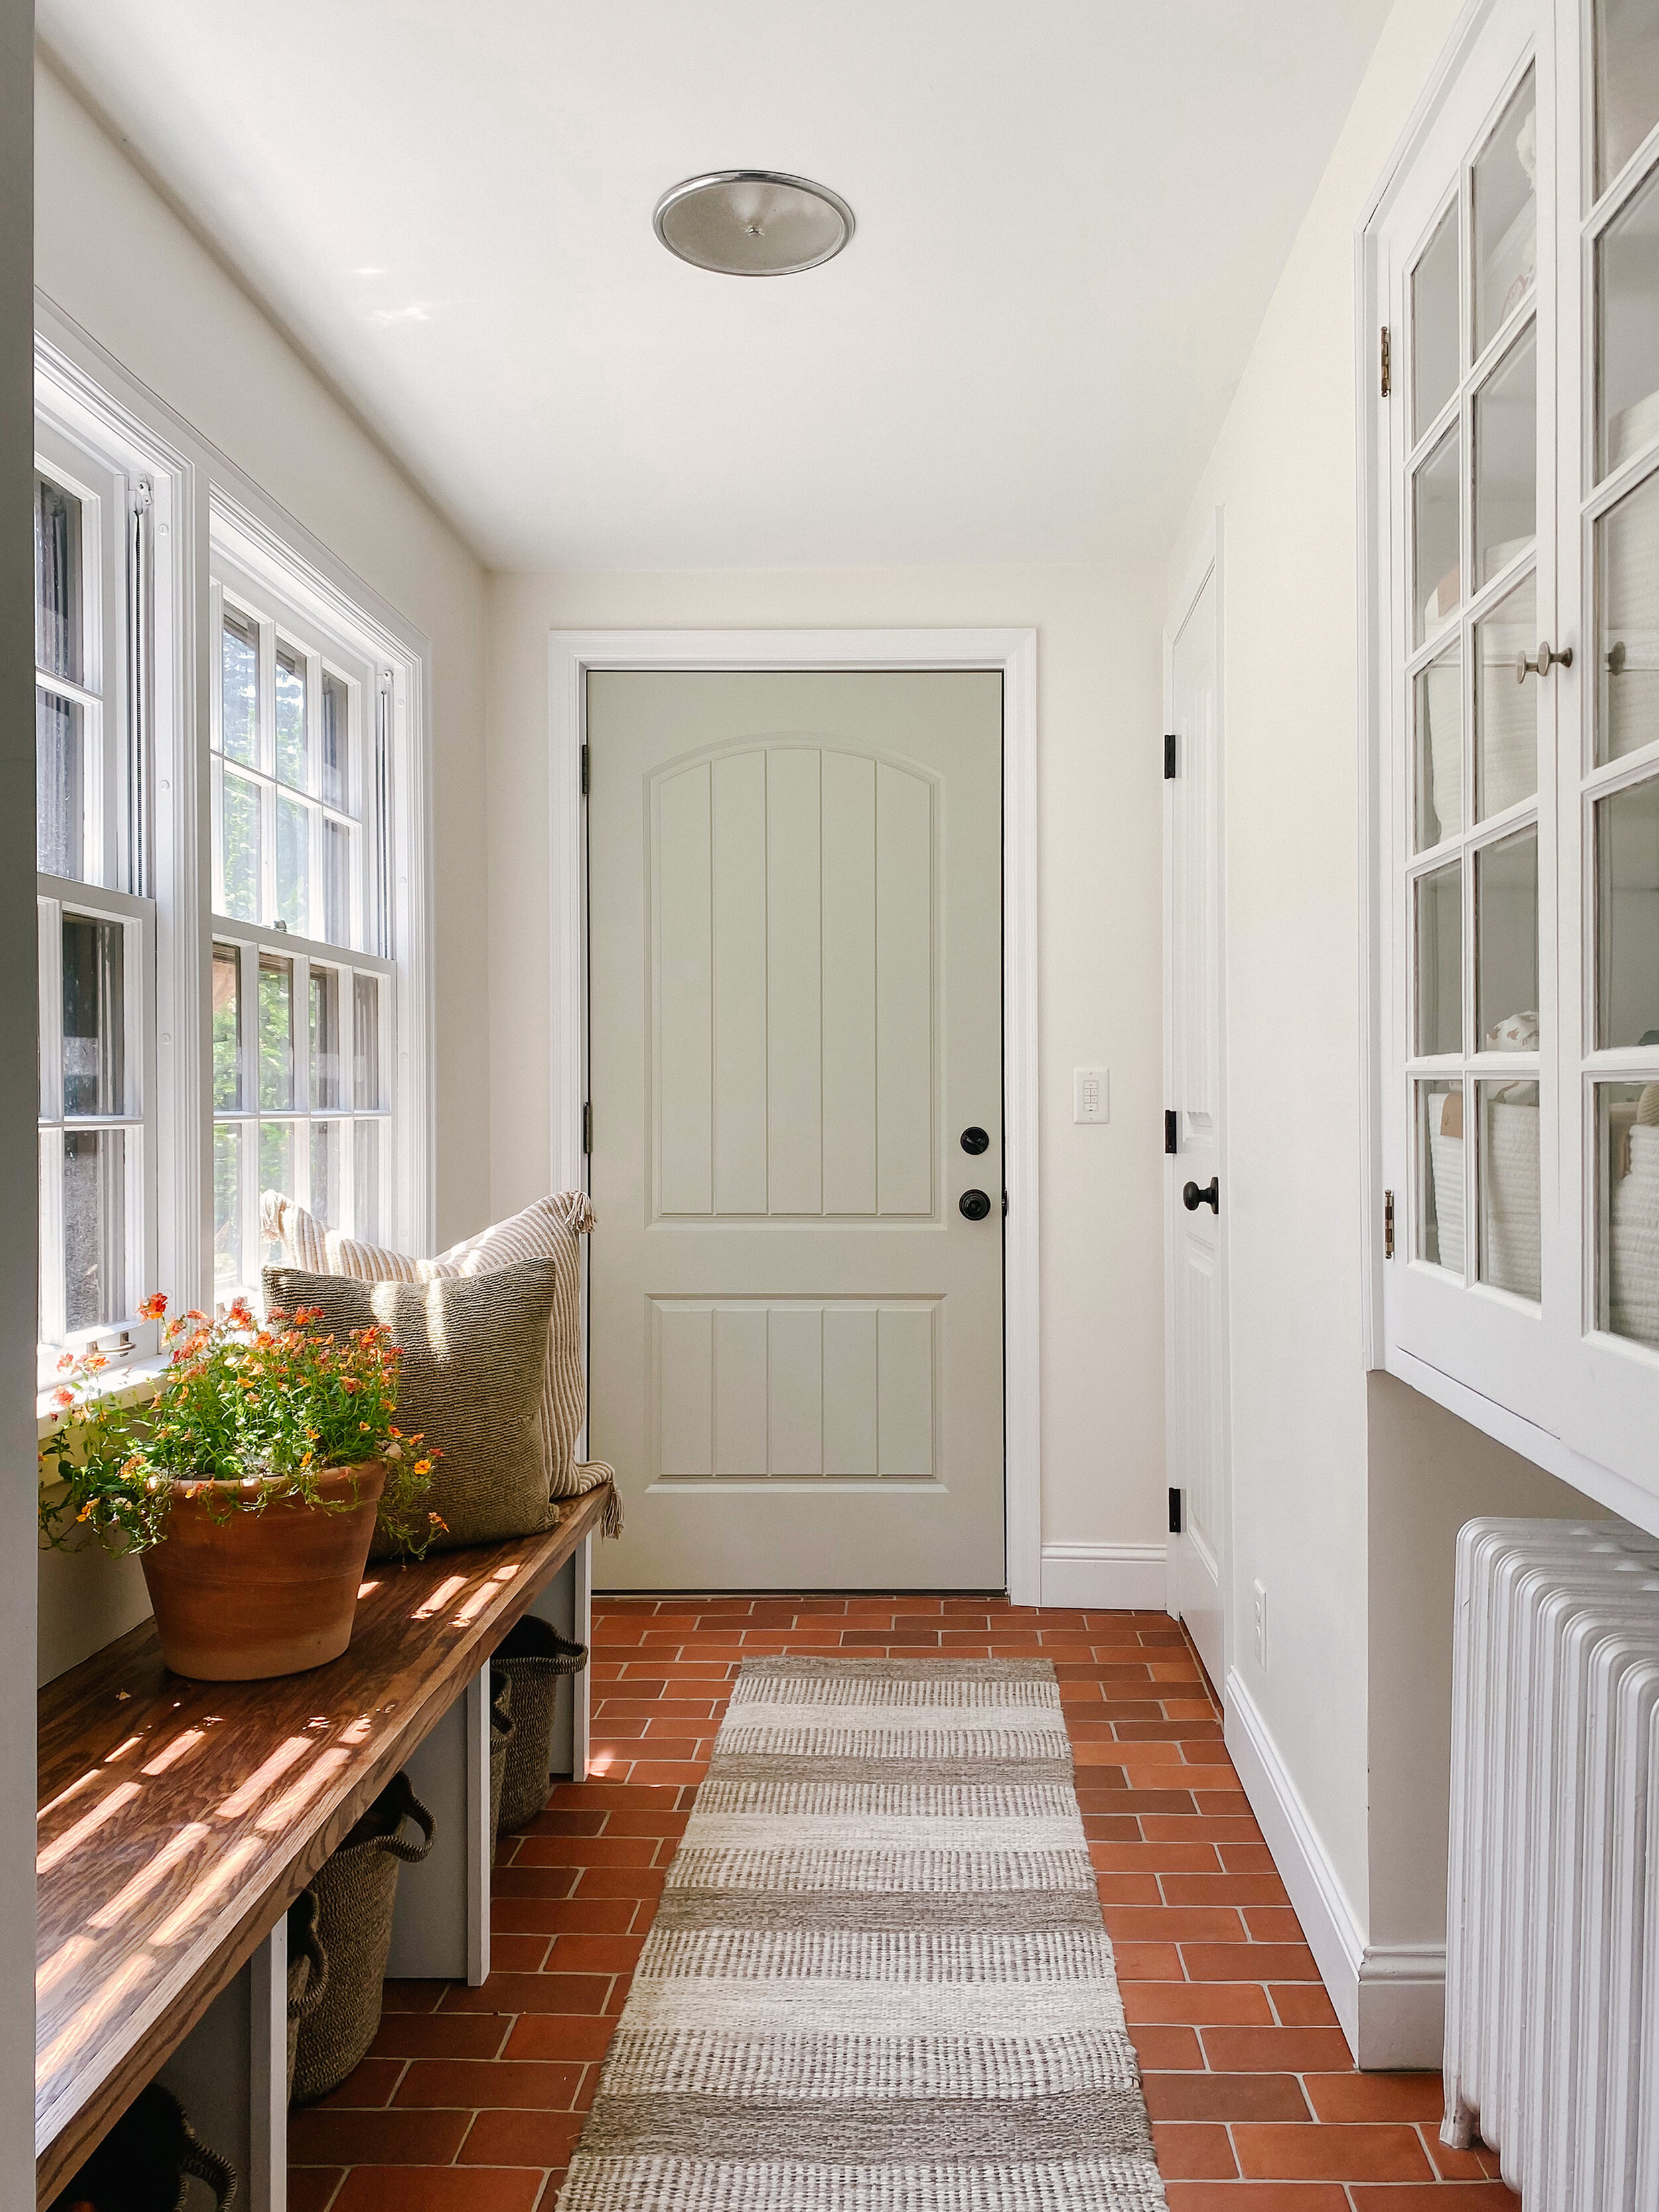
The color is too good! It really softened it and also makes the room look brighter! I love the results so much and it was an easy but gratifying change.
Hope this helps give you a nudge if you’ve been wanting to paint your fiberglass door (or any door). You can also find my video process in my Instagram highlights. Happy door painting!
Product sources in AFTER photos are no longer available but I’ve linked similar options below to get this look:


