
How We Created a Beautiful, Low-Maintenance Backyard Garden in Less than Two Days
We have a small narrow backyard that has been neglected since the first day we bought our home due to other projects getting pushed to the top of the list. Hashtag old home problems. Since we’re spending so much time at home and want to enjoy our entire outdoor space, we decided it was time to finally give our backyard a facelift. Keep reading to see how we transformed our lifeless backyard into a beautiful garden in less than two days!

In high school and college, Brian worked at his brother’s landscape company so he’s pretty knowledgeable with outdoor projects and lawn care. We’ve been looking forward to this backyard makeover and were ecstatic to have the opportunity to work again with The Home Depot (a.k.a. our other home), to share with you some outdoor tips using Vigoro live goods and products. If you’re not familiar with Vigoro, it is a total care solution brand exclusively sold at The Home Depot. We love that it’s easy to use and helps create a quality foundation for a beautiful garden all season. So if you’re looking to create a quick but nice, low maintenance garden in your backyard, you’ll want to follow along as we share our step-by-step process!
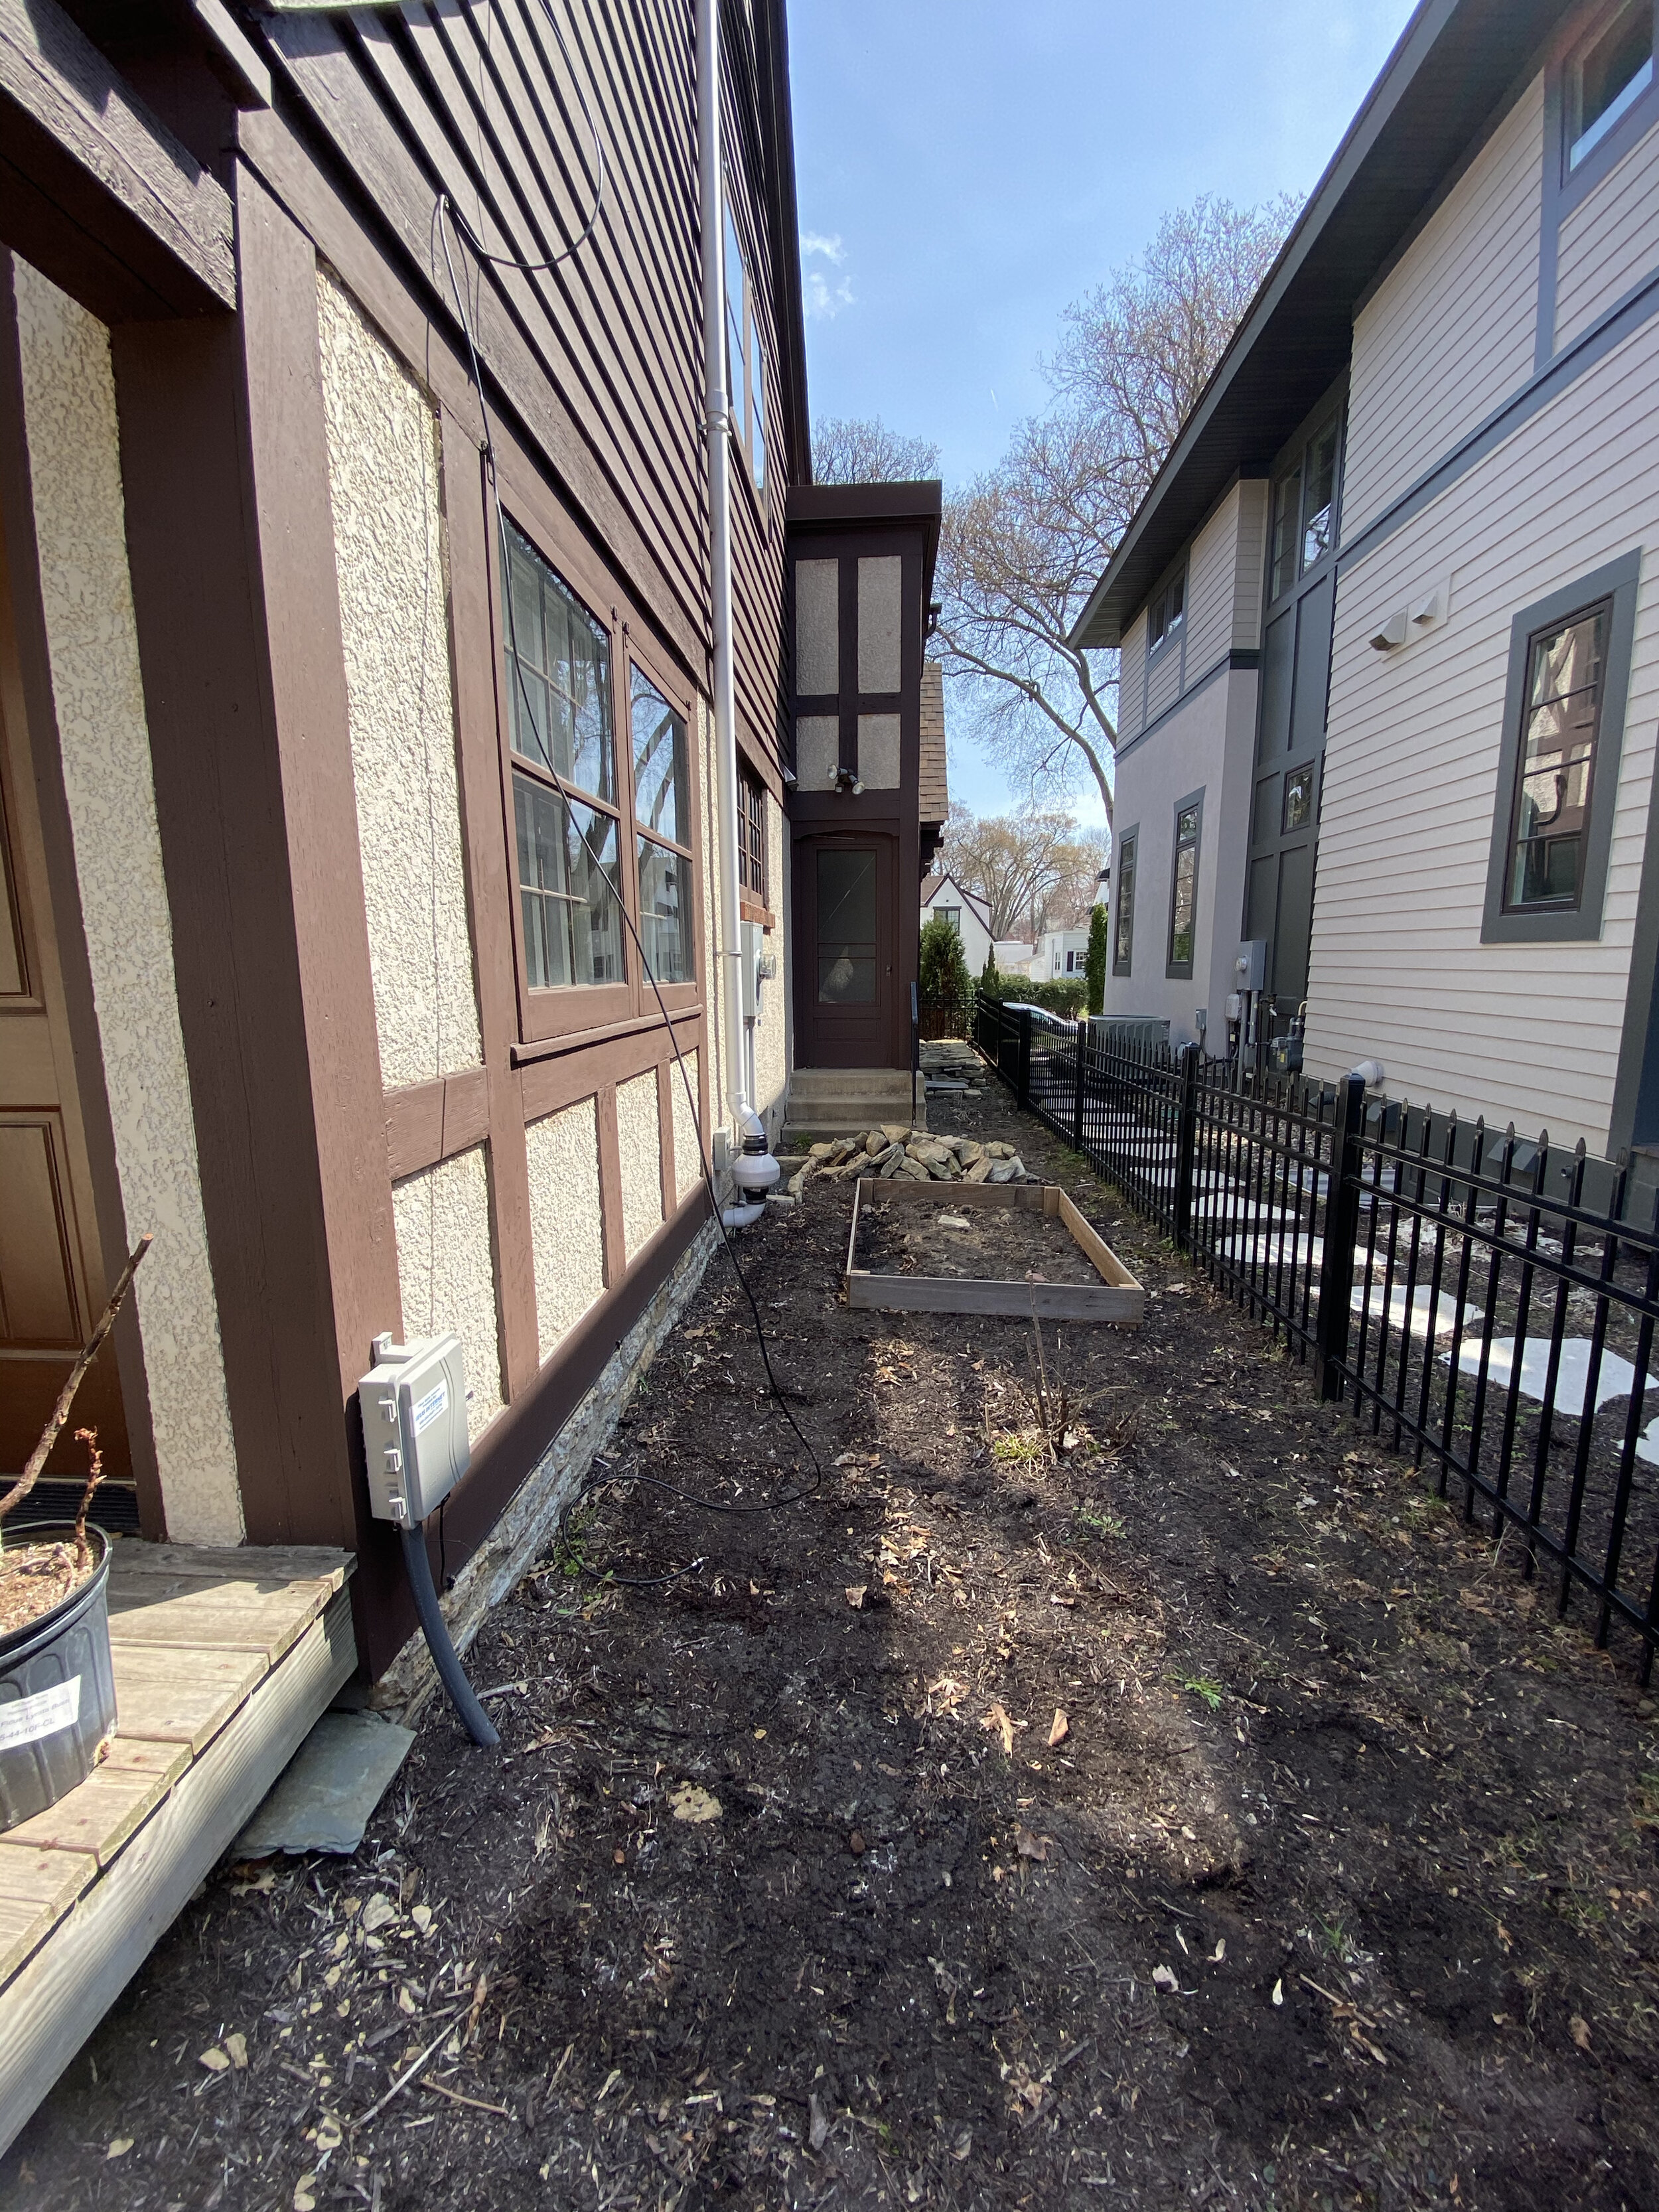
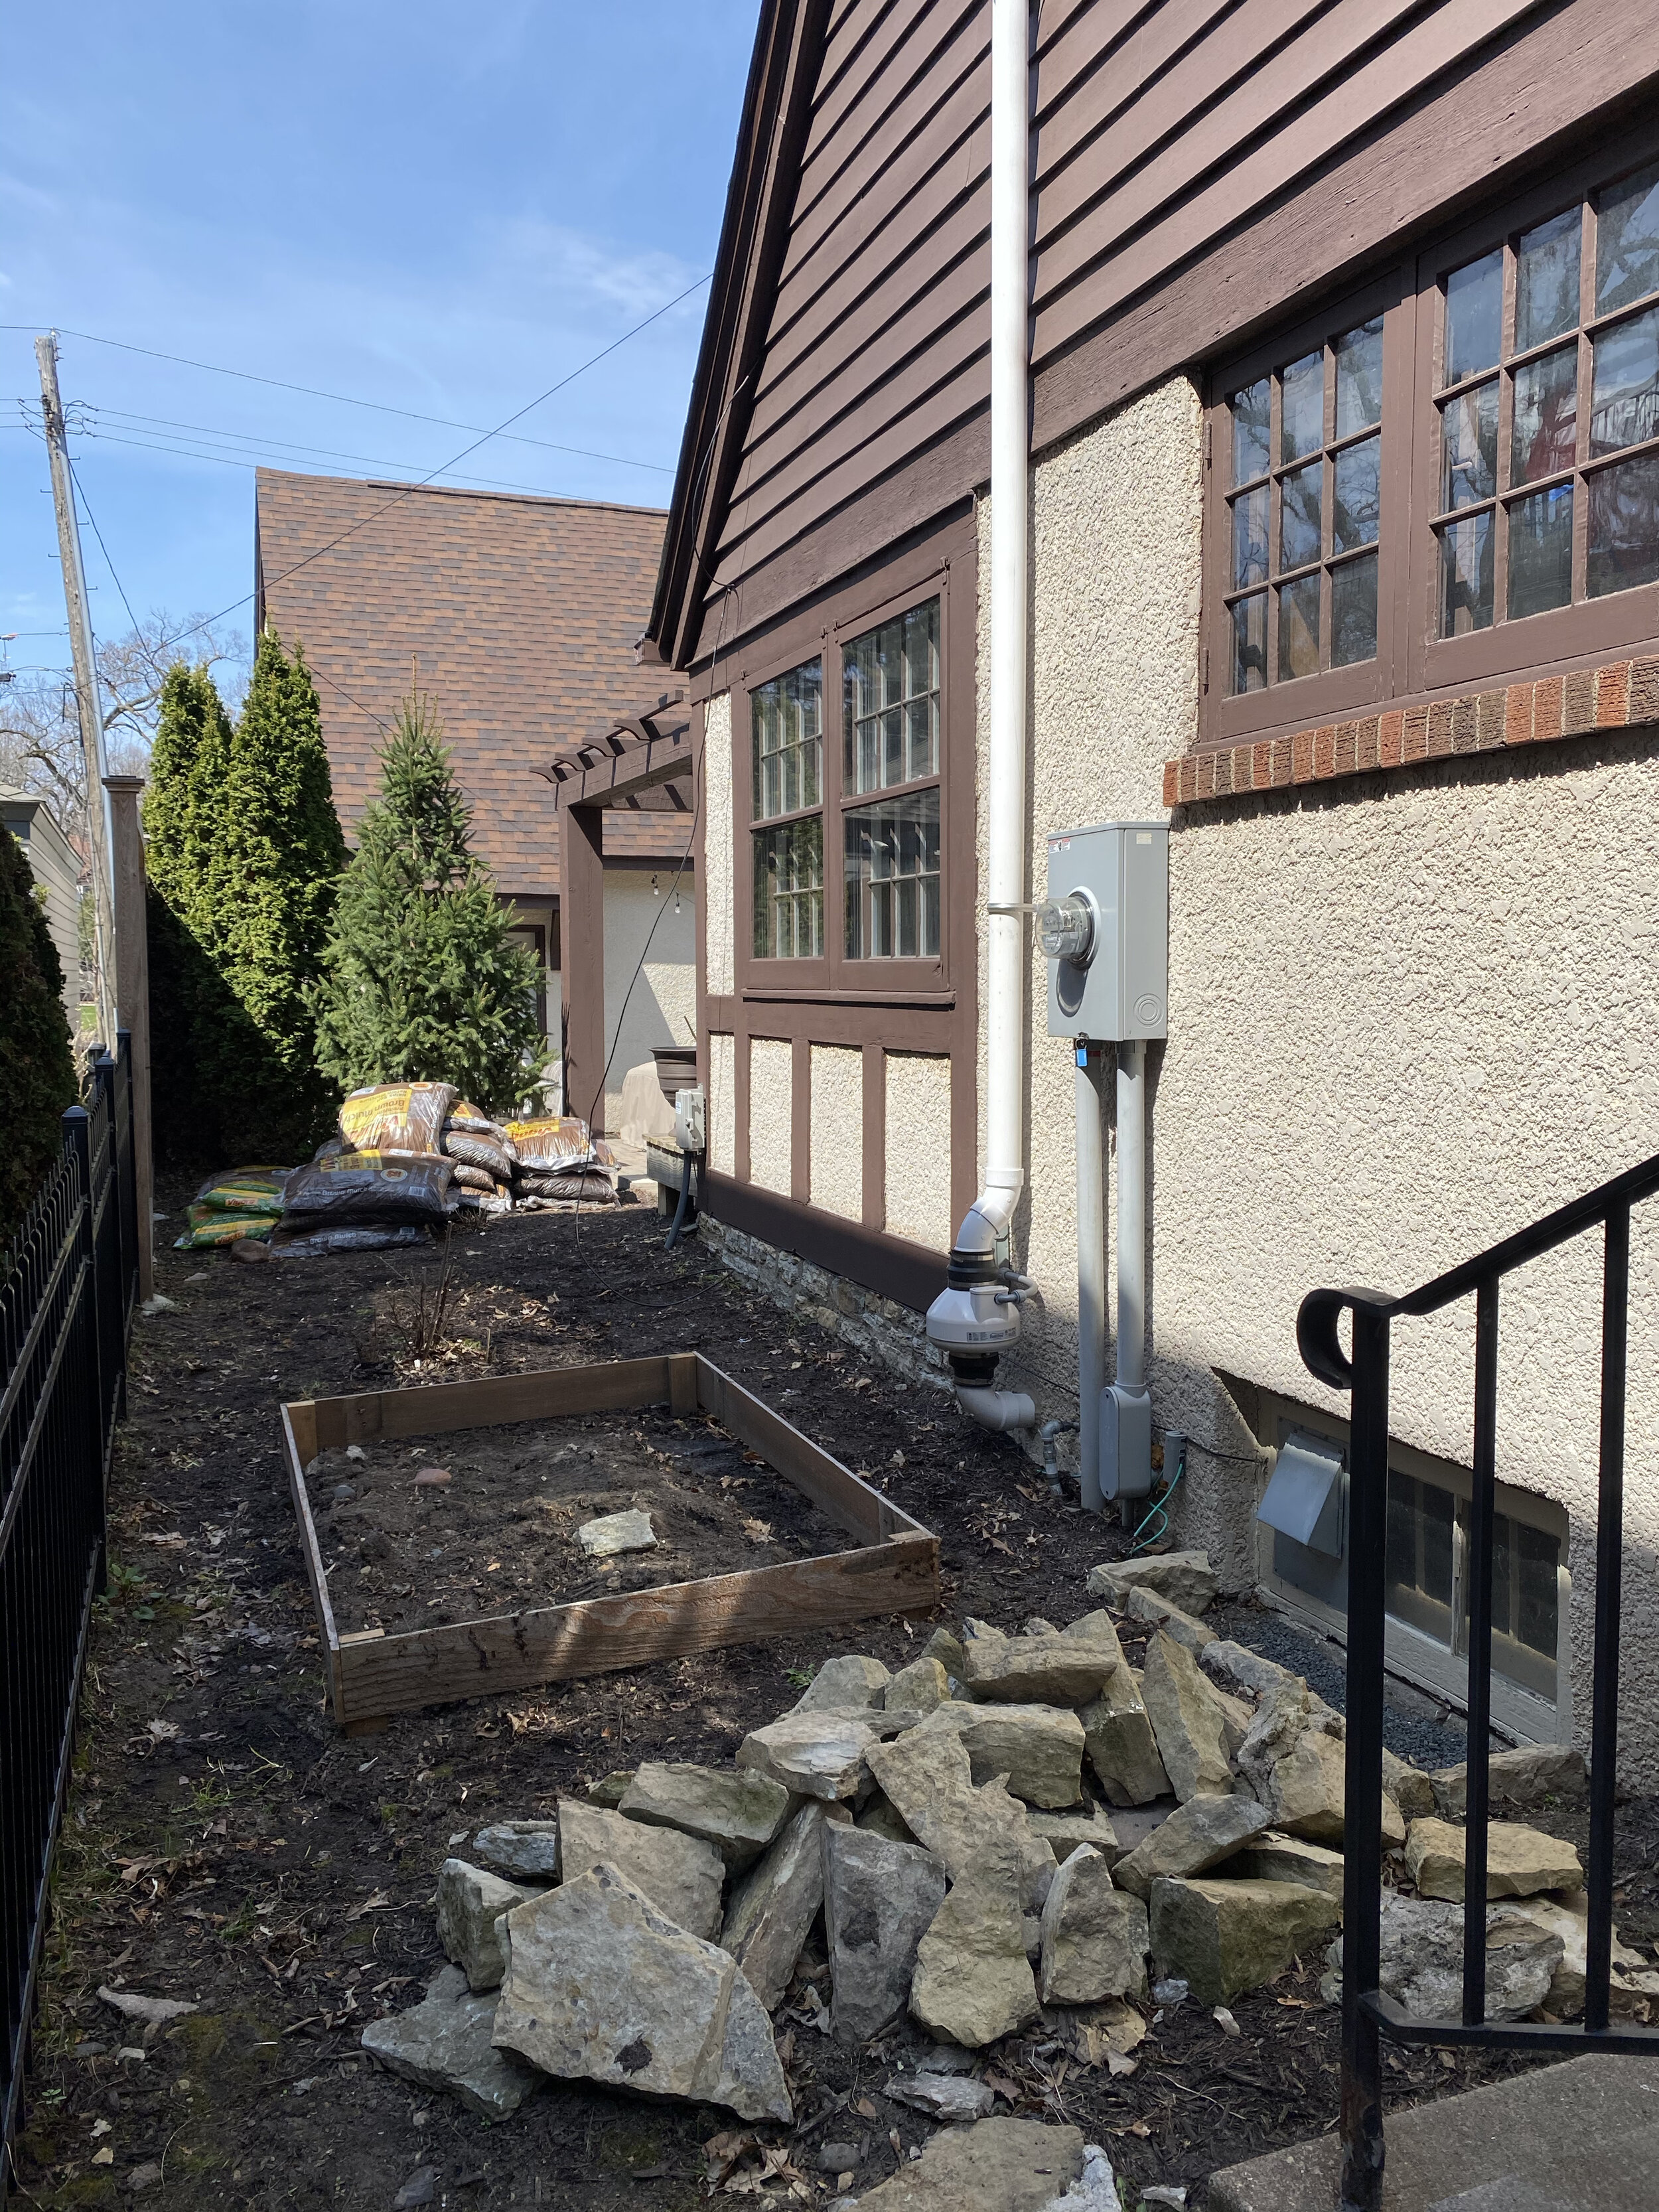
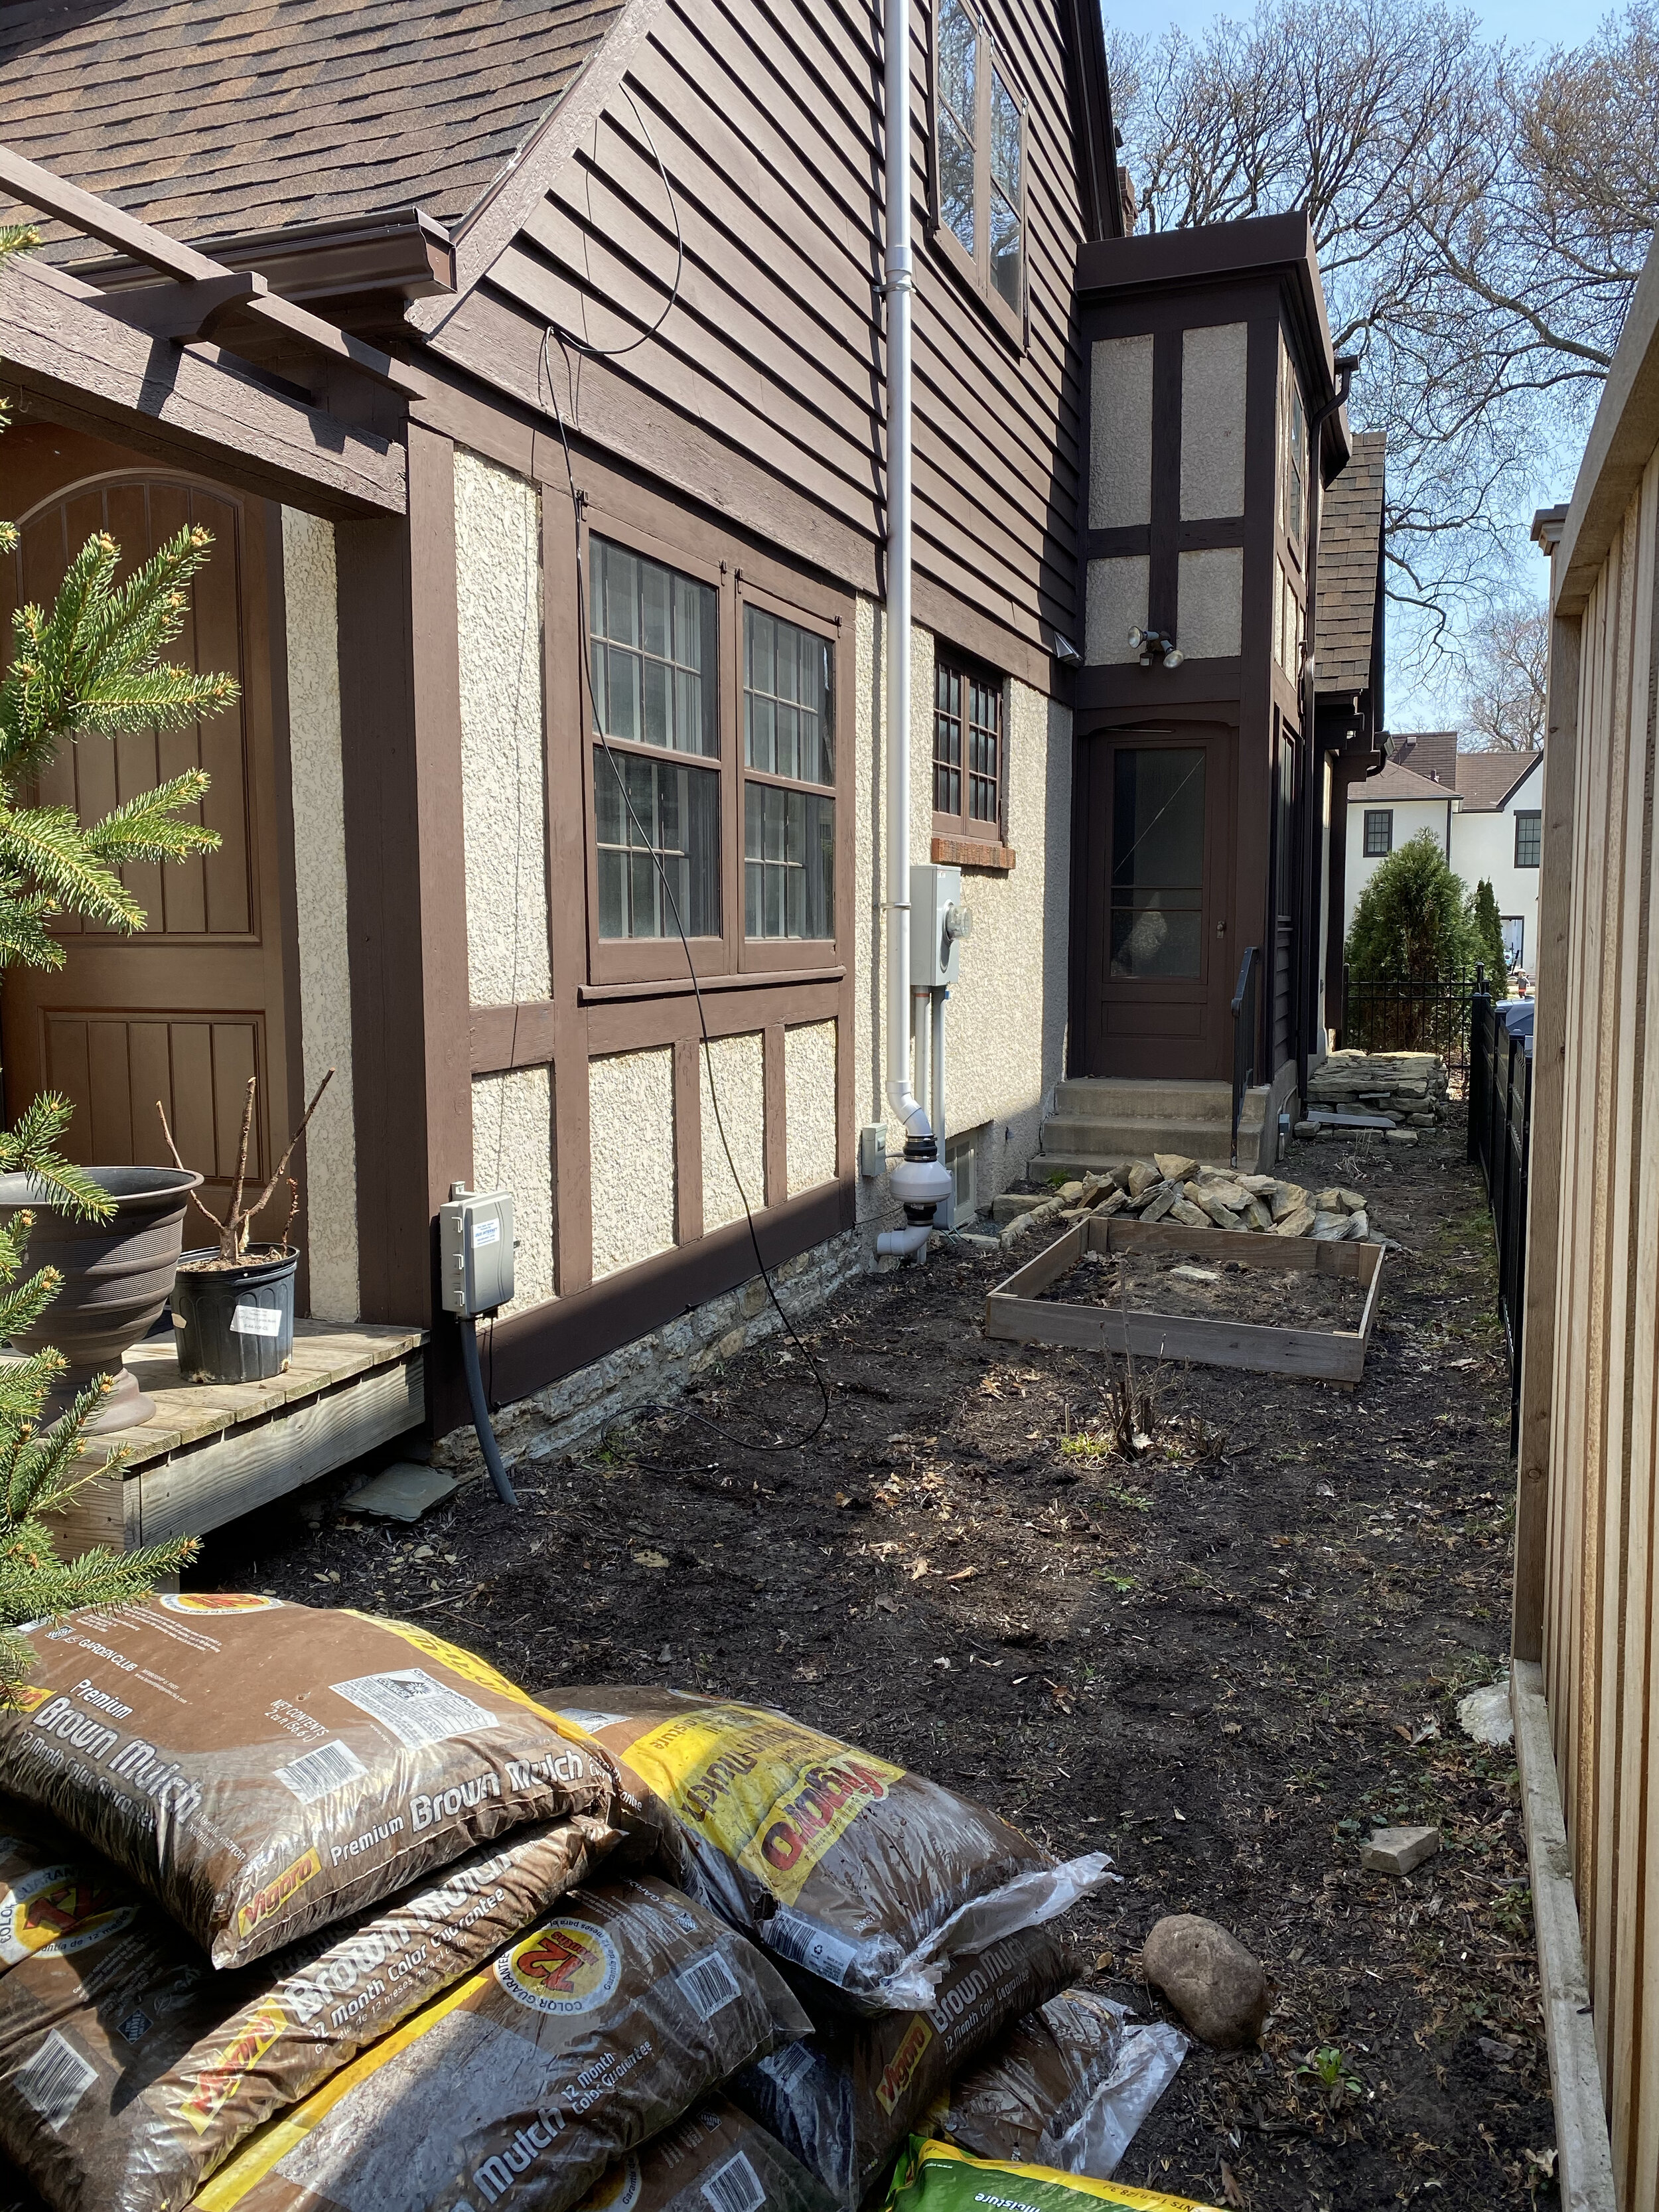
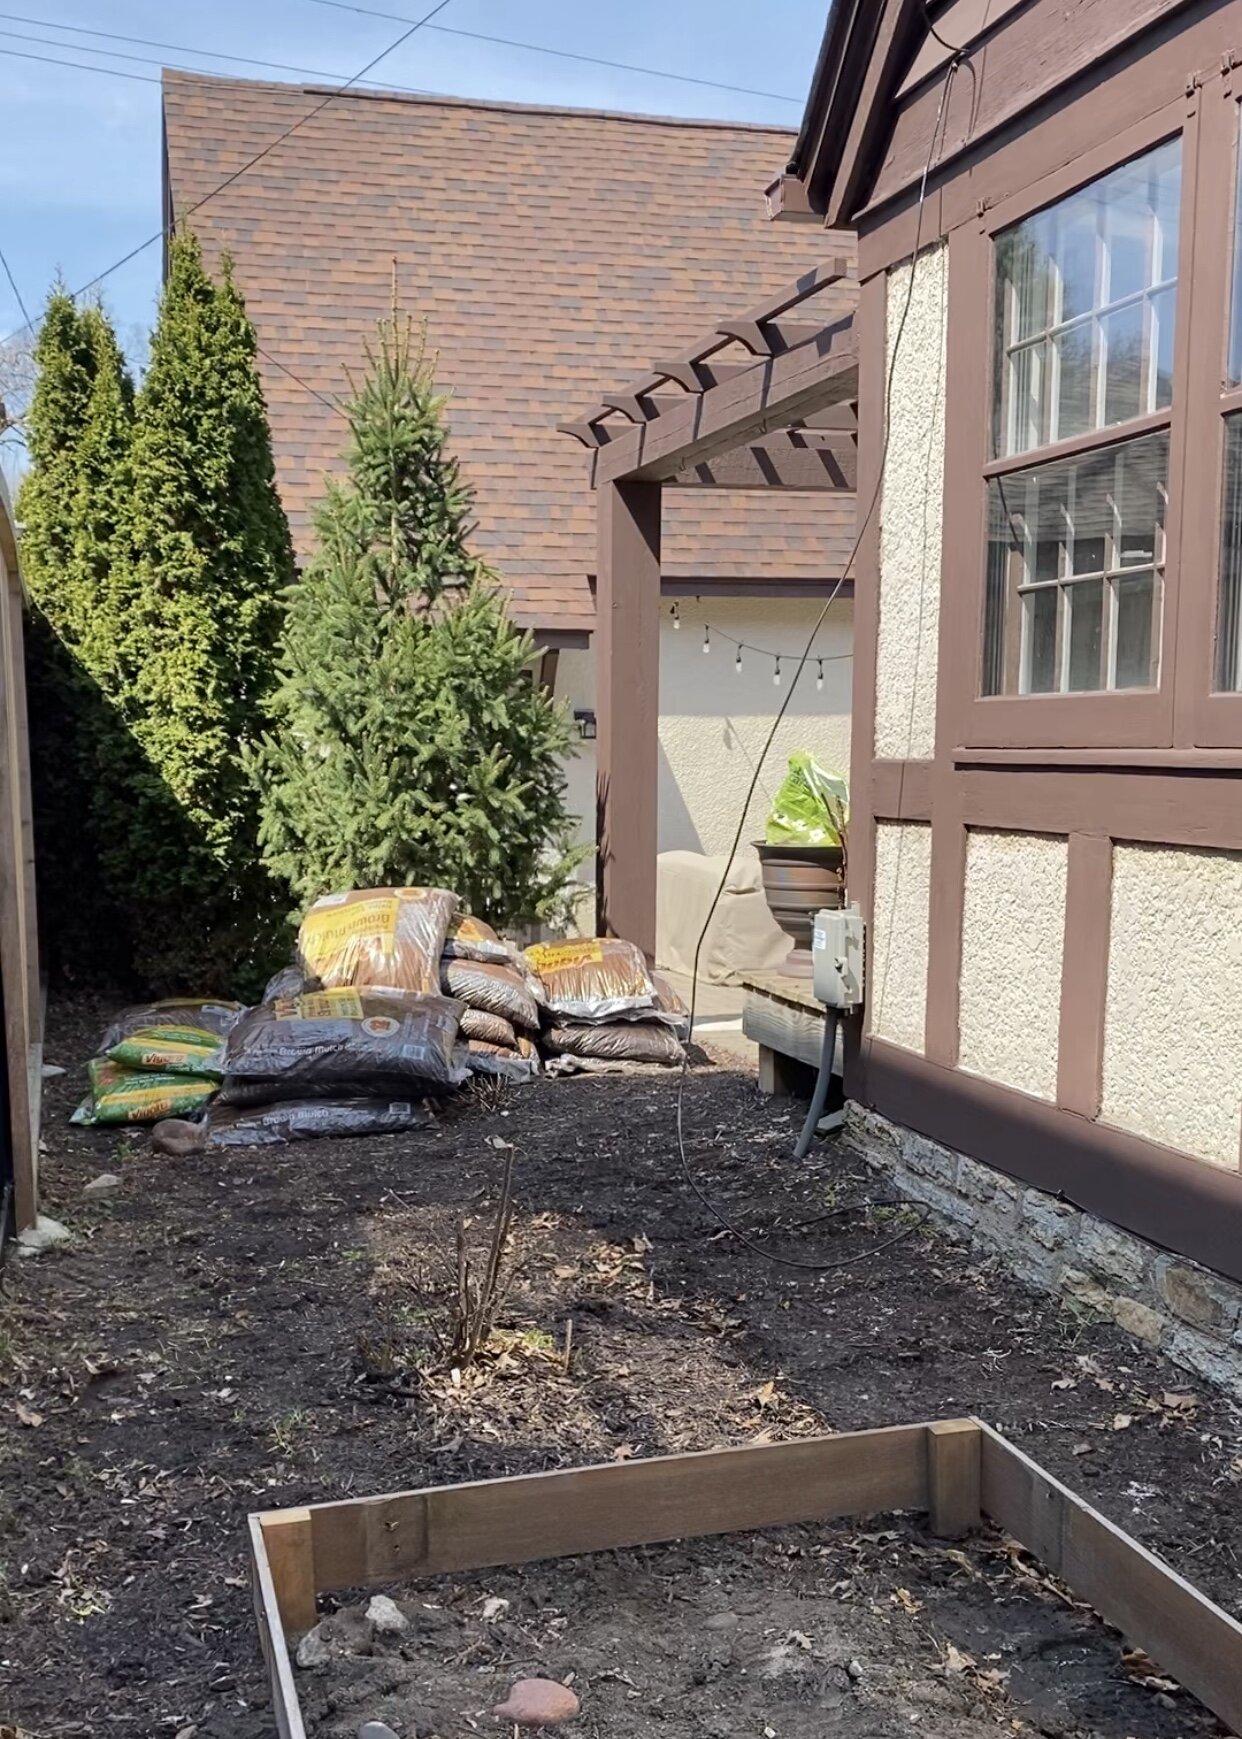
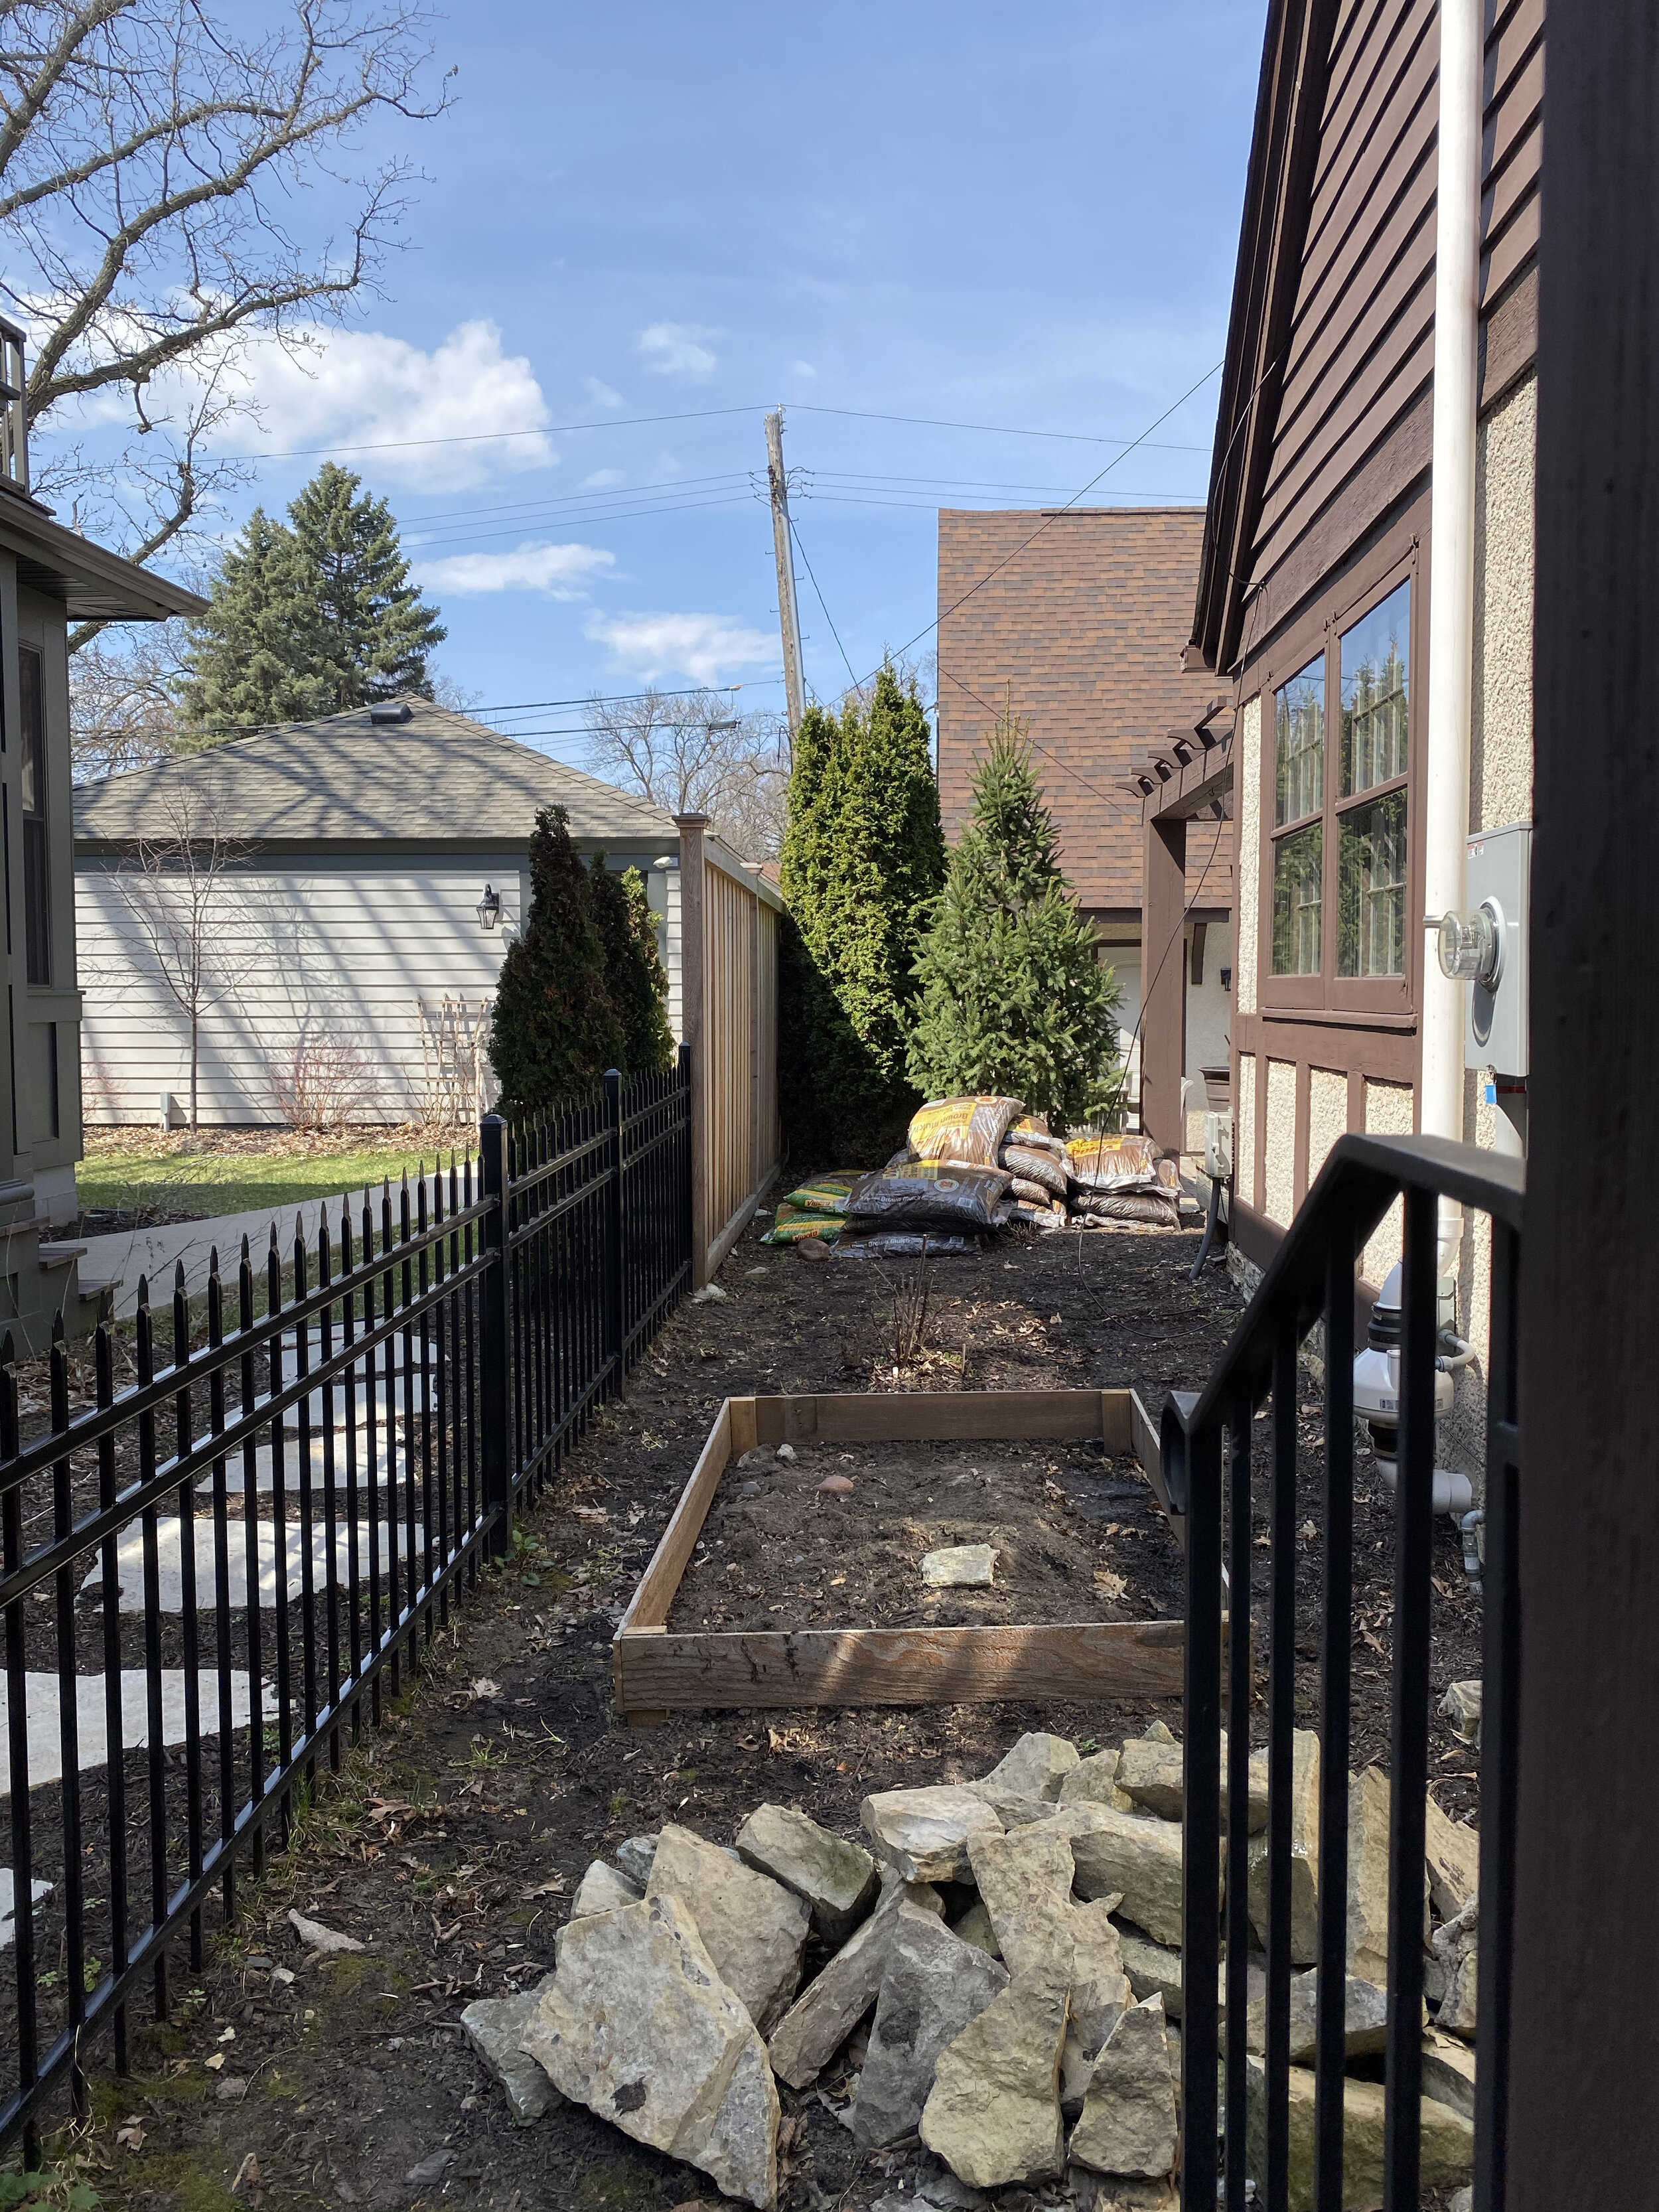
Here’s the before. Beautiful view isn’t it? Yikes!
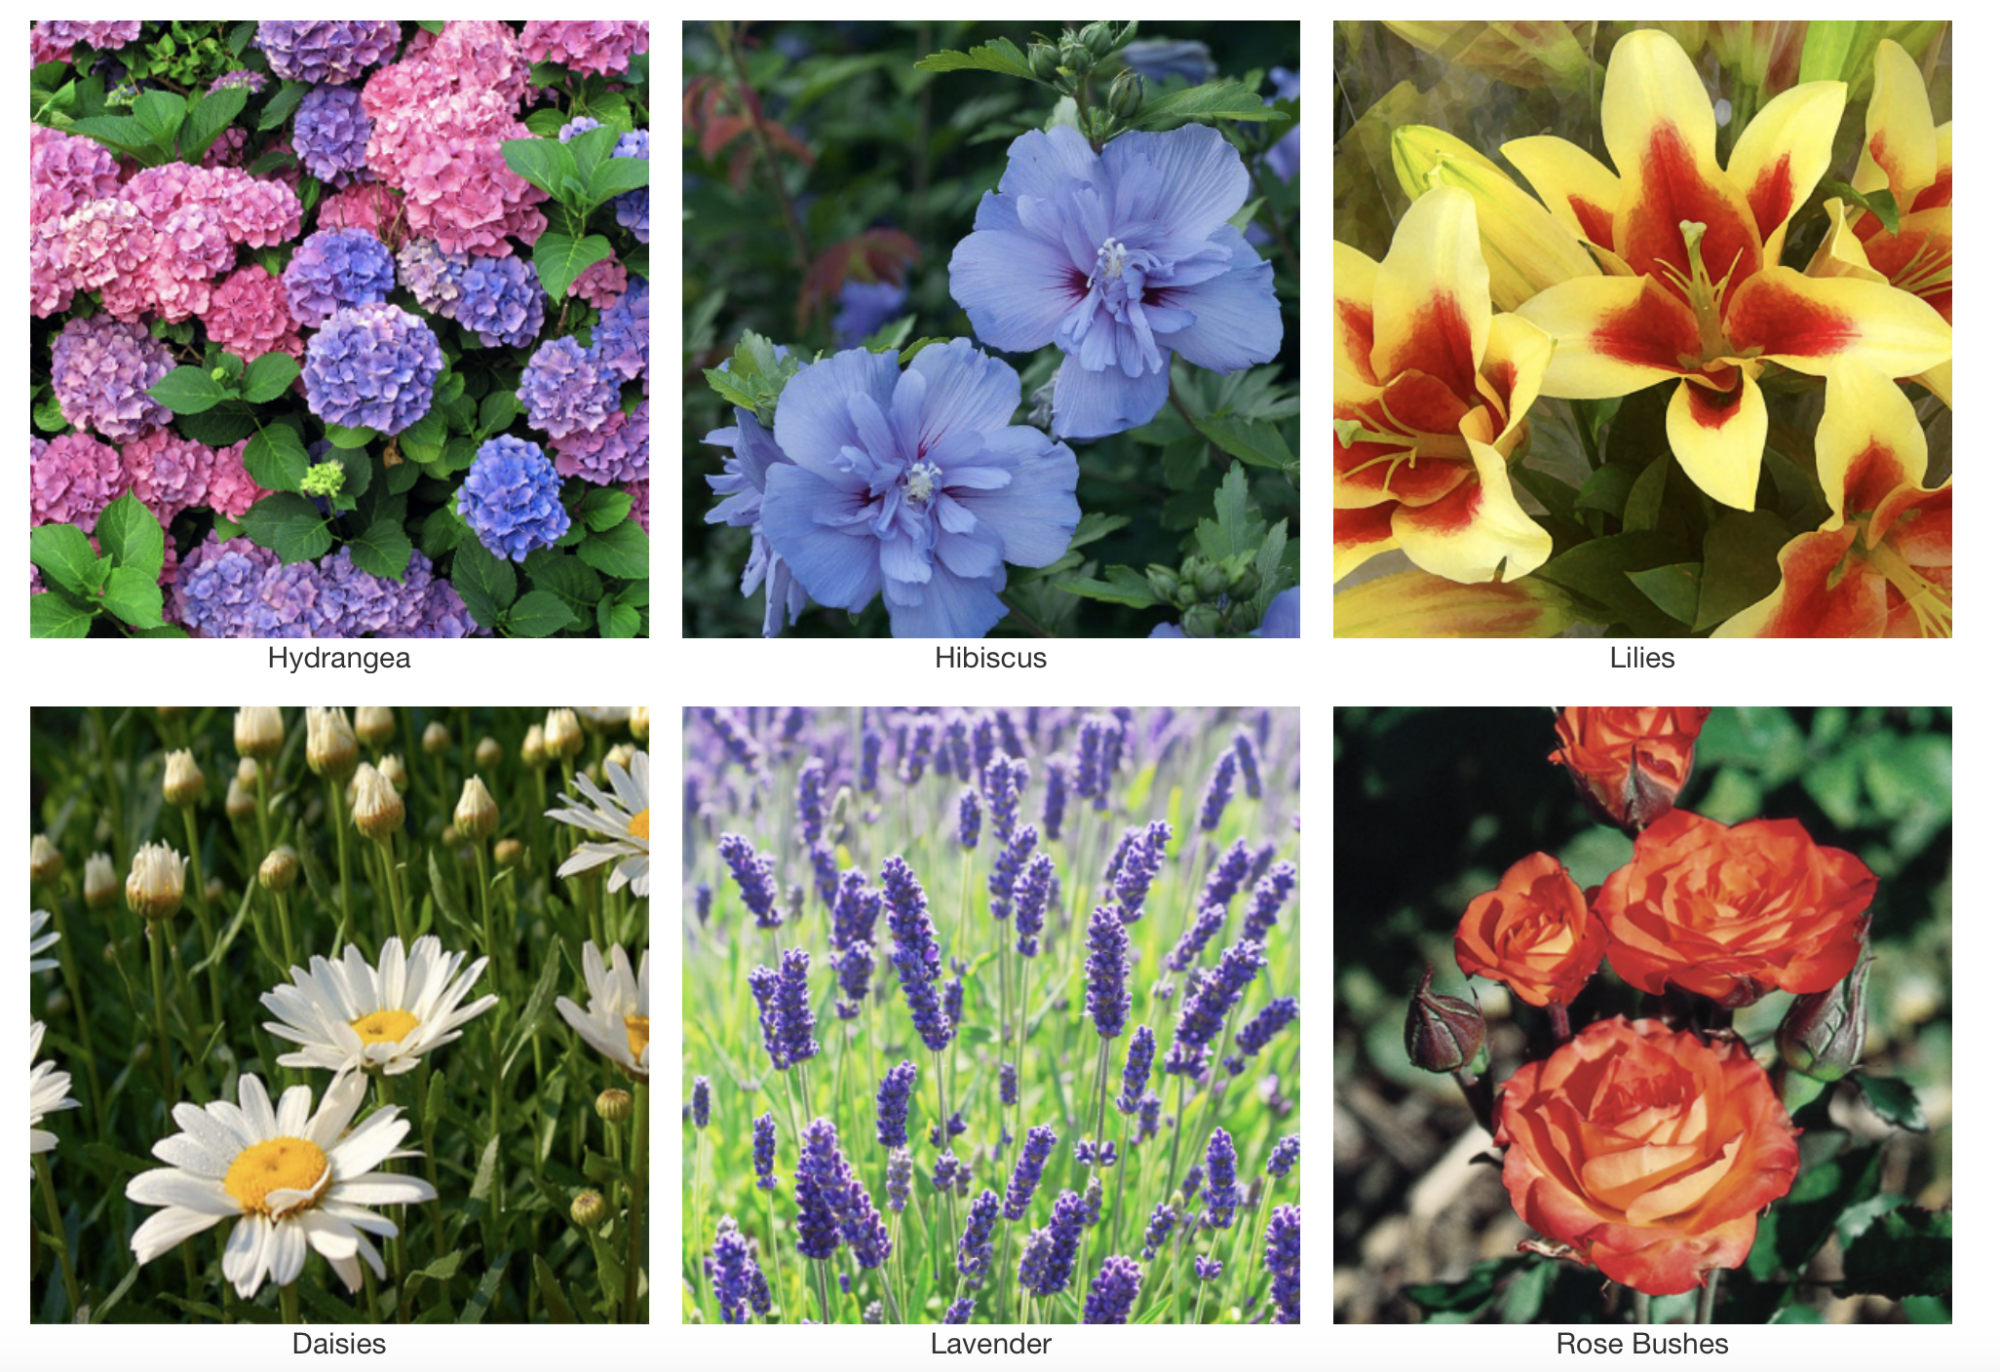
Creating an outdoor space doesn’t have to be complicated. The key to having a nice looking, yet low maintenance garden is having a no-mow yard using hardy plants that are longer lasting. Vigoro has so many great selections of live plants that are more disease resistant, sun shade tolerant with a broad selection of quality colors. They also have a 1 year plant guarantee! Click here to learn about the Hardiness Zone and figure out what types of plants work best in your area, their sun tolerance and how to decide between annuals or perennials.
Some Perennial Options from Vigoro. Photos from The Home Depot
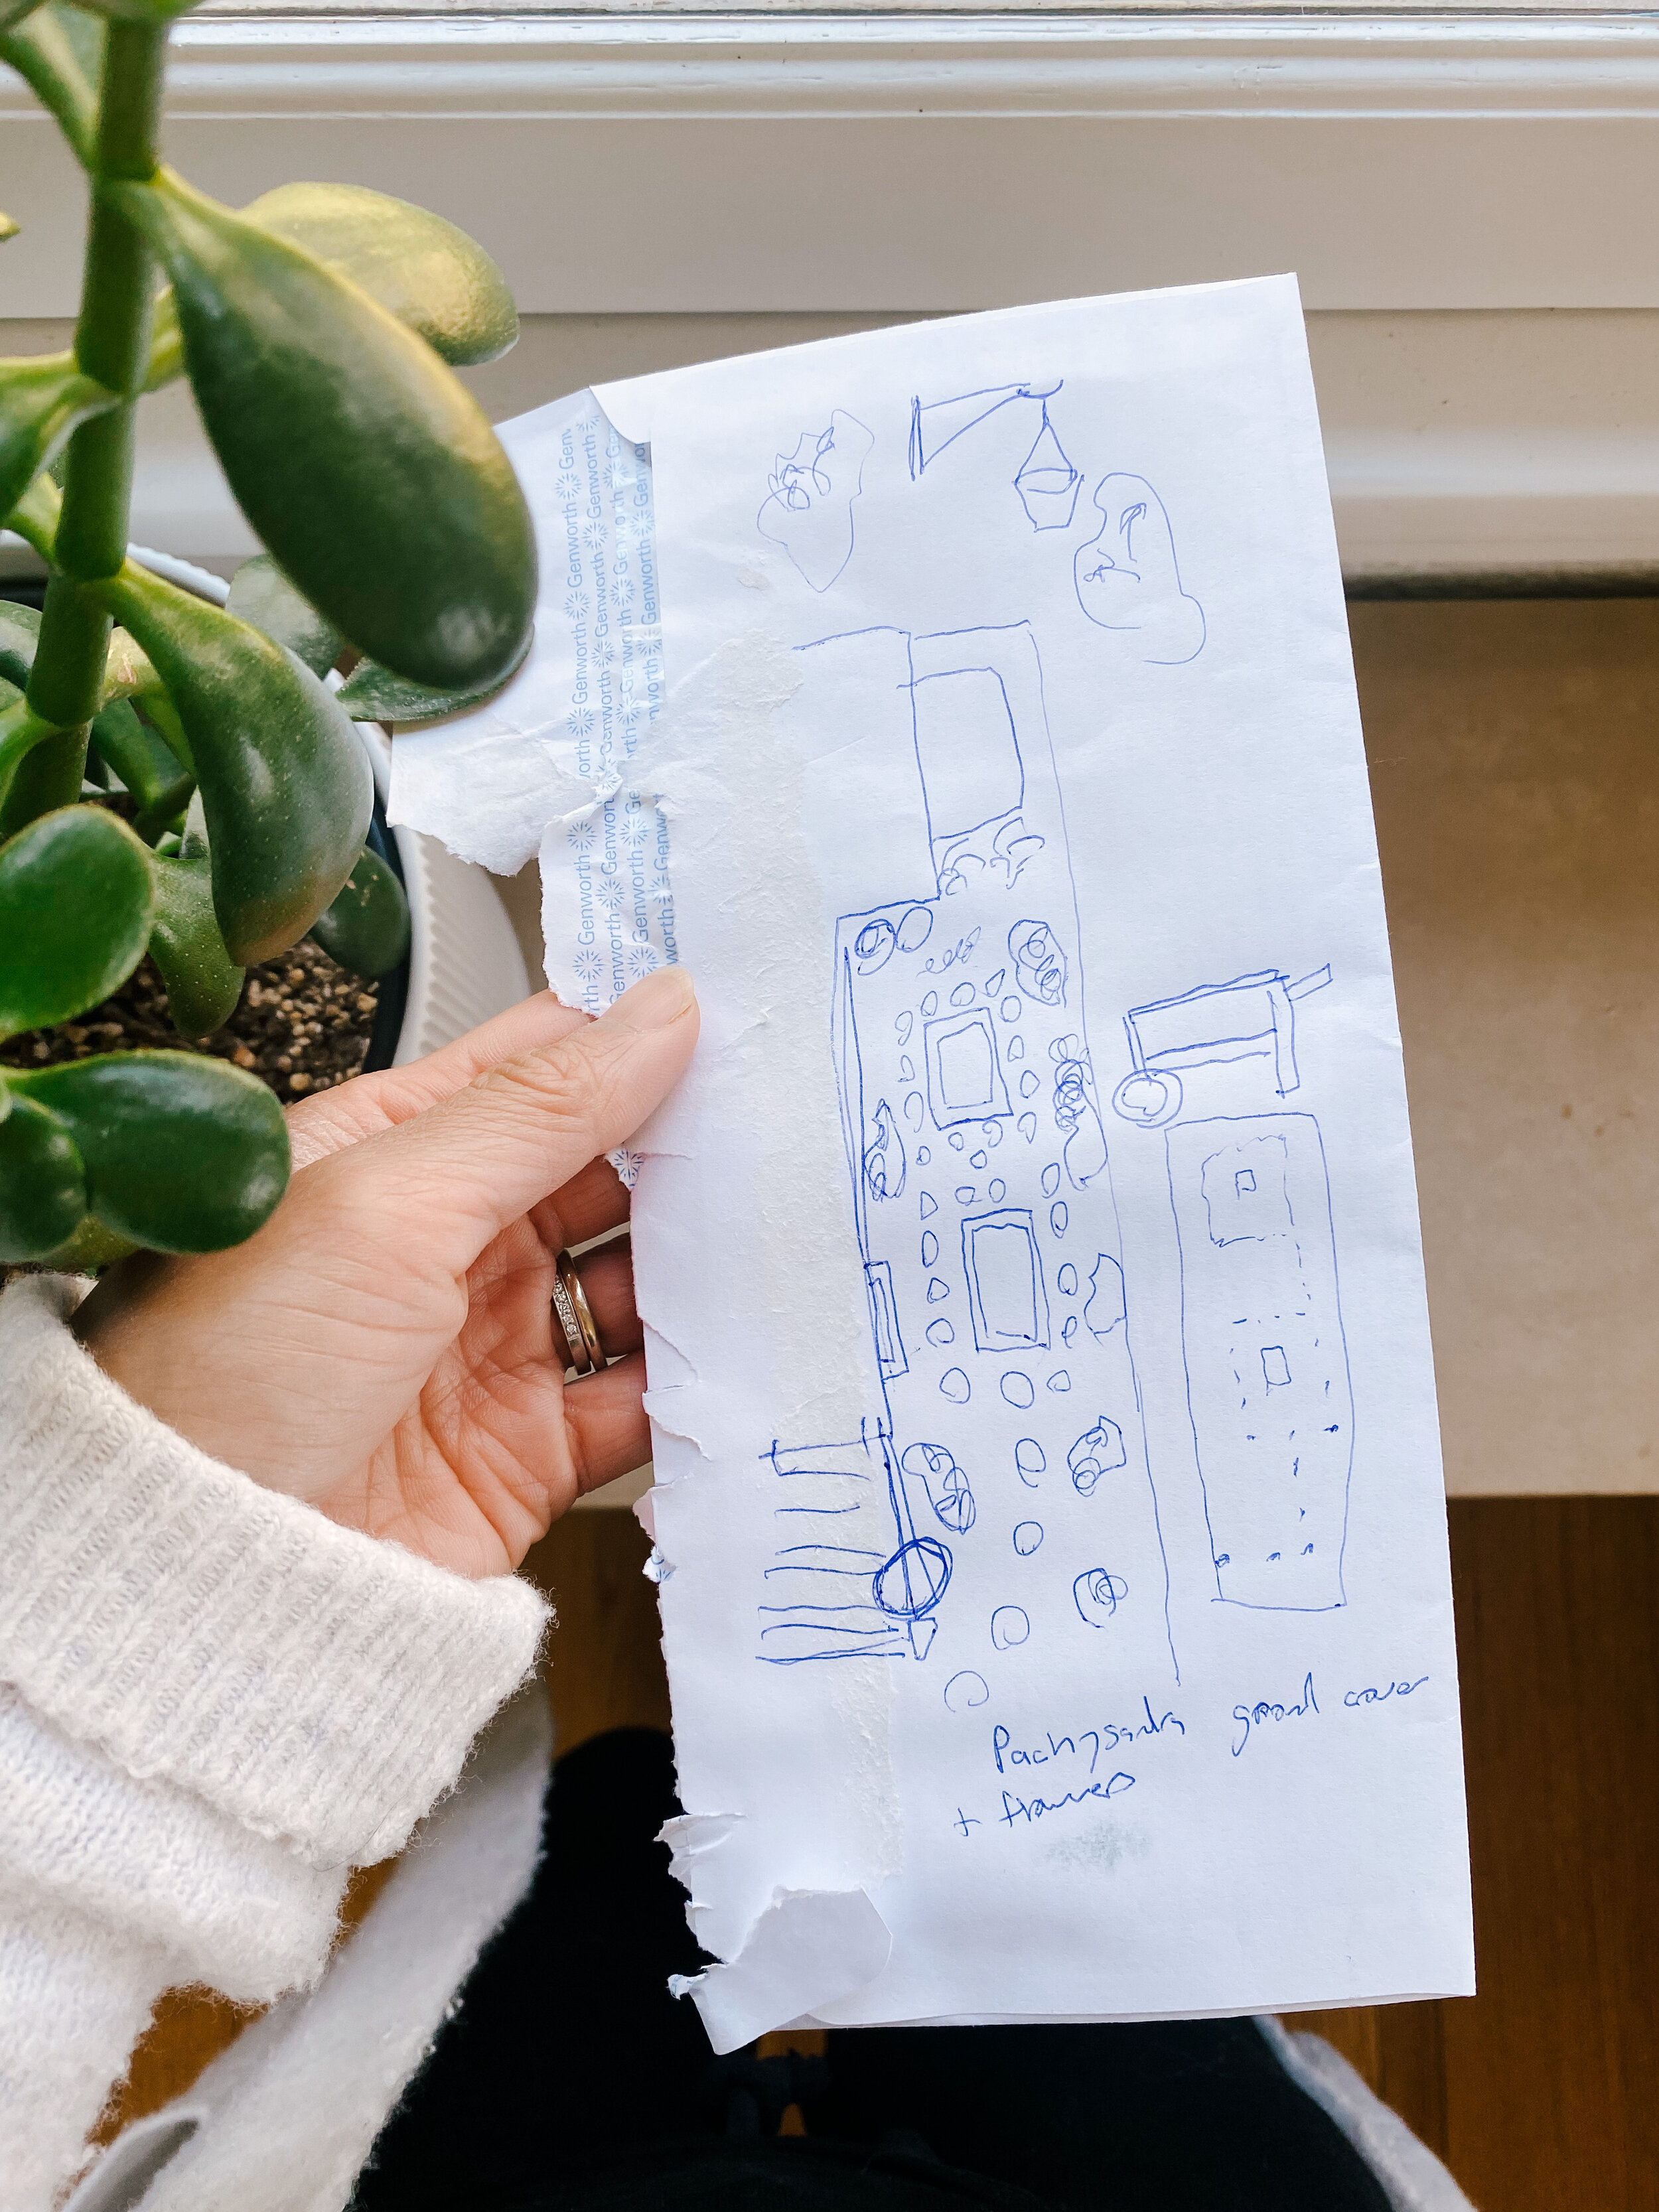
Here’s a super quick and messy rendering from Brian to get us started. See, no need to be intimidated or discouraged 🙂
When planning your garden, understand which areas get more sun vs. shade and have a general idea of where you want your walking path to be placed. This will help you visualize where you want to place the plants along the path. Here’s how we planned ahead to order and have things shipped directly to us before getting started. Note: If you’re planning on a vegetable garden like us, it will need plenty of sunlight.
Order Process
Step 1: Measure your space to get approximate square footage. This is important to help you plan how much you should order for each product.
Step 2: Order outdoor essentials based on your measurements.
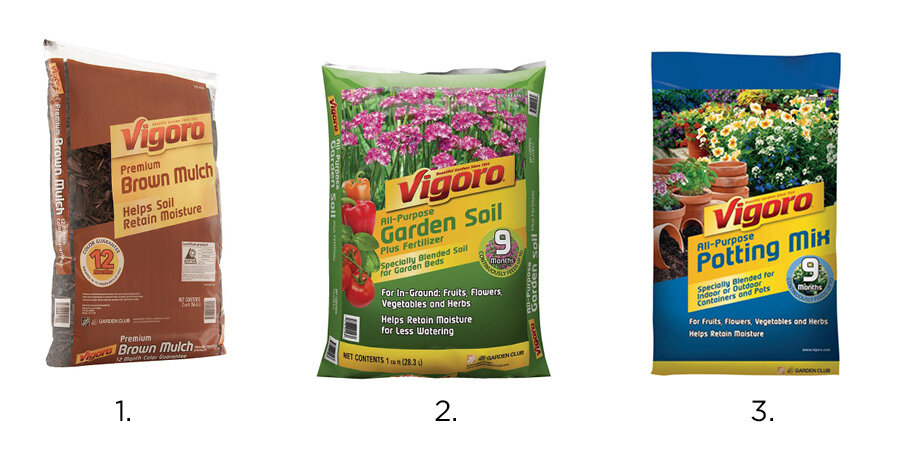
1. mulch | 2. garden soil | 3. potting mix
Step 3: Order Additional Garden Items. Here’s what we needed and ordered:
-
Raised garden beds (2x) – you can DIY this too!
-
Hanging Coco Baskets (we used both the 12” and 14”)
* Other tools we already have that you may need (make sure to order ahead if you don’t have them): rake, shovel, garden gloves, hand tool set, hooks and drill if you plan on hanging plants. See checklist and helpful links below.
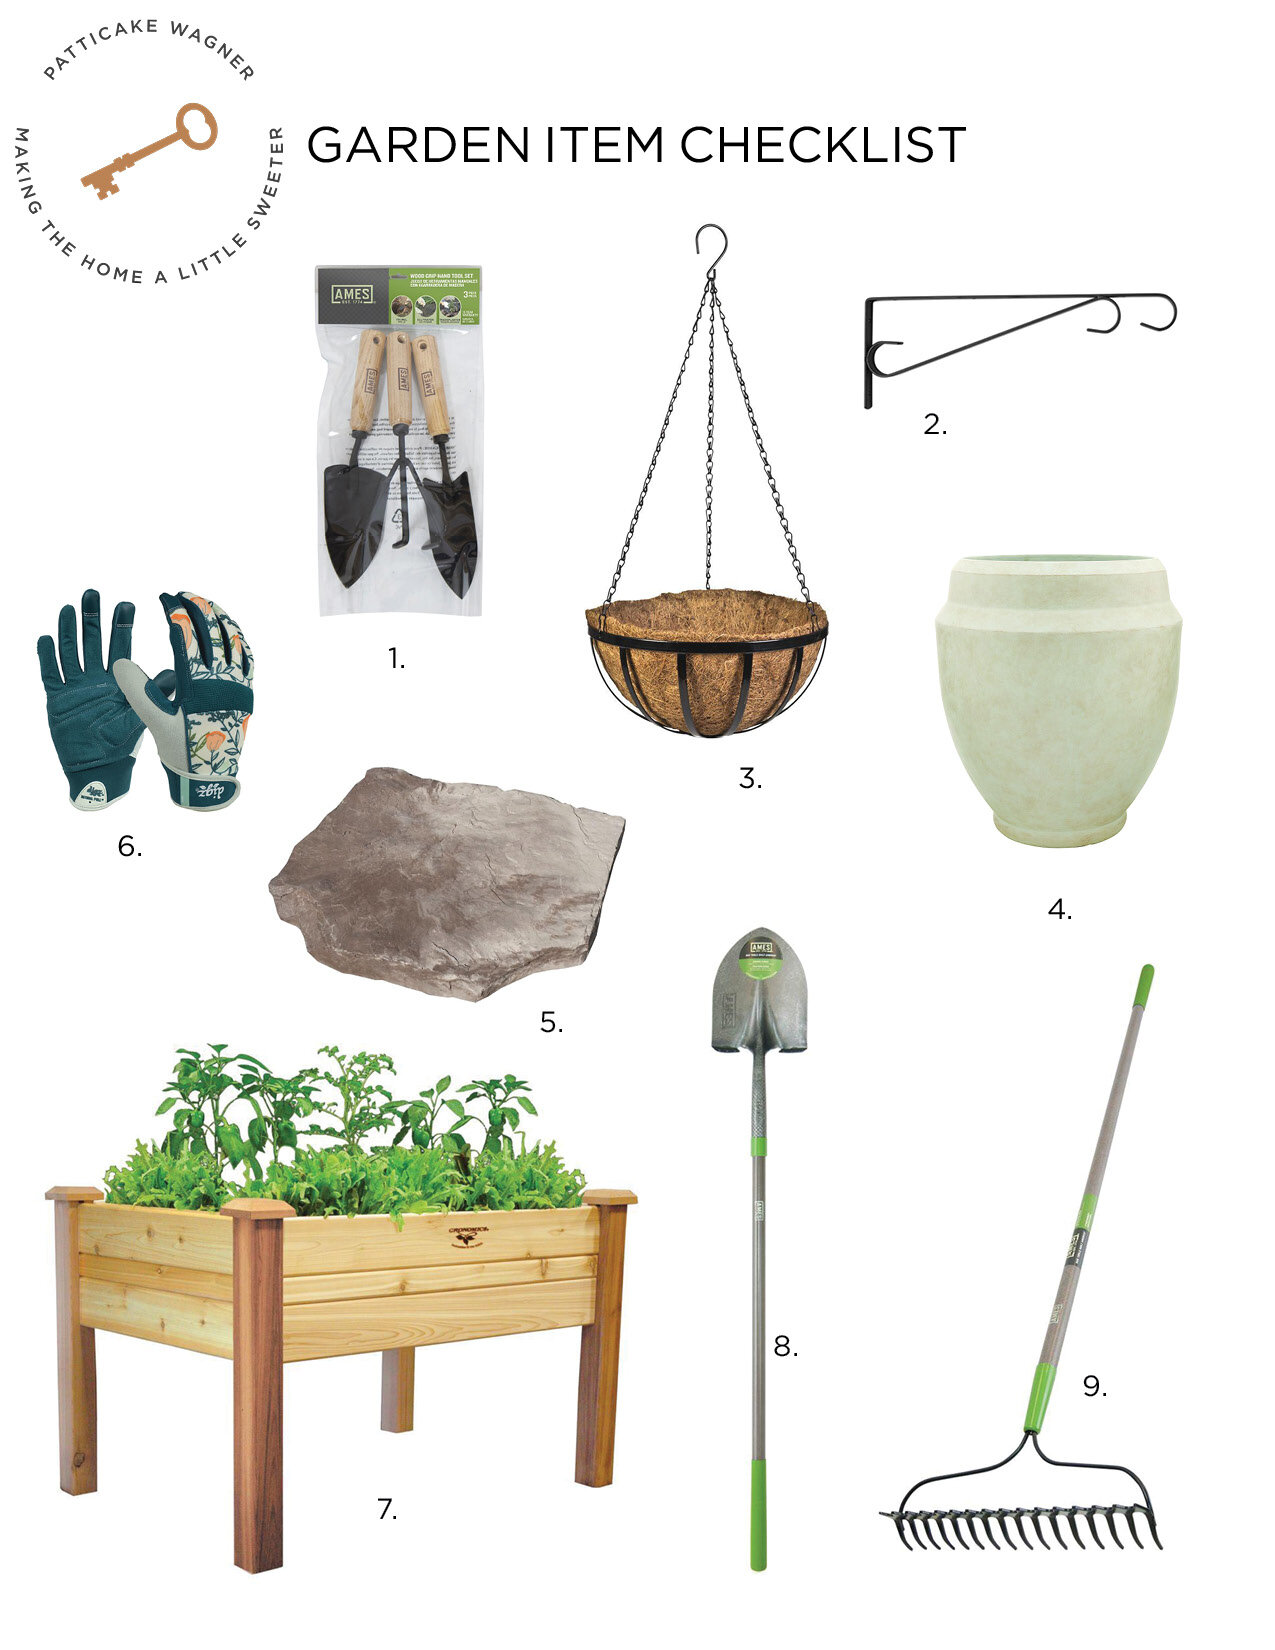
1. Hand Tool Set | 2. Plant Brackets | 3. Hanging Baskets | 4. Monroe Planter | 5. Stepping Stones | 6. Women’s Gardener Touchscreen Gloves | 7. Raised Garden Bed | 8. Digging Shovel | 9. Bow Rake
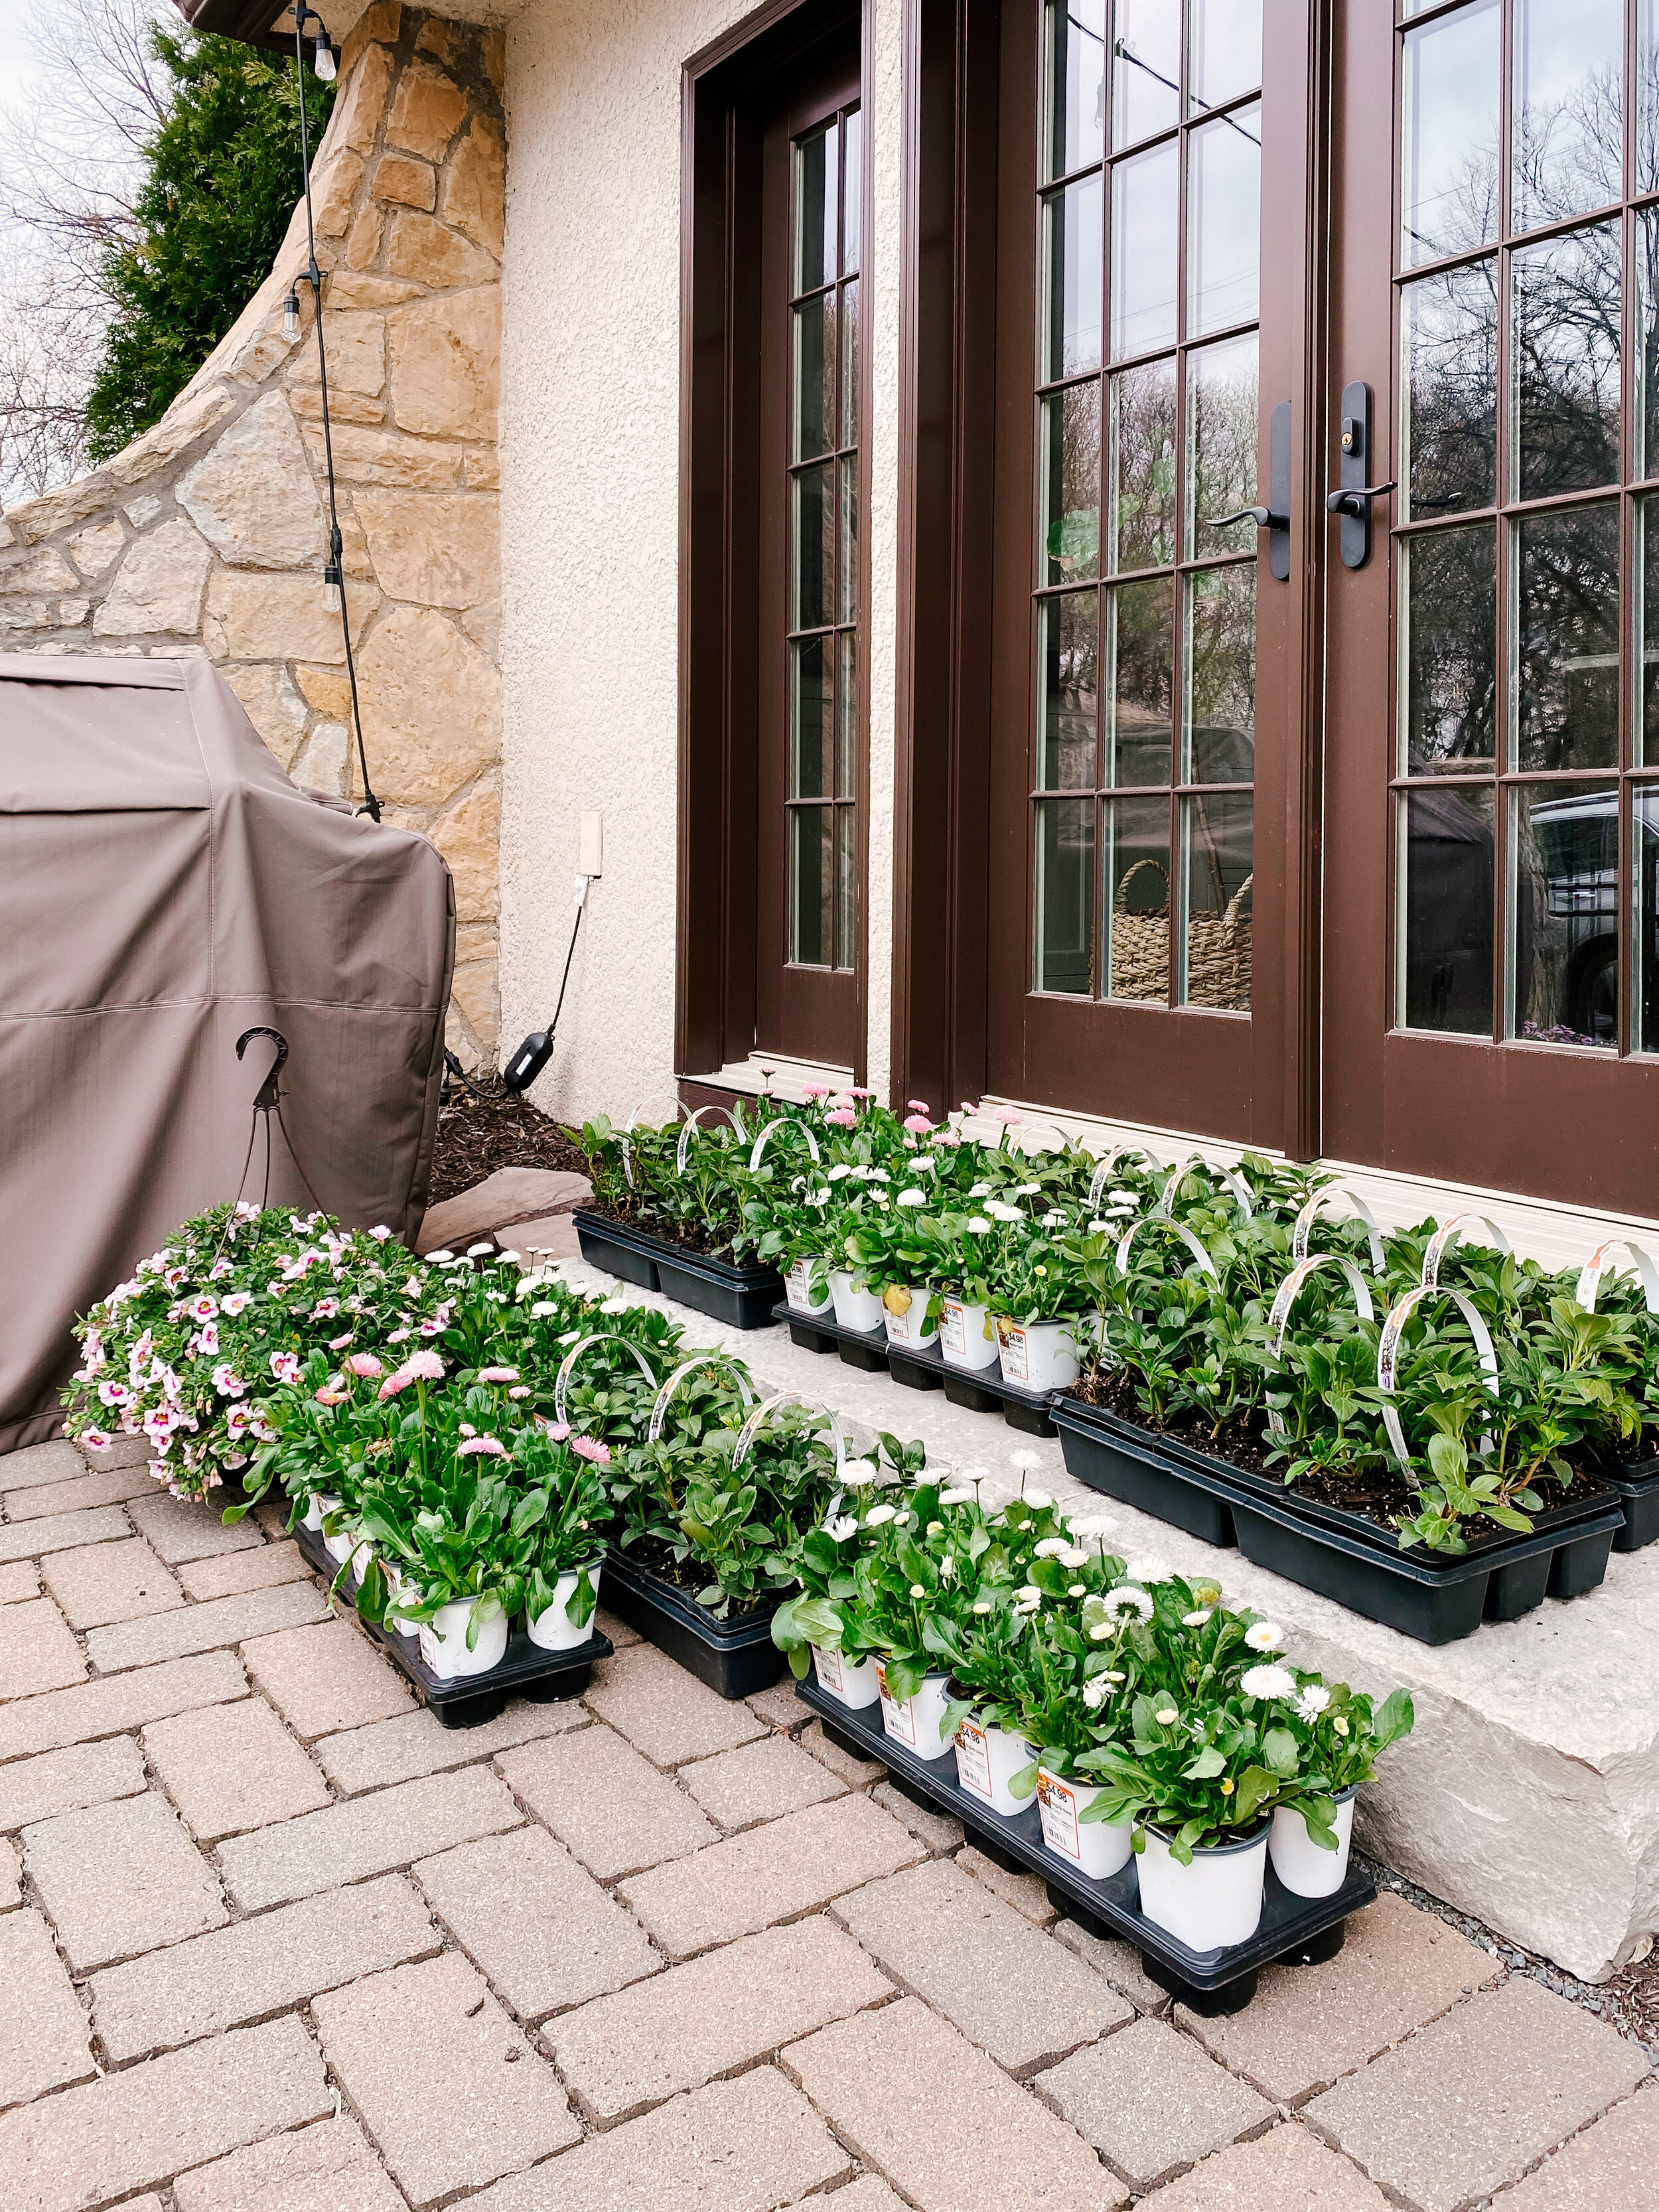
Step 4: Order Live Plants. Consider each plant type below and how much. Vigoro has a broad selection and remember it comes with a 1-year plant guarantee!
-
Vegetable plants (we opted for a variety of tomatoes, green beans, cauliflower, red peppers, kale, green peppers)
-
Potted Plants (we opted for Calibrachoa)
-
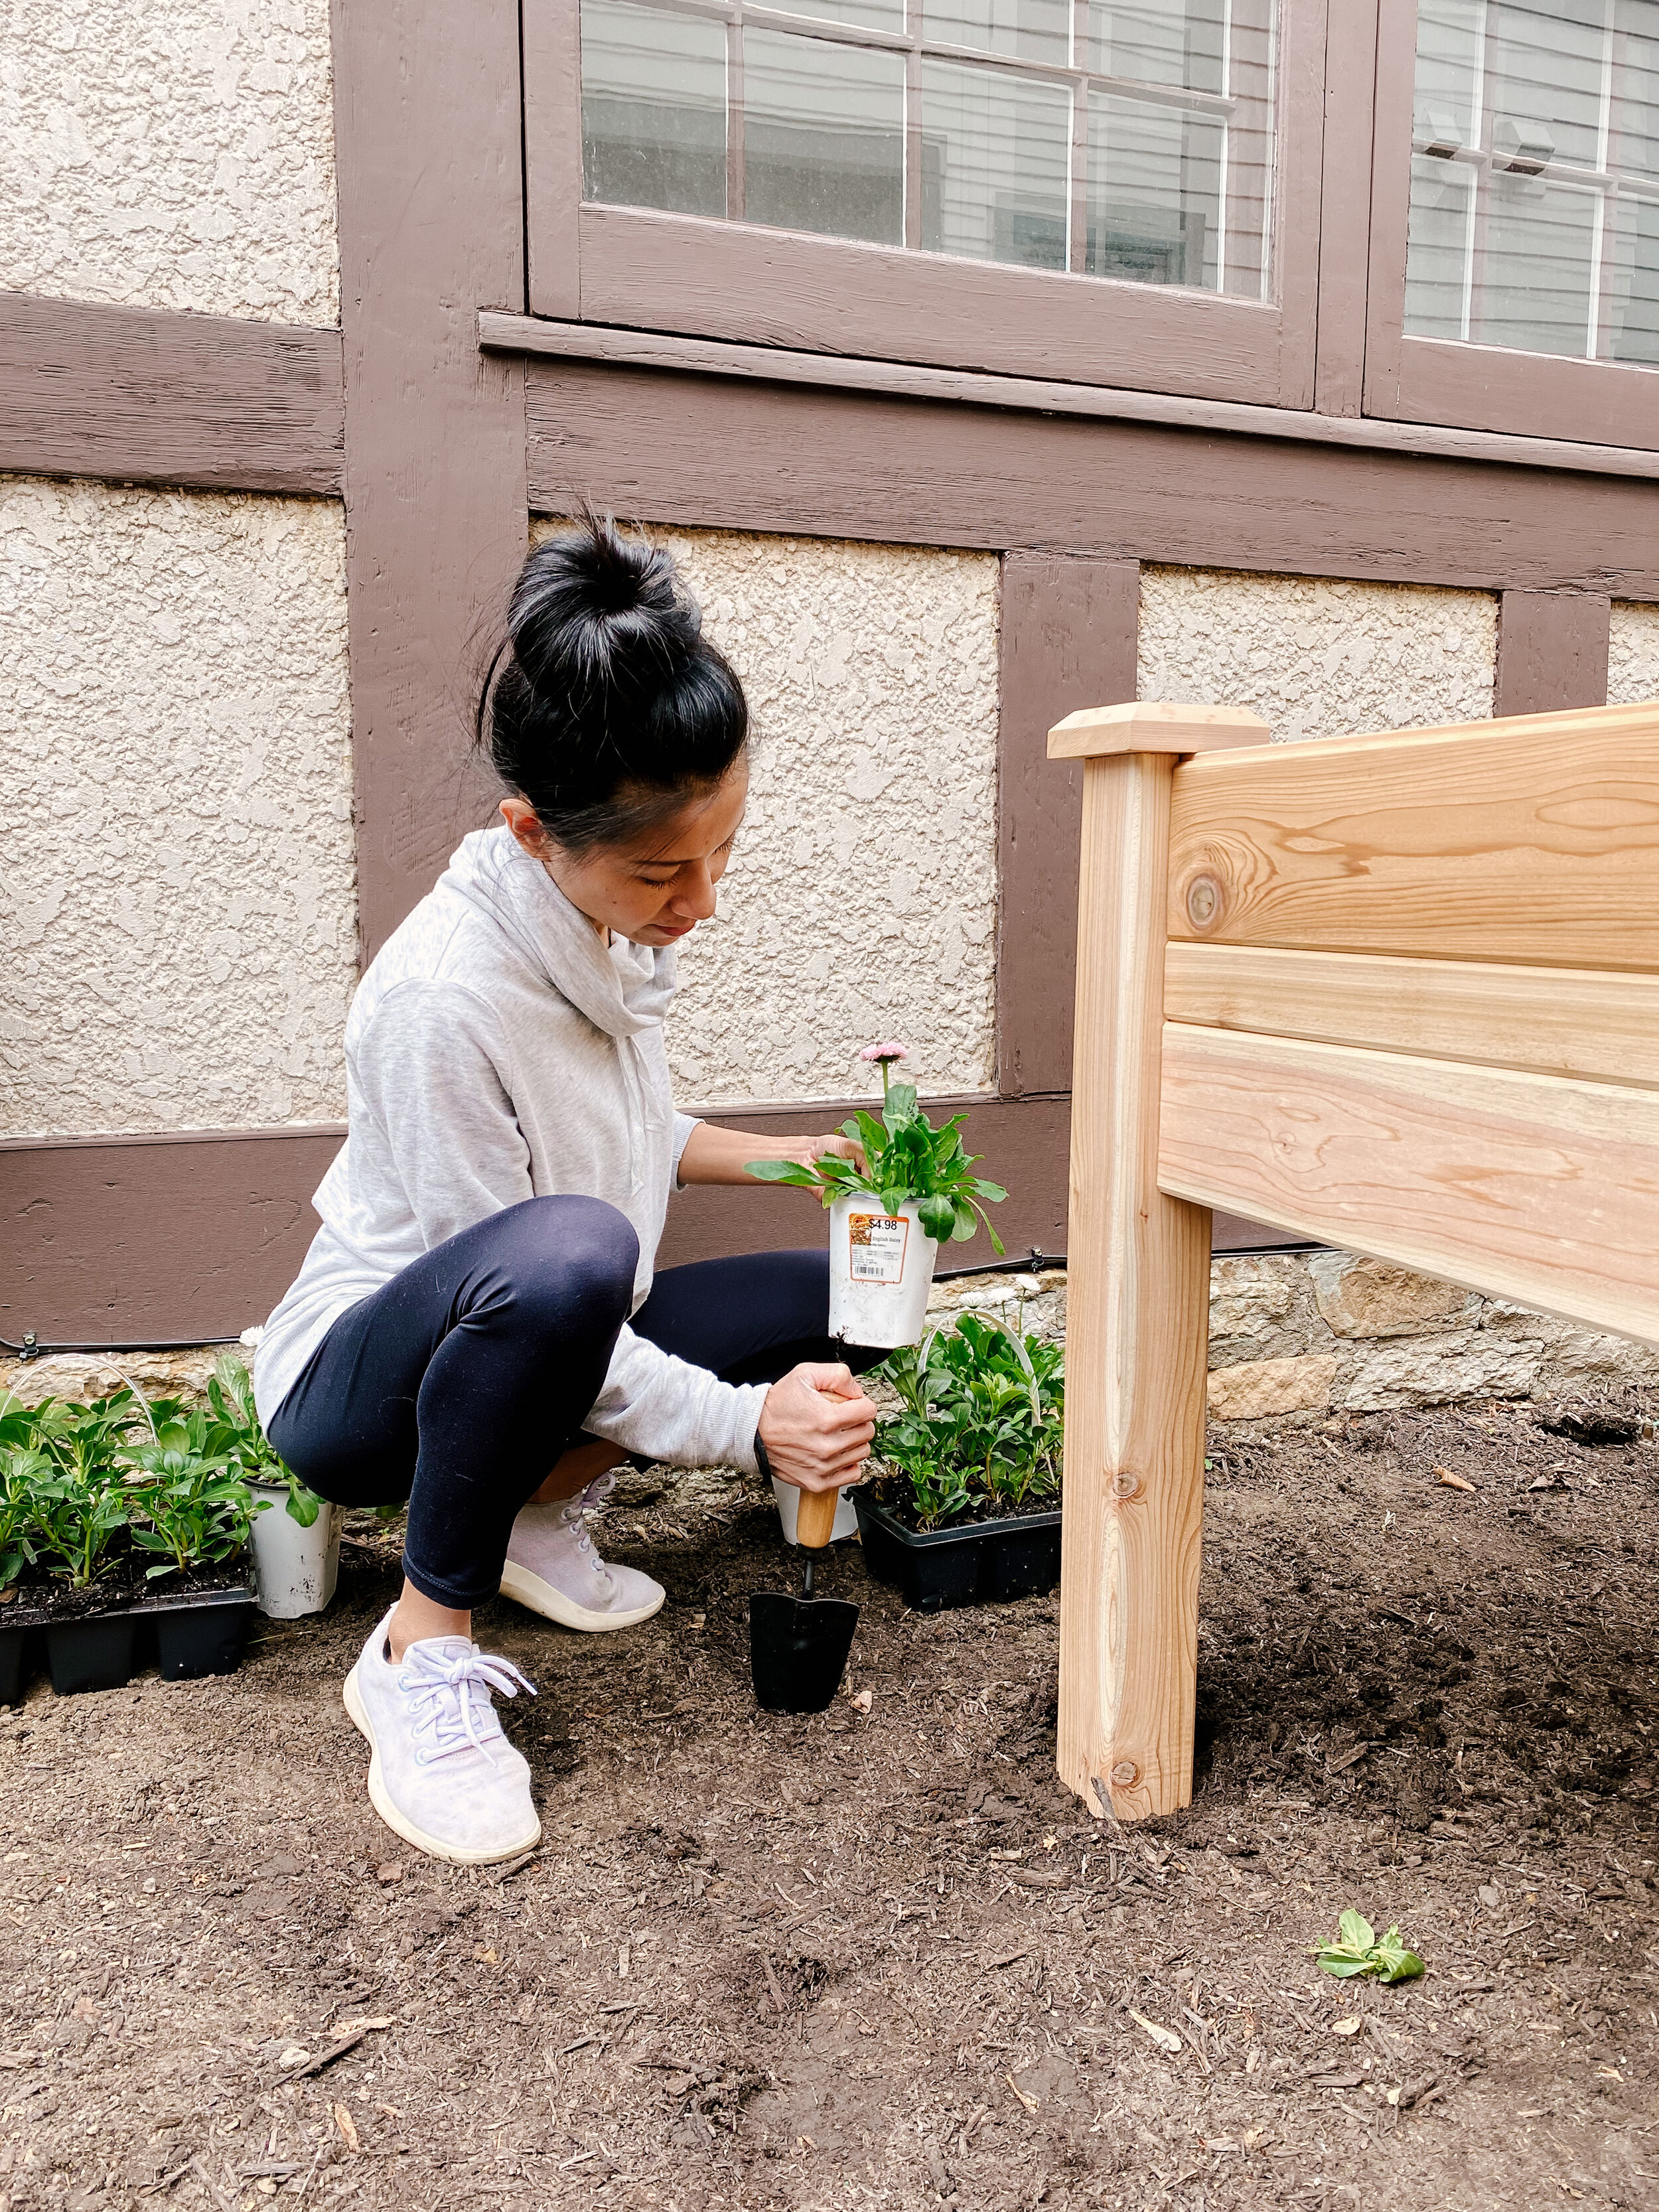
Ground Cover (we opted for perennials in English Daisy and Japanese Pachysandra)
-
Hanging Plants (we opted for annuals in African Daisy and Calibrachoa for their beautiful colors)

Once all of your items arrive, it’s time to get your hands dirty!
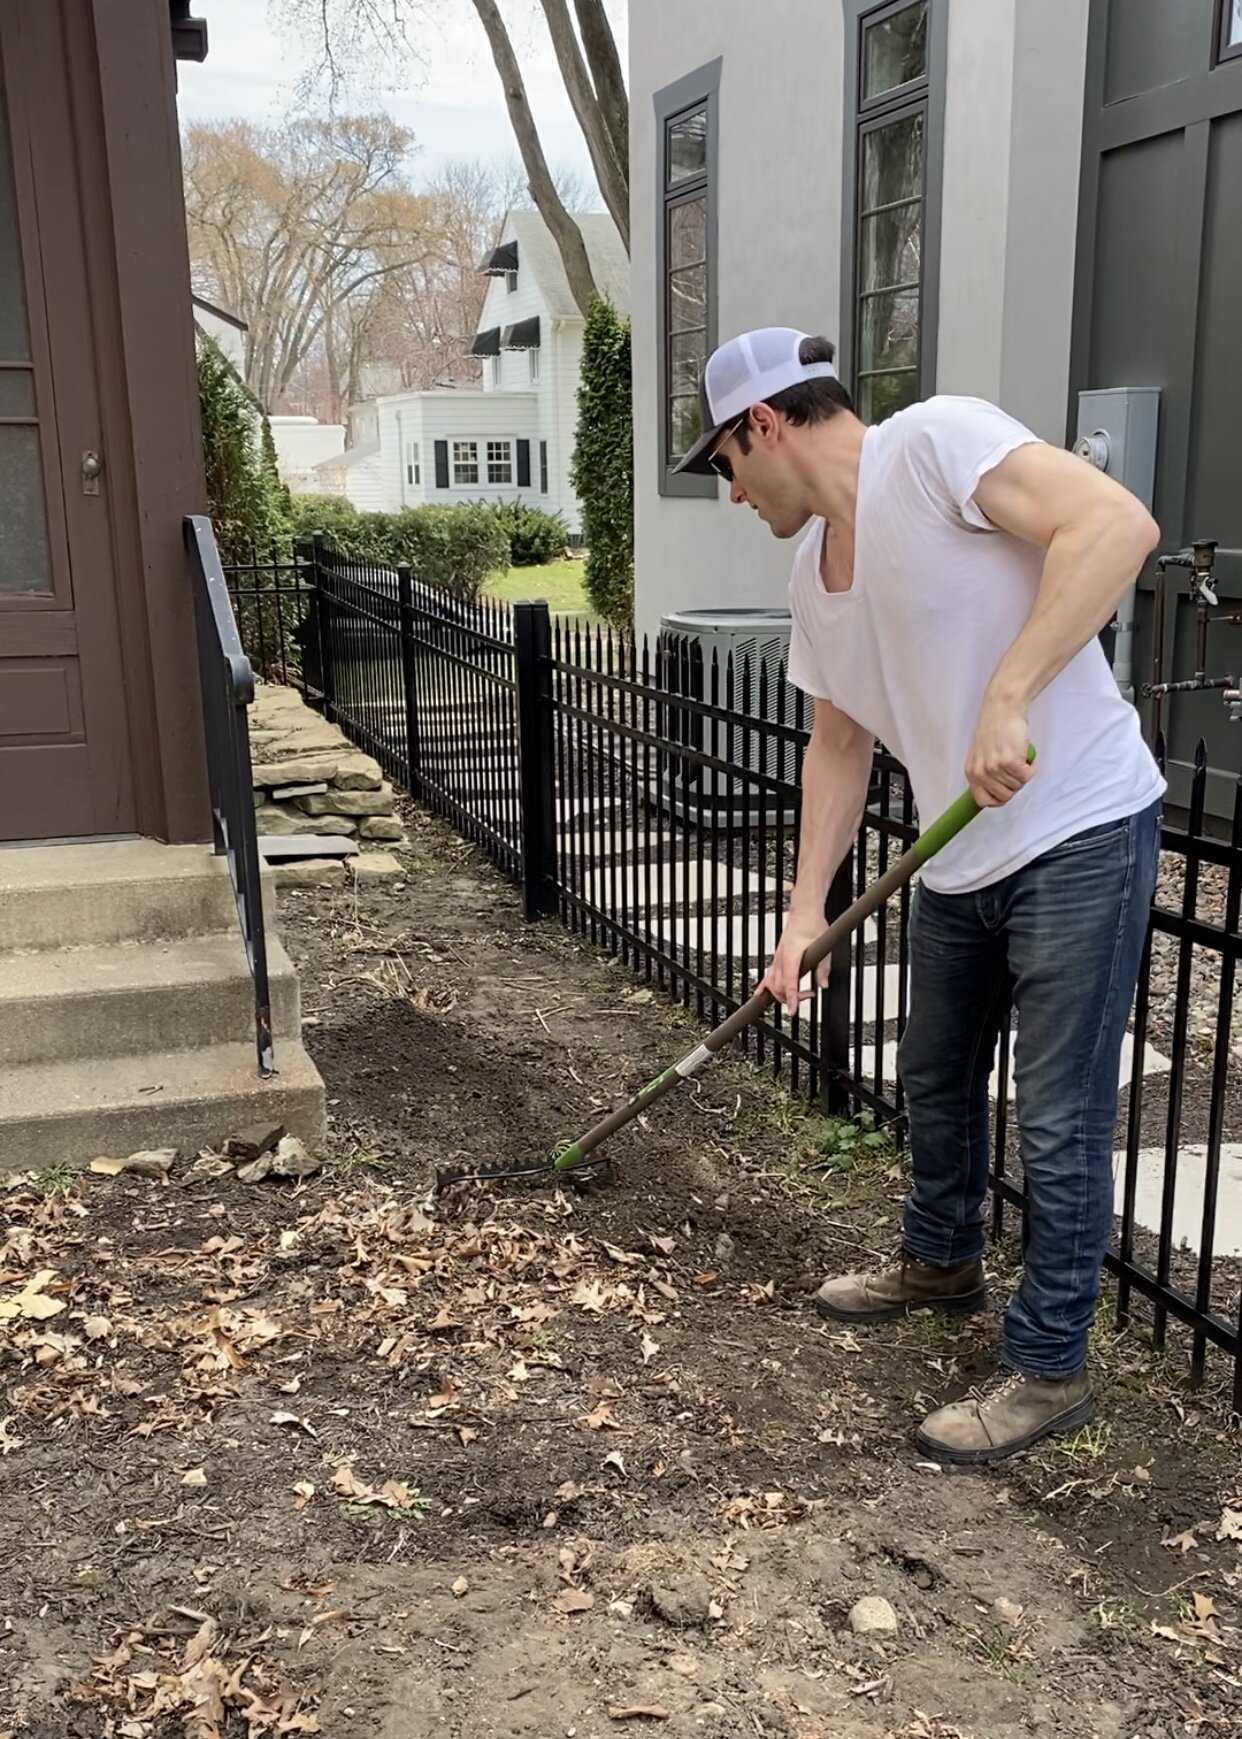
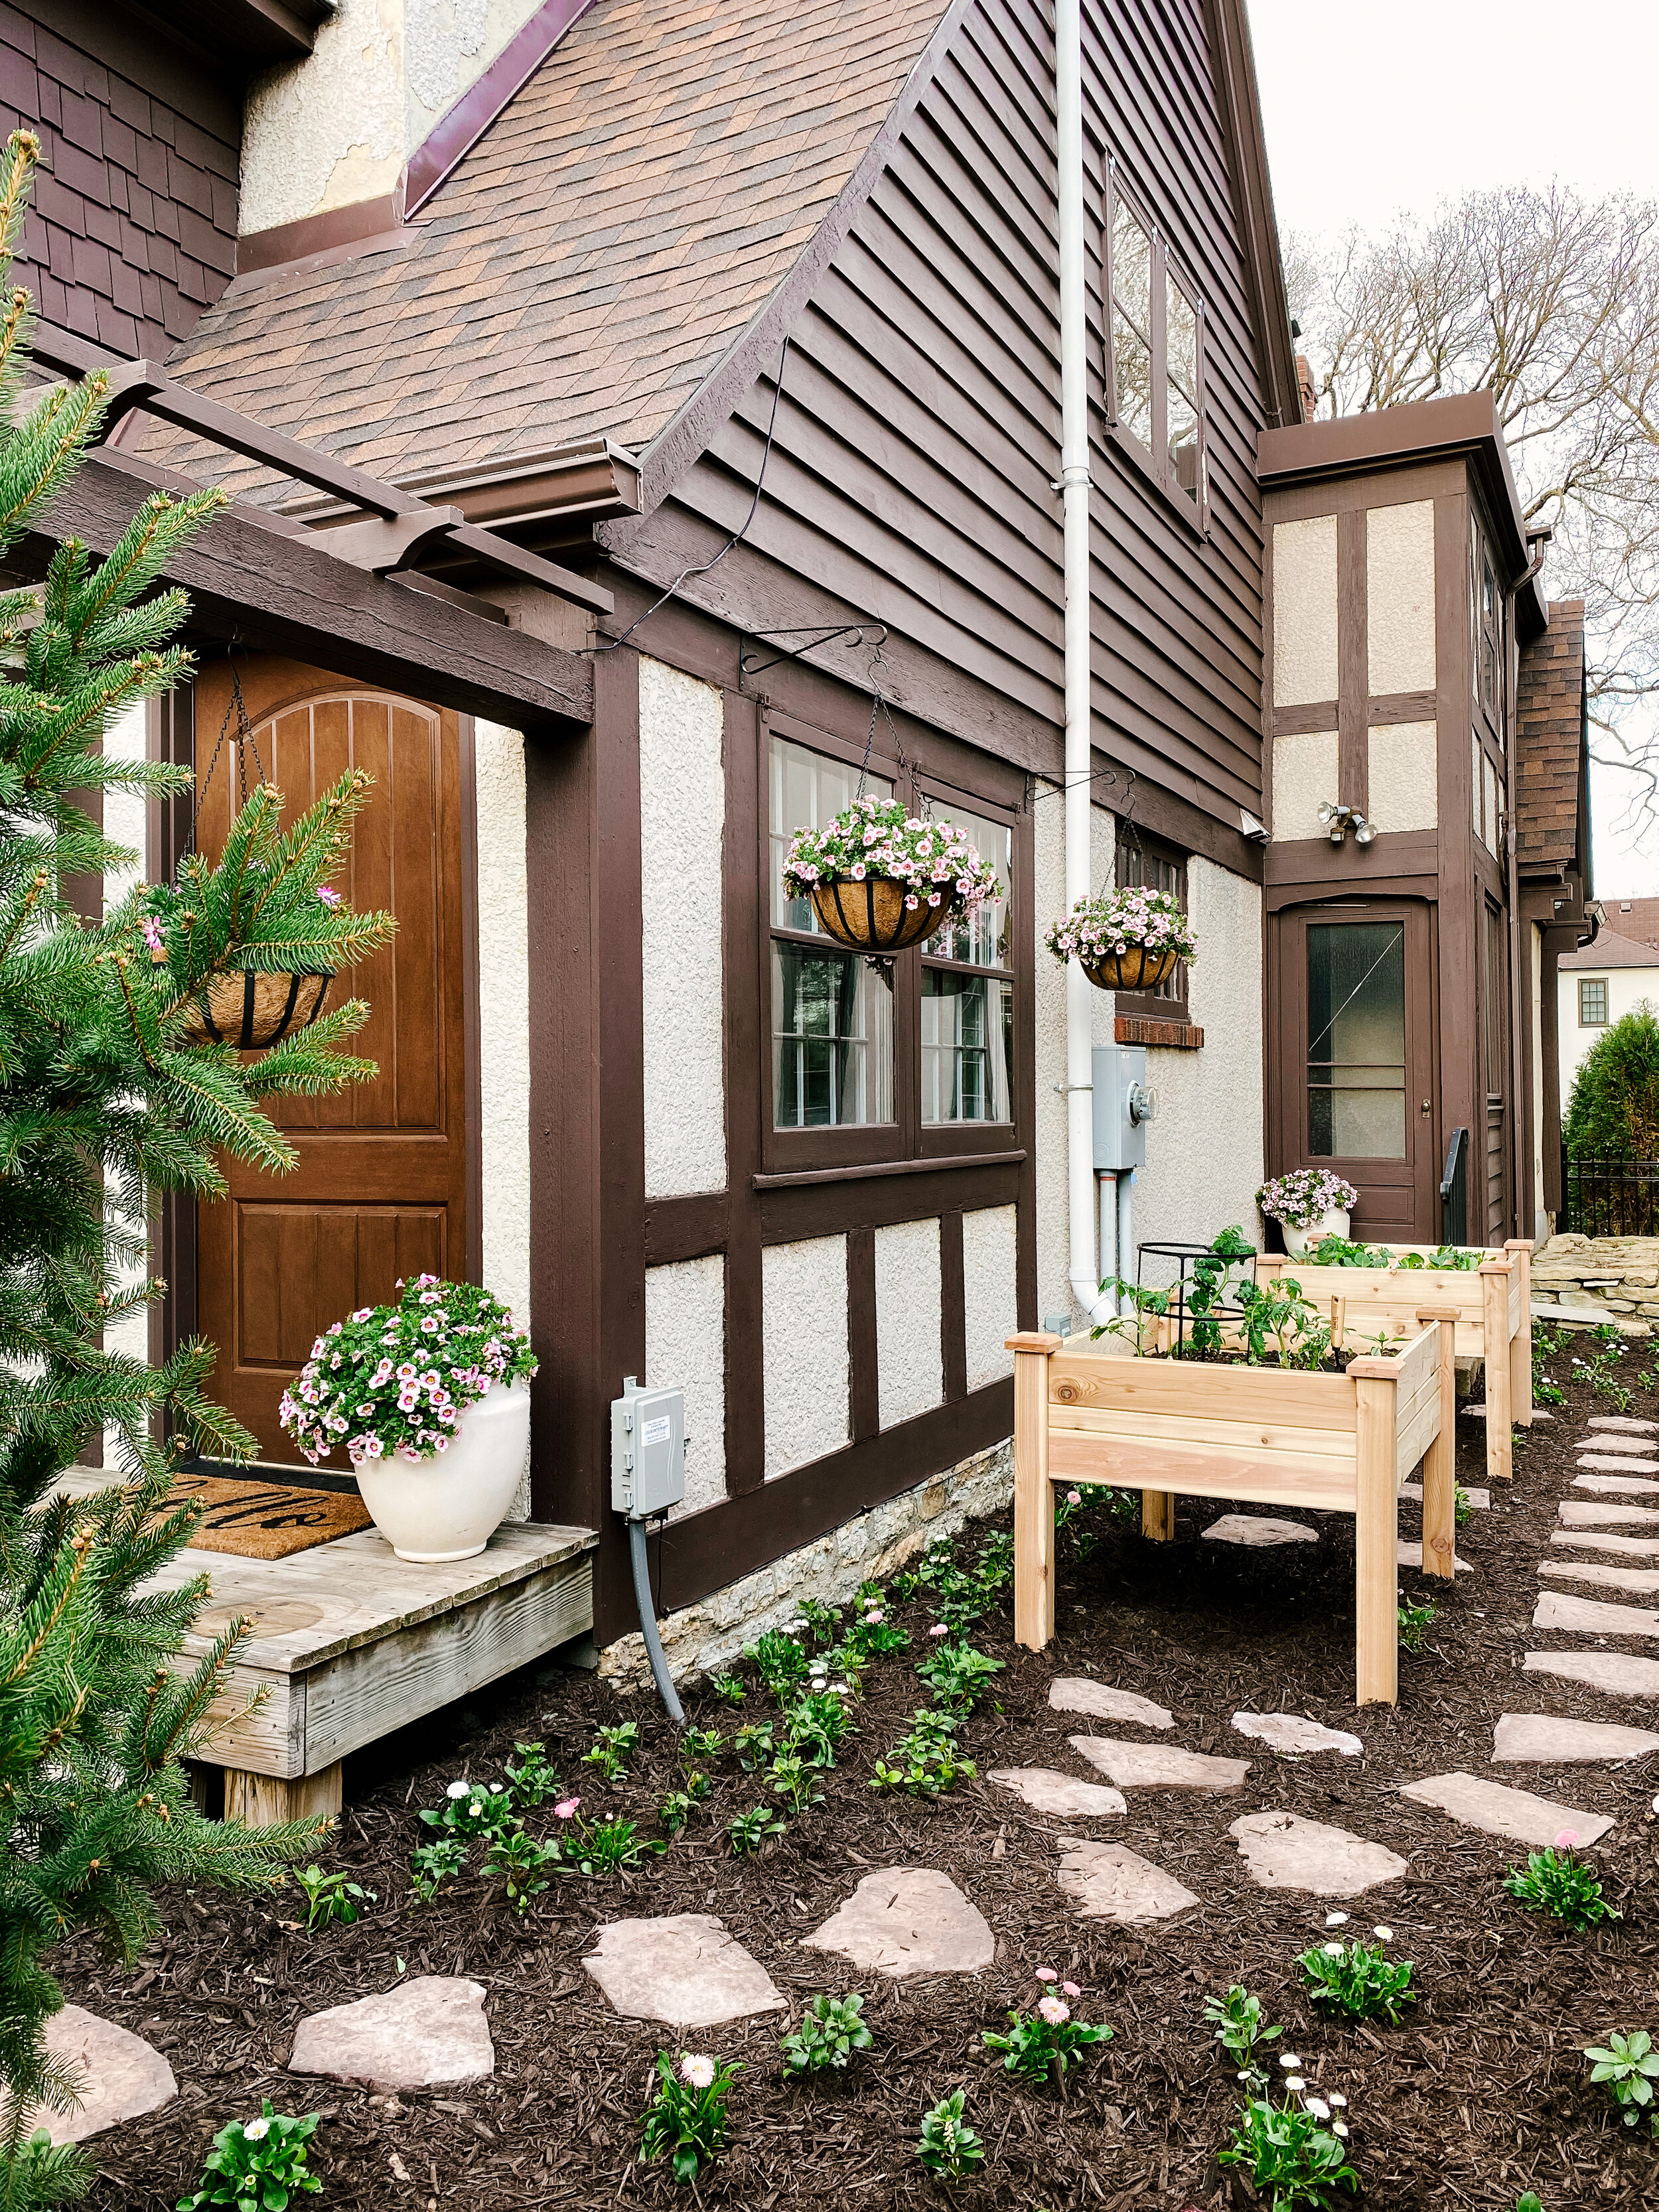
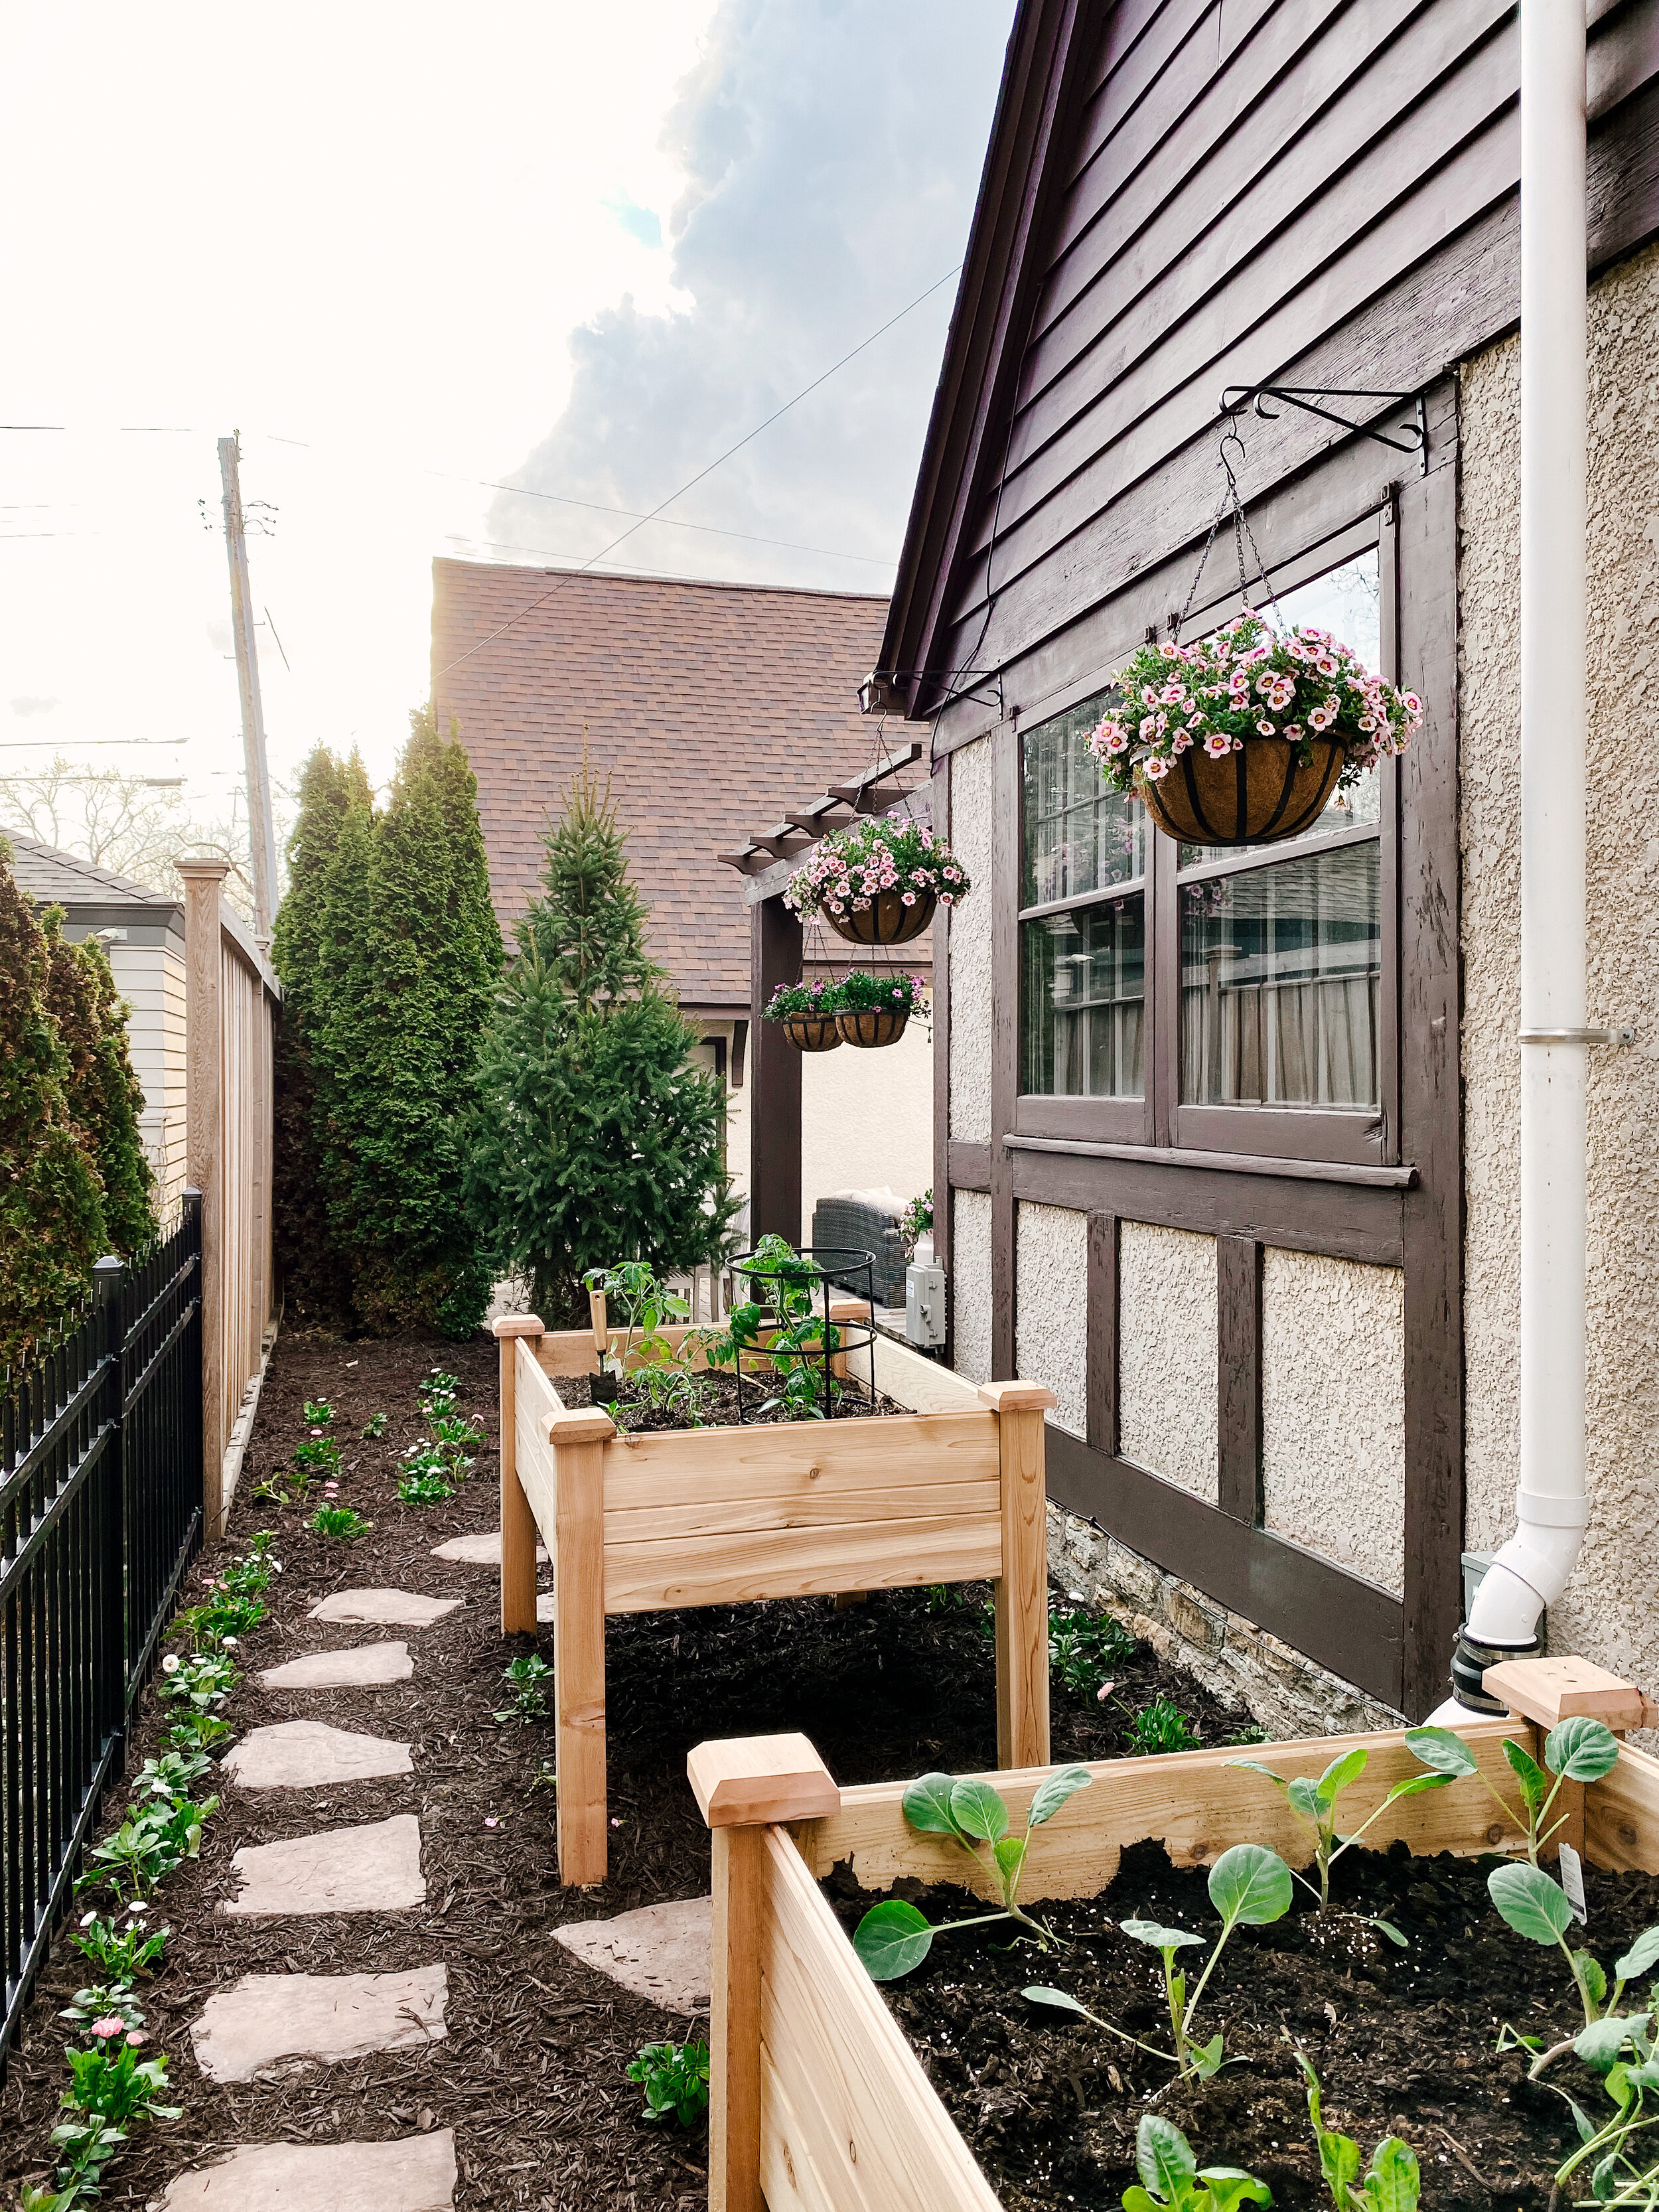
First, we cleared the yard and raked. Tip: You want the ground to be smooth with a slight slope away from the foundation so water runs away from the house.
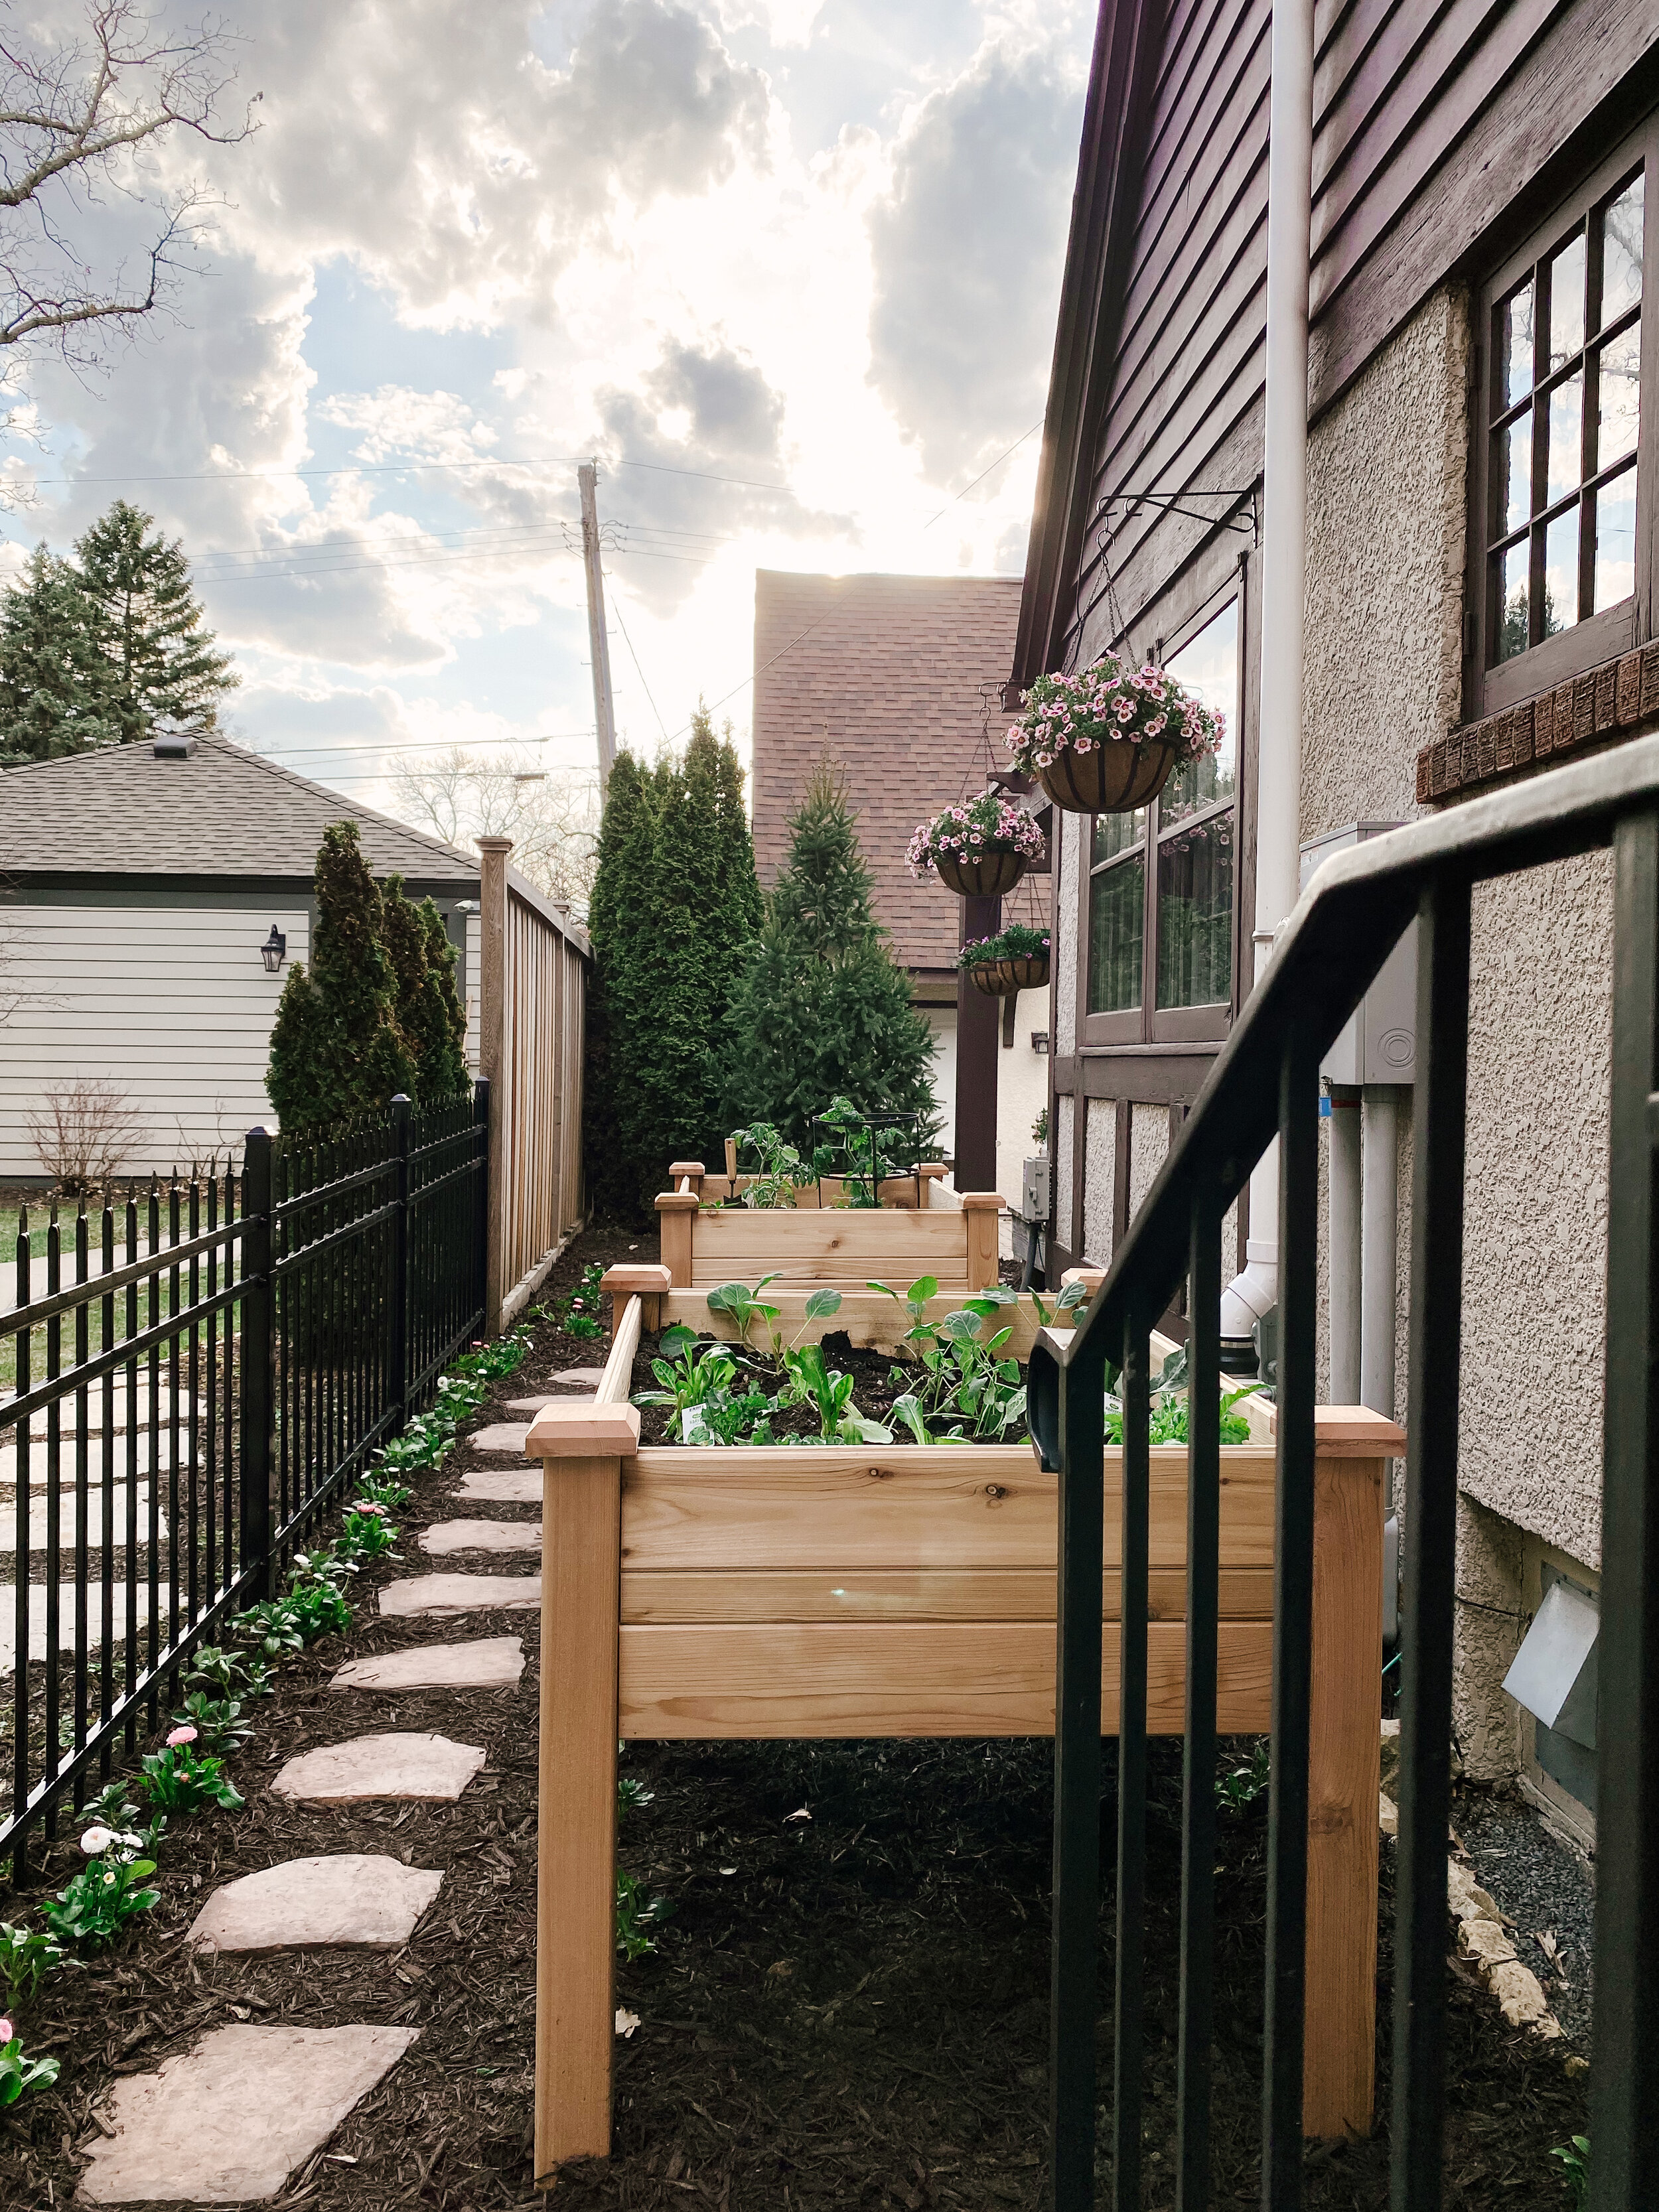
Second, we laid out the raised garden beds and stone steppers. We used Brian’s quick sketch as a starting point and played around with the design and placement until it looked right to us. Then we laid out the ground cover to ensure they were evenly distributed before planting them.
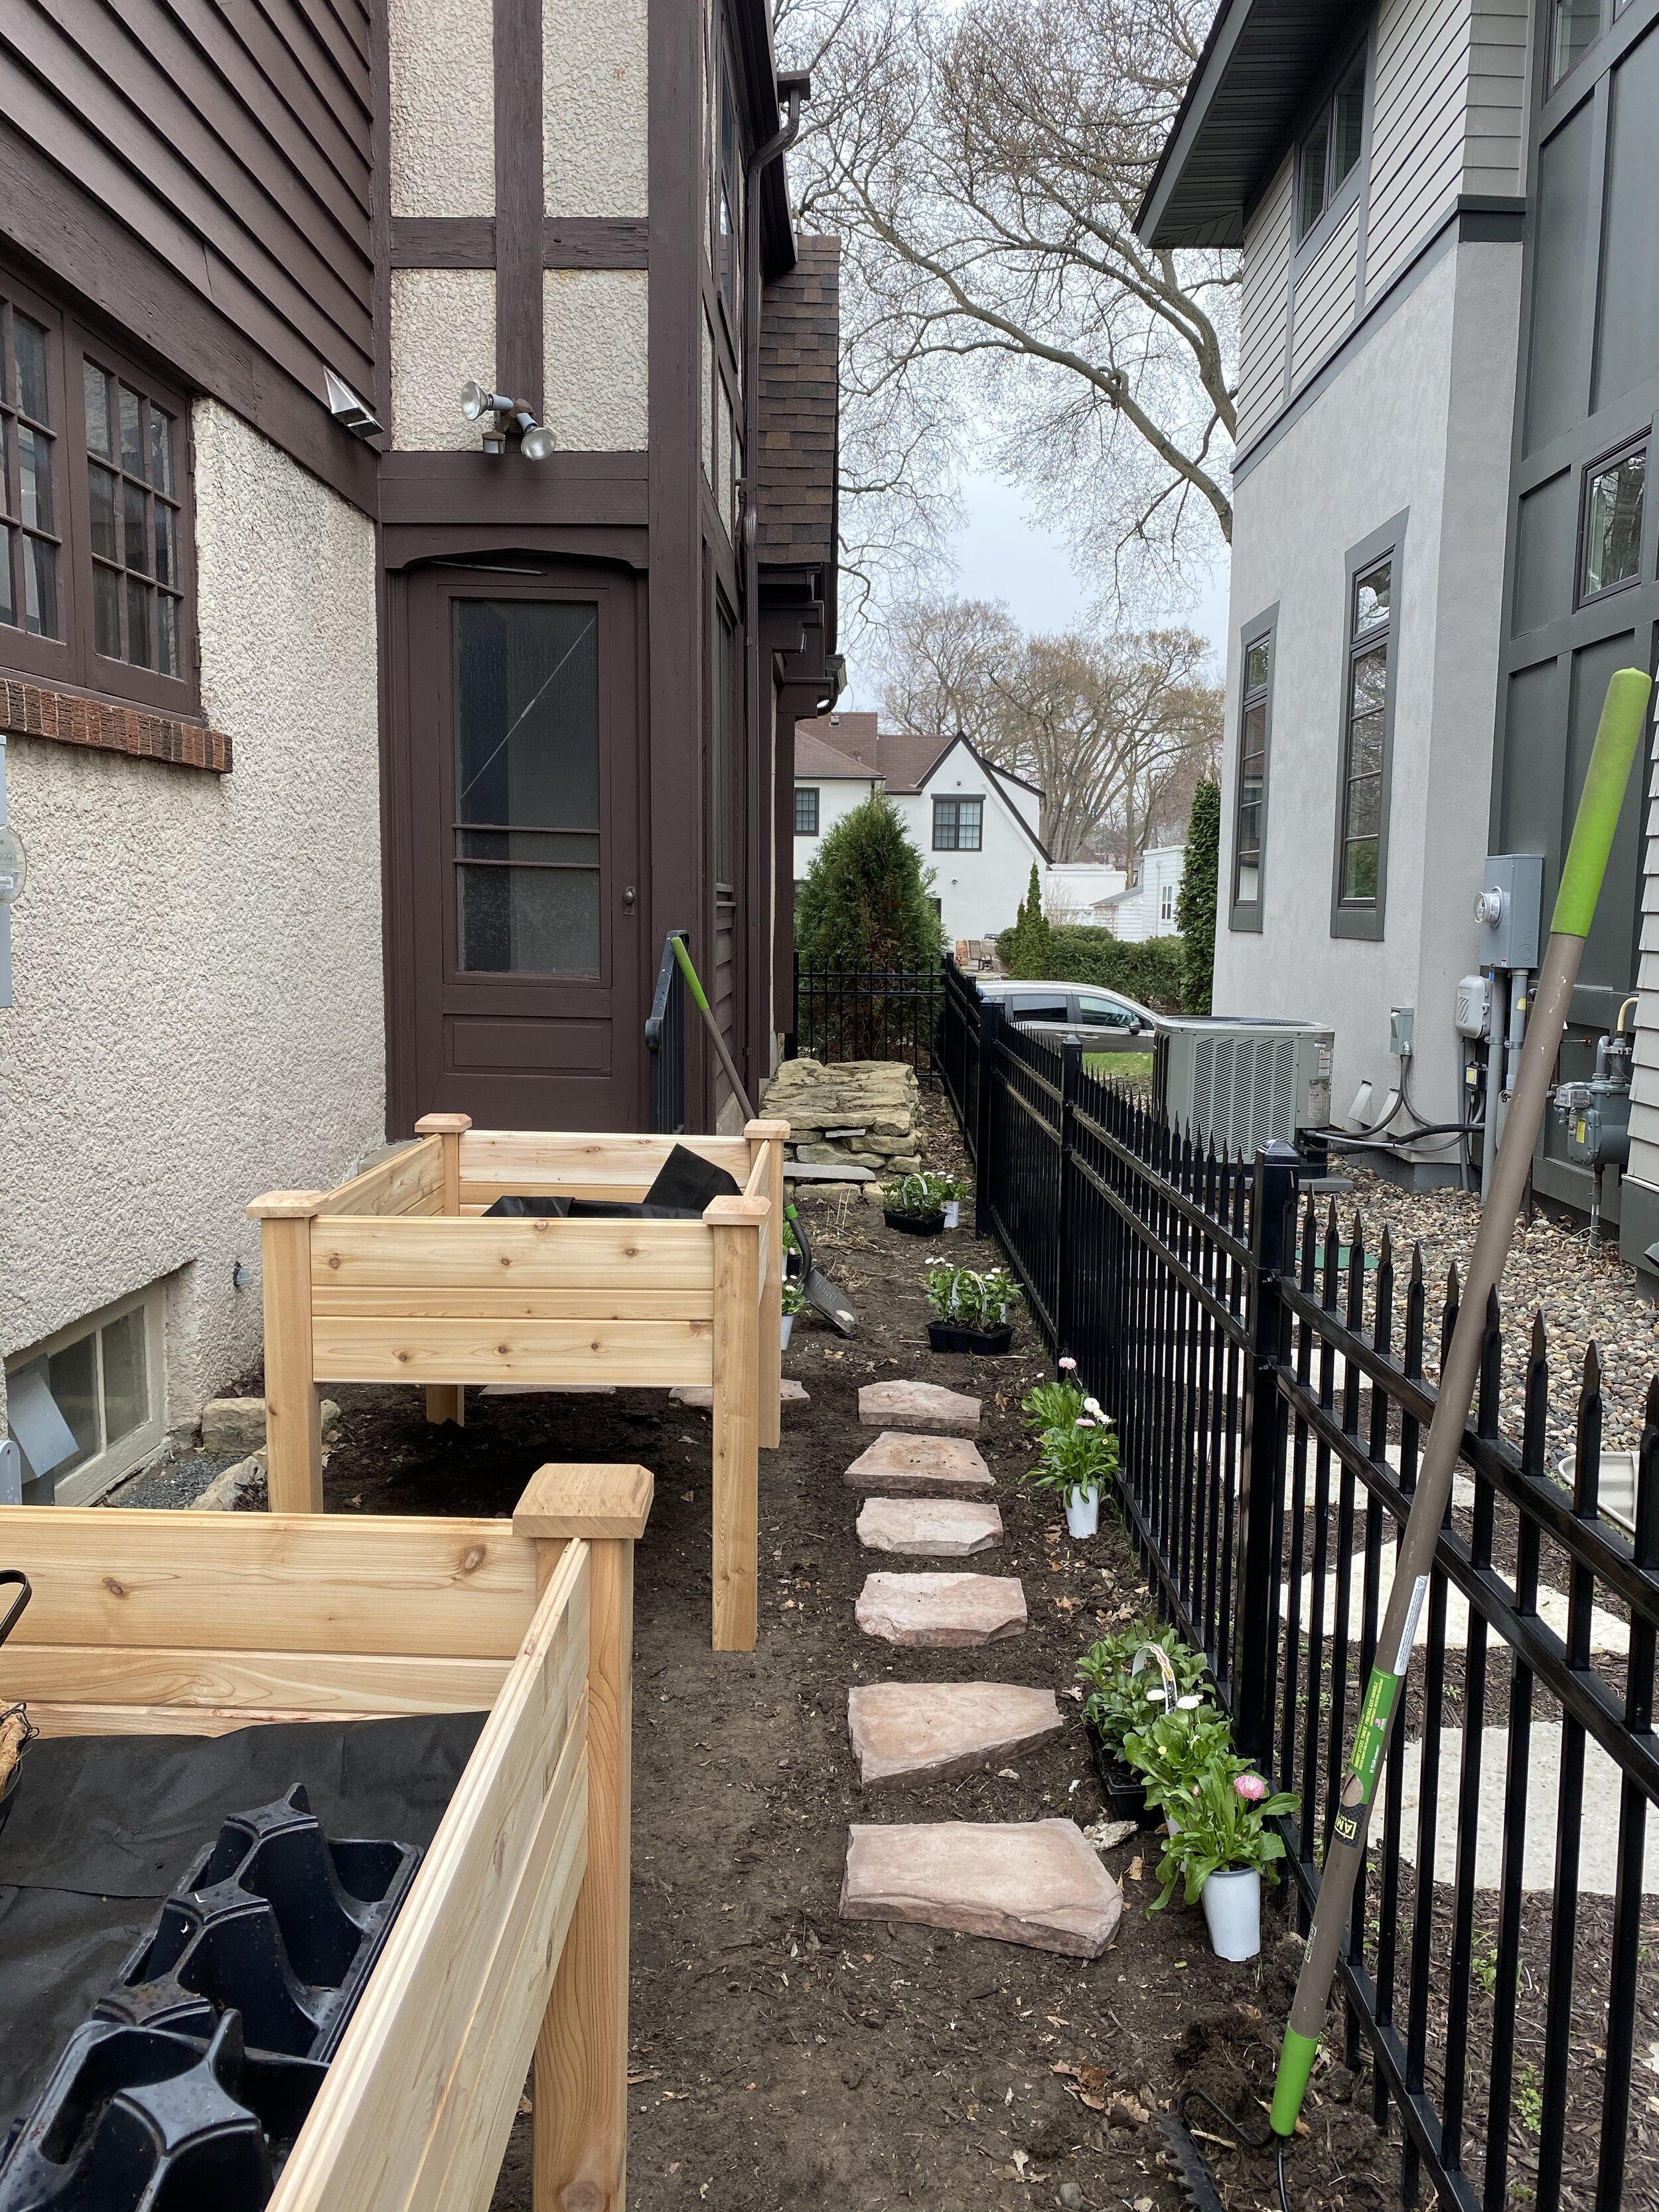
Ground cover is low-maintenance but add interest to mulched areas. We used English Daisies (for long lasting blooms that can handle cooler weather for our area) and Japanese Pachysandra (use less water and is also great for shaded areas). They’ll continue to grow and spread to create a more green space. Tip: Don’t plant them too low to the ground to prevent them from being covered by mulch. And always check the tags to anticipate their full size to see how far apart to plant them.

Third, we laid mulch over the dirt and that’s when we could see a huge improvement!
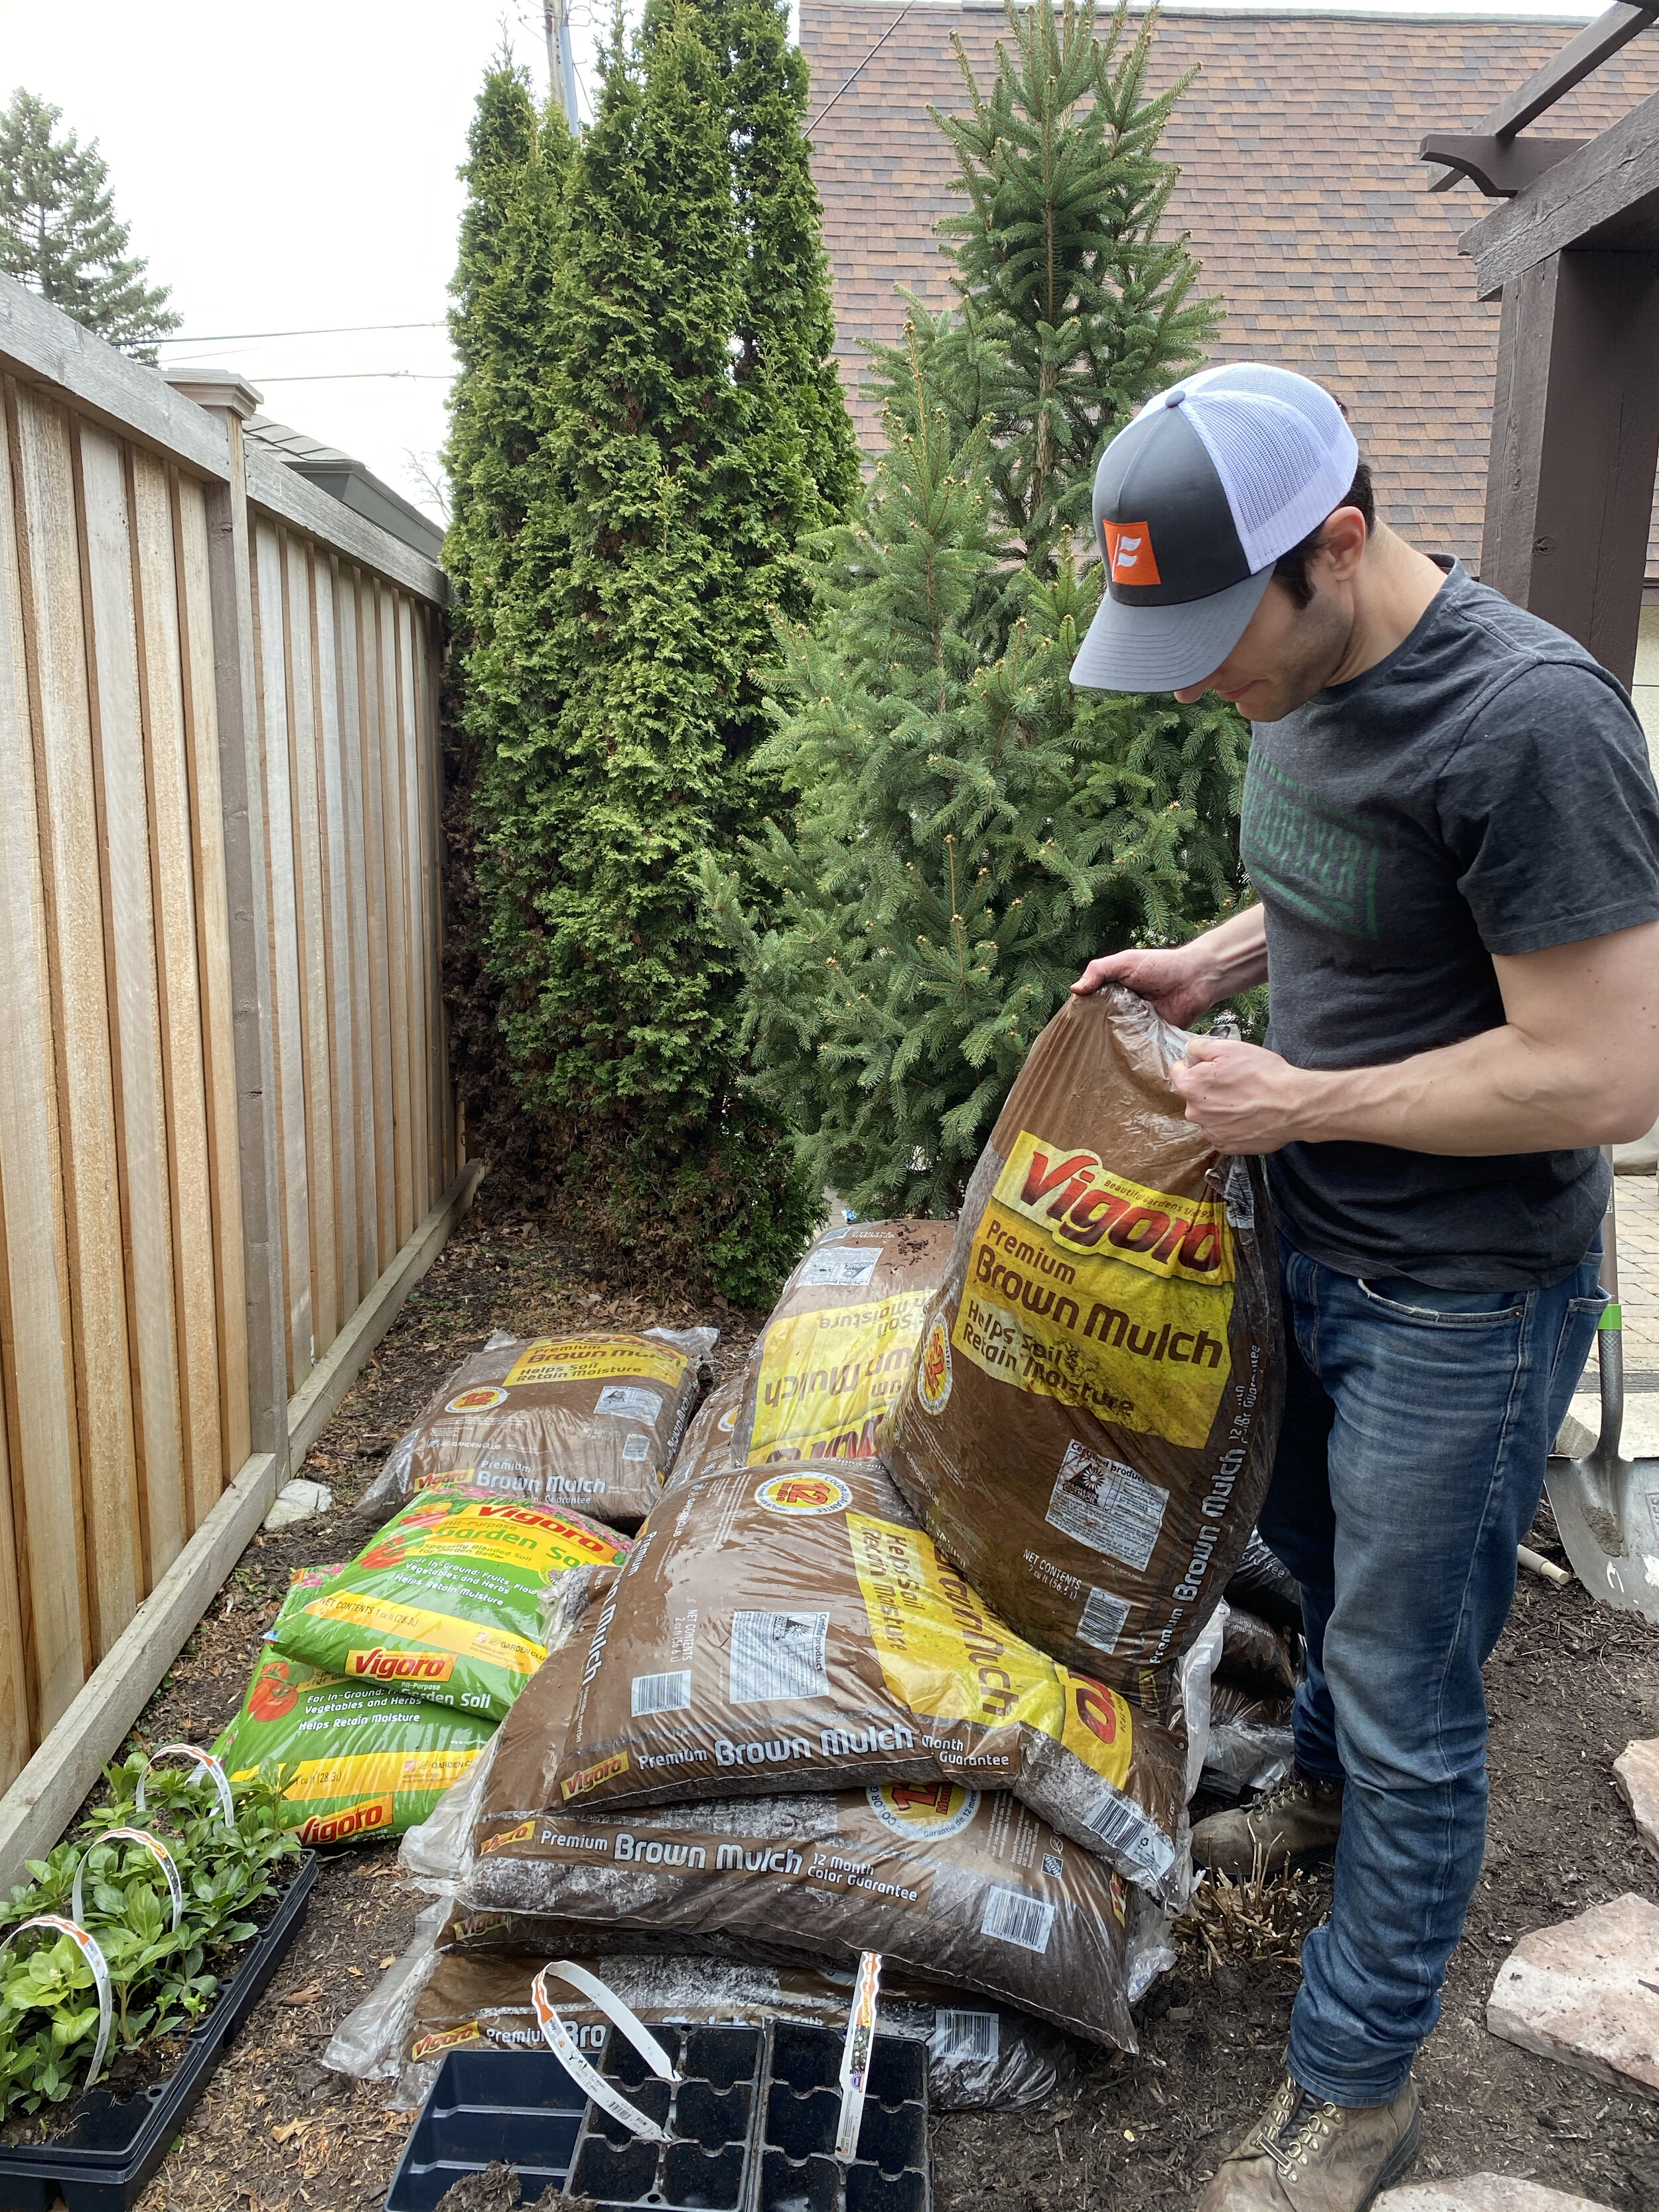
We love Vigoro’s Premium Brown Mulch for our yard
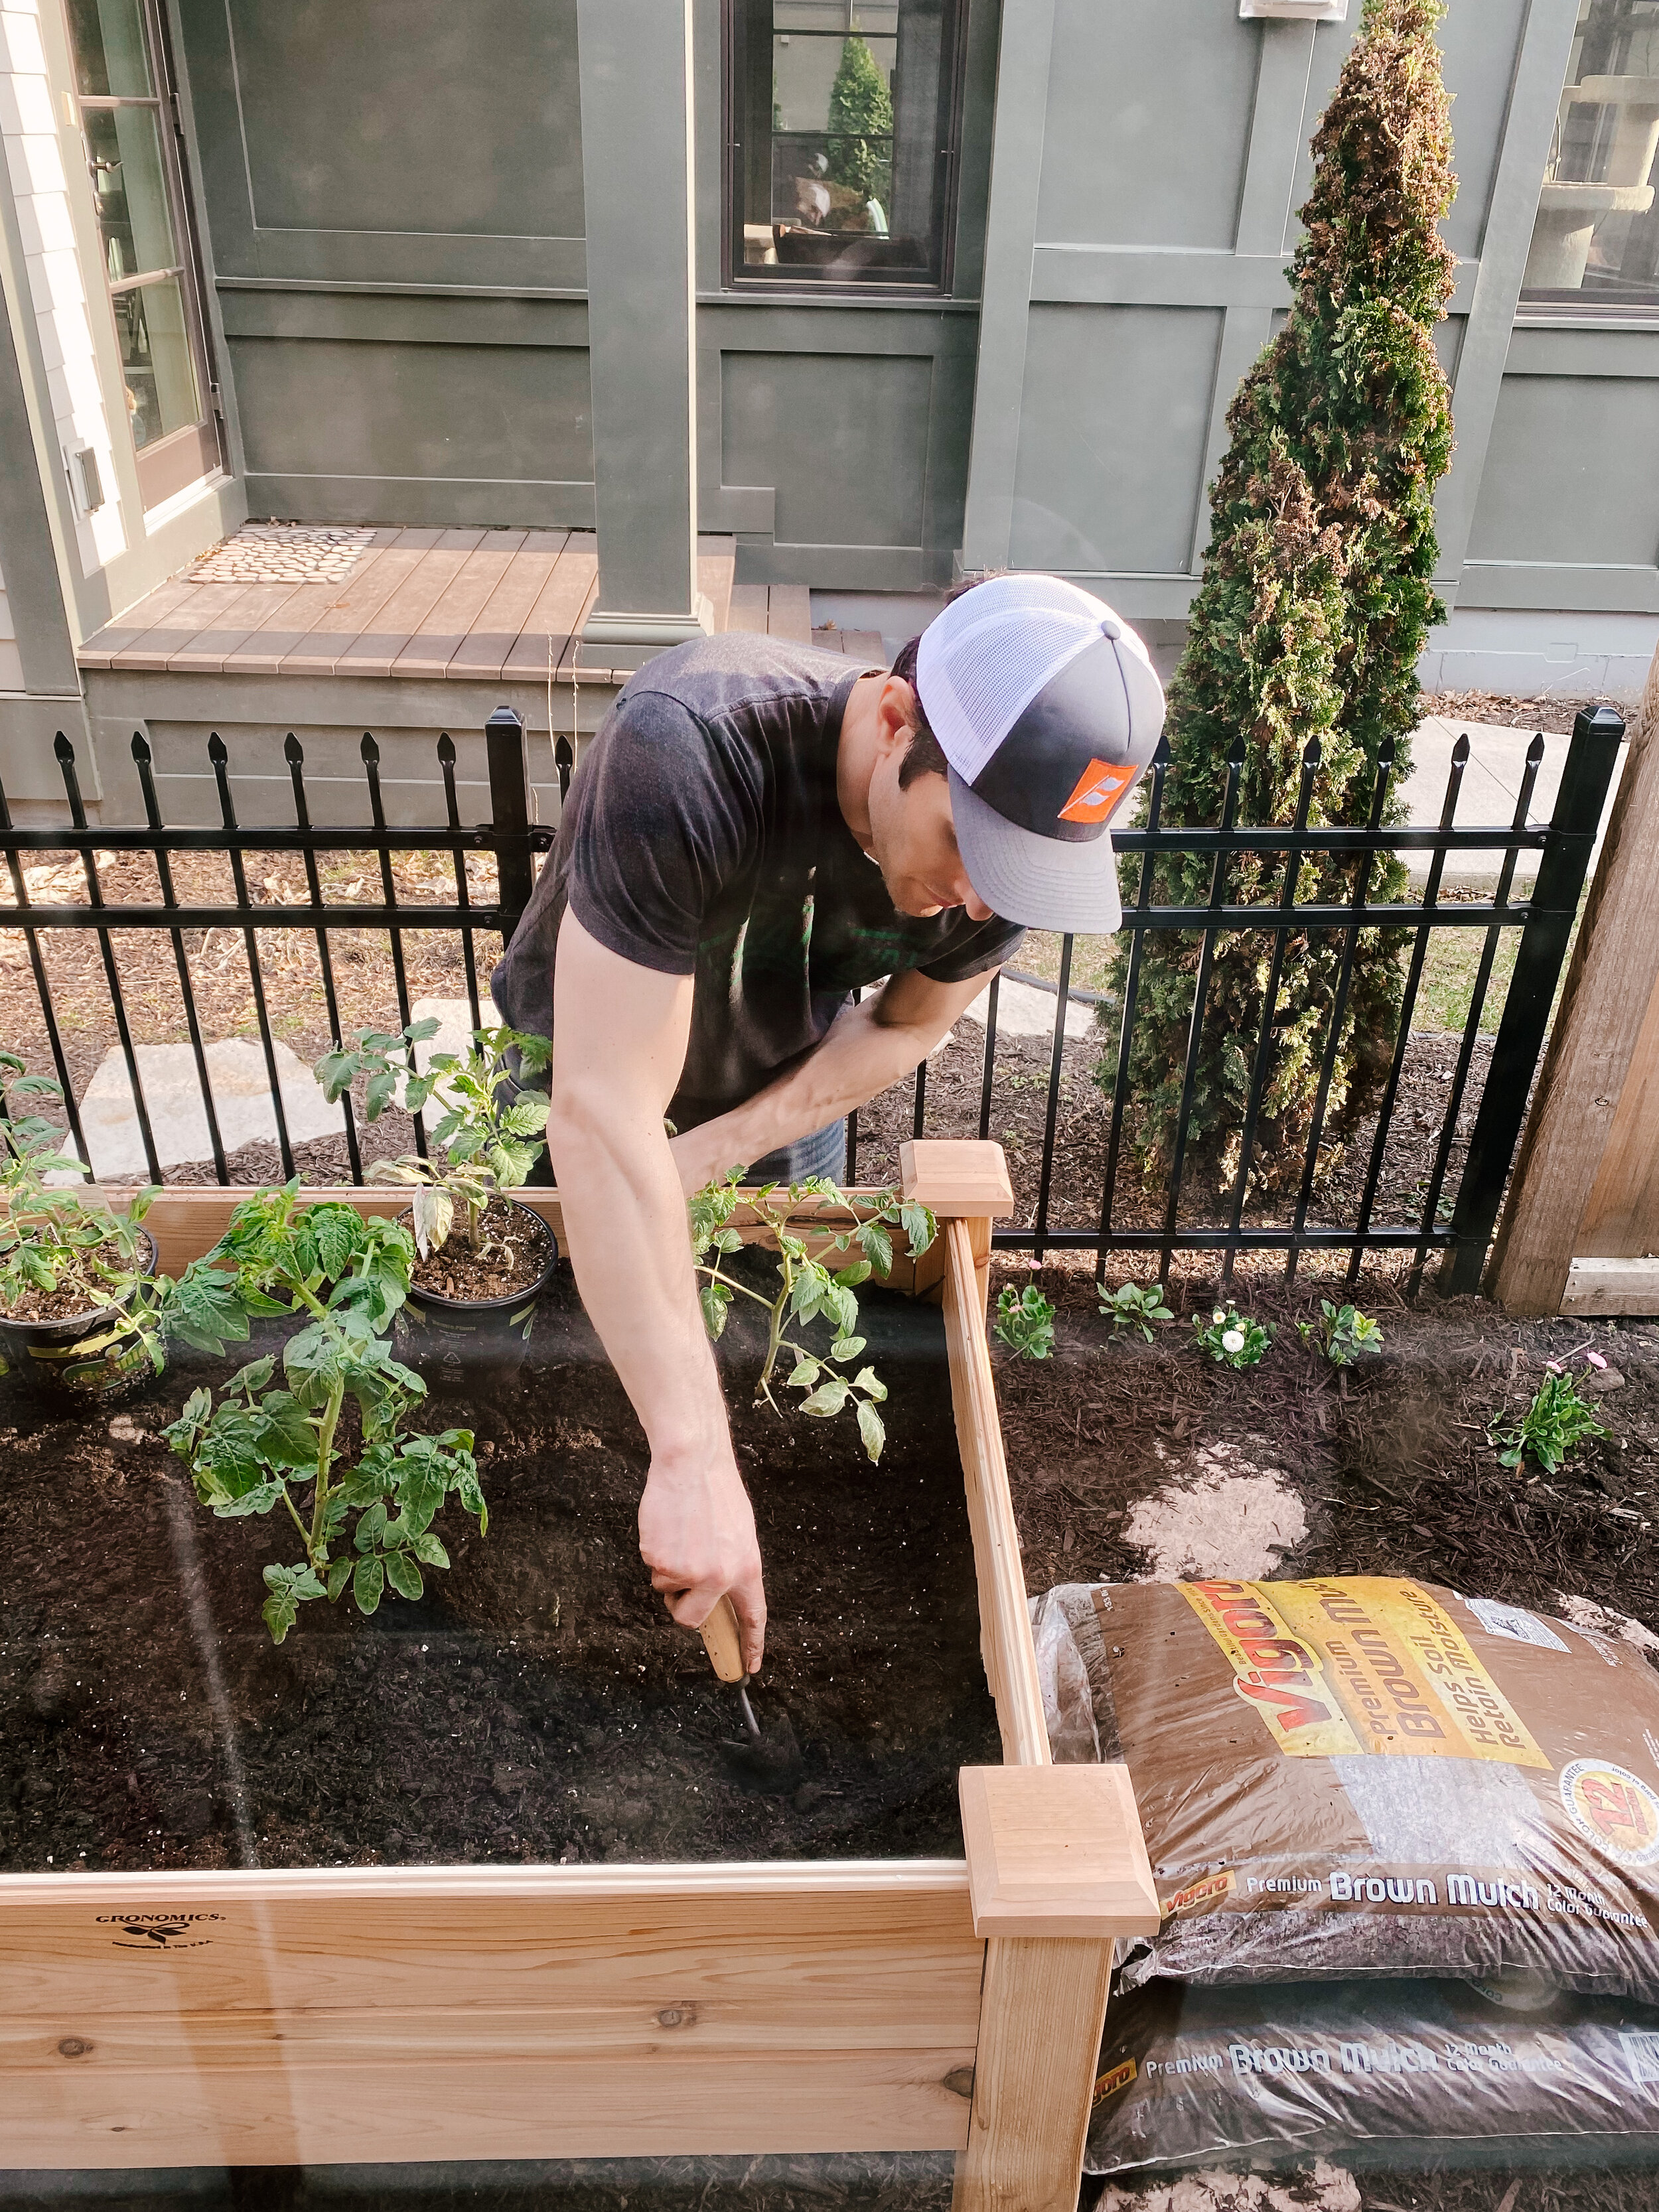
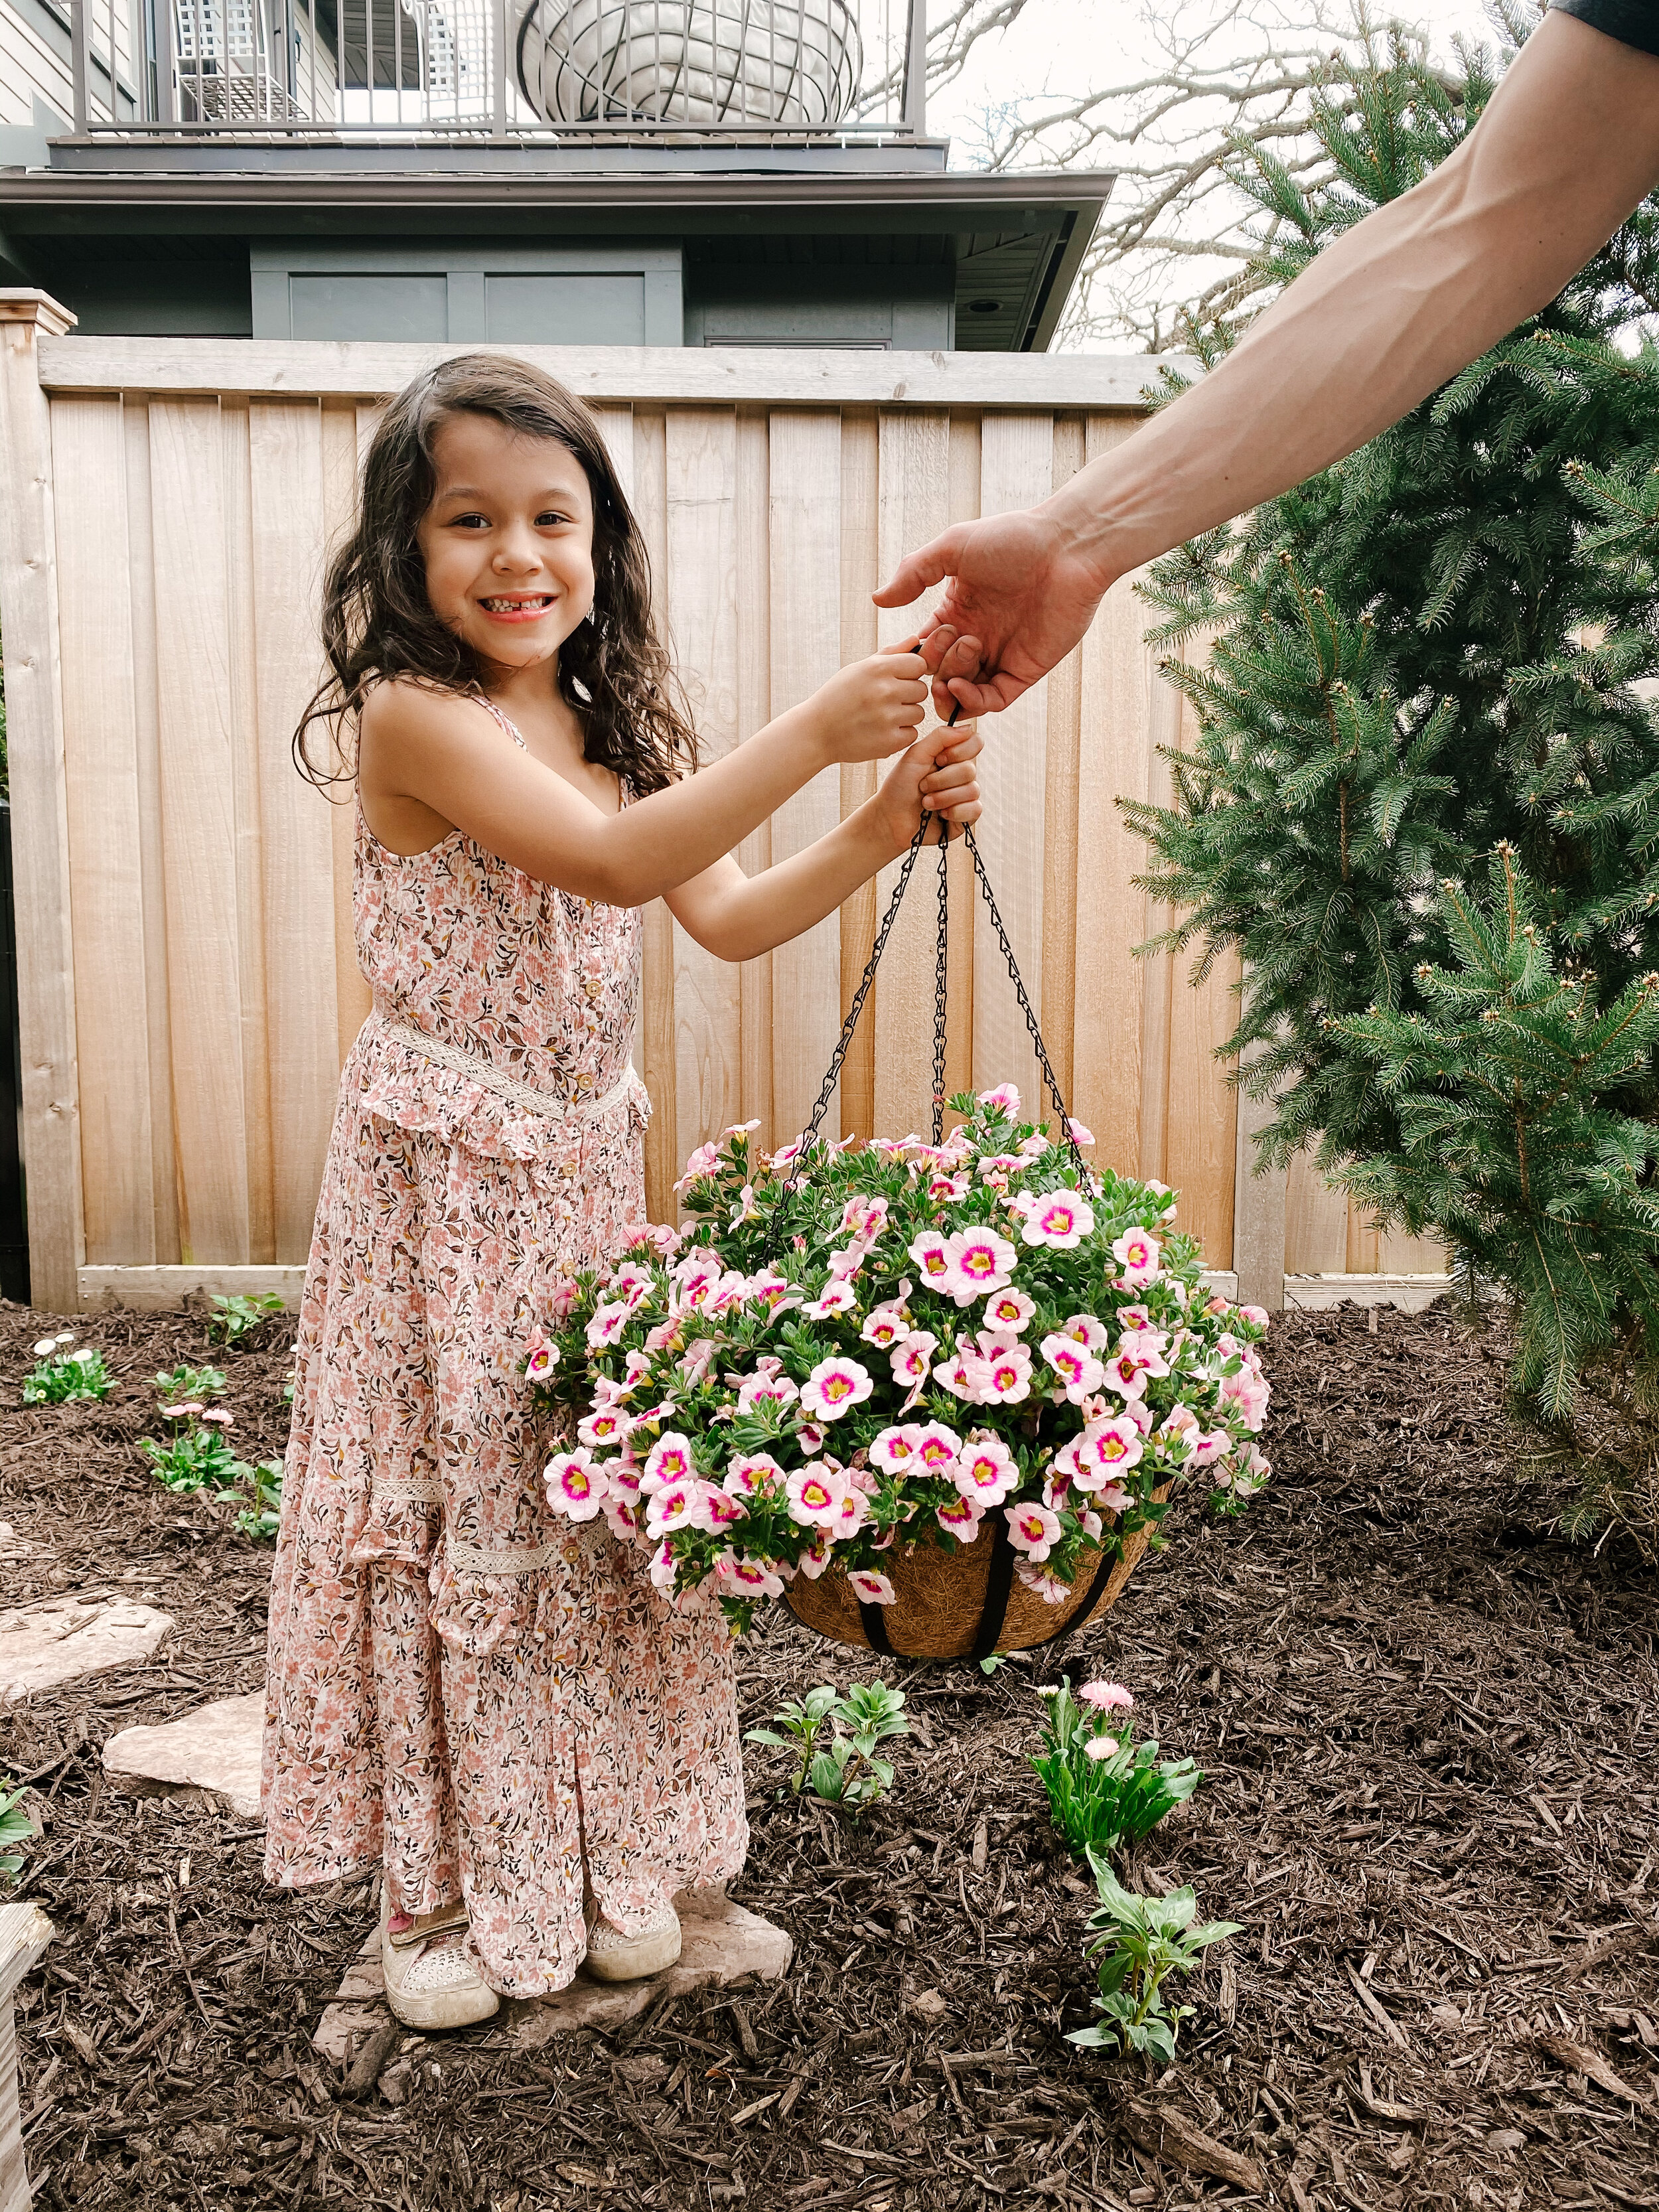
Fourth, we poured Vigoro’s garden soil in the raised garden beds and planted the veggies. We picked out the veggie options with our girls which was a fun activity to do with them!
Brian planting the vegetables in the raised garden bed.
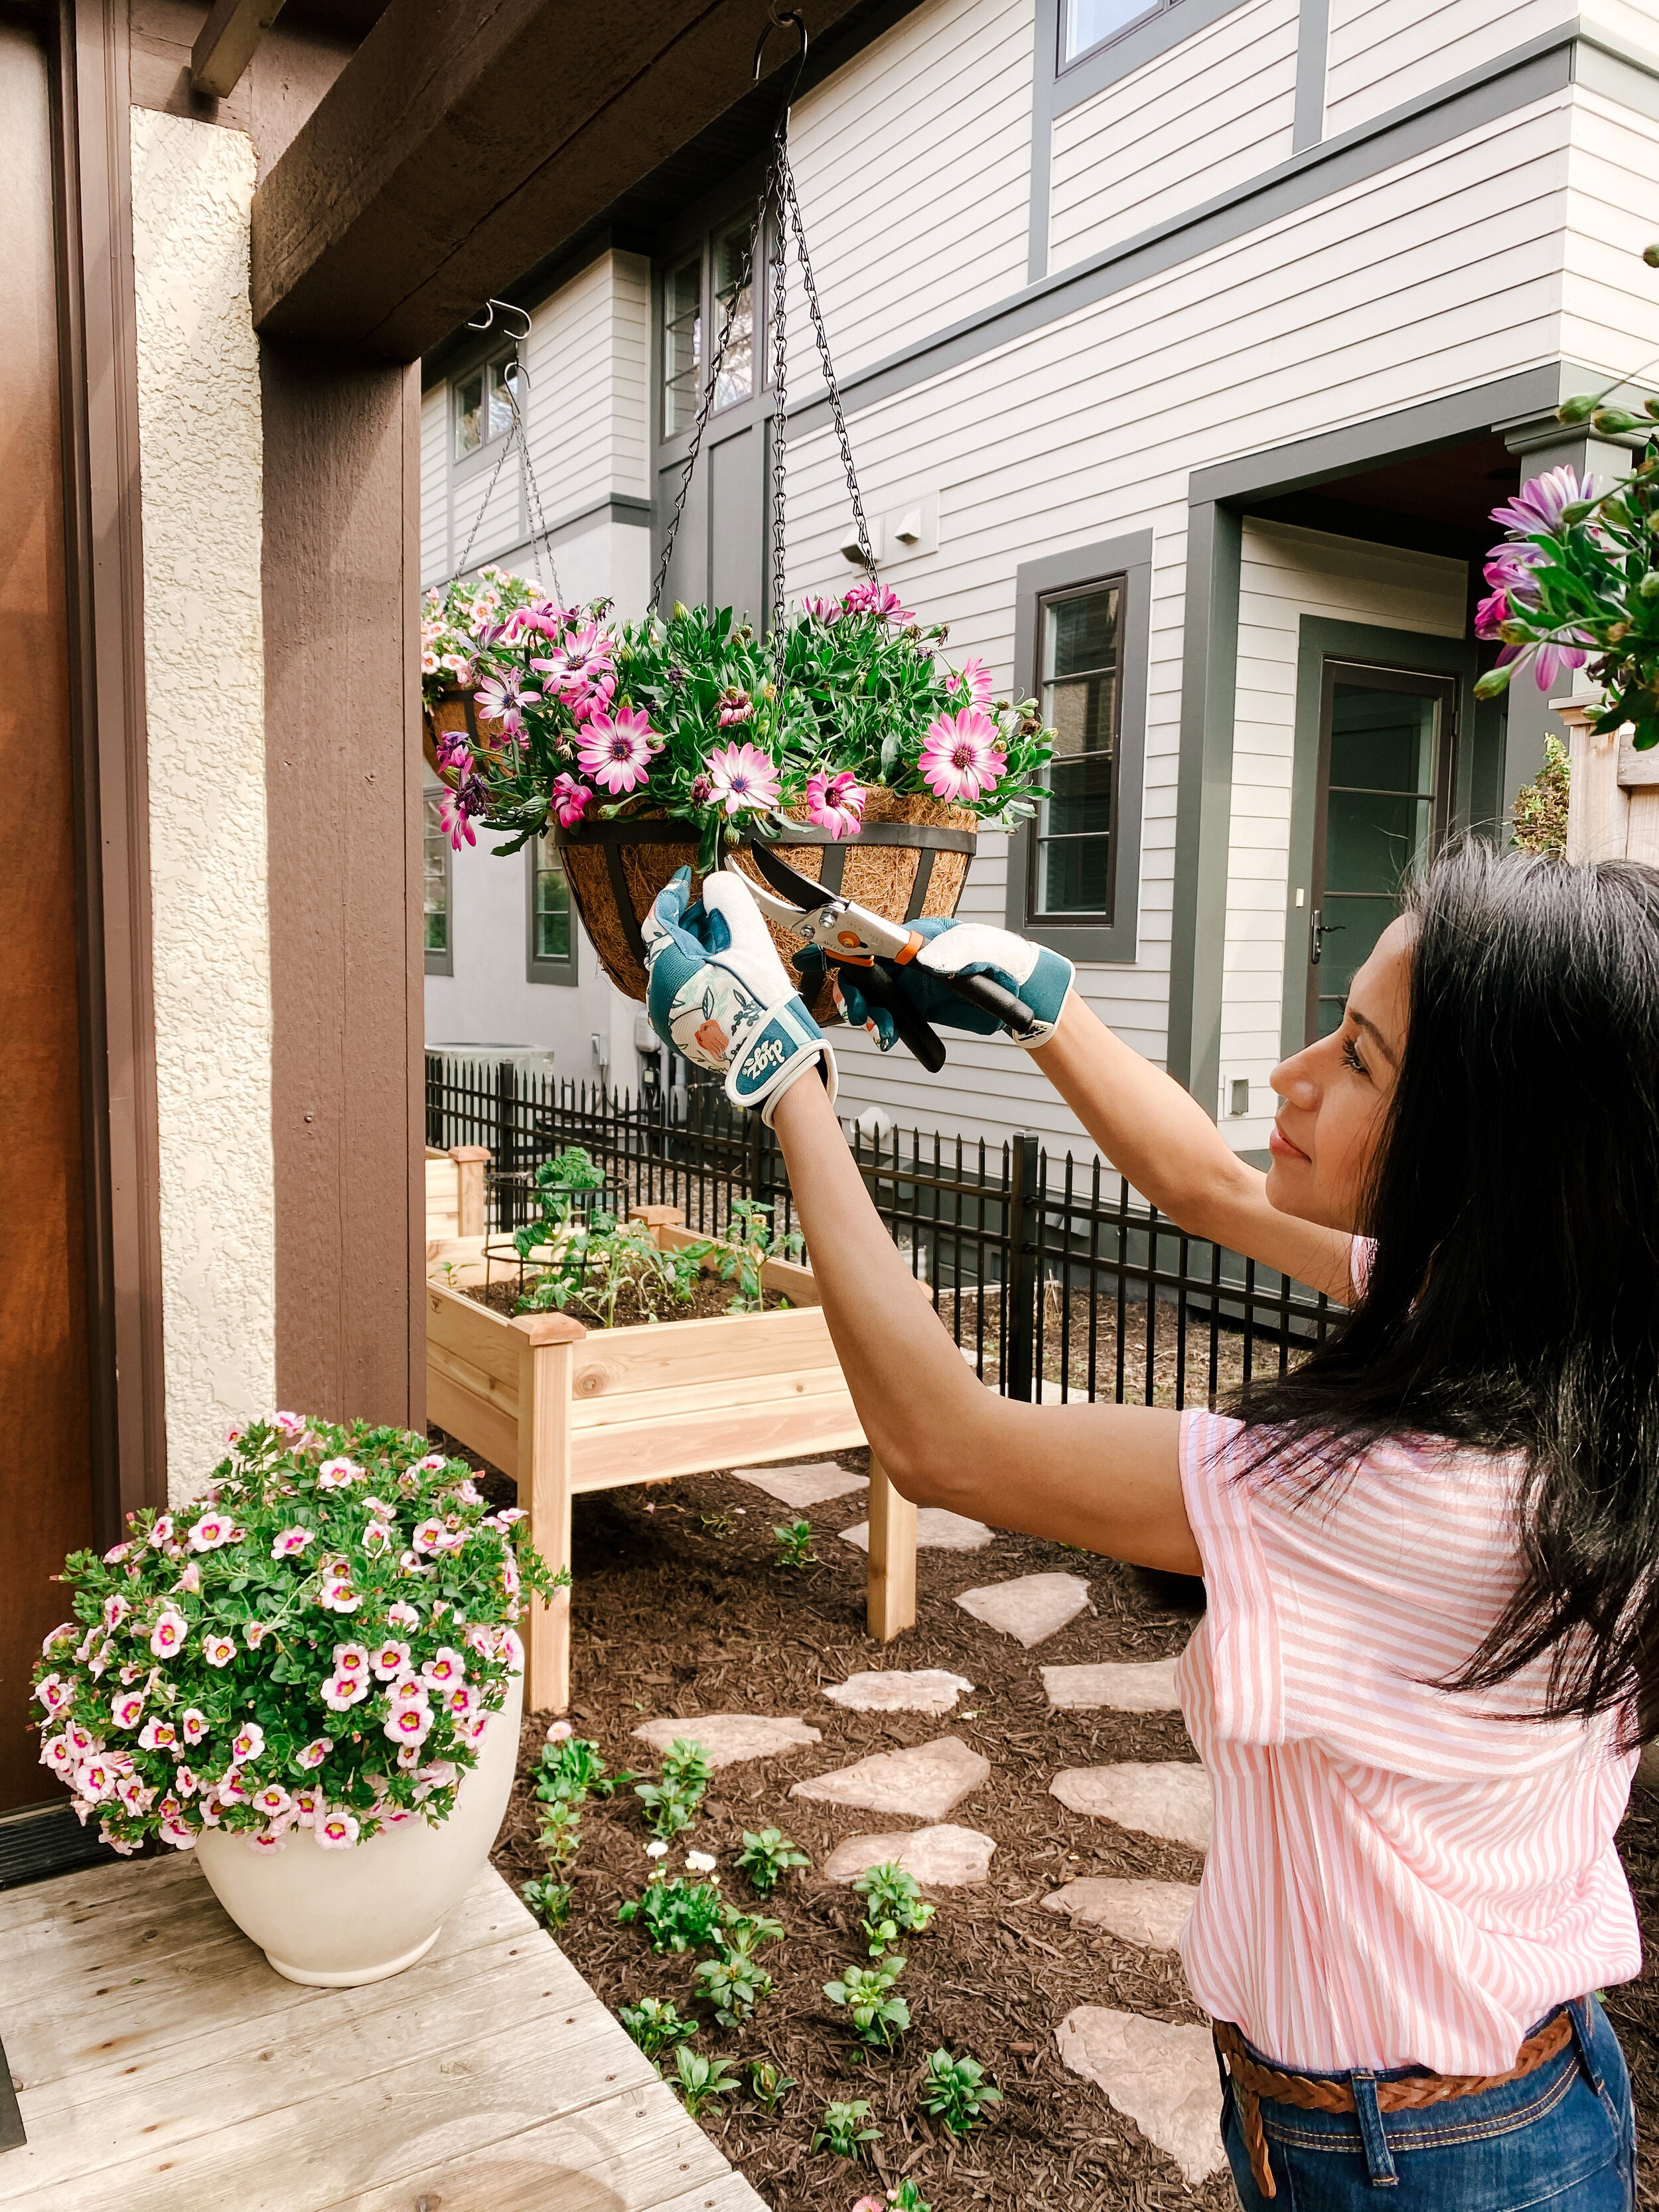
Last, we hung all the hanging flowers and potted the ones in the planters with Vigoro’s Potting Mix. Don’t underestimate the impact of what hanging and potted plants can do to a space! Here’s how we utilized the Vigoro flowers – scroll down to see more photos:
-
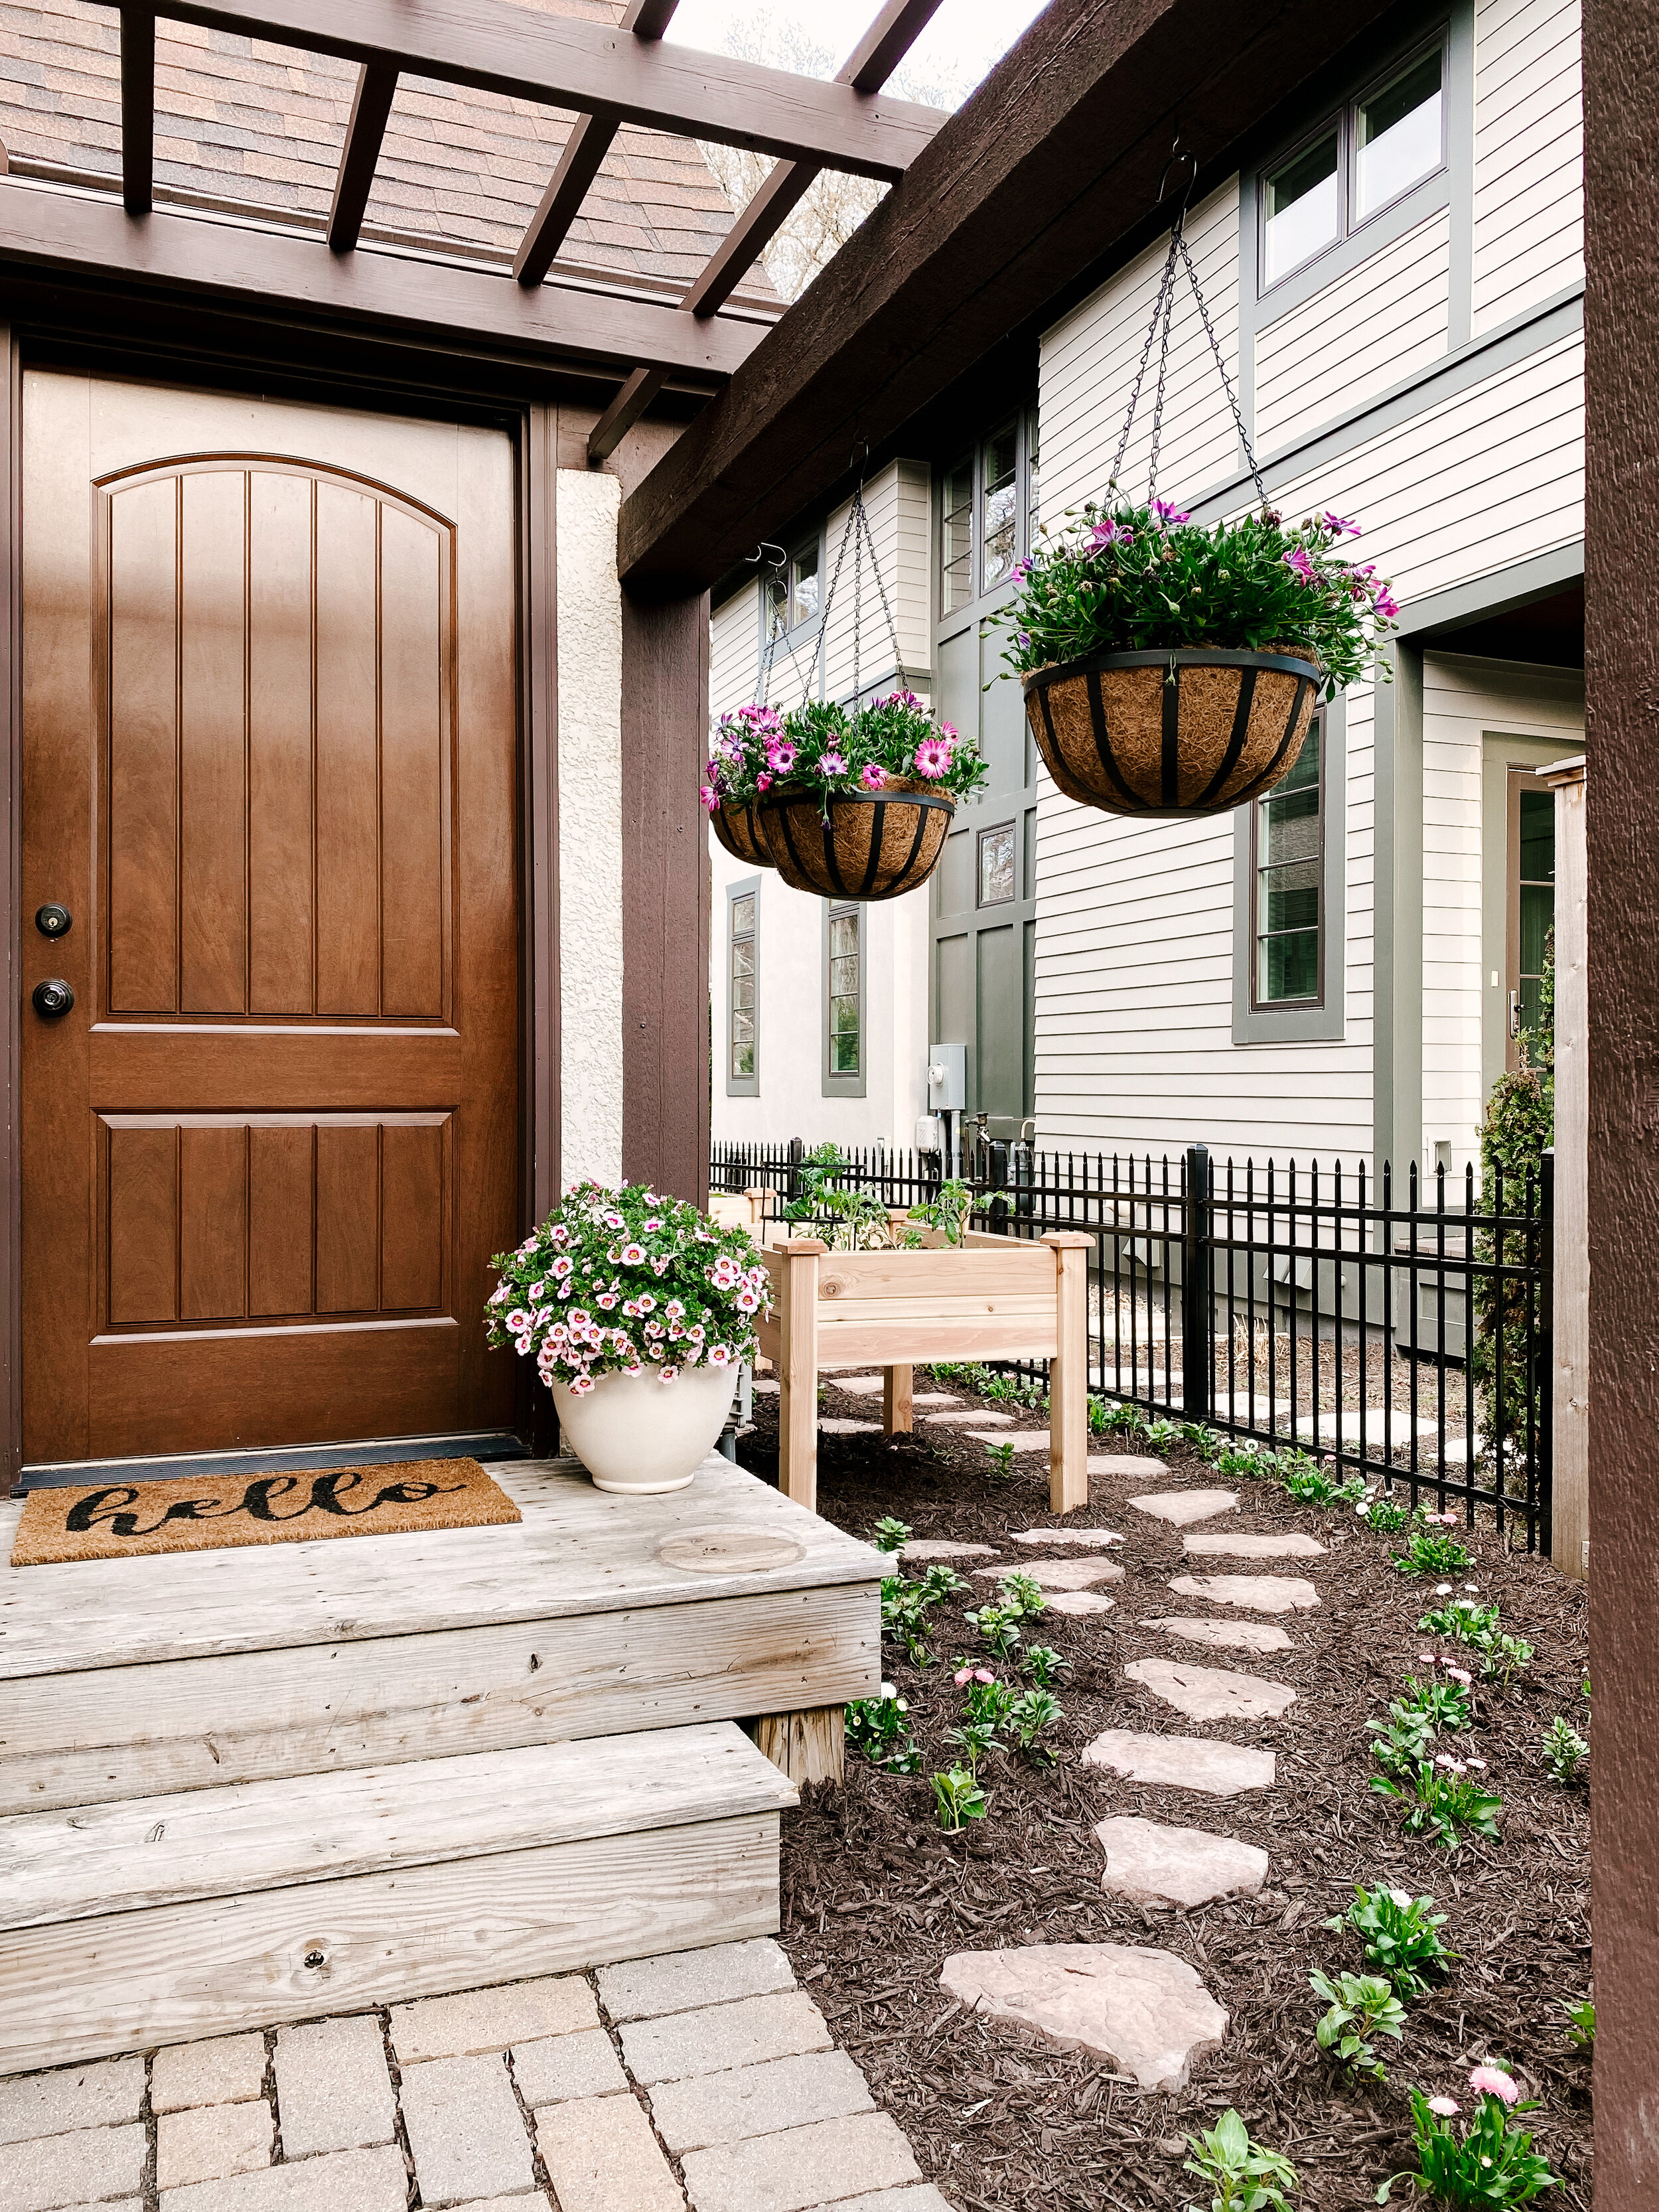
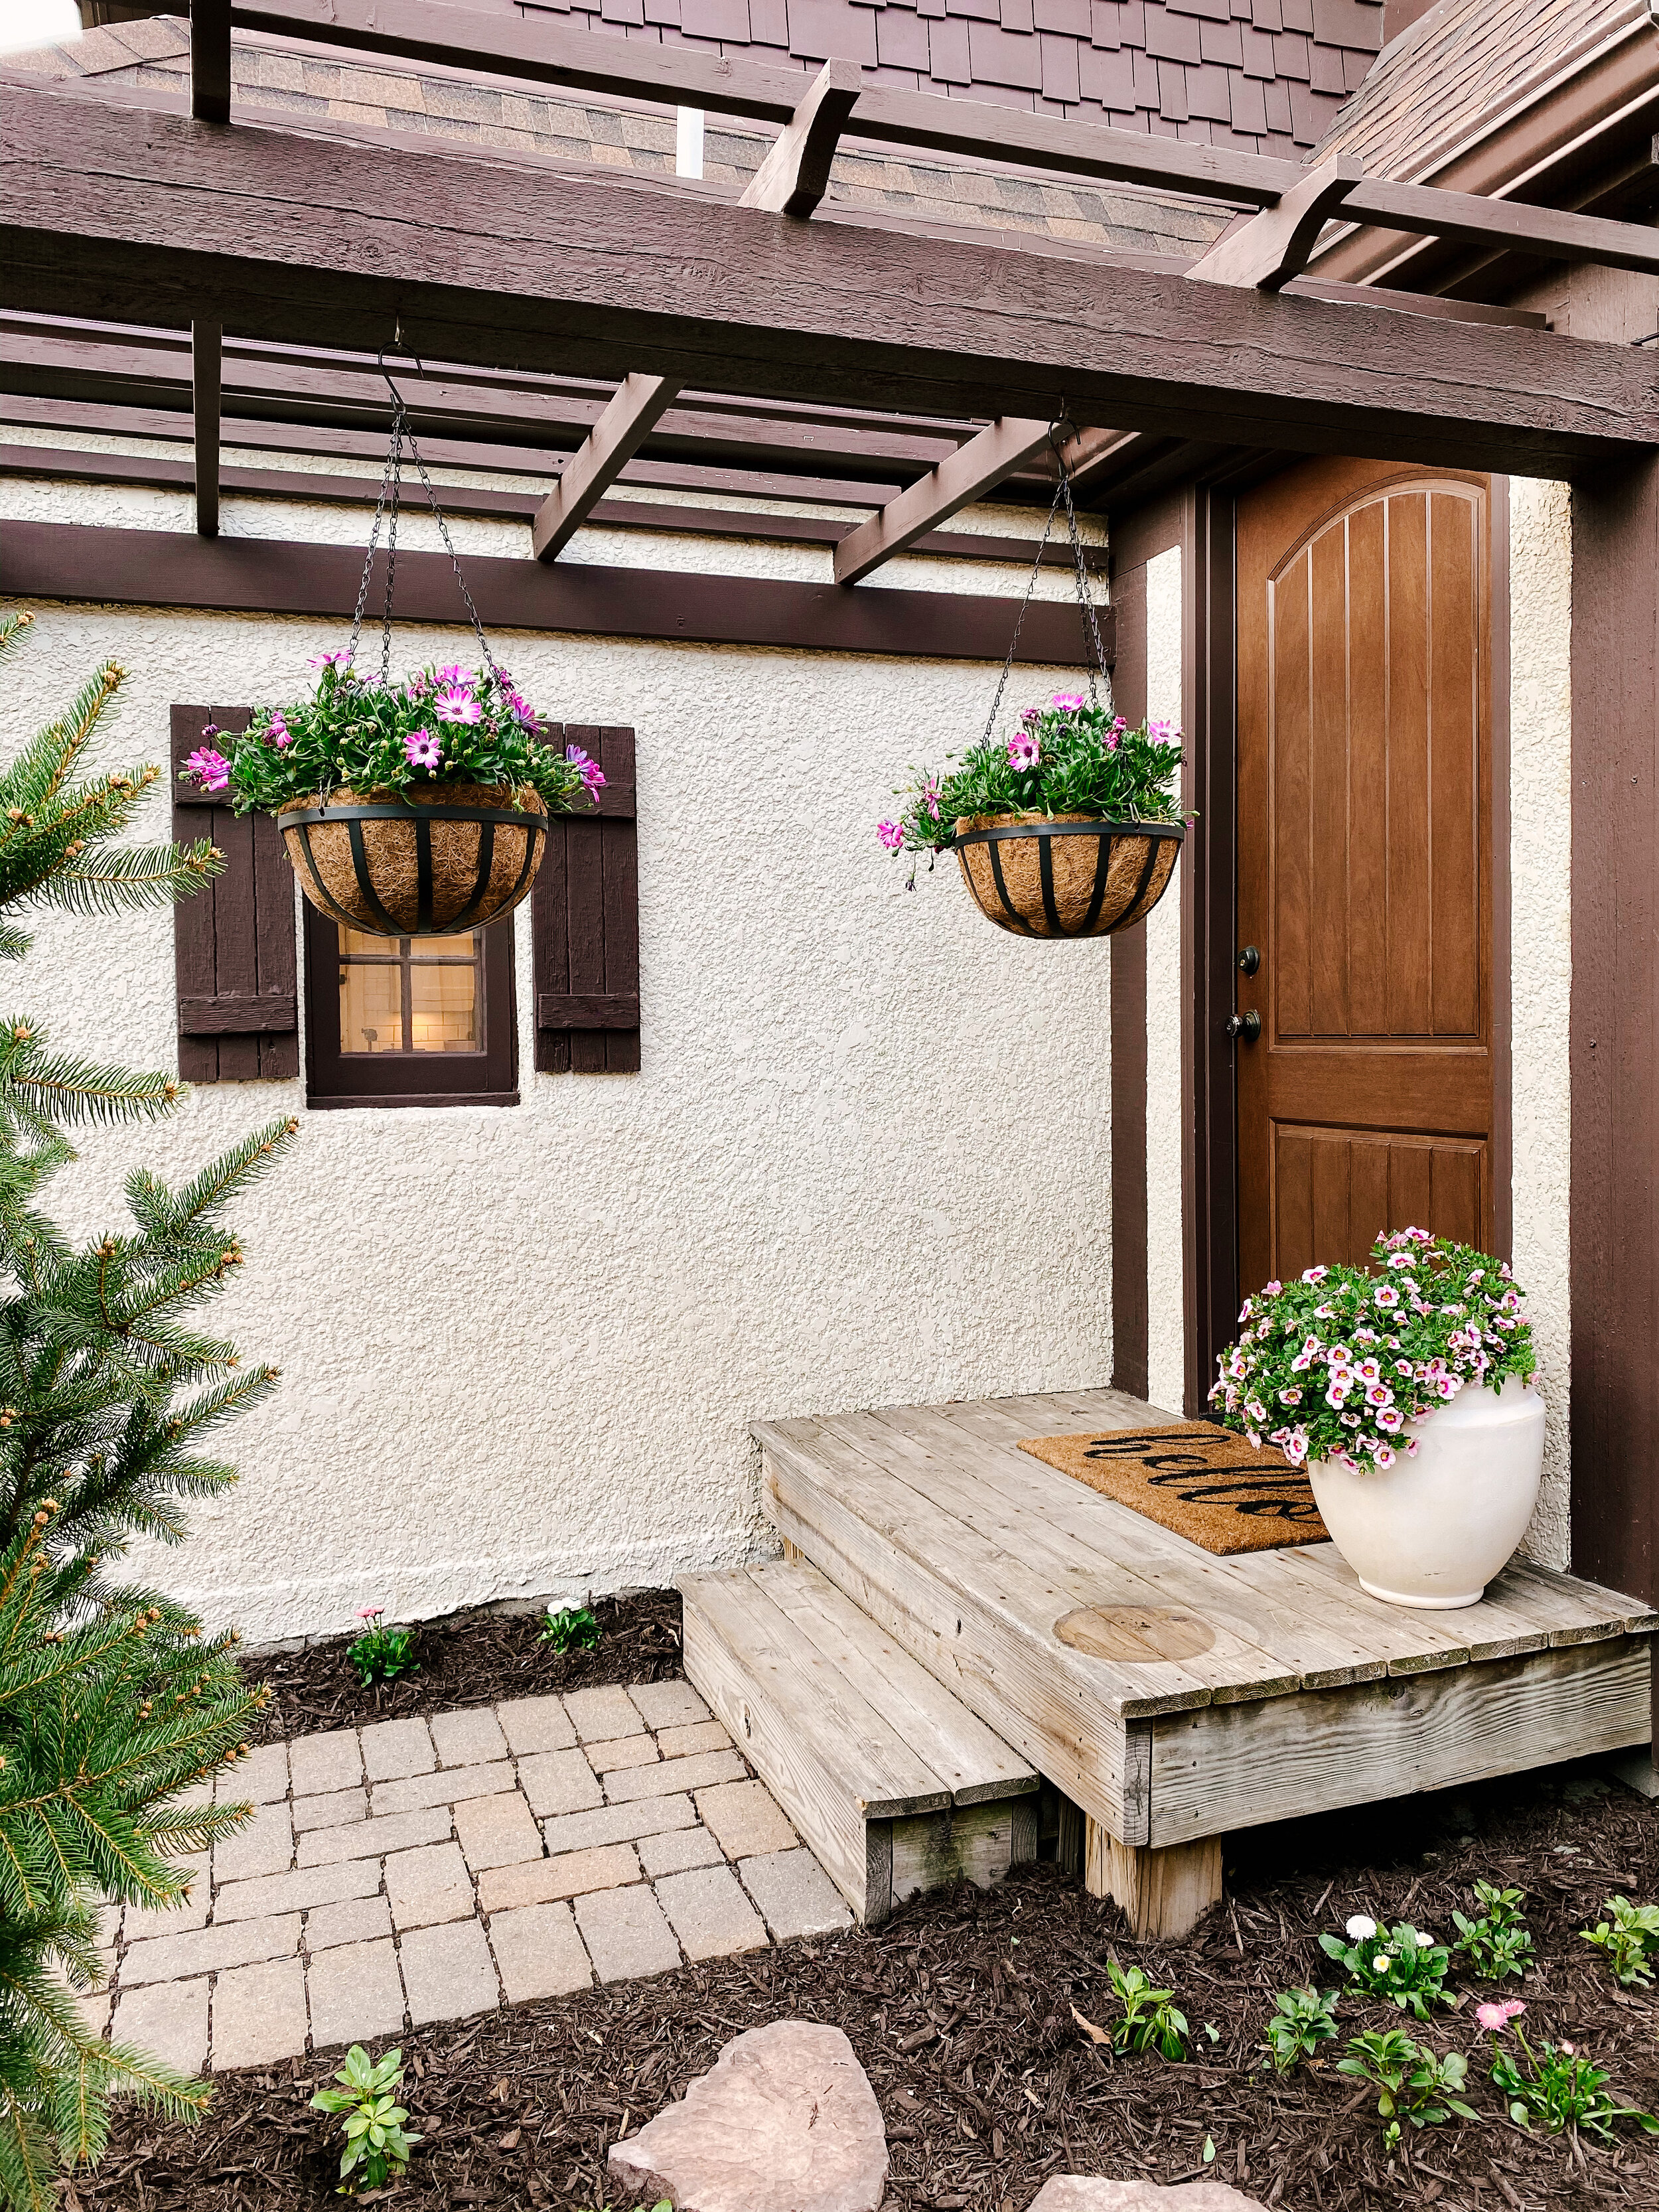
Hung two of the Calibrachoas in the 14” hanging coco baskets off the mudroom windows using these sturdy plant brackets.
-
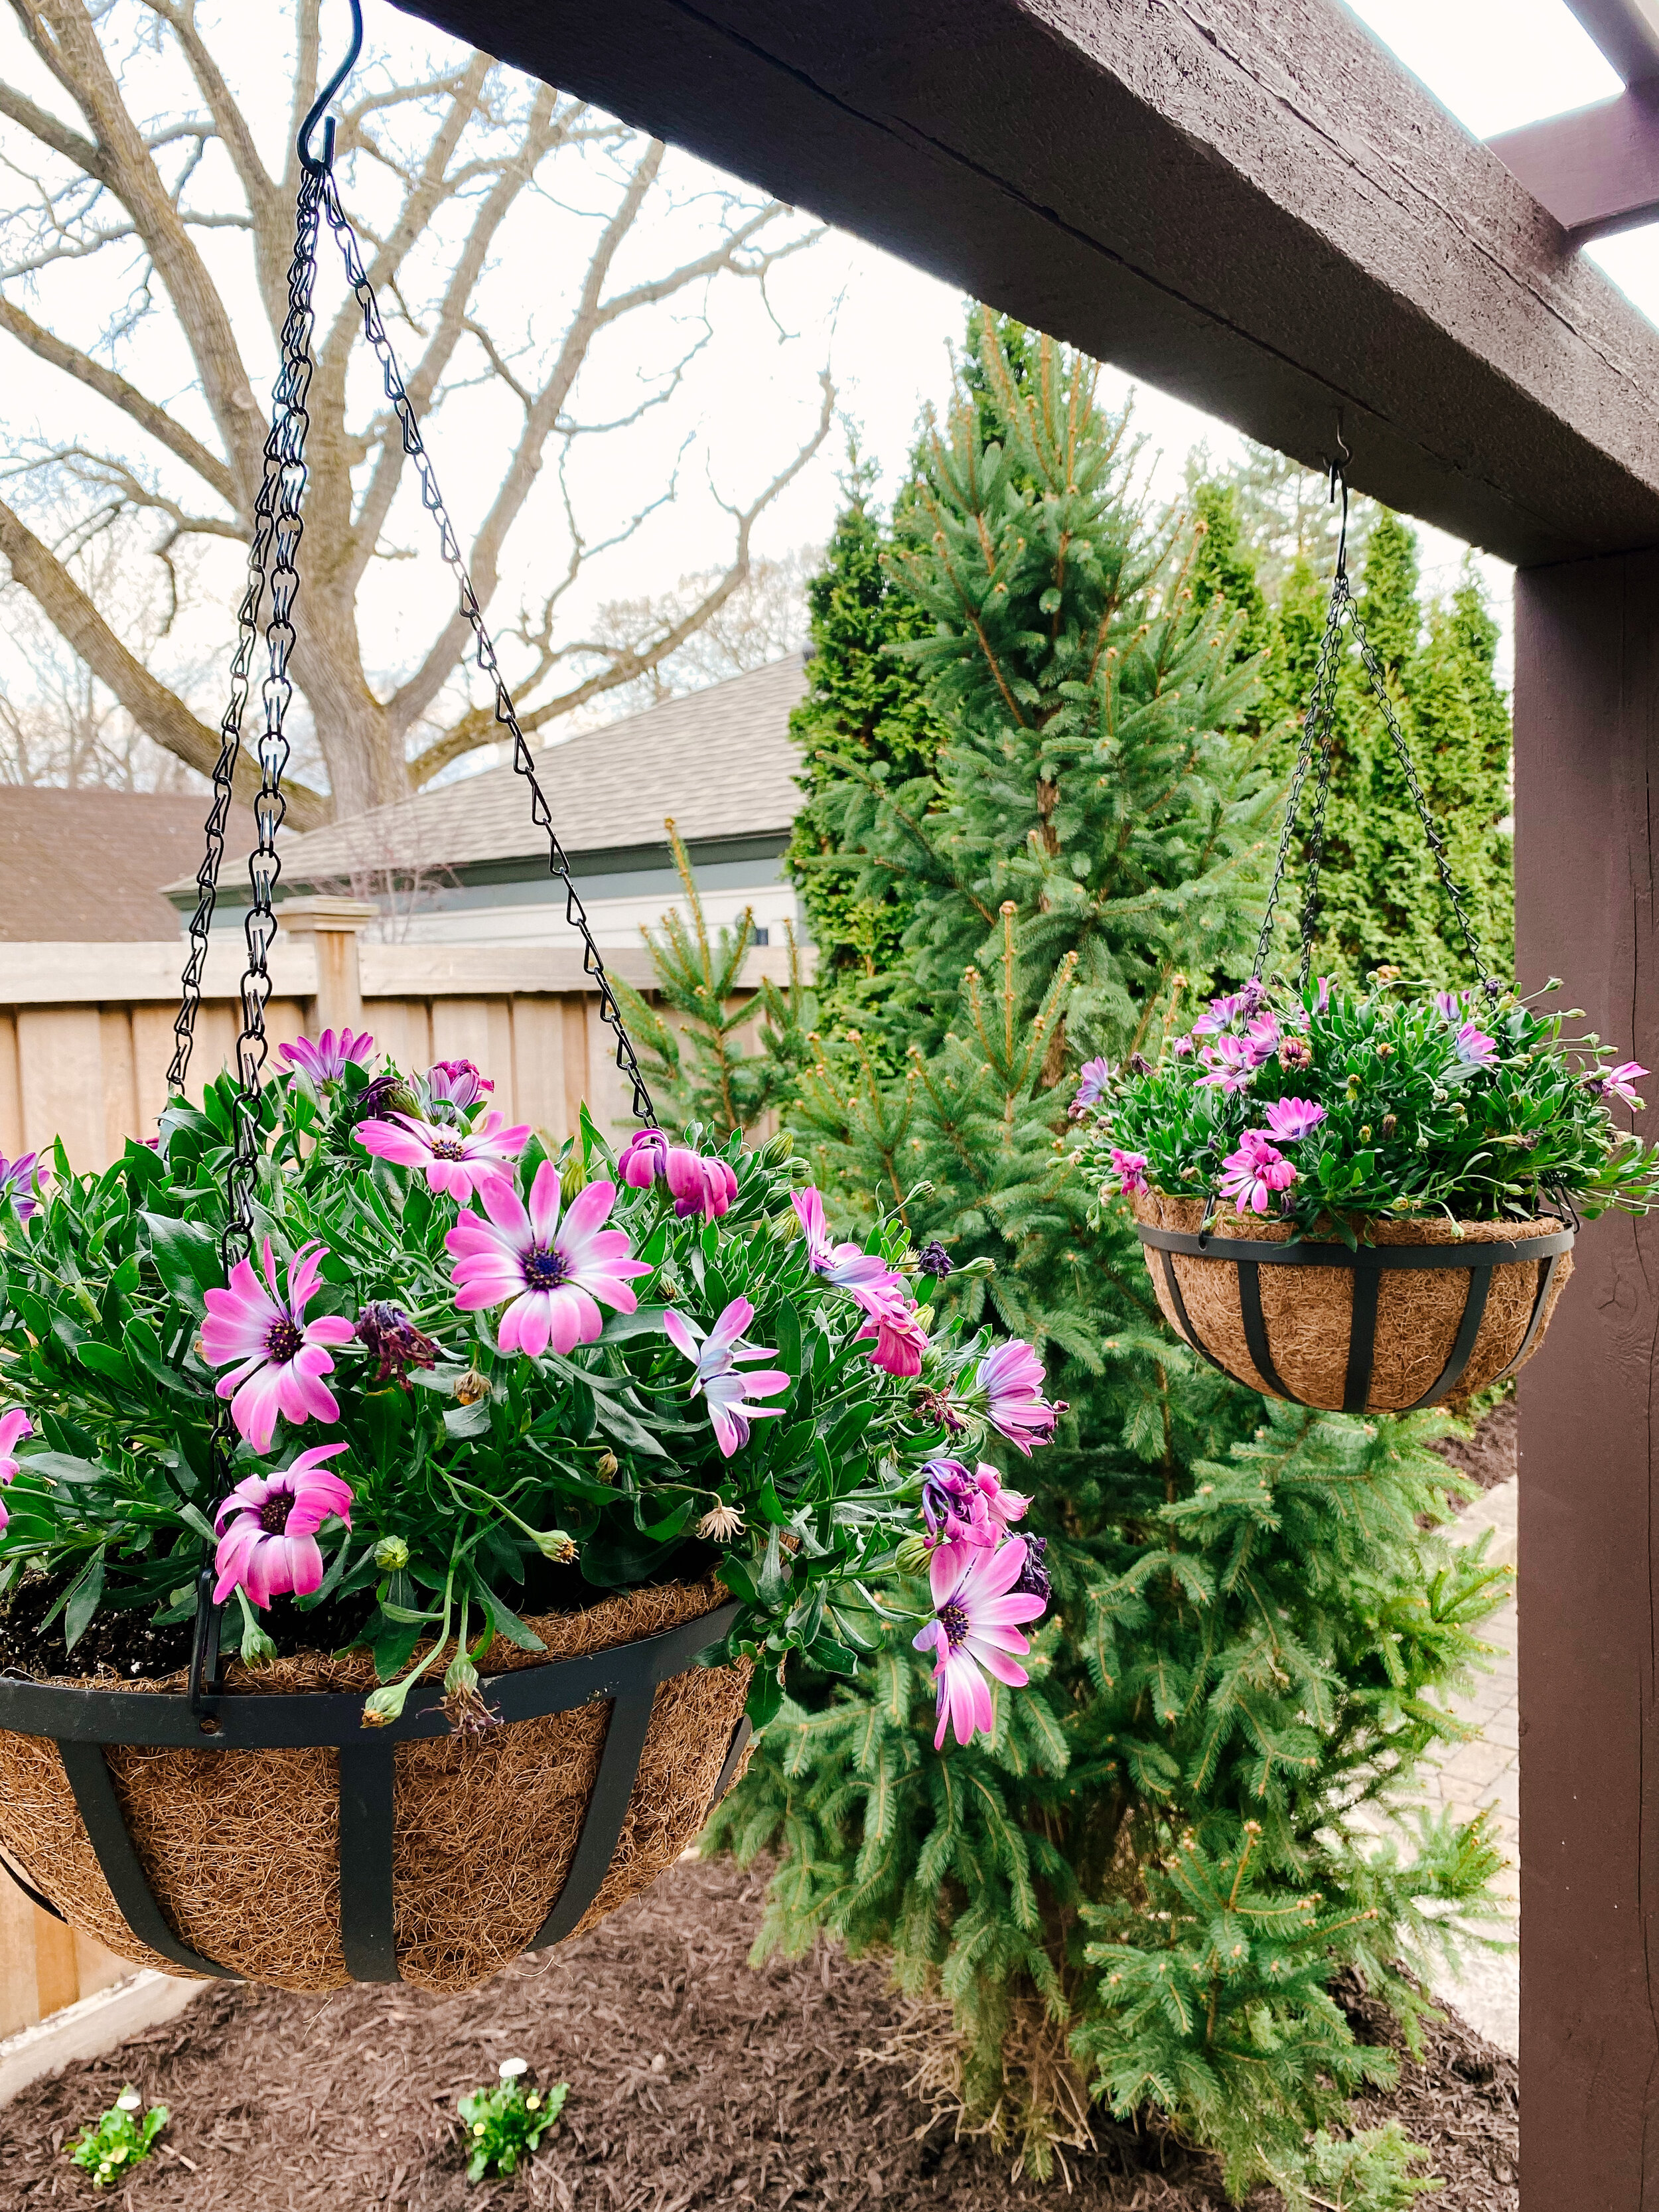
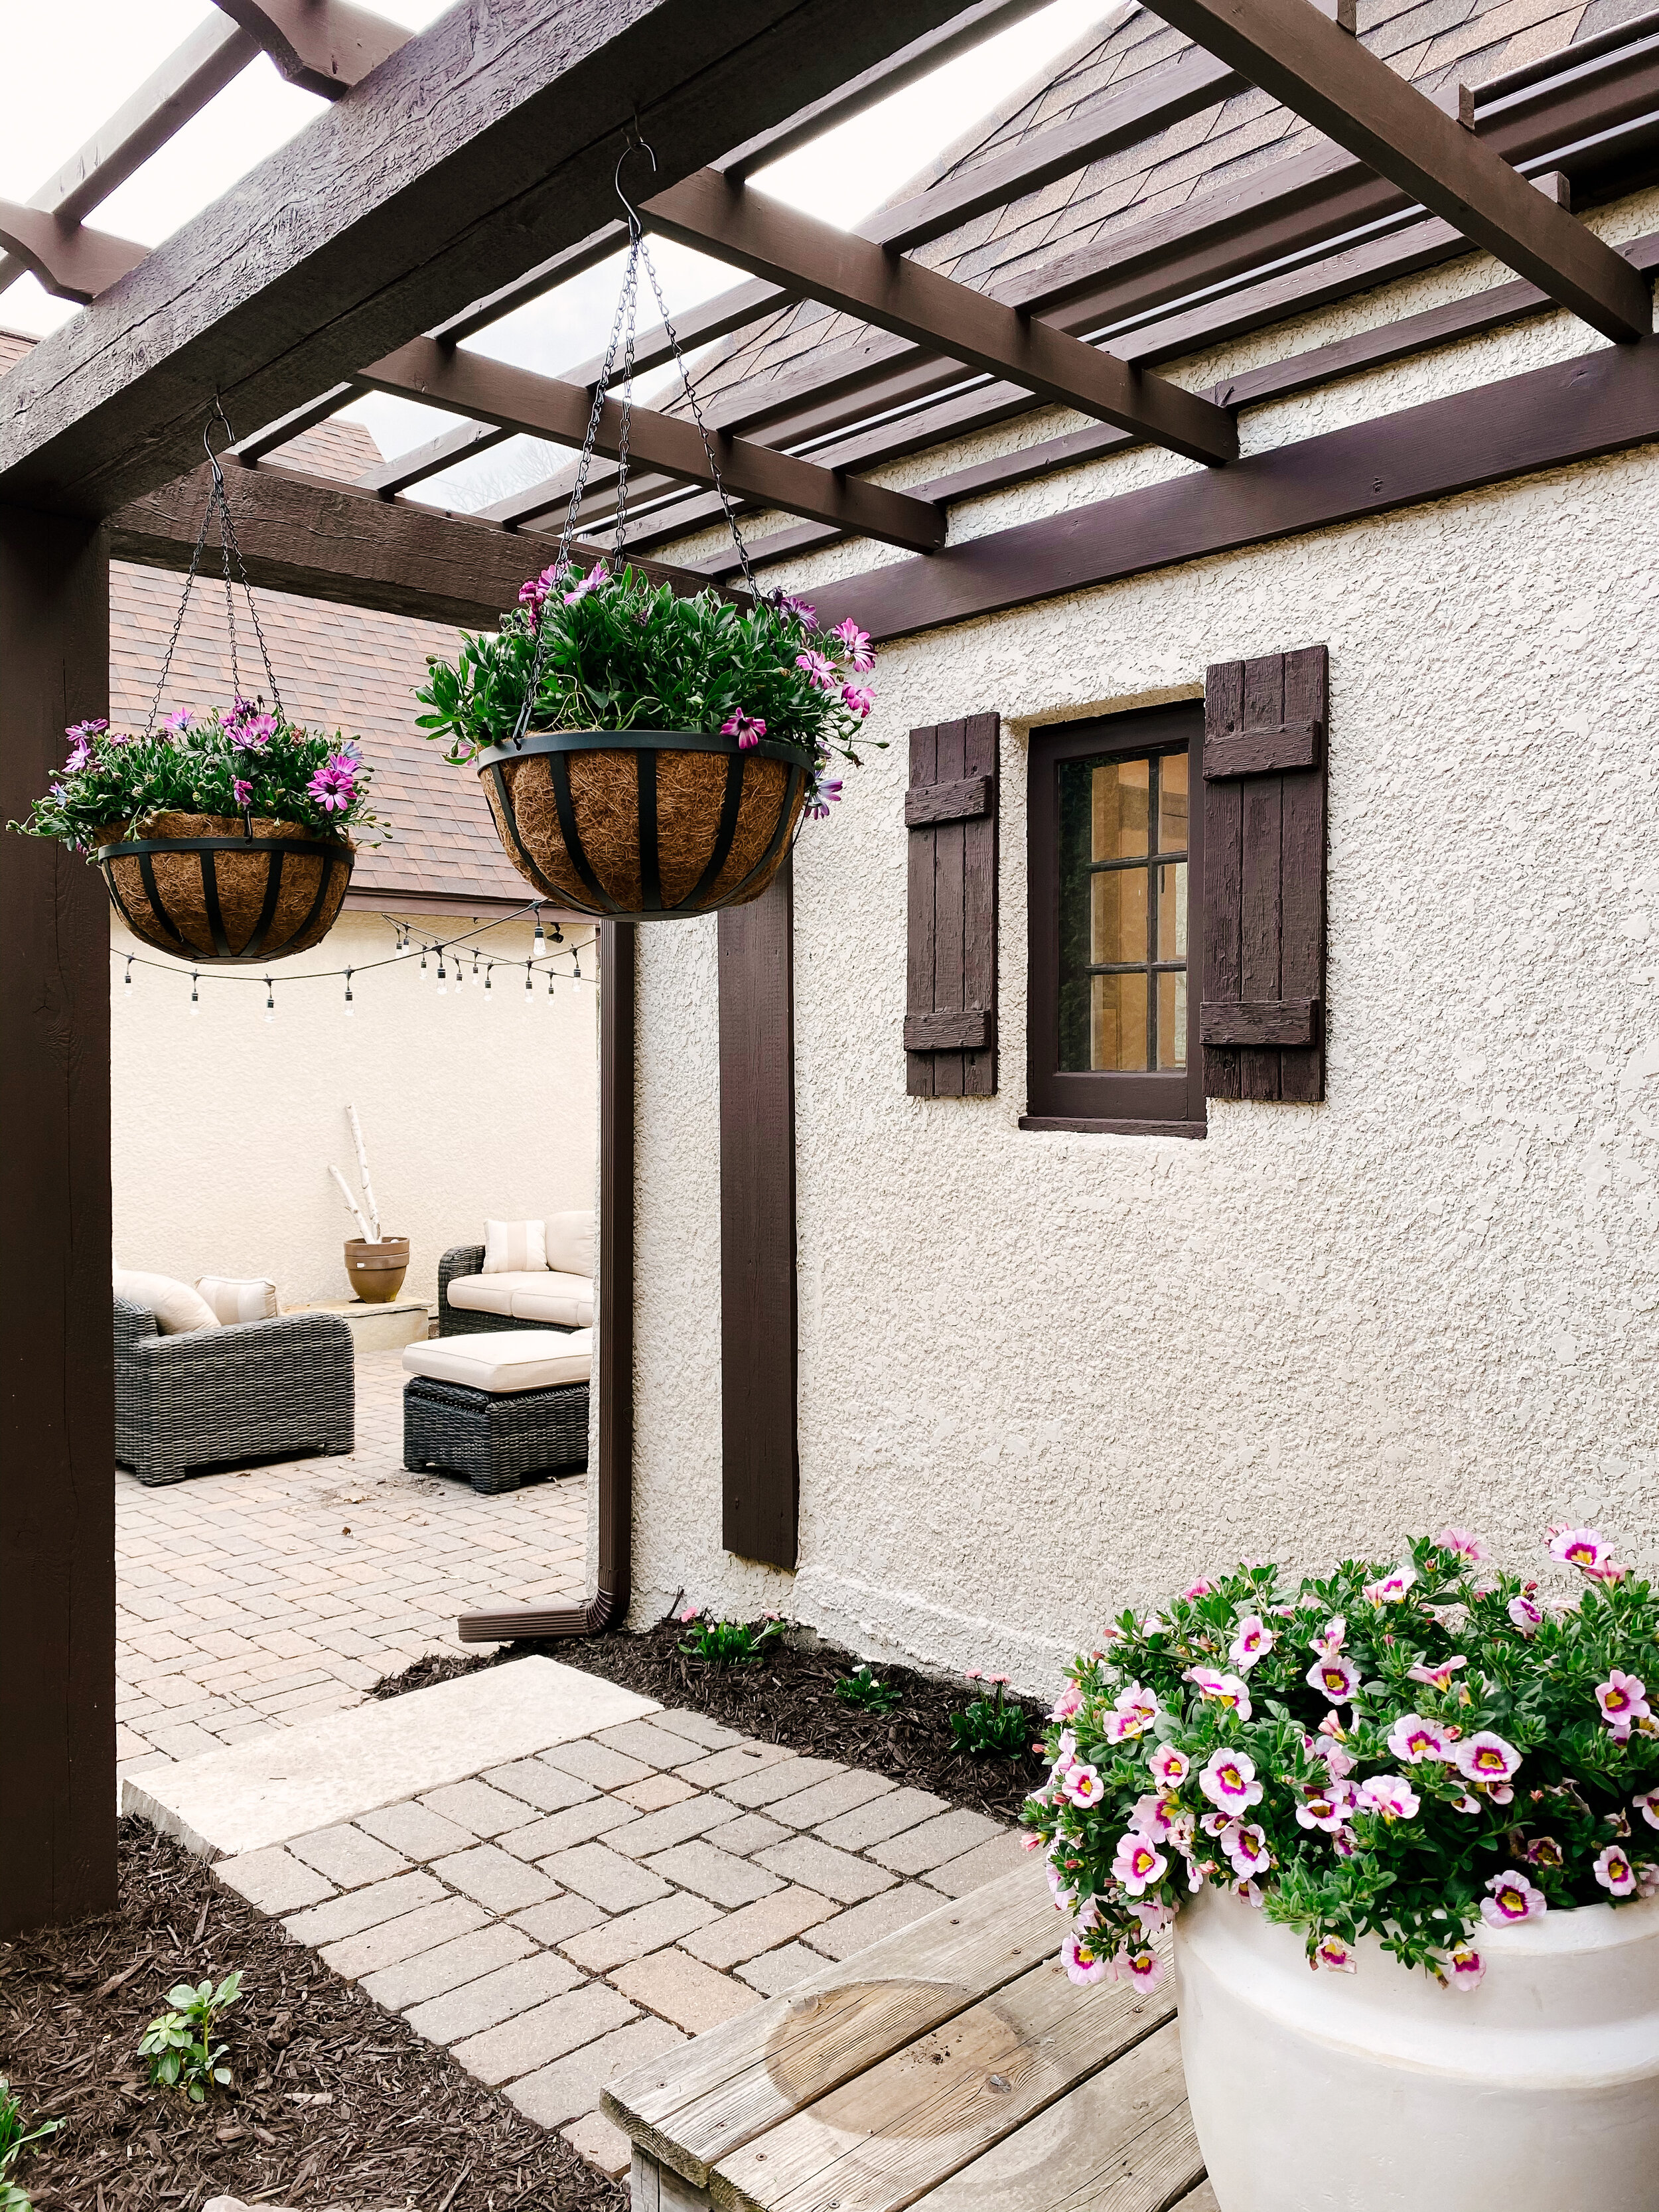
Hung two African Daisies in the 12” hanging coco baskets from the backdoor pergola using existing hooks.
-
Potted two Calibrachoas in a large size planter to put outside our two back doors.
These hardy plants provide the perfect mixture of soft and bright beautiful colors. I love that they’re longer lasting at such an unbeatable value! Tip: Don’t forget to water the plants as soon as you’re done planting them!
If we can tackle this backyard garden makeover in less than two days with three small kiddos, we’re hopeful that you can as well! We wanted to document our step-by-step process to encourage you to create your own. Now is the time to tackle it and don’t forget to check out The Home Depot to order Vigoro products for your next project!
Here are some before and after photos that make me giddy! Enjoy!
BEFORE
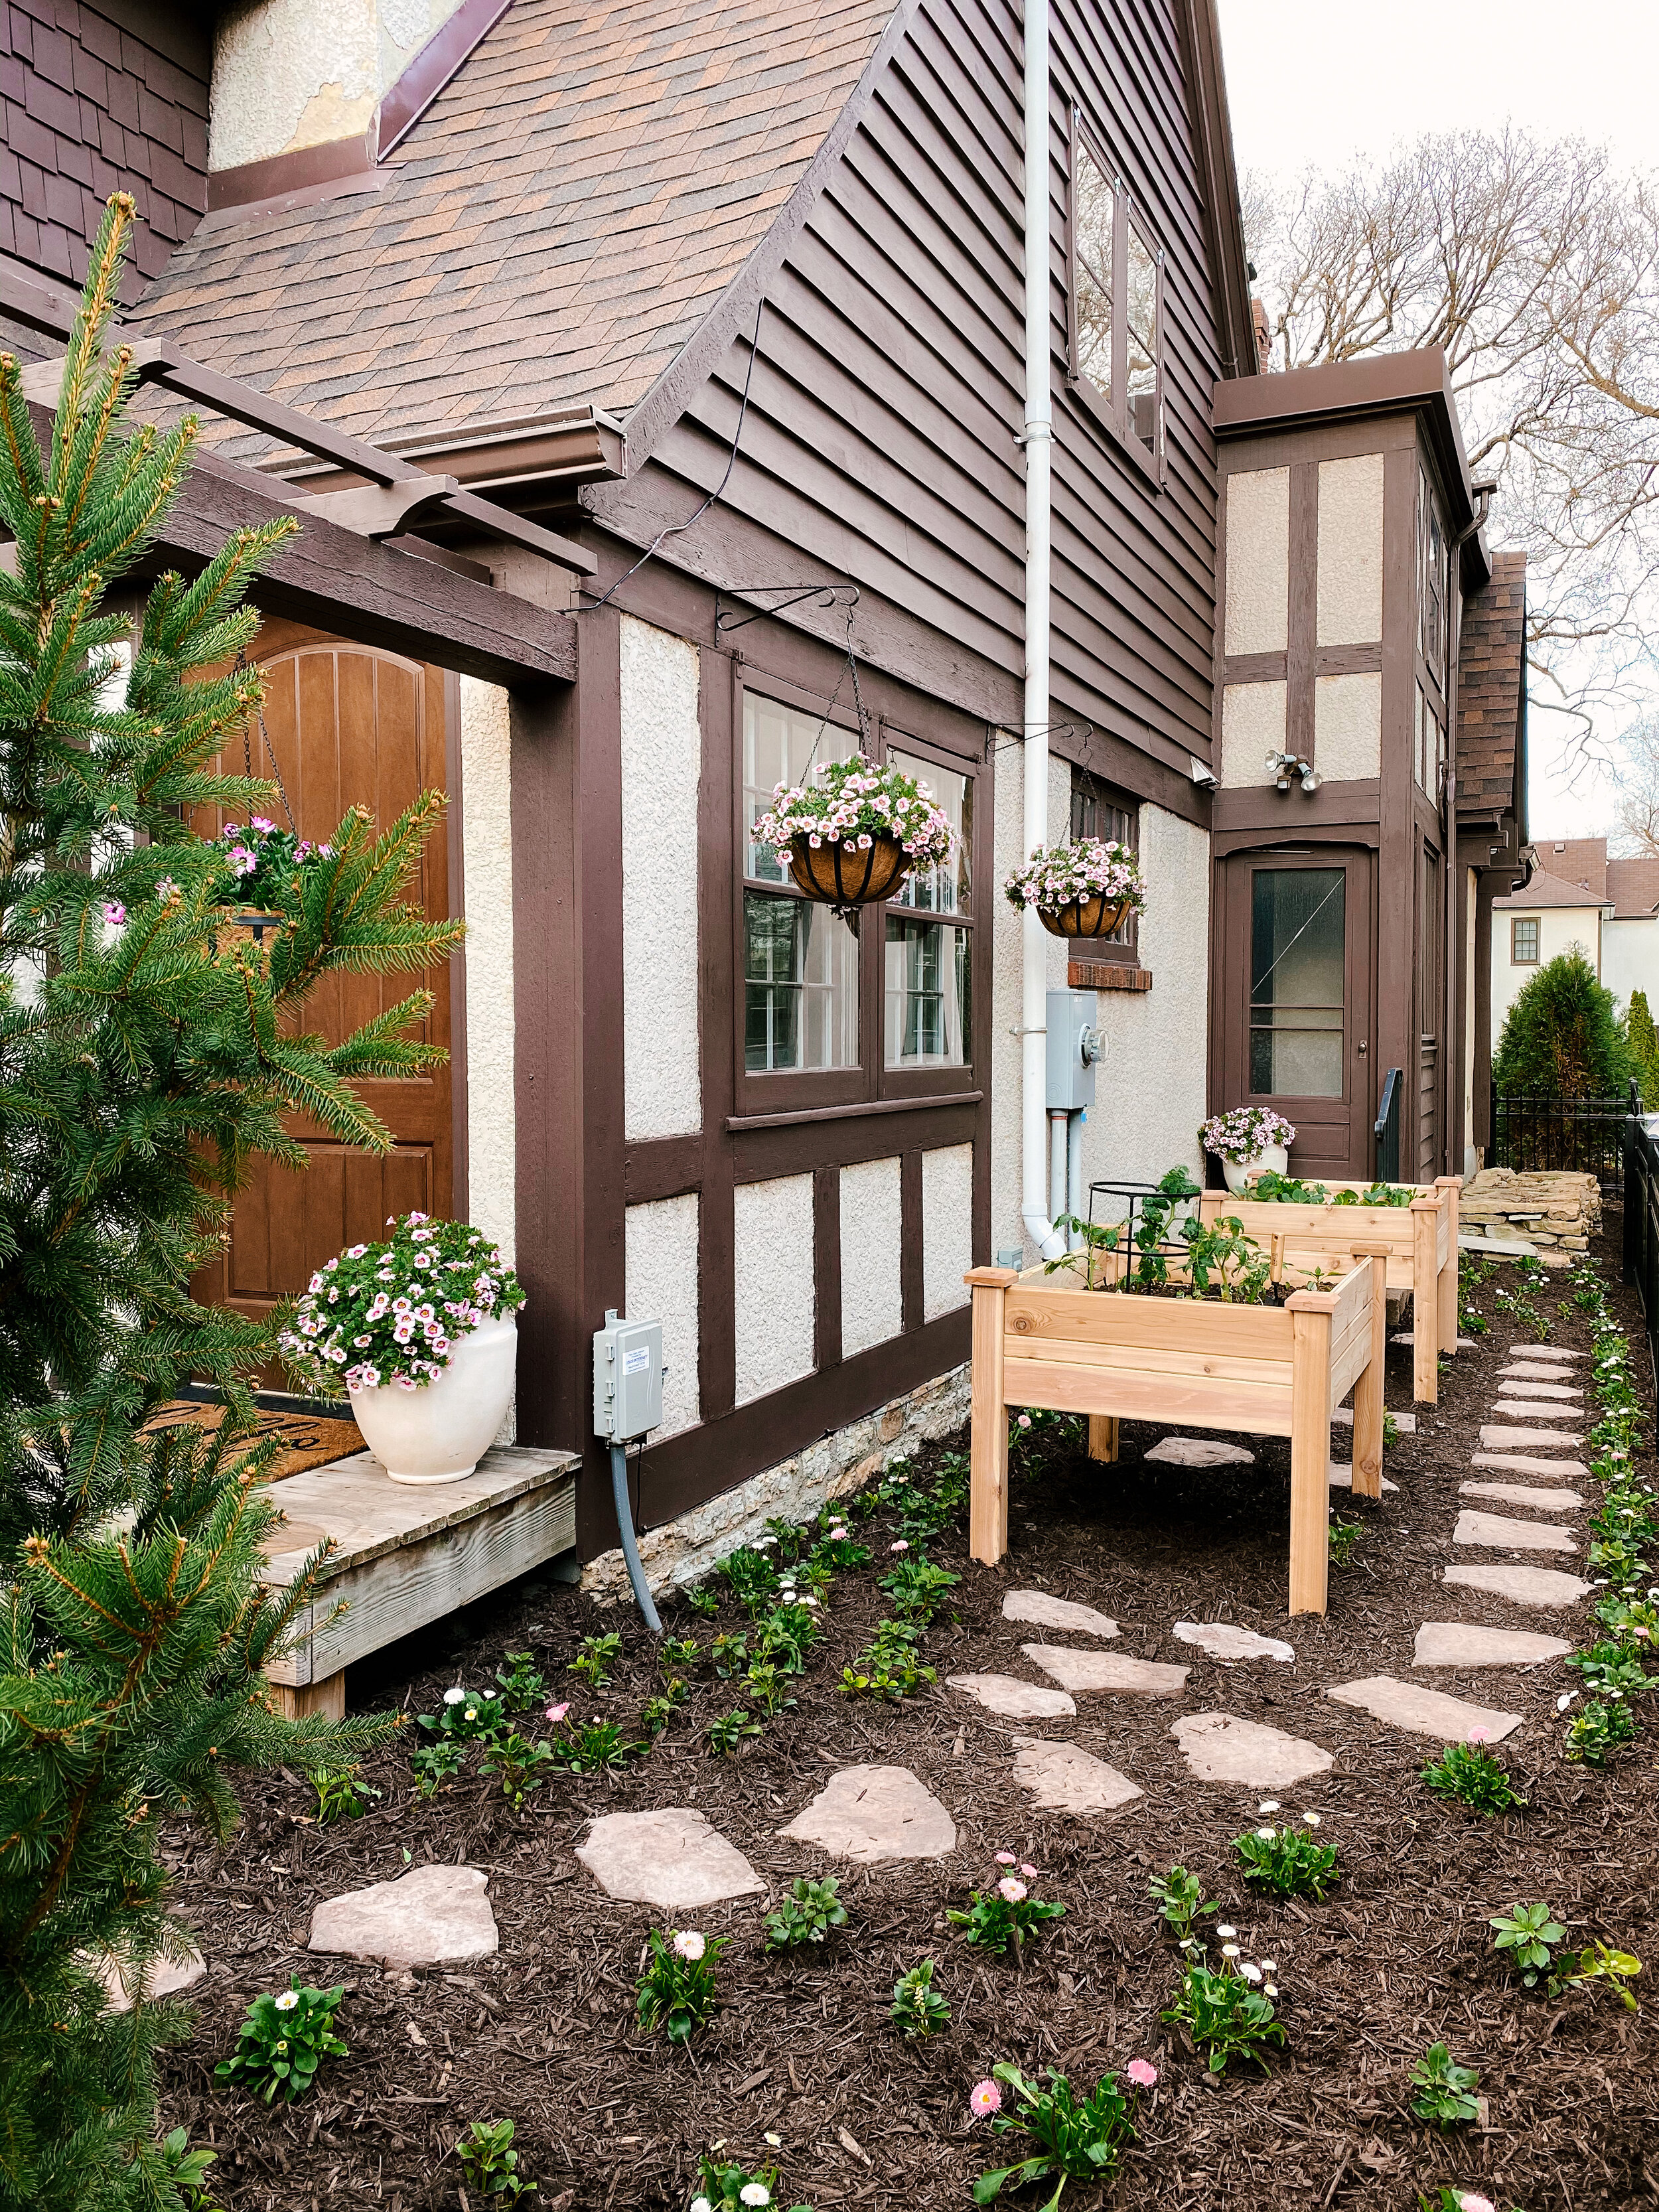
AFTER (note: ground cover will continue to grow and spread so mulch will be less visible as time passes)
BEFORE


BEFORE
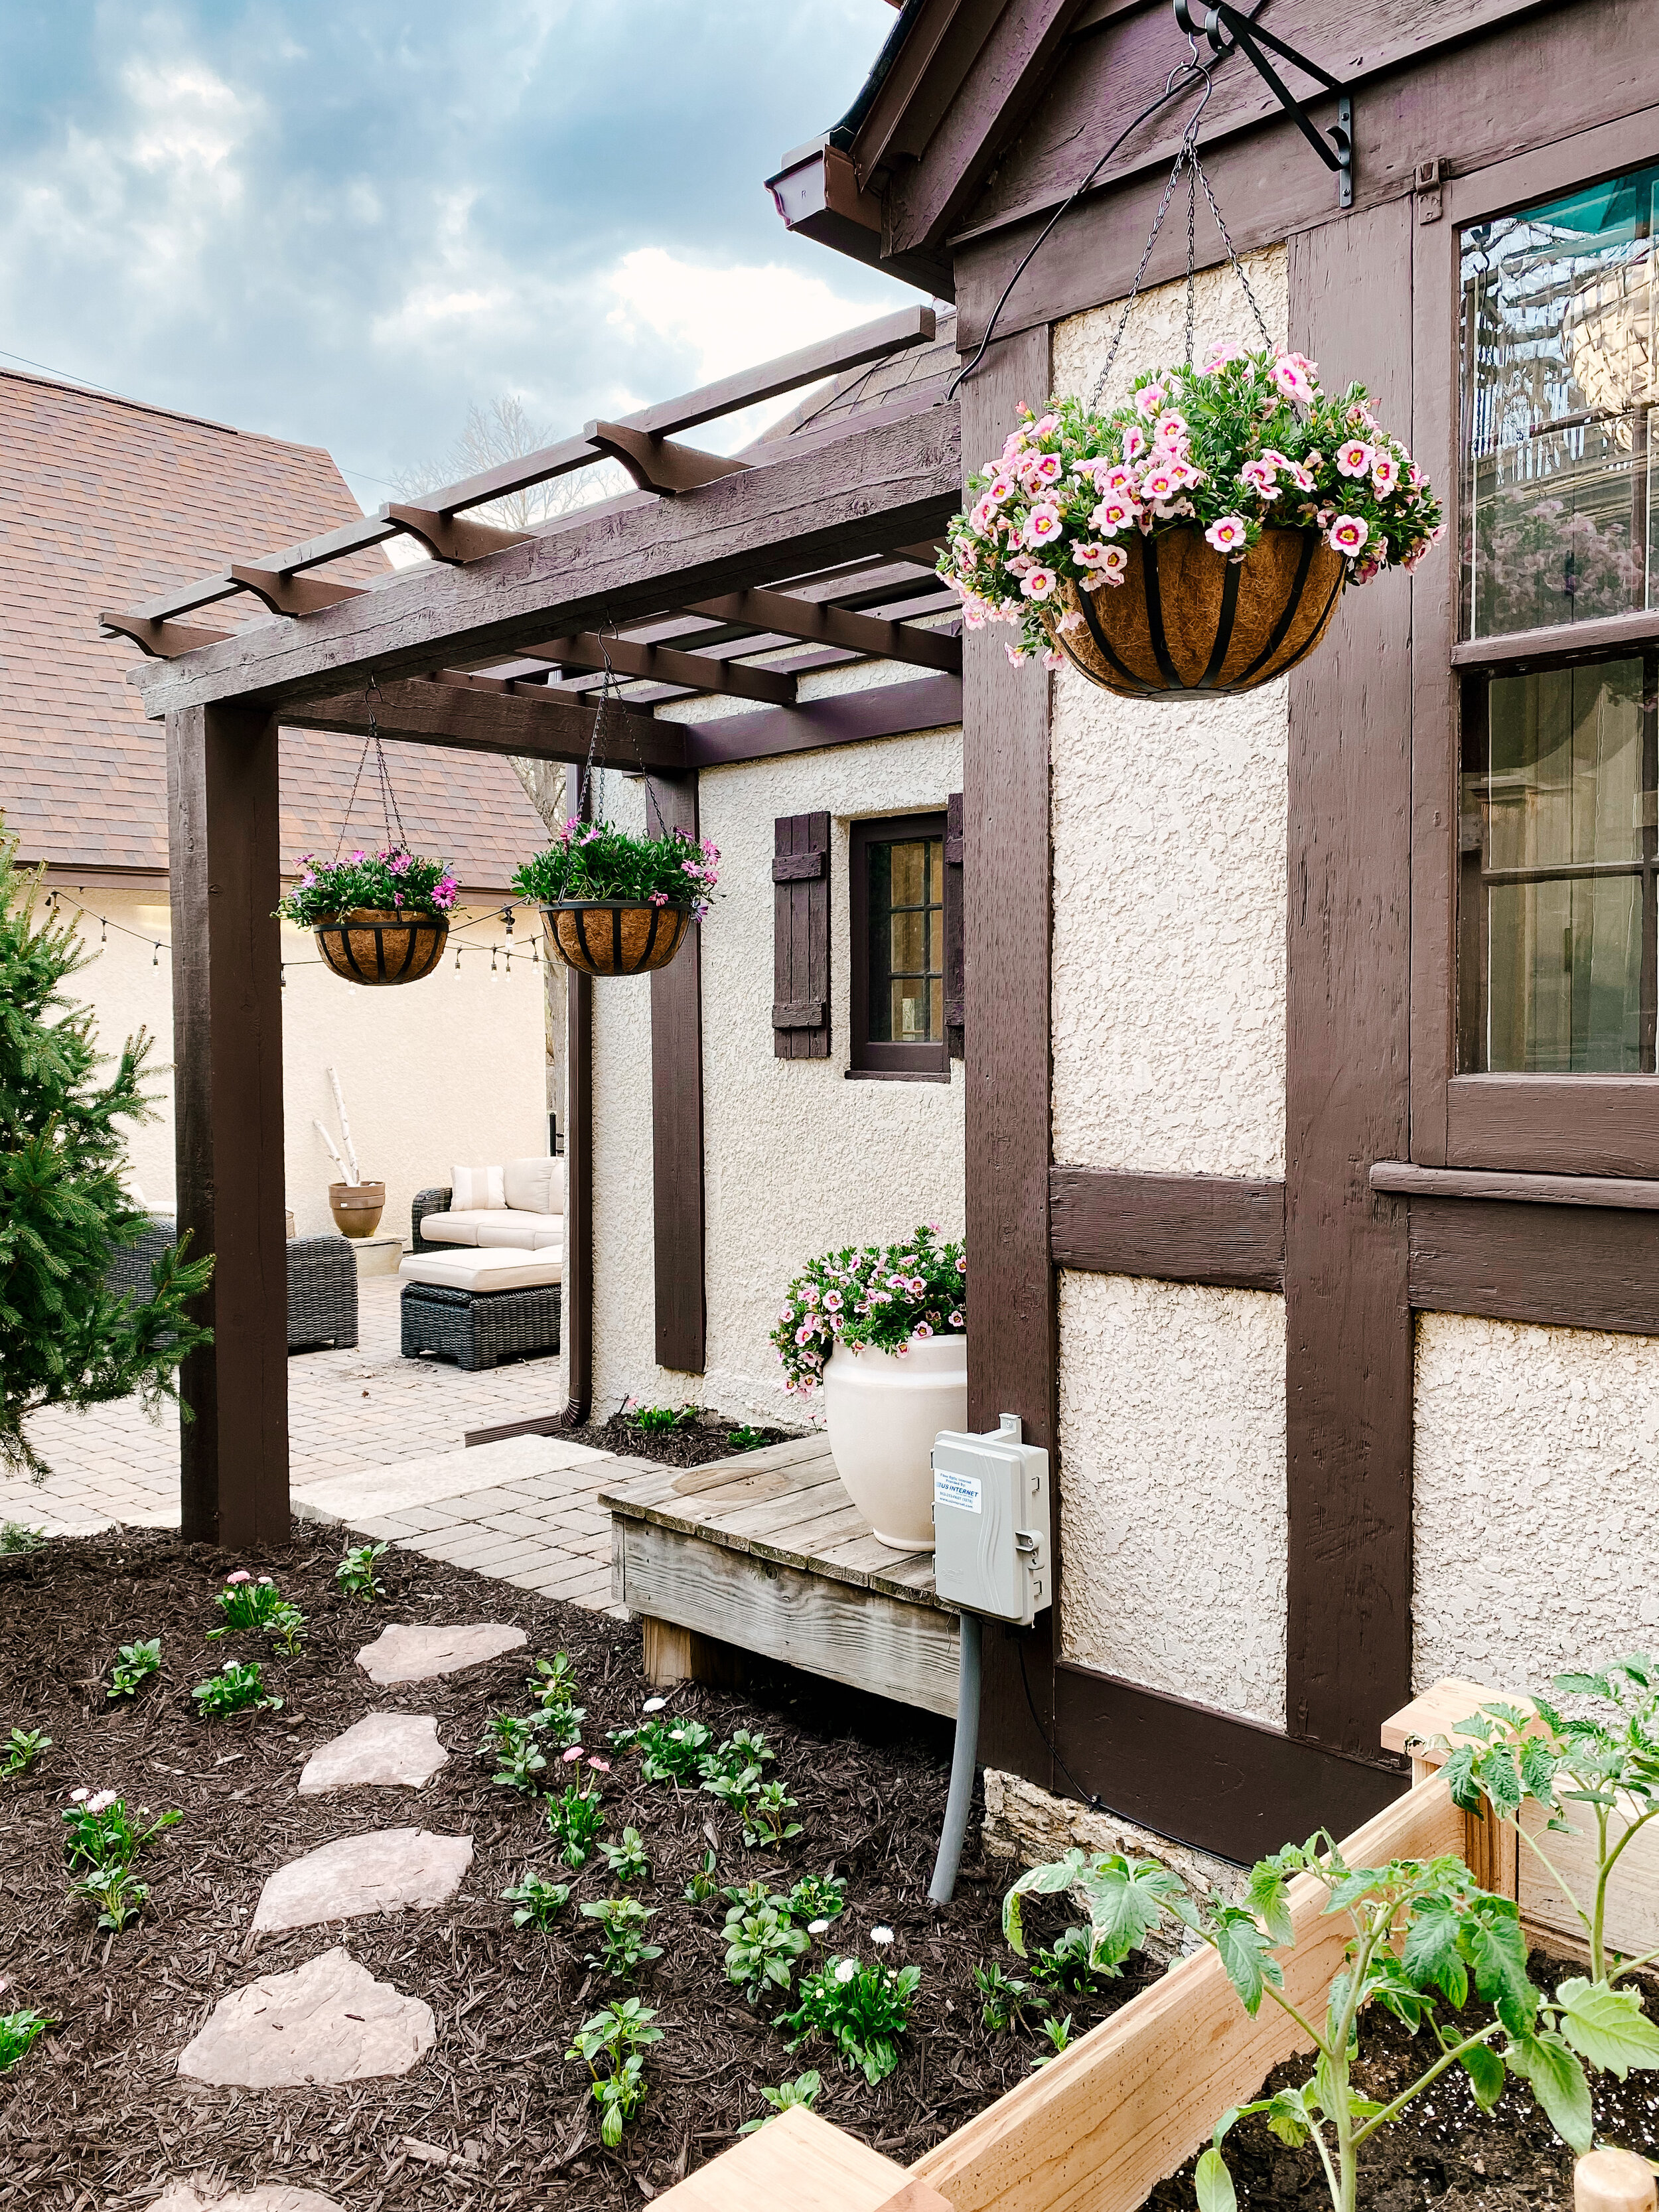
AFTER (Calibrachoa flowers in Large Resin Planter | Plant Bracket | Hanging Coco Baskets
BEFORE
AFTER
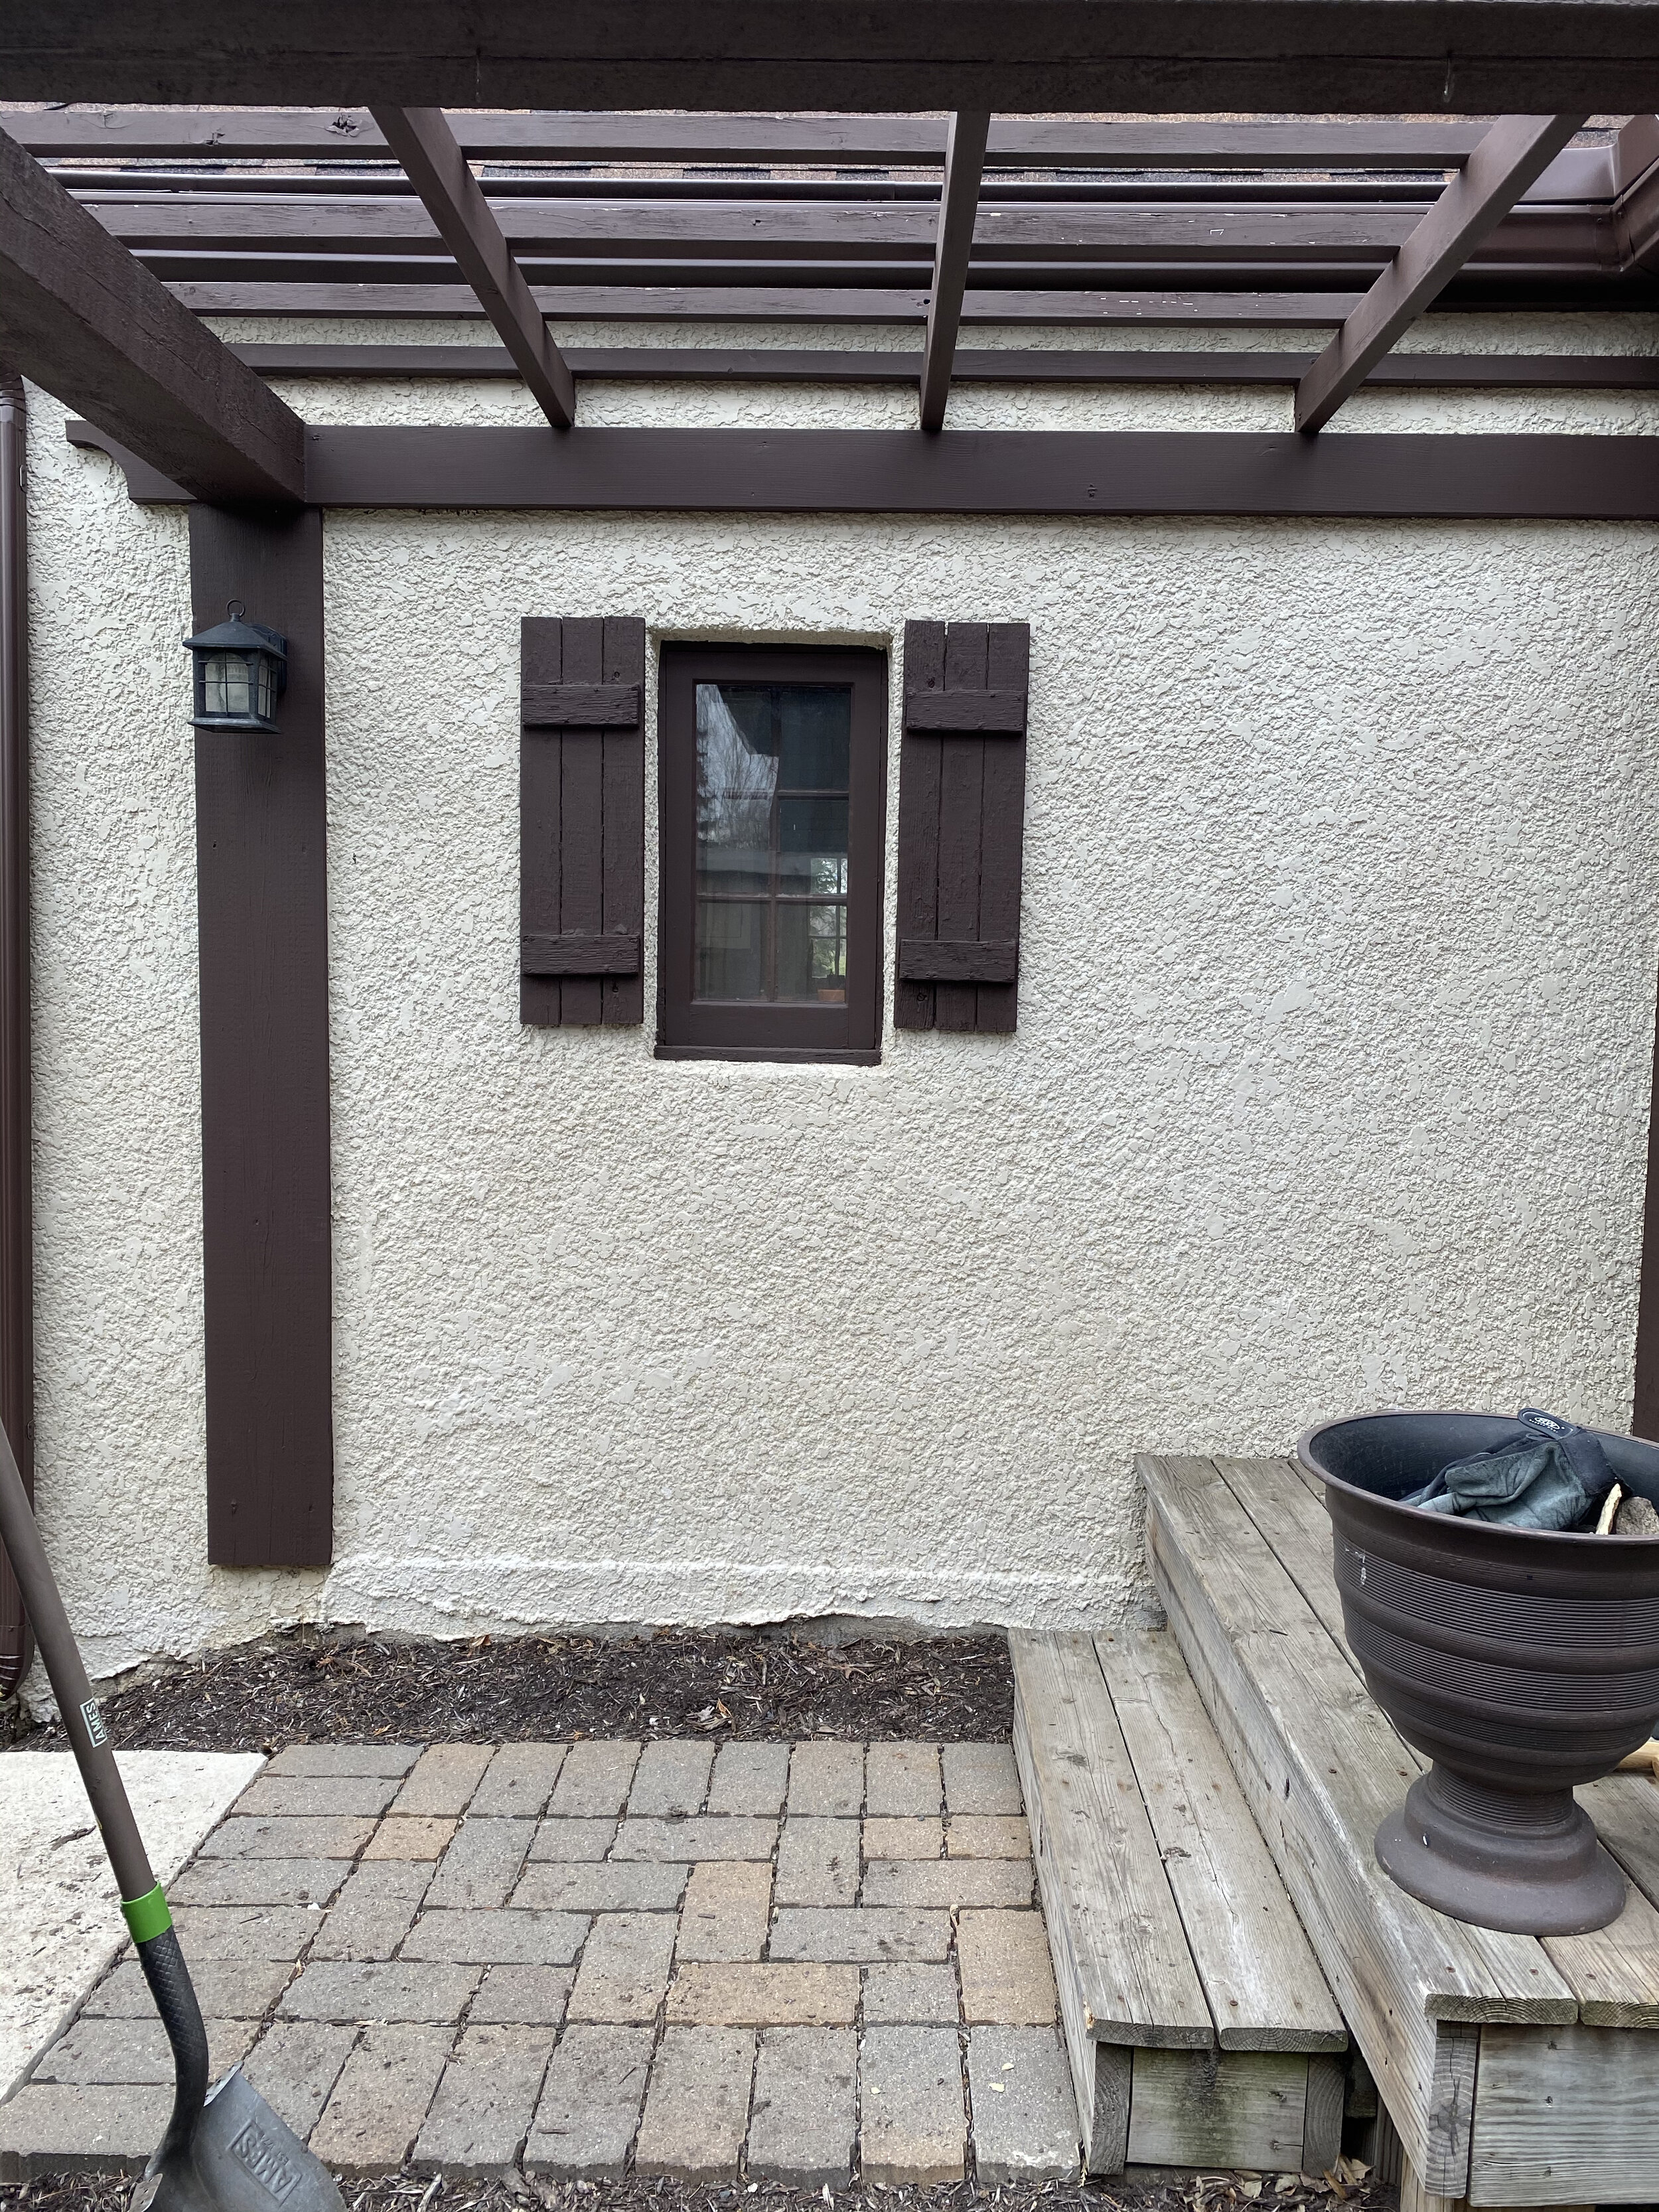
BEFORE
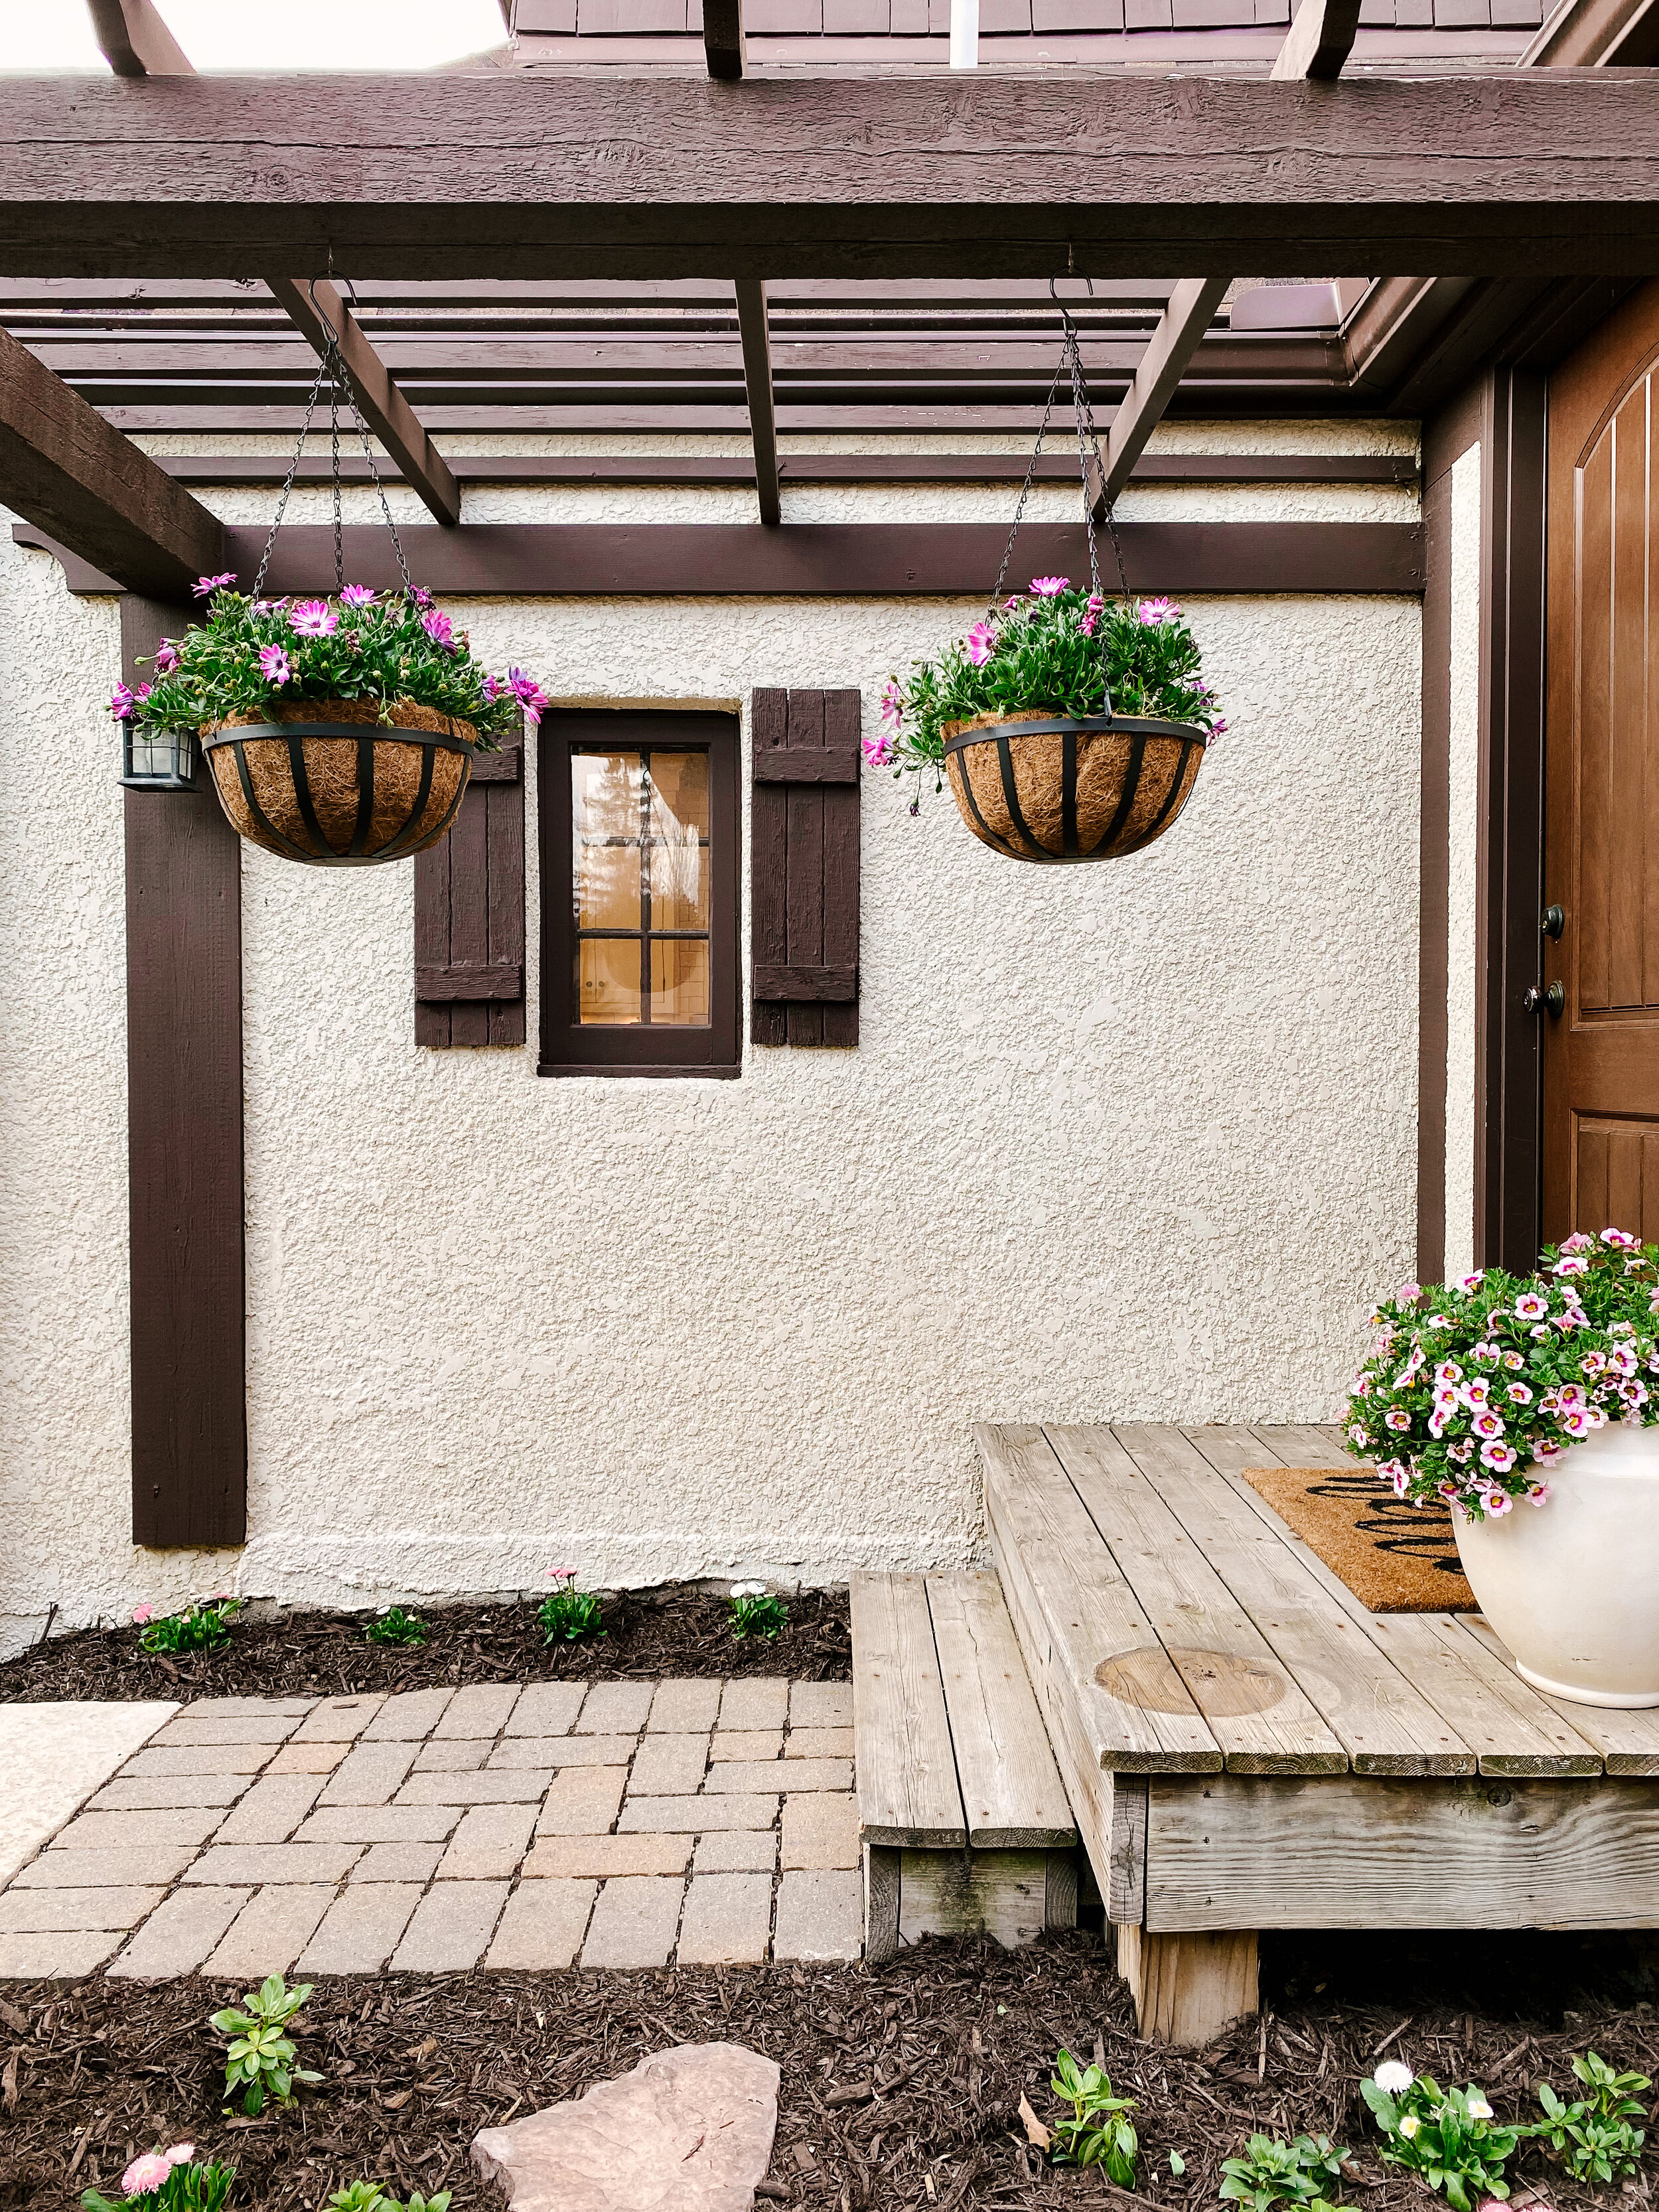
AFTER (African Daisies in 12” Hanging Coco Baskets | Calibrachoa flowers in Large Planter)
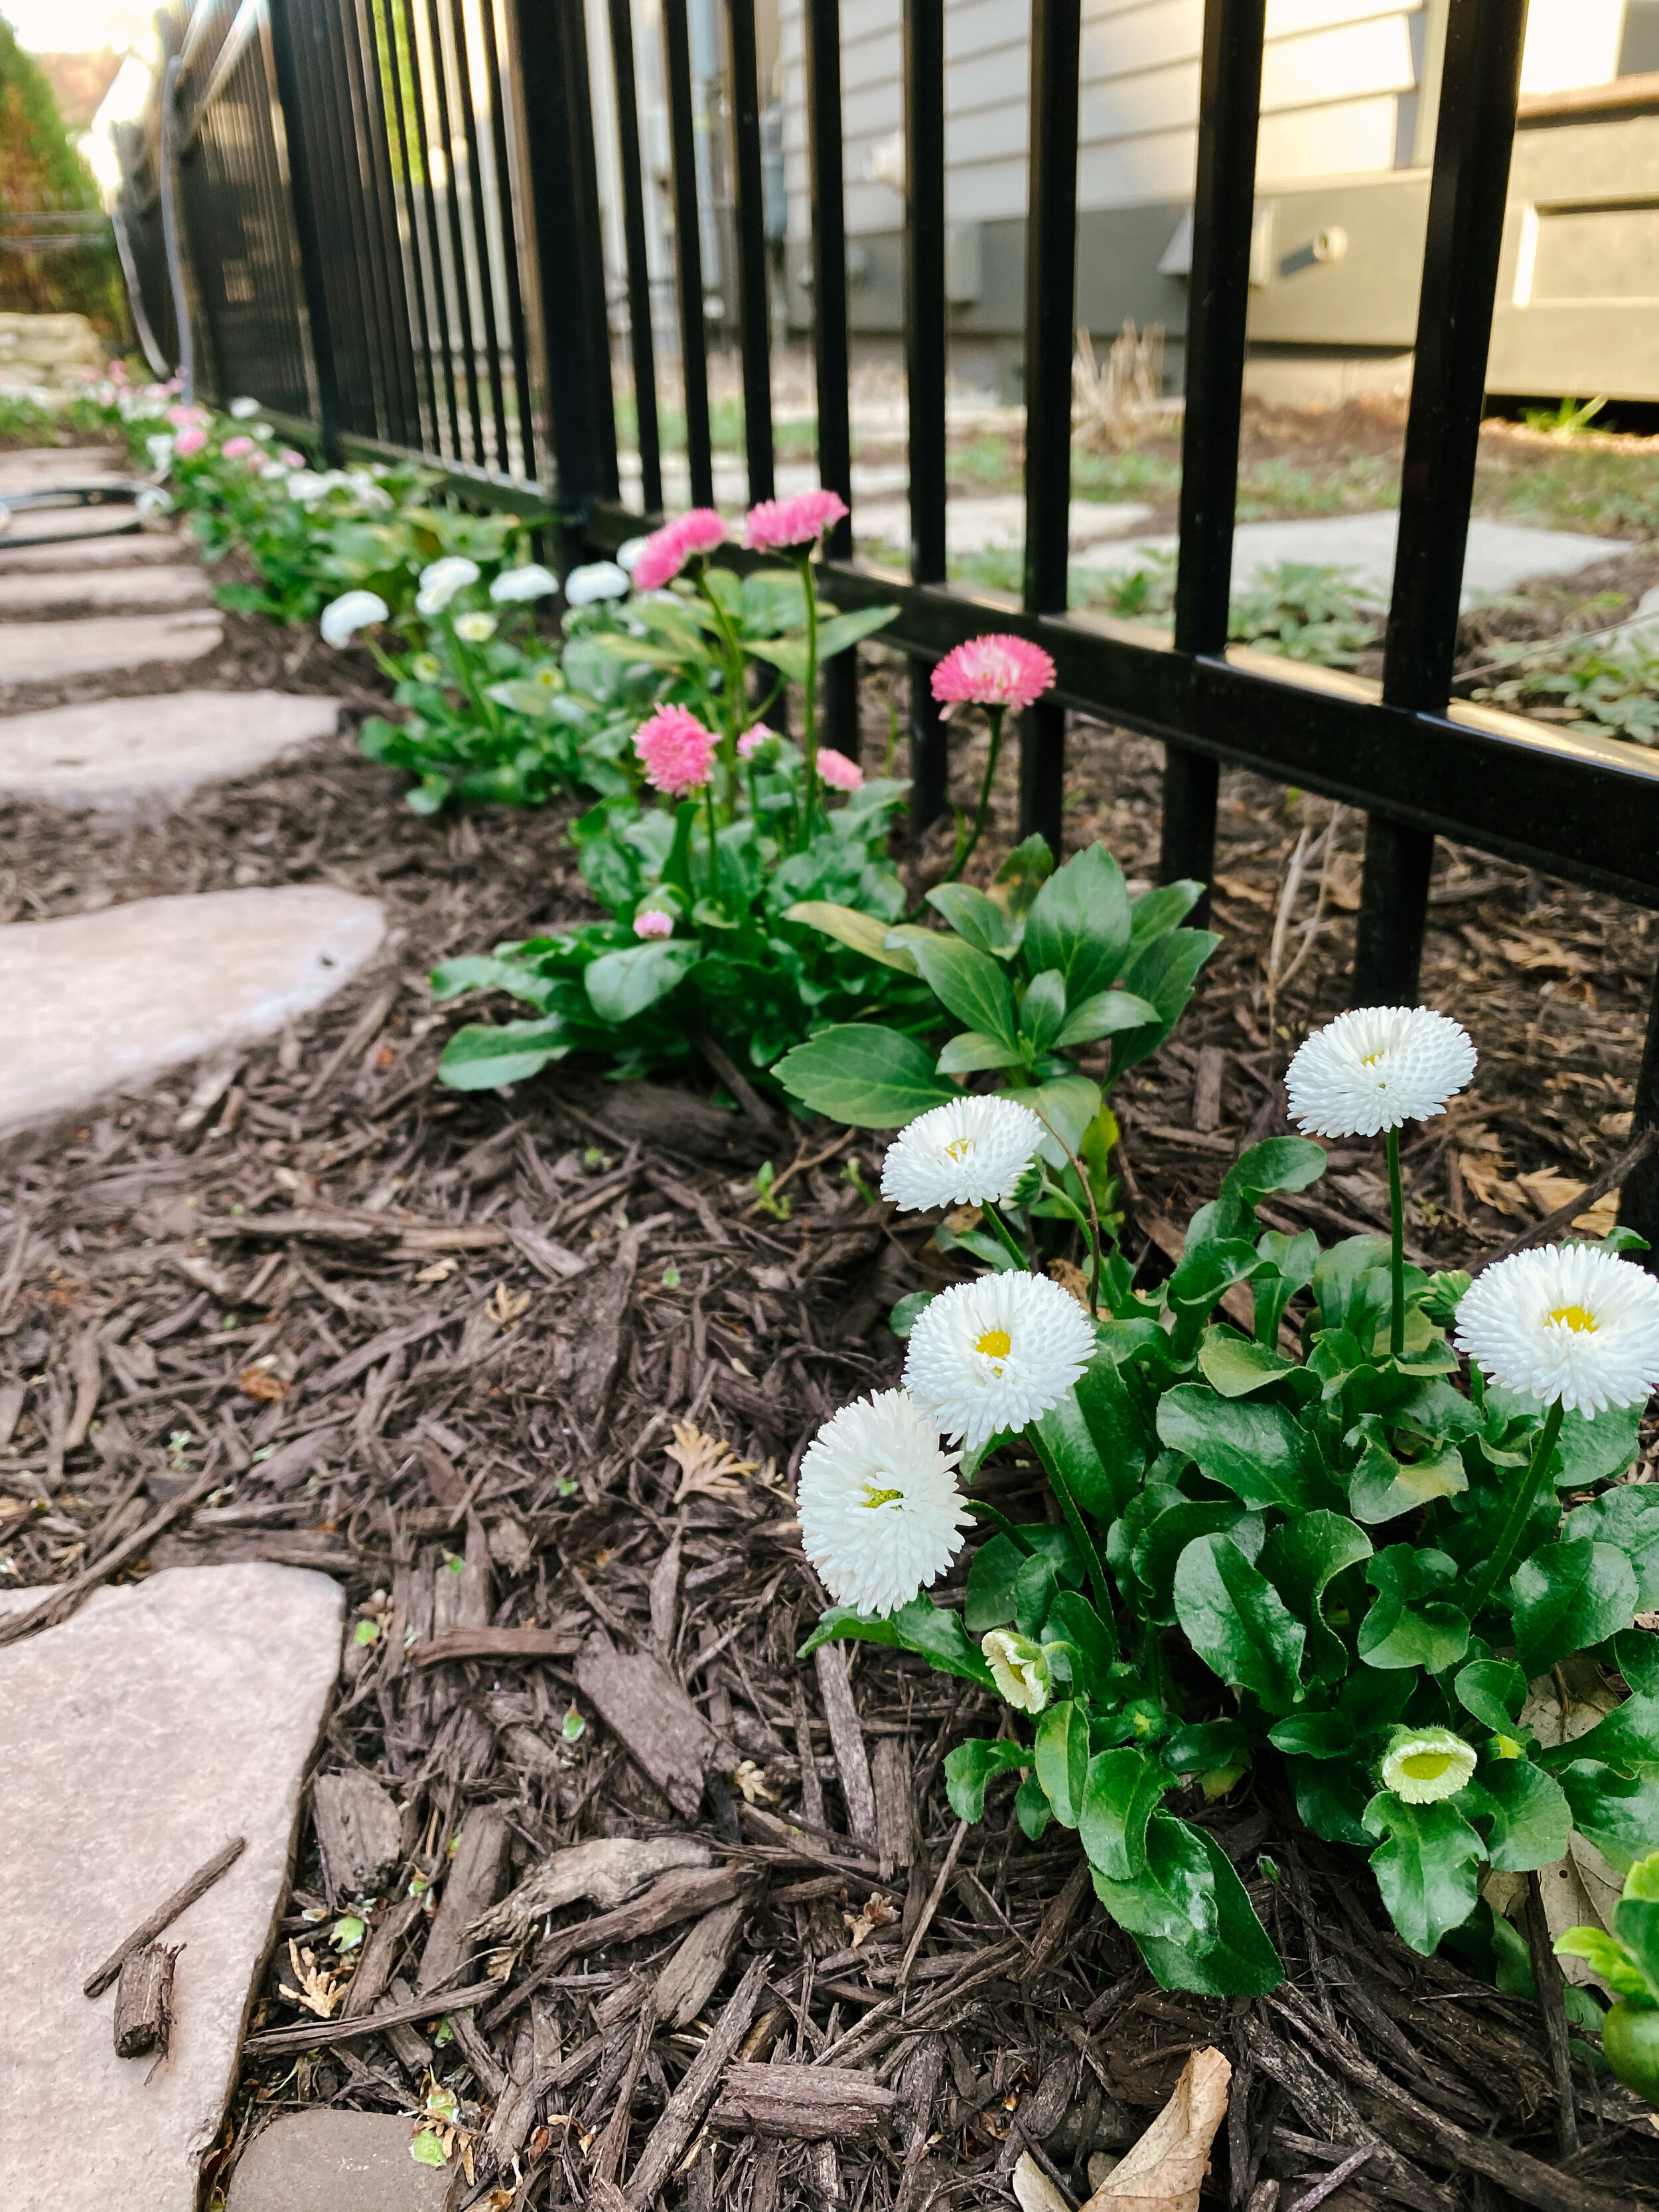
English Daisy and Japanese Pachysandra ground cover are long lasting and provide some nice colors


Absolutely beautiful as always! Already planning my trip to The Home Depot tomorrow! This is such a great use for your backyard!
Thank you! Definitely great use of our small + narrow backyard. Have fun with your project and thank you for reading the blog!
Absolutely beautiful as always! Already planning my trip to The Home Depot tomorrow! This is such a great use for your backyard!
Thank you! Definitely great use of our small + narrow backyard. Have fun with your project and thank you for reading the blog!
Fantastic transformation!
Thank you! We’re so happy with how it all turned out!
Fantastic transformation!
Thank you! We’re so happy with how it all turned out!
Absolutely stunning!!! So happy with you guys 😍
Thank you so much!
Absolutely stunning!!! So happy with you guys 😍
Thank you so much!
Simple and lovely!
Thank you so much!
Simple and lovely!
Thank you so much!
Hello Patti! I love your blog/Instagram/content! I am working on refreshing several areas of my yard this year (I have almost an acre!) And I was curious to see if you have an updated picture of the ground cover 2 years later? Also, have you had any problems keeping that area clear of weeds? Thanks for the inspiration! -Jackie