
DIY Horizontal Murphy Bed for Our Guest Bedroom & Office
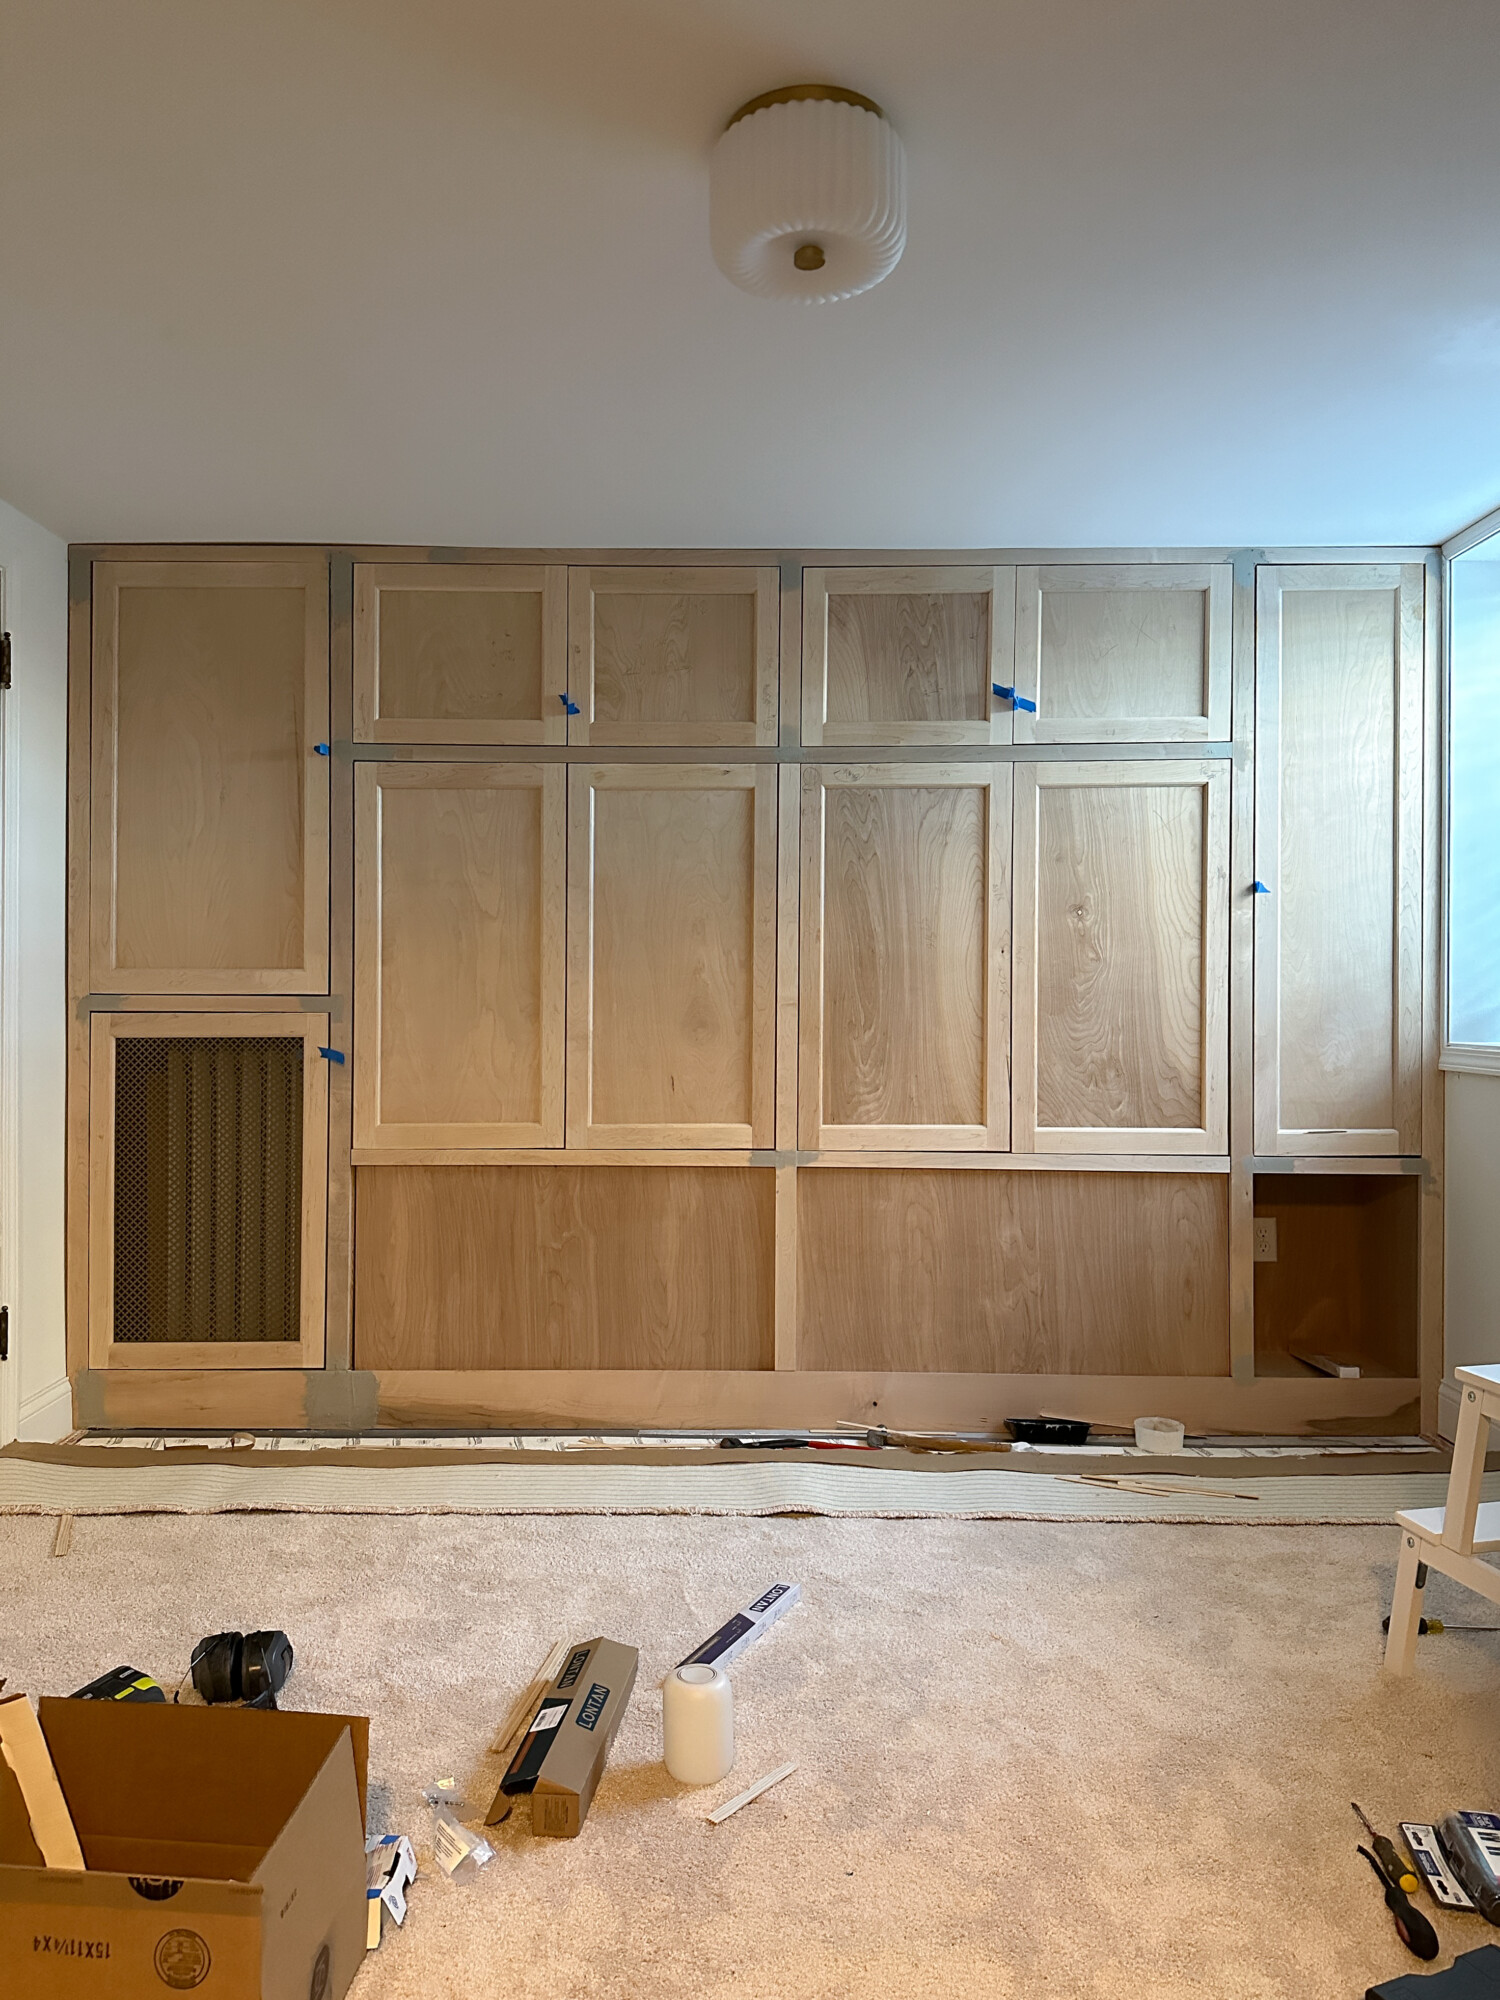
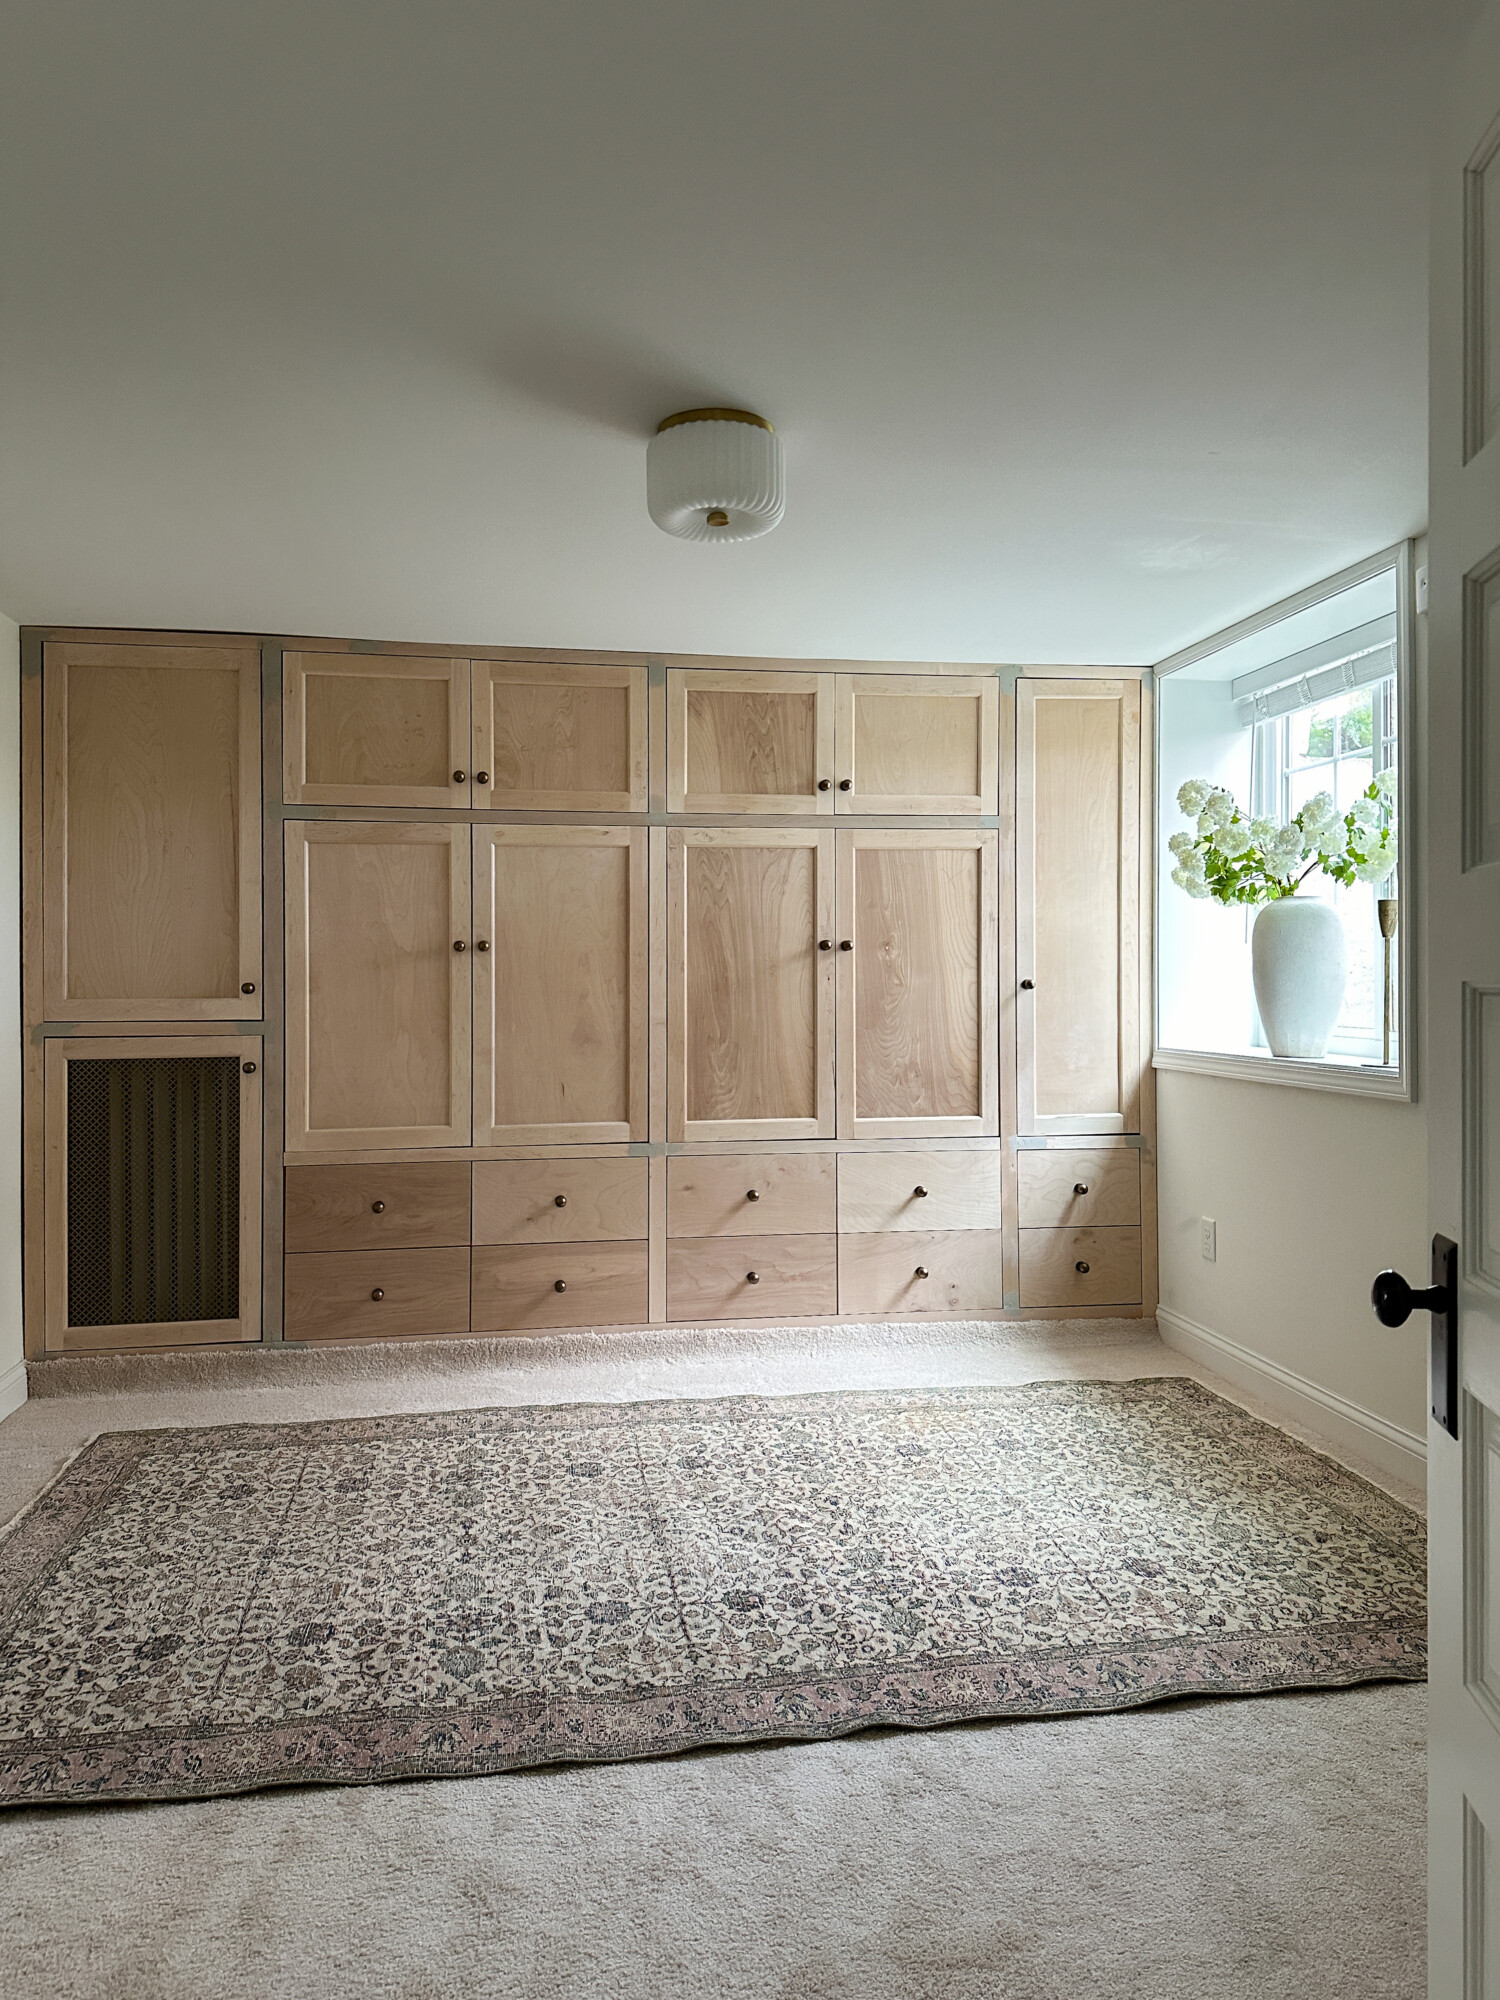
We finished building the DIY horizontal Murphy bed for our guest bedroom & office earlier this month. It looks amazing! There were a few setbacks. In addition to uneven walls and ceiling, the Murphy bed and custom built-in cabinets were beyond Brian’s carpentry skillset. But he persevered and did an incredible job with the seamless design in this 7′ tall room in our basement.
* Update: see the fully painted guest bedroom & office here
*Read more about our basement family room that is adjacent to the guest bedroom
Project & Room Sources

The hard part is done (hopefully) and next up is choosing the paint color! Before I jump into my next blog post with color options, I want to share the resources for the Murphy bed and built-in cabinets to give some guidance to those who are eager to tackle it.
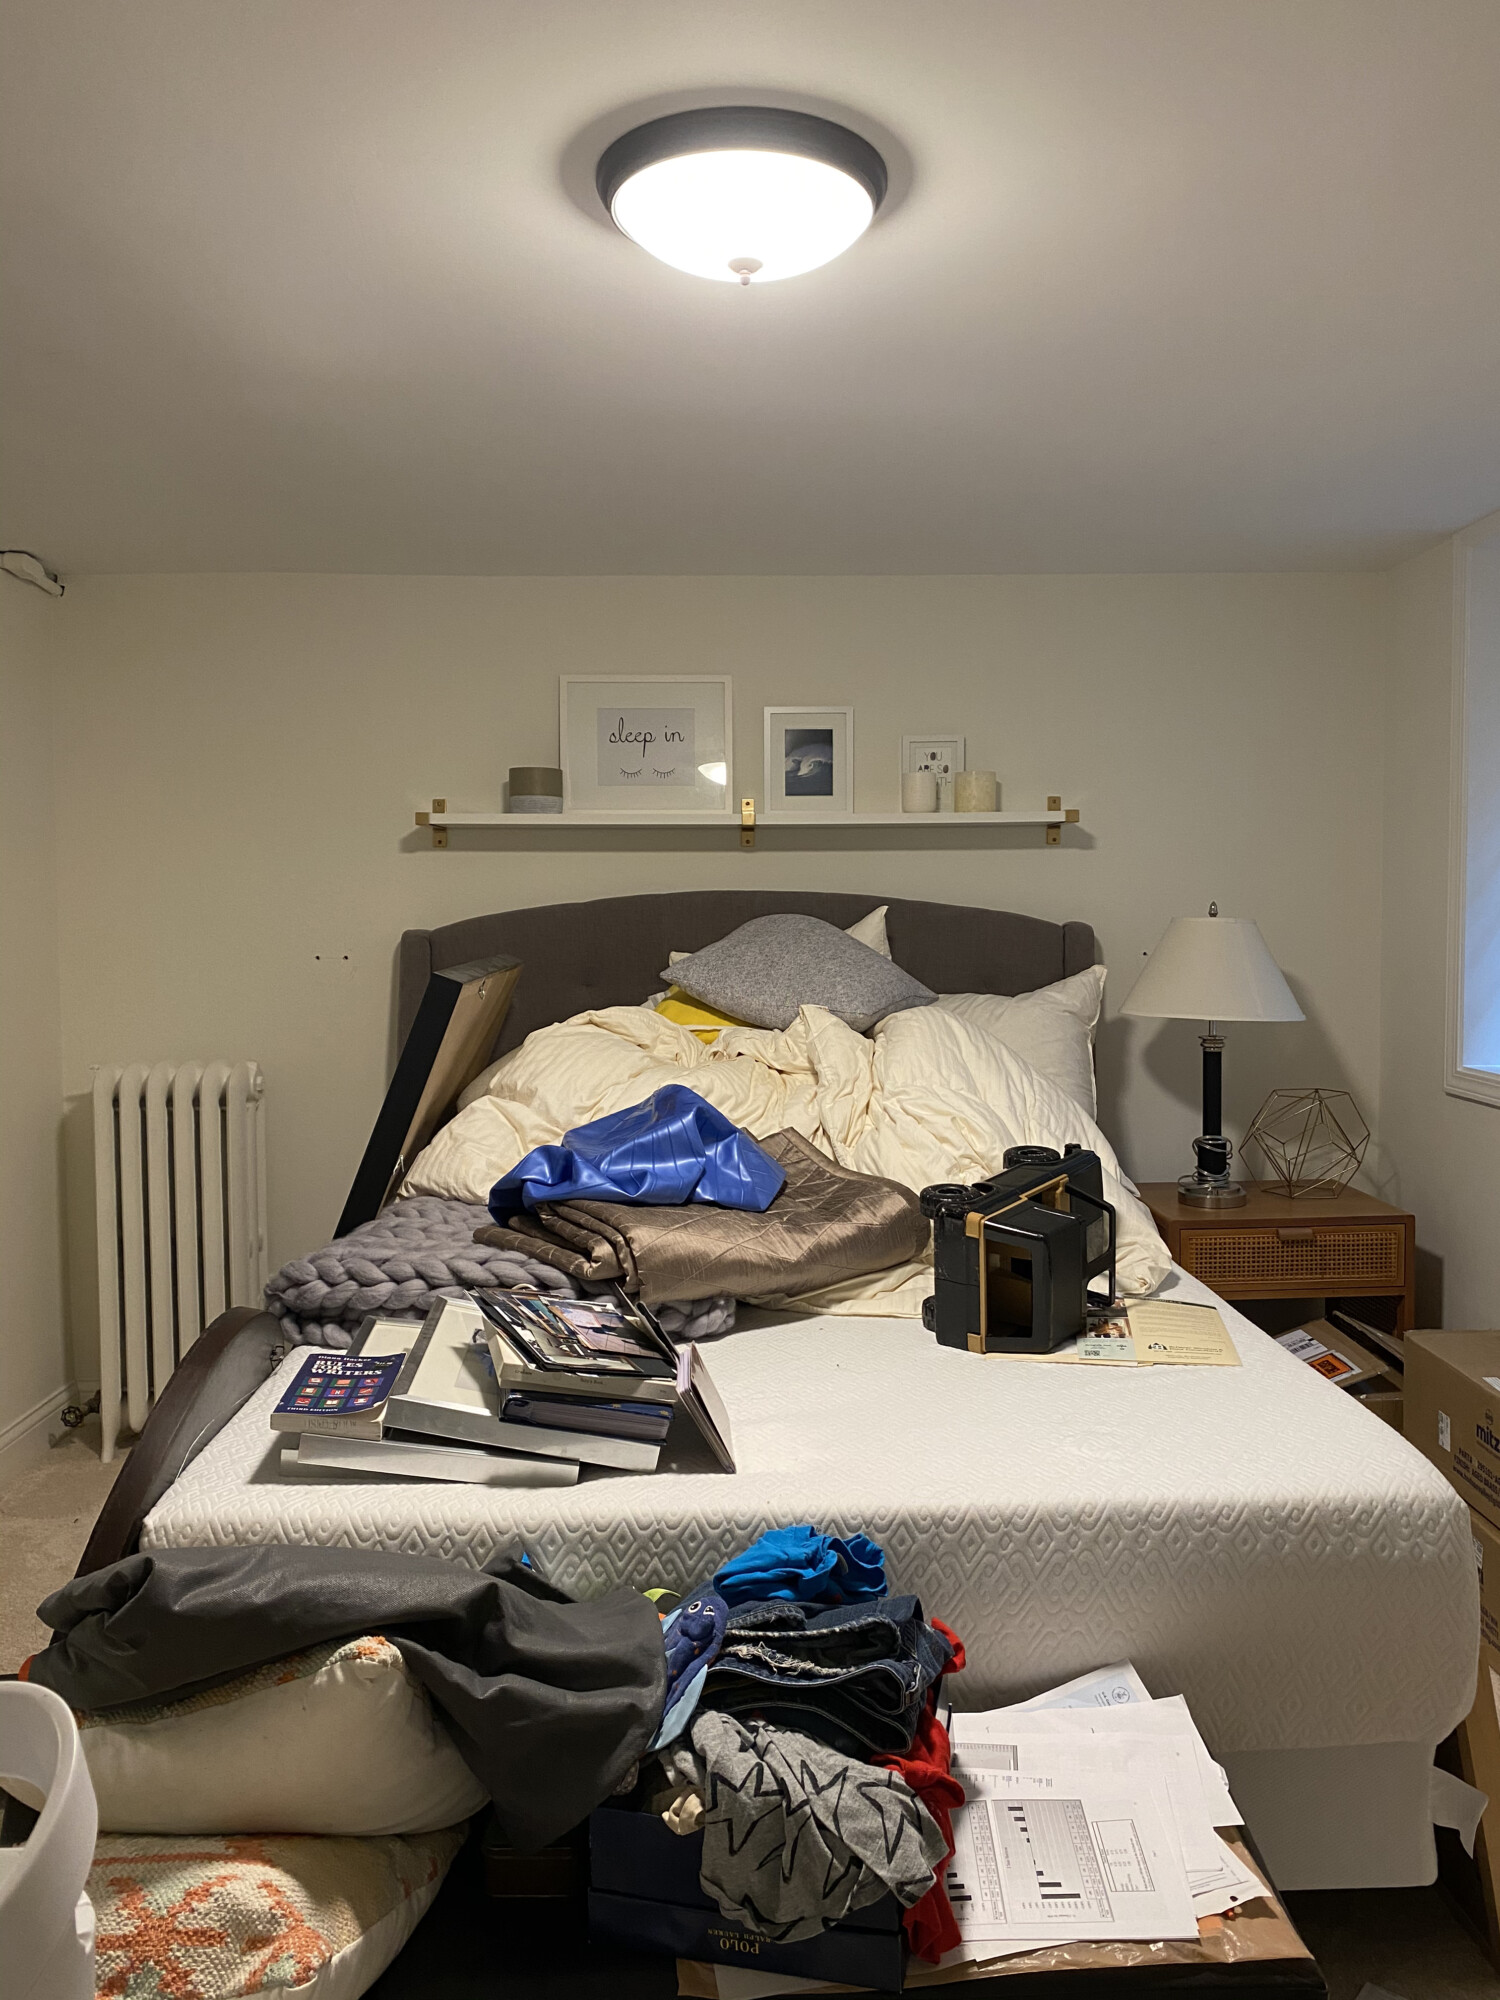
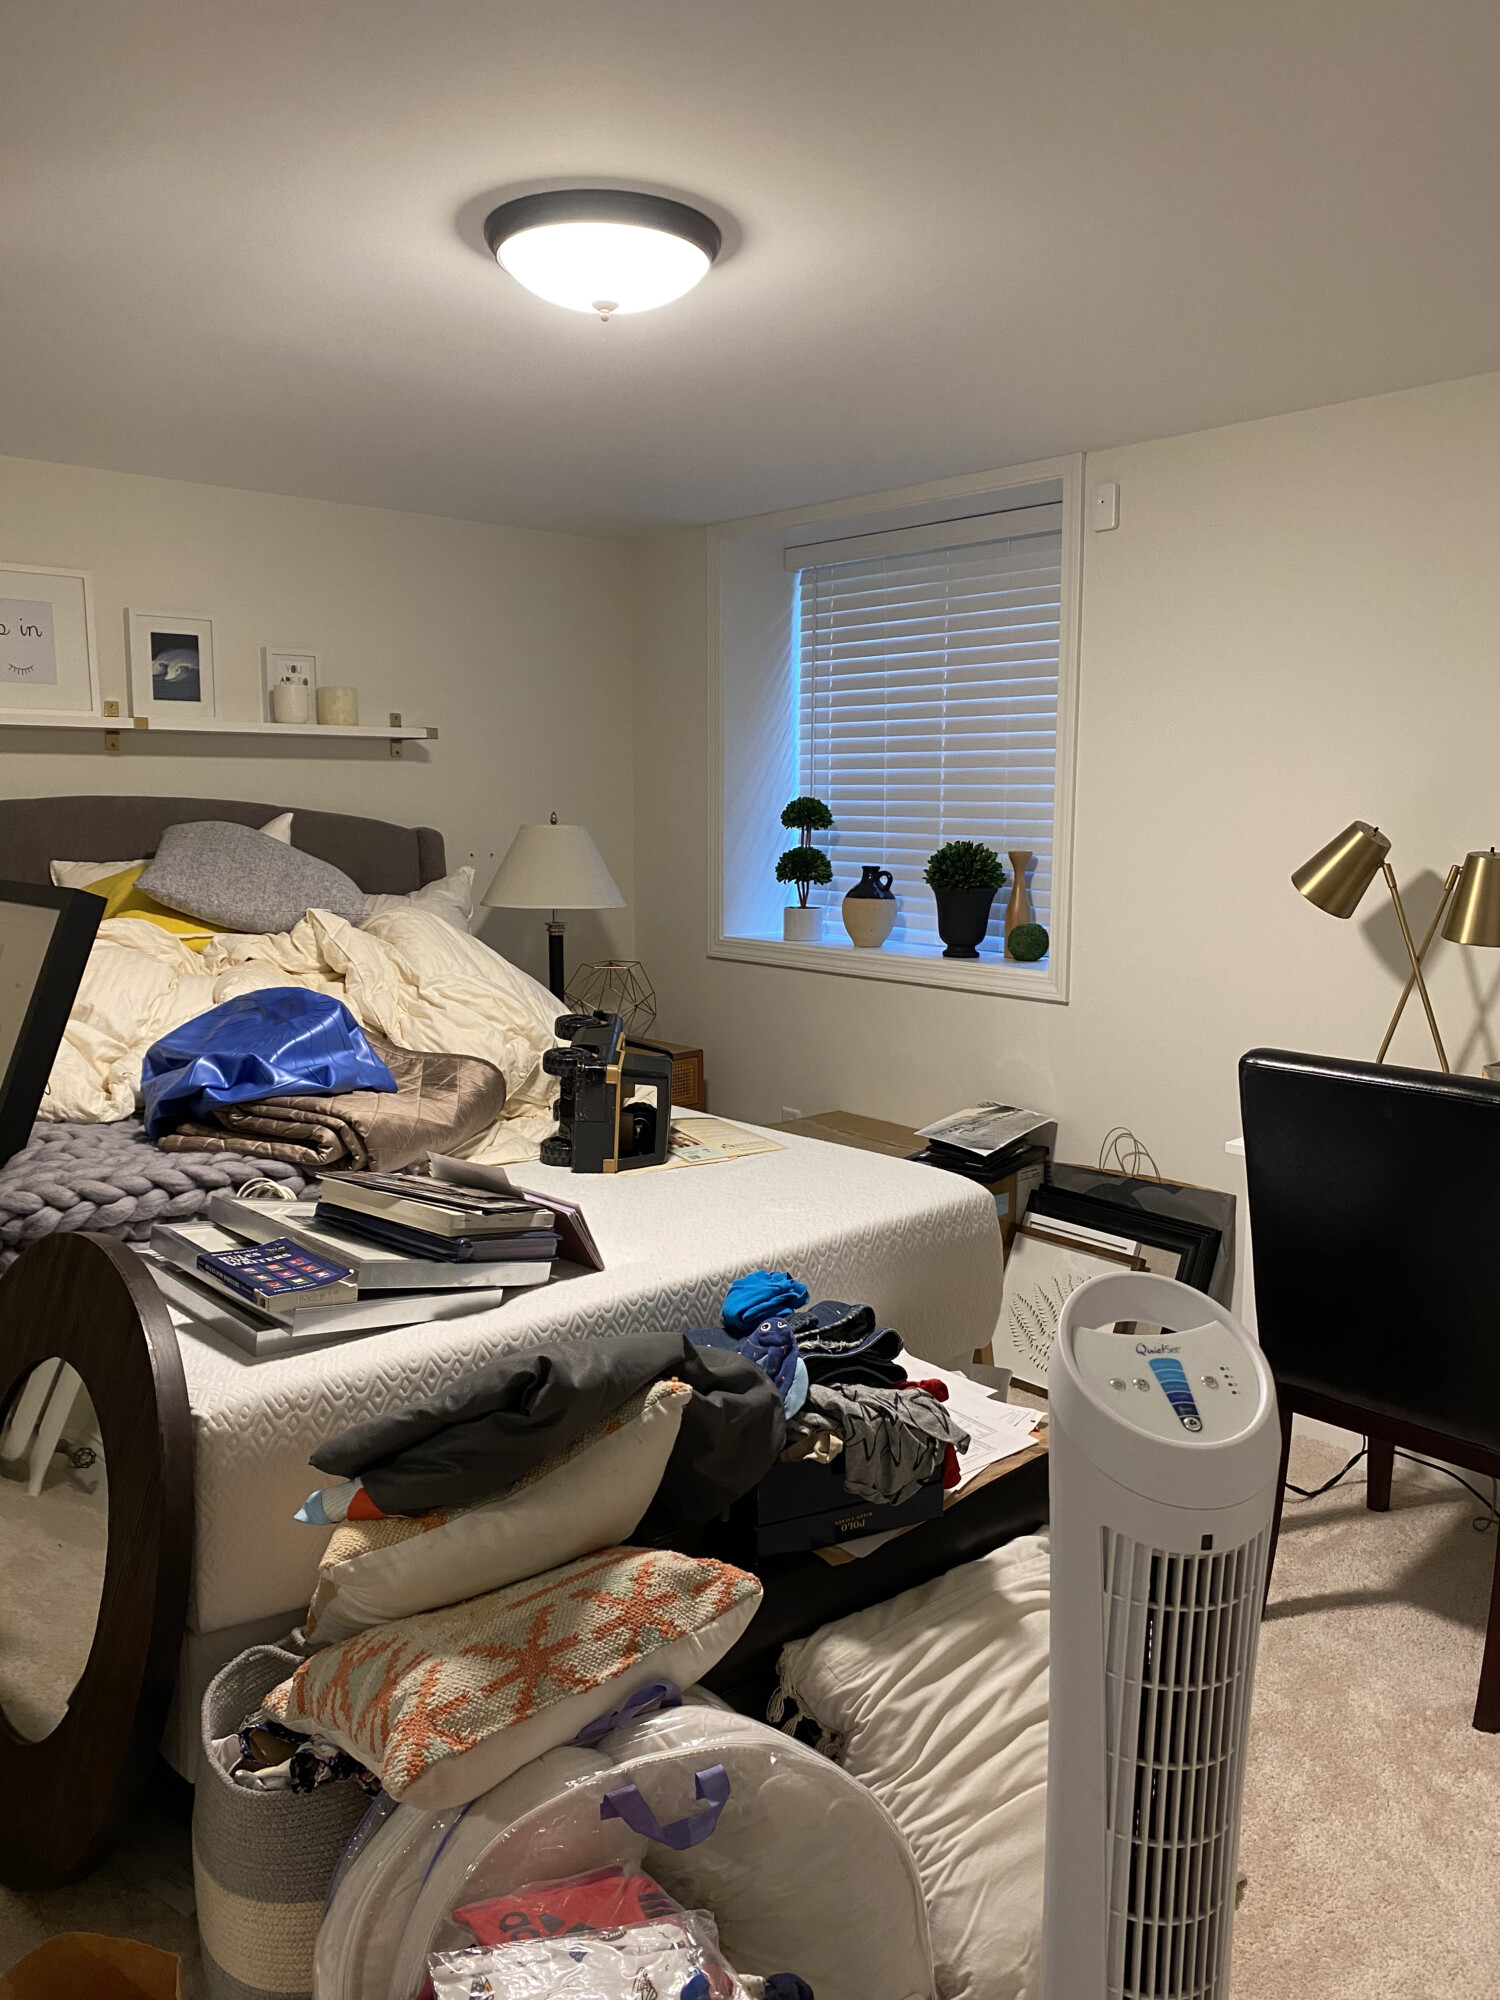
BEFORE
The bed constantly became a dumping ground taking up unnecessary space when we weren’t hosting. We would tidy up when guests stayed over and as soon as they left, it was an invitation to collect things.
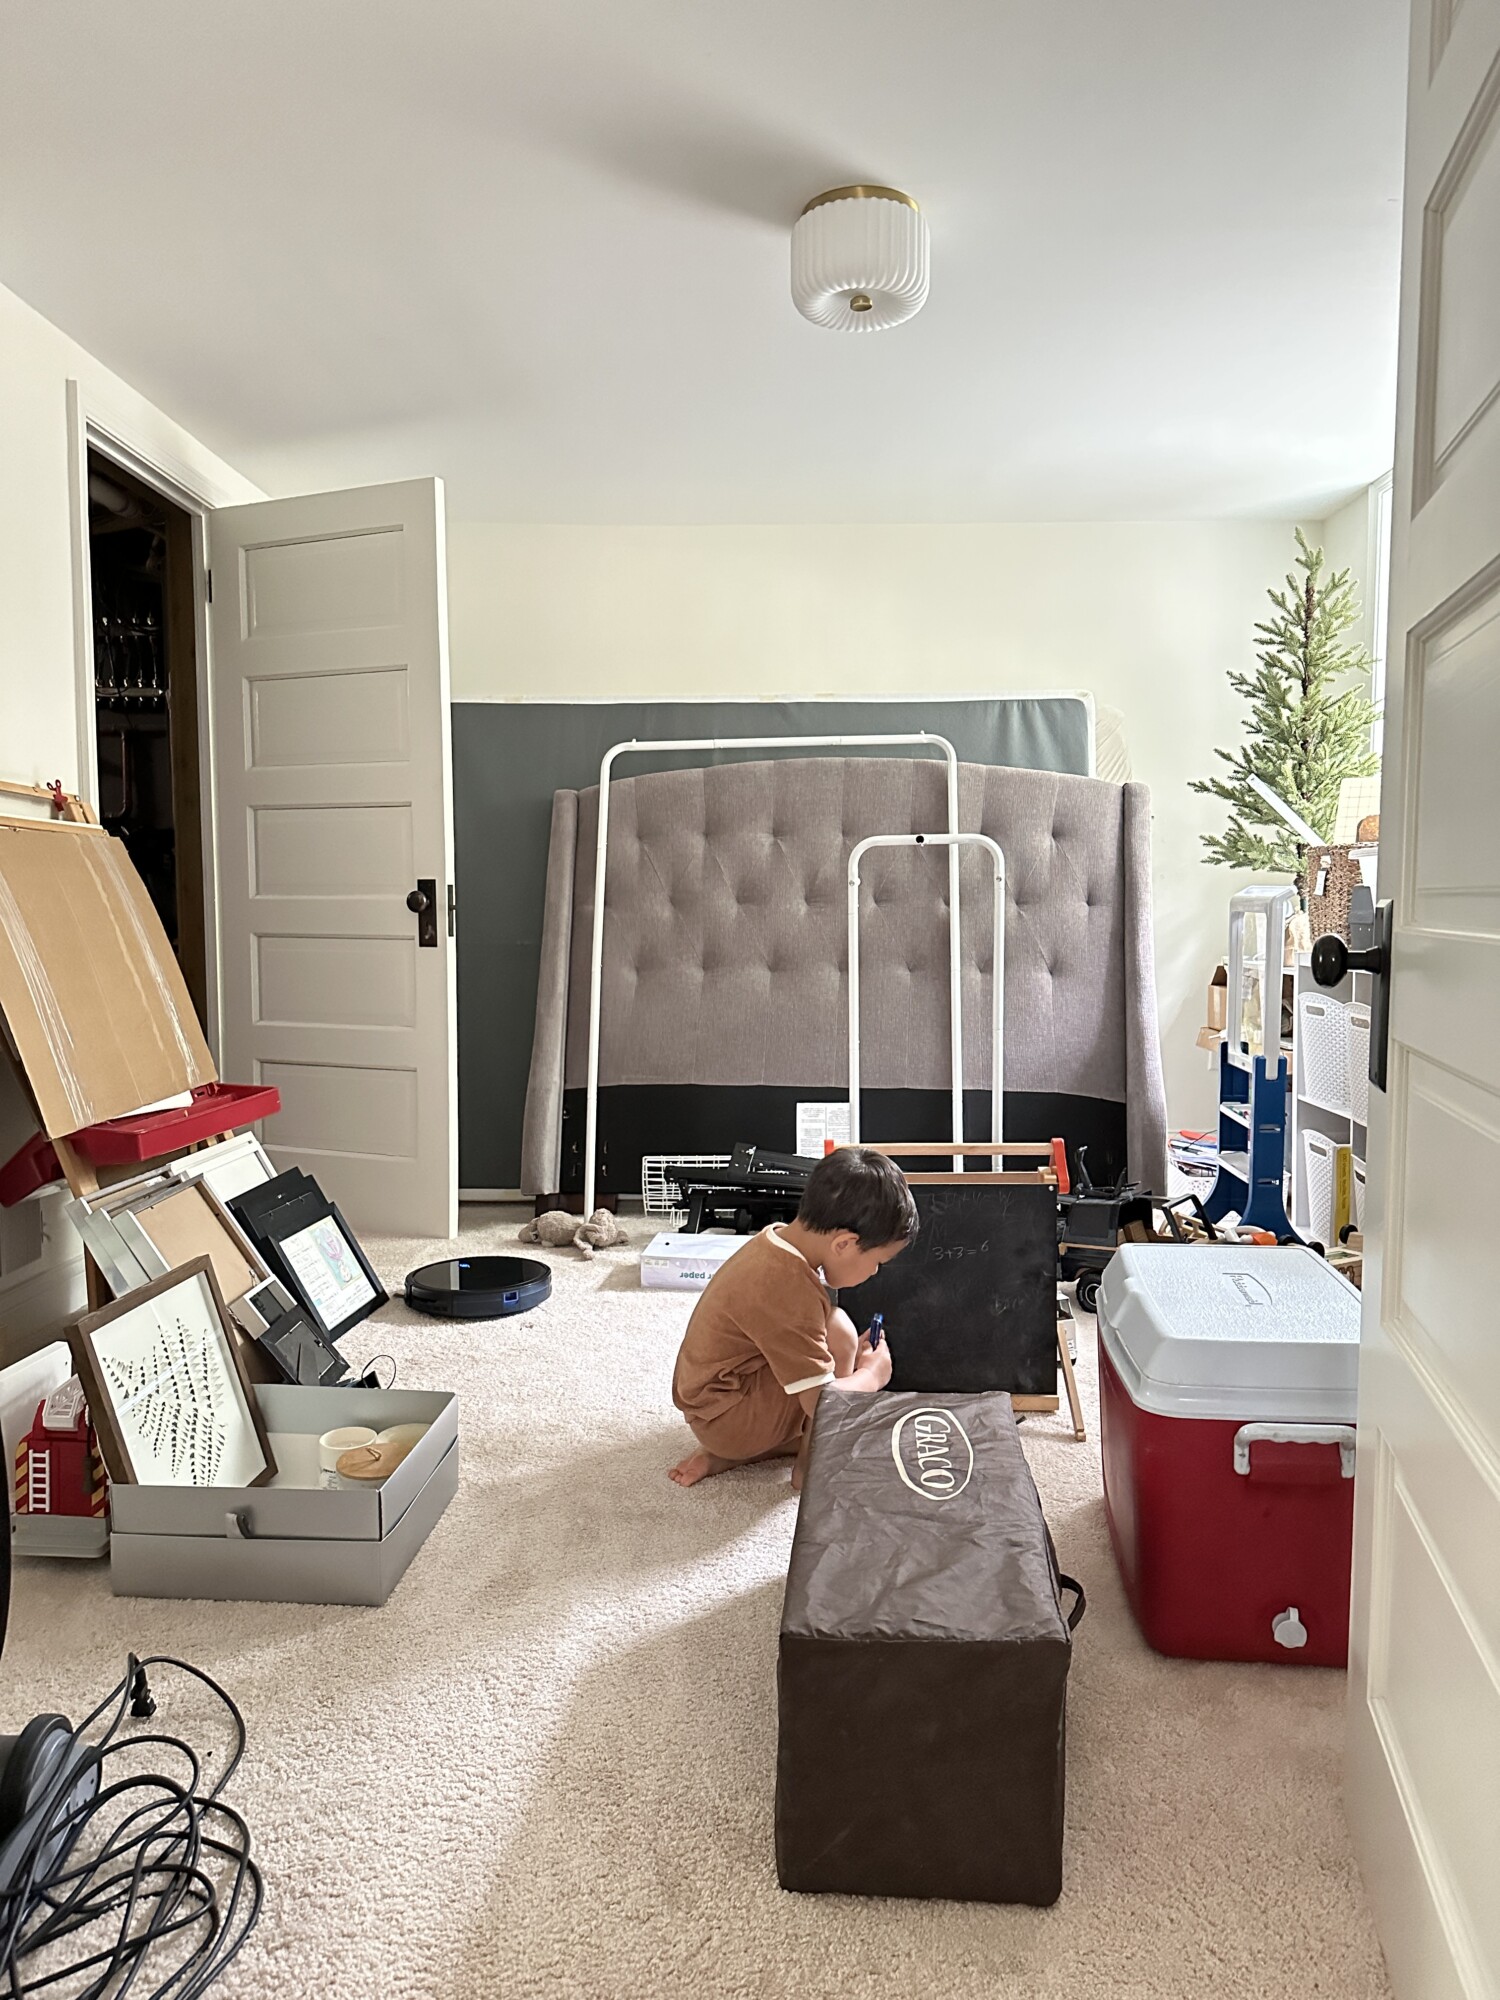
One day, Brian was tired of his office space looking like a cluttered mess and impulsively took the bed apart to commit himself to building a Murphy bed. That’s how the wheels were set in motion!
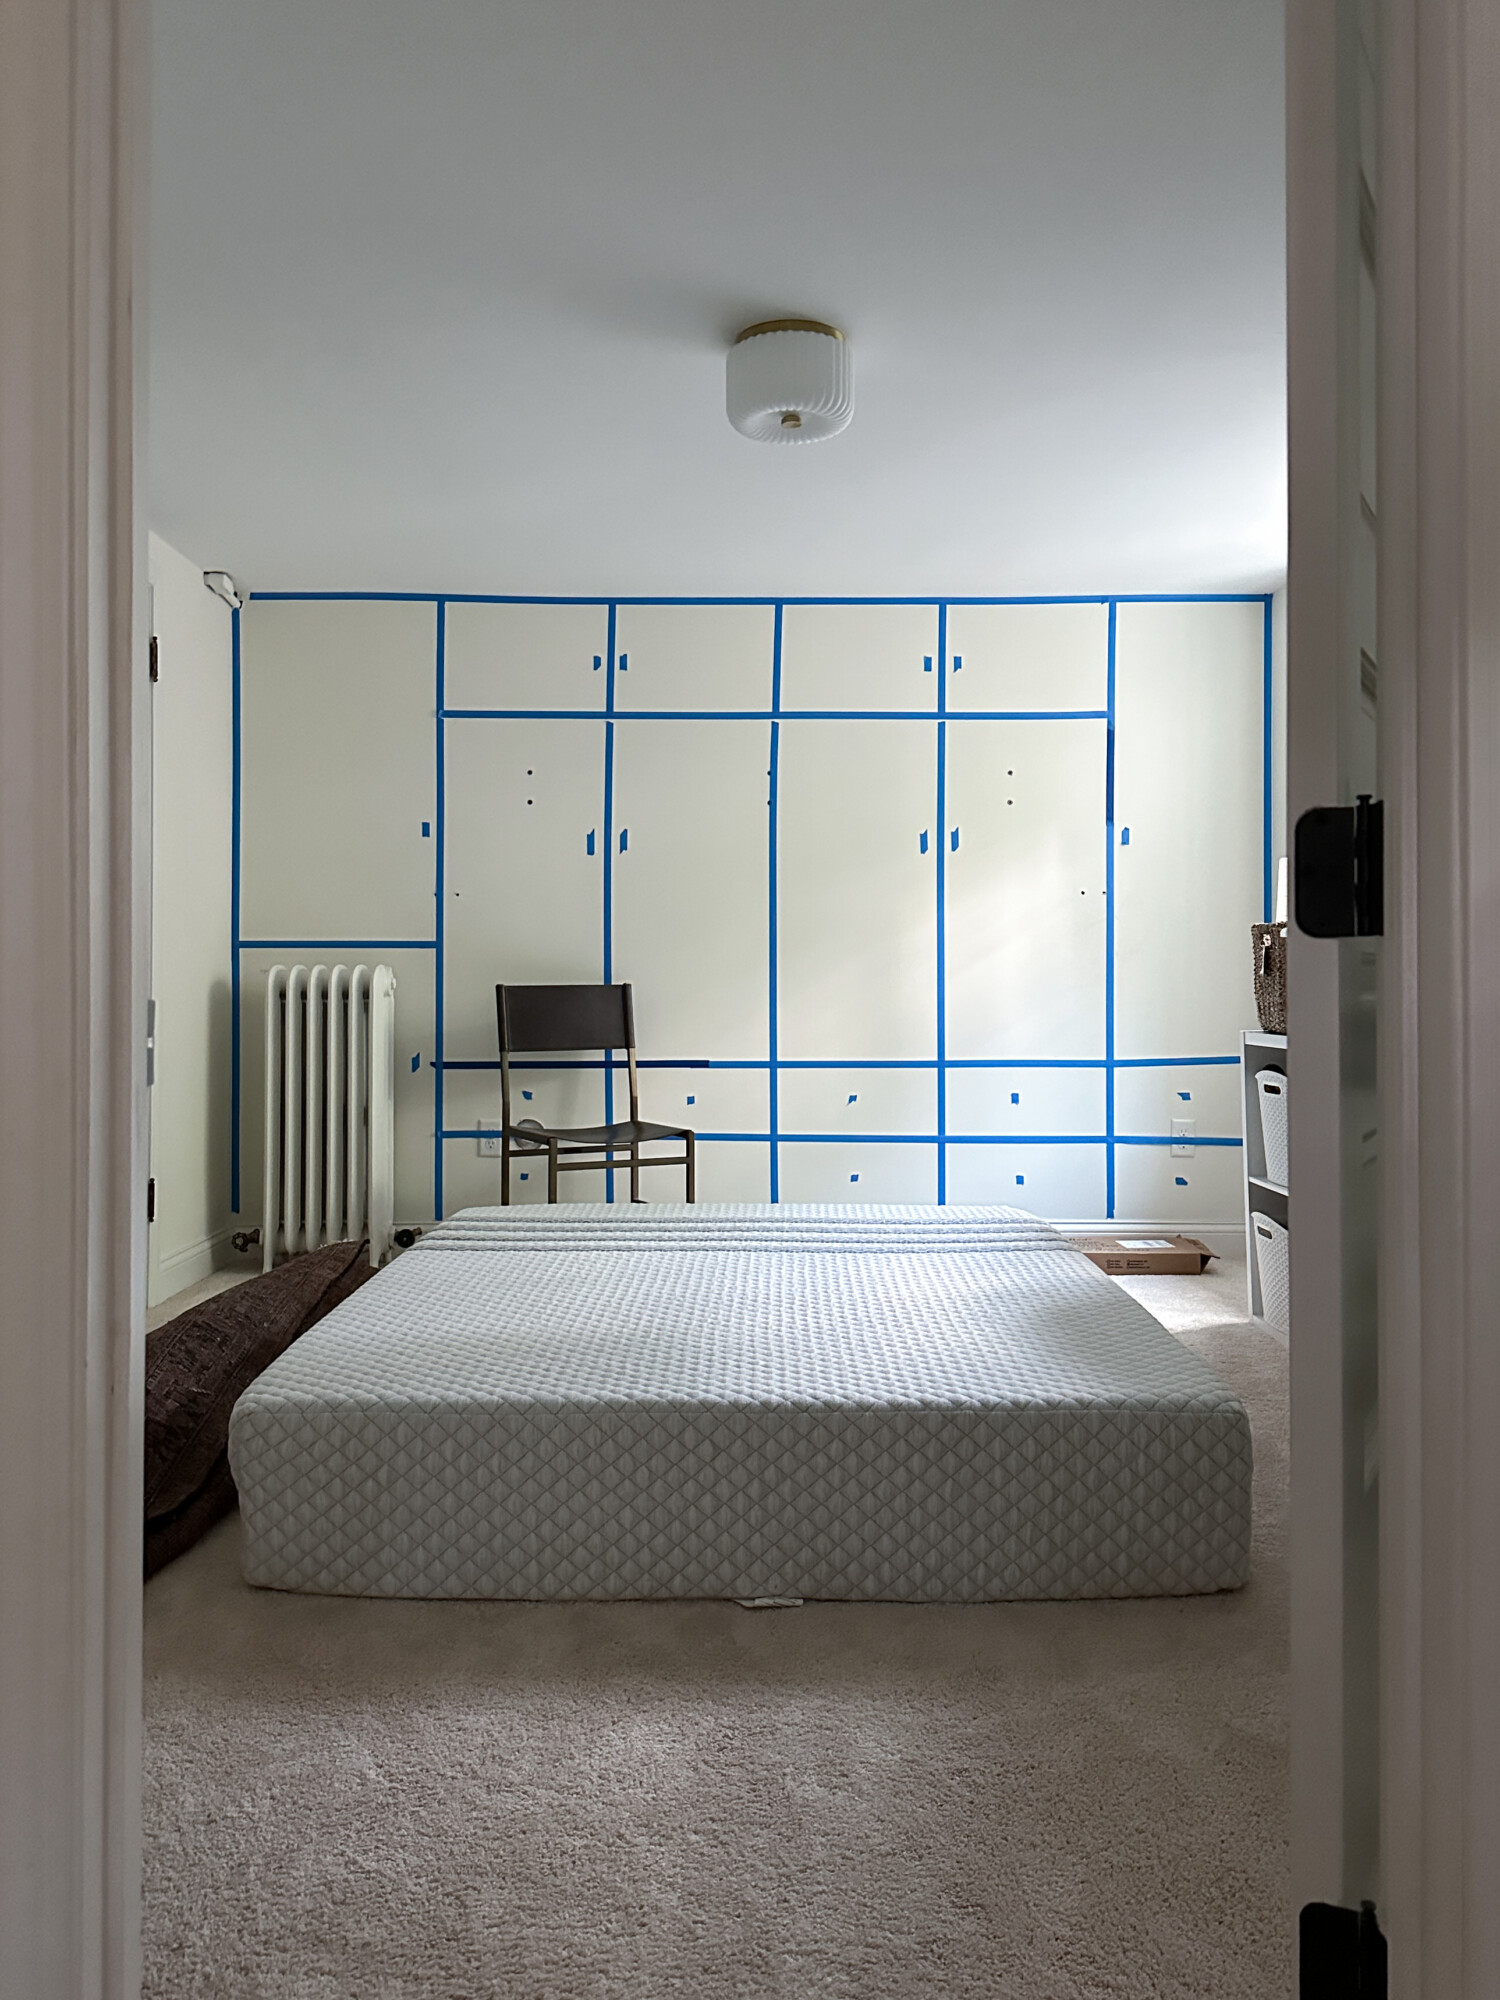
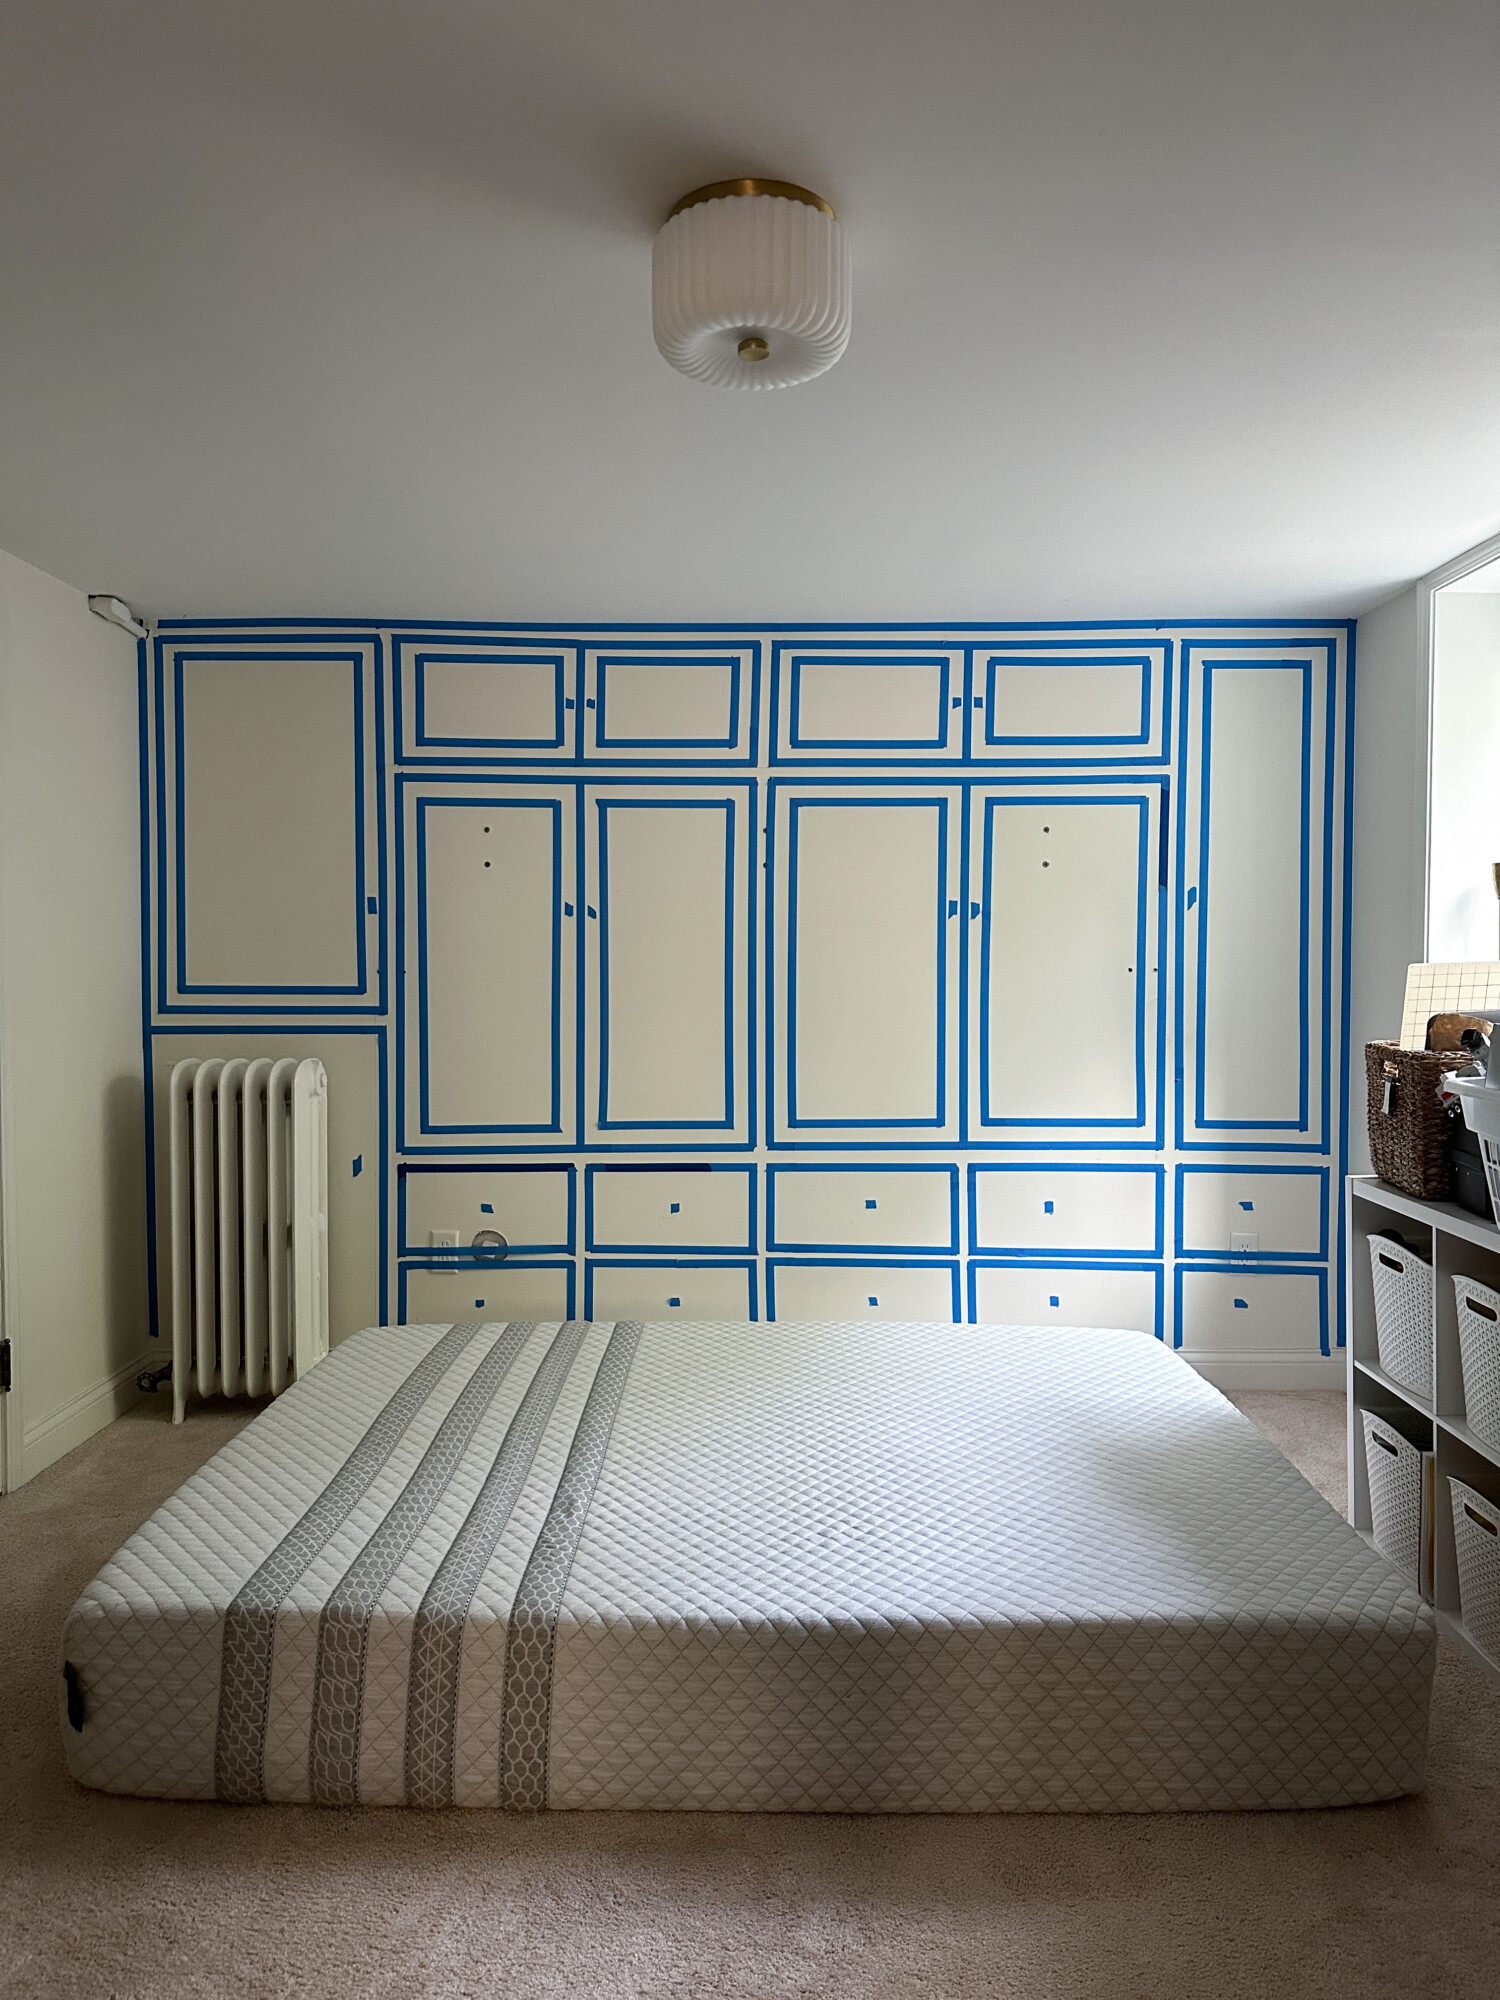
PROJECT PLANNING
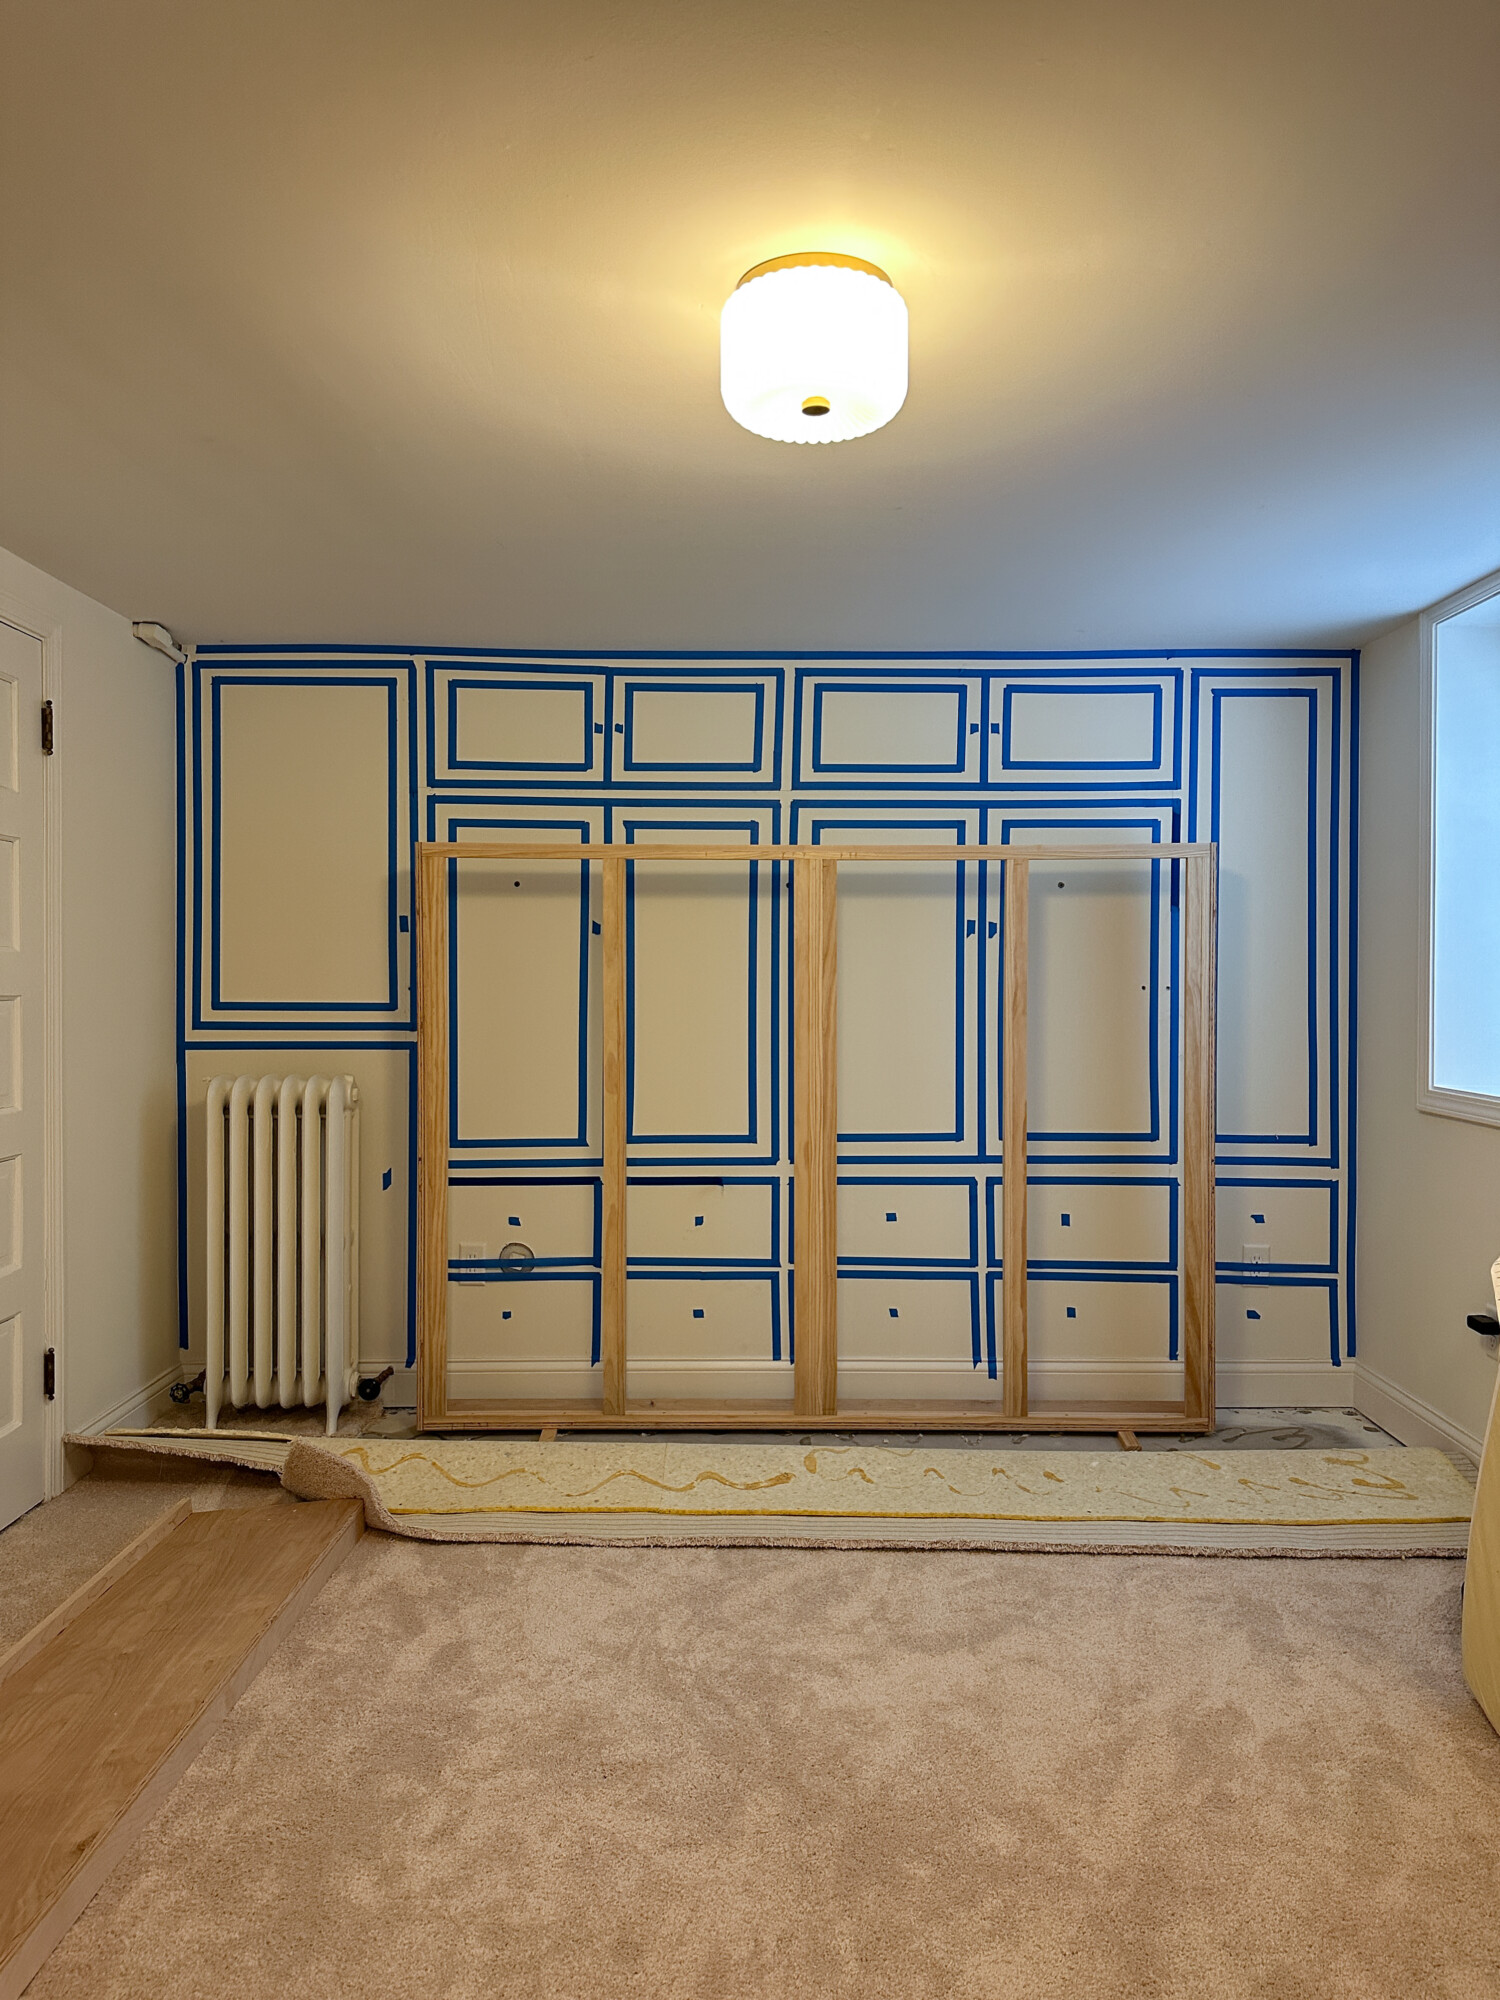
When we started planning out the Murphy bed and built-in cabinets, we taped off the design to help visualize. I highly recommend doing this to solidify your design before the build phase.
This room’s ceiling is about 7′ high which is why the Murphy bed had to be mounted horizontally. There are lots of inspiration/examples for the typical Murphy bed vertical setups but not much for horizontal setups. However, we came across this one from Lumber Jocks that sparked an idea for the inset cabinet design.
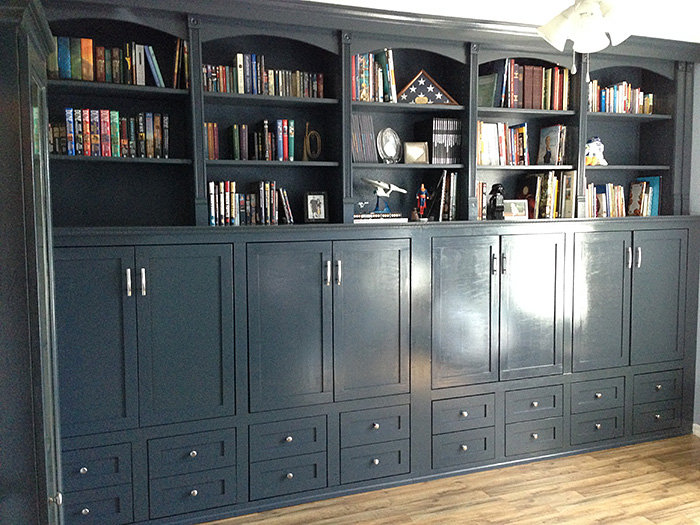
Images via Lumber Jocks
We knew the inset design would be the most challenging but agreed it was the right look for our home. Once we decided, Brian started researching for the best DIY Murphy bed kit. We landed on this one. It had amazing reviews and excellent customer service by answering all of our questions.
BUILDING + MOUNTING THE MURPHY BED
Murphy Bed and Built-in Cabinet Tools and Materials
The kit has really great instructions. A lot more informative than what I can share here so I’d recommend following their plan for safety and structural support.
Step 1: Build the Murphy bed frame
We used pine lumber following the plan in the Murphy bed kit.
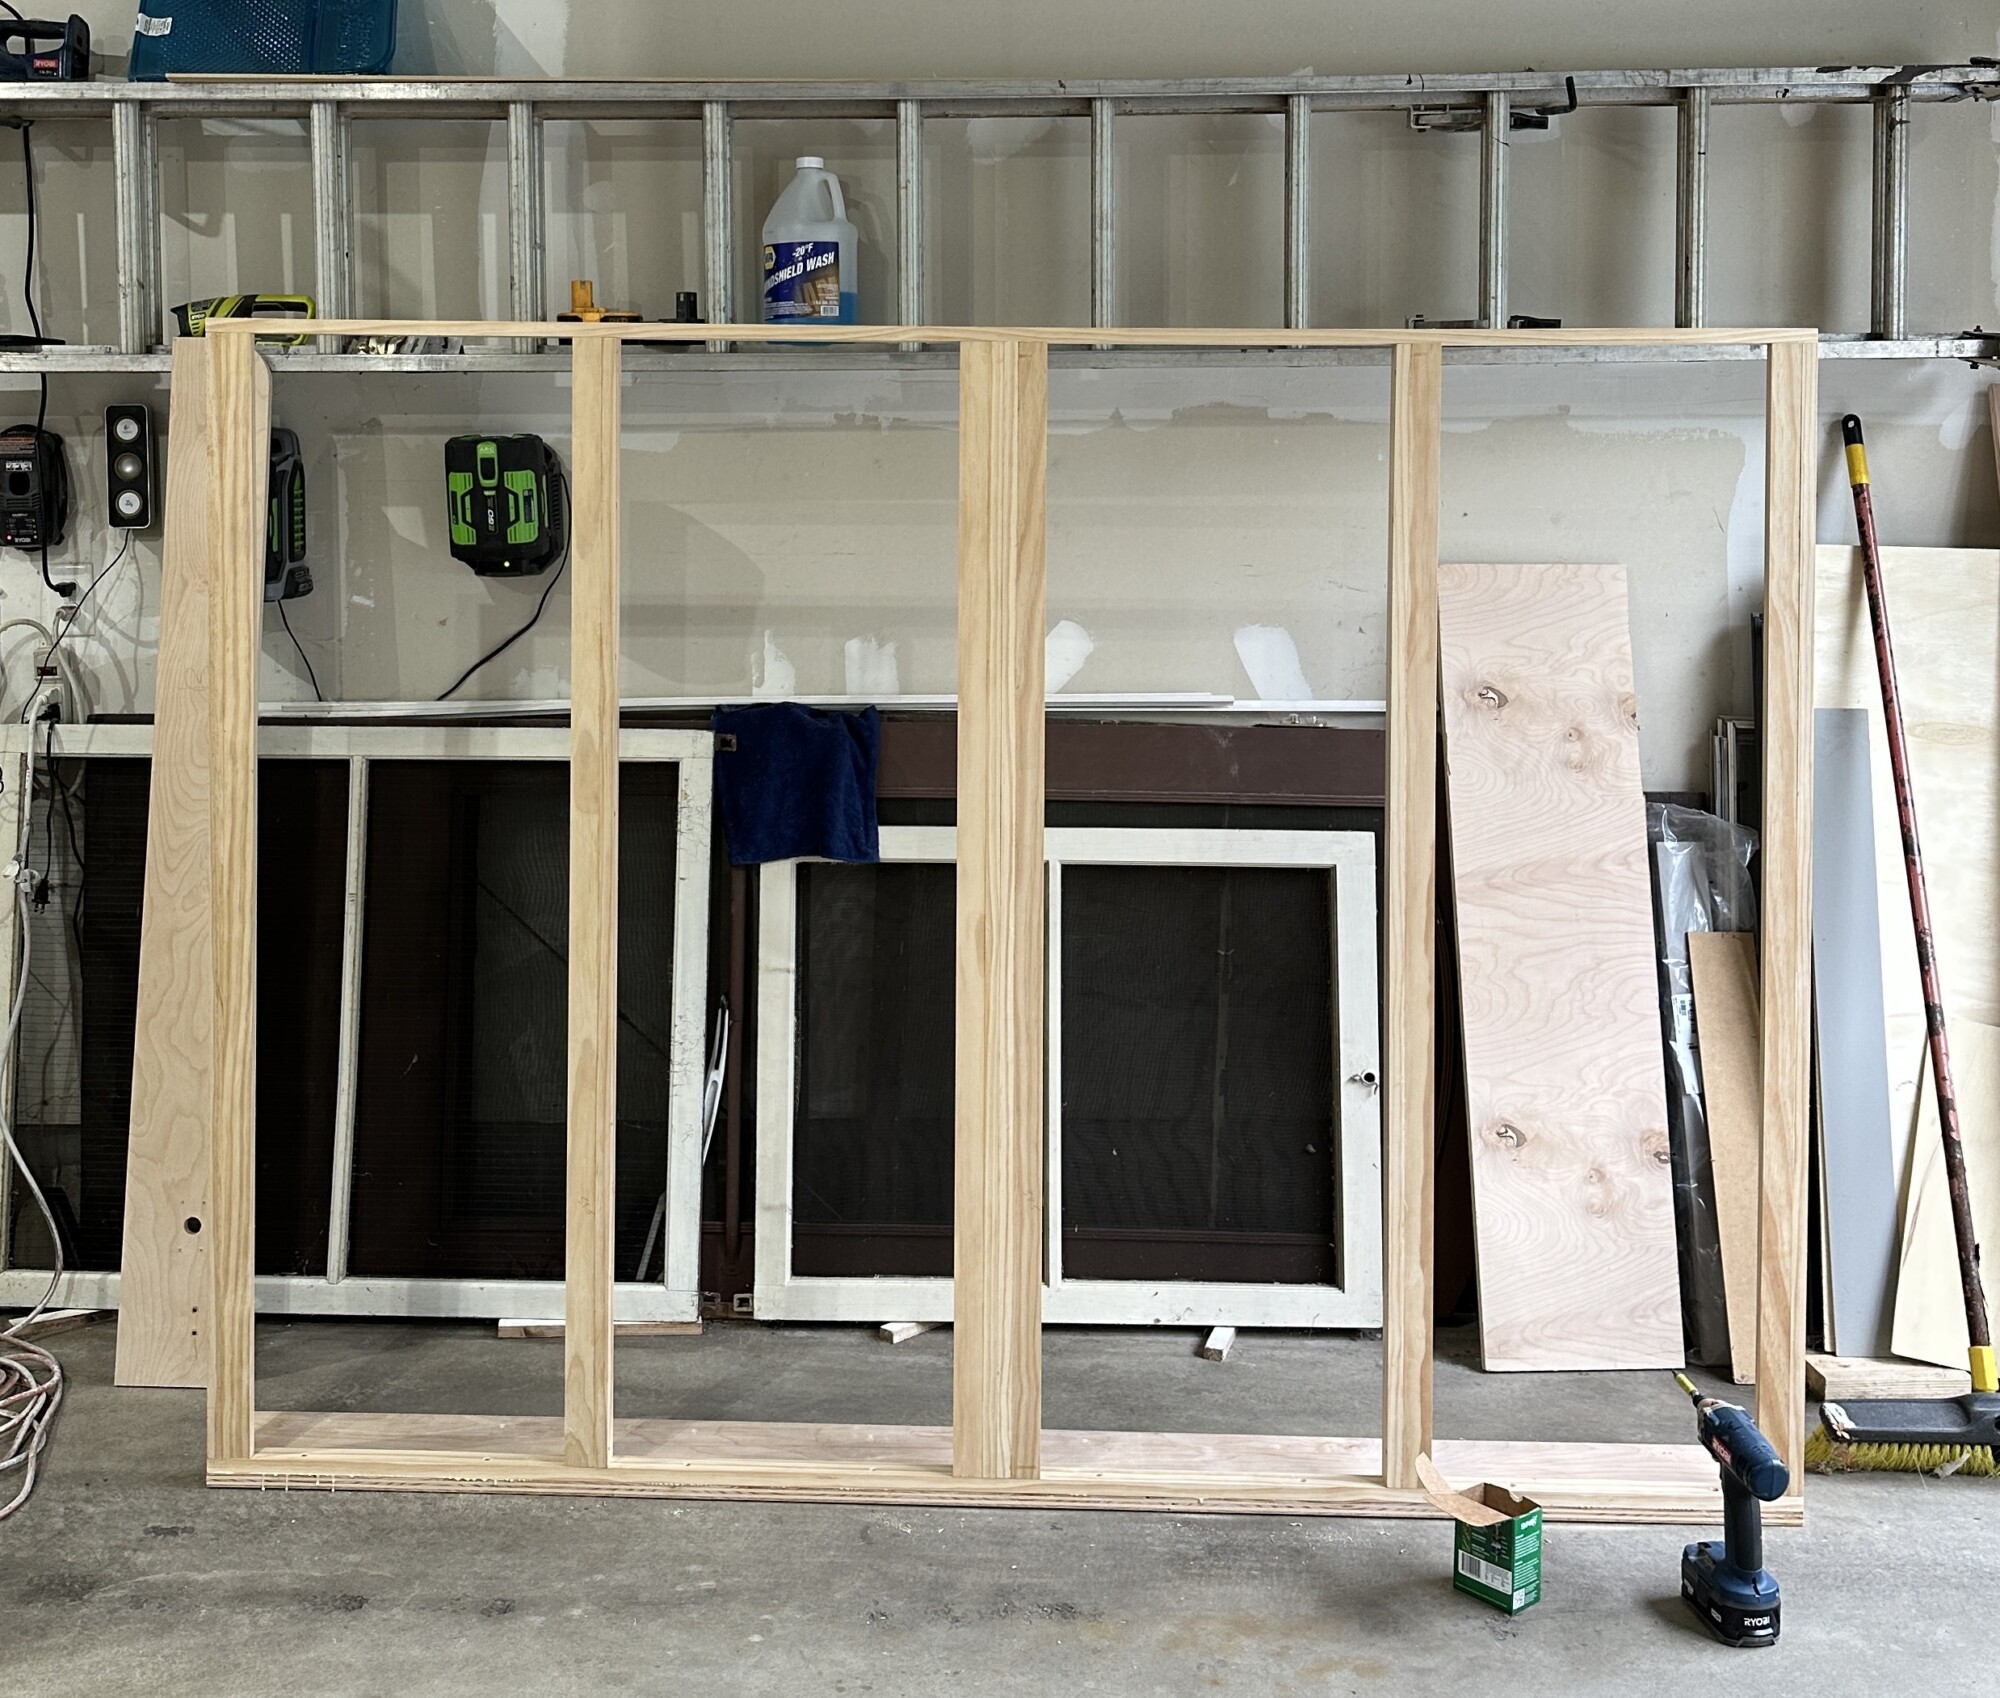
*Tip: you’ll want some clamps on hand to make the job easier
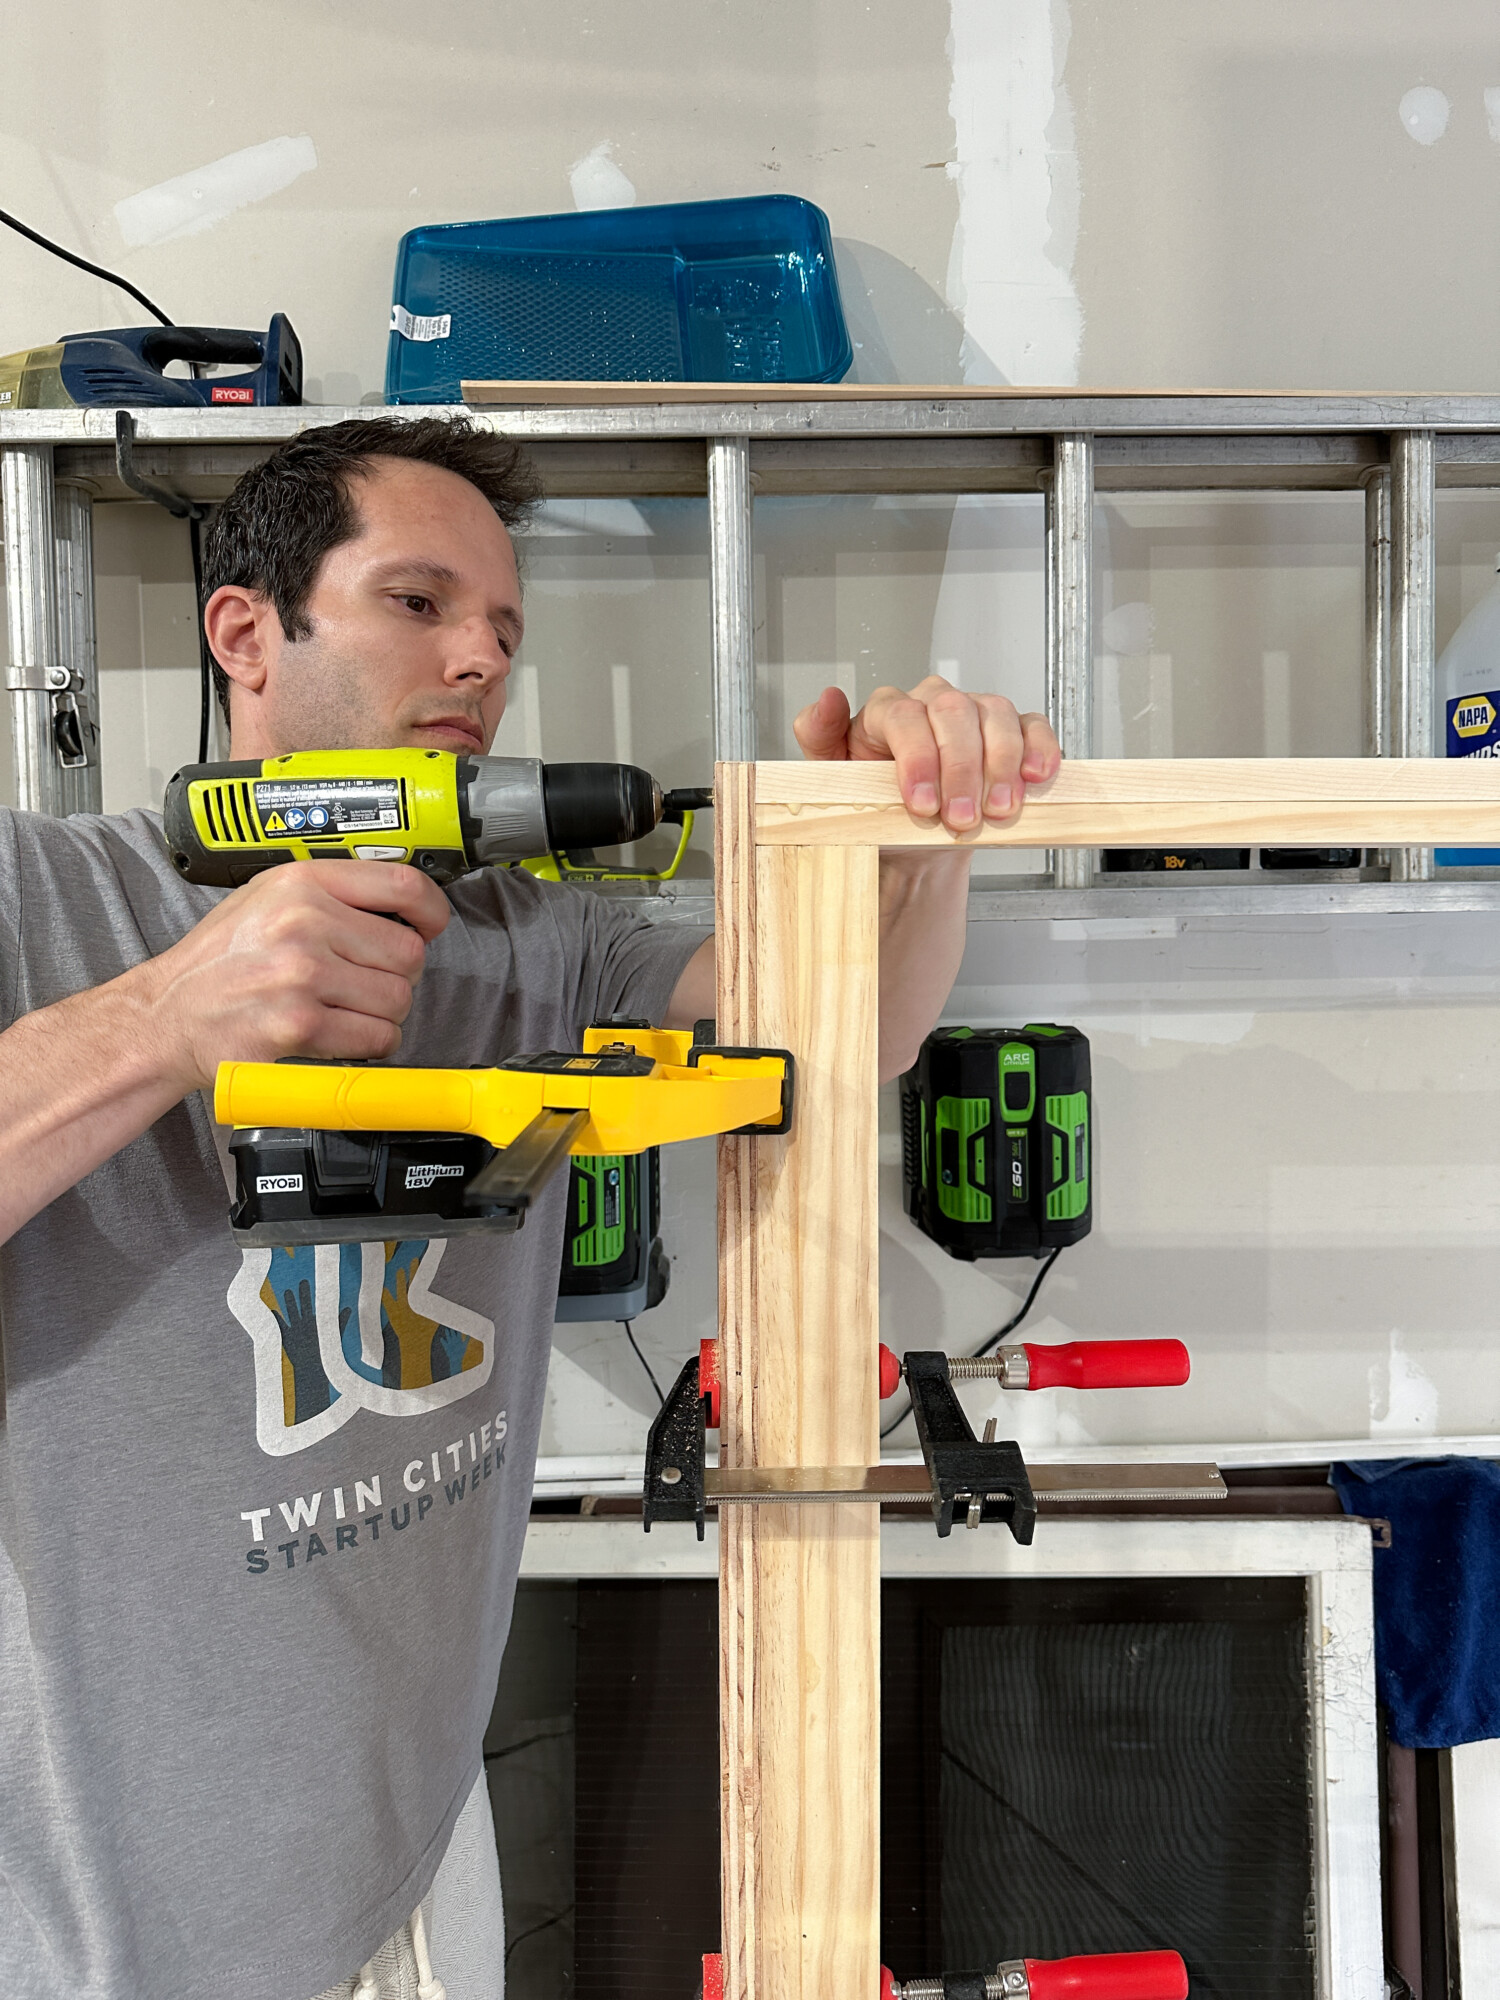
Use preglued wood veneer edgebanding to finish off the wood edges by simply ironing on.
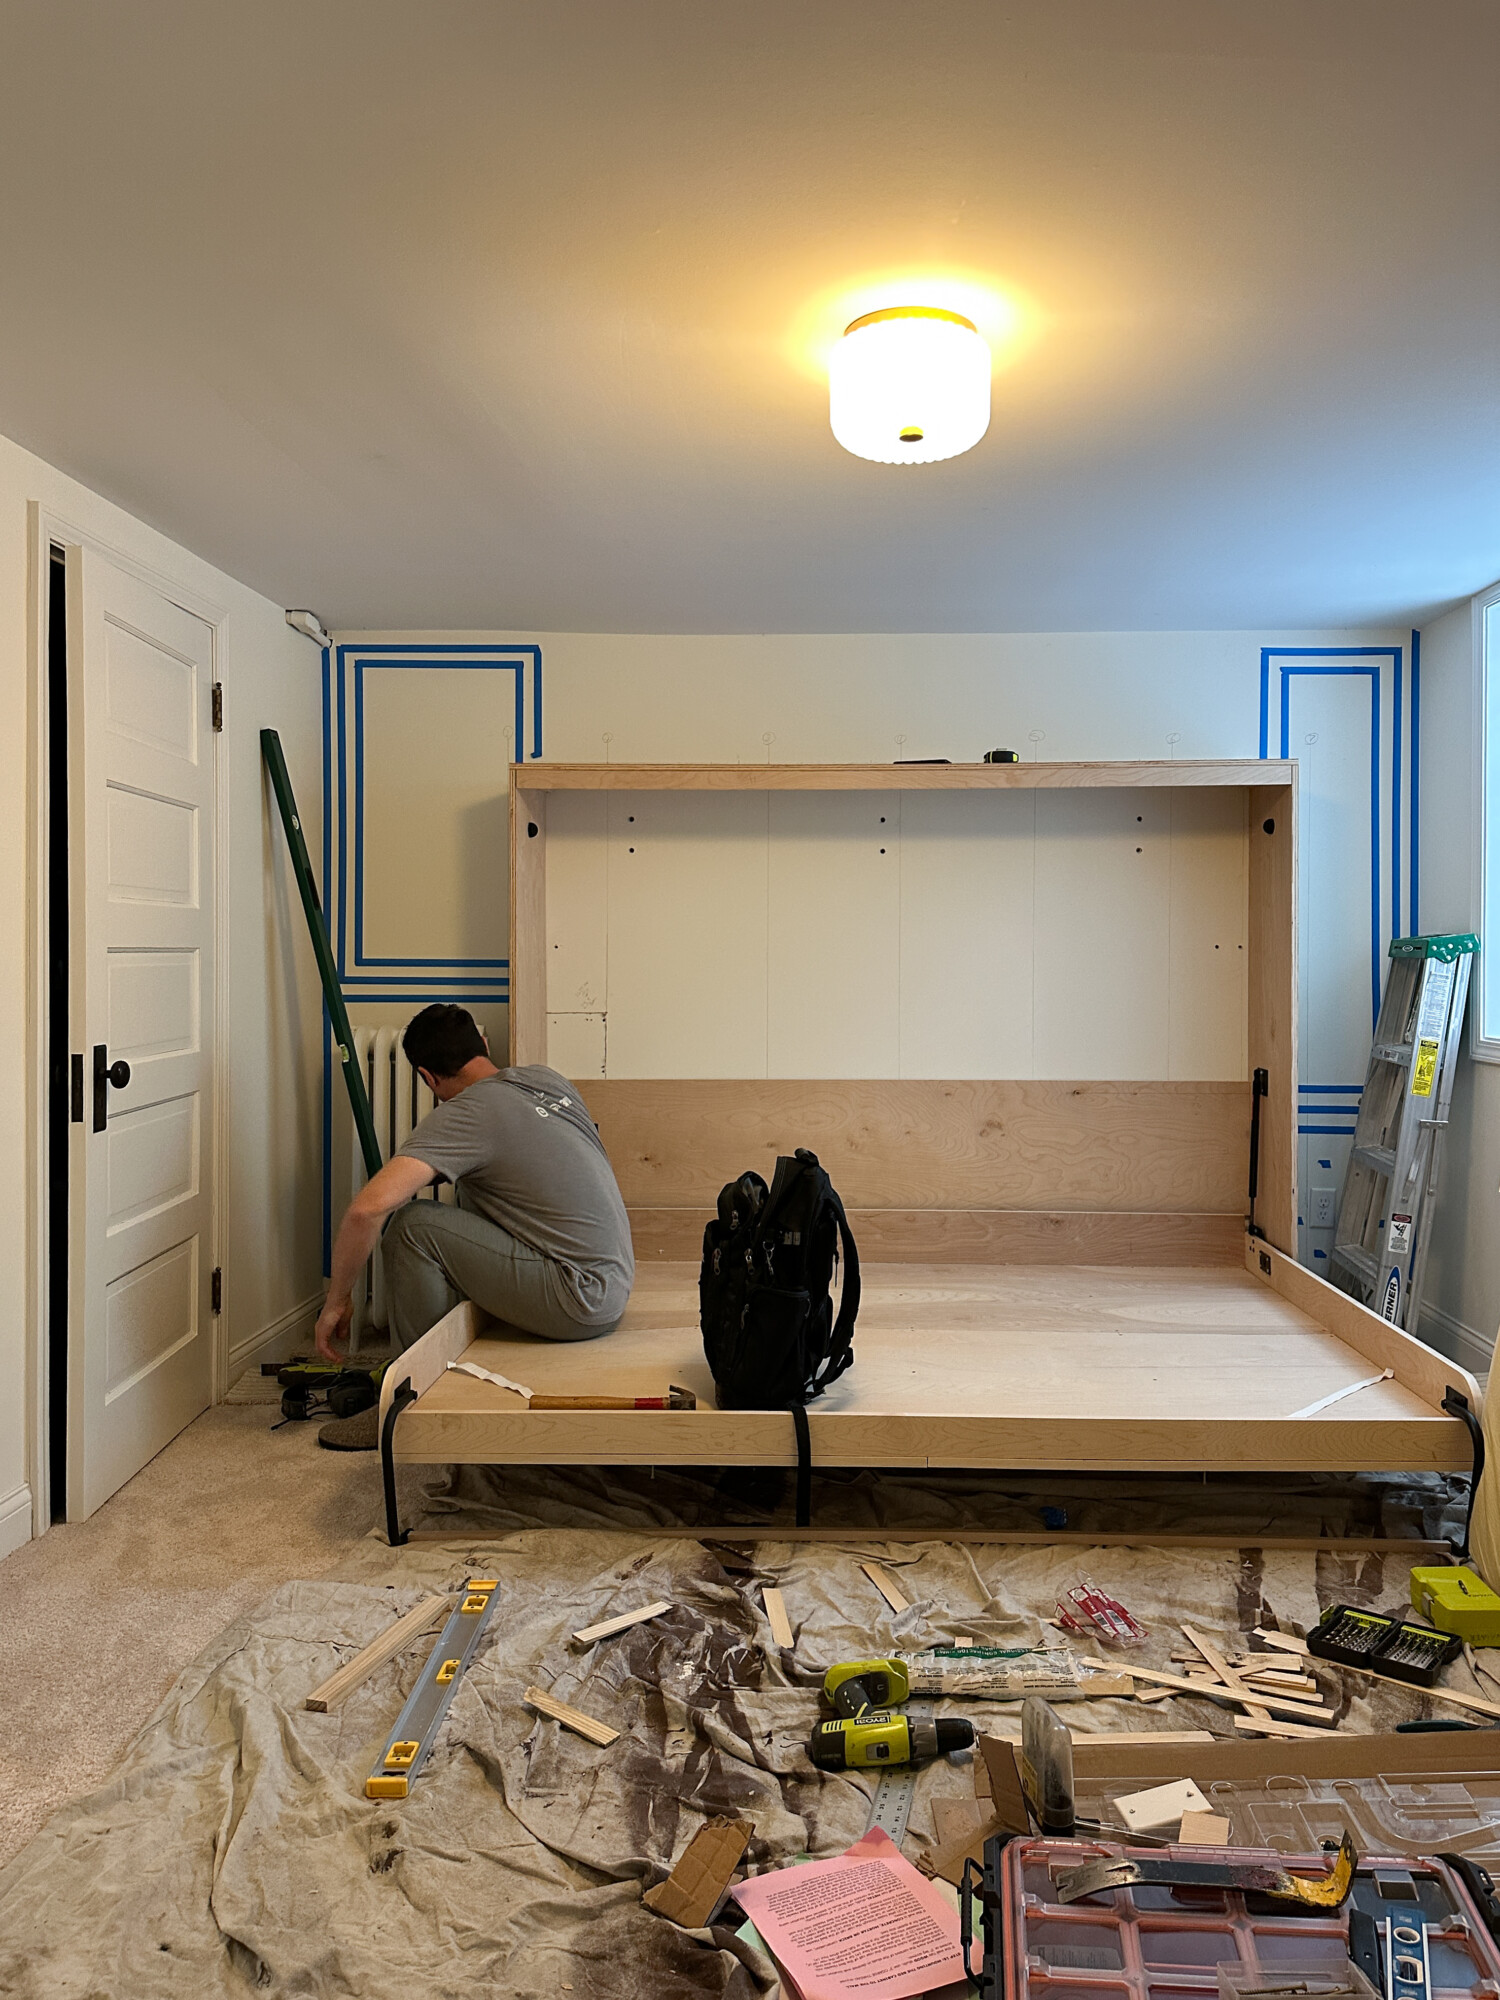
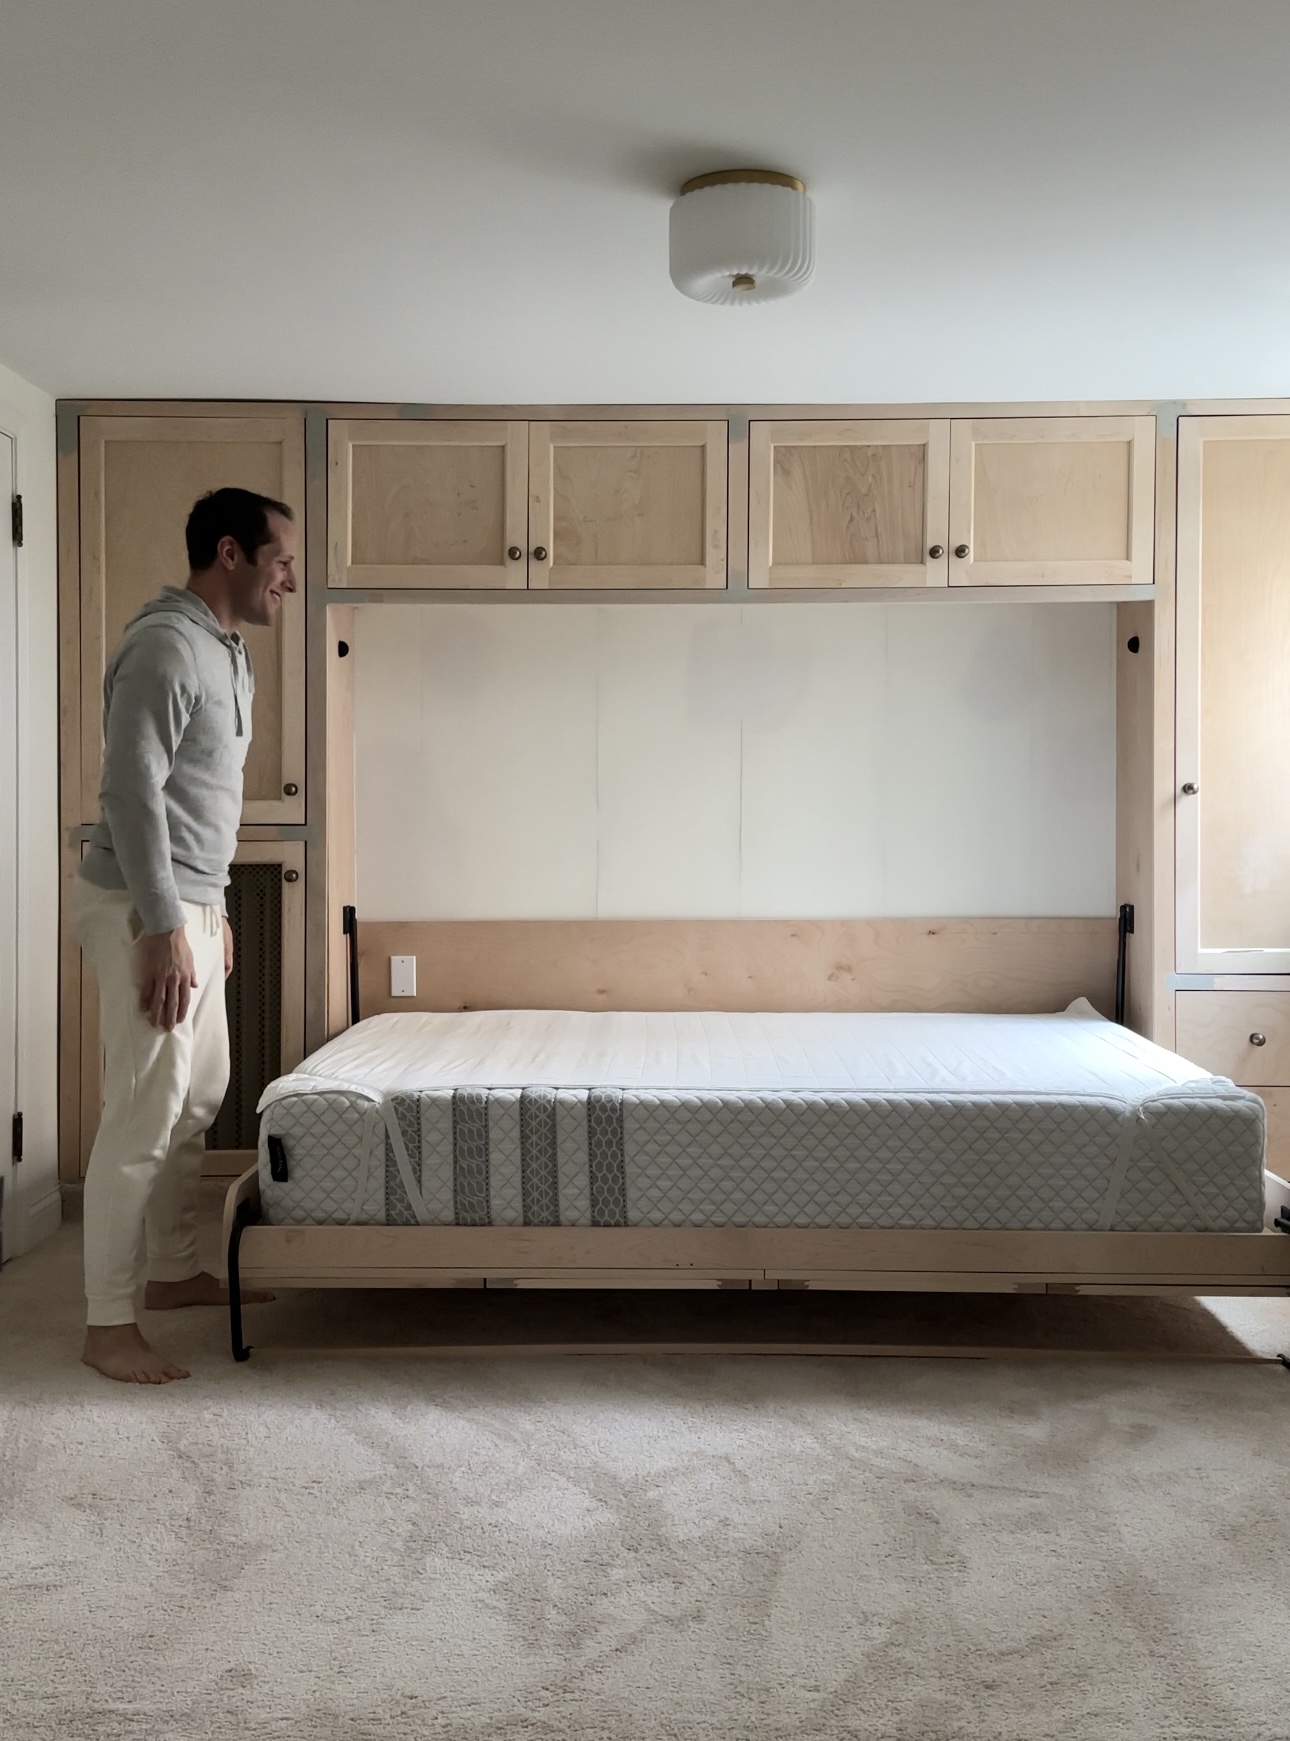
Step 2: Mount the Murphy Bed Frame
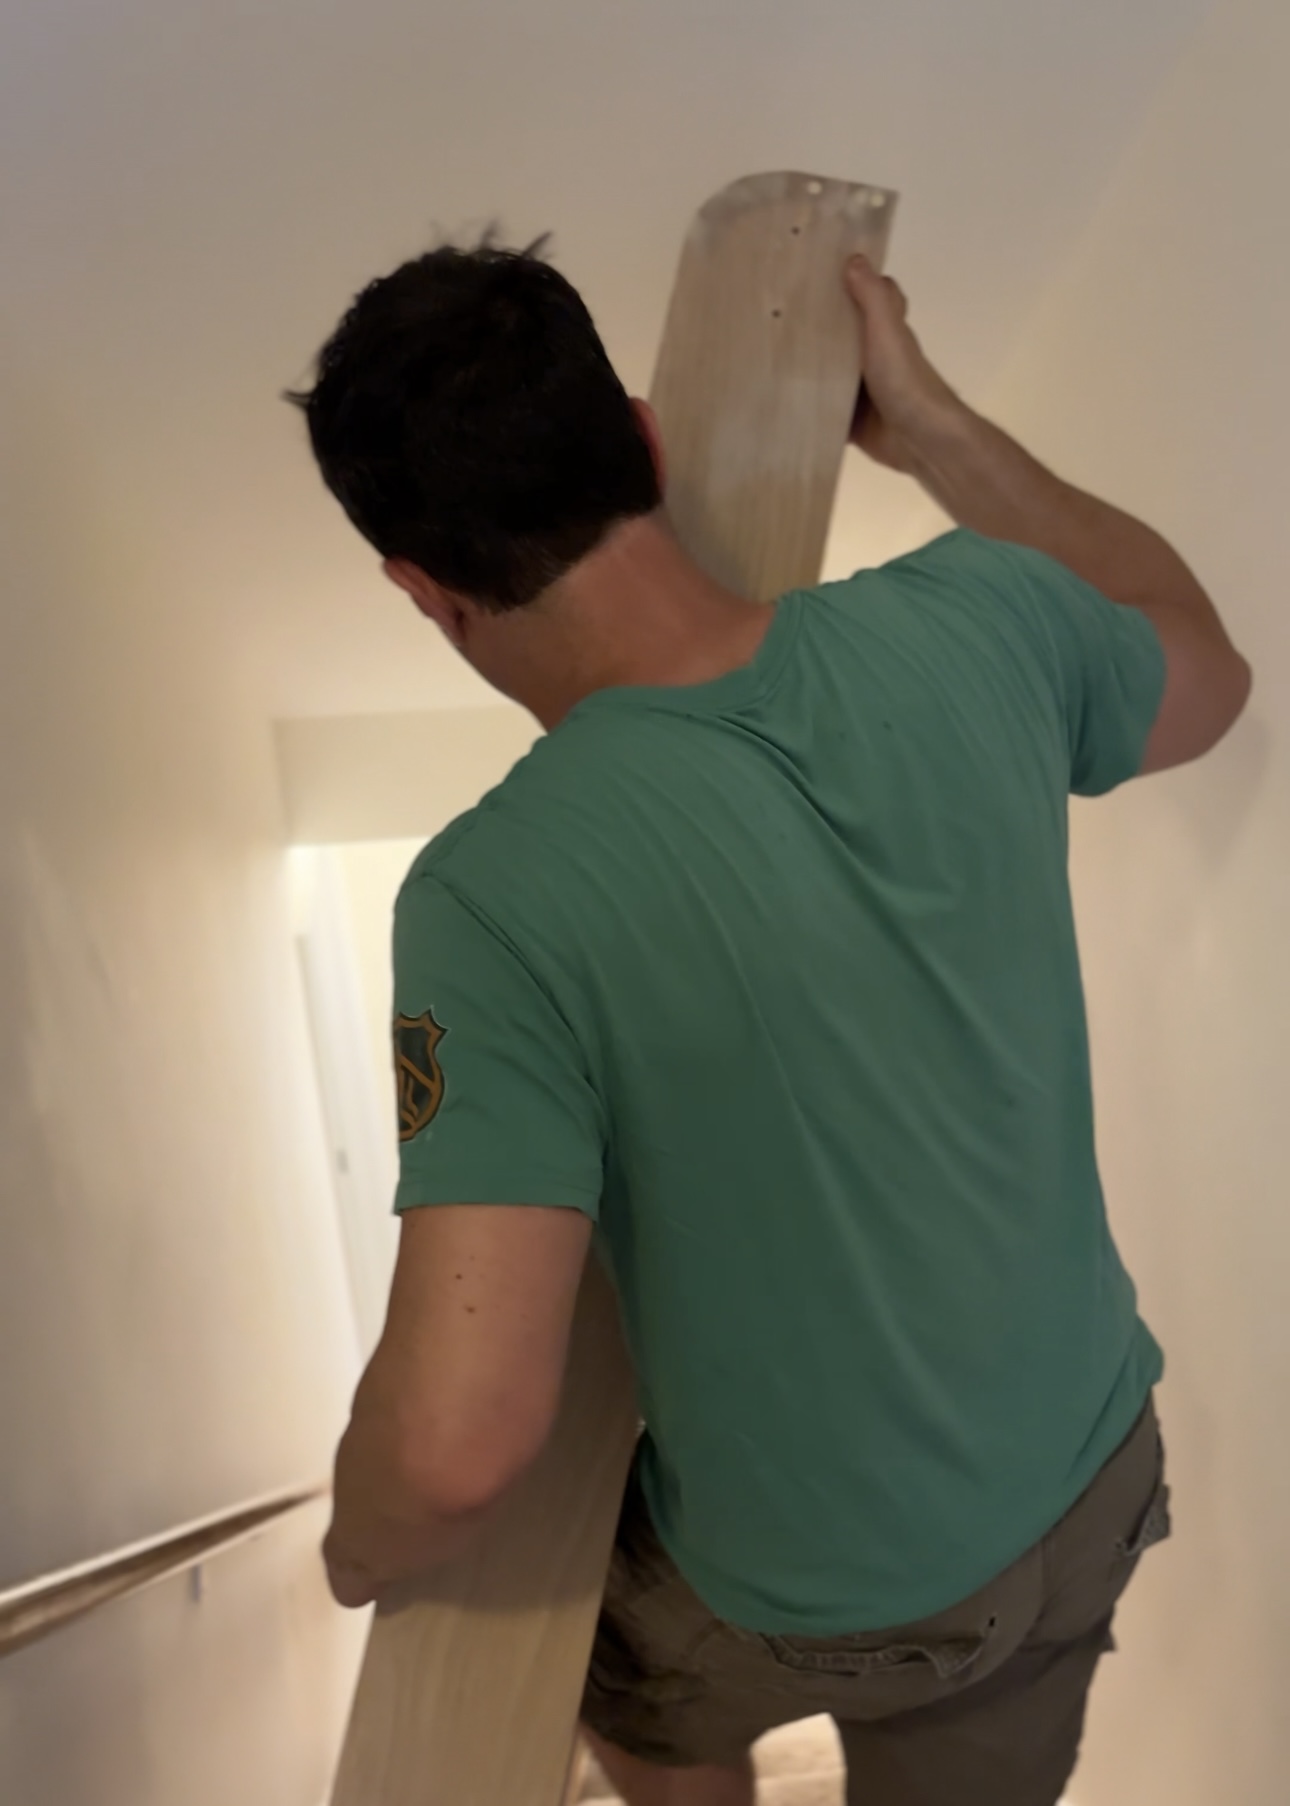
If you’re building offsite, like we did in our garage, make sure you’re able to transport your bed frame to the room you plan on mounting it in. We had a tough time maneuvering it down our tight basement steps – queue the pivot scene from the show, Friends! We eventually got it down.
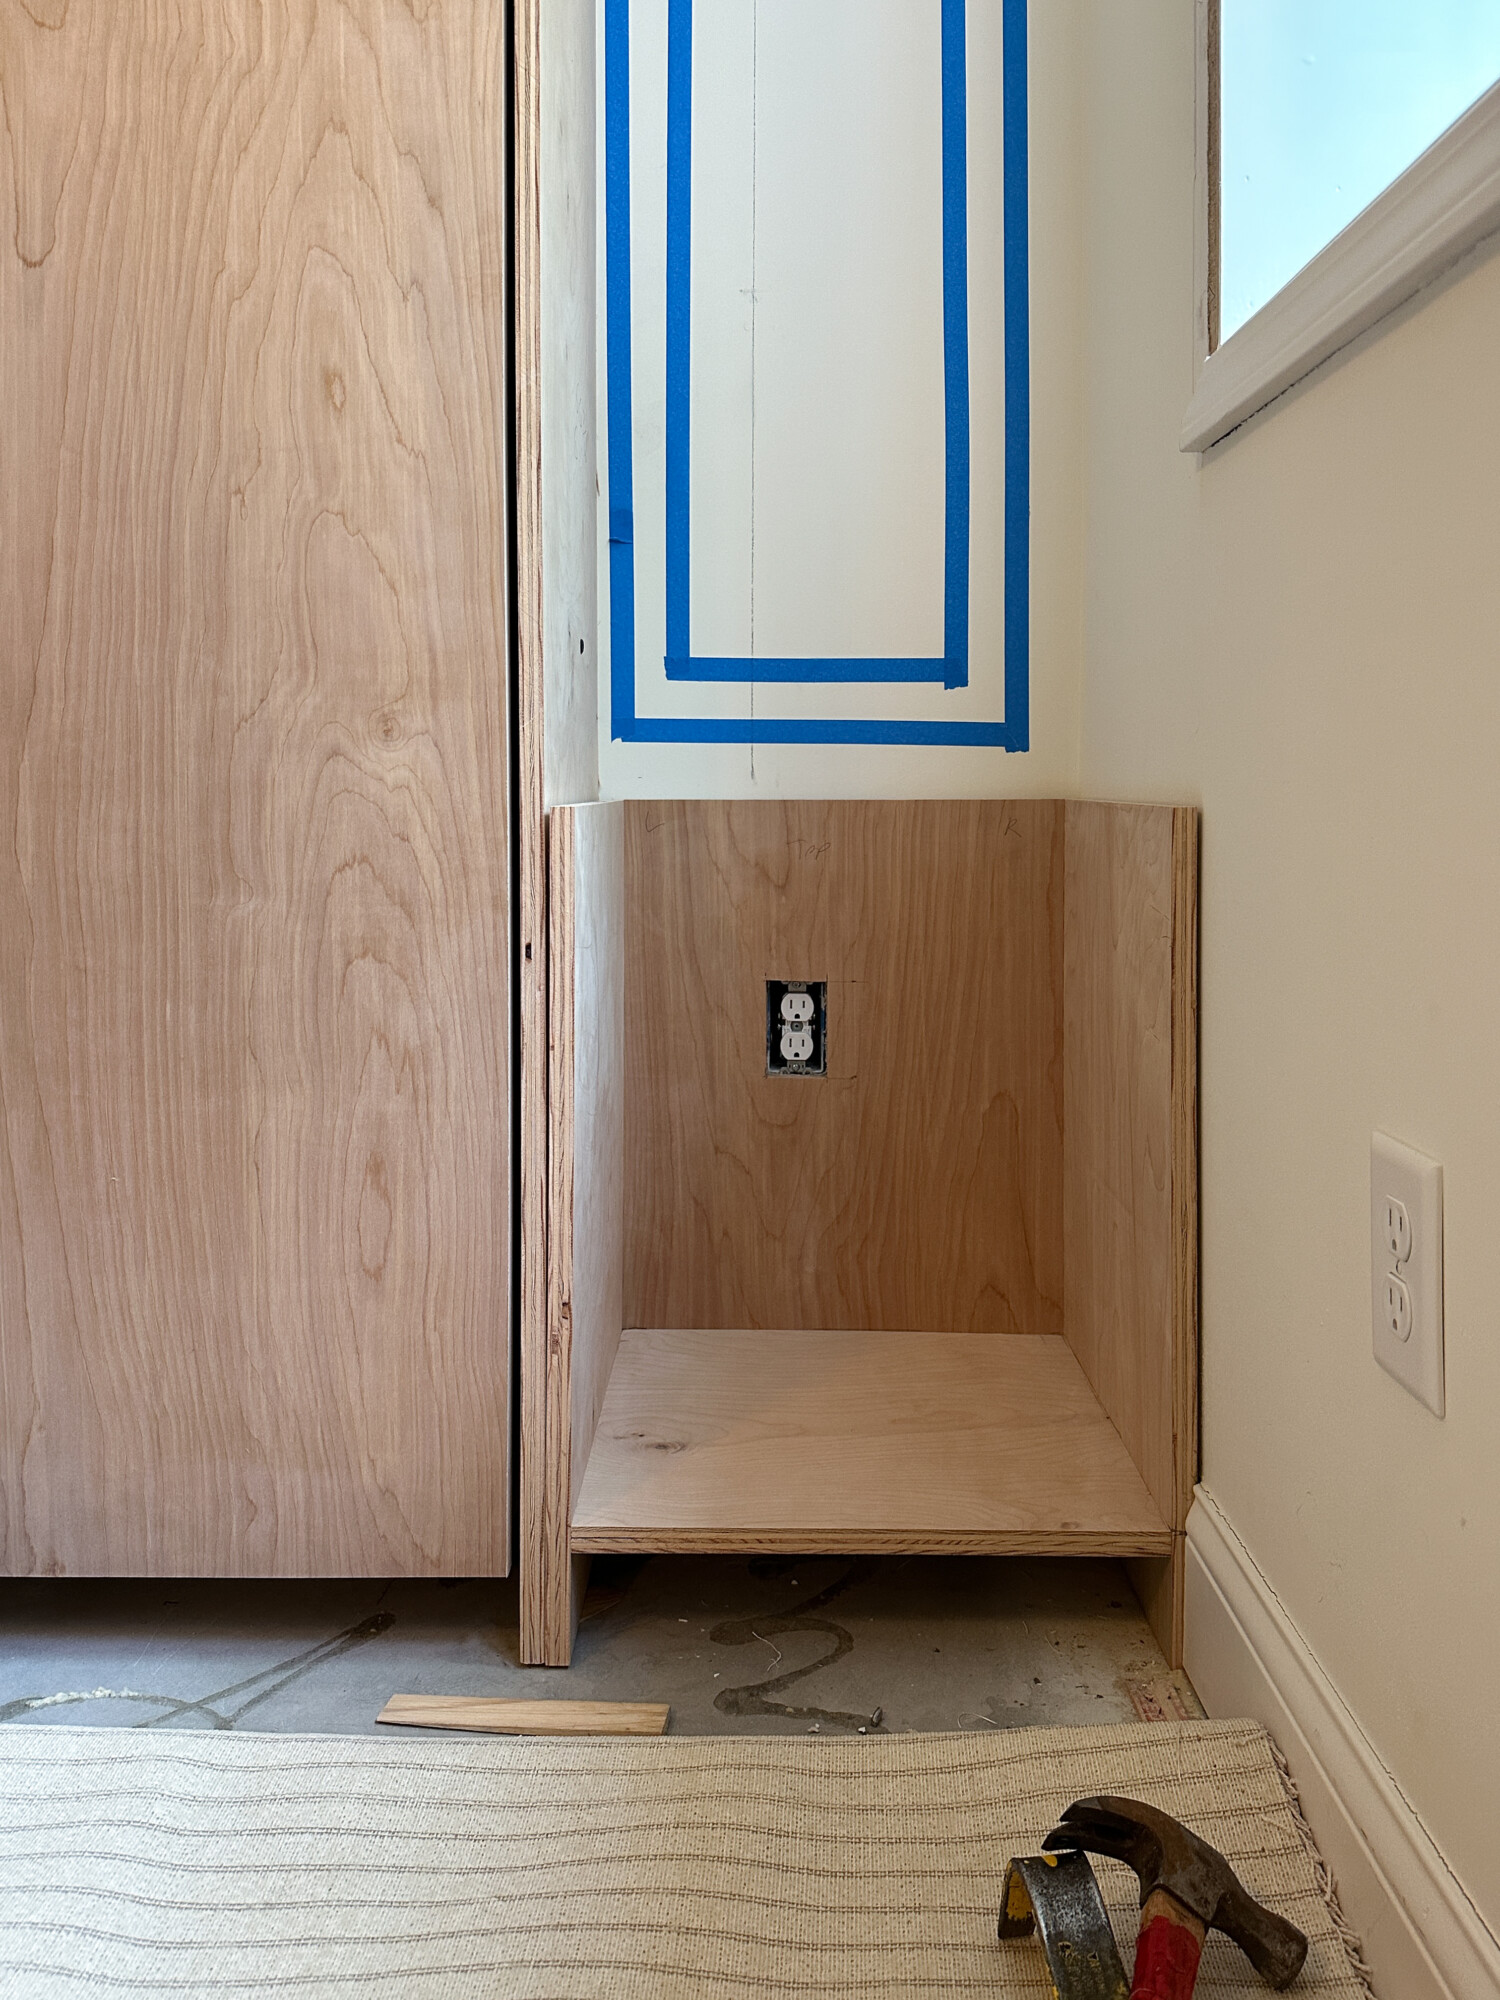
*Tip: Re-locate any outlet that may be obstructed by the Murphy bed or cabinets. Use a license electrician.

Locate and mark wall studs for securing the bed. Follow the detailed instructions on the Murphy bed kit to mount into place.
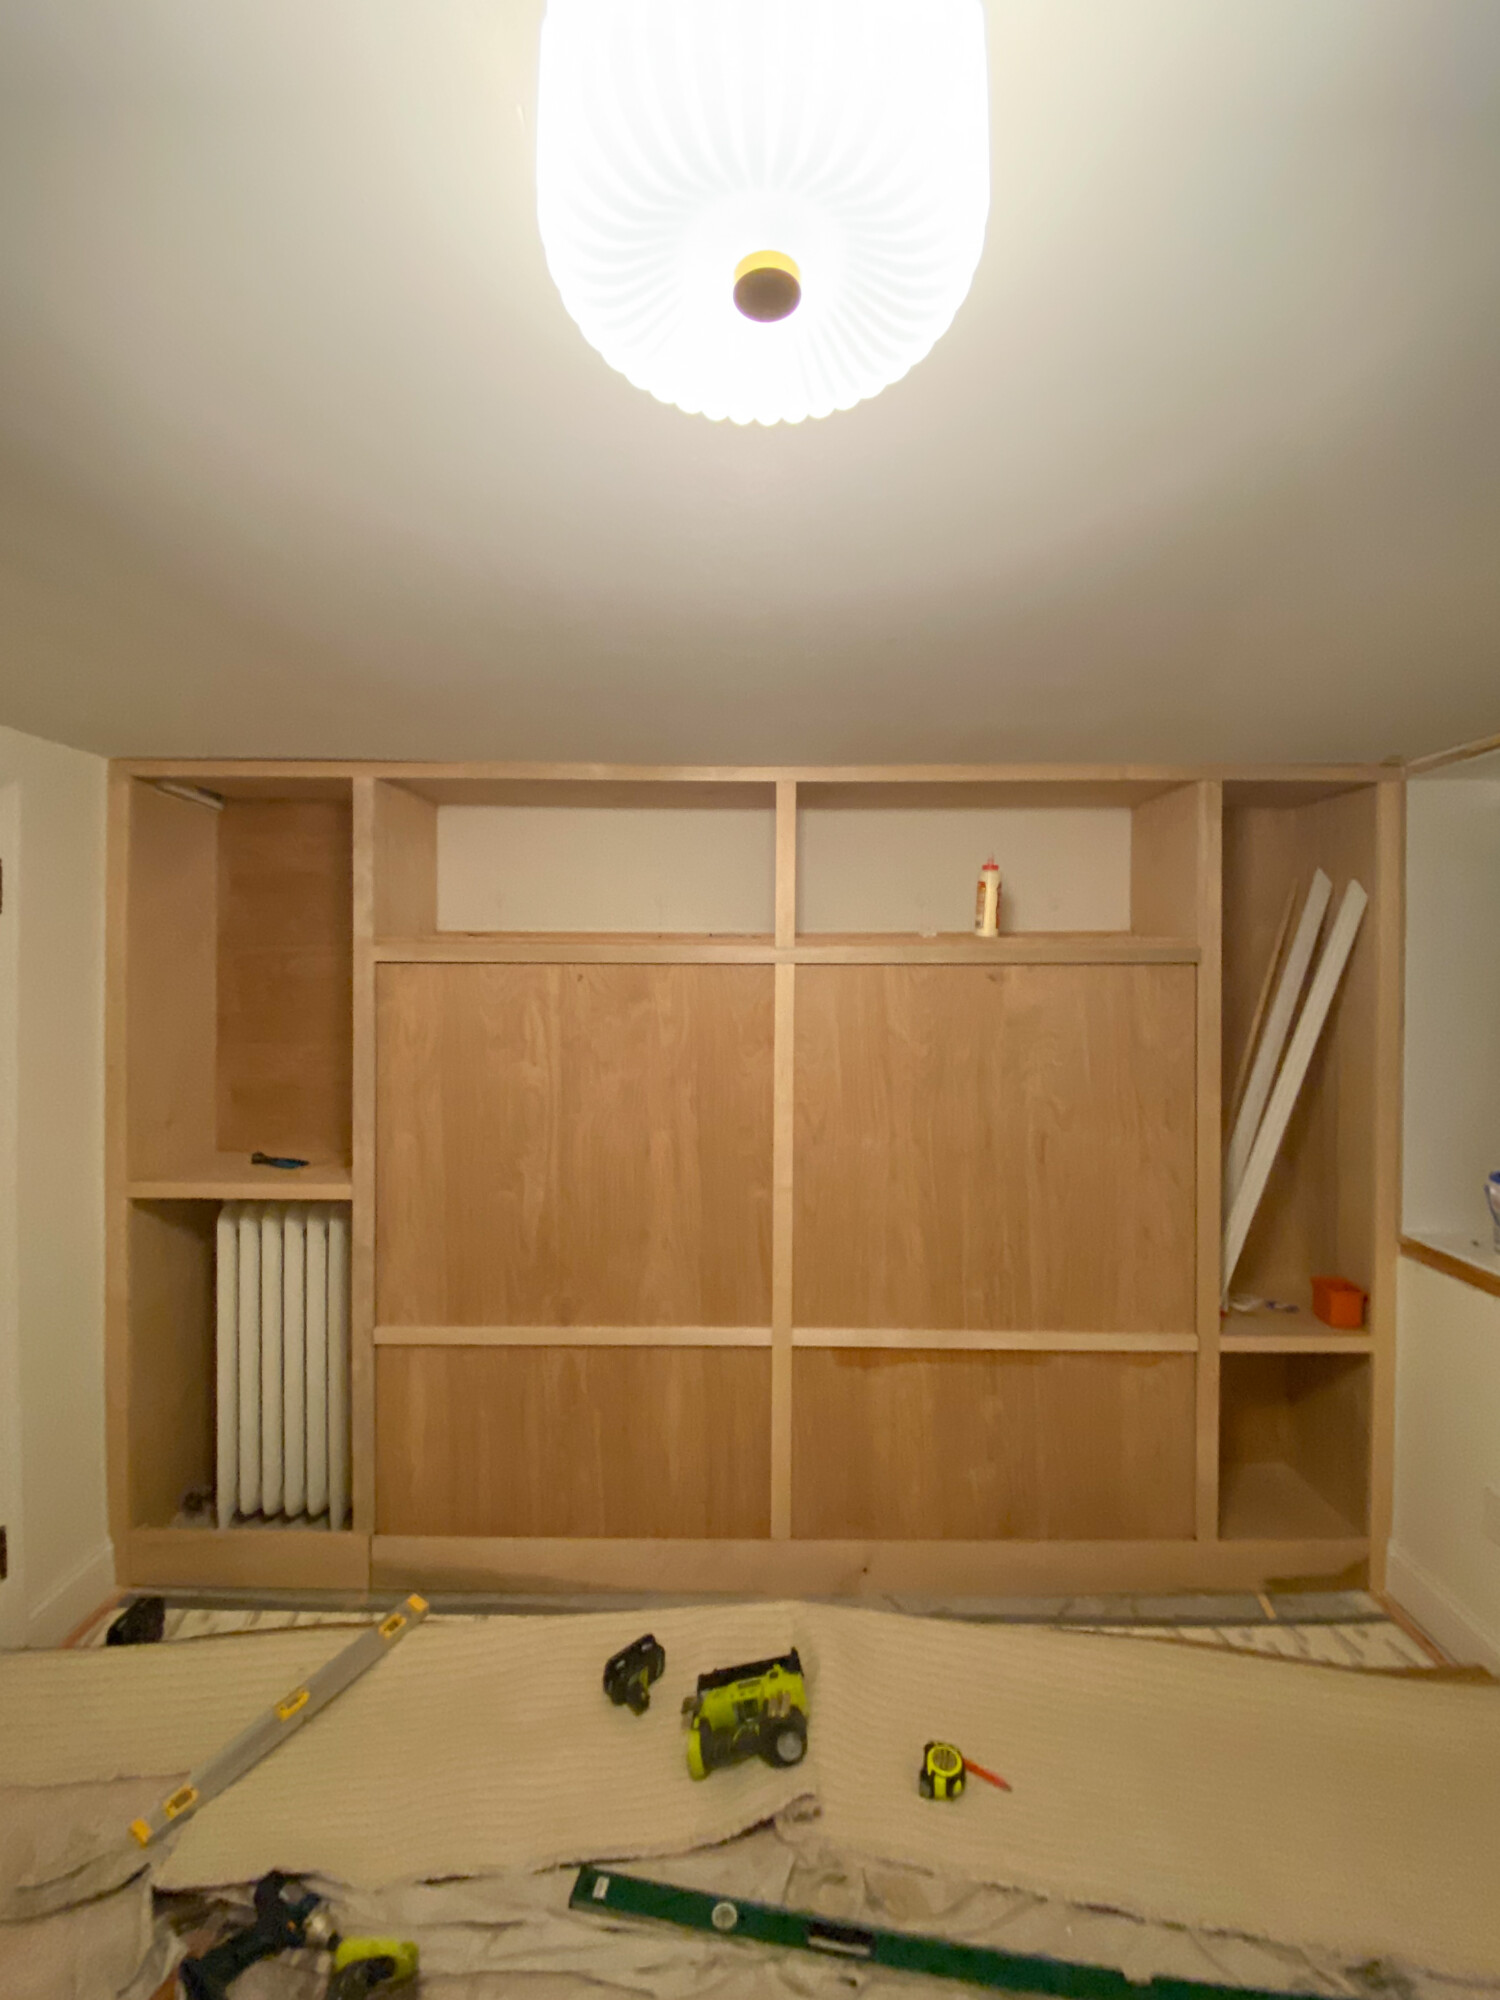
INSTALLING BUILT-IN CABINETS
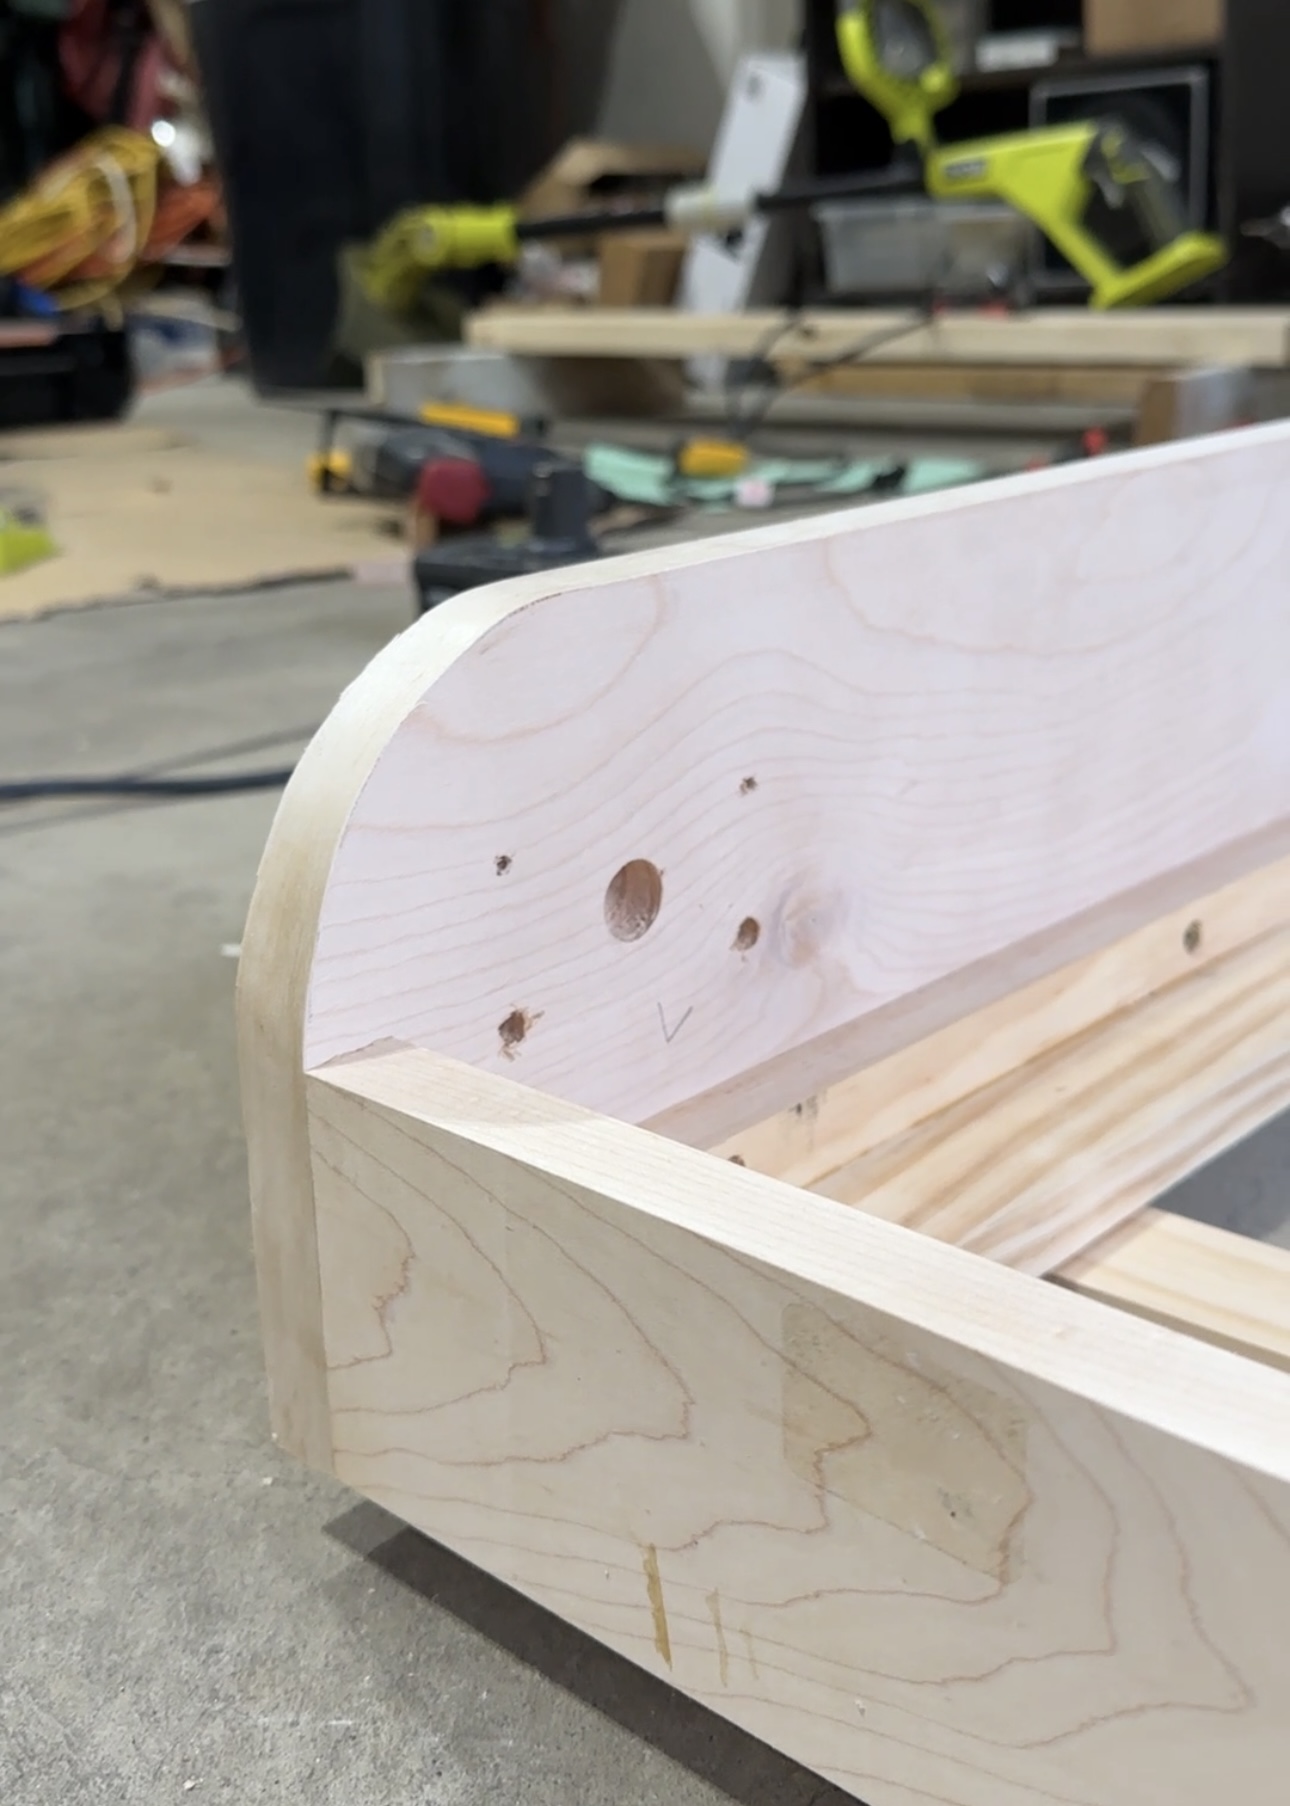
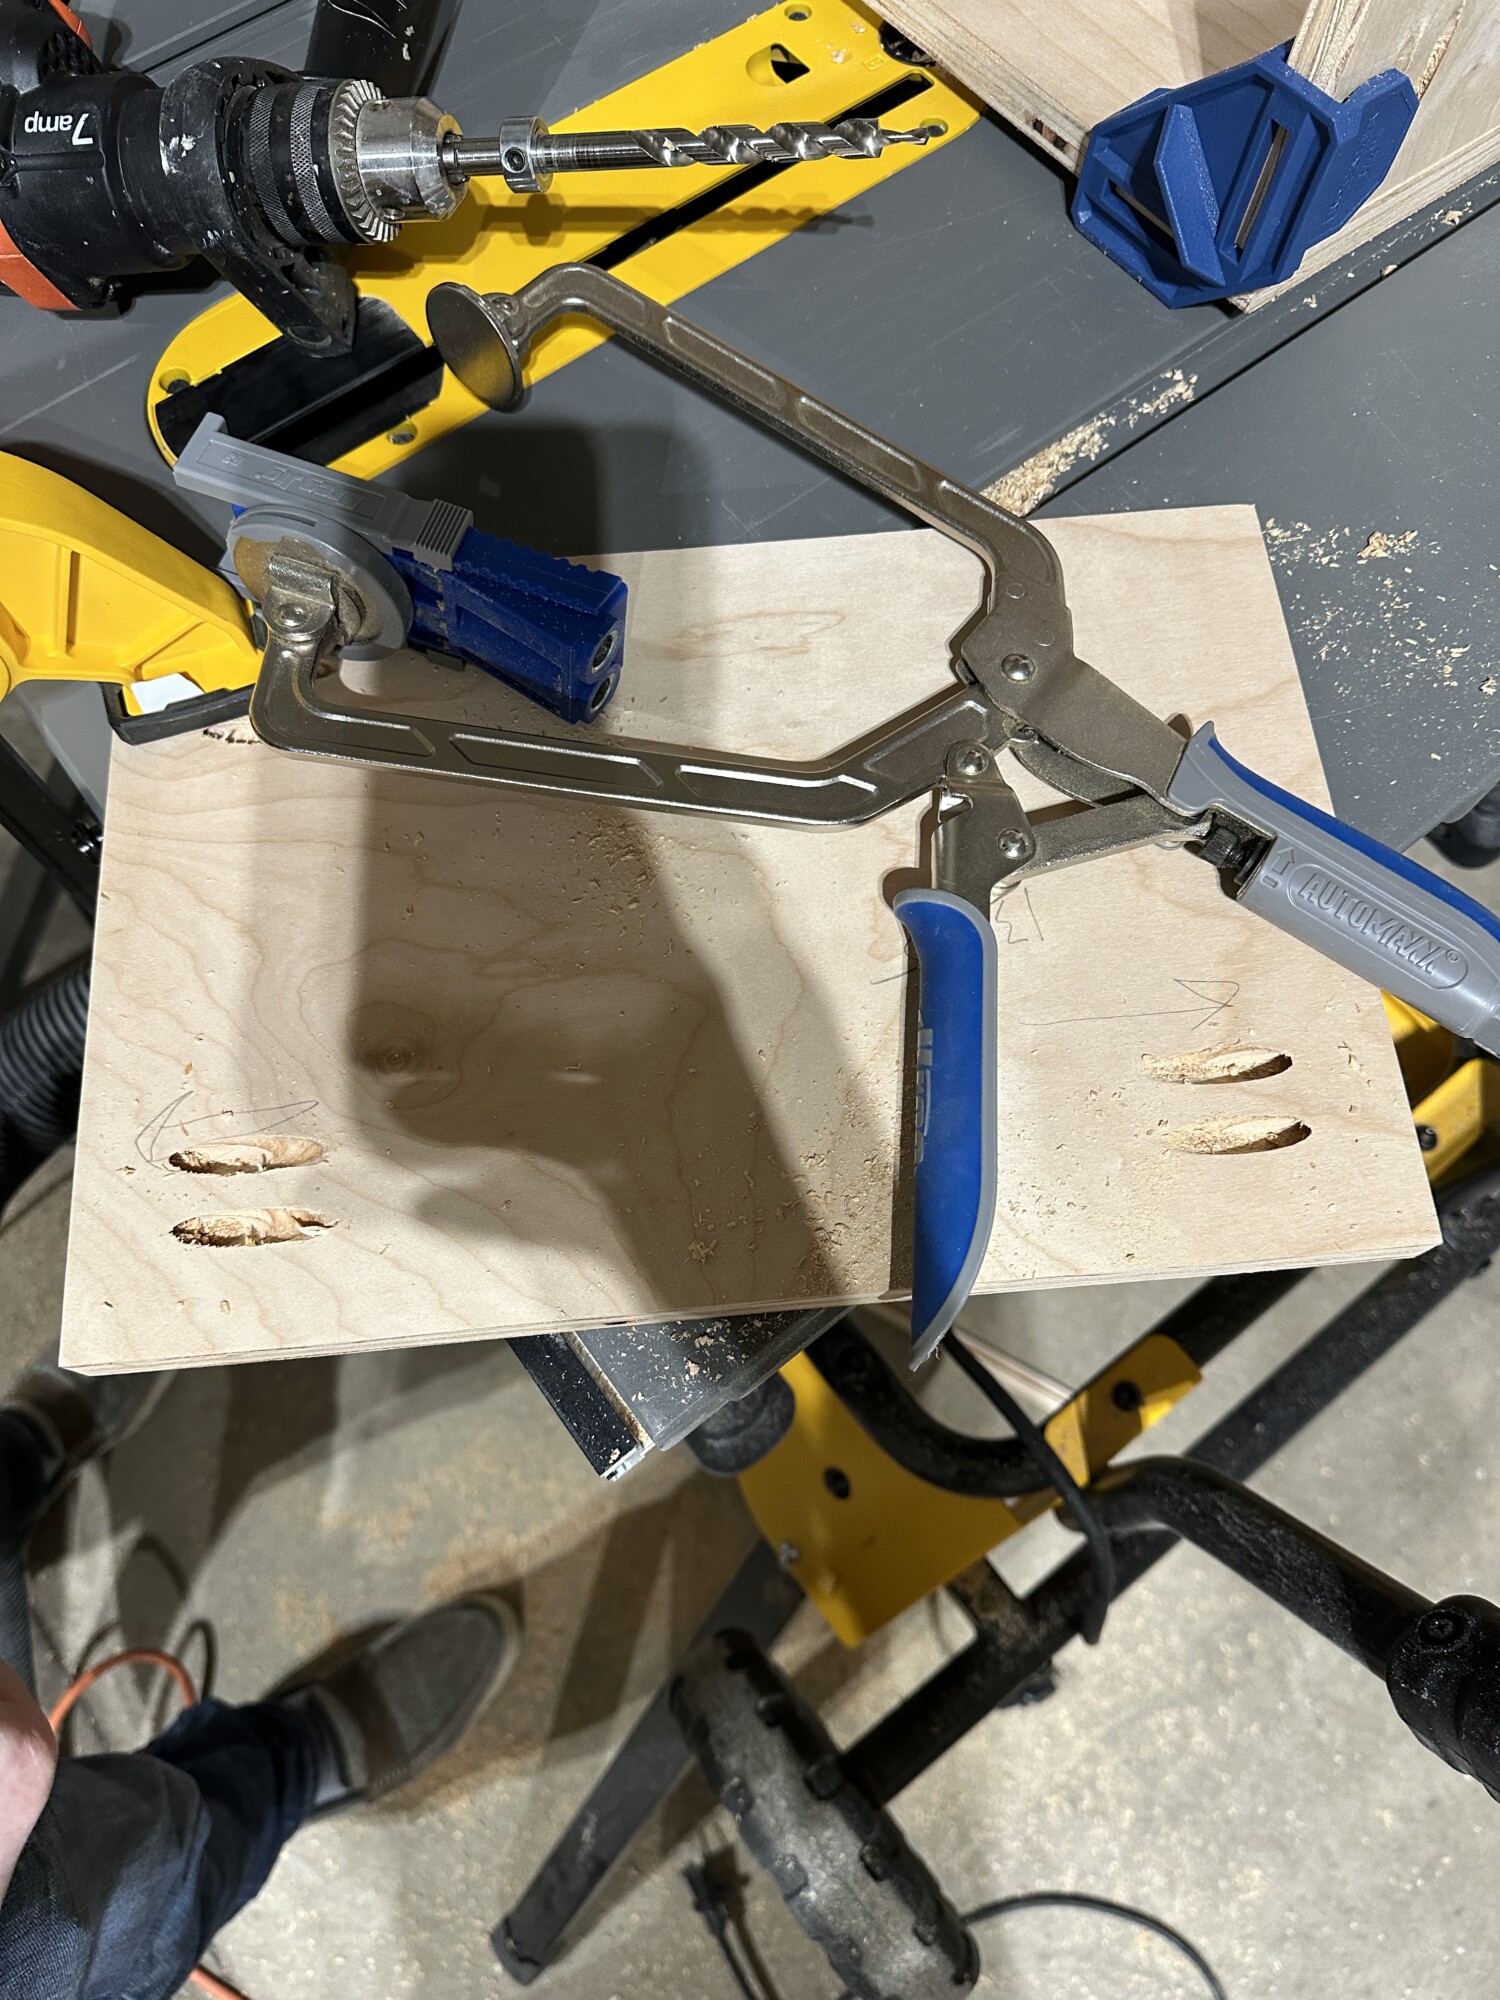
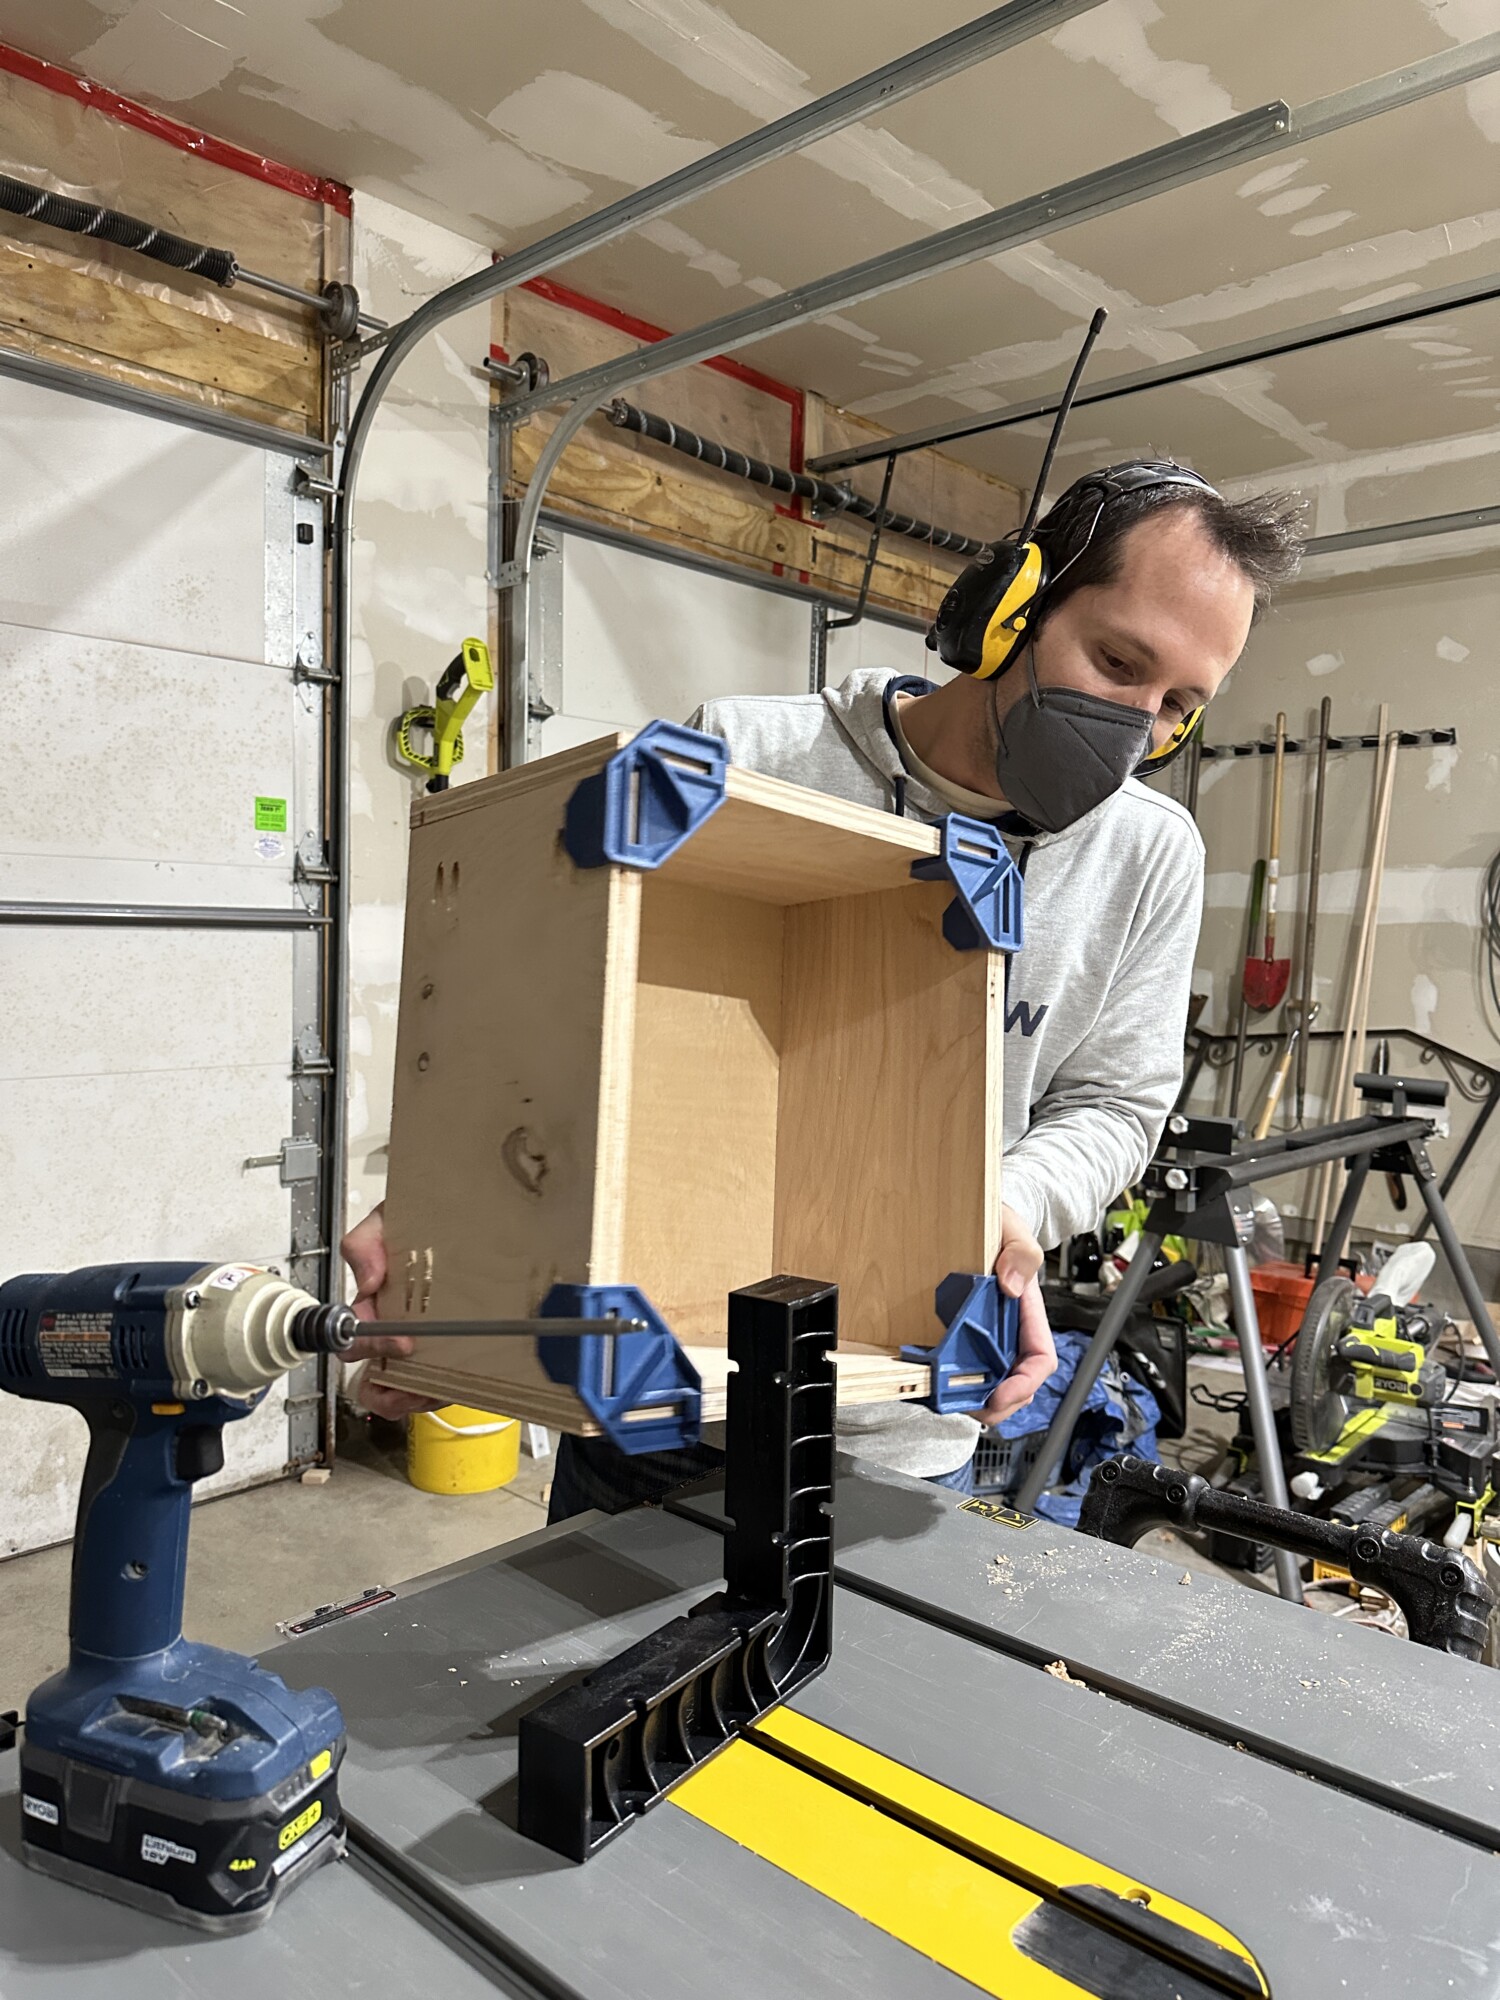
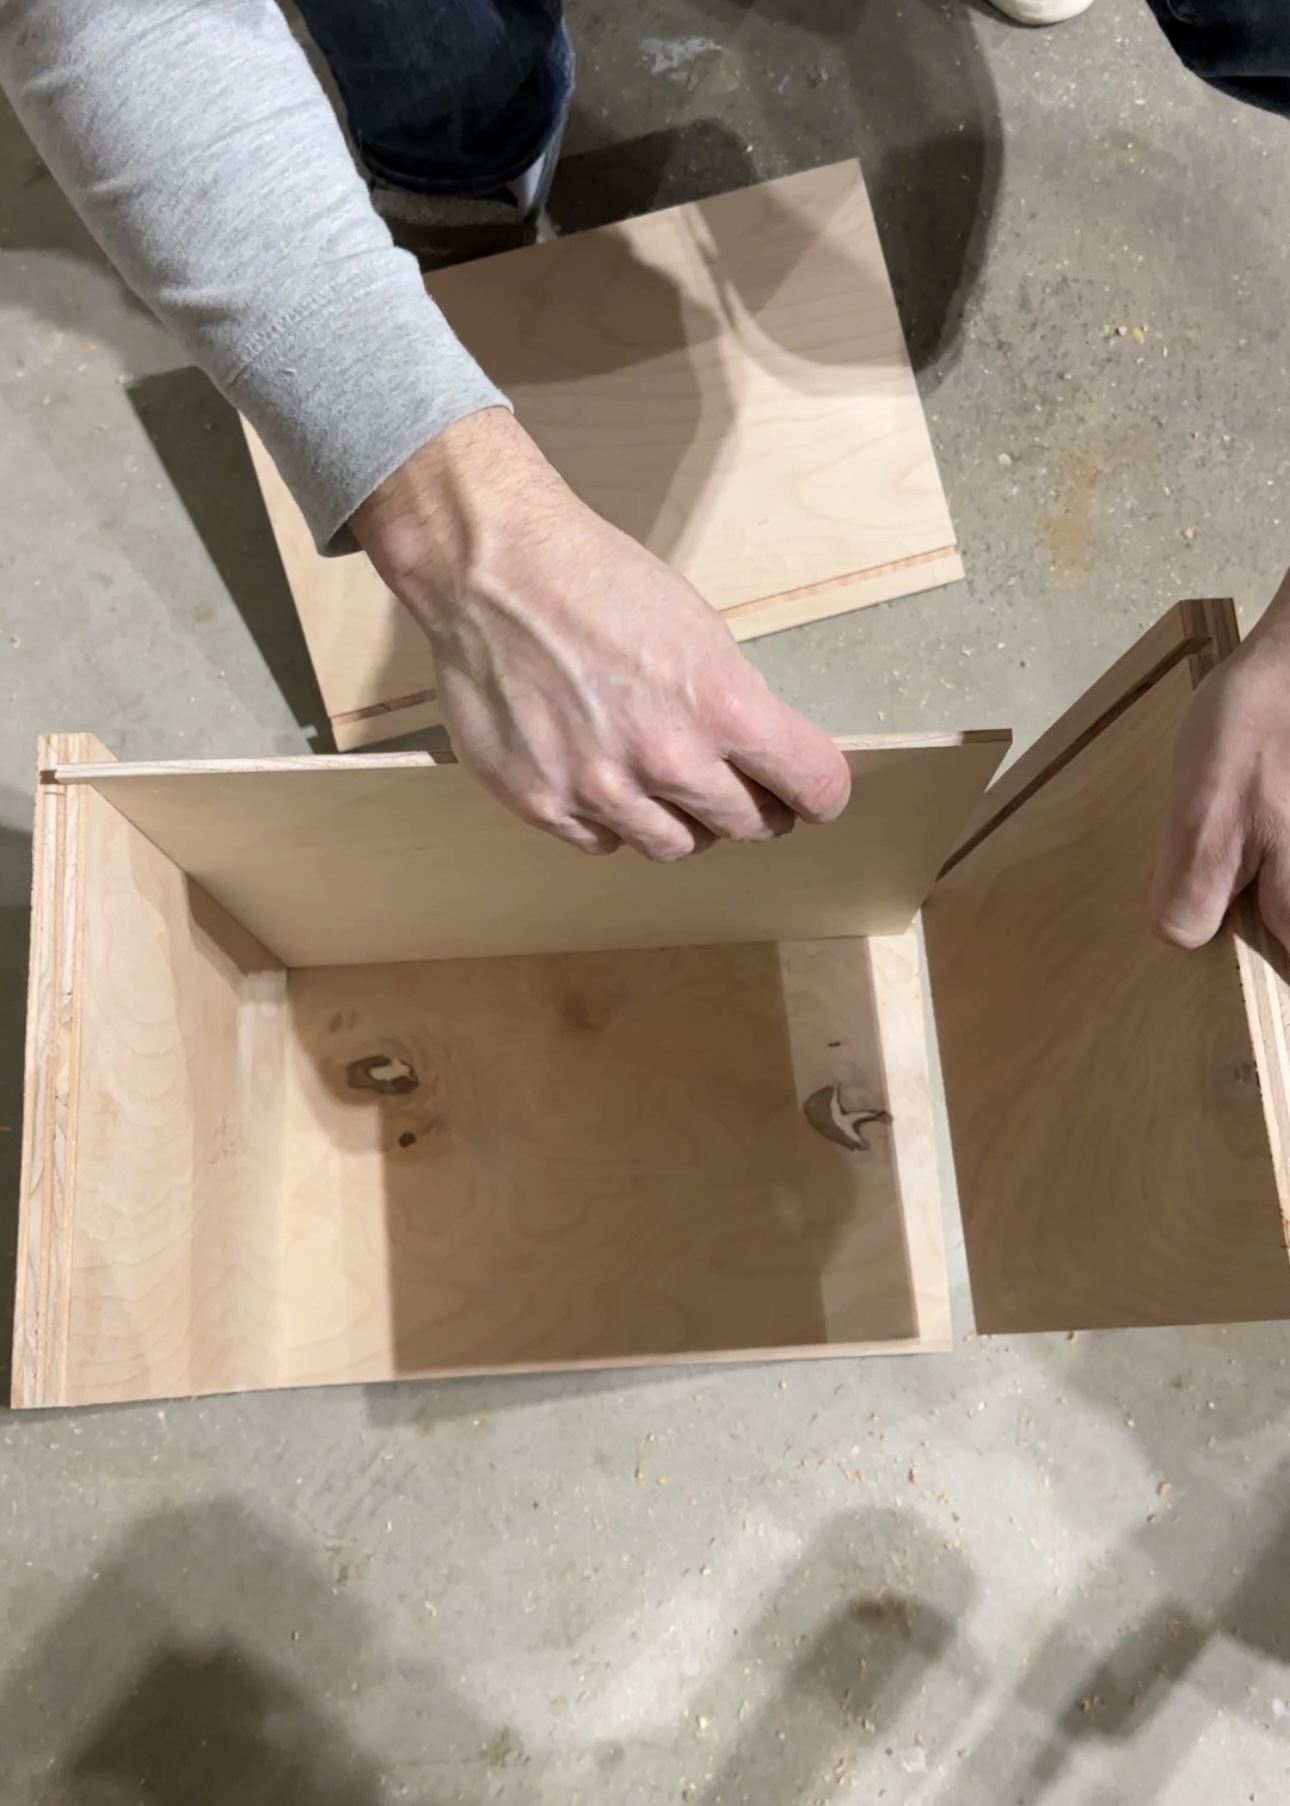
Step 1: Build cabinet boxes
We used a mix of maple and birch wood – whatever was available at the local home improvement stores since we knew we were going to paint the Murphy bed and built-ins. There’s a lot of stain wood throughout our old home so this is a great opportunity to incorporate color. Also, cabinetry of this level is beyond Brian’s skillset. He’s a perfectionist but couldn’t get certain parts to the standards of a professional woodworker and used wood filler to achieve the look he wanted.
*Tip: you may need to remove nearby trim to slide the cabinet boxes into place. We had to remove our window trim to squeeze in this upper one.
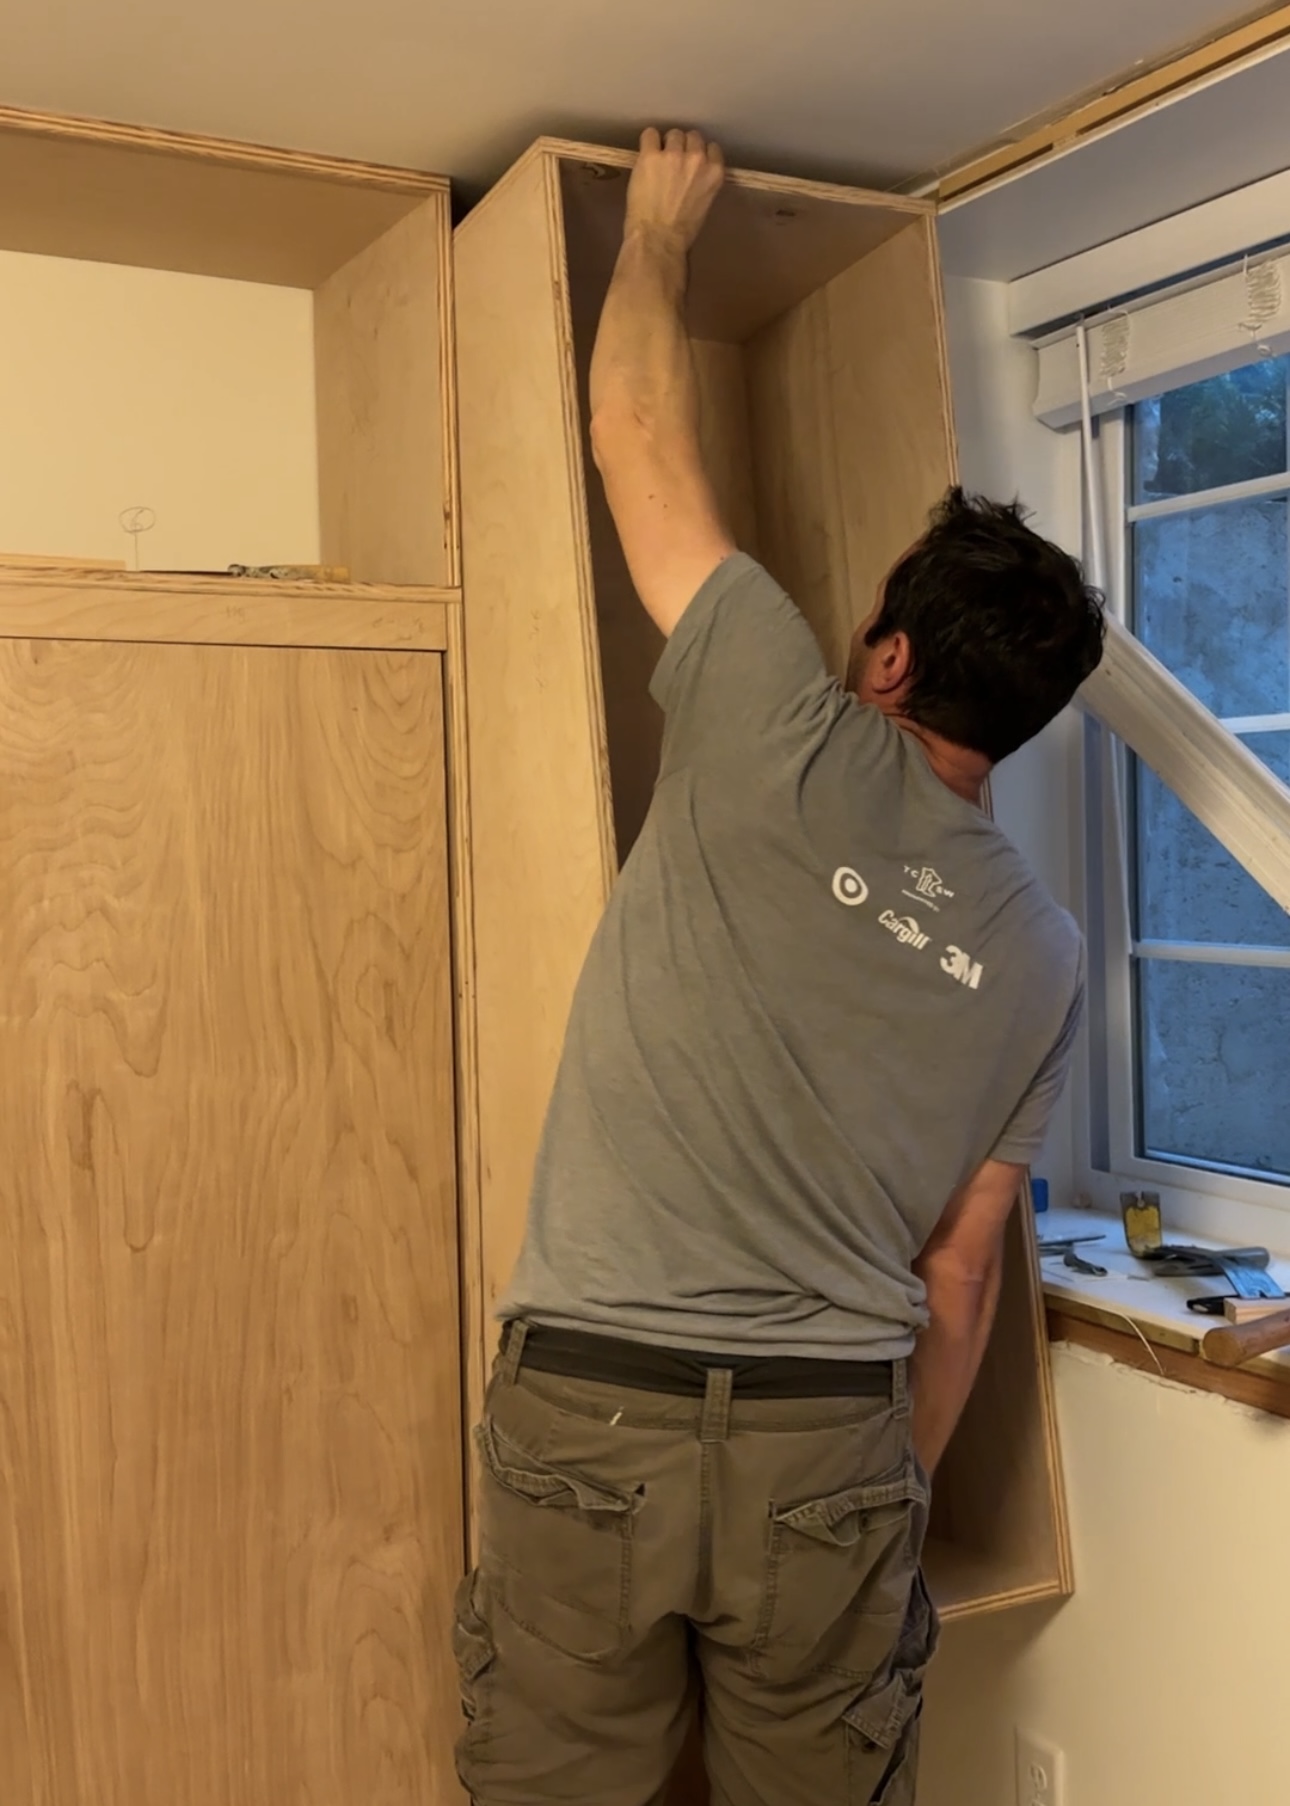
Trying to get the boxes to fit as perfectly as possible was very challenging. Brian had to do a lot of re-cuts so don’t be discouraged if you experience the same.
*Tip: use a long level to check that boxes are level and plumb
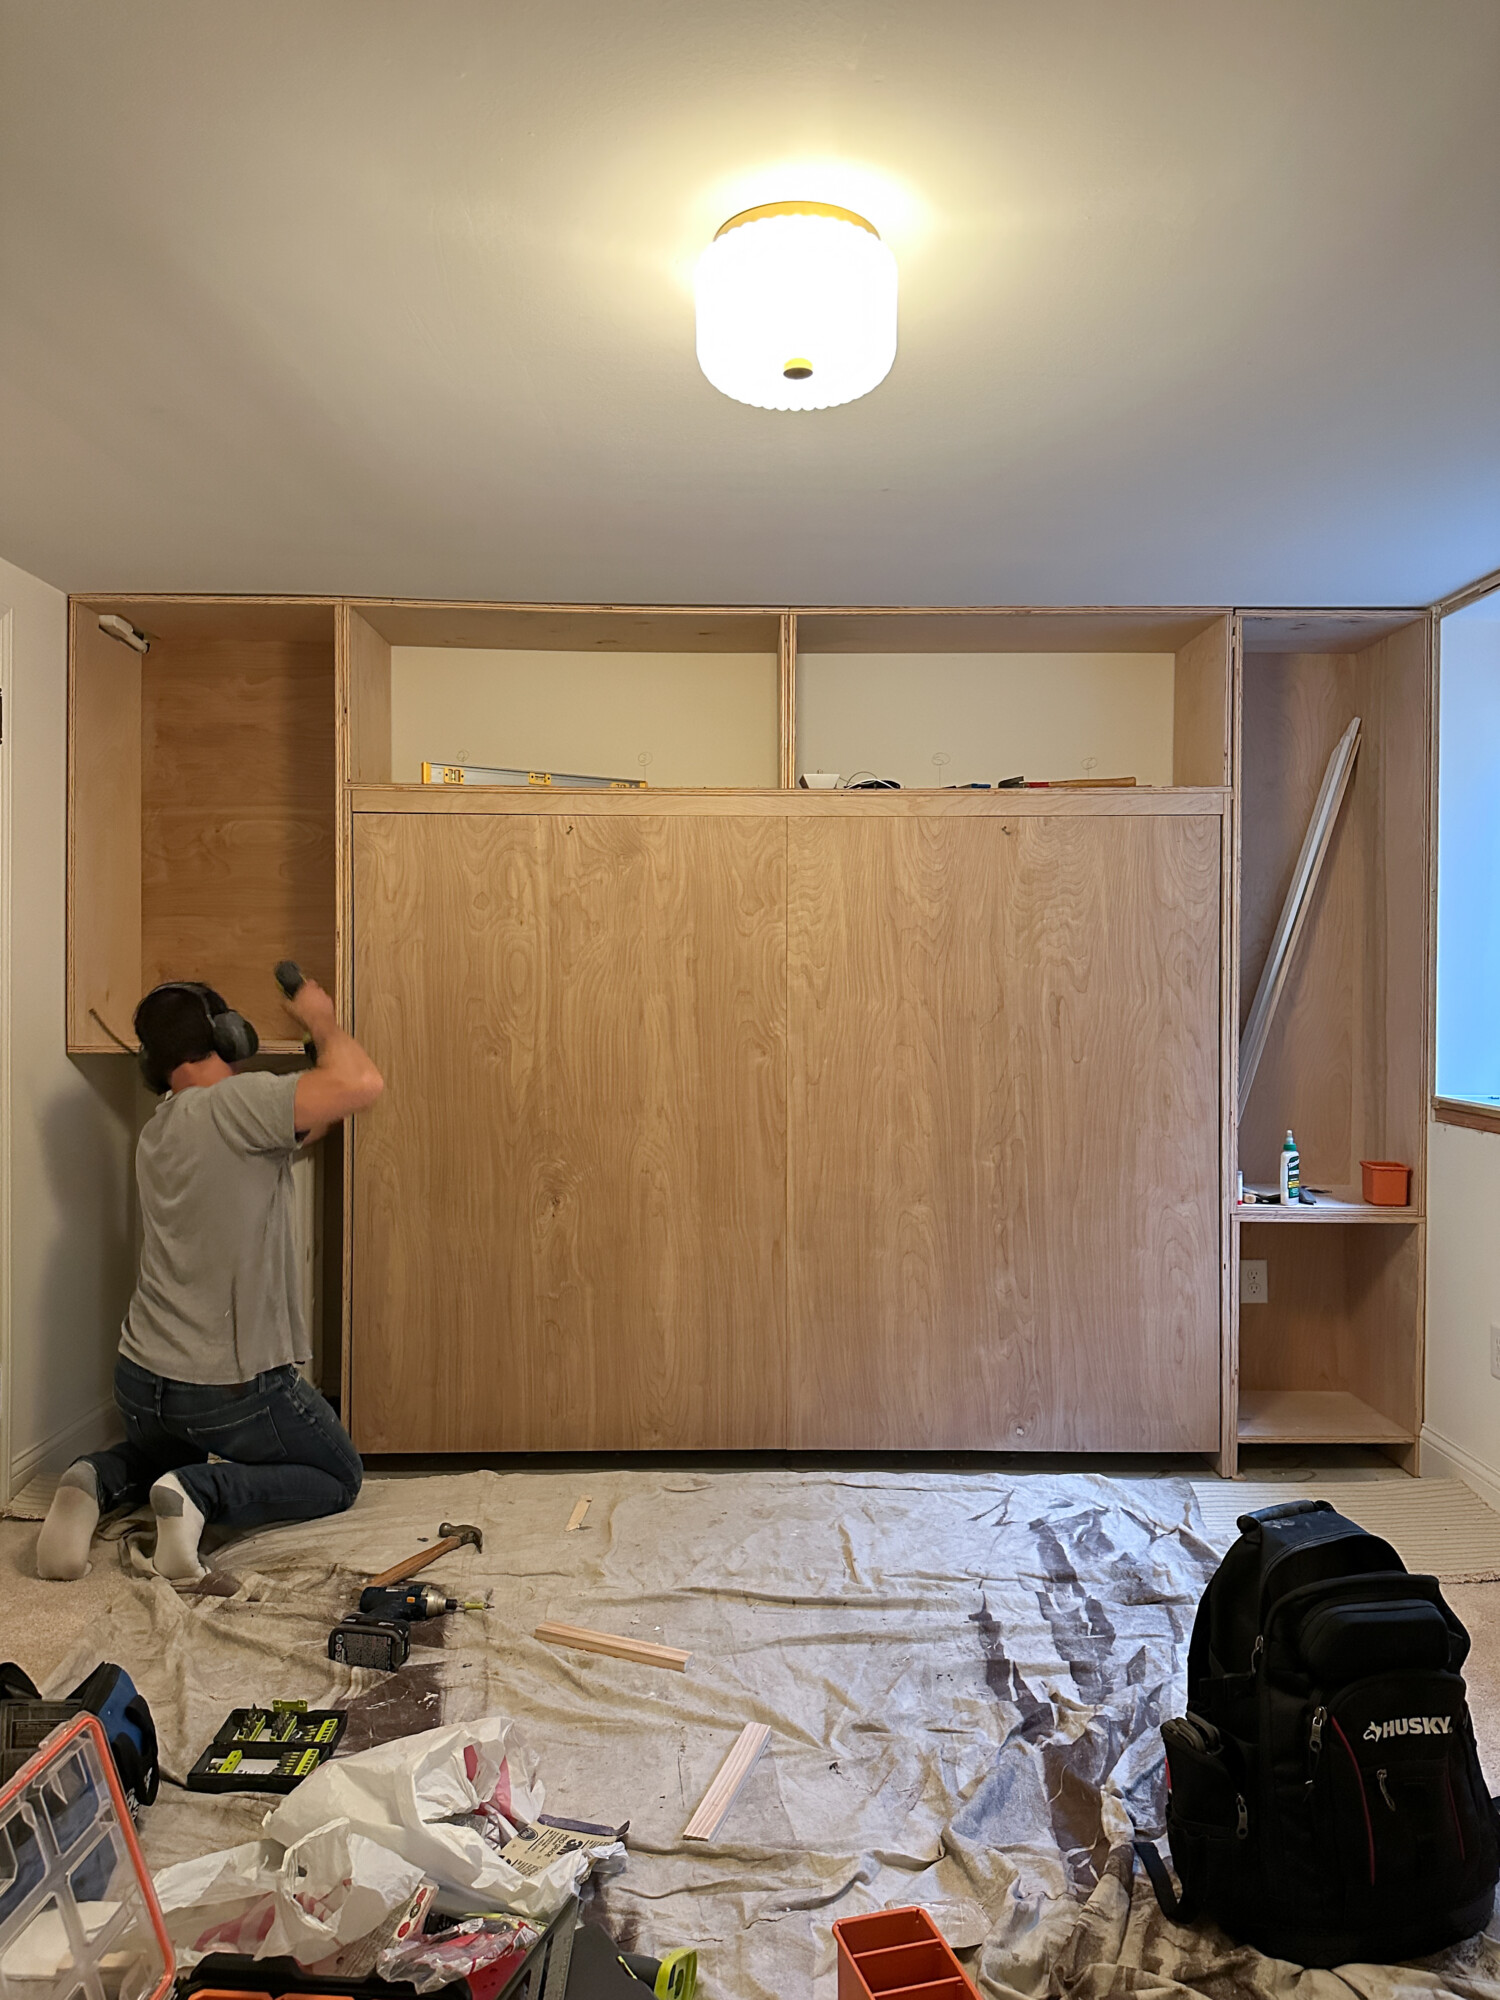
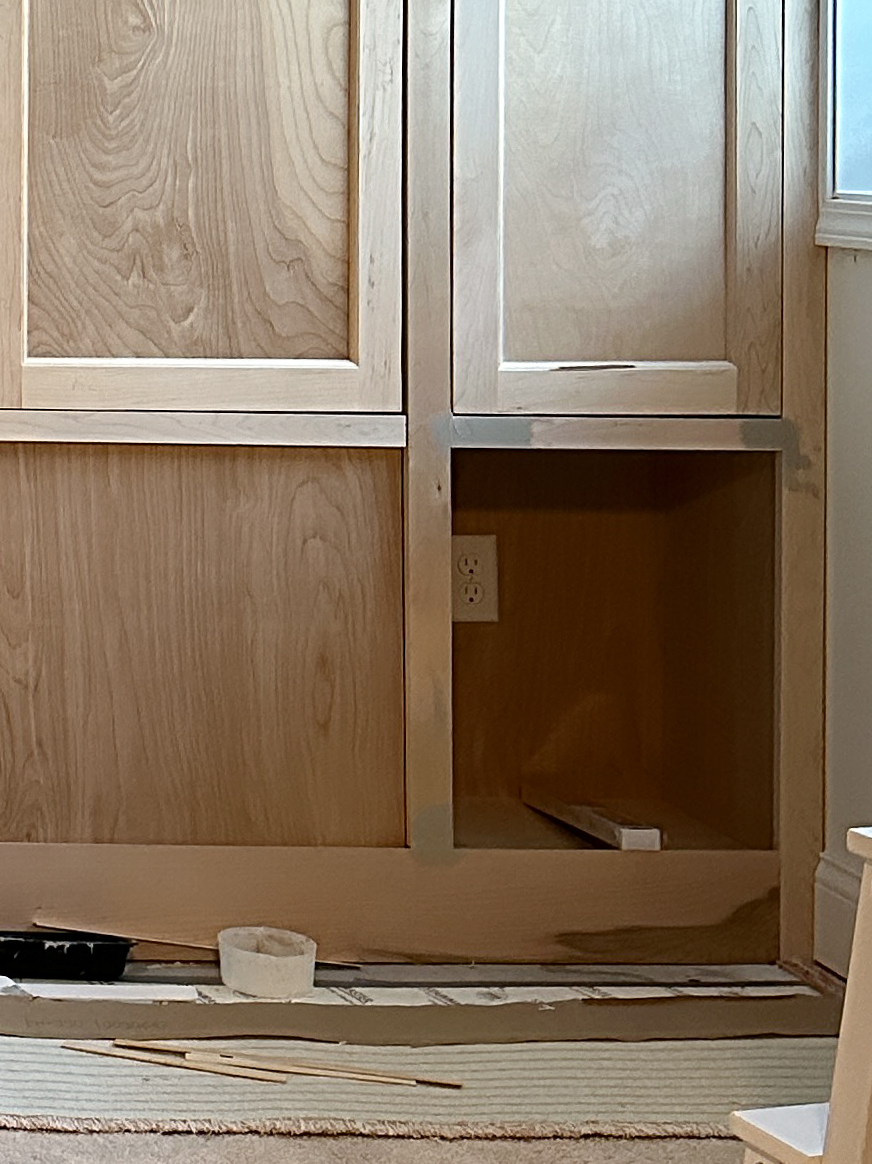
Step 2: Install face frames
After boxes are installed, for inset cabinets, you need to include face frames.
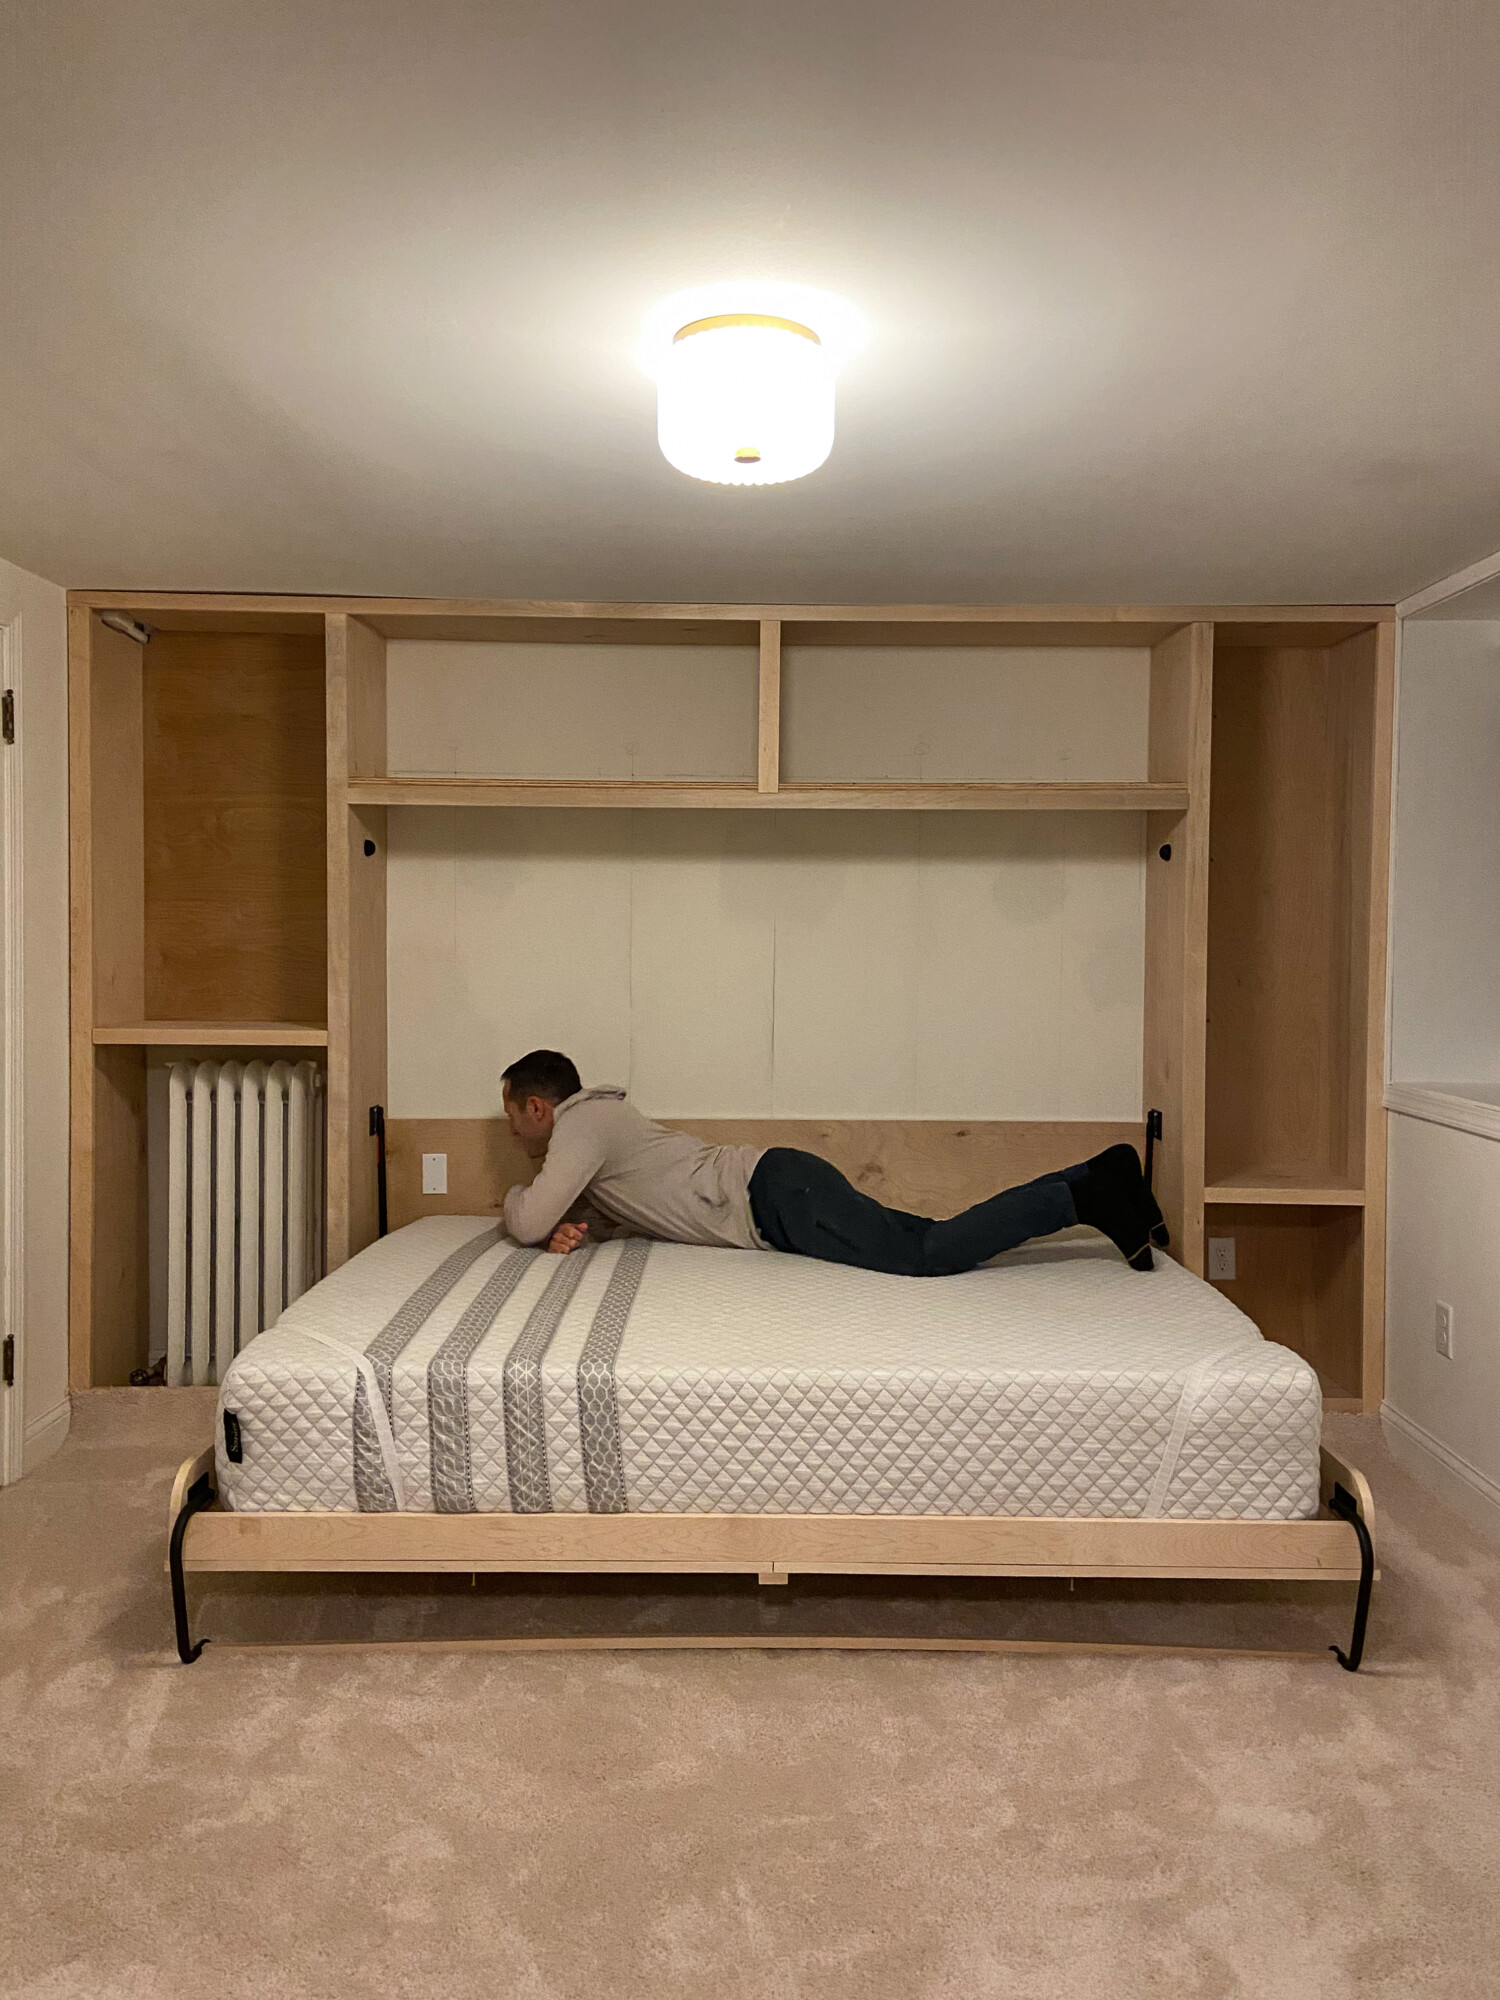
Brian testing out the Murphy bed 🙂
Step 3: Install doors, faux doors + drawers
Once the cabinet boxes and face frames are installed, you’ll need to cut doors, faux doors + drawers to size. Be prepared for several rounds of tweaks.
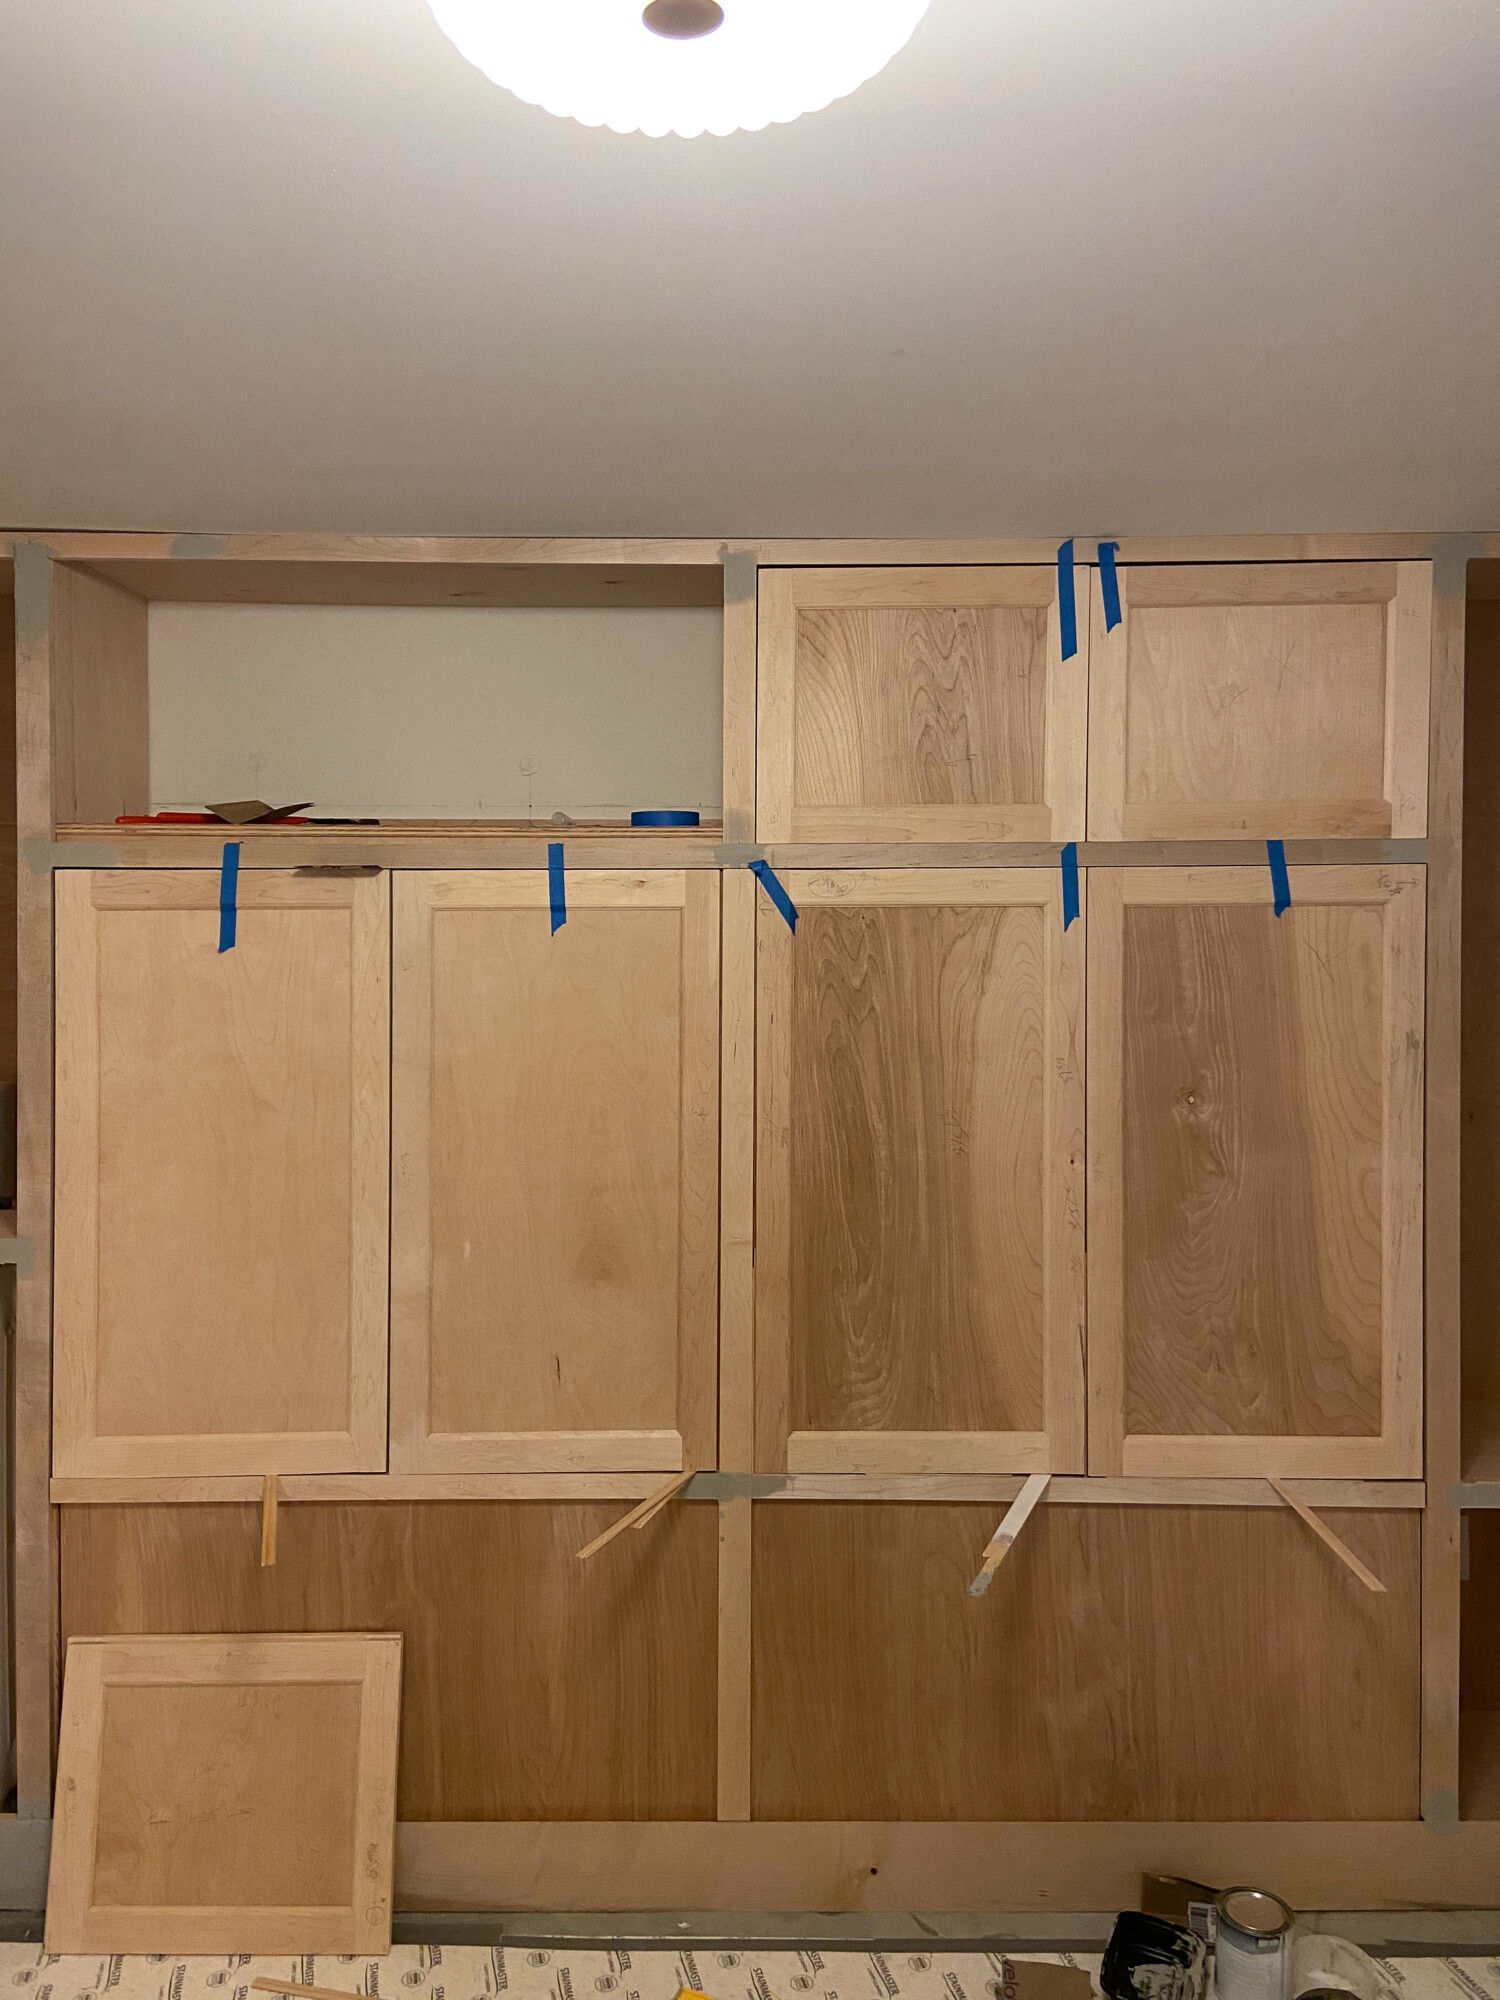
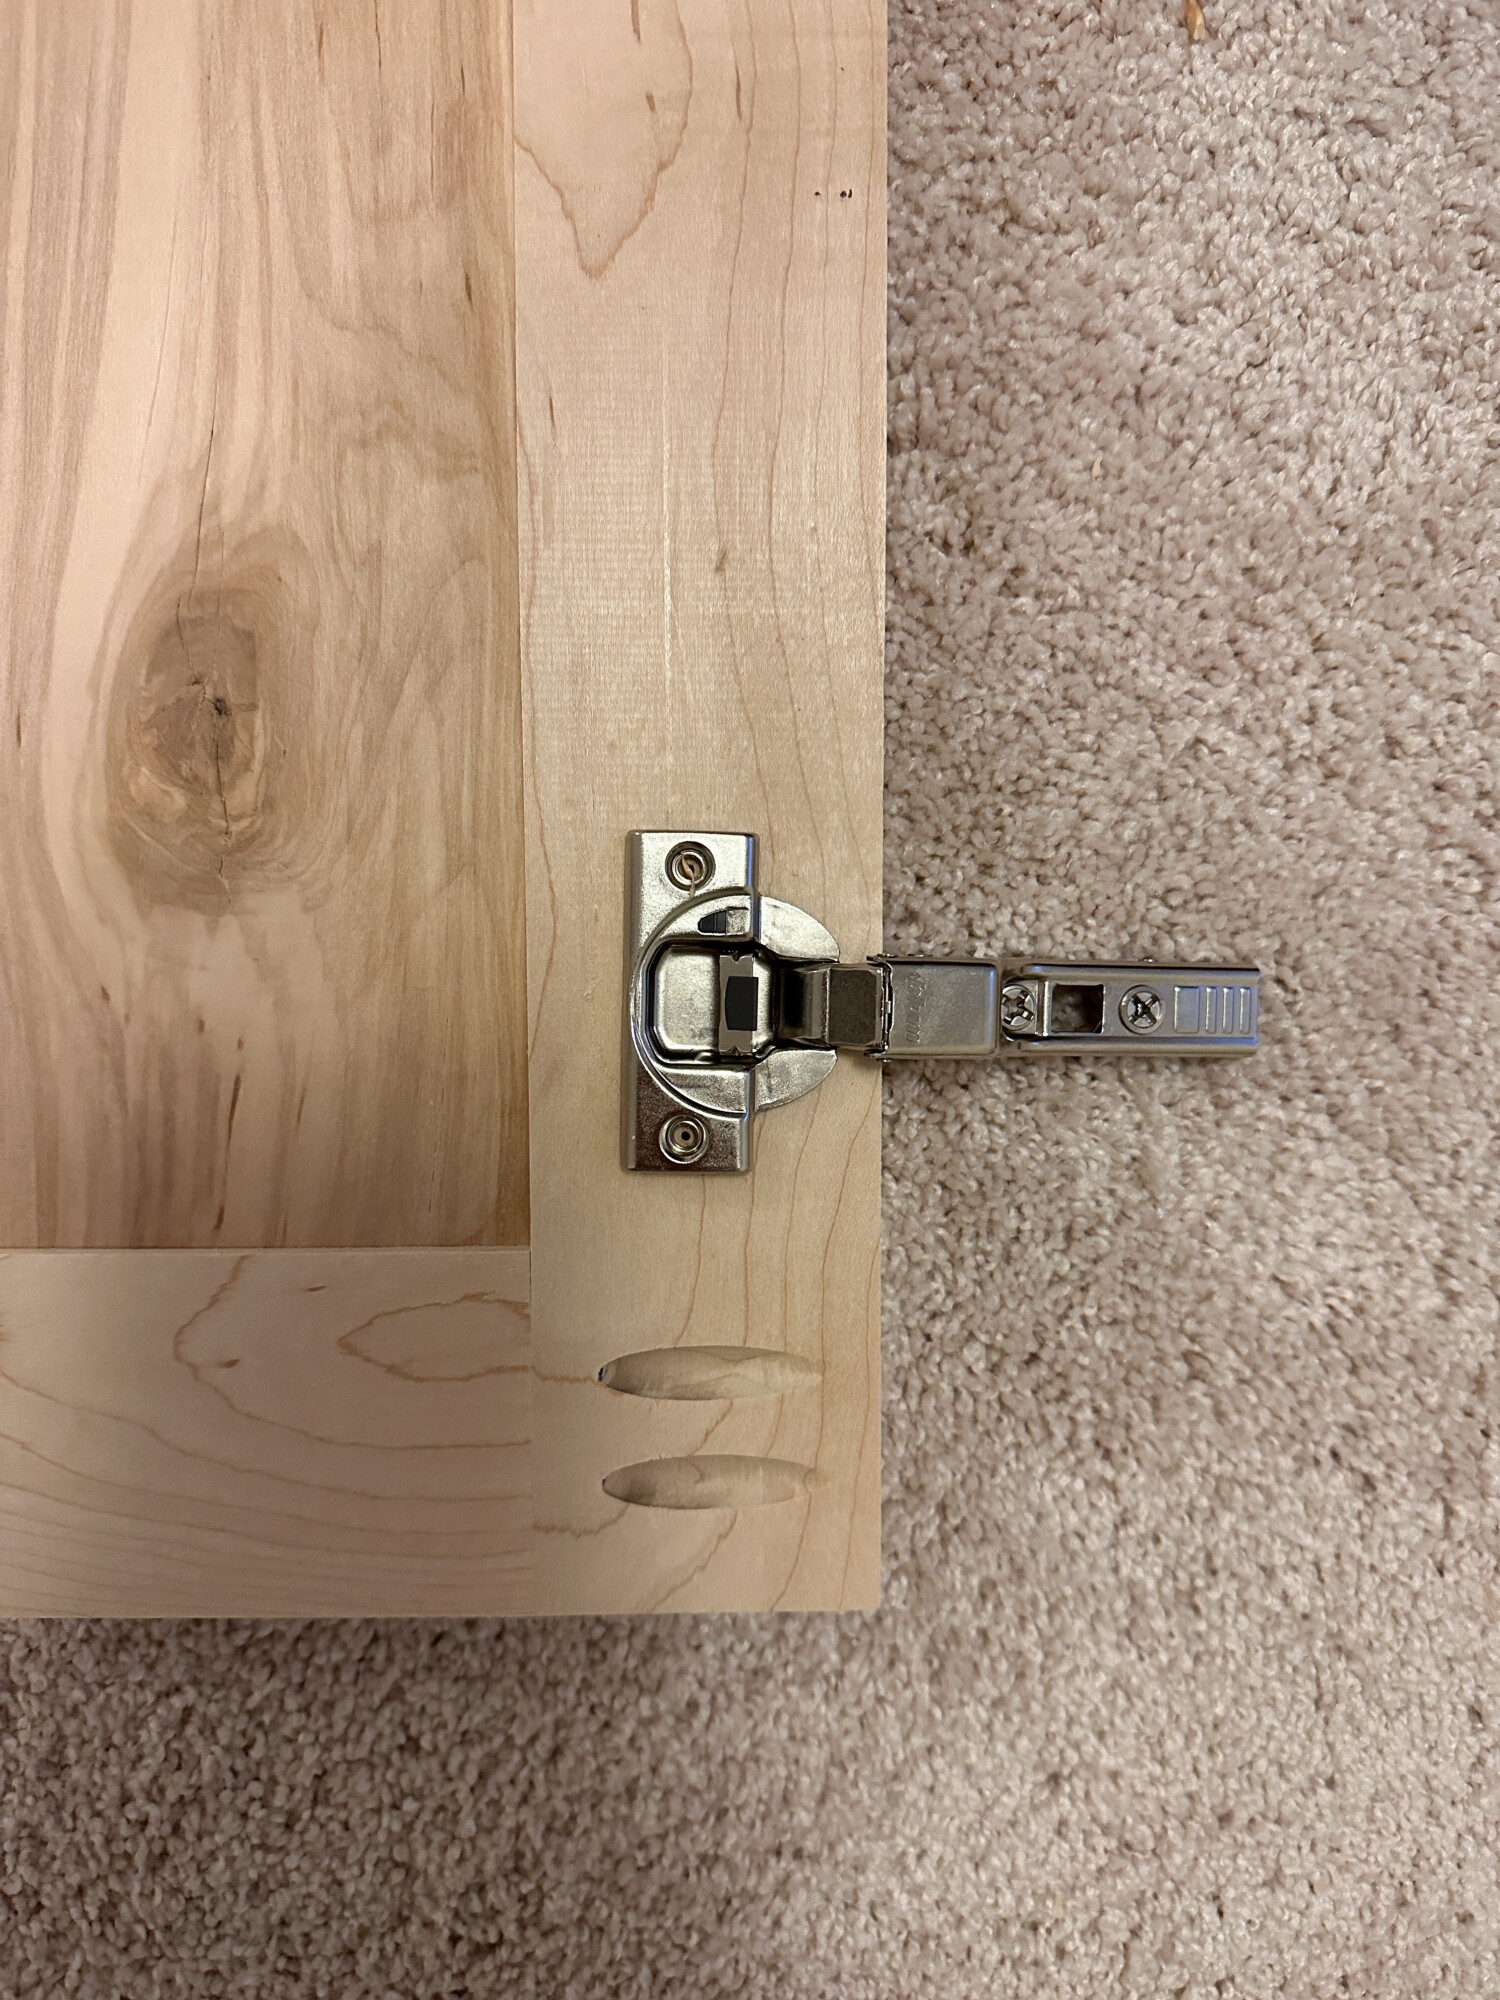
Install doors. Like Brian’s band practice space, we used the Kreg Concealed Hinge Jig to make perfect circles for the hinges.
Product Sources
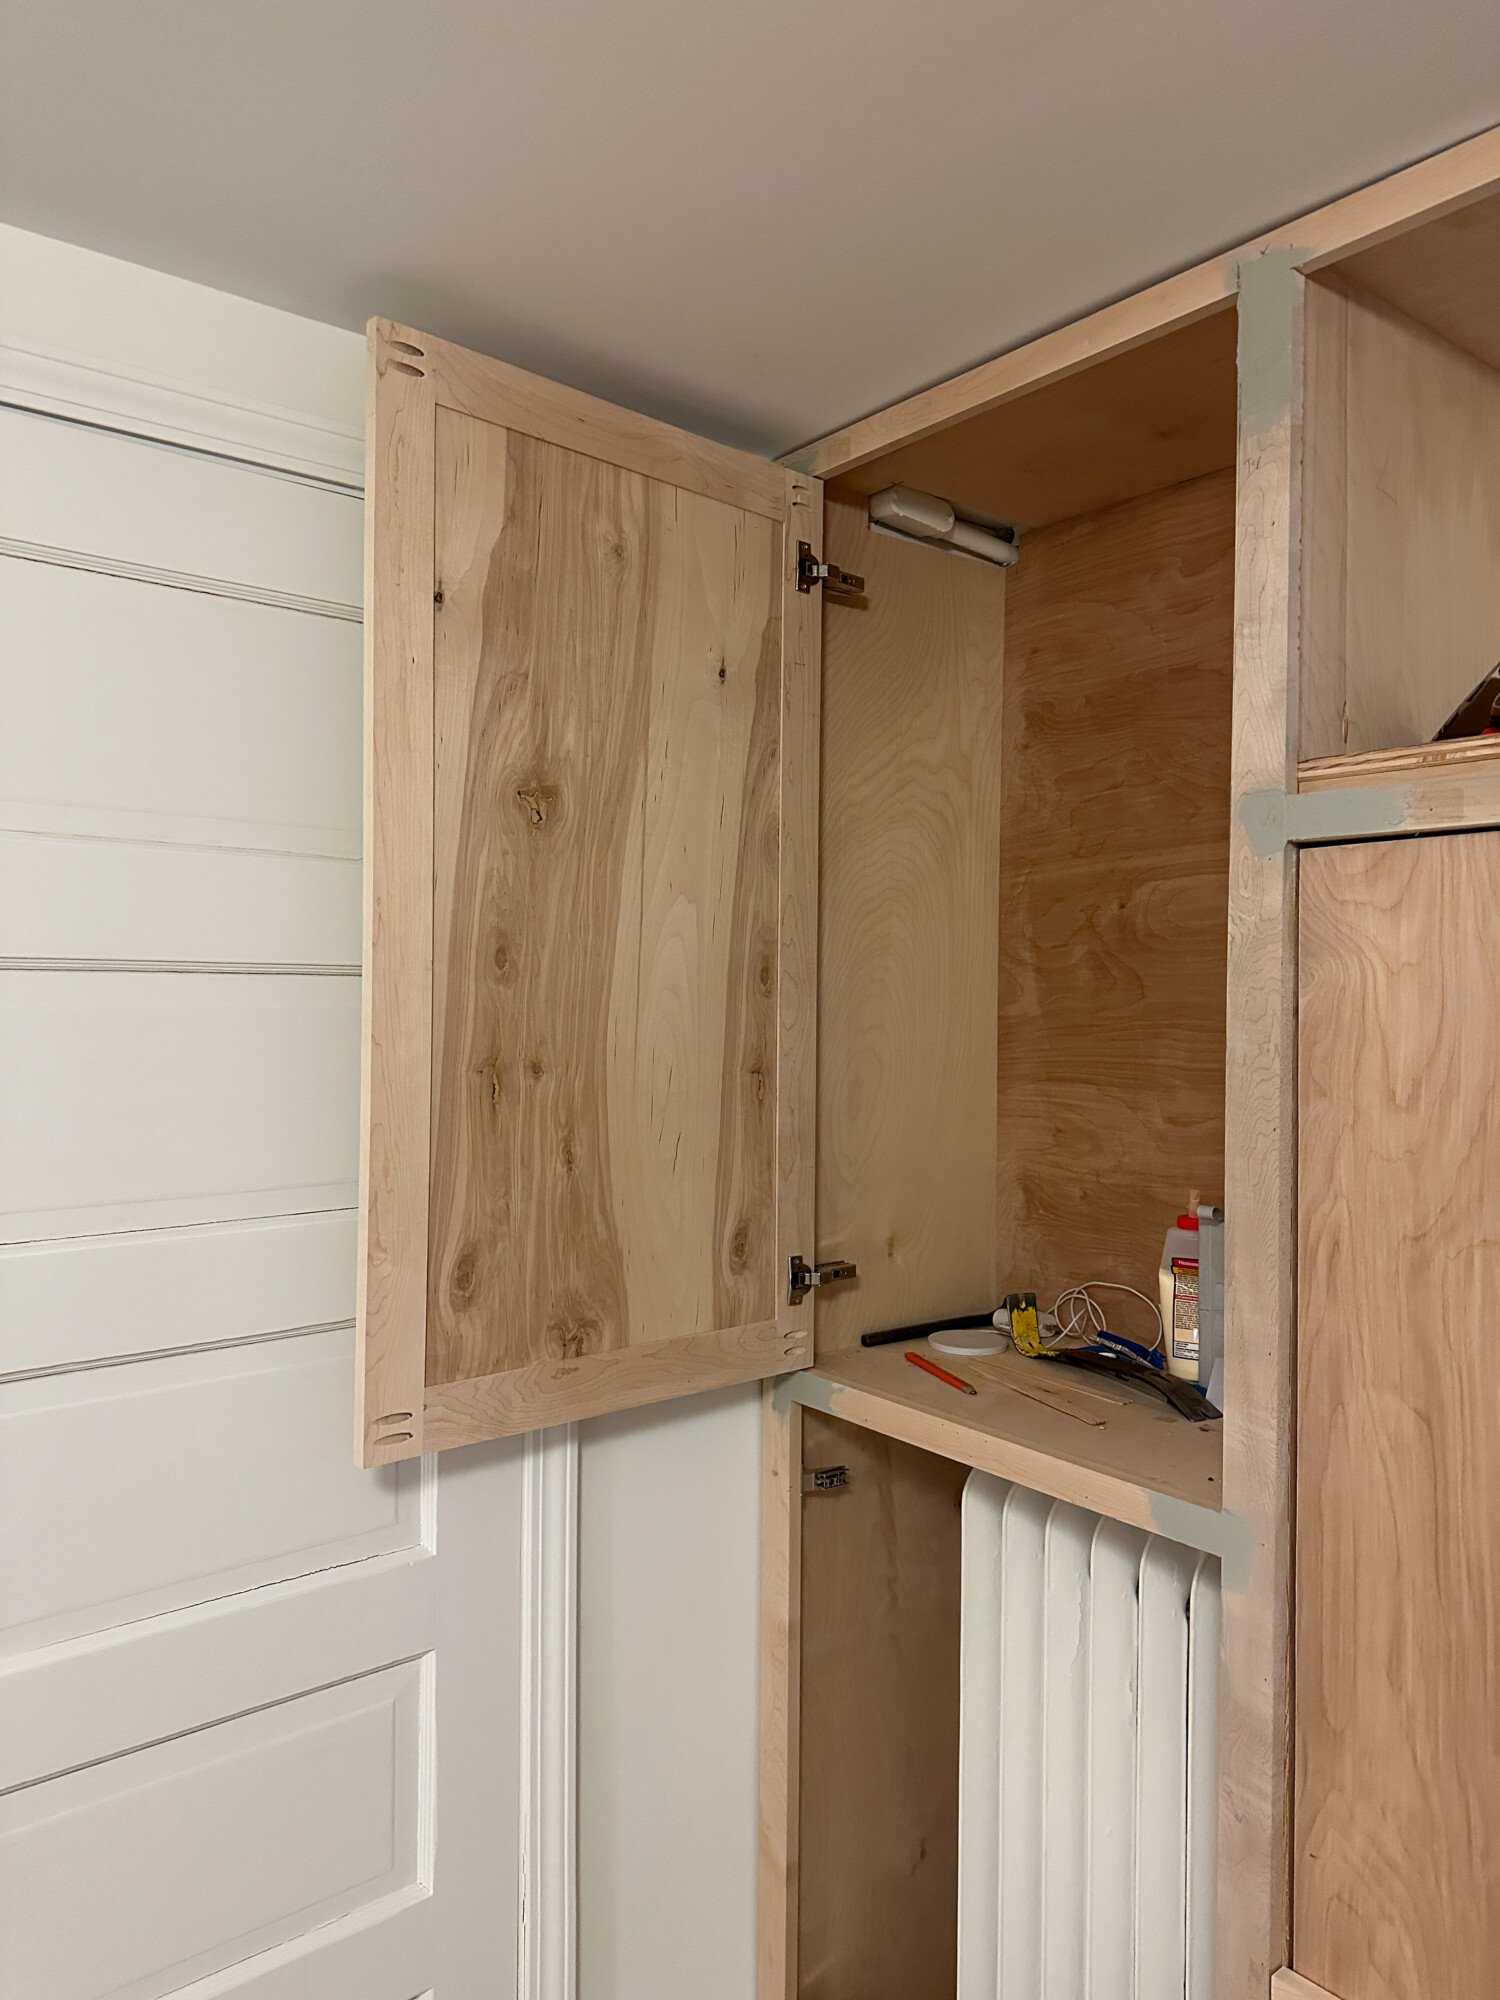
It took a lot of patience to cut the doors. You can see wood filler where we had to touch up. We also decided to cover the radiator which I’ll touch on in another post.
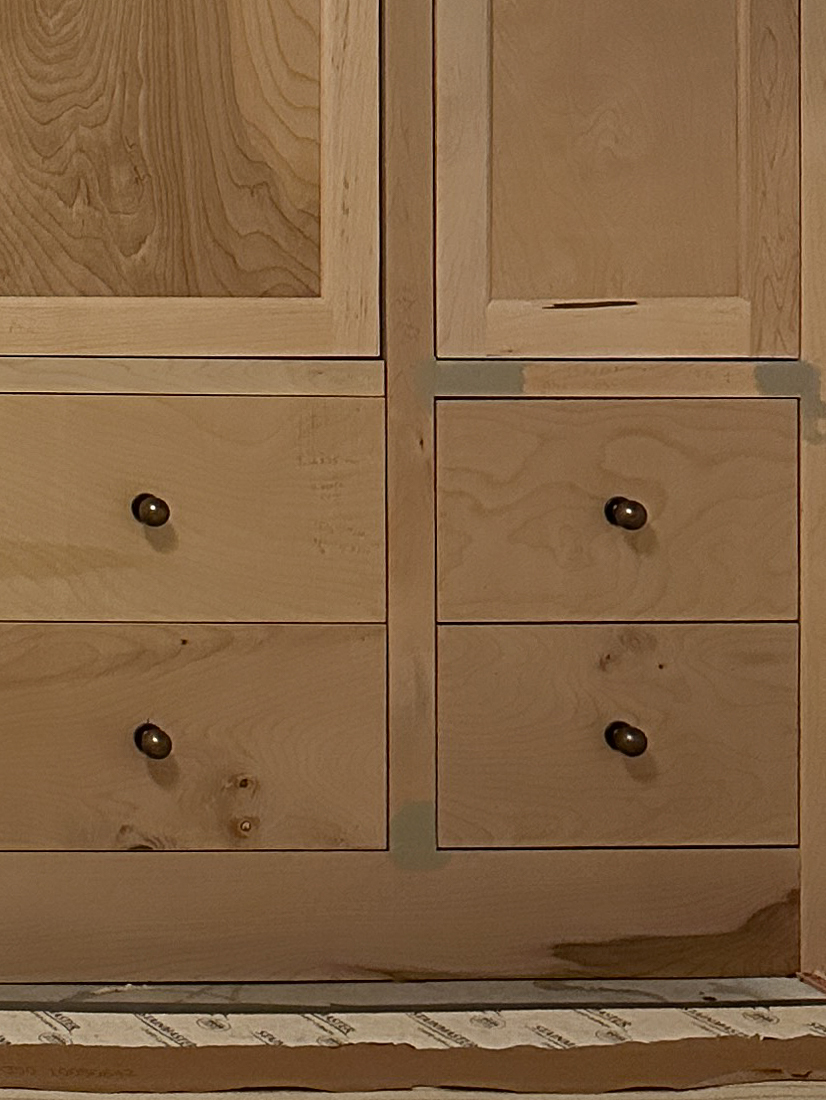
Step 4: Build drawers
Time to build the drawers. Brian has been very happy with his new table saw and highly recommends it for this project.
Pocket screws and dado were used to construct the drawers.
Step 5: Install drawers and hardware
We opted for soft close drawer slides and installed these antique brass knobs which are the same as our ensuite bathroom vanity but in a larger size.
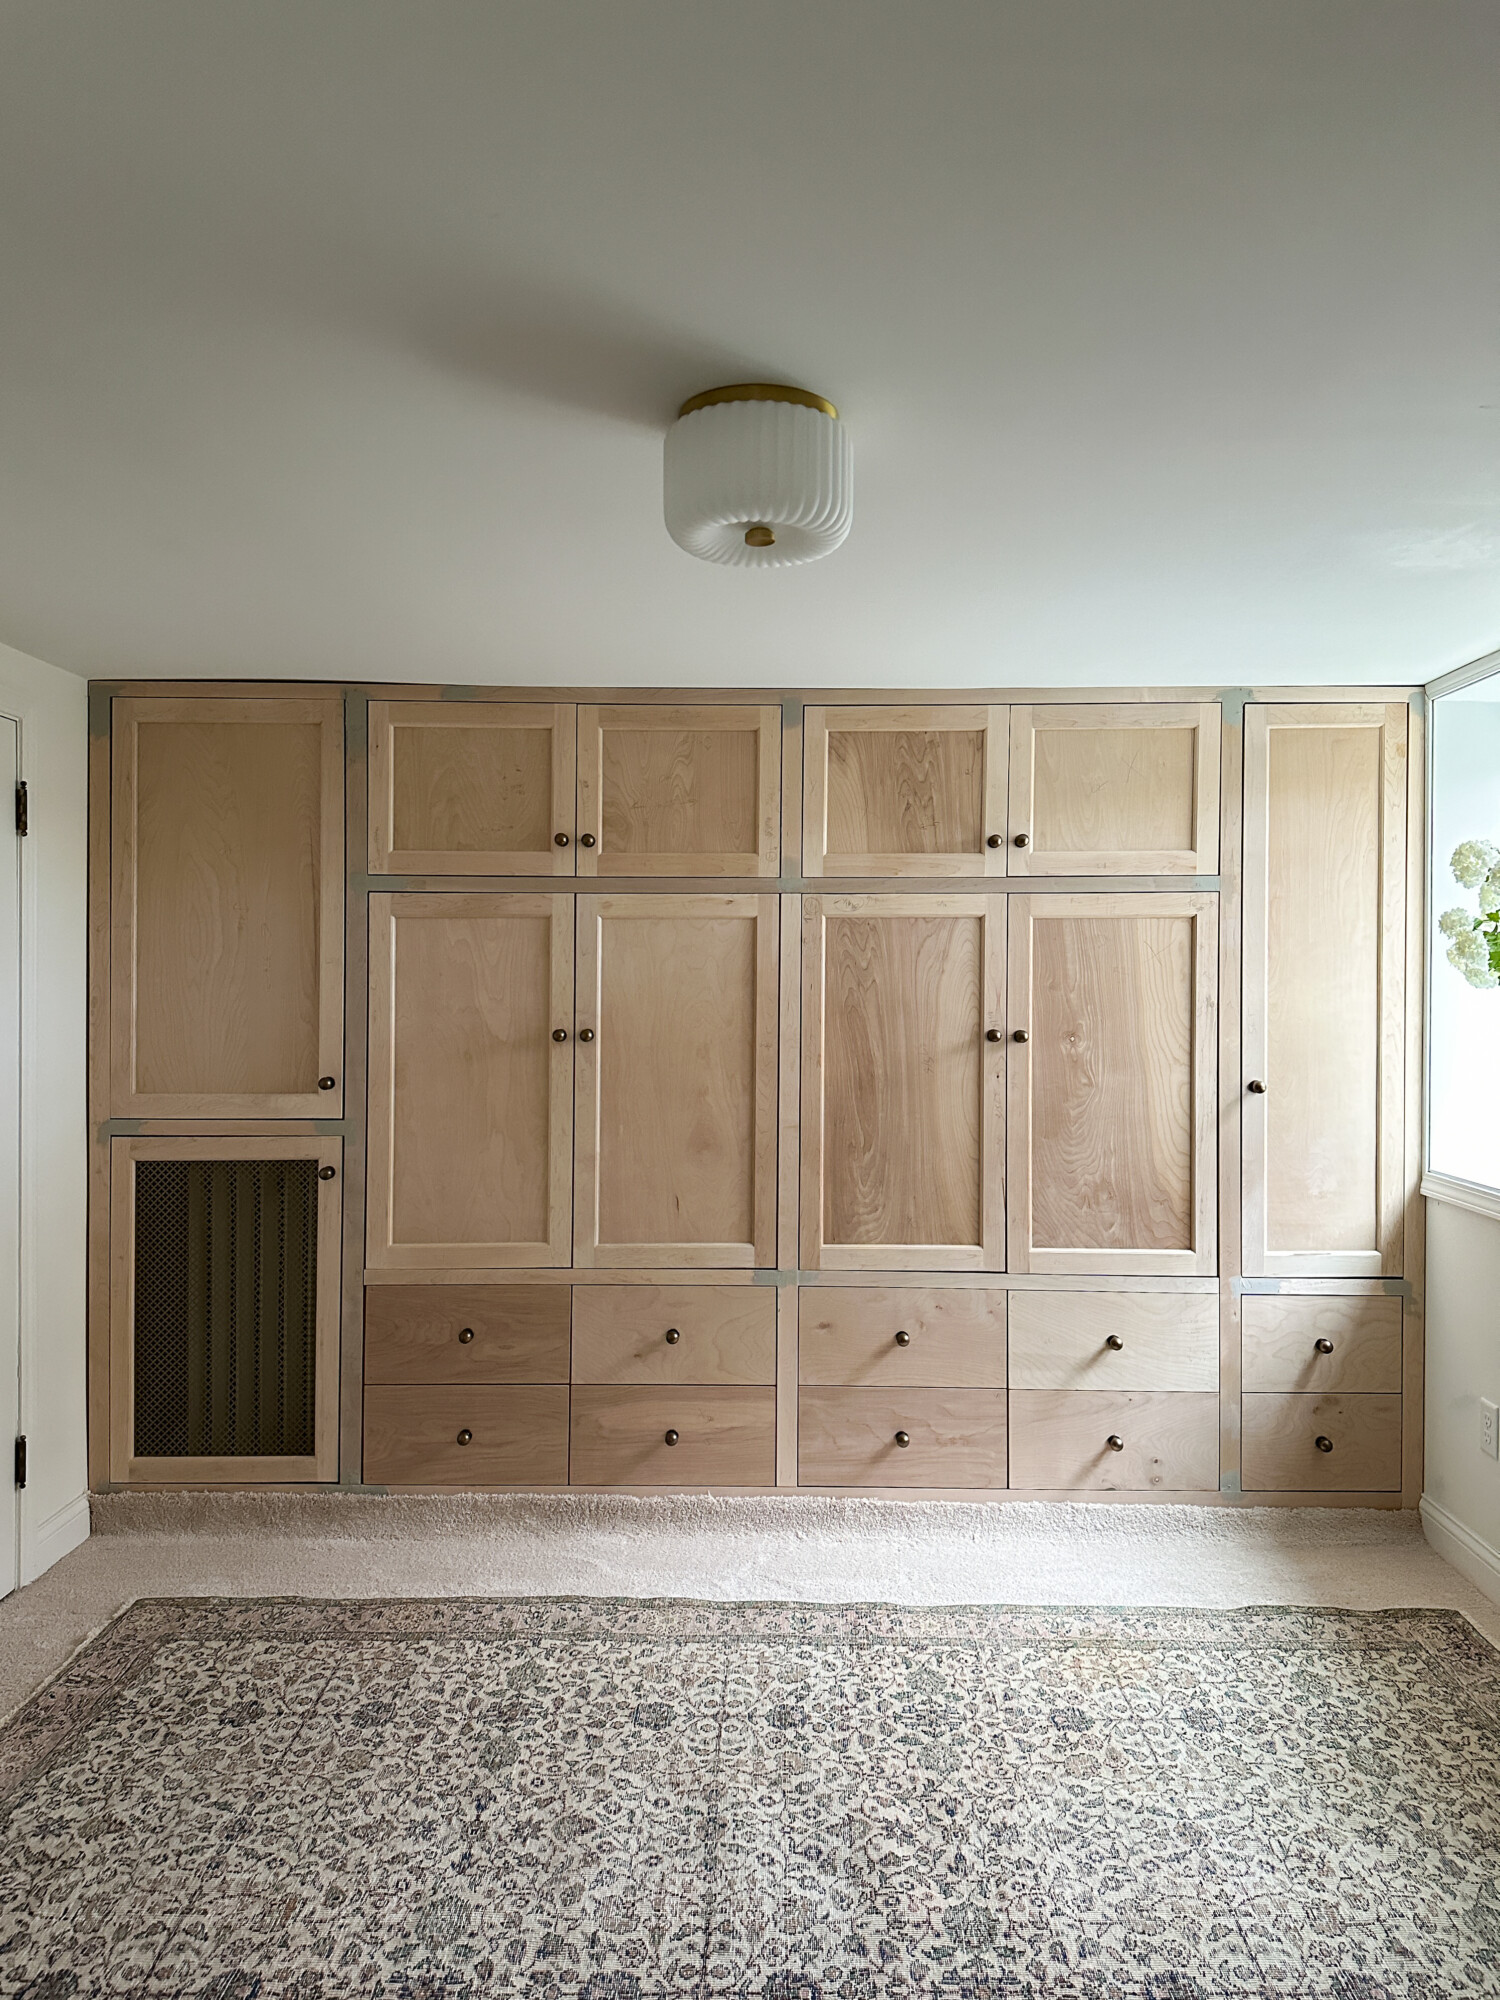
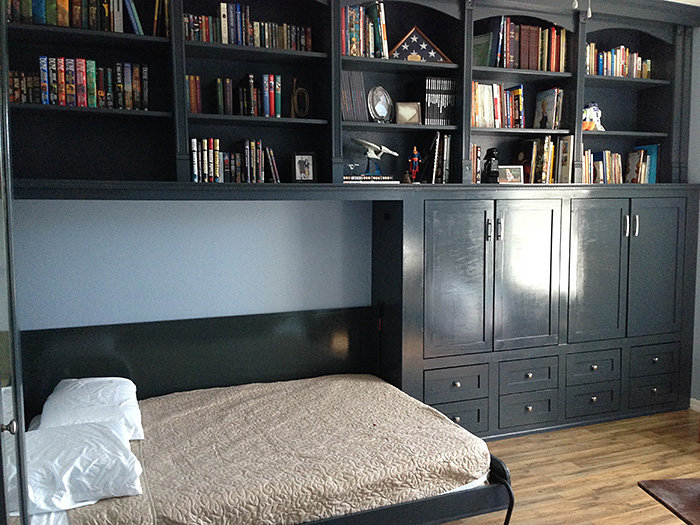
BEFORE & AFTER PHOTOS
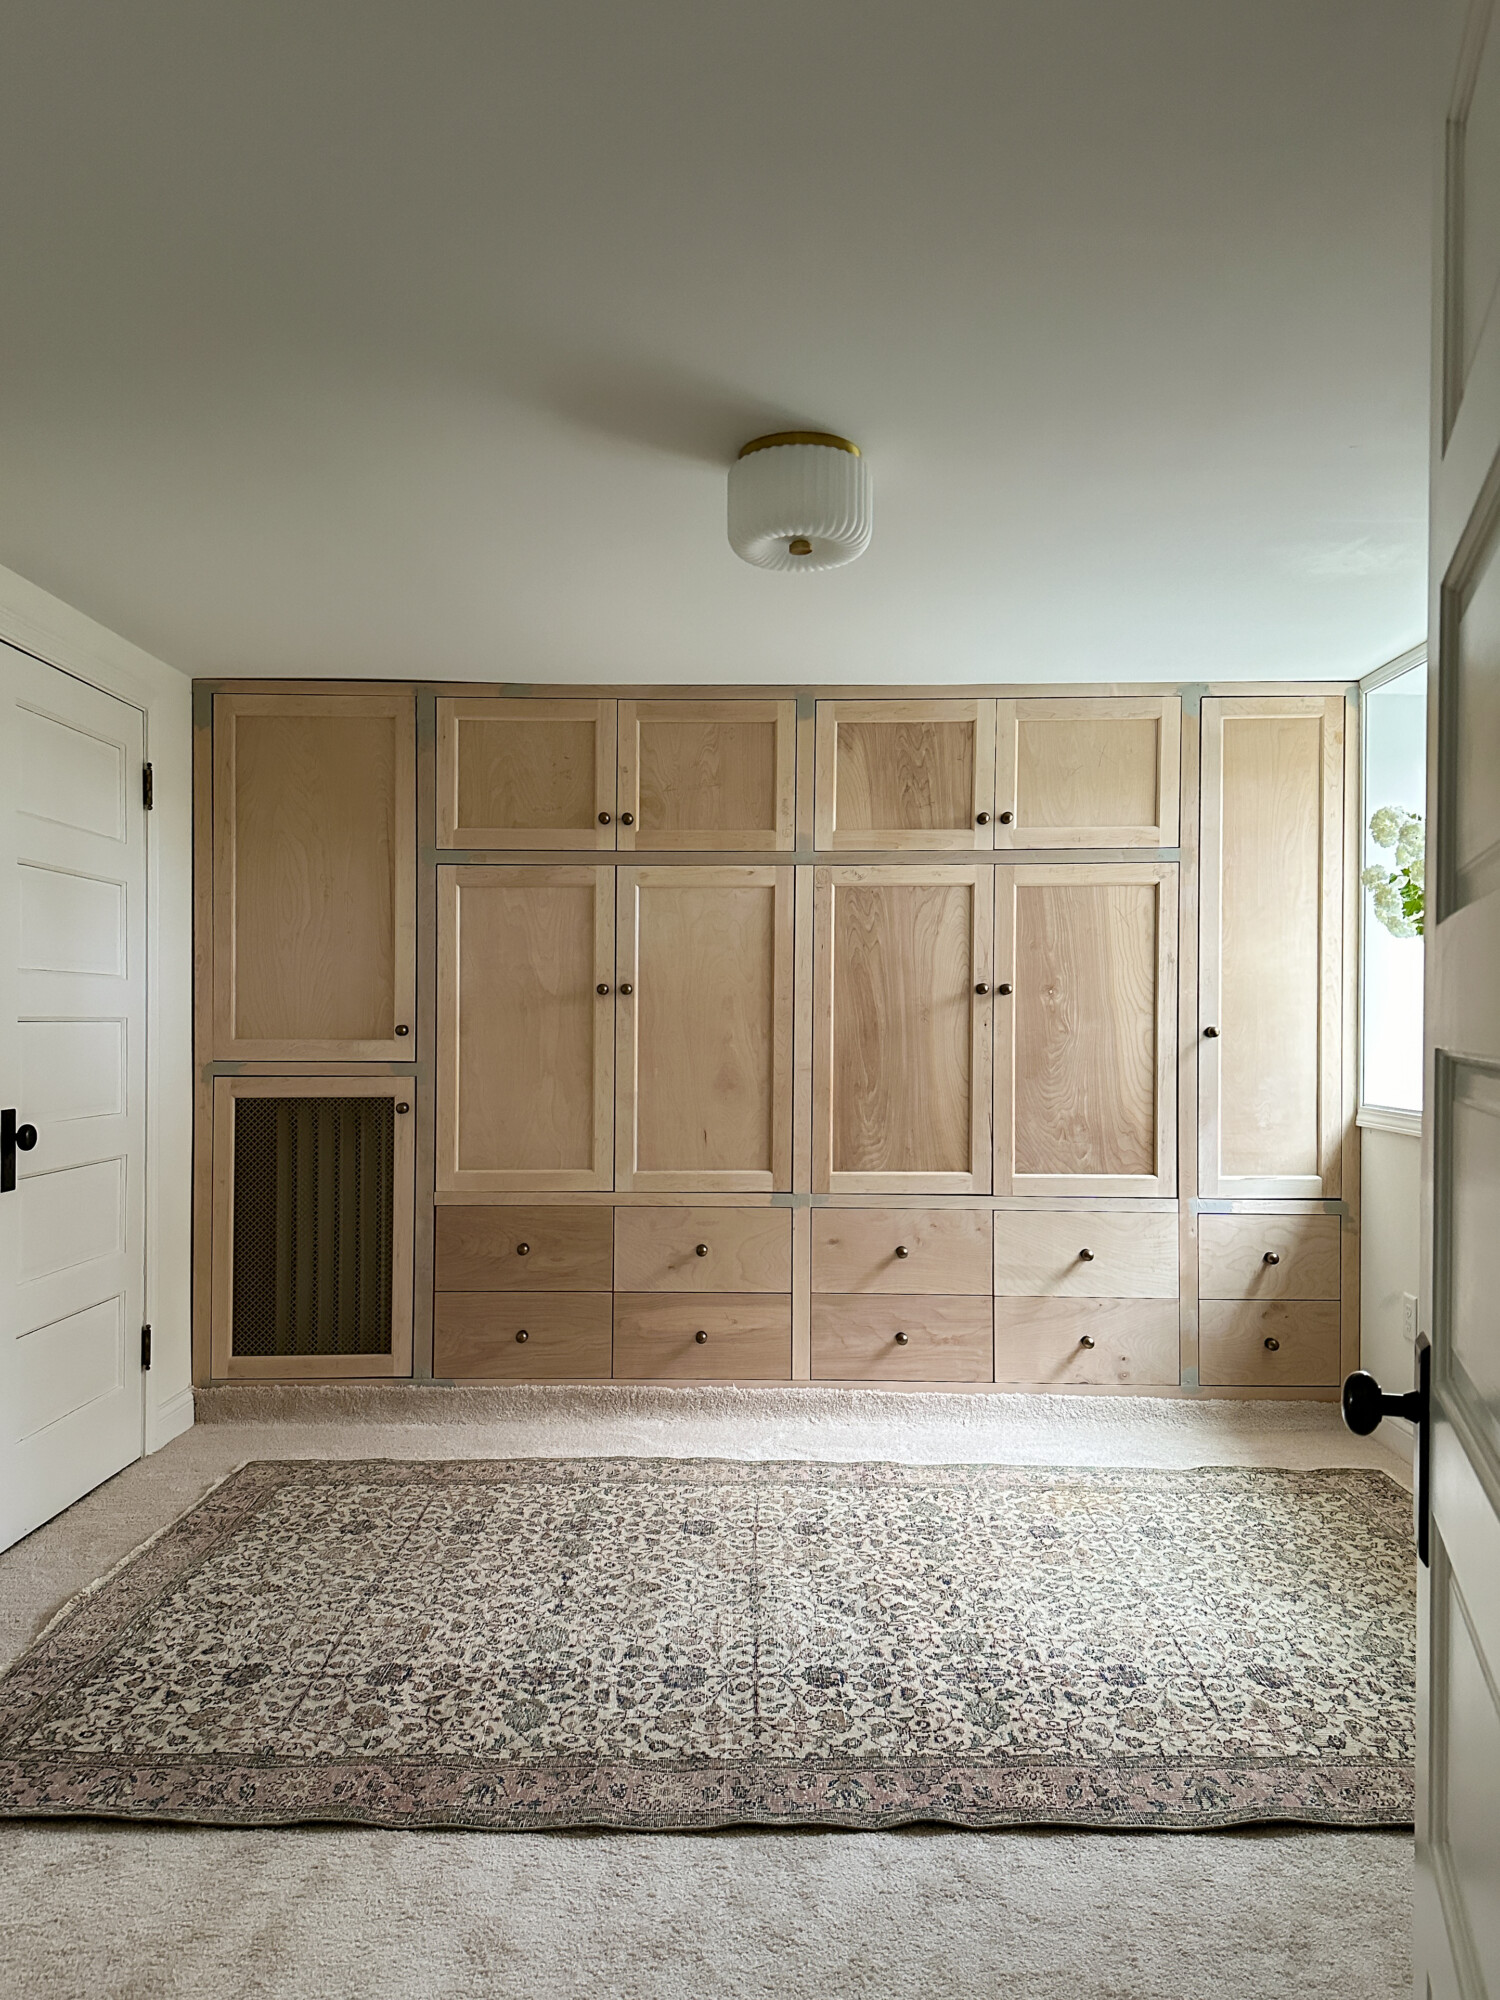
Not only does this built-in design look amazing, but love that we can fold away the bed and created extra storage space to help minimize clutter. The best marriage of form and function!
View this post on Instagram
We are very happy with how it’s turning out so far. Next step is to paint it. We have tested nine paint swatches and reviewing them throughout the day. I think we have a winner but want to wait a few more days to finalize our decision. Make sure to head to my Instagram to cast your vote! * Update: see the fully painted guest bedroom & office here
If you liked this post, you may also enjoy reading:
How we build our knee wall cabinets in our garage attic
How we transformed our basement into our dream family room
Tools & Materials List


what is the size dimensions of this room?
Hi, this room is approximately 13’9″ x 10’8″ with a 7’1″ ceiling height.