
How to Make Homemade Pizza Using the Pizza Oven
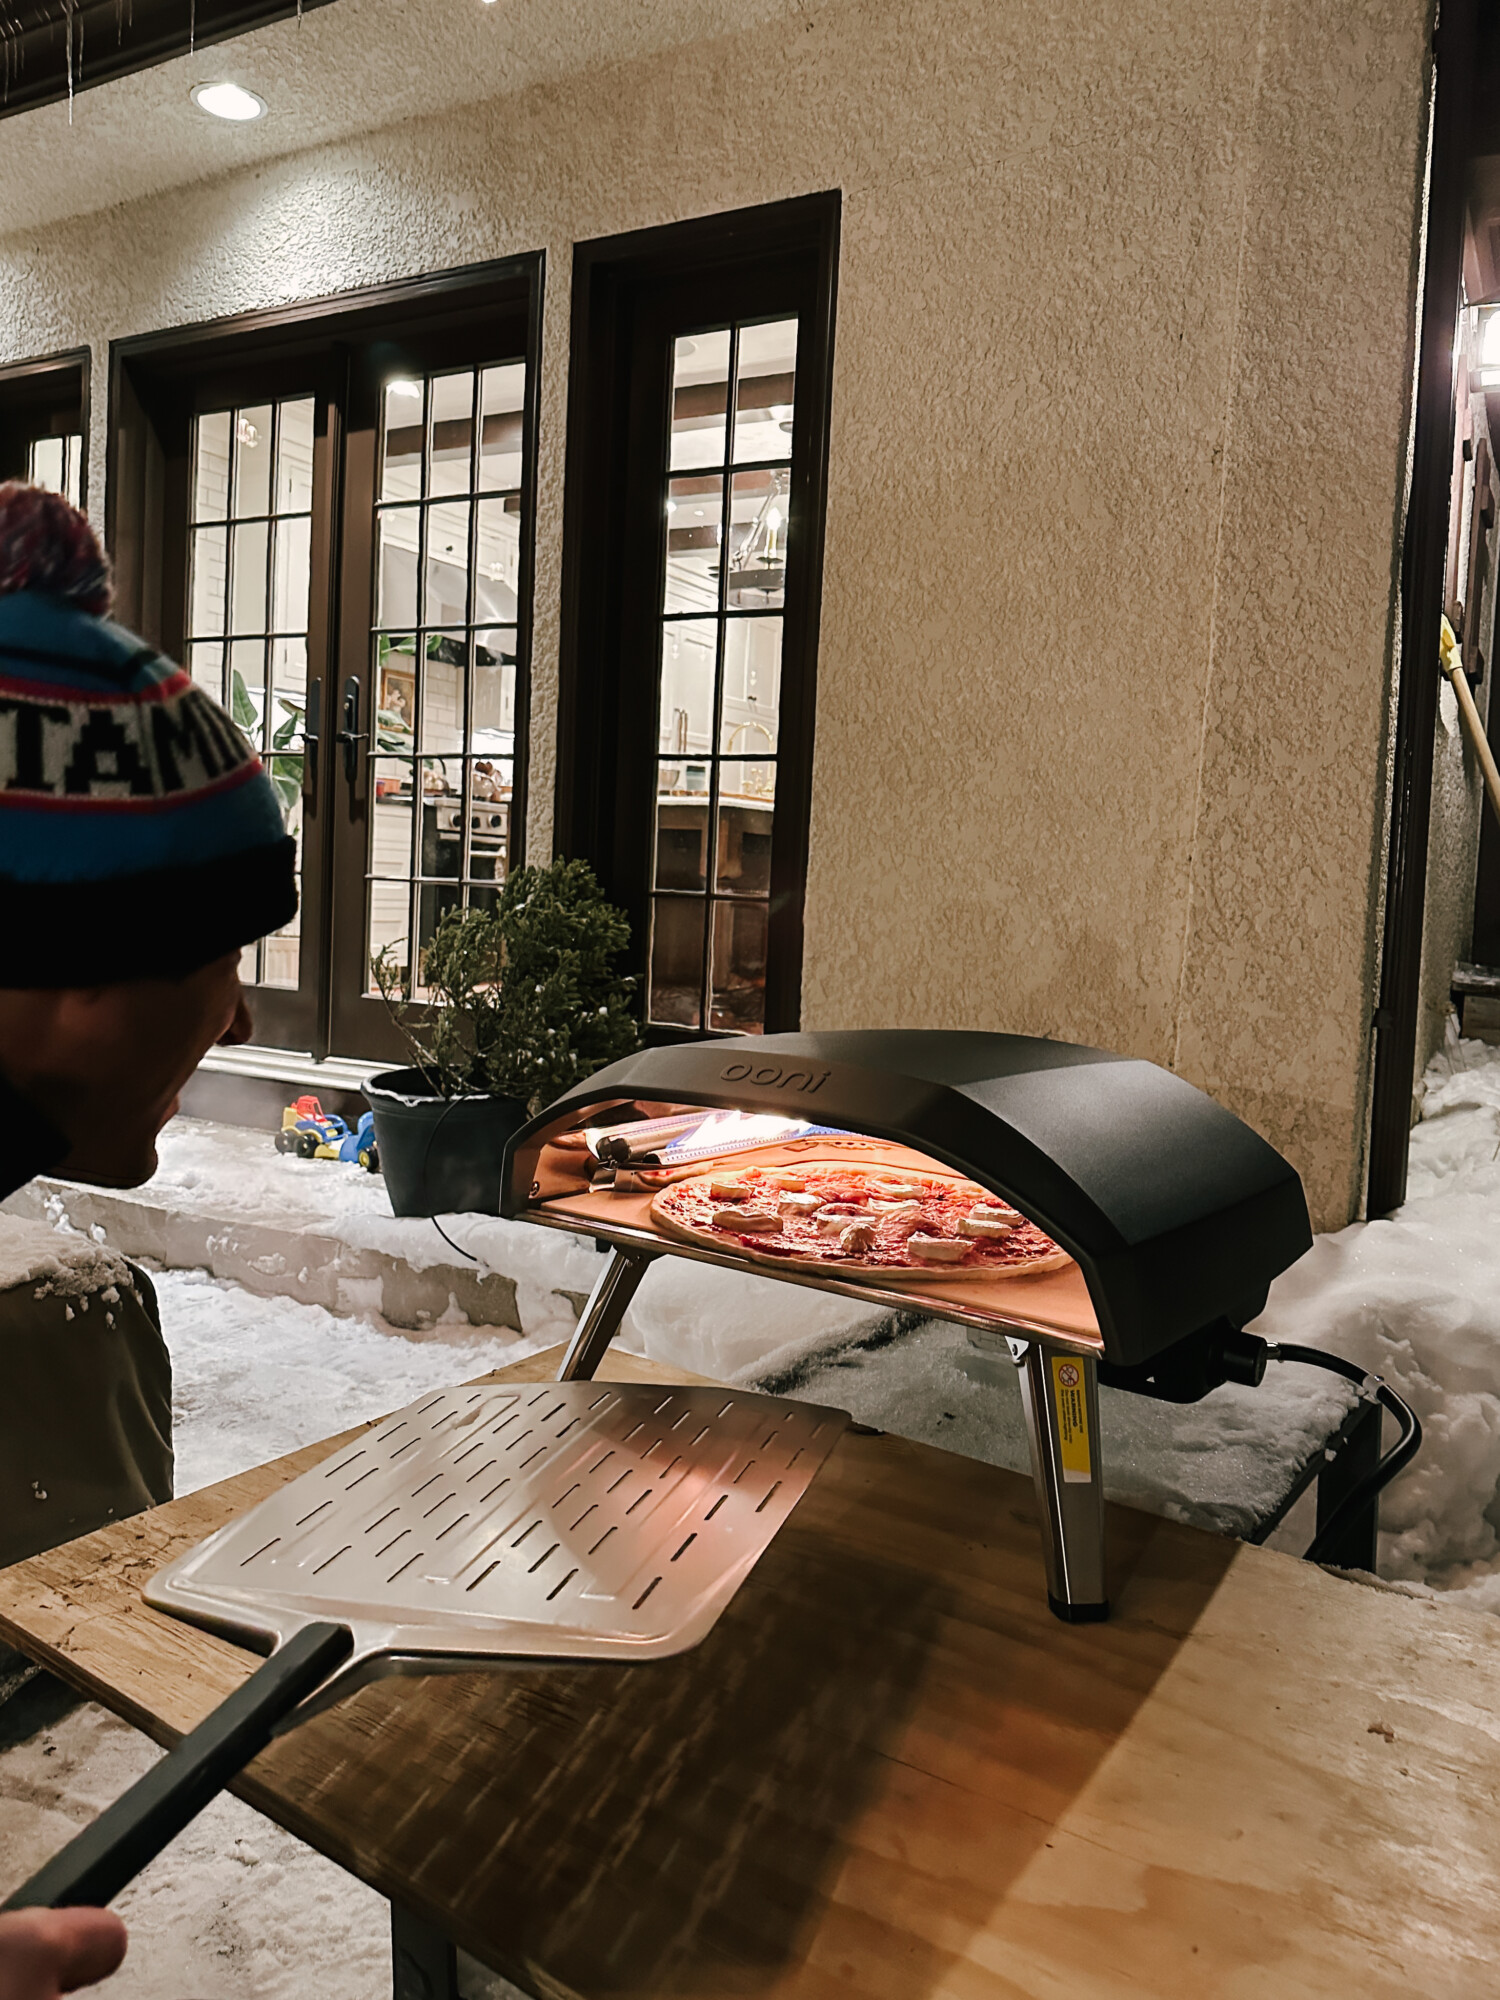
Brian loves to try new things in the kitchen. For years, he has attempted to make homemade pizza. They never turned out quite right and he figured out that the secret weapon was having the right pizza oven. His Christmas present to himself was an Ooni Koda 16 Pizza Oven Bundle. It included the oven, perforated pizza peel and waterproof cover.

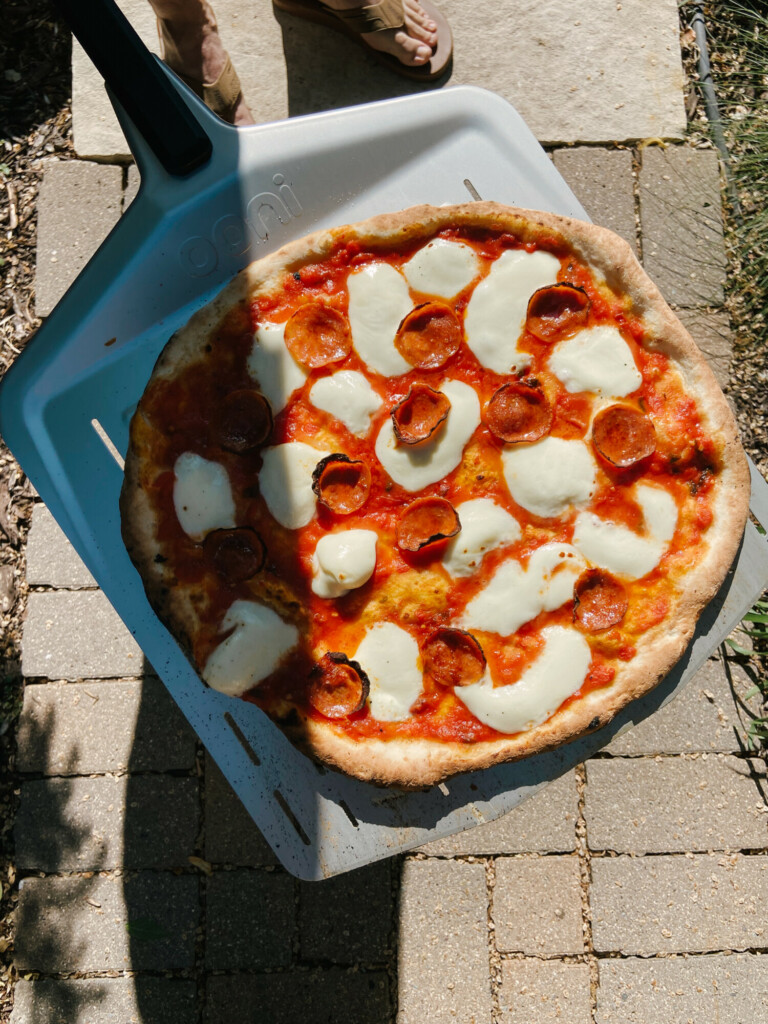
Brian read the Ooni blog, watched YouTube videos and bought all the proper ingredients to make the pizza dough and sauce. To his surprise, the first couple of pizzas came out perfectly! They were absolutely delicious! I’m talking restaurant quality delicious. Since purchasing the pizza oven in December, he’s made about 20 pizzas total – including for our oldest daughter’s birthday party. Ava’s best friend exclaimed that it was the best pizza she’s ever had! This is not to say that every launch into the oven has been perfect (a few times a hole has torn in the crust) but overall, it has made him confident in his homemade pizza making skills. This post is not sponsored by Ooni (as always, all opinions are our own) but he credits a lot of this to the Ooni blog and is sharing his experience in this post with some helpful tips.
If you’re serious about making the perfect homemade pizza, keep on reading!
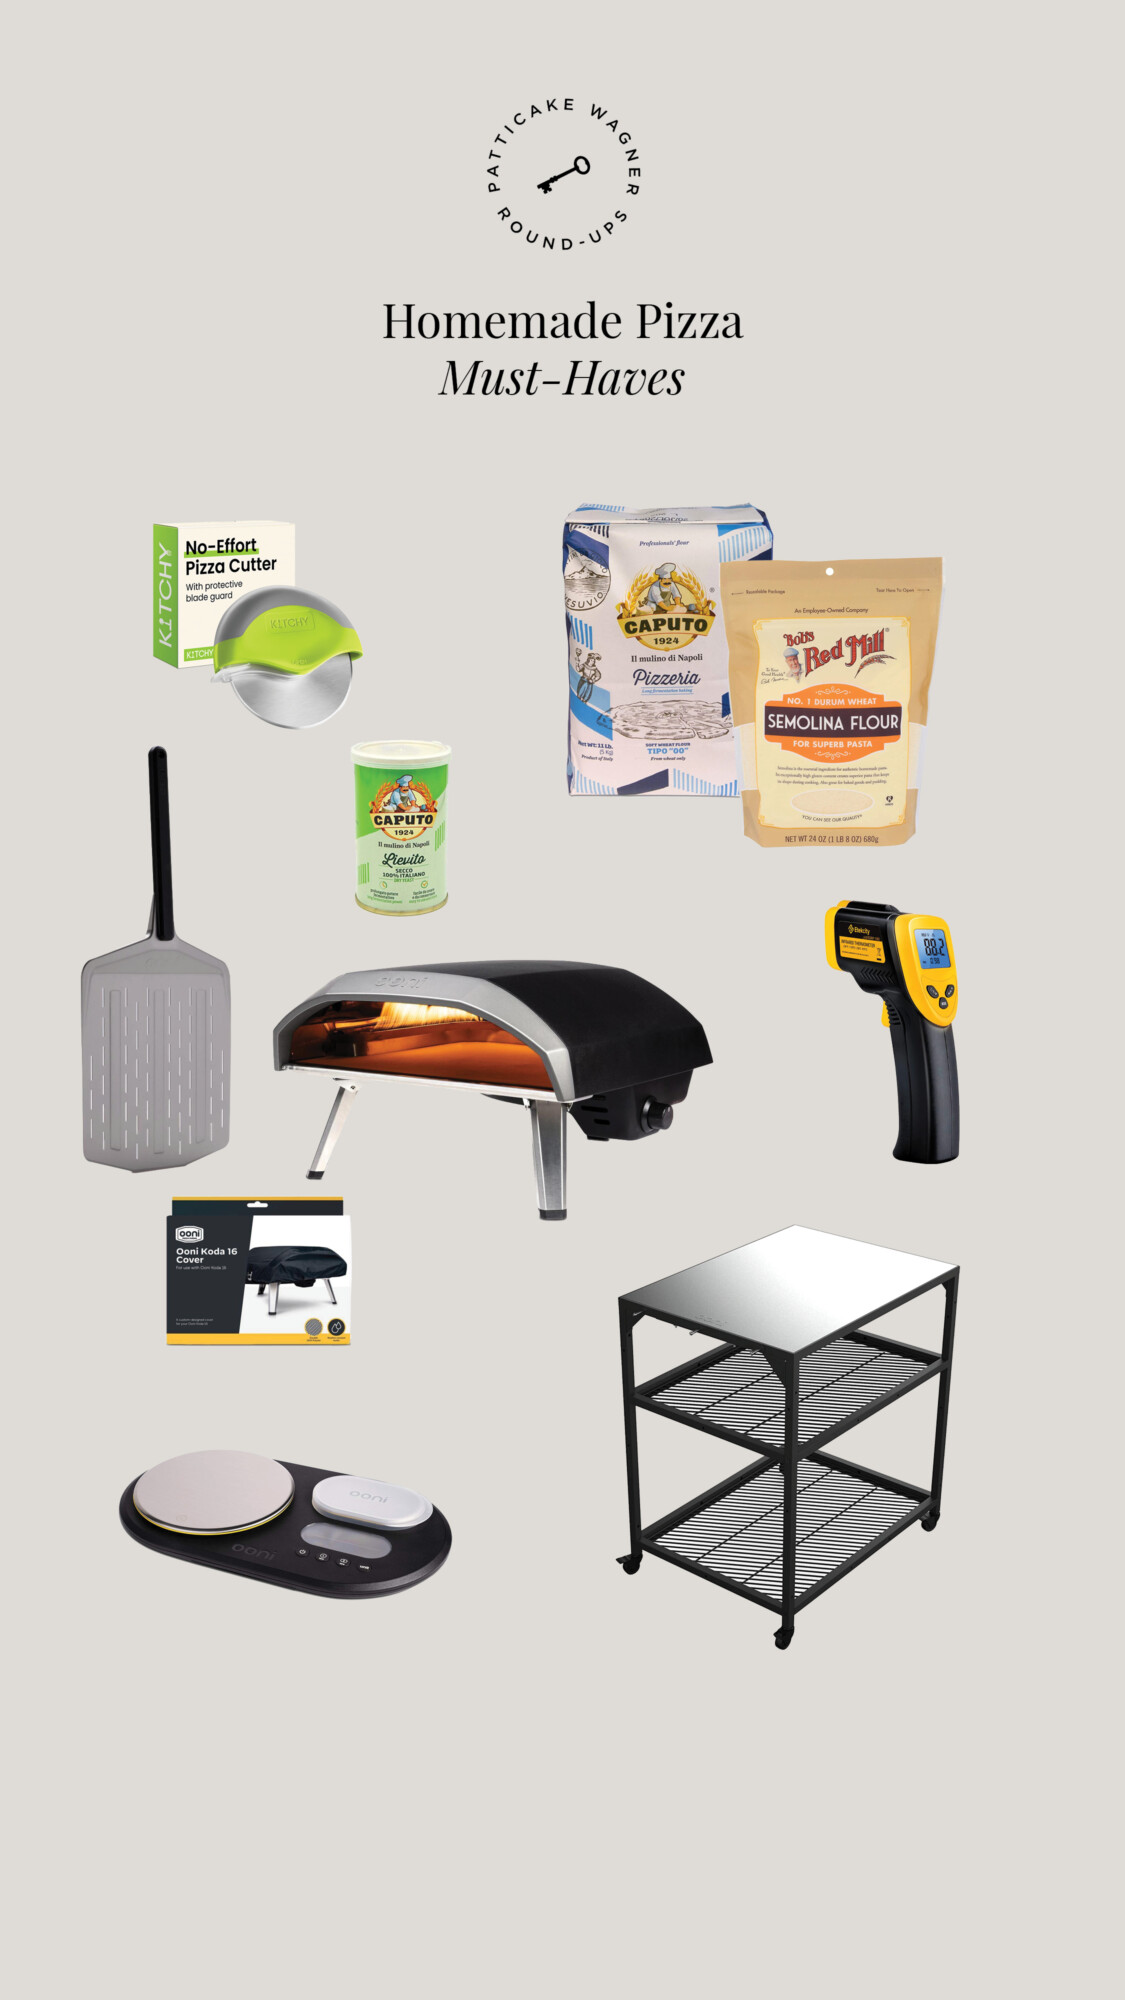
Tools You’ll Need:
- Ooni Koda 16 Pizza Oven (they also make the 12) – we suggest getting the bundle
- Pizza Peel
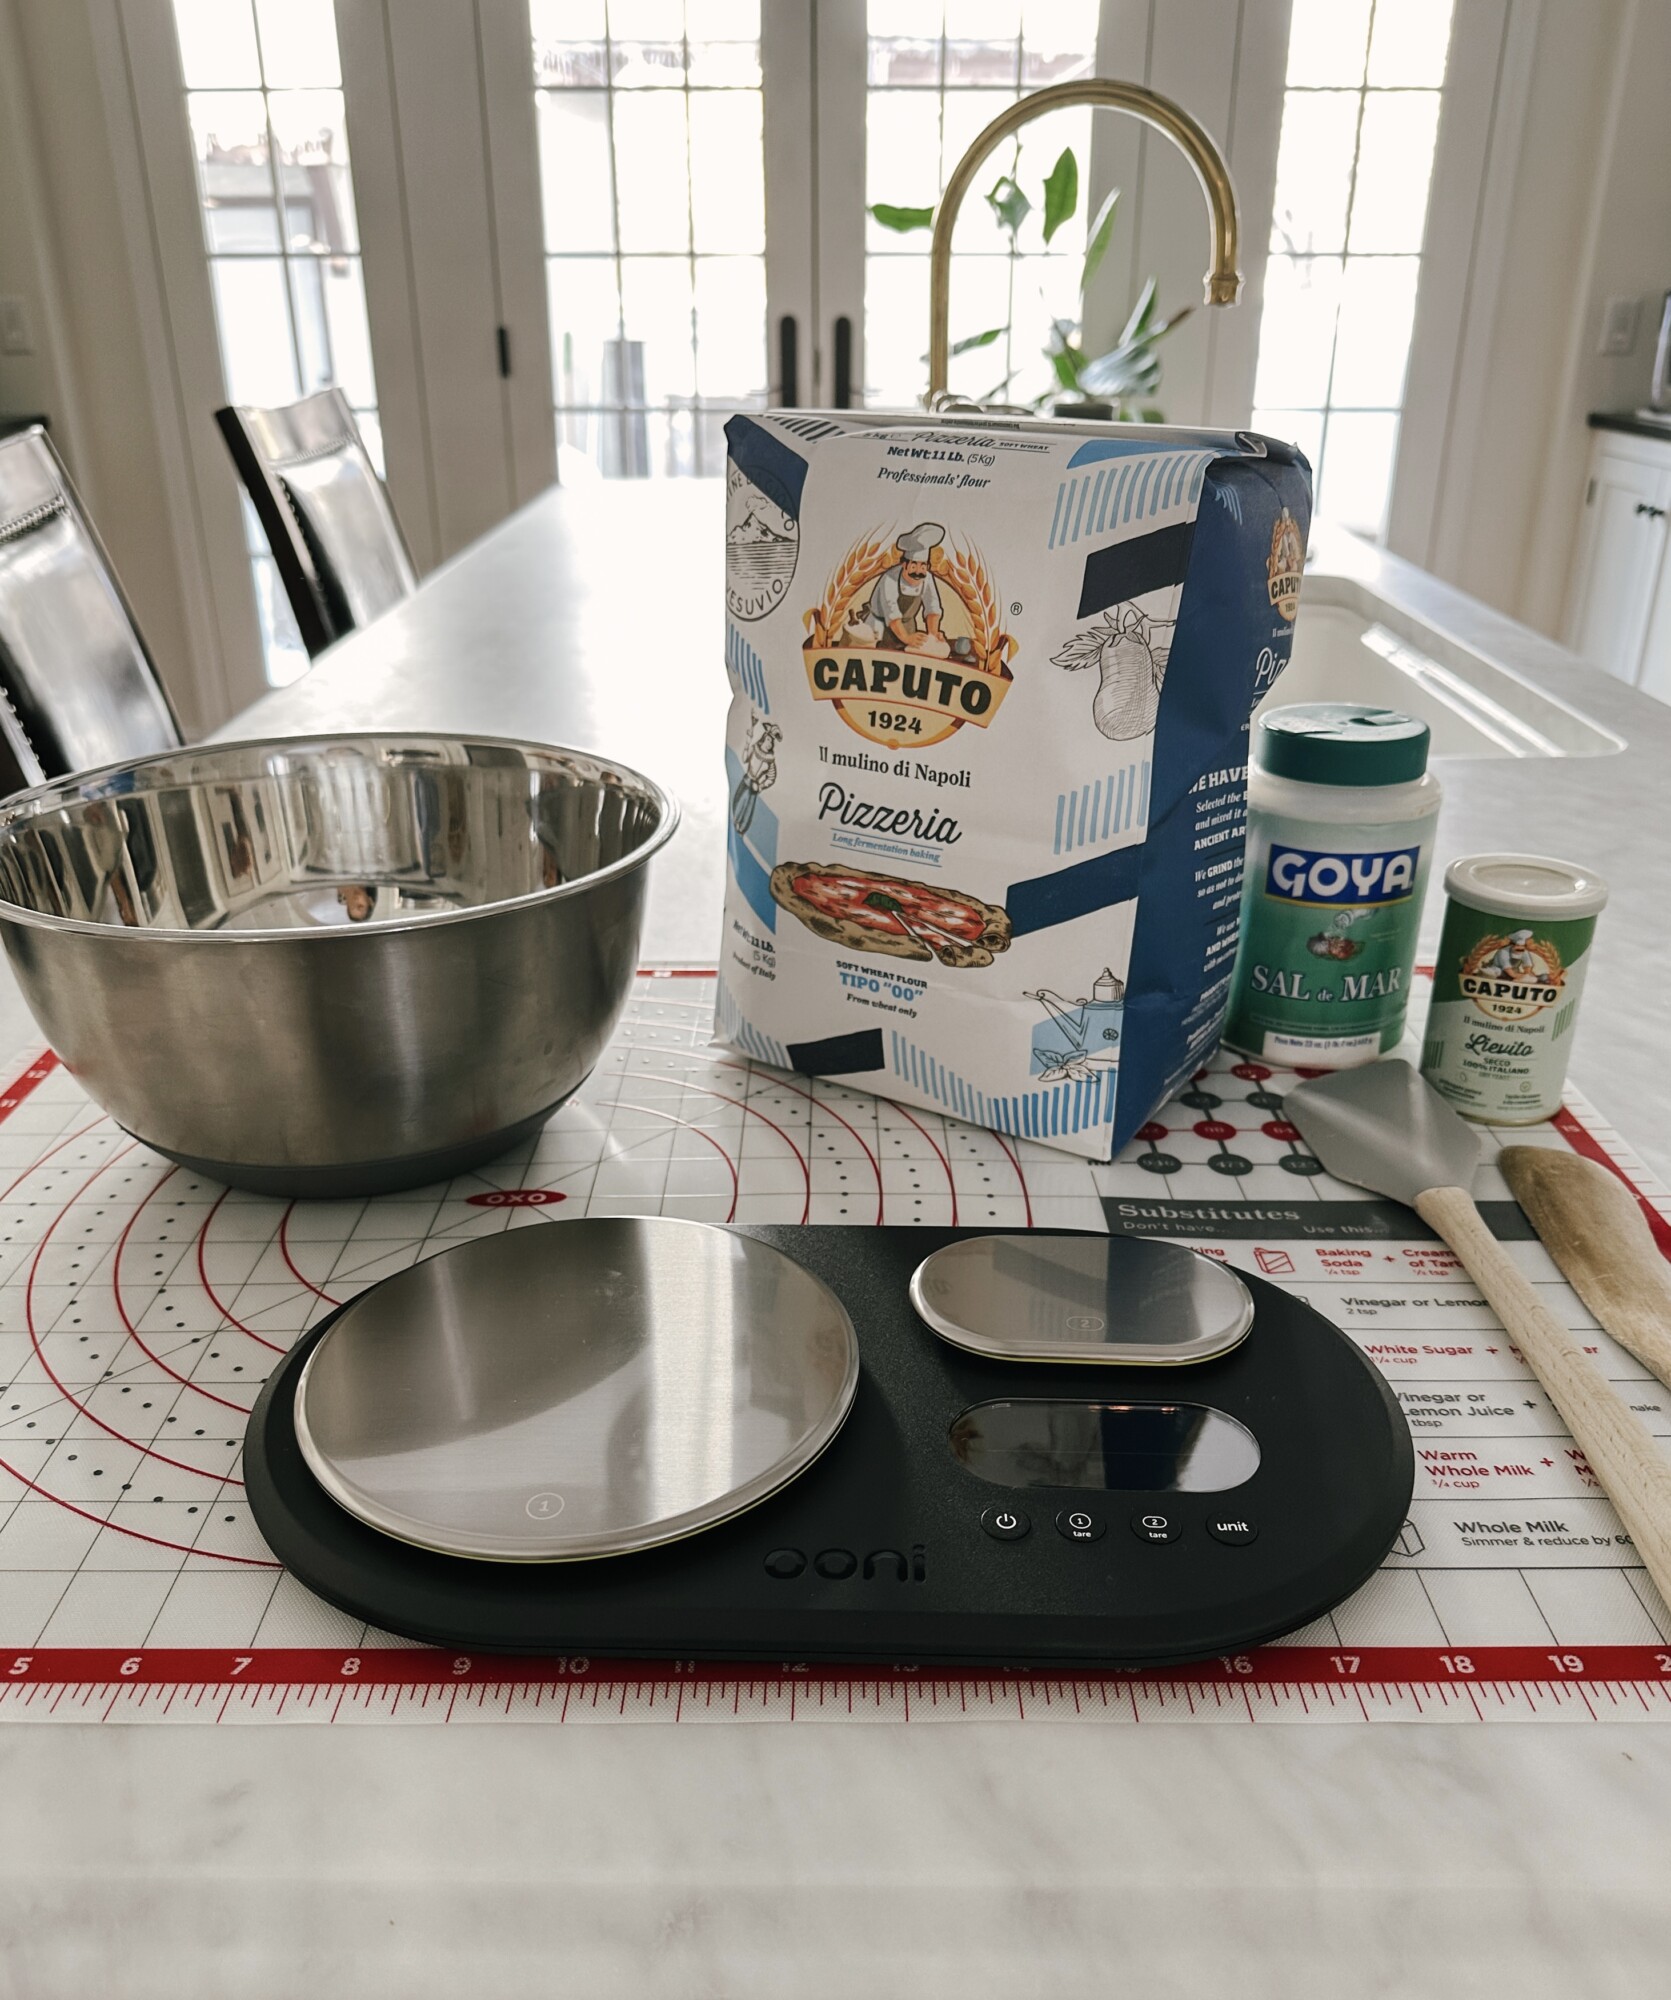
- Digital Scale for maximum accuracy
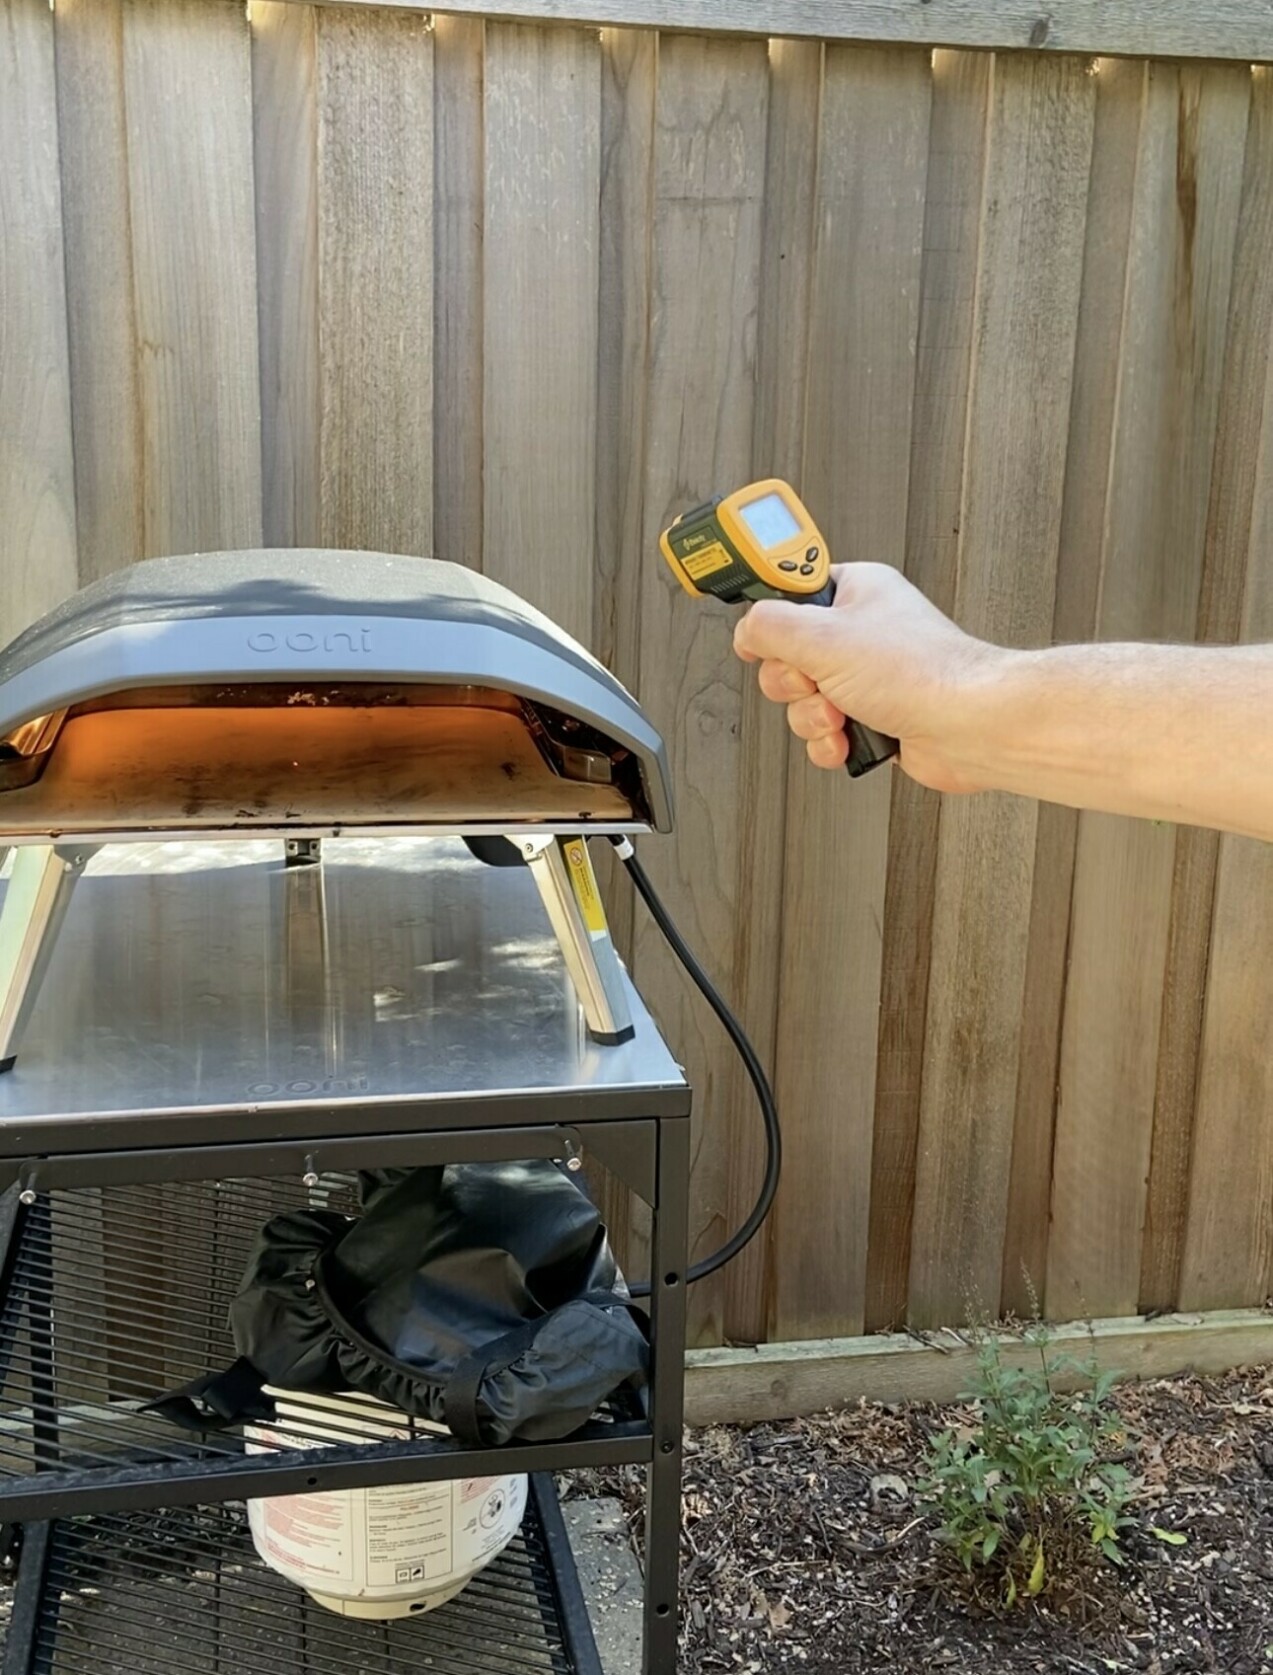
- Infrared Thermometer
- Pizza Cutter – we have an old plastic one given to us for free but are due for a new one. This pizza cutter and this cutter with a handle were top rated.
- Modular Table (optional)
- Waterproof Cover (optional)
- Silicone Pastry Mat (optional)
- Saucepan – we love this stainless steel one and this copper one with non-stick coating
- Semolina Flour for dusting on on the pizza peel (optional)
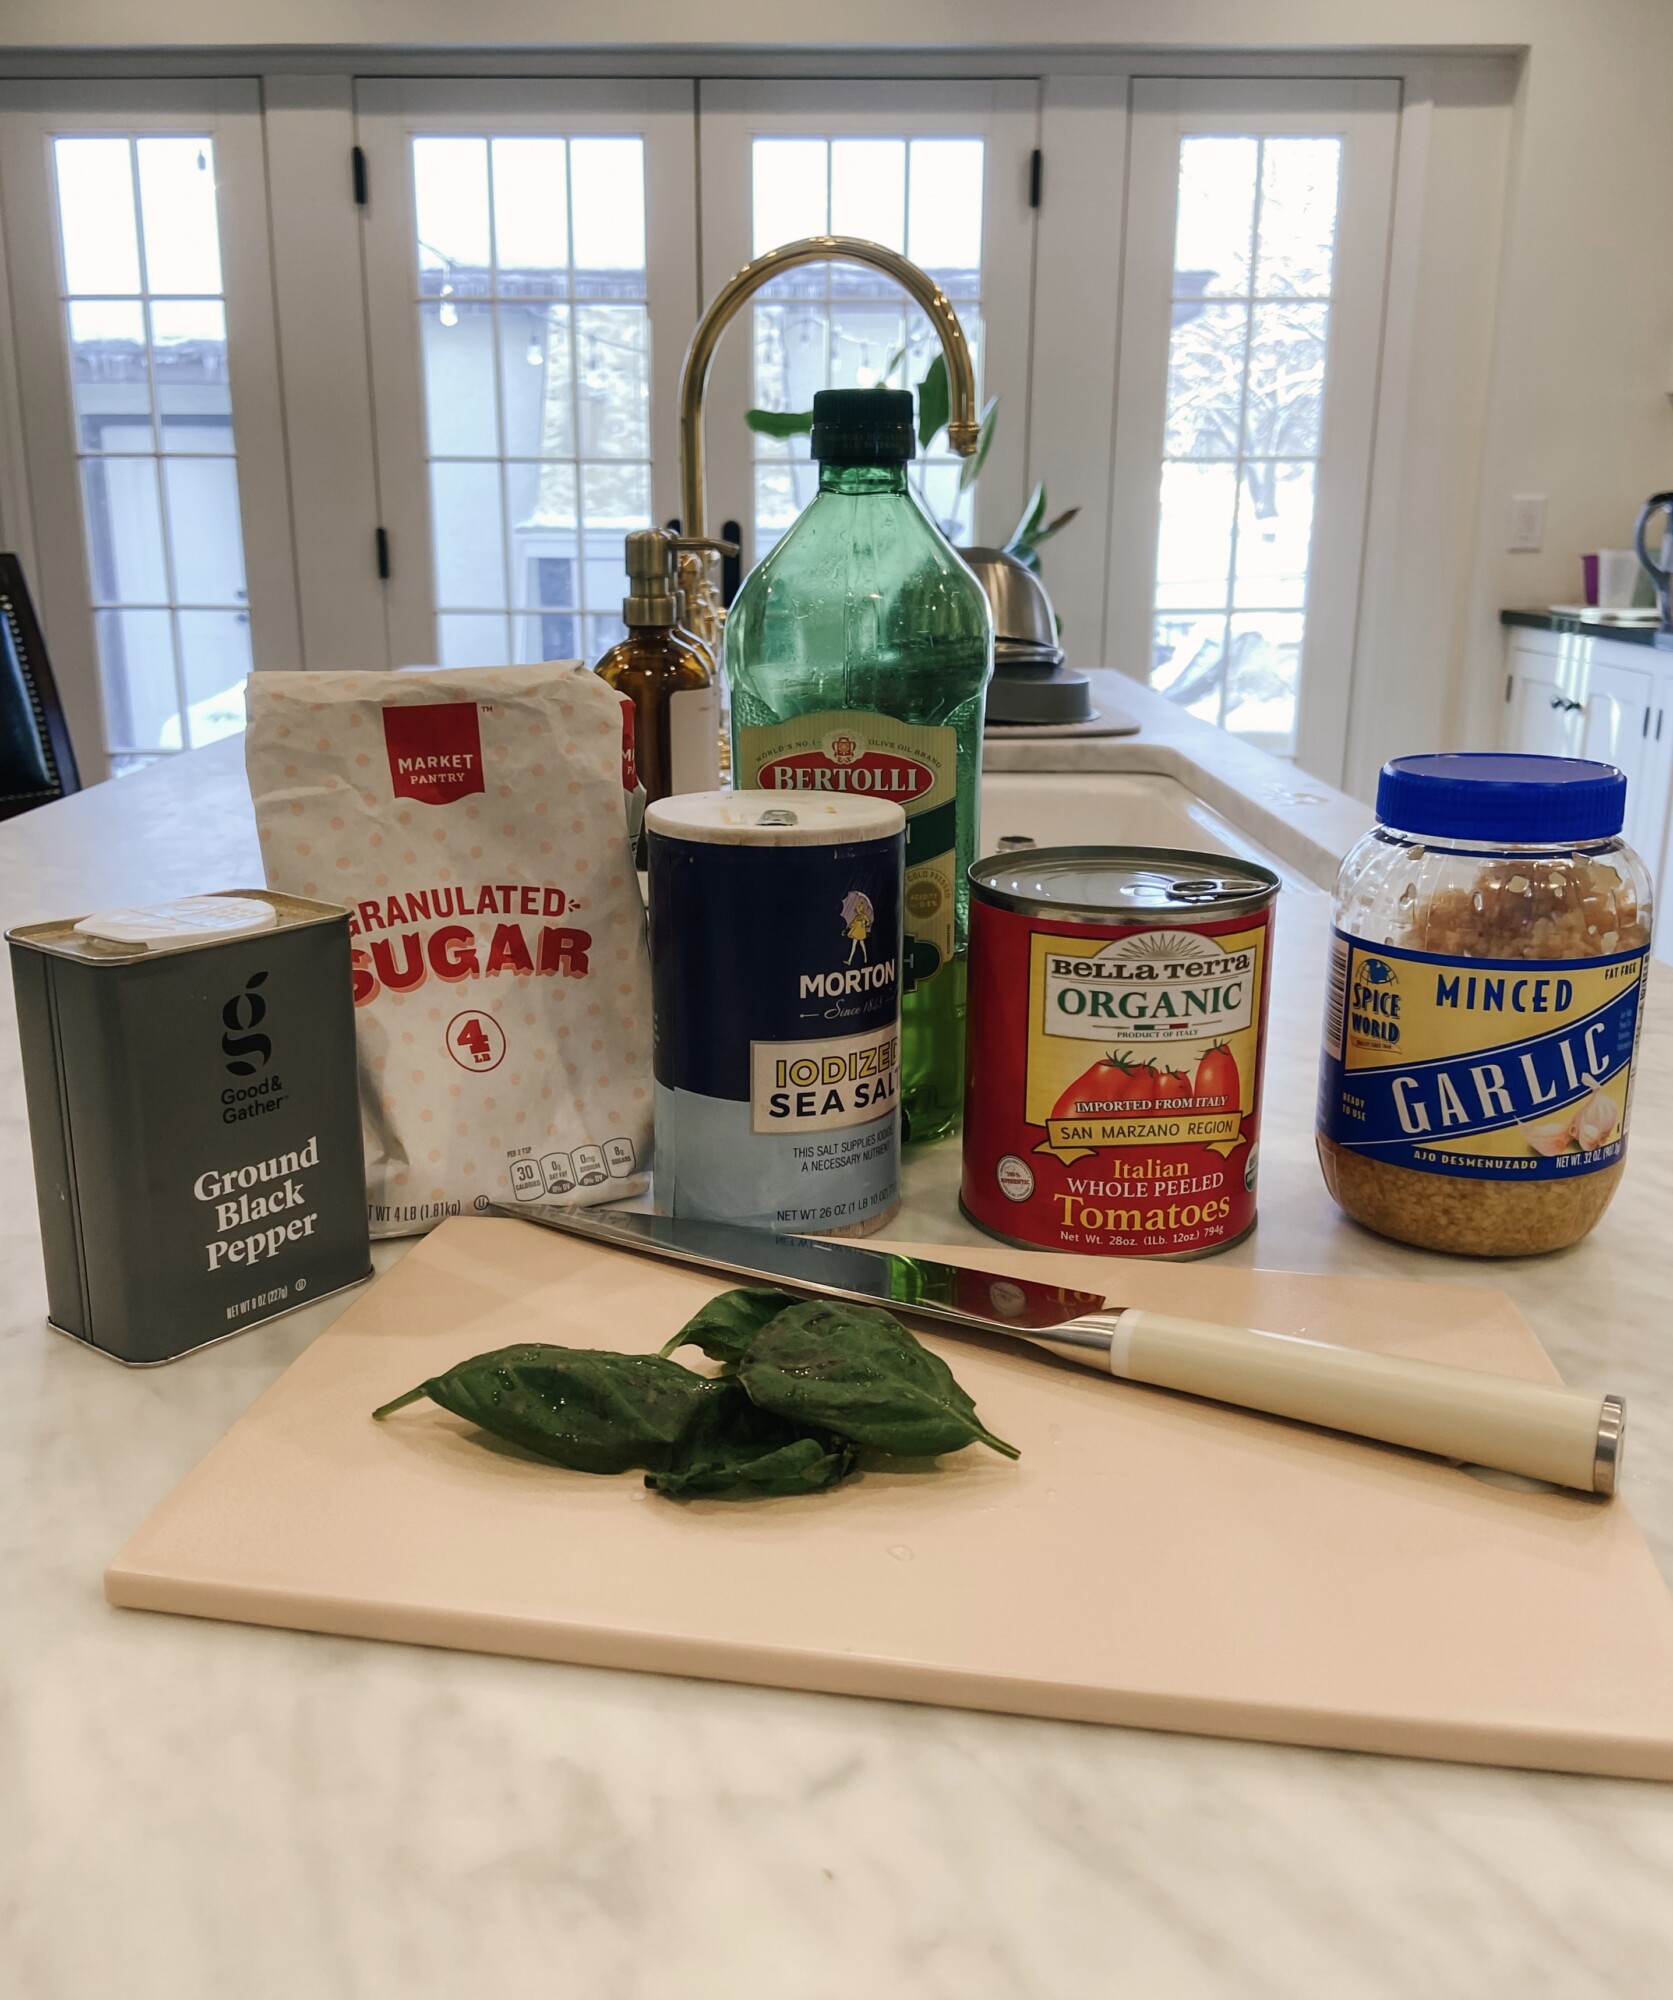
Ingredients You’ll Need:
Note: This is for the 16 inch. If you have the 12 inch, refer to the Ooni blog here.
Brian’s tip: Buy quality ingredients, they make a huge difference.
1. Pizza Dough (three 330 gram dough balls – freeze what you don’t make)
- 5 Cups (613 grams) Caputo Pizza Flour, plus extra for dusting
- 1.5 Cups (368 grams) Lukewarm Water
- 3 TSP (18 grams) salt
- 1 1/2 TSP (3.5 grams) Caputo Active Dry Yeast
2. Pizza Sauce (for about six 16 inch pizzas – freeze what you don’t need)
- 2 tablespoons (30 grams) extra-virgin olive oil – Ooni blog suggests this
- 2 garlic cloves, crushed or finely chopped
- 4 cups (800 grams) canned whole plum tomatoes – Ooni blog suggests San Marzano
- 1 teaspoon (5 grams) sugar, heaped
- 1 teaspoon (8 grams) salt, or more to taste
- Handful of basil leaves, roughly chopped
- Pinch of freshly ground black pepper
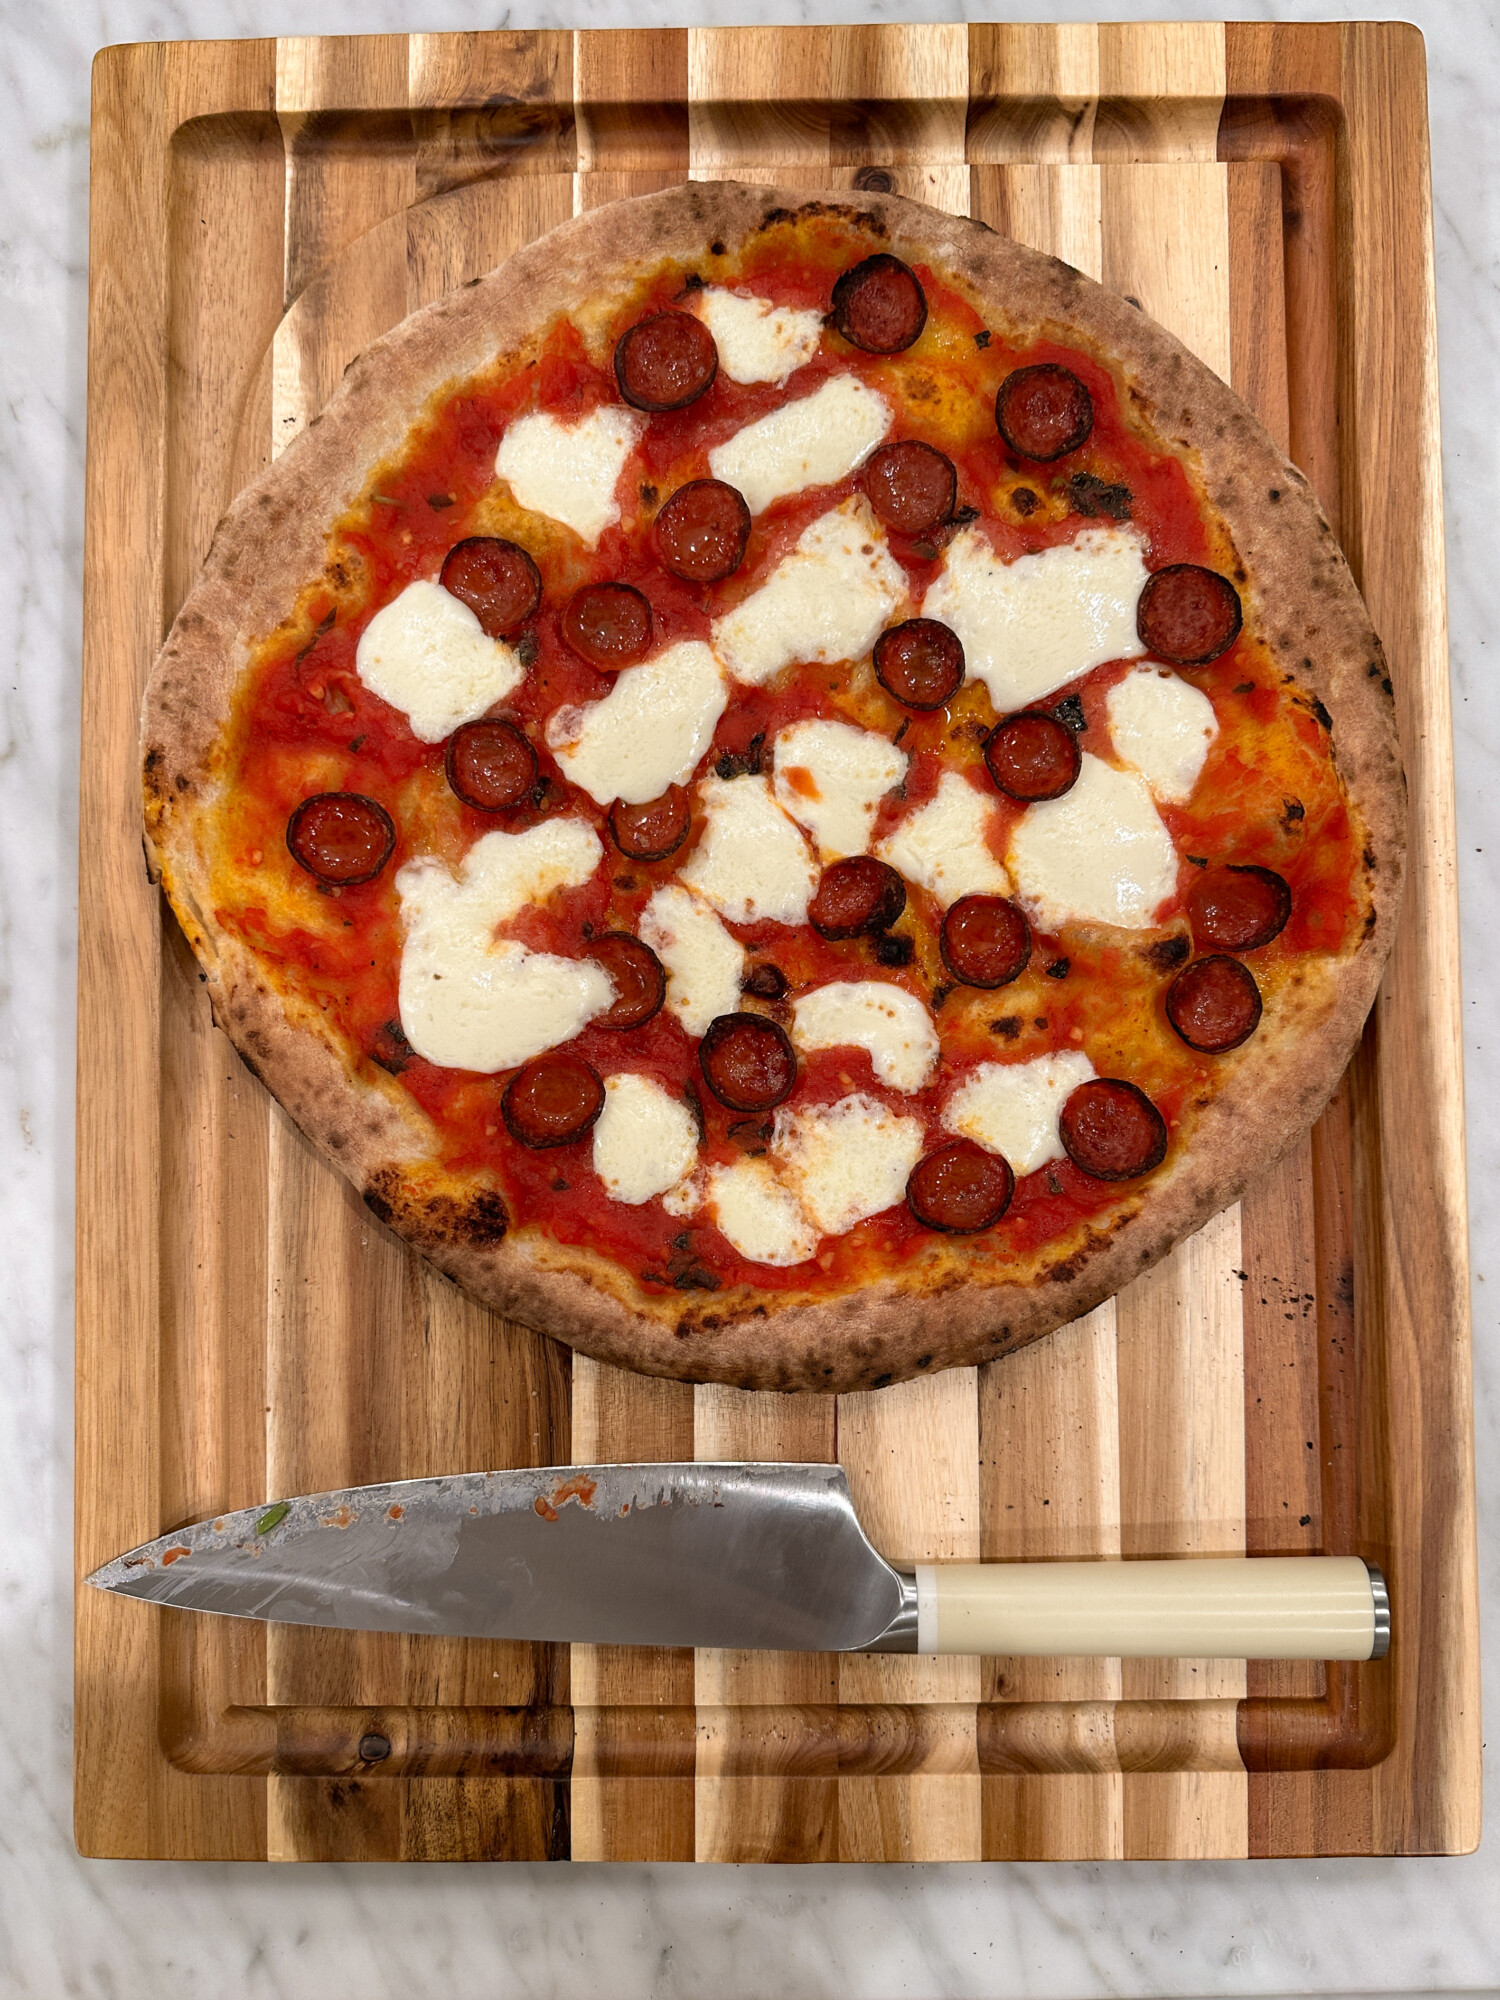
3. Toppings
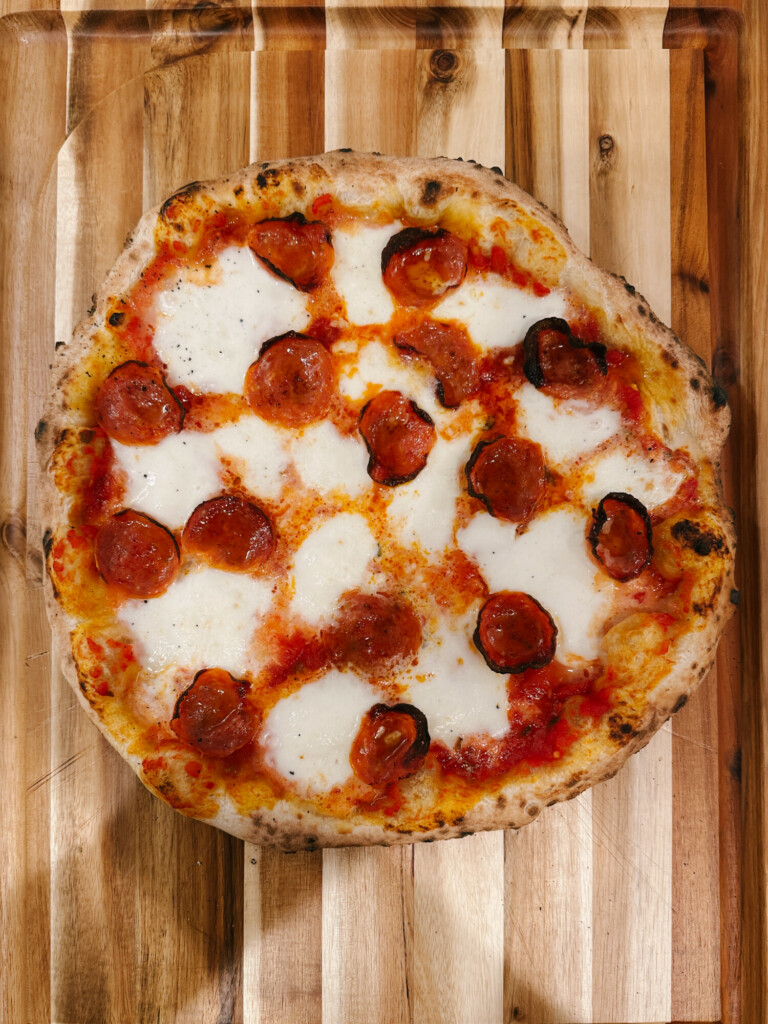
- Pepperoni
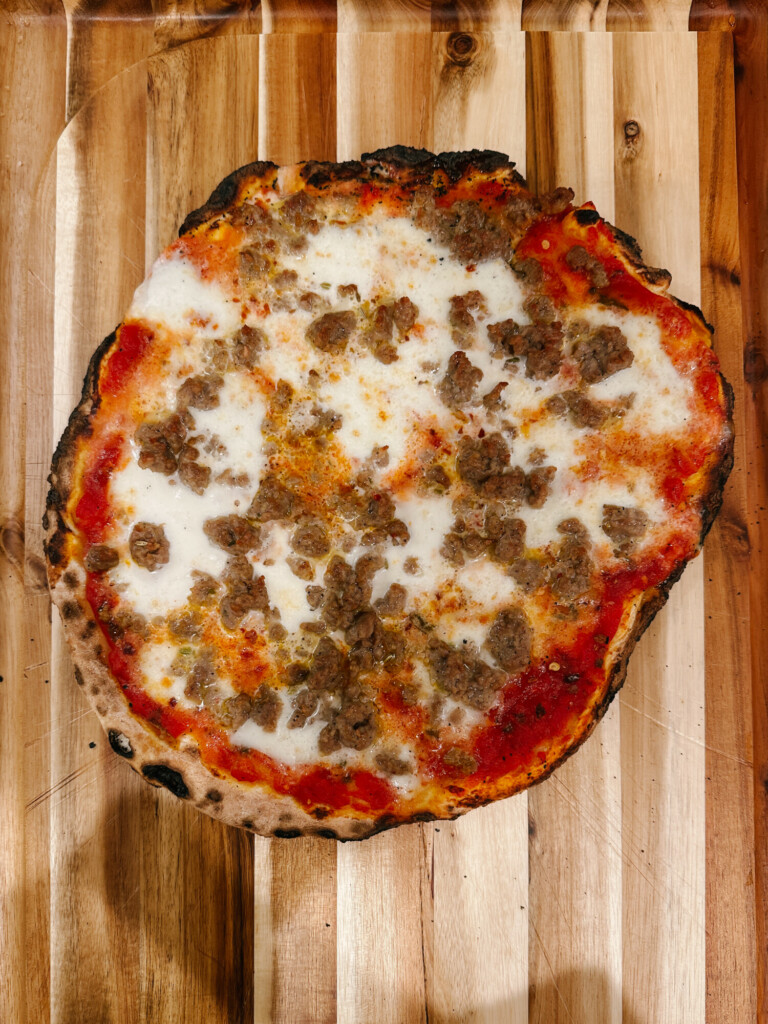
- Sausage (cook ground Italian sausage on the stove top in a skillet pan)
- Fresh Mozzarella Cheese (torn into chunks)
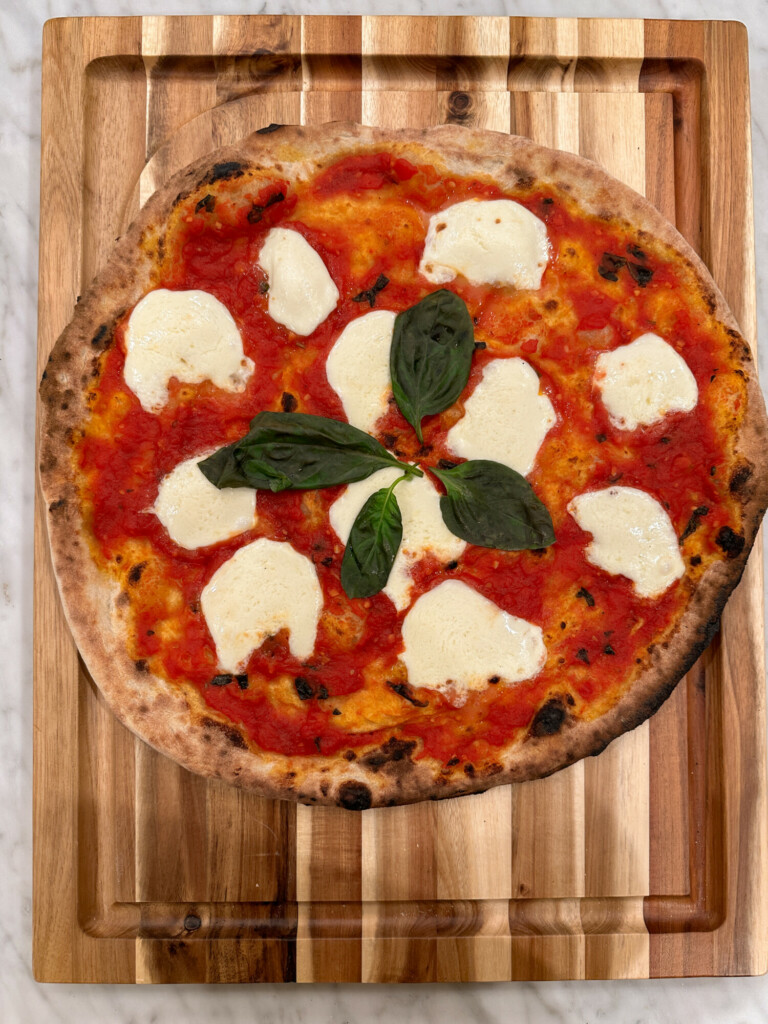
- Basil for Margherita pizza
Let’s Make Homemade Pizza!
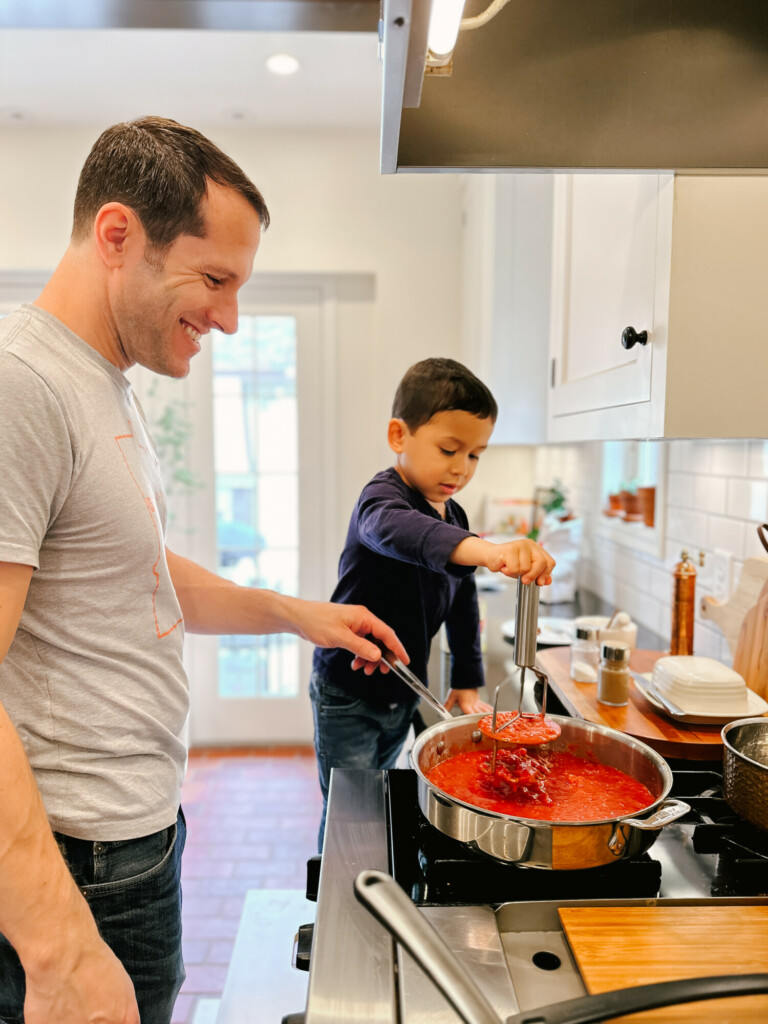
Making Pizza Sauce
Source Ooni Blog
-
Place the oil in a pan over medium heat. When warm, add the garlic and cook until softened but not brown (not more than a minute).
-
Pour the can of plum tomatoes into a bowl and use a masher or fork to break them apart and crush them down. Pour the tomatoes into the pan.
-
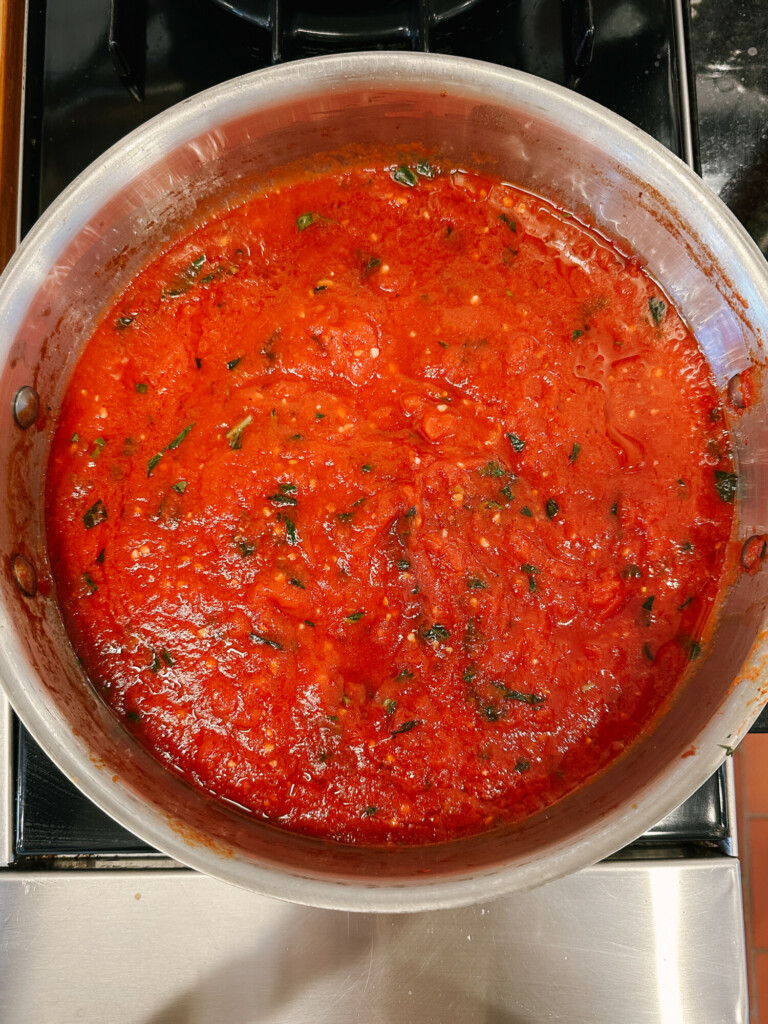
Add all the remaining ingredients, then simmer on low heat for 45 minutes, or until the flavor has deepened and the sauce has thickened slightly. Adjust seasoning to taste.
-
This sauce can be used straight away, or placed in an airtight container and stored in the fridge for up to a week, ready to be used as required.
Tip: Make more sauce than you needed or just want to have some on-hand in a pinch? No problem. This pizza sauce freezes well for quick and easy use. Just place the sauce in sealable freezer-safe bags, remove all of the air, then lay them flat in the freezer. They’ll be great for up to six months. To use, defrost overnight in the fridge or use your microwave setting. If you find that the sauce has thinned out at all, give it a quick reheat on your stovetop until warmed through!
Making Pizza Dough
Source Ooni Blog
-
Fill a bowl with lukewarm water and add the active dry yeast, using a whisk to thoroughly mix until blended. In a separate bowl, mix the flour and salt together, then pour it into the water.
-
If using a mixer: Fit the mixer with the dough hook and pour the flour and yeast mixture into the mixer bowl. Turn the machine on at a low speed for 5 to 10 minutes, or until it’s firm and stretchy. Cover the dough with a dish towel and leave to rise in a warm place for about 2 hours, or until doubled in size.
If mixing by hand: Stir with a wooden spoon until a dough starts to form. Continue mixing by hand until the pizza dough comes together in a ball. Place the dough onto a lightly floured surface and knead with both hands for about 10 minutes, until it’s firm and stretchy. Return the dough to the bowl. Cover with a dish towel and leave to rise in a warm place for about 2 hours, or until doubled in size.
Tip: Make more dough than you need, or just want to have some on hand in a pinch? No problem. The best time to freeze your homemade pizza dough is after the first rise (after it’s doubled in size). Once your dough has doubled in size, divide it into equal dough balls. Make sure you’ve put a light layer of olive oil into your containers to prevent the dough from sticking. Place the dough balls into separate containers with lids, and place in the freezer. You can freeze your dough balls for up to 3 months.
-
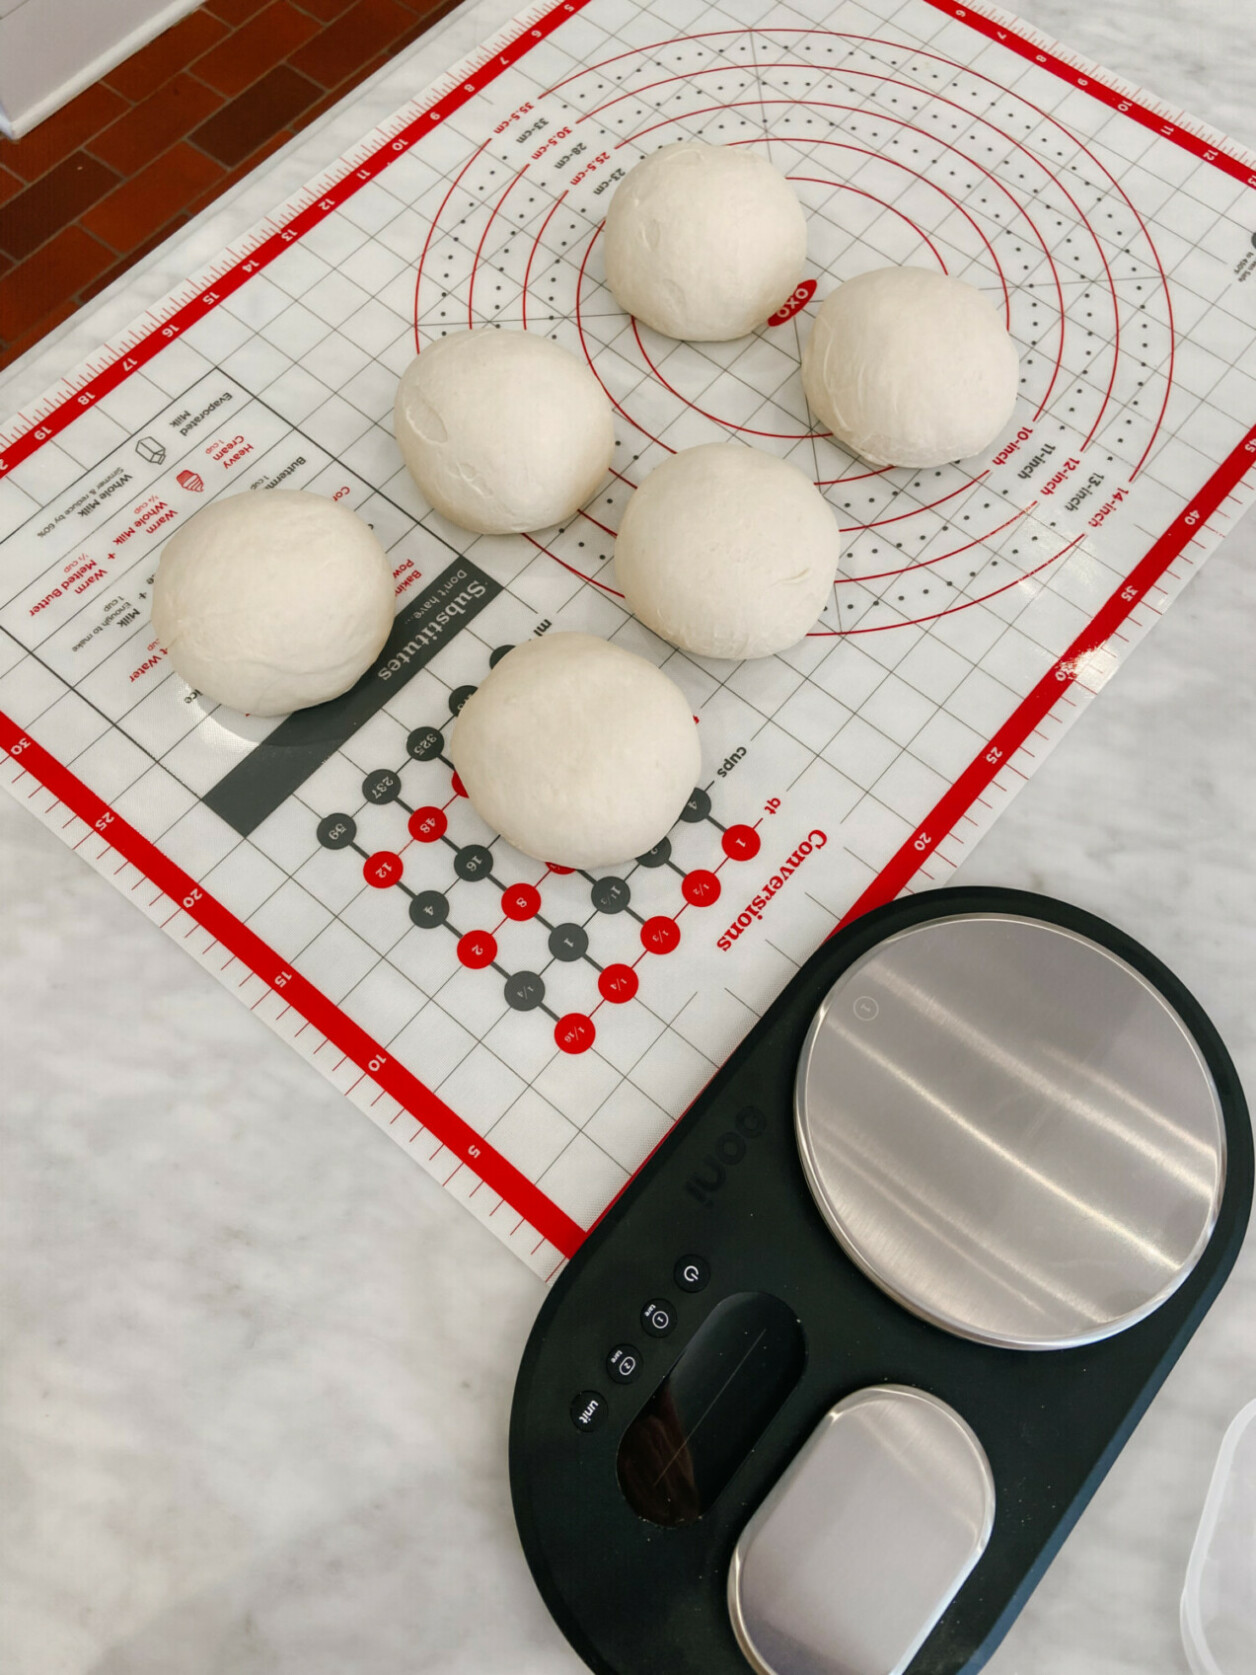
When the dough is ready, divide it into 3 or 4 equal pieces, depending on the size of pizza you’re making (either 12- or 16-inches wide). Place each piece of dough in a separate bowl or tray, cover with a dish towel and leave to rise in a warm place for another 30 to 60 minutes, or until doubled in size.
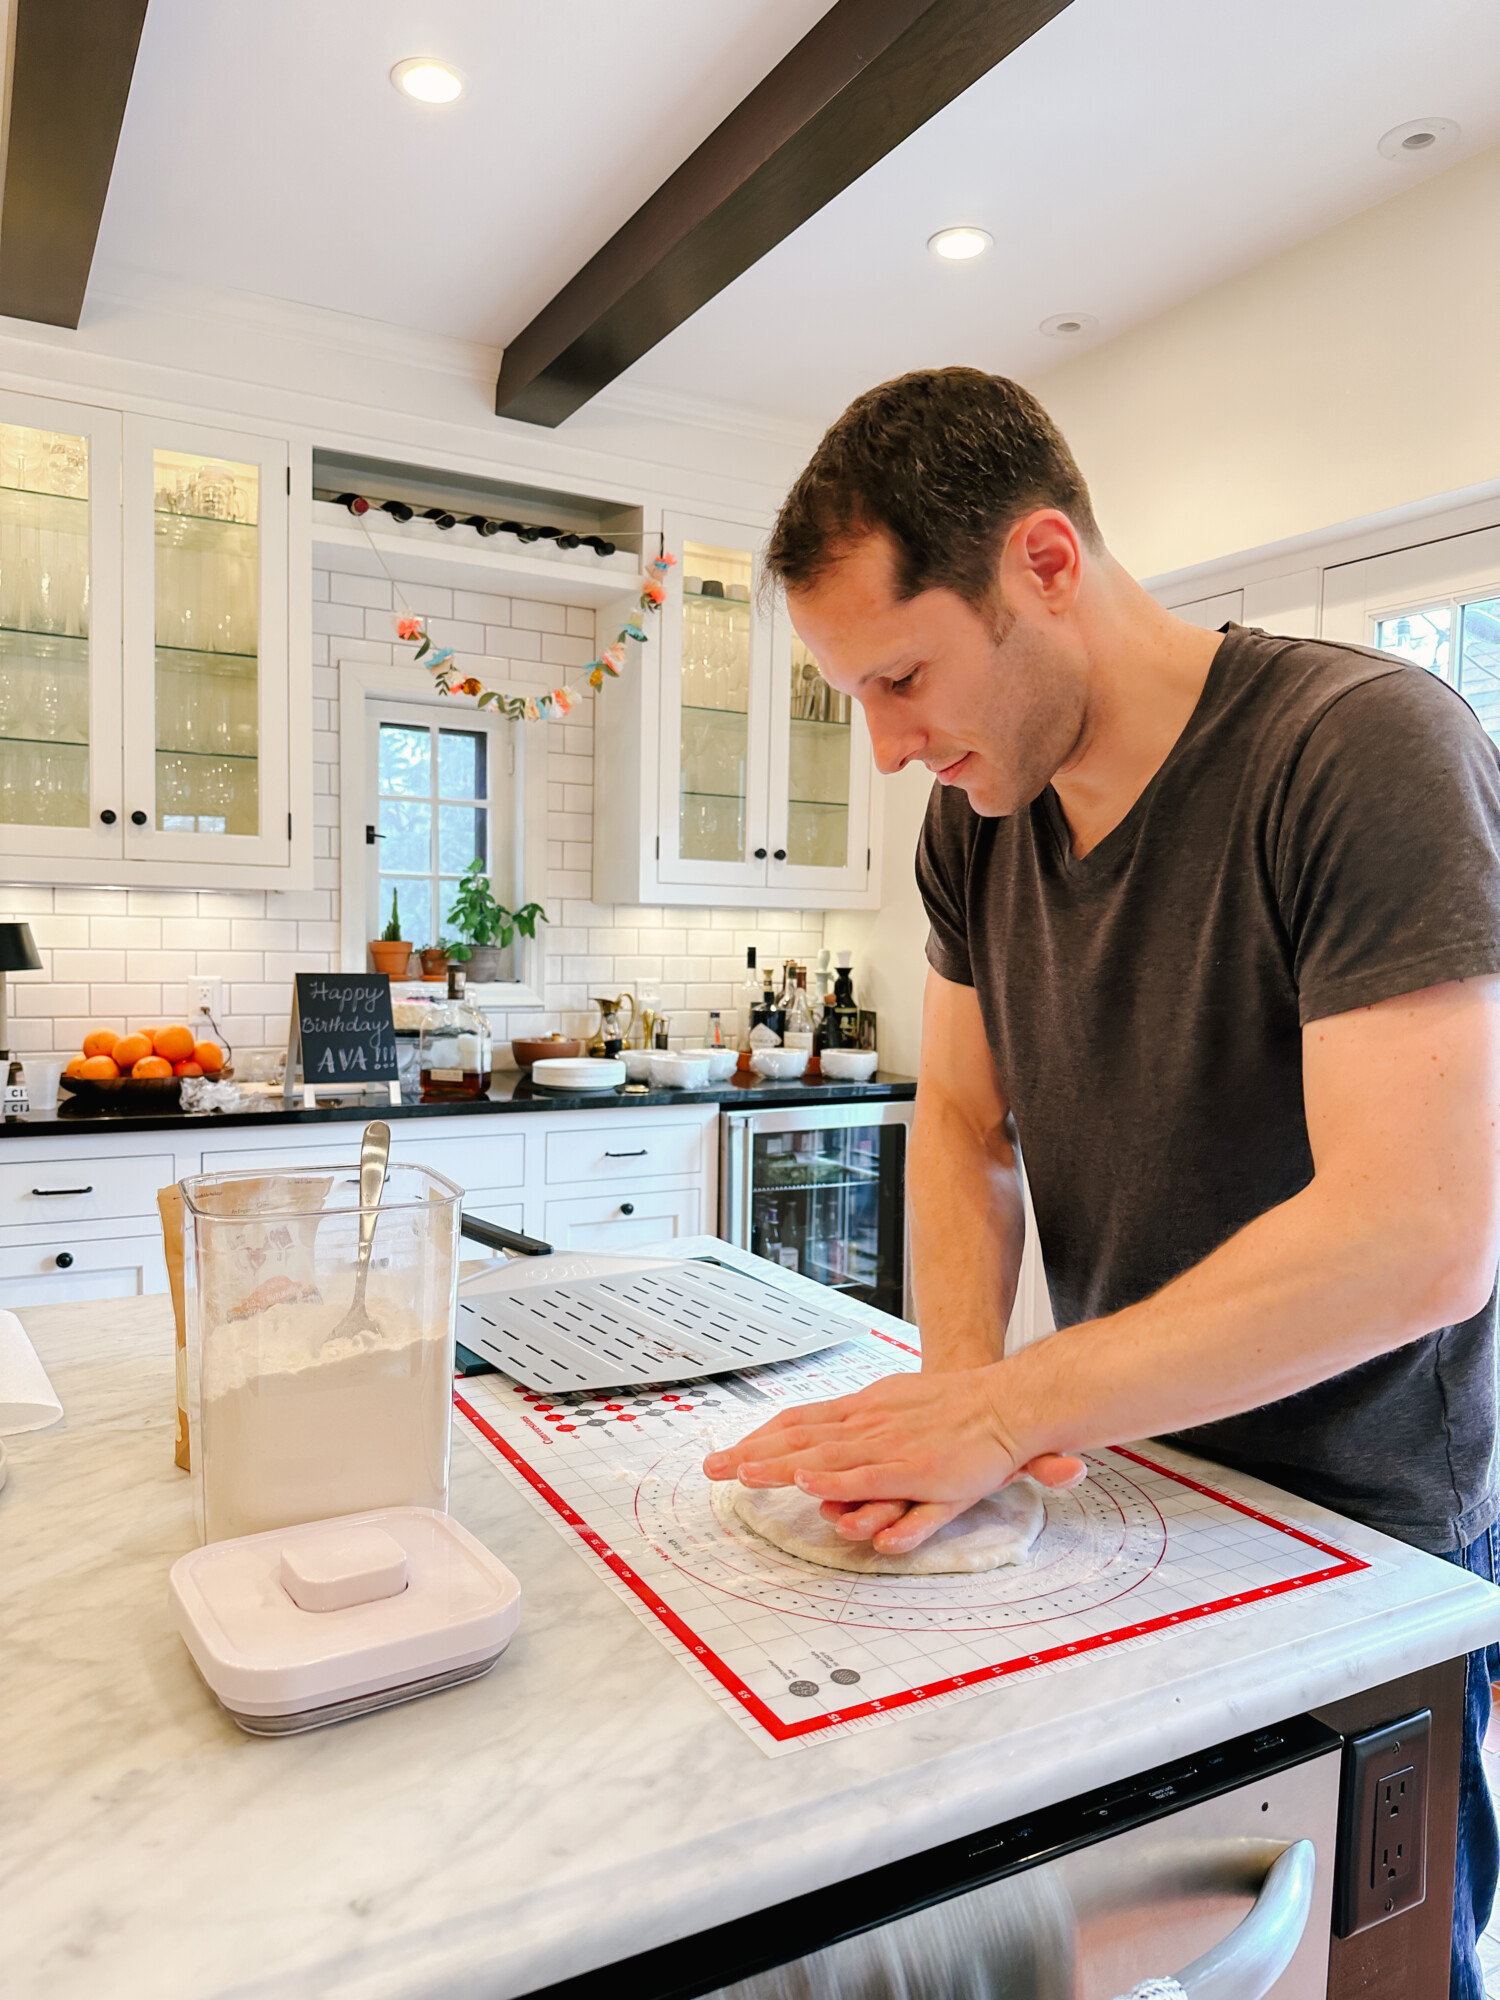
Tip: Always start with a perfectly rounded ball of dough. This helps to keep the shape of the base circular during the stretching process.
-
Before stretching and topping your dough, fire up your oven and allow it to preheat for 15 to 20 minutes. Aim for 850 °F and 950 °F (450 °C and 500 °C) on your baking stone. You can check this quickly, accurately and from a safe distance with an infrared thermometer.
Brian’s tip: Prep all of the toppings before stretching the dough to form the pizza crust. The longer the crust sits, the more it will stick to the peel.
-
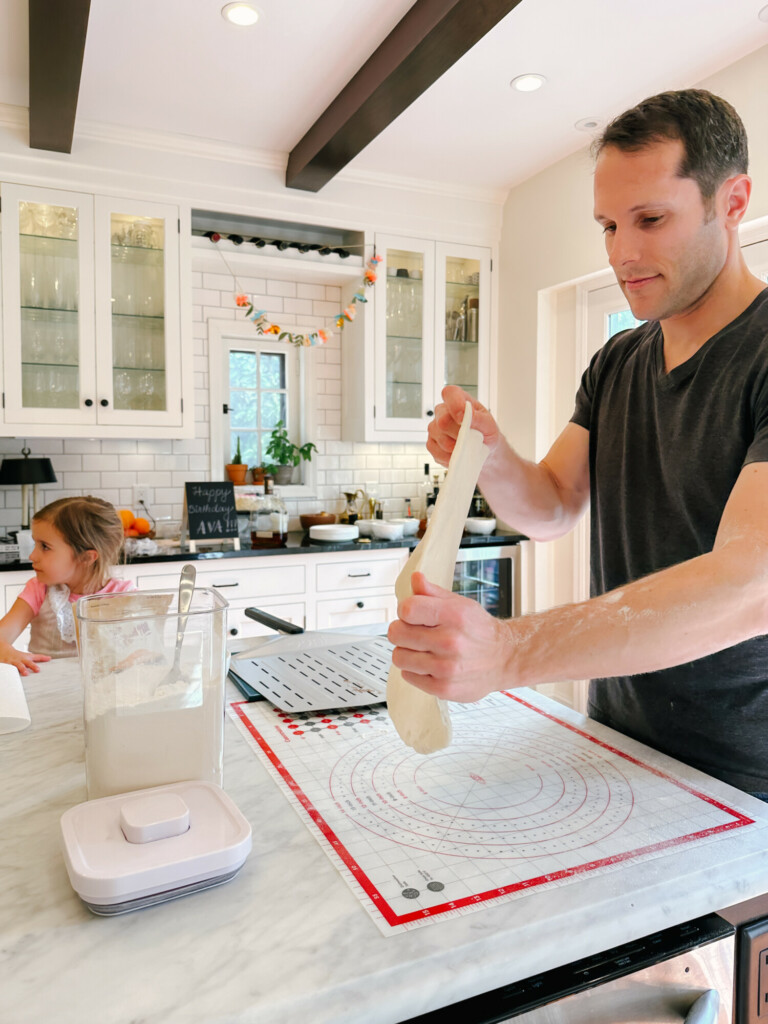
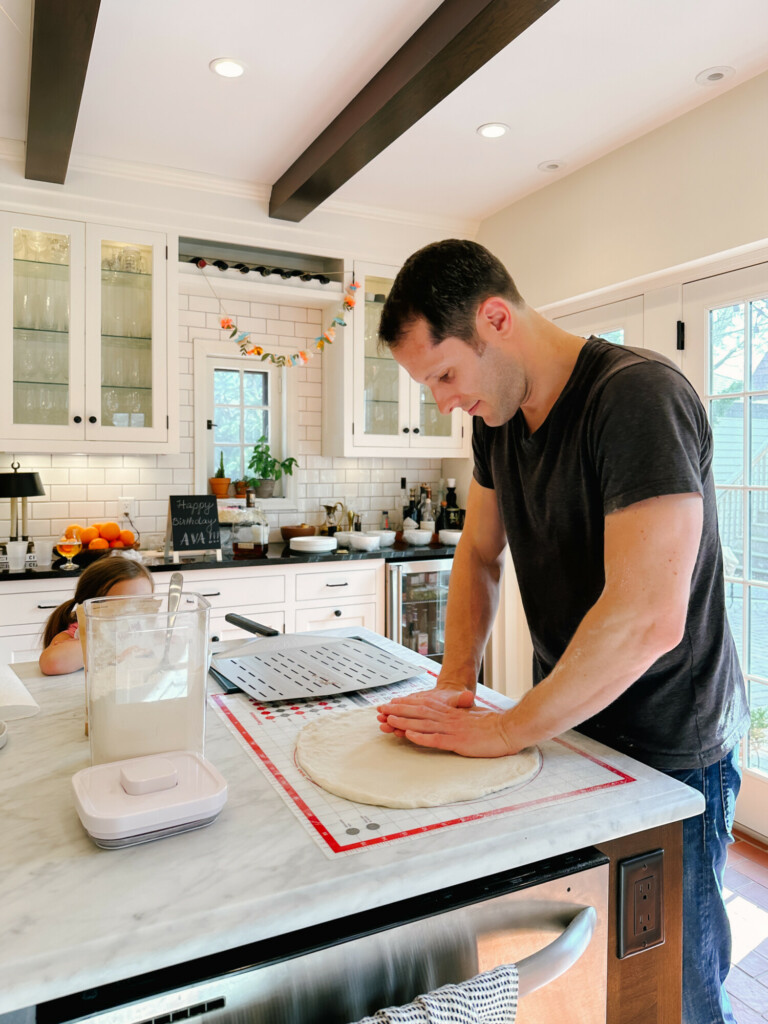
When the dough is ready, place the ball on a lightly floured surface, flour your hands and use your fingertips to press the dough into a small, flat disc. Working from the center, push the dough outwards while spreading your fingers, making the disc slightly bigger. Pick up the dough and gently pinch it all around the edge, allowing gravity to pull it downwards into a circle. Neapolitan-style pizza bases are very thin, so you should be able to see through the base when you hold it up to the light. Take care when doing this, as you don’t want it to tear.
Brian’s tip: Watch a few YouTube videos on making dough balls and forming the crust for Neapolitan style pizza to learn different techniques and tips. Don’t be intimidated, even if you don’t master it, the pizza will taste great and you’ll continue to get better!
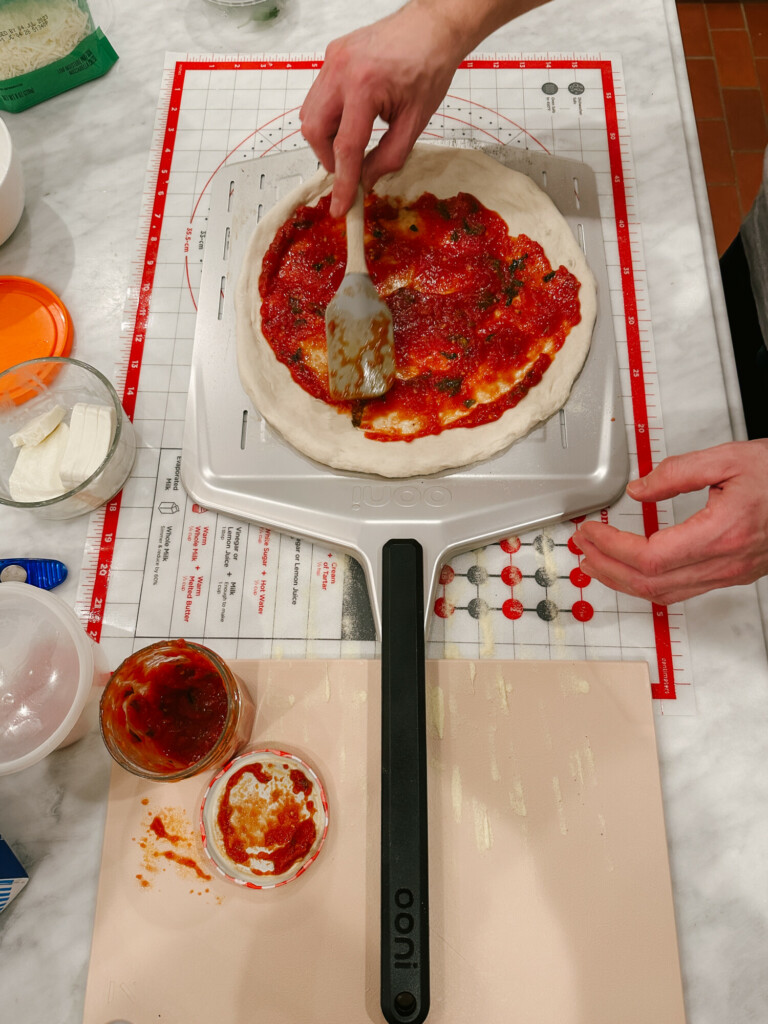
- Once the dough is fully stretched, lightly flour your pizza peel and lay the base on it. If at this point you see any small holes in the dough, gently pinch them back together. Brian’s Tip: Dust the peel with Semolina Flour which helps with the launching process. Always make sure to put the pizza dough on the peel before putting on sauce and toppings.
Add Toppings
Once you’re happy with the base, it’s time to add the toppings. Spread the pizza sauce evenly across, add the mozzarella cheese and pepperoni or veggies (unless they’re delicate herbs like basil, arugula, etc.).
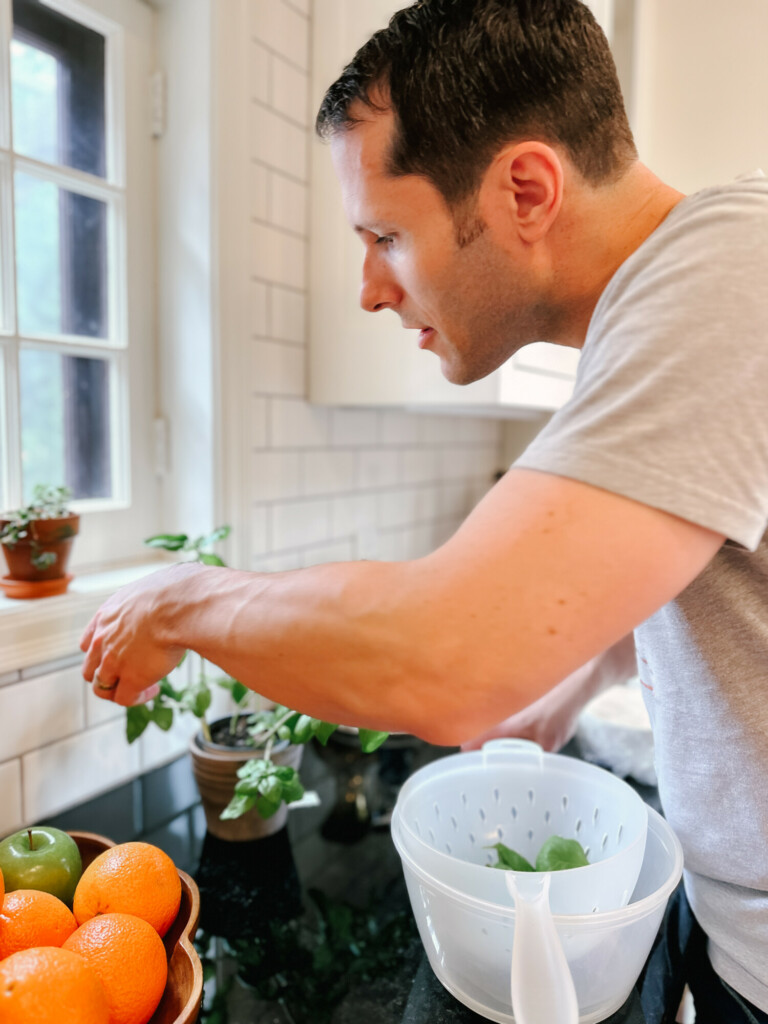
Brian’s tip: For sausage, Brian prefers to cook it first and then wait to add it until he’s turned the pizza in the oven so he doesn’t overcook it. He also suggests buying a basil plant because the cost isn’t much more than fresh basil sprigs and it will be something you can continue to use fresh off the plant.
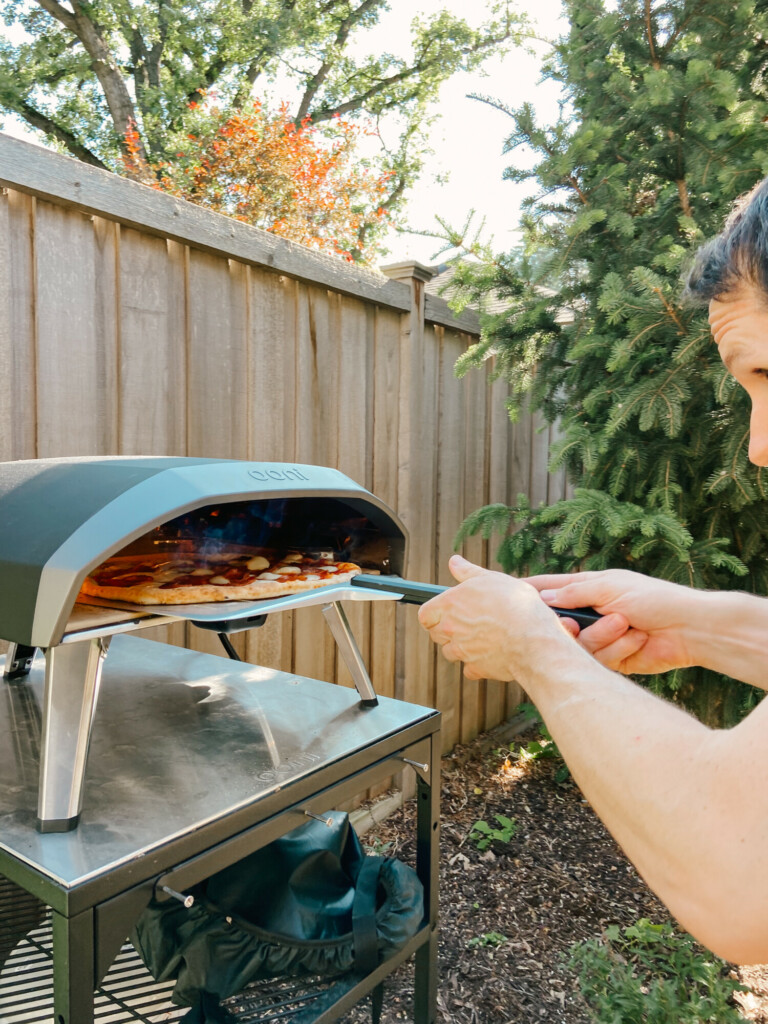
Cook in Pizza Oven
When your oven is hot enough, launch your pizza (slide off peel) and cook it for 1 to 2 minutes, turning every 20 seconds to ensure an even bake. Remove from the oven, (add whole fresh basil leaves for Margherita pizza), slice and serve!
Now that he has the basics down perfectly, there are so many possibilities! It’s such a fun way to include kids in cooking and the results are delicious! My favorite is the spicy sausage but I love them all! What toppings should we try next?
Shop Products Below

