
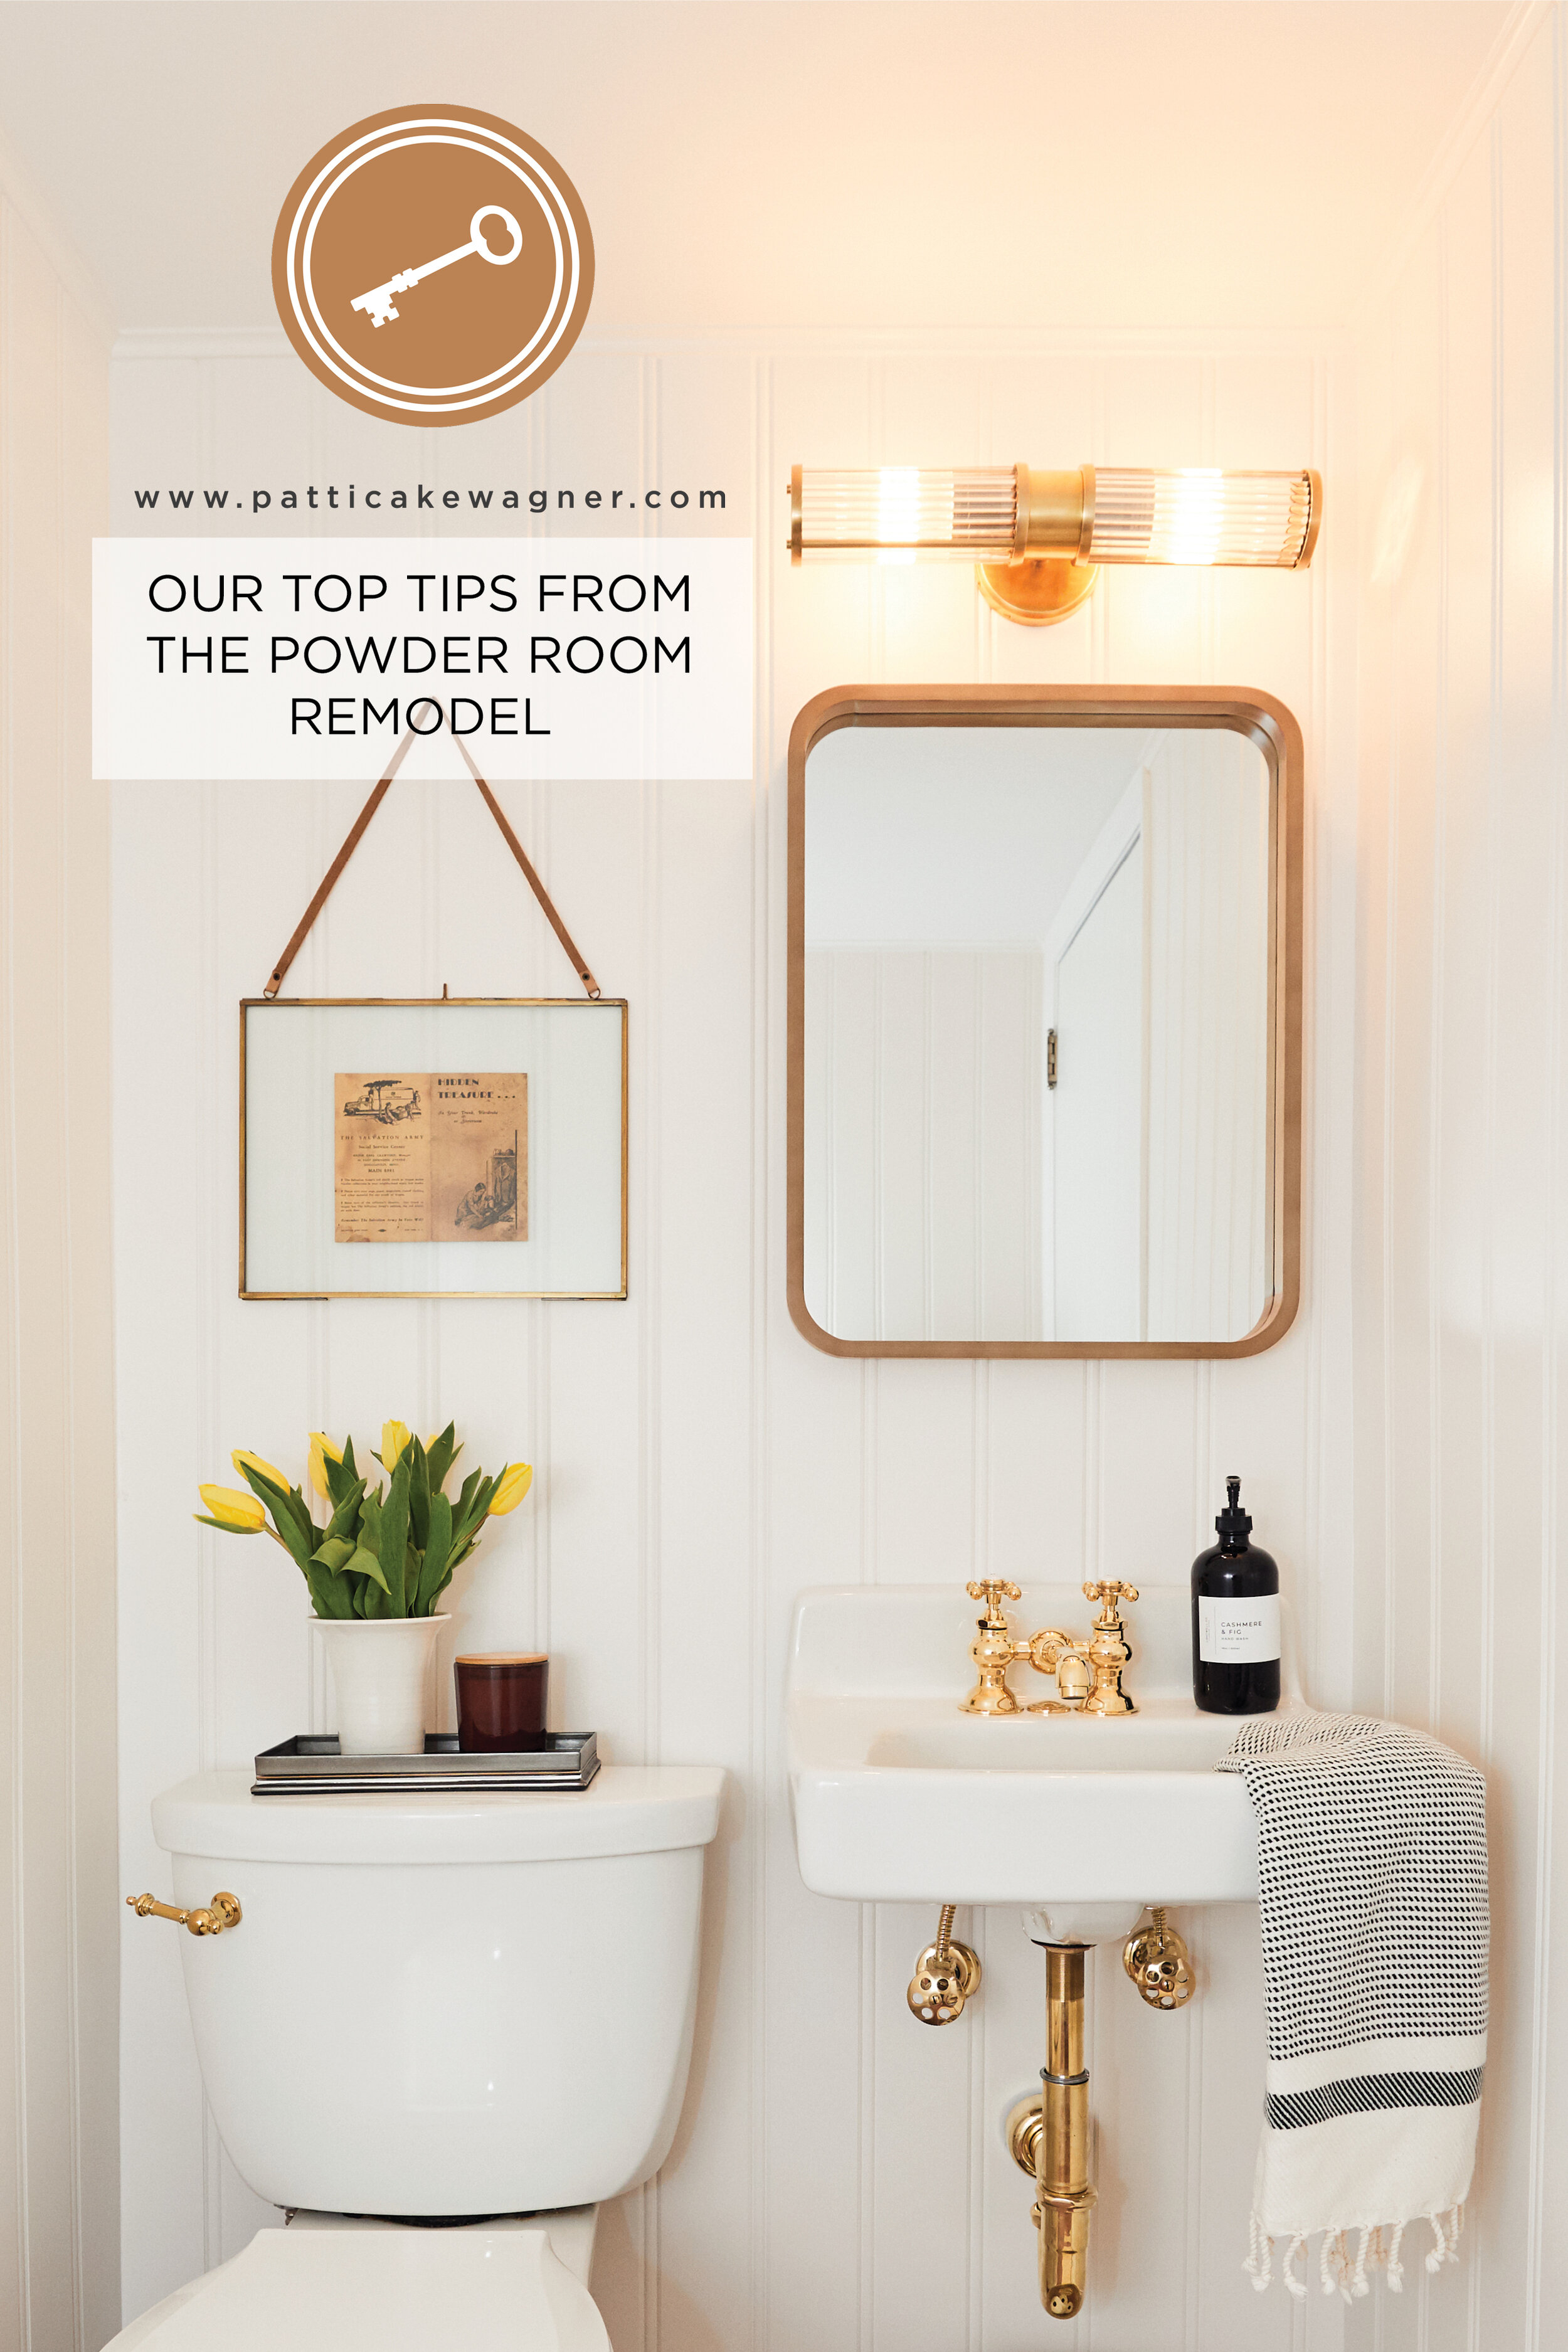
Our Top Tips from the Powder Room Remodel
We still can’t get over our tiny powder room DYI remodel. There were some hurdles with the plumbing, imperfect walls, etc. but we got it done and LOVE it so much! Many of you had questions during the process and reveal so I wanted to pull together a post to share some tips and what we learned from this project so you don’t have to make the same mistakes we did if you decide on the DIY route…
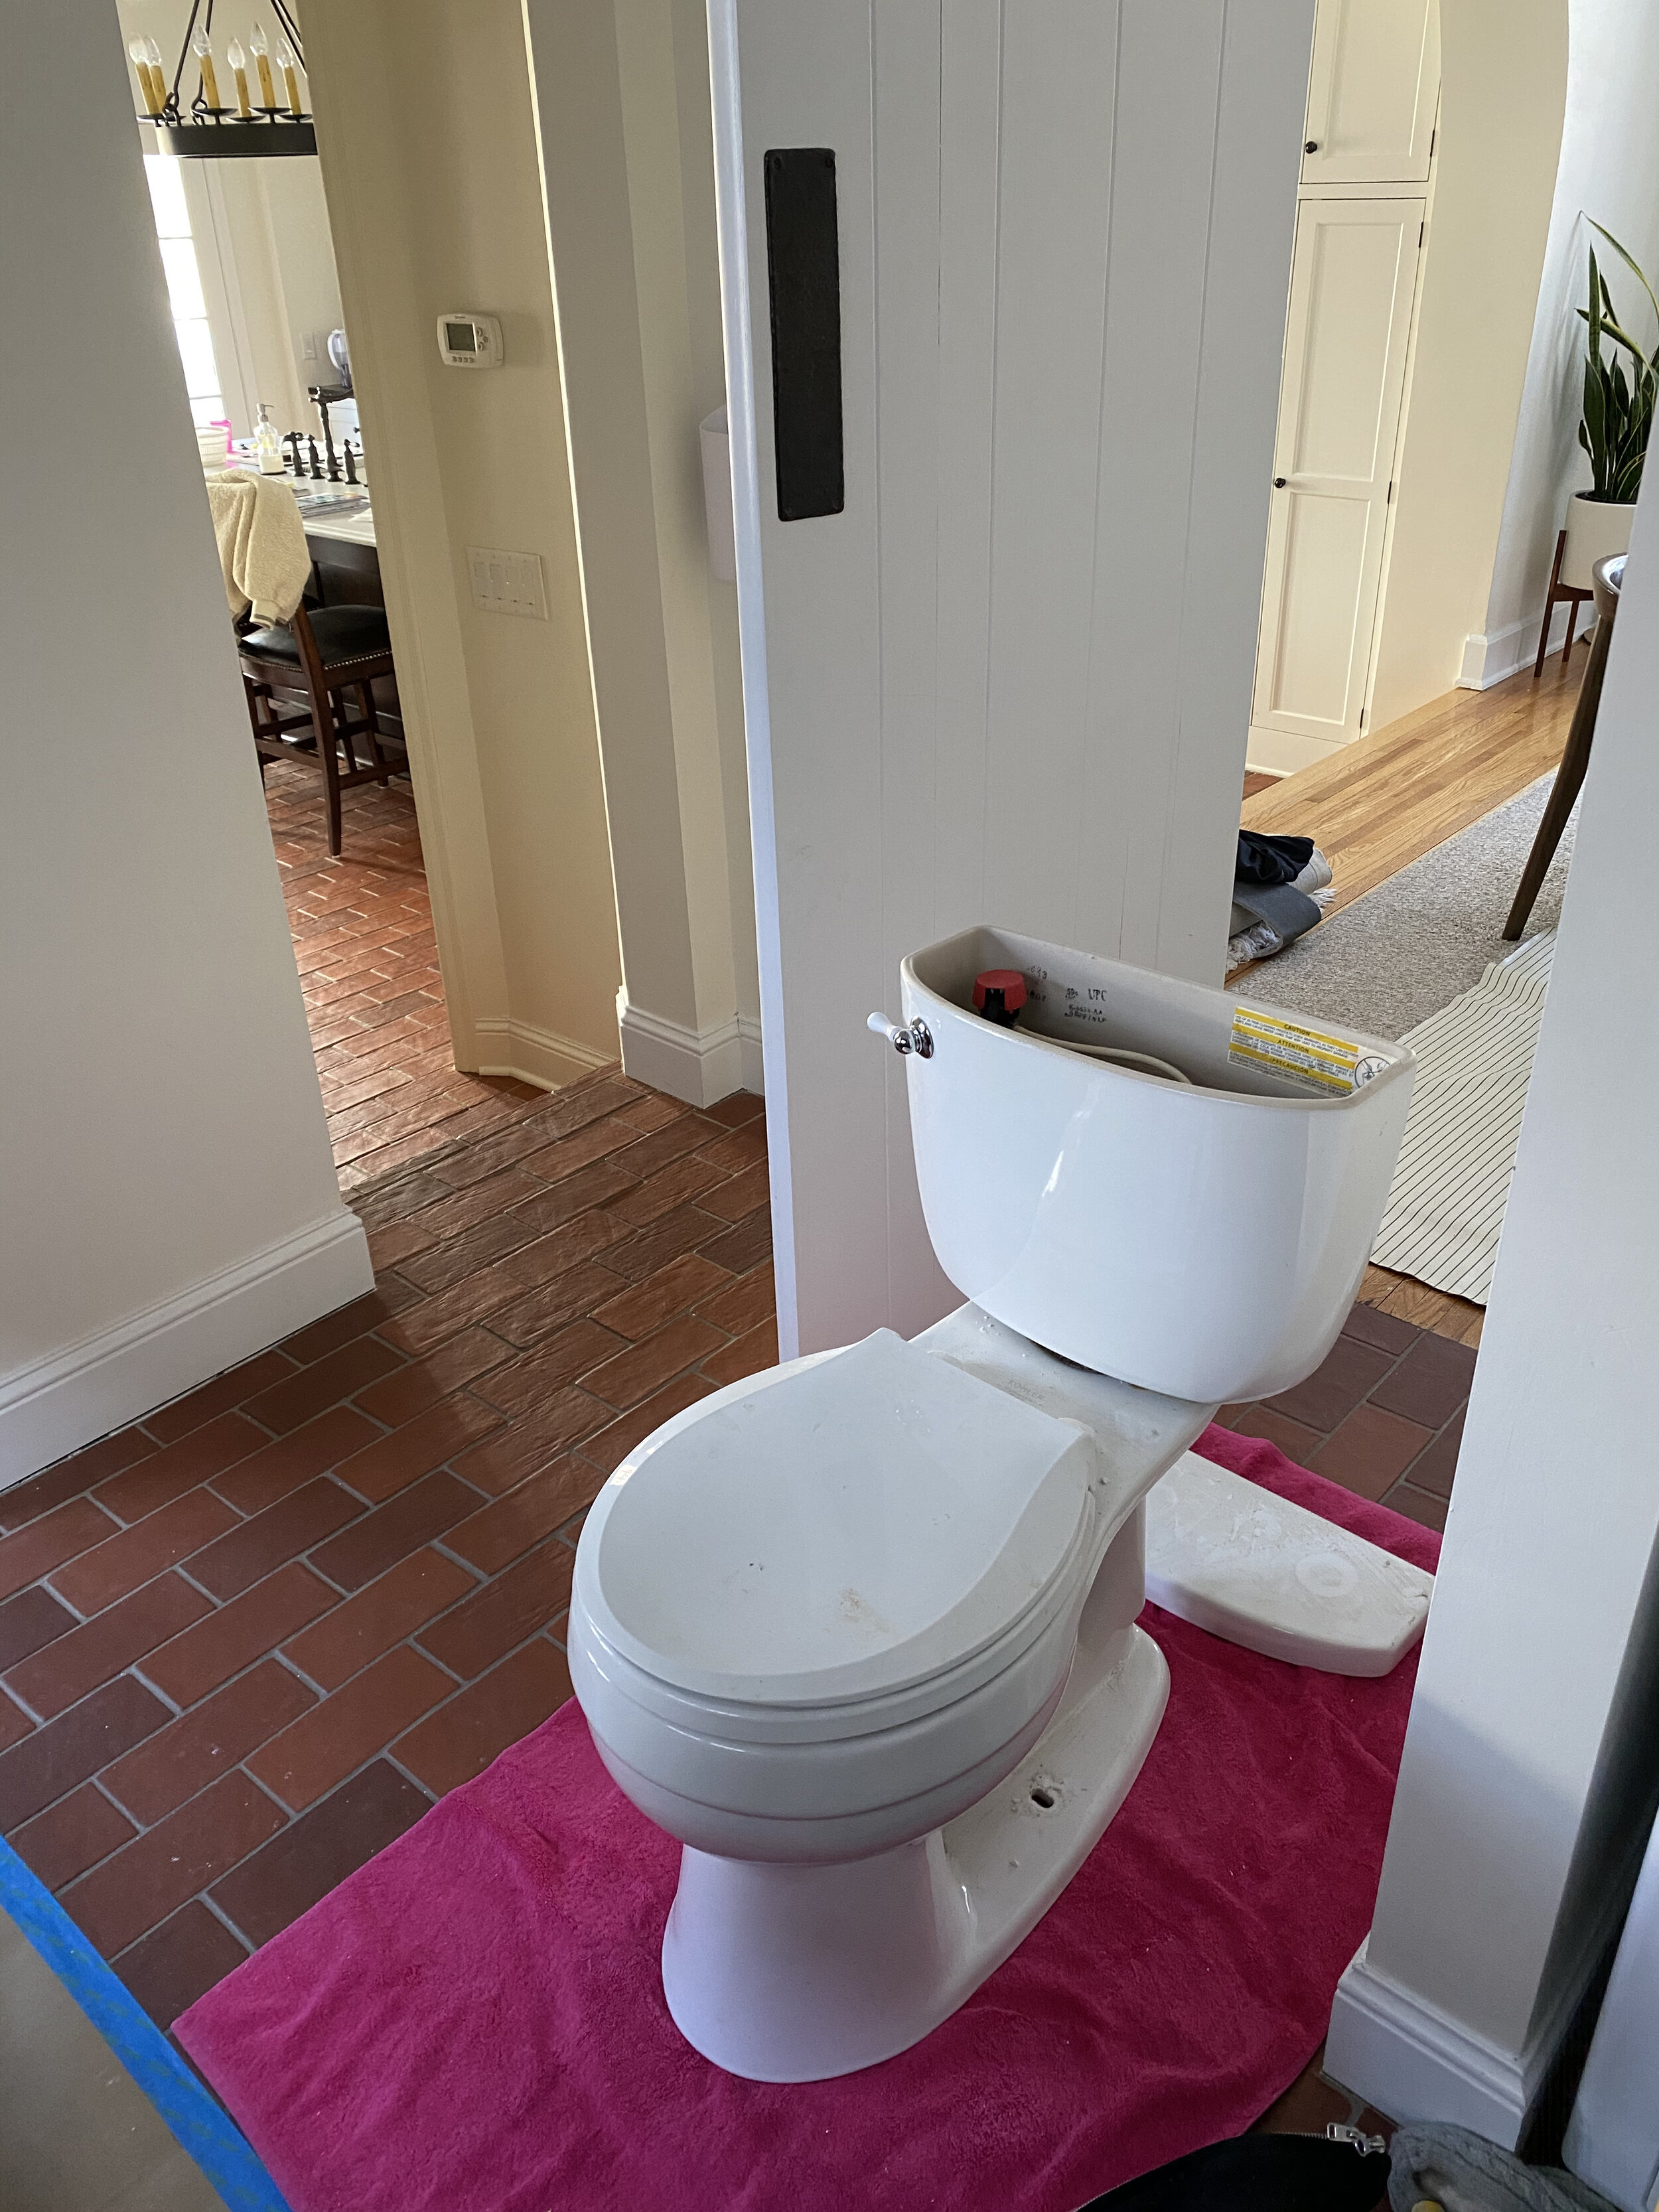
Removing the Toilet
This task may seem intimidating but we highly recommend removing the toilet during a bathroom remodel, especially with a small space. We didn’t do this at first but it’s a no brainer. This will give you more room to work when tiling, painting, installing wall treatments, trim, etc. Follow these steps for toilet removal:
-
CLEAN the toilet! This will make it all much more pleasant for you or your plumber.
-
Shutoff the water supply valve.
-
Flush the toilet to remove most of the water from the tank. If you want, use a wet/dry vac or sponge to remove the rest of the tank water.
-
What do you do with water in the bowl? This may seem counter intuitive but the secret to removing nearly all off the water from the bowl is to take roughly 2-3 gallons of water in a bucket and quickly dump it into the bowl of the toilet. This will force the water out and leave you with almost no water in the toilet. This minimal amount can stay at the bottom of the bowl without any issues.
-
Disconnect the water supply.
-
Remove the two bolts holding the toilet to the floor.
-
Pull the toilet by lifting it straight up off the two bolts coming out of the floor. They are heavy so make sure to at least remove the tank cover. if you have a two piece toilet you can also separate the entire tank from the bowl. It will be held on by two nuts located just under the tank.
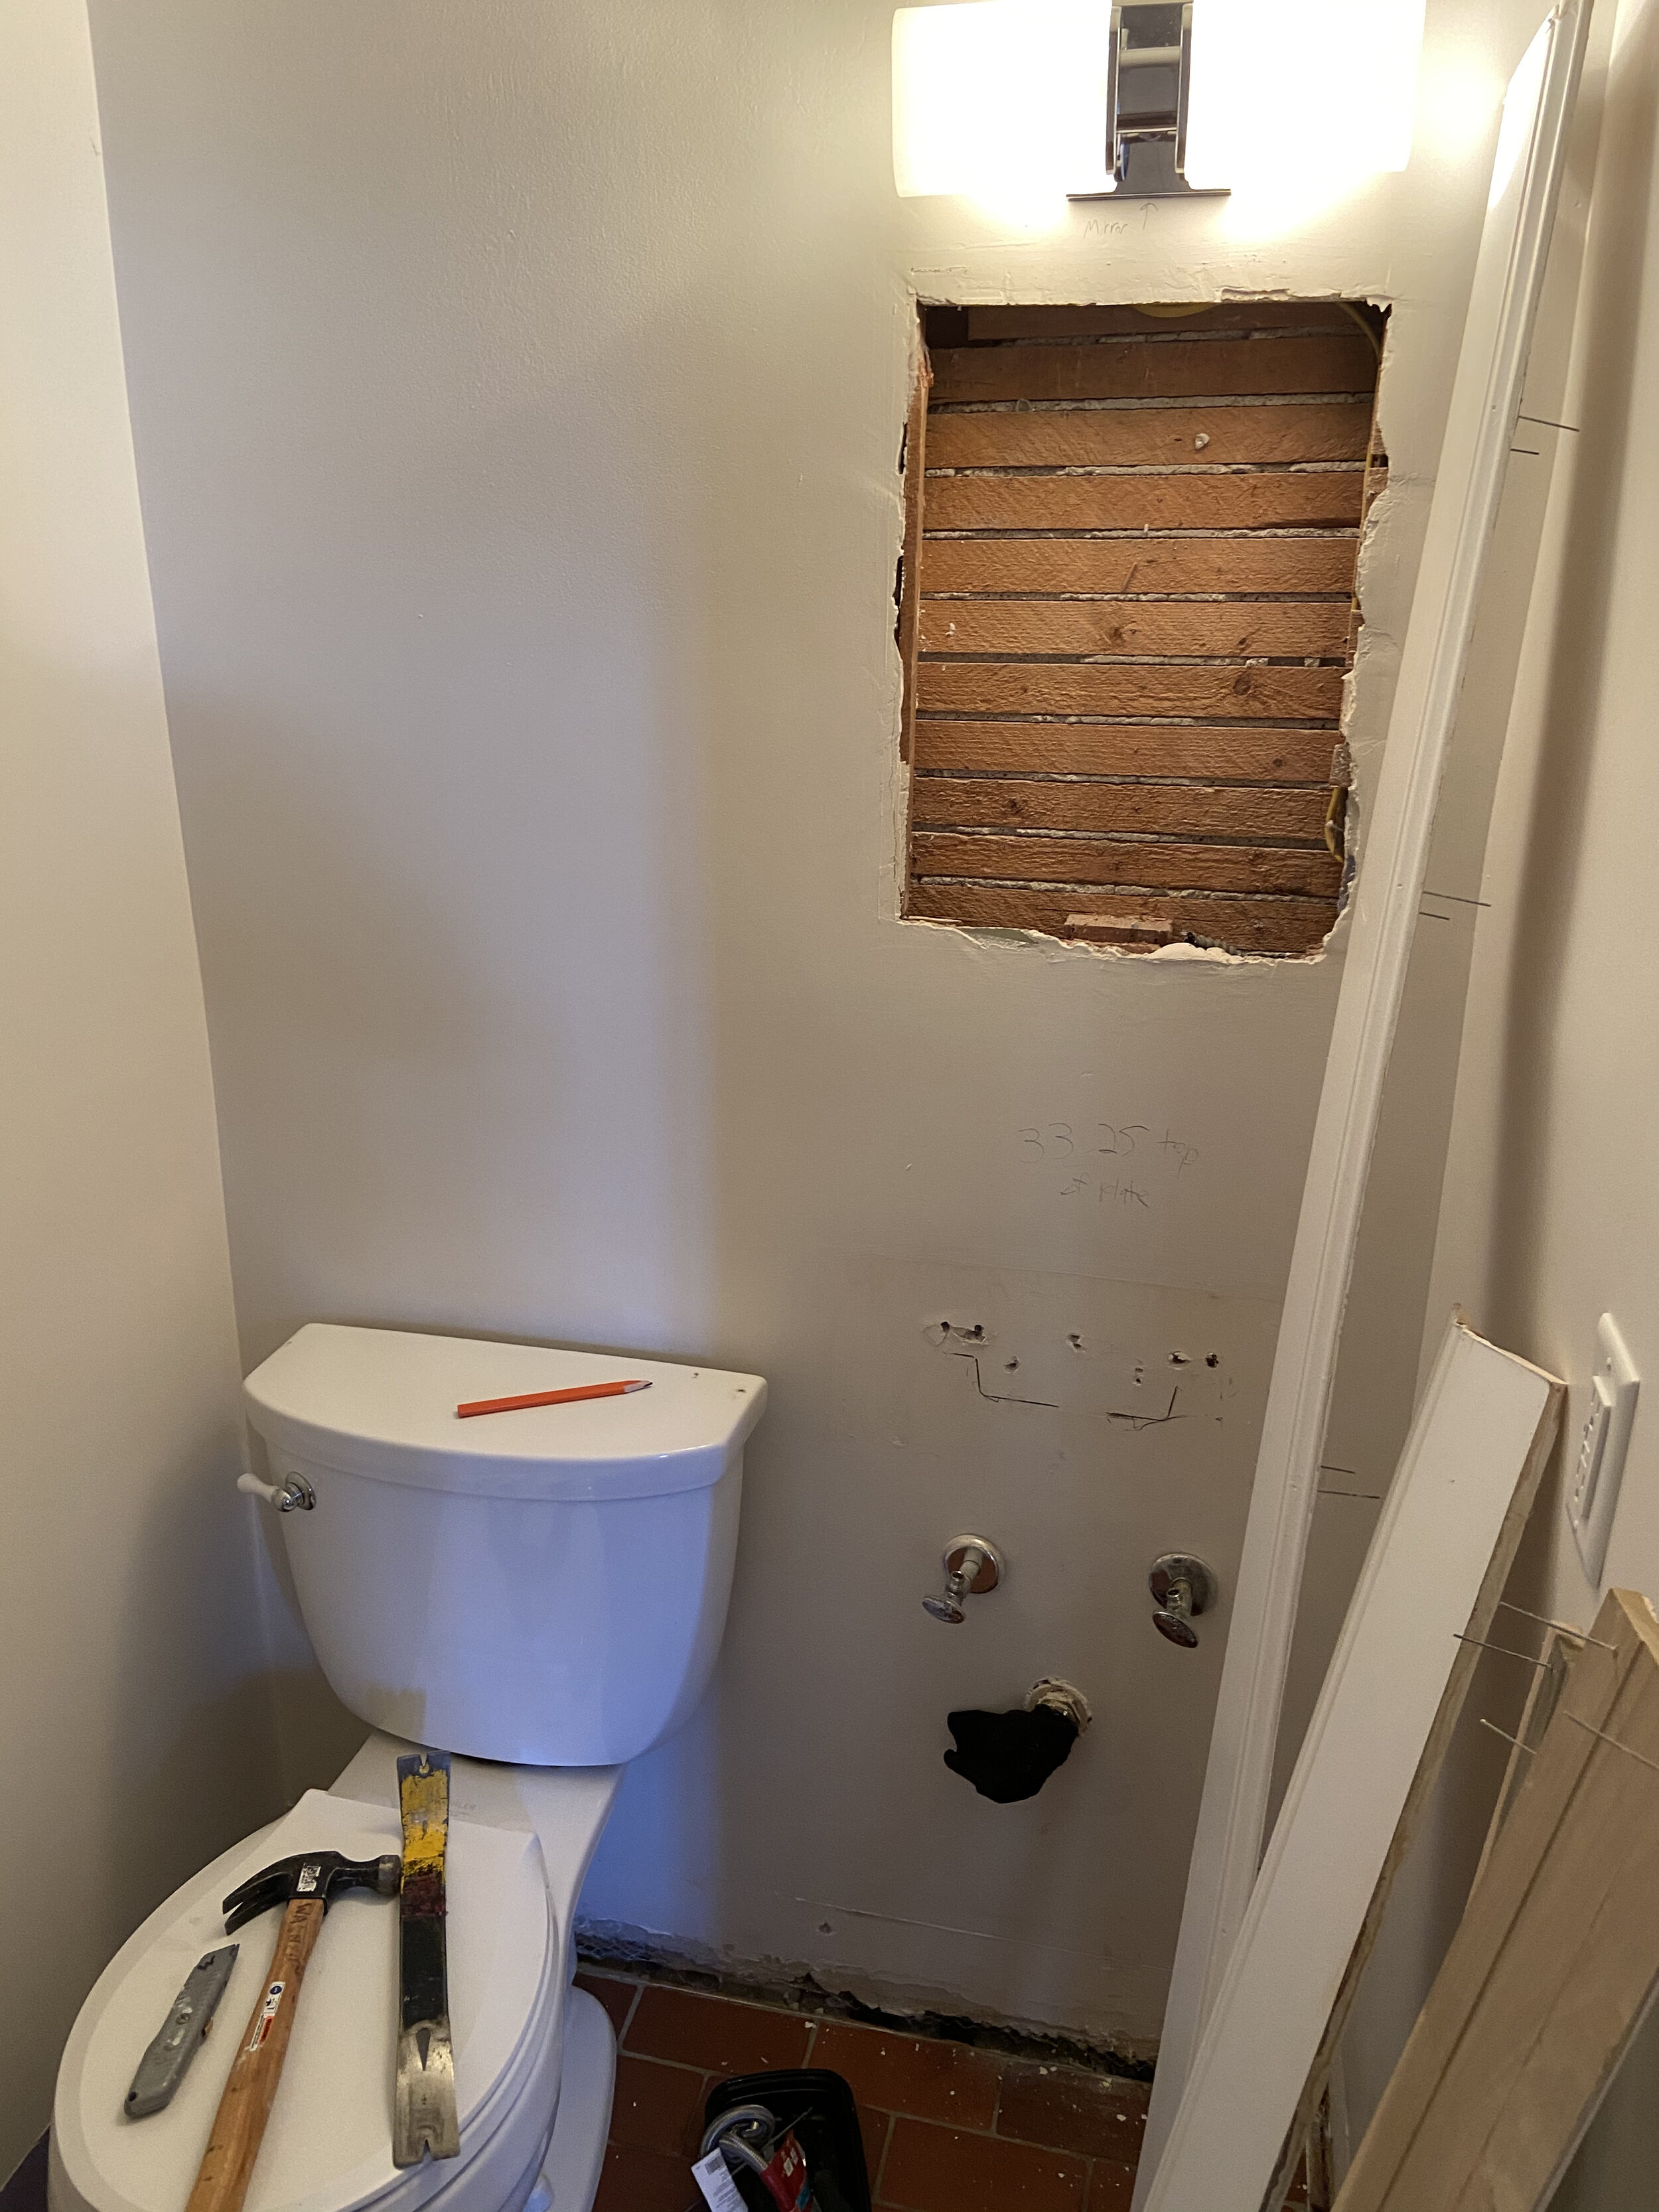
Paneling on Imperfect Walls
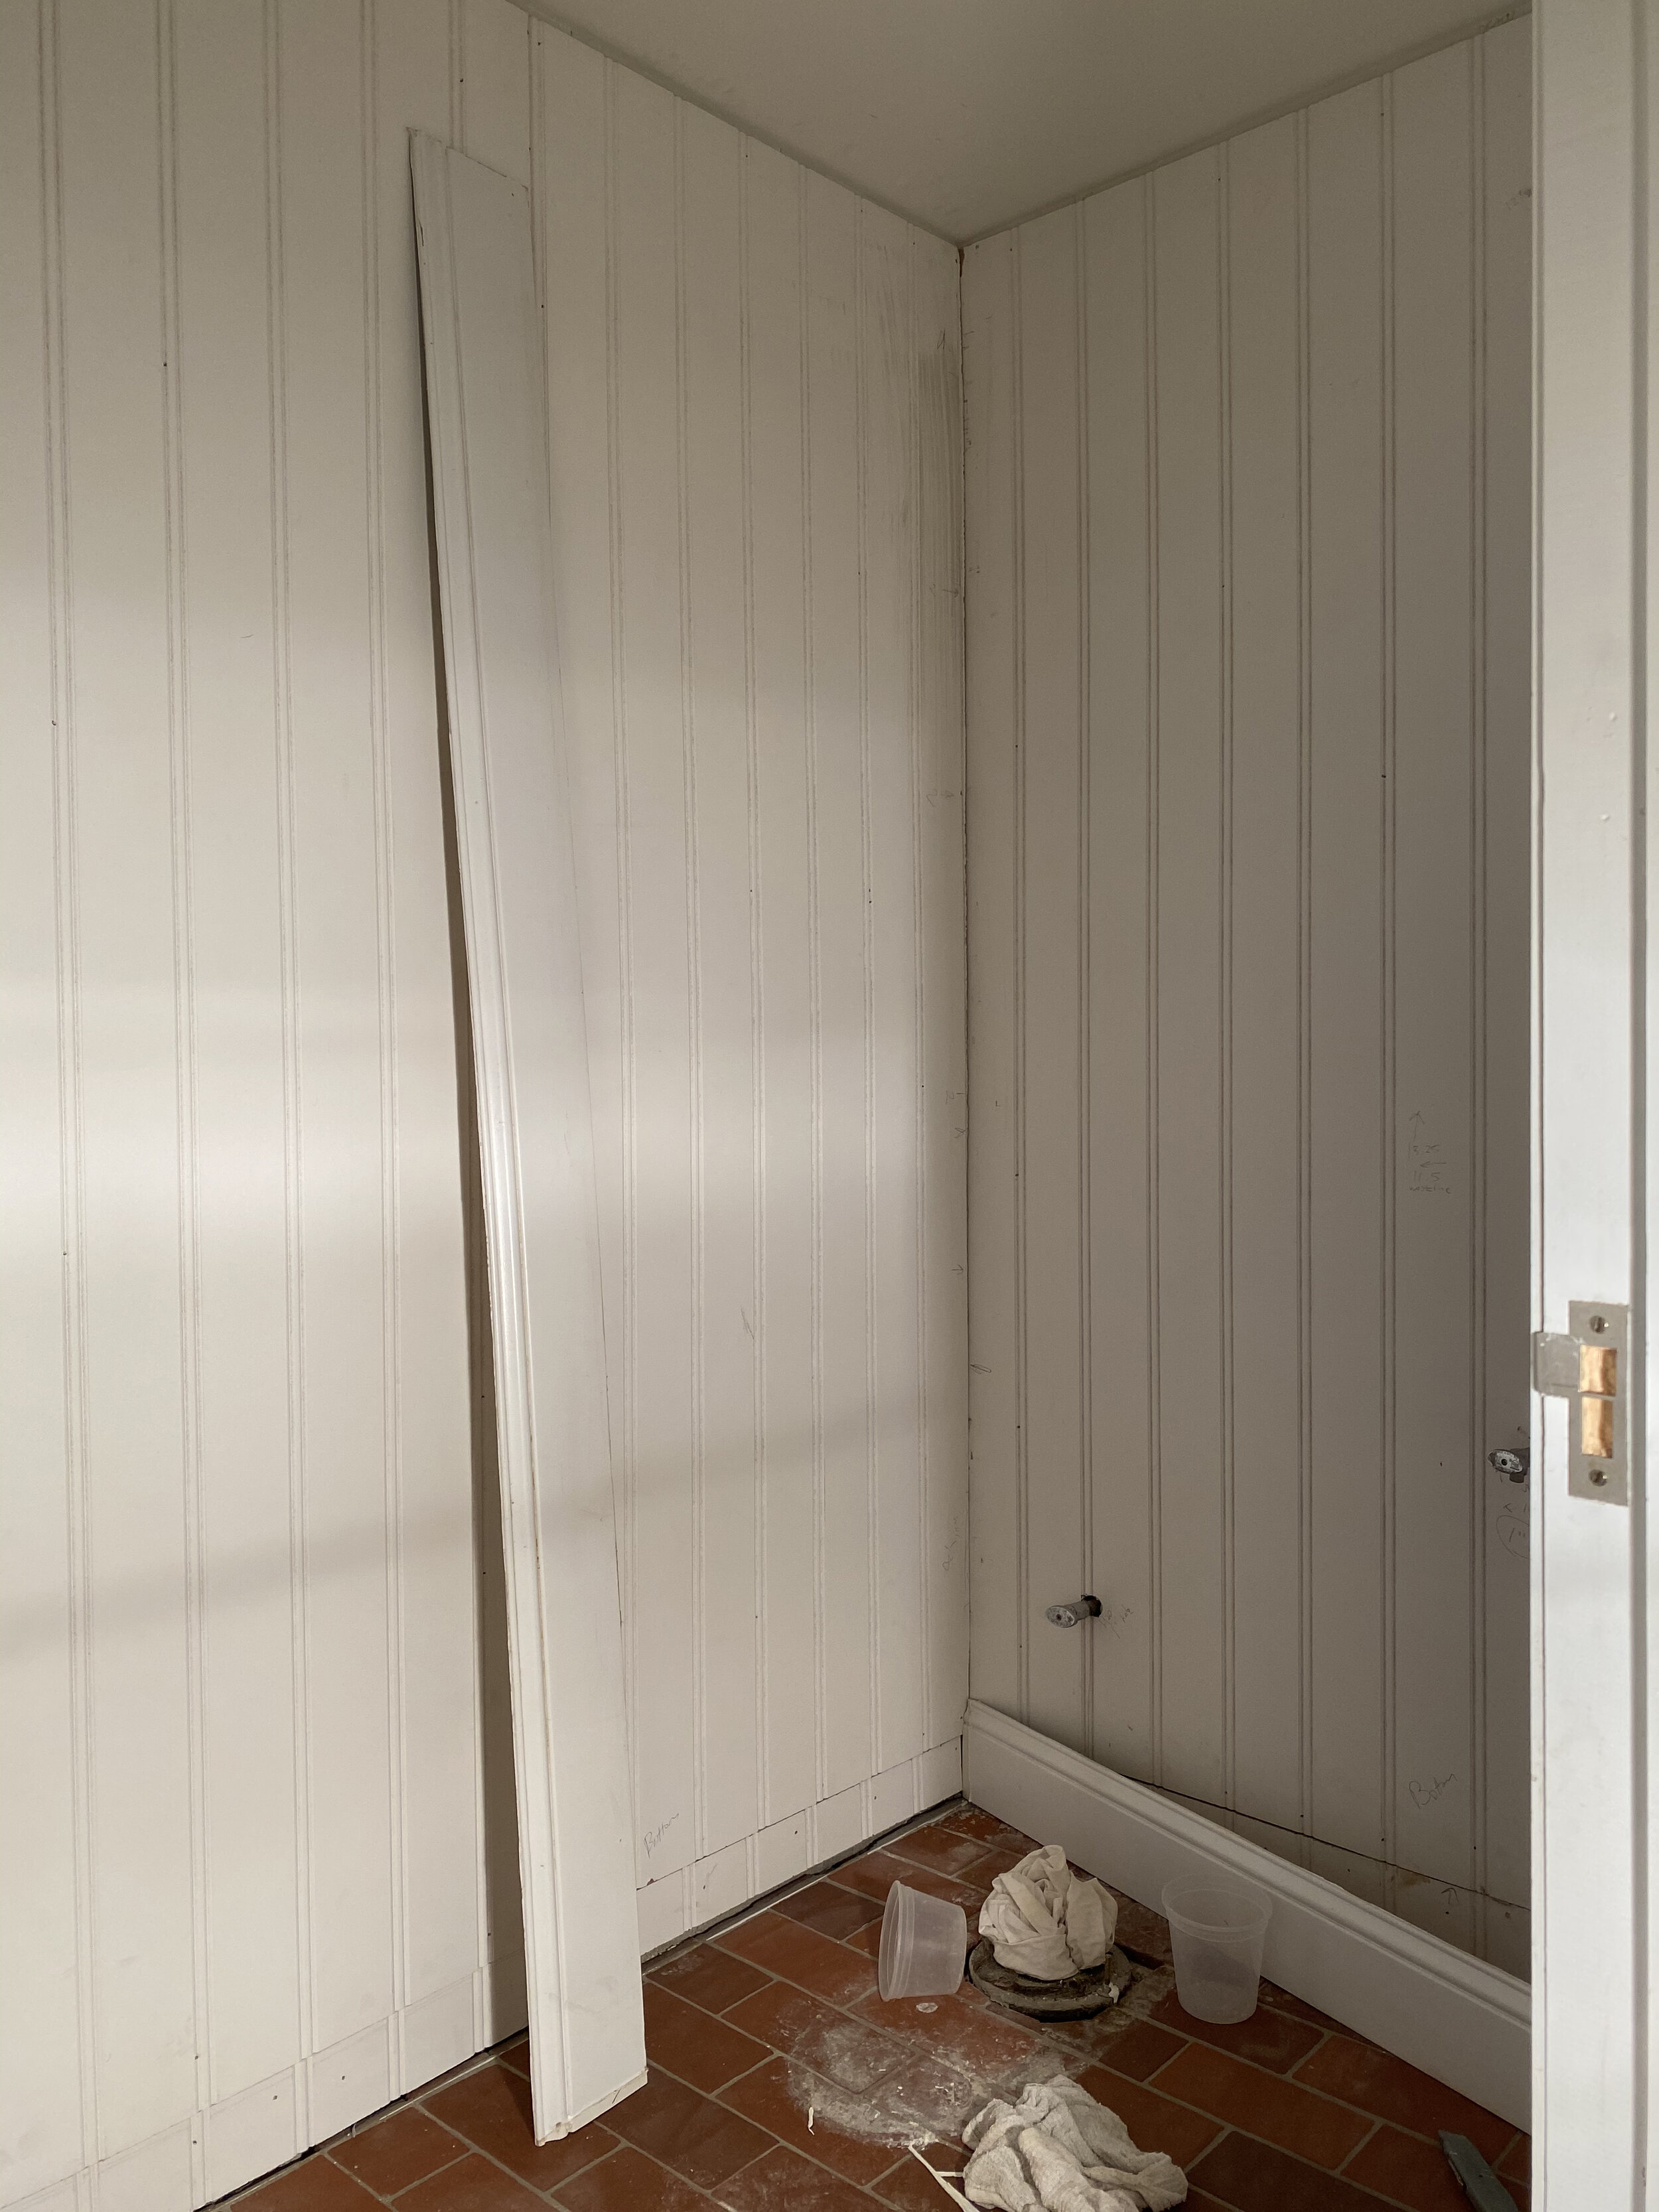
If you don’t know the background to our powder room (you can read it here) , it used to be the size of a phone booth. We were able to enlarge it to roughly 45” x 77” and later found out that our one wall was very out of plum. If you have an imperfect wall like we did, use a long level to measure how far out of plumb the wall is as well as find any large bumps or valleys in the wall surface. Mark these with a pencil and then fill with drywall mud and/or various thicknesses of sheetrock.

In our bathroom we discovered one entire corner of the wall was 5/8” out of plumb. We attached a layer of 1/2” drywall to this area and then float it out with 20 minute easy sand joint compound. You can purchase fast drying joint compound which speeds up the process significantly.
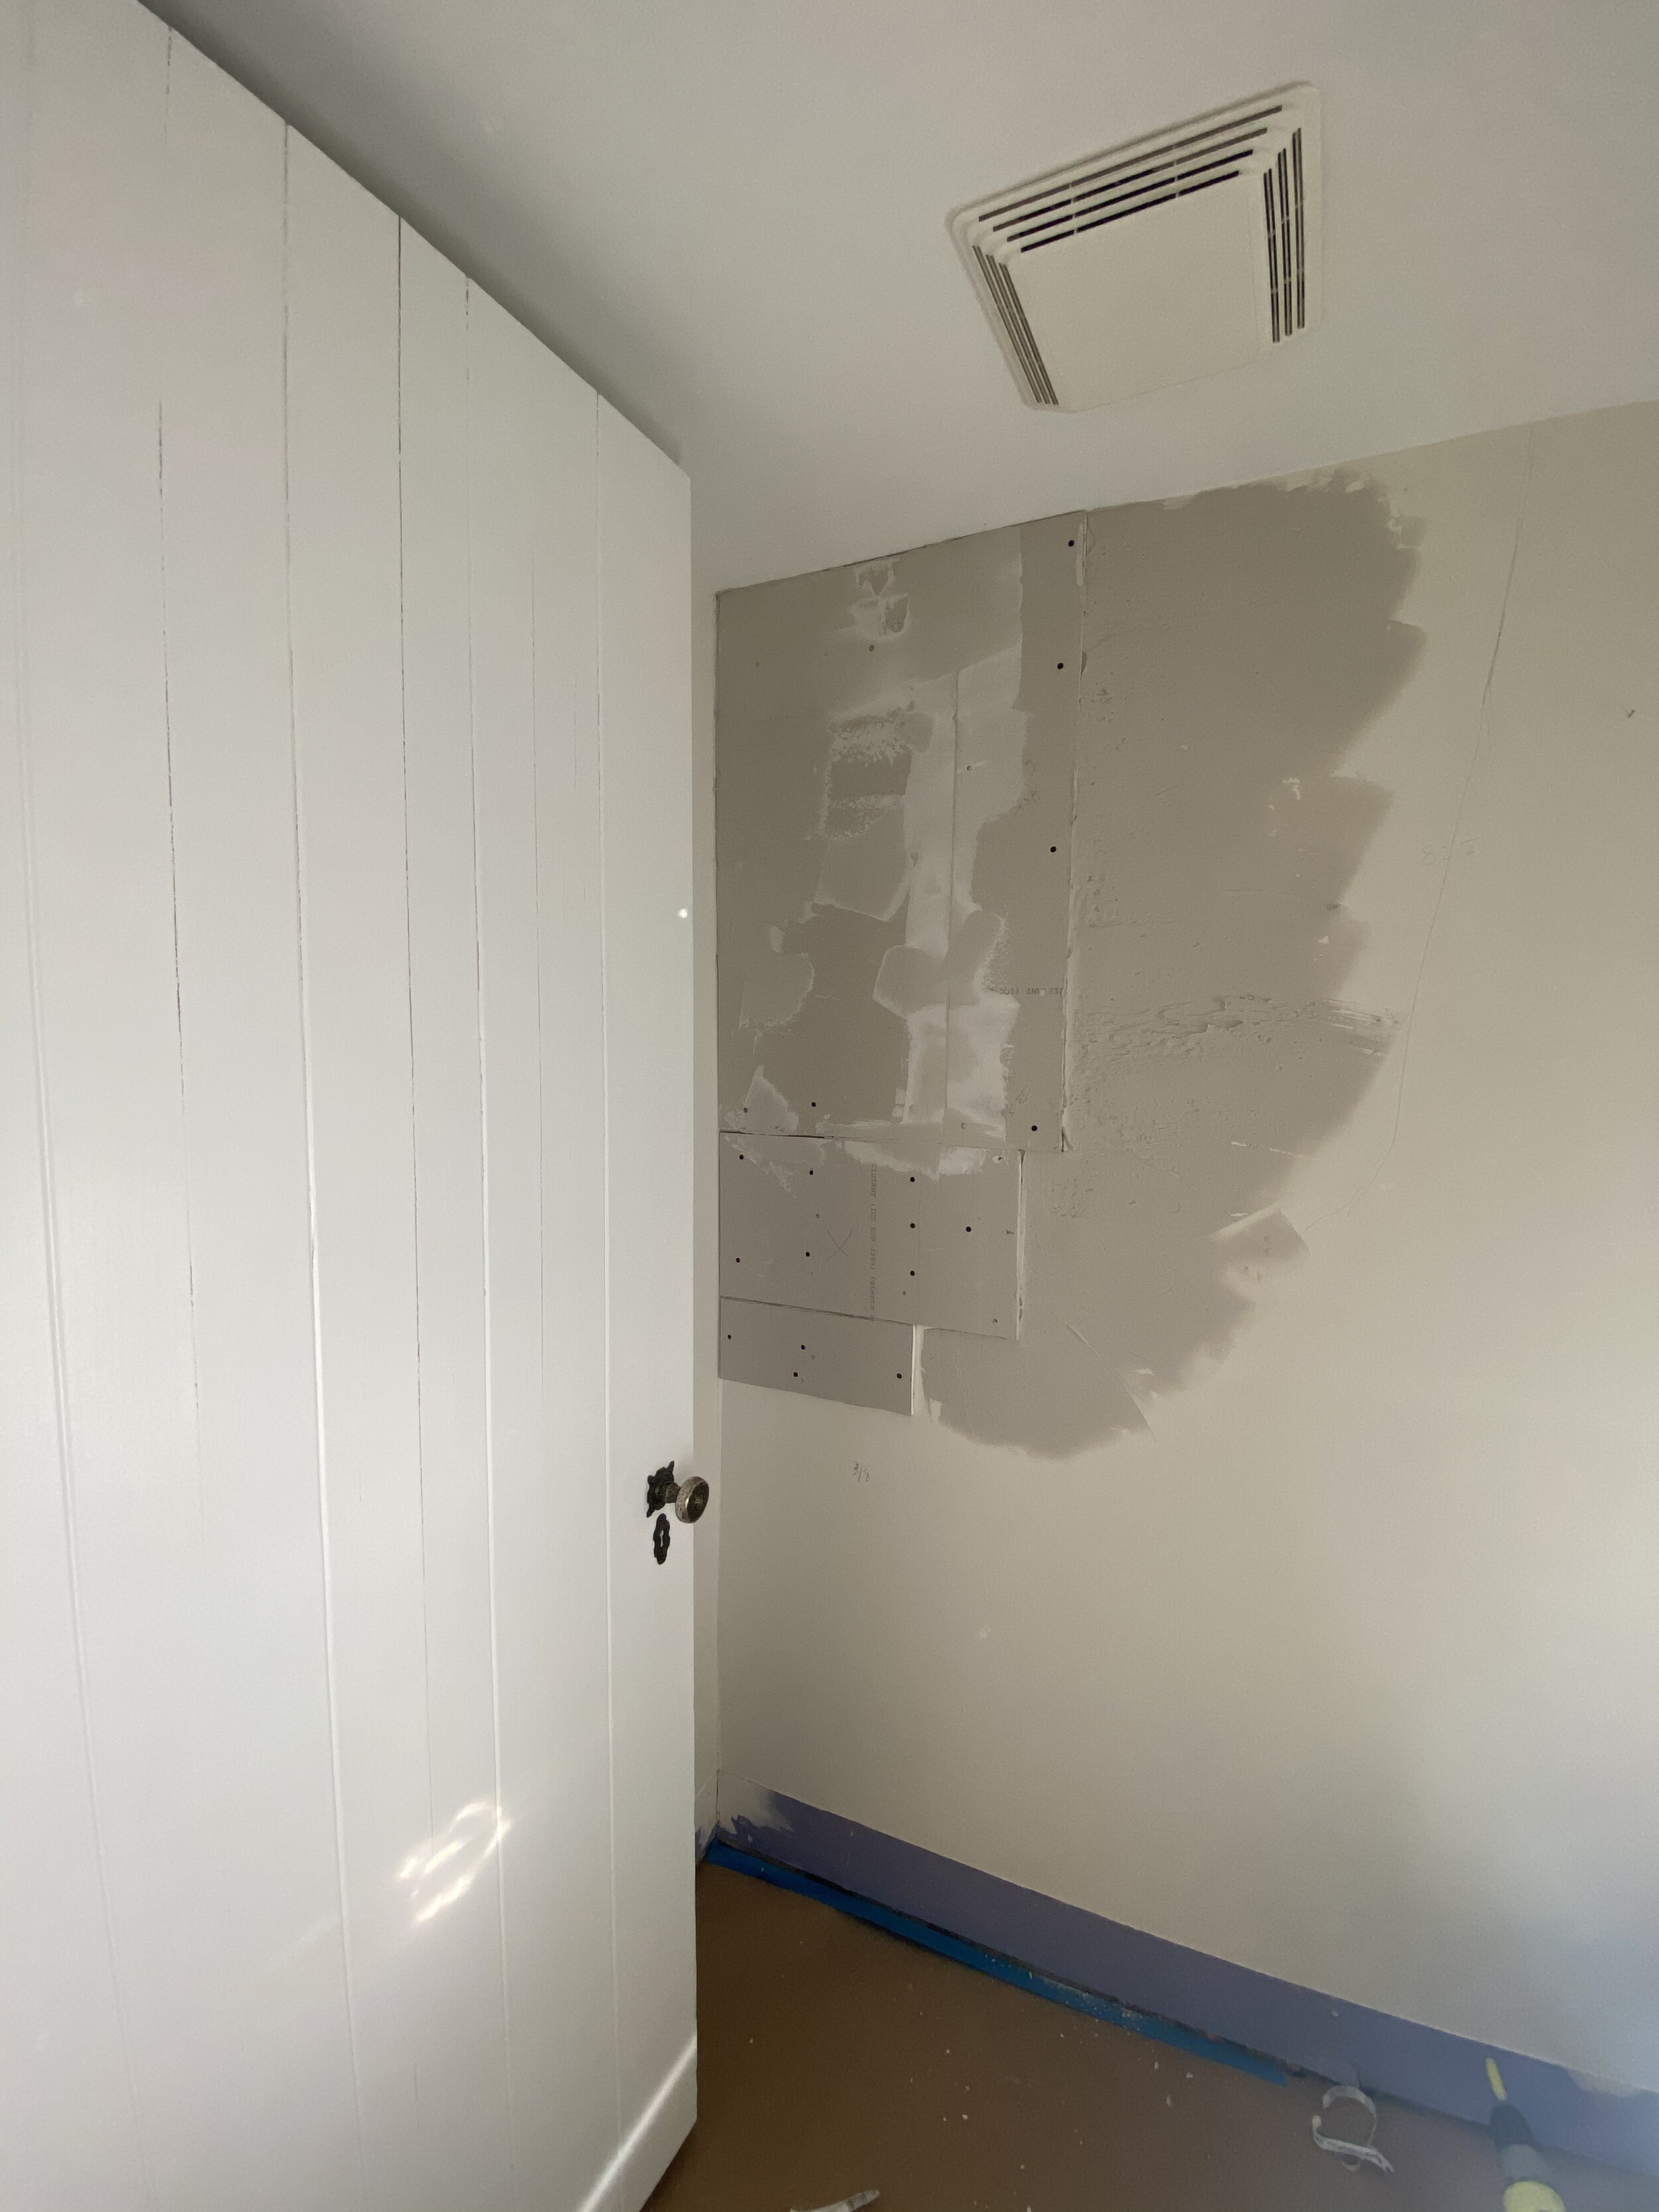
Also, you can leave your door casing in place during installation. To help the base moulding meet up with the door casing, simply cut the base at a 45 degree angle.
Panel Installation
When installing paneling (click here for the panel we used), measure the height of the wall, then subtract the height of the baseboard and add 1 inch. The goal is to end up with paneling that will cover the entire wall and overlap under the baseboard. Cutting the paneling short makes it easier to maneuver into place. You can then use a scrap piece of paneling for the remaining space under the baseboard so that it sits even and flush with the wall.
Scribing Technique
You can use a technique known as scribing where paneling meets inside corners or door/window trim that is uneven. There are many great YouTube videos on this and it only requires a pencil and a compass/protractor. You can also use something as simple as a scrap of wood.
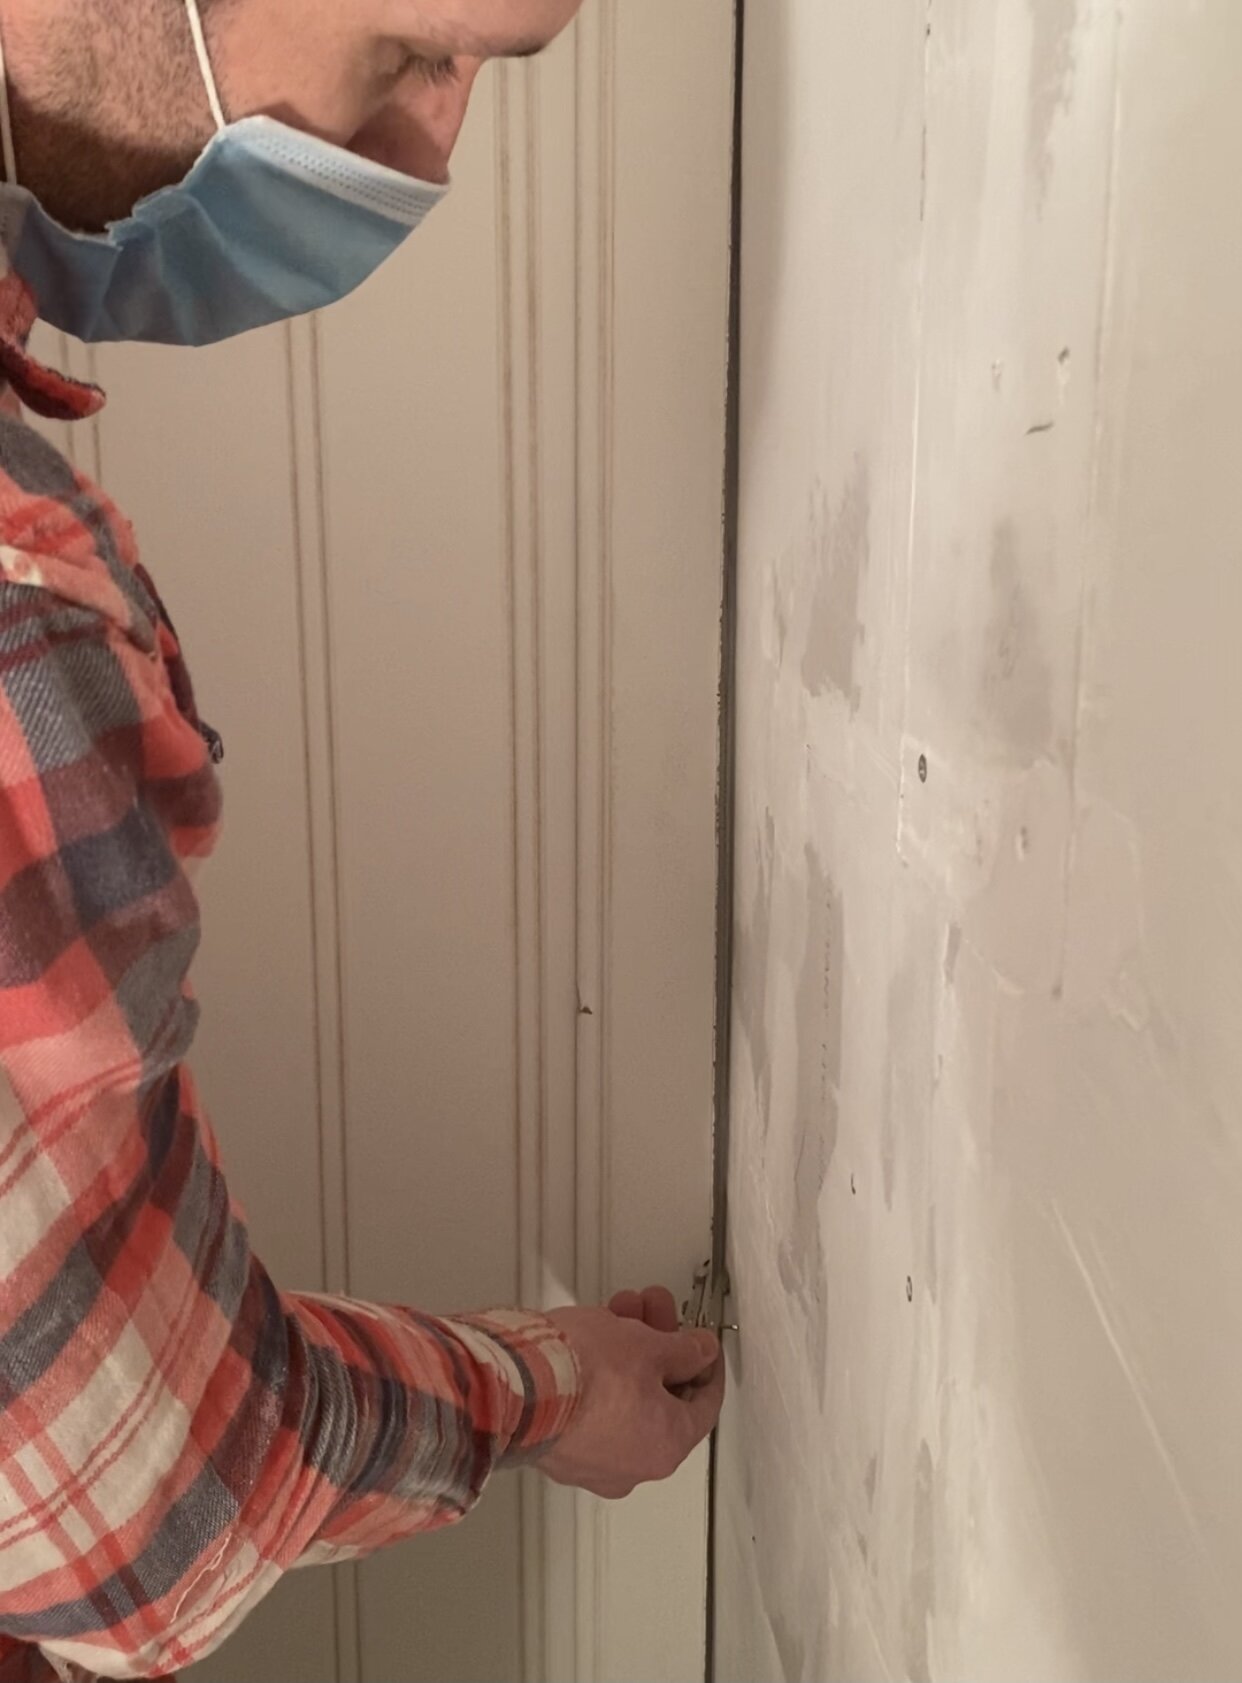
The concept is to put the edge of your panel up to the uneven corner, measure the largest gap then use either a compass (or cut scrap of wood) to set the pencil that same distance from the wall. Then you run the pencil along the edge of the panel while holding the compass against the wall following the contour. You should end up with a pencil mark that follows the shape of the wall, where you can then cut along that mark using a jig saw.
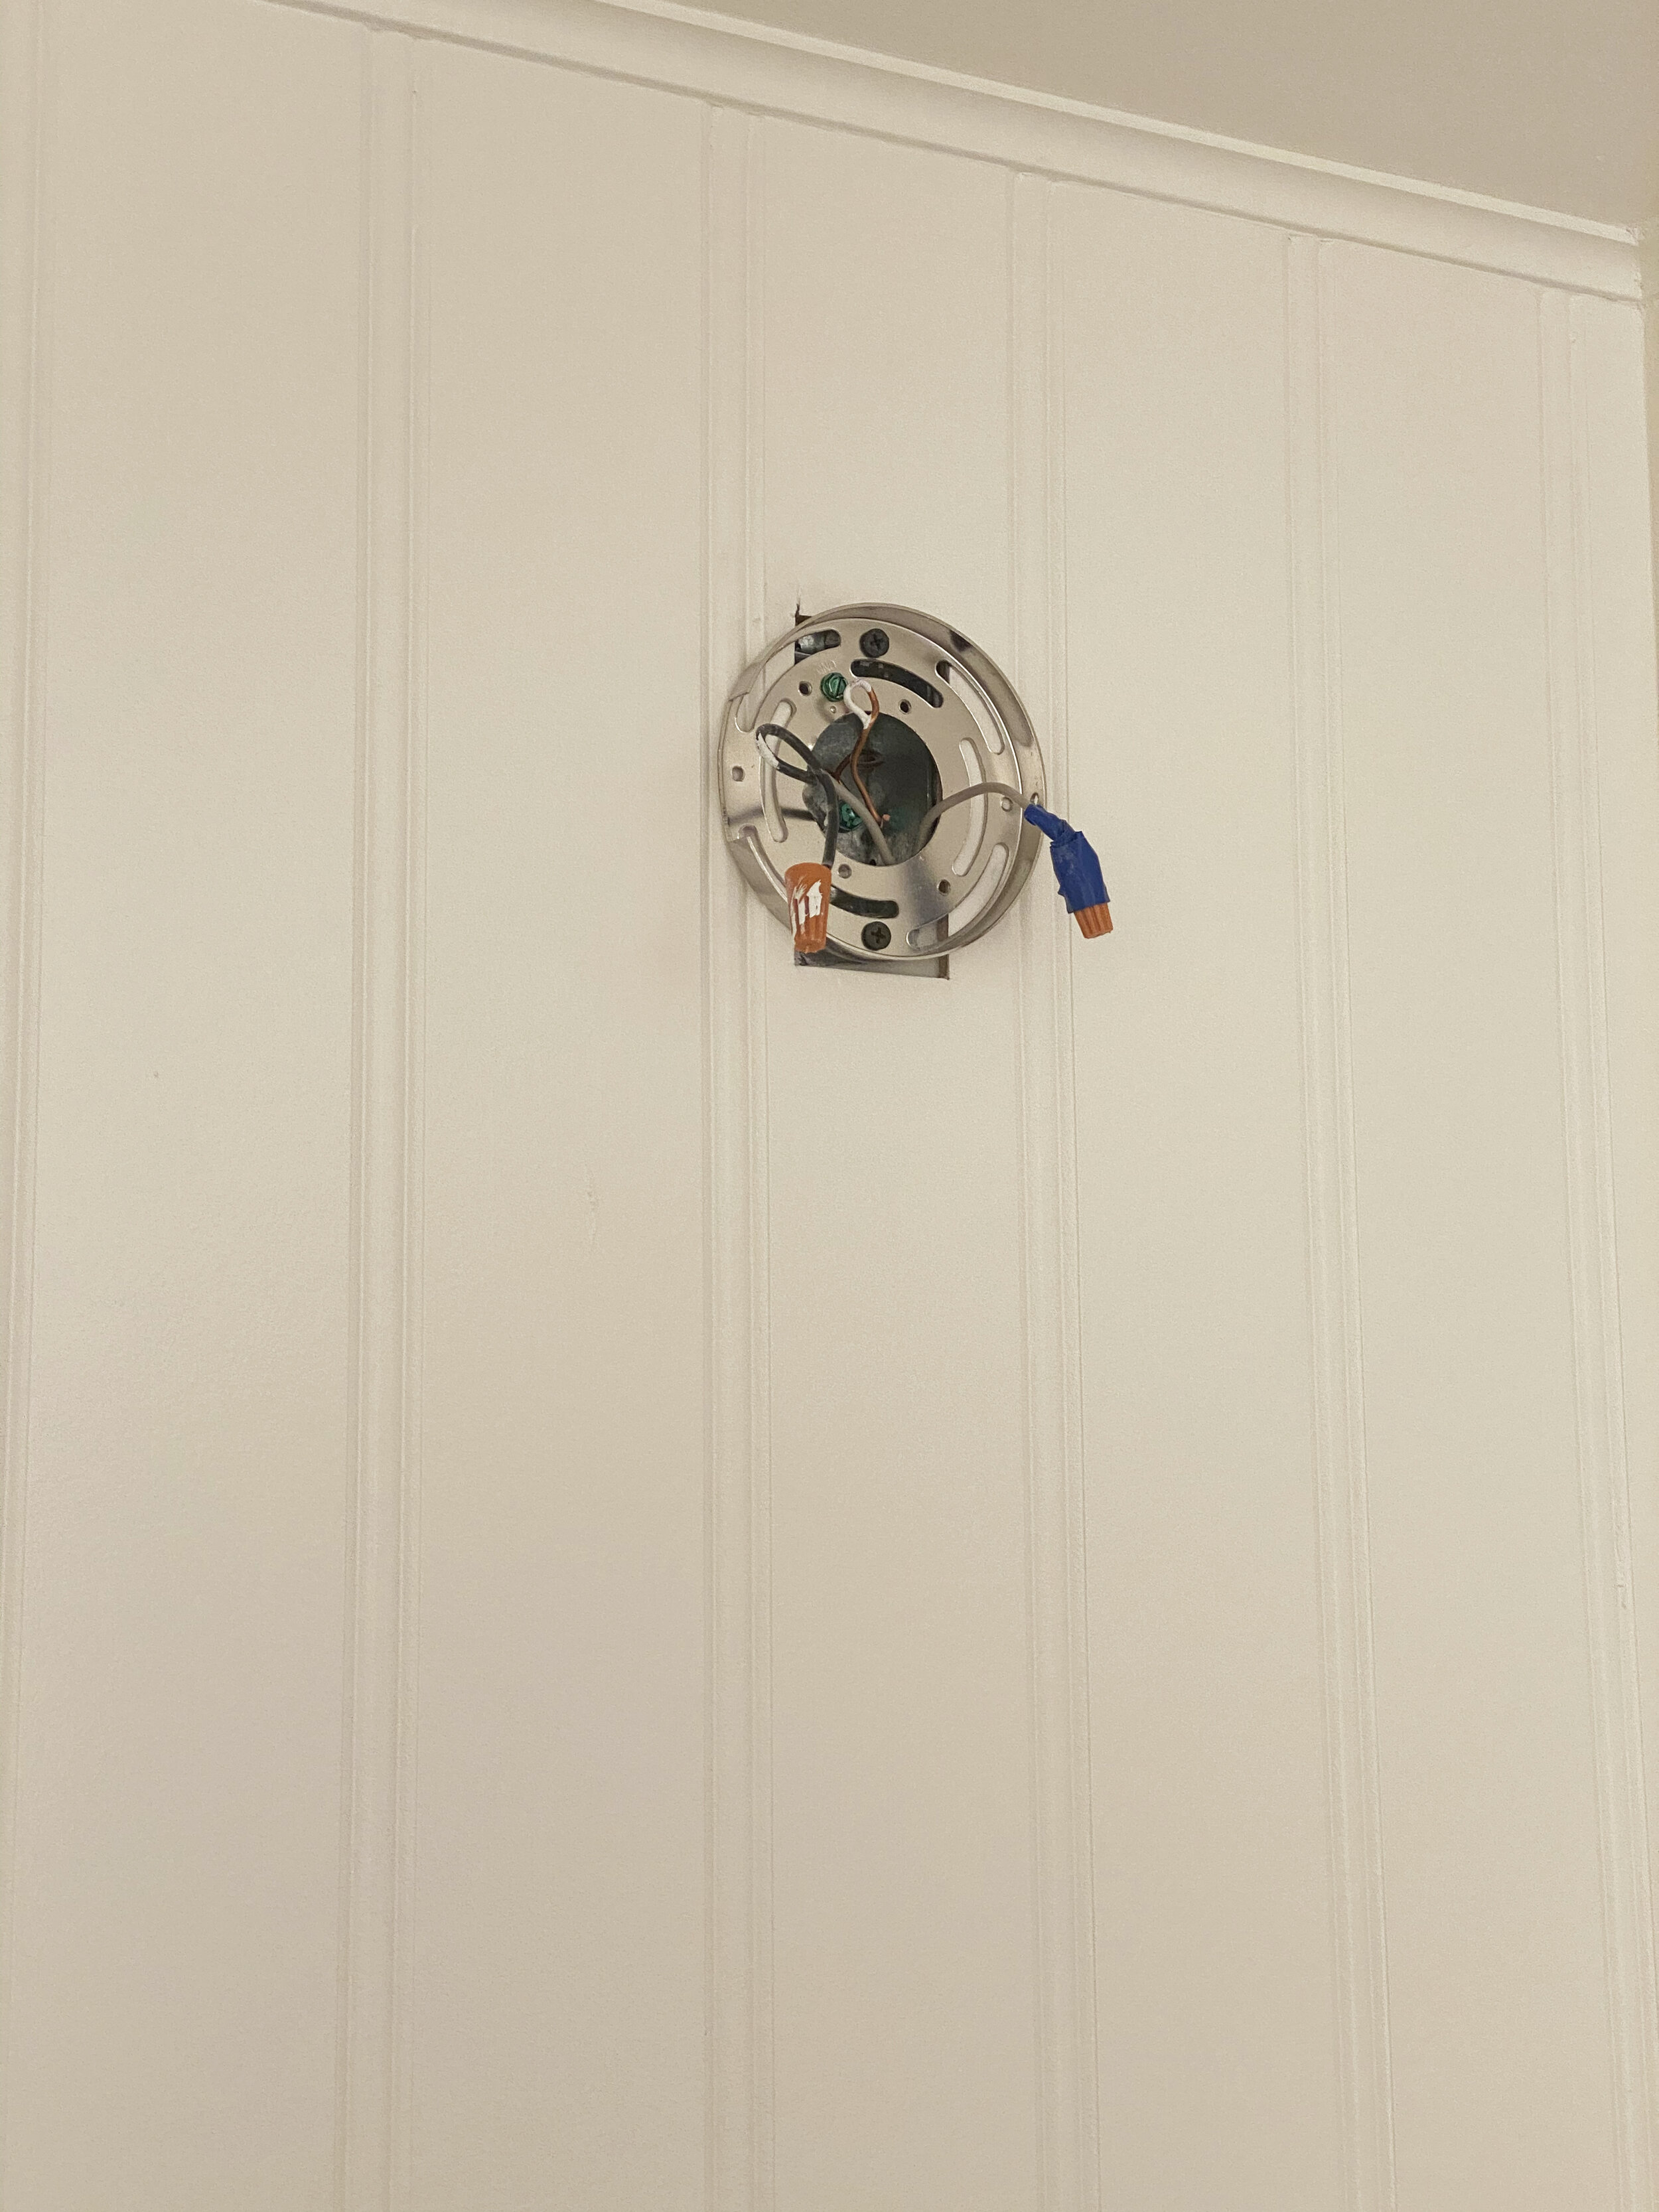
Pipe and Electrical Box
Measuring for pipe and electrical box locations: measure down from the ceiling and off of the corner of the walls to the center of the pipe cutout and edges of the electrical boxes.
Cutting paneling for electrical fixtures: don’t just measure the box you plan to cut around. It is a good idea to place the fixture or outlet cover over the proposed opening prior to cutting to see how much margin for error you have when cutting and trying to fit the panel. We this mistake with the lighting fixture and had to do some patching.
P-Trap
If you are purchasing a new p-trap it is import to dry fit the pieces together to determine if a slip joint extension will be required for the new drain and trap. In addition, make sure that it is the same diameter as the existing waste line hookup coming out of the wall. Common sizes are either 1-1/2” or 1-1/4”.
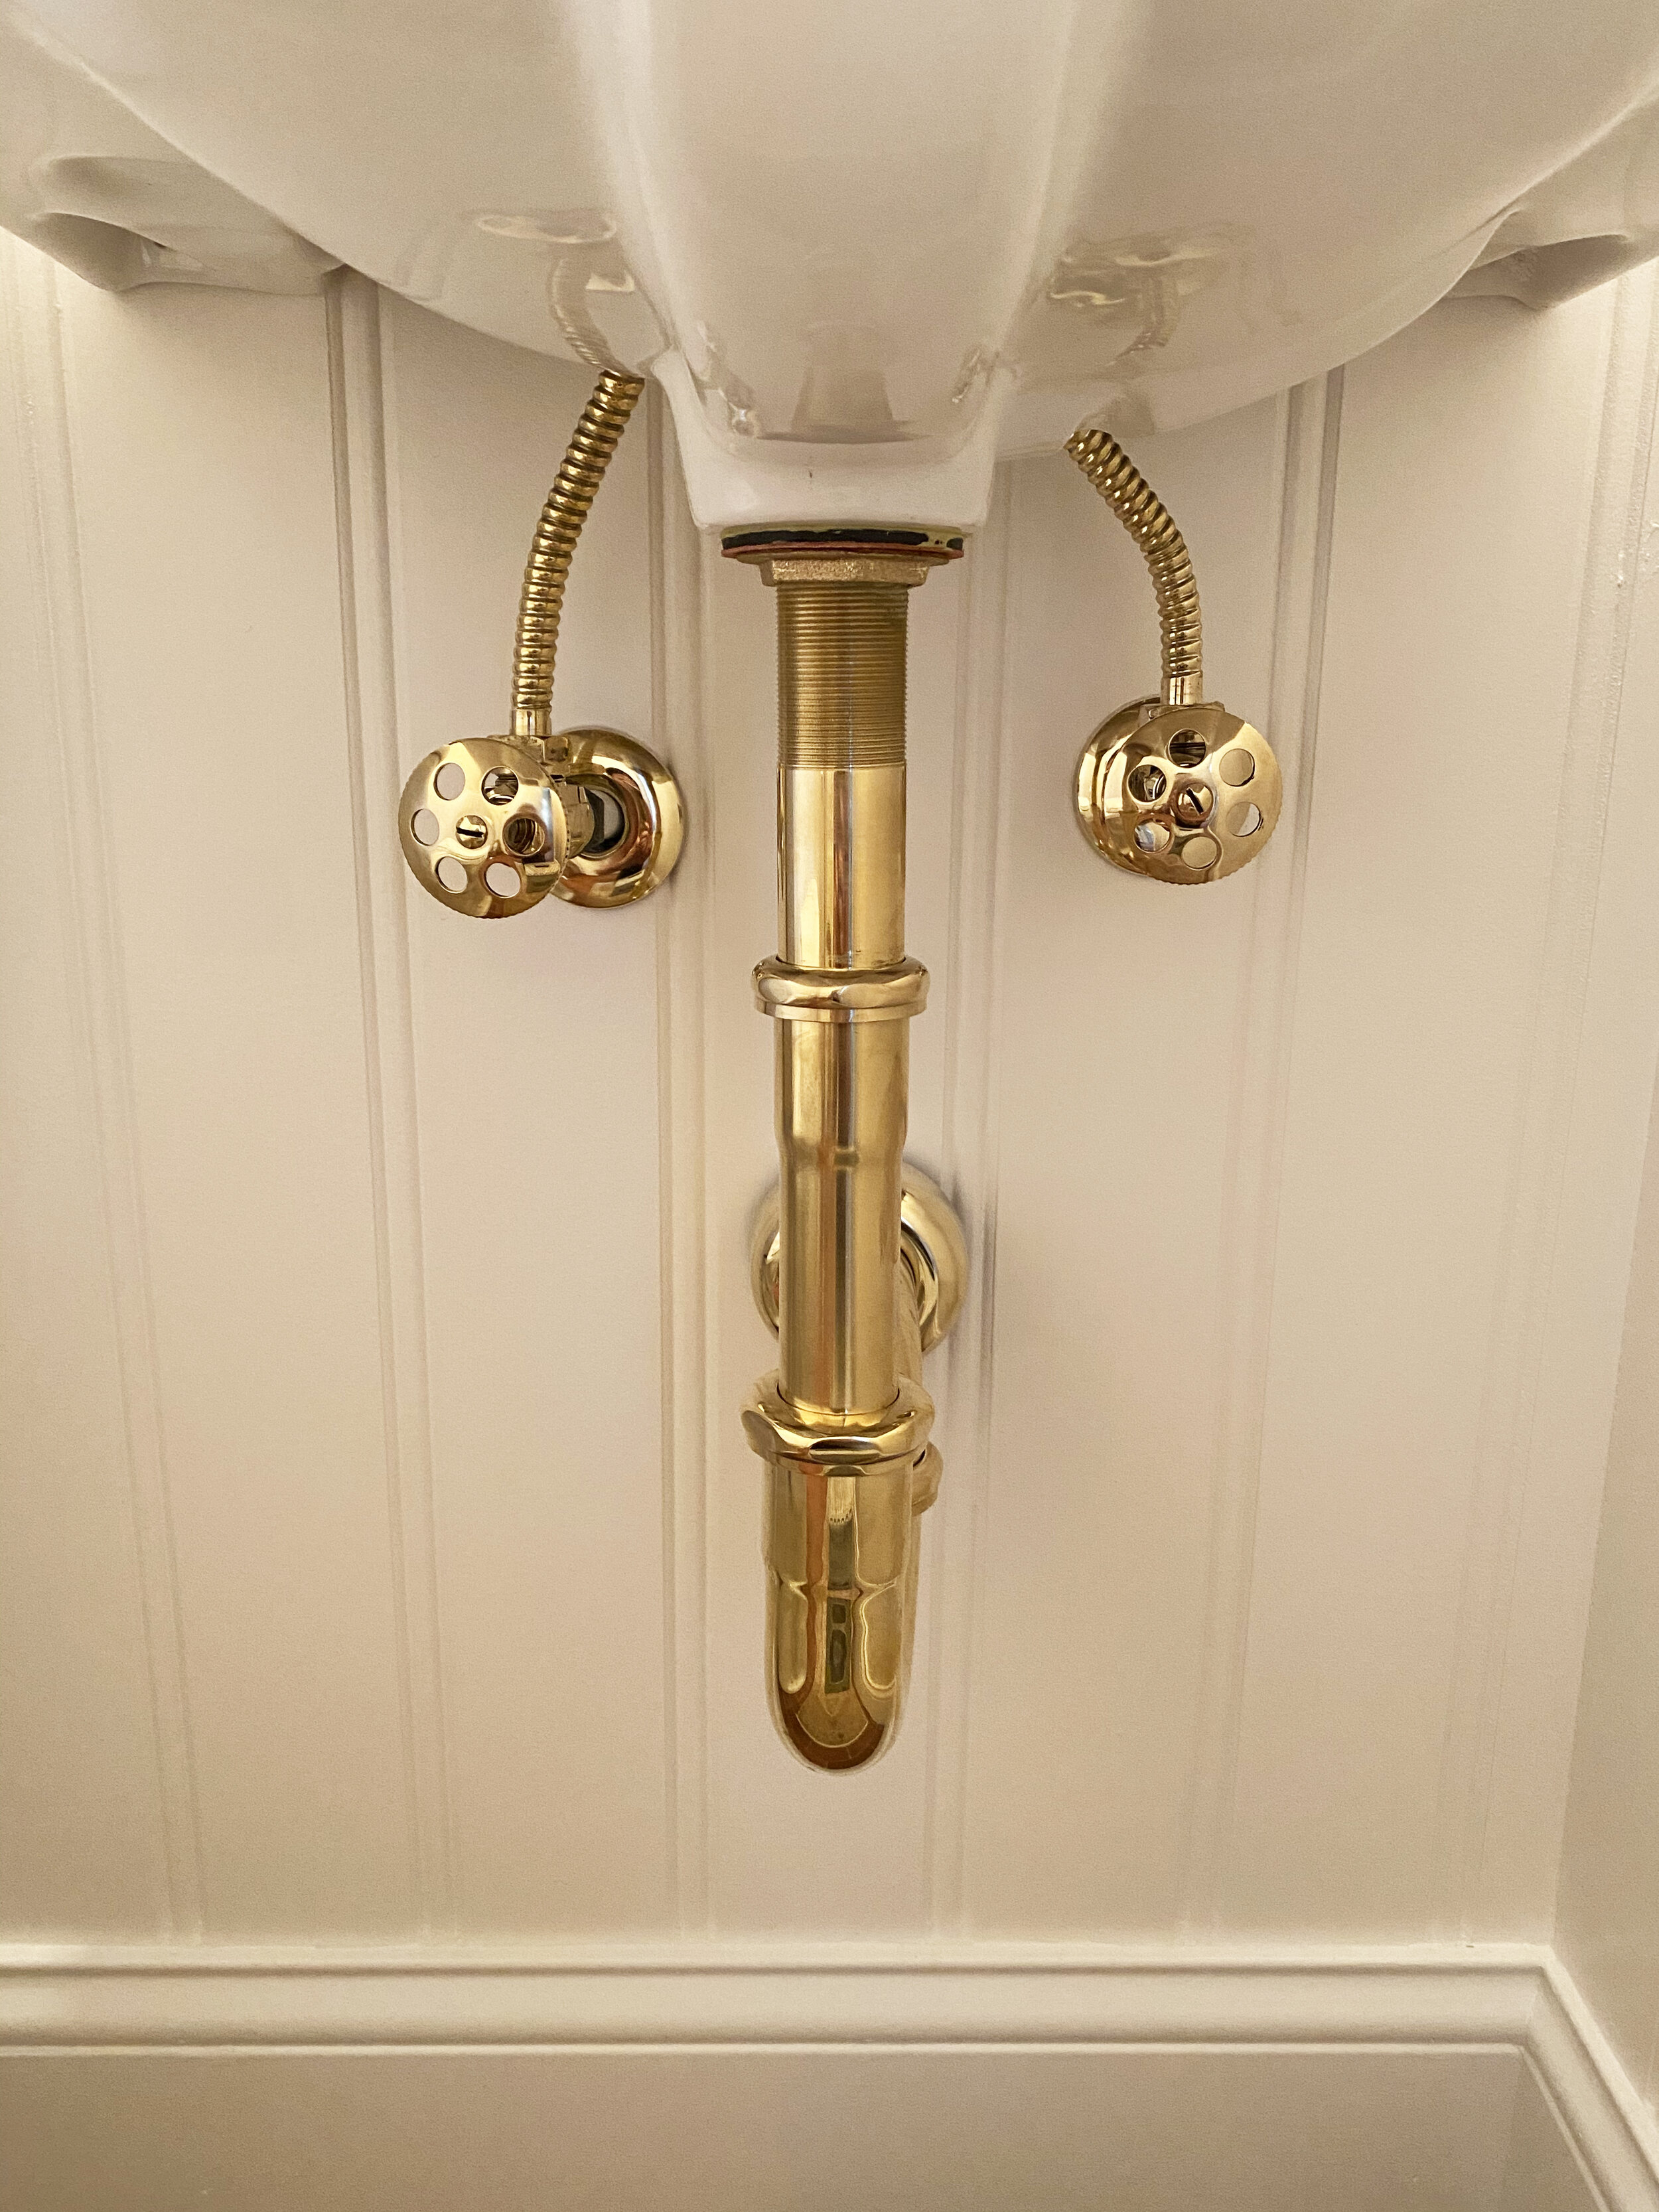
We chose a unique faucet and since our sink had exposed valves and p-trap, we opted to order a matching set of valves and p-trap. Unfortunately we discovered that the new p-trap was larger than our drain hole and due to the condition and age of our plumbing we needed to cut out and replace the sink drain connection.
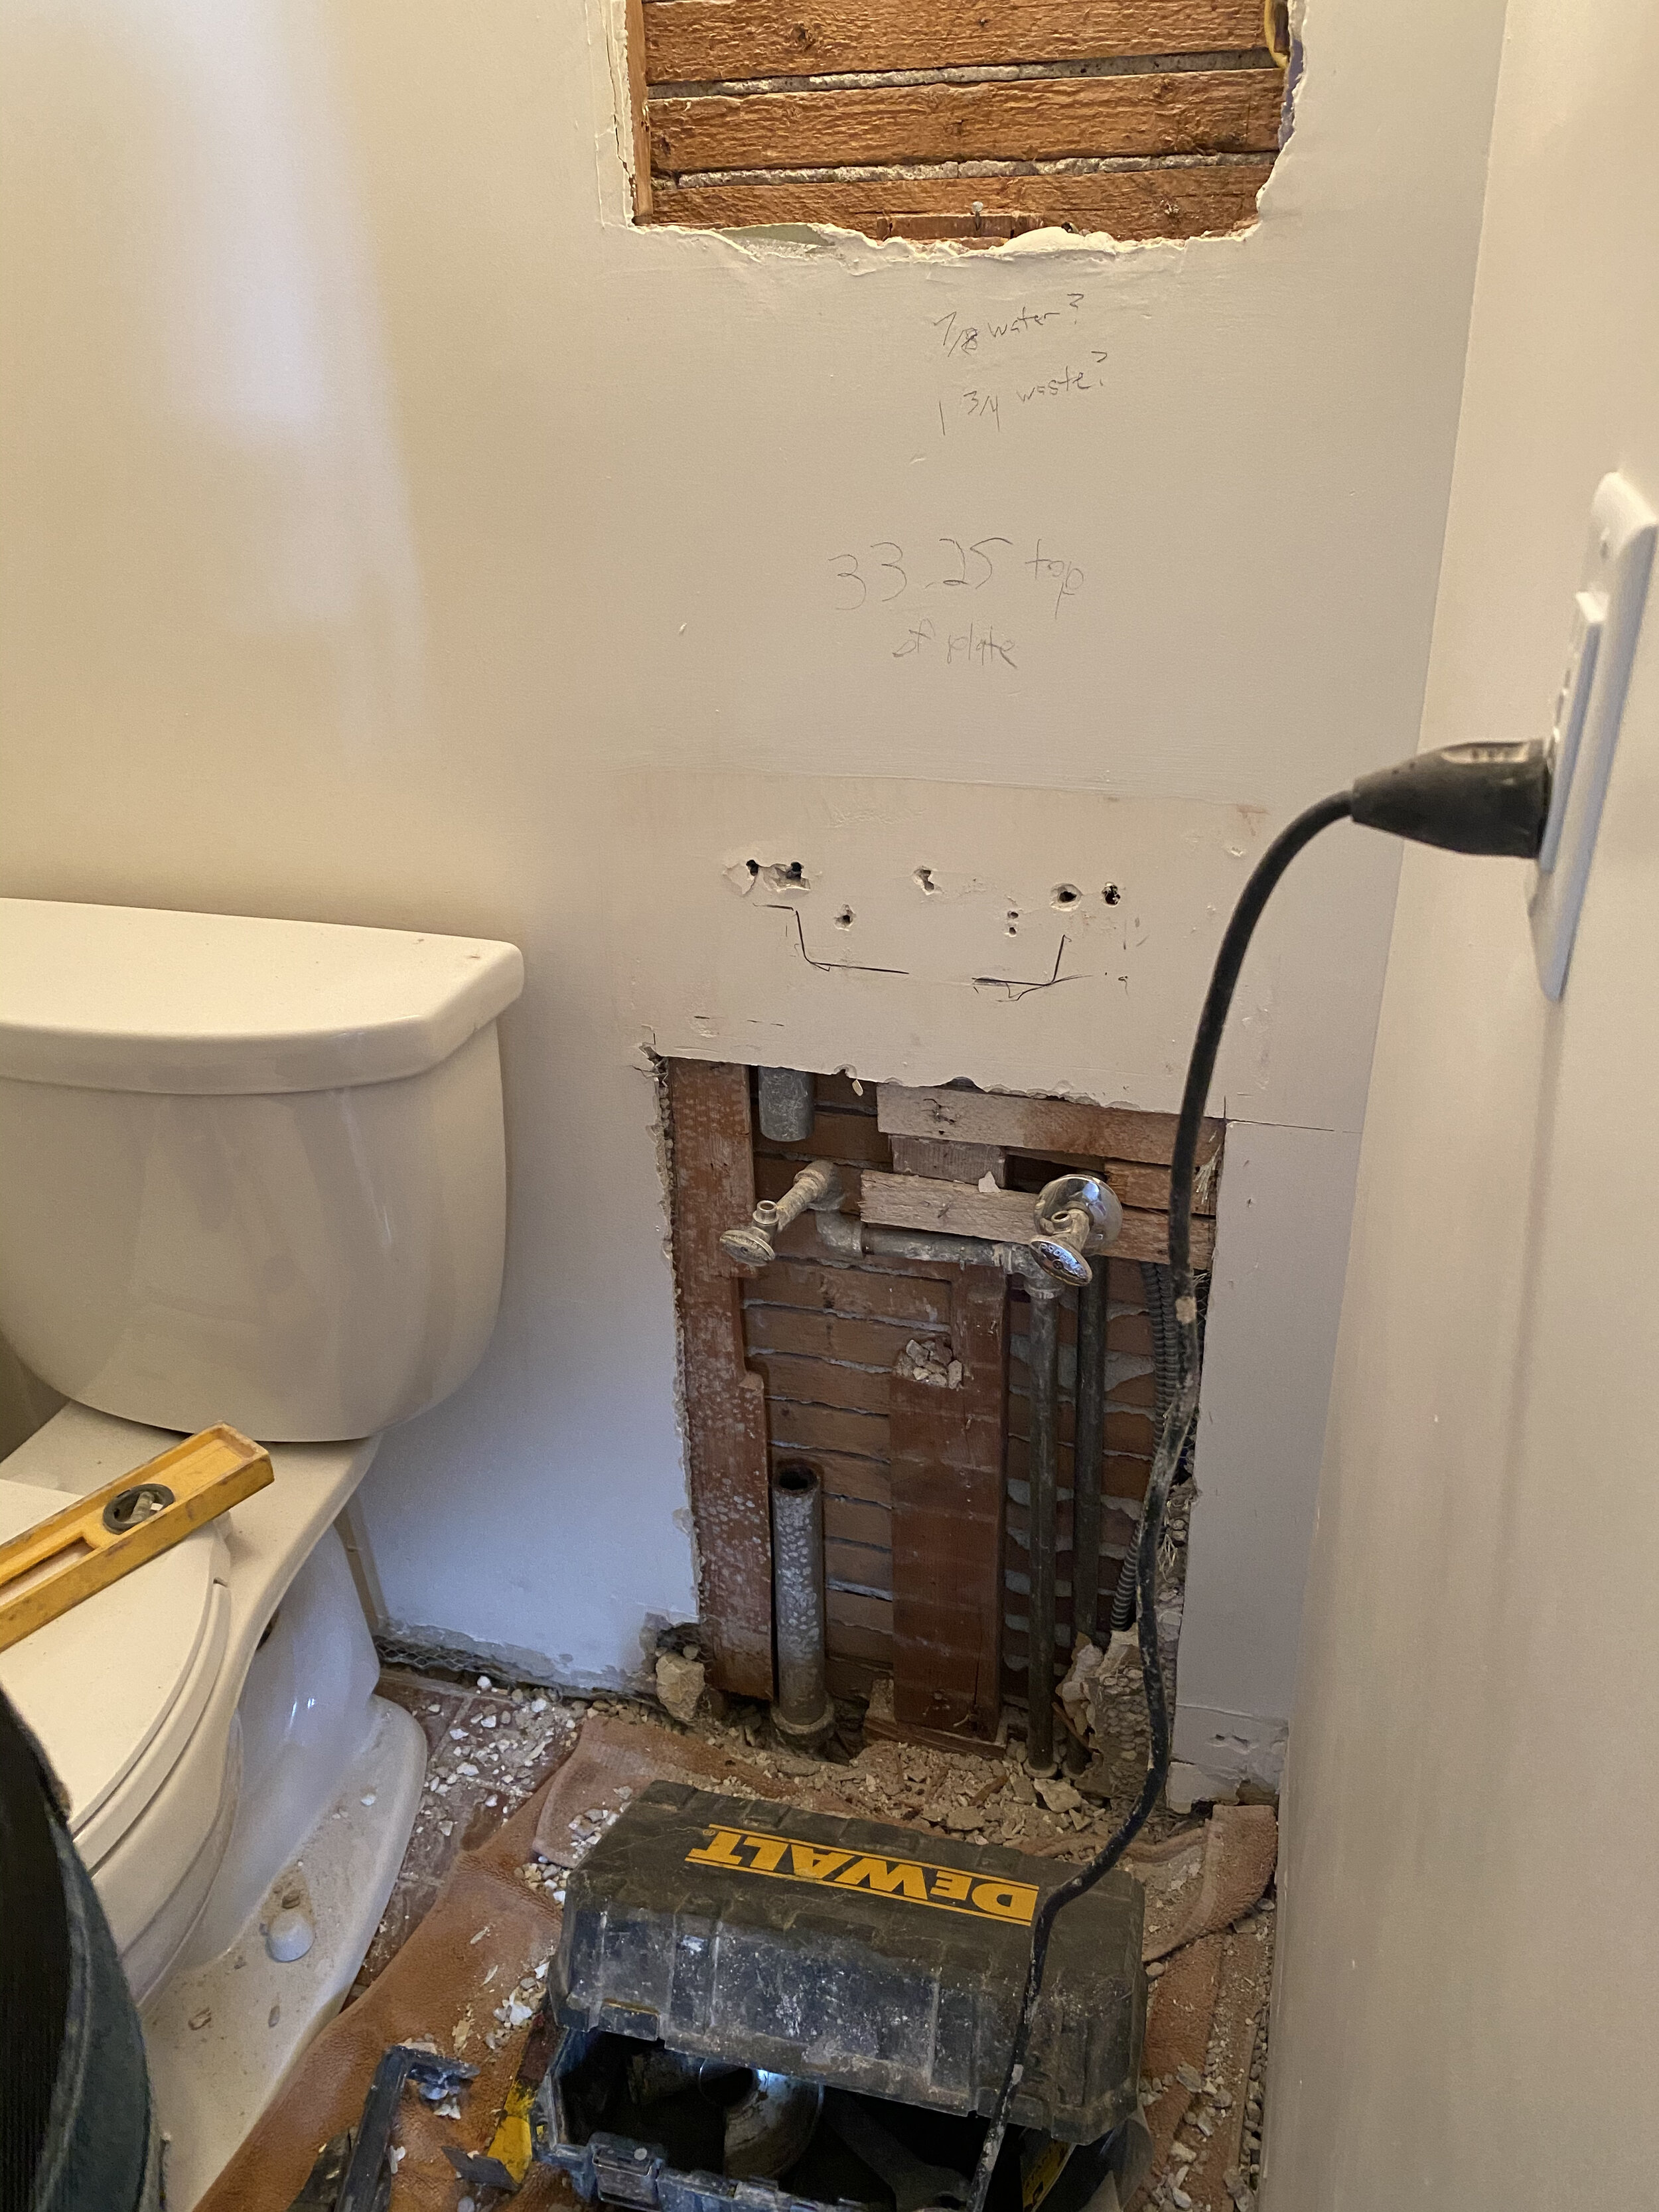

In addition, our existing iron water pipe was an odd size at 3/8’ so the valves required an adapter as they were 1/2’ valves. TIP: if you have old plumbing and are planning to replace valves it is best to try removing them early in the remodeling process. This way, in the event the plumbing does not come apart as planned and repairs are needed you are not stuck ripping something up that you recently remodeled.
Hope you find some of these tips helpful if you decide to tackle your own bathroom remodel!
Our Tool Checklist for this Powder Room Remodel (read here for product sources or here for a one-click link):
Tape measure
Circular saw (for cutting long straight cuts in paneling)
Jig saw (for cutting scribed panel edges and used for coping trim)
Coping saw (for coping trim)
Oscilating multi-tool (for cutting out electrical box locations)
Miter saw (for cutting trim and cove)
Drill (for drilling pipe openings in paneling and screwing in sheet rock and wood)
Hole saw drill bits (for drilling pipe openings in paneling)
Drywall knife (various sizes)
Utility knife
Hammer
Flat Bar
Nail Set
Finishing nail gun (to nail in paneling, trim and cove)
Saw horses and a sheet of 3/4 plywood (for a work surface while cutting)
Wood Clamps (to hold the paneling in place while cutting)
Caulk gun (for applying adhesive and caulk)
Angle Grinder with metal cut off wheel (for cutting metal pipe)
72 inch level
24 inch level
Torpedo level
Marking pencils
Drill bits
Paint brush
Paint roller
Paint roller pan
Worklight
Wrenches/sockets
Screwdrivers
Alan wrenches
Wire stripper
NCV (no contact voltage) Tester

