
Powder Room Remodel: Design Direction
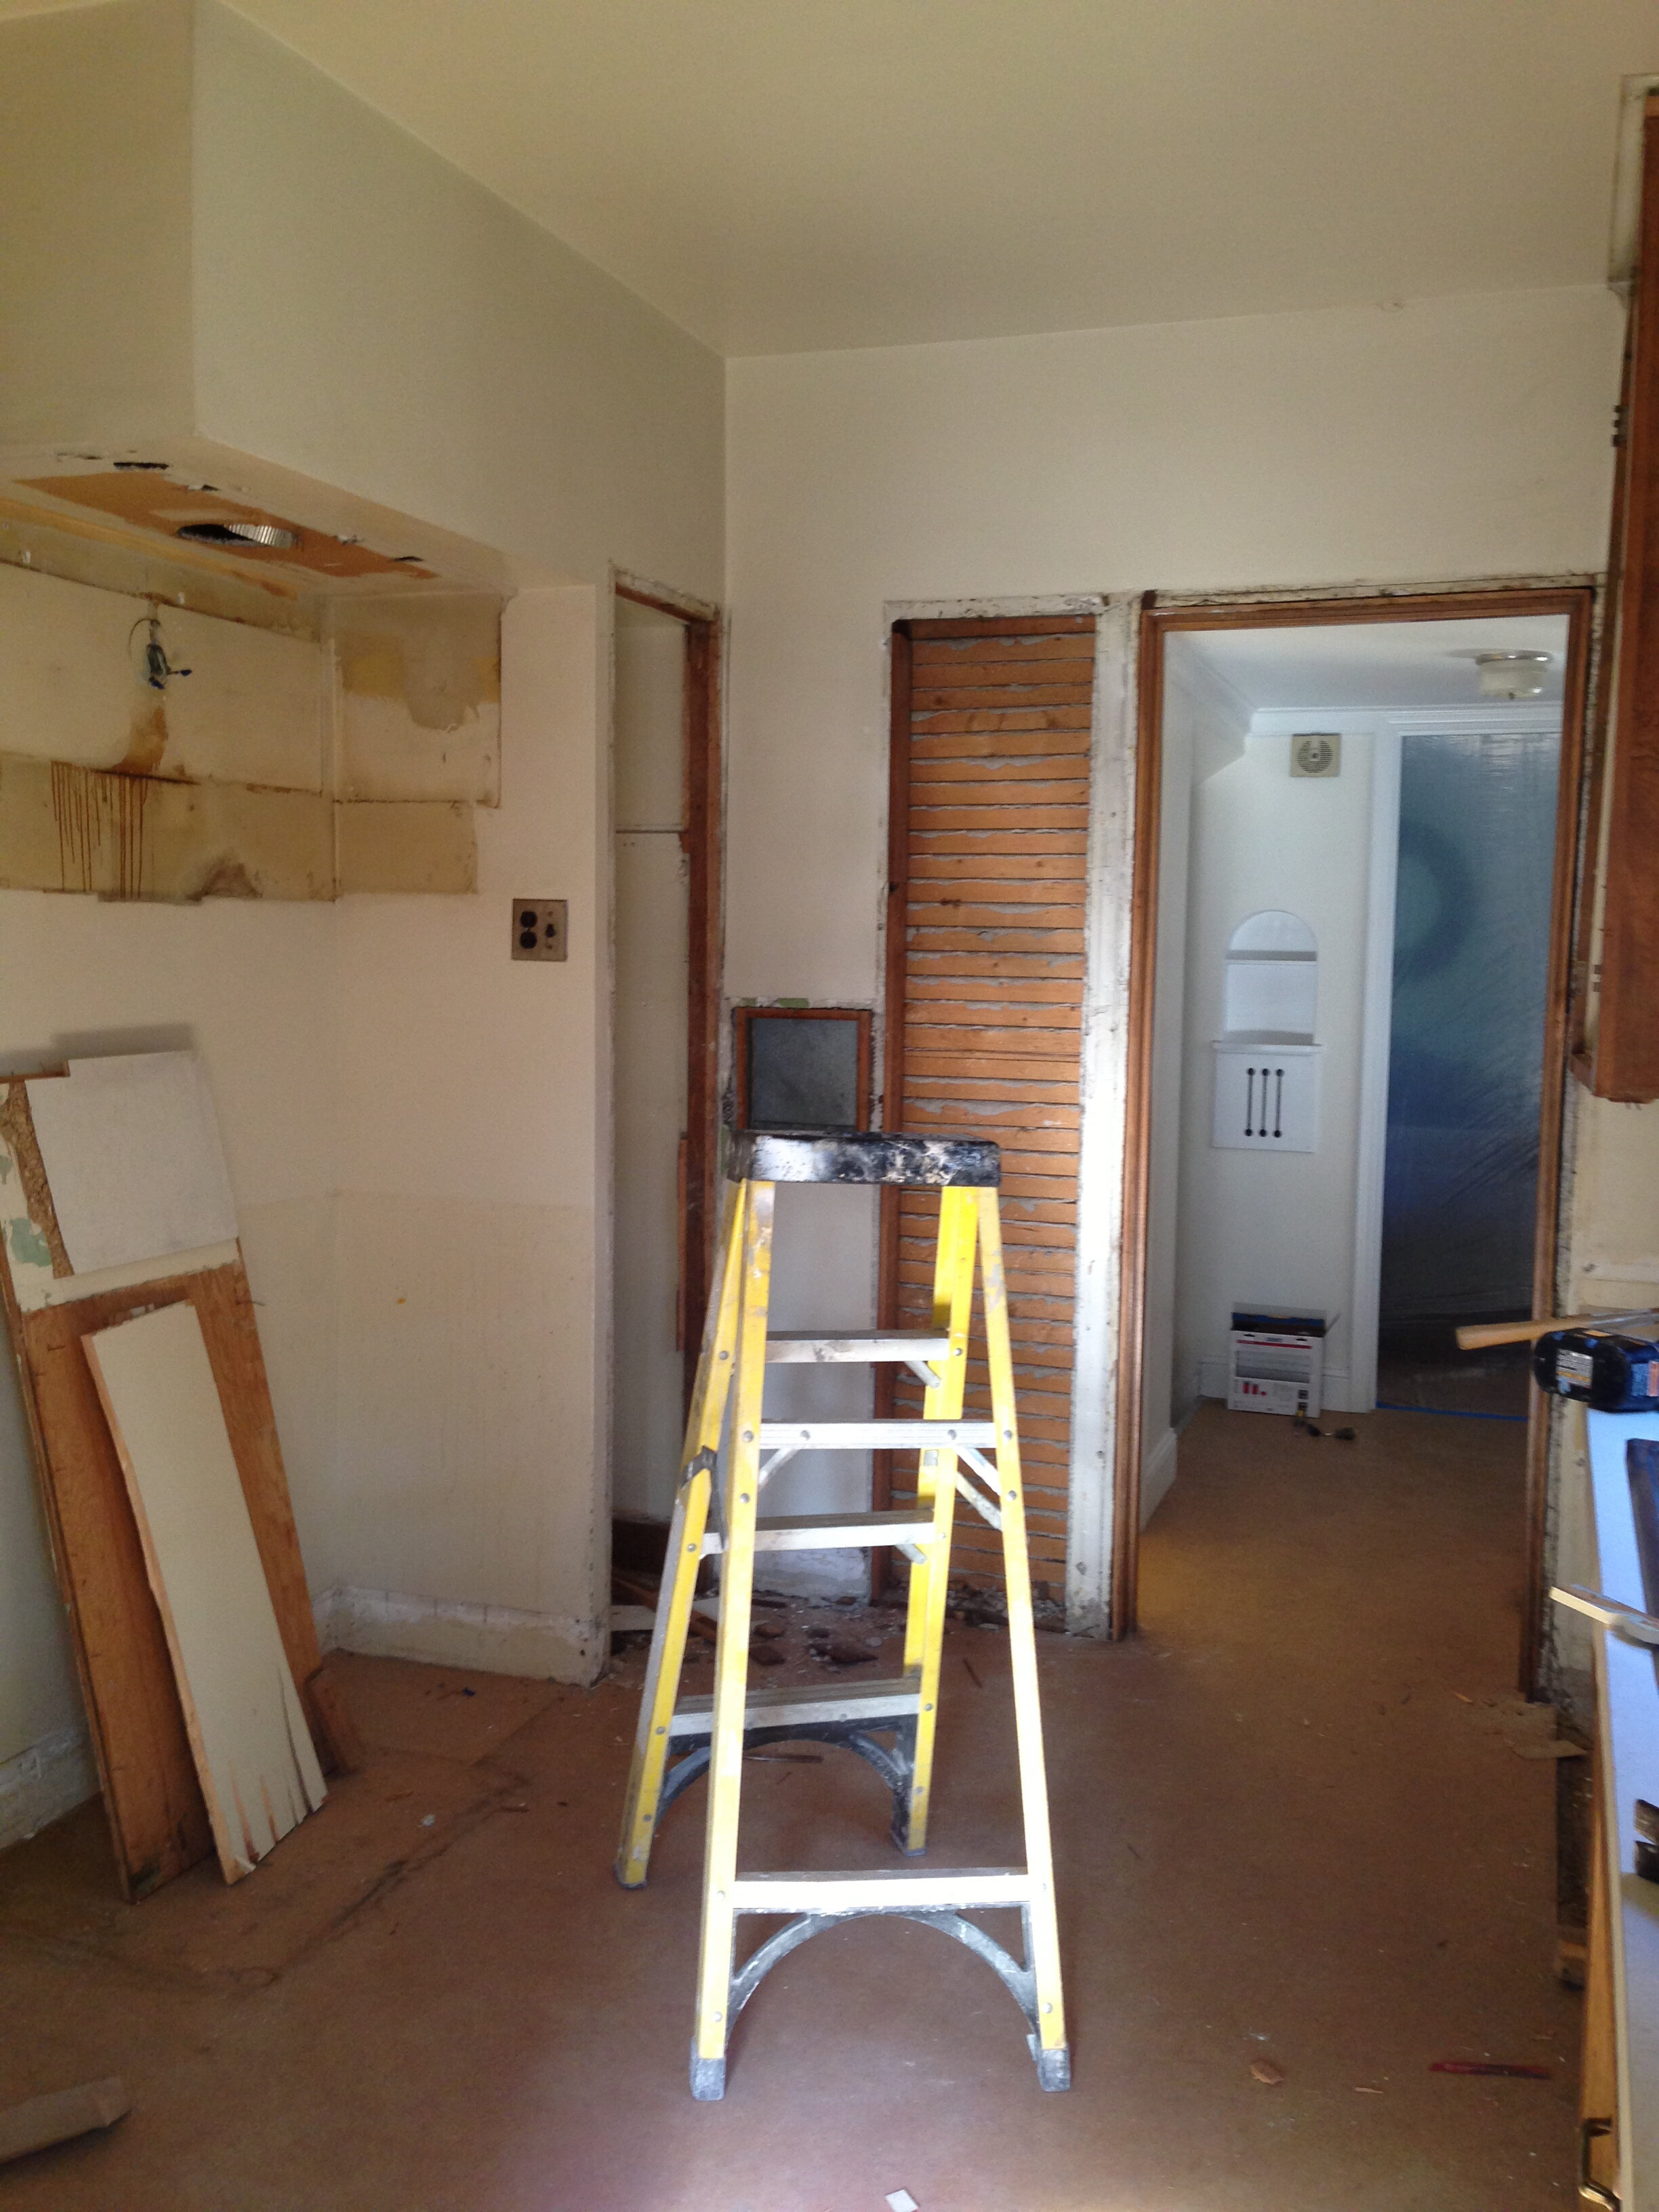
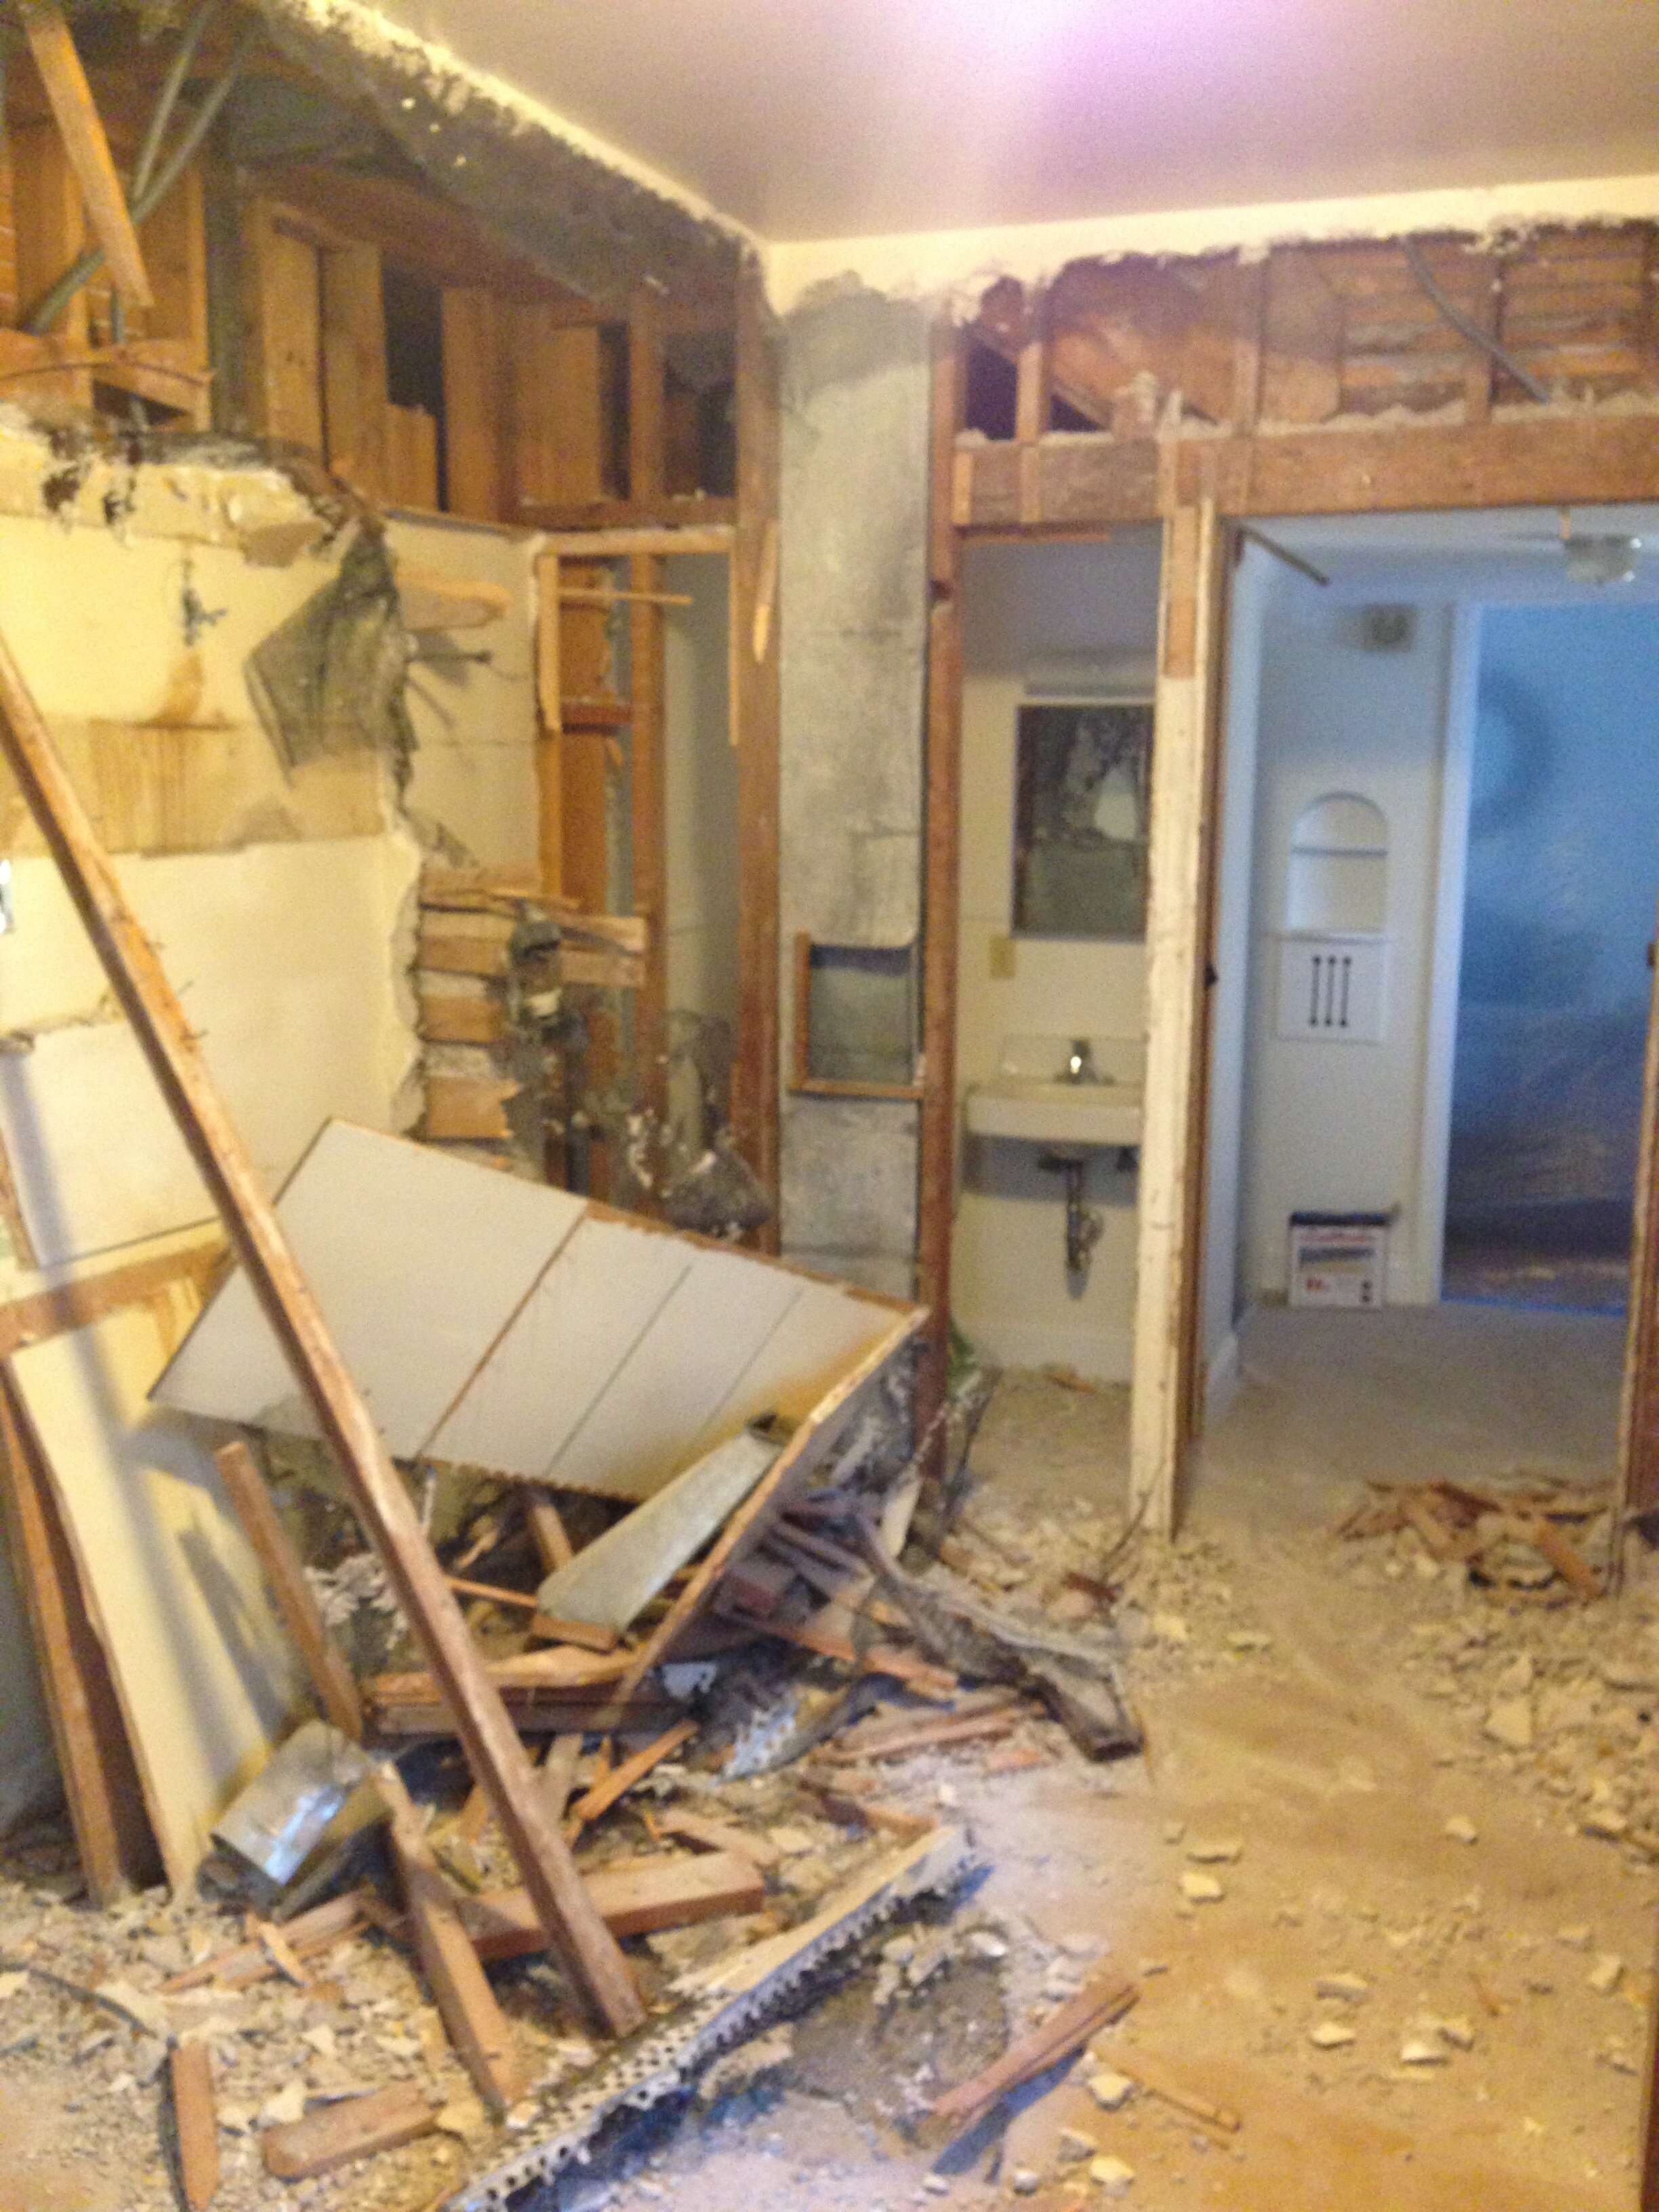
We just kicked off our Powder Room remodel and I’m so excited! It’s been on our project list since we moved in and finally wrote it down to take action this year. It has had leaking issues on and off with bandaid fixes because we didn’t want to rip out the wall to investigate until we felt it was urgent. On top of that, it drains very slowly and there has been a lingering odor no matter how much we deep clean. If you’ve followed along in my stories, you’ll know we discovered that our pipe had rotted out with crud badly built up.
We have a lot going on right now with the ensuite bathroom and garage attic renovation but we knew it was time to open up the wall before things got worse. And if we’re going to go through that headache, then might as well remodel it, too!
The good news is that we plan to do all the work ourselves so we’ll be in control of the timeline unlike the other two ongoing renovations where we are dealing with subcontractors.
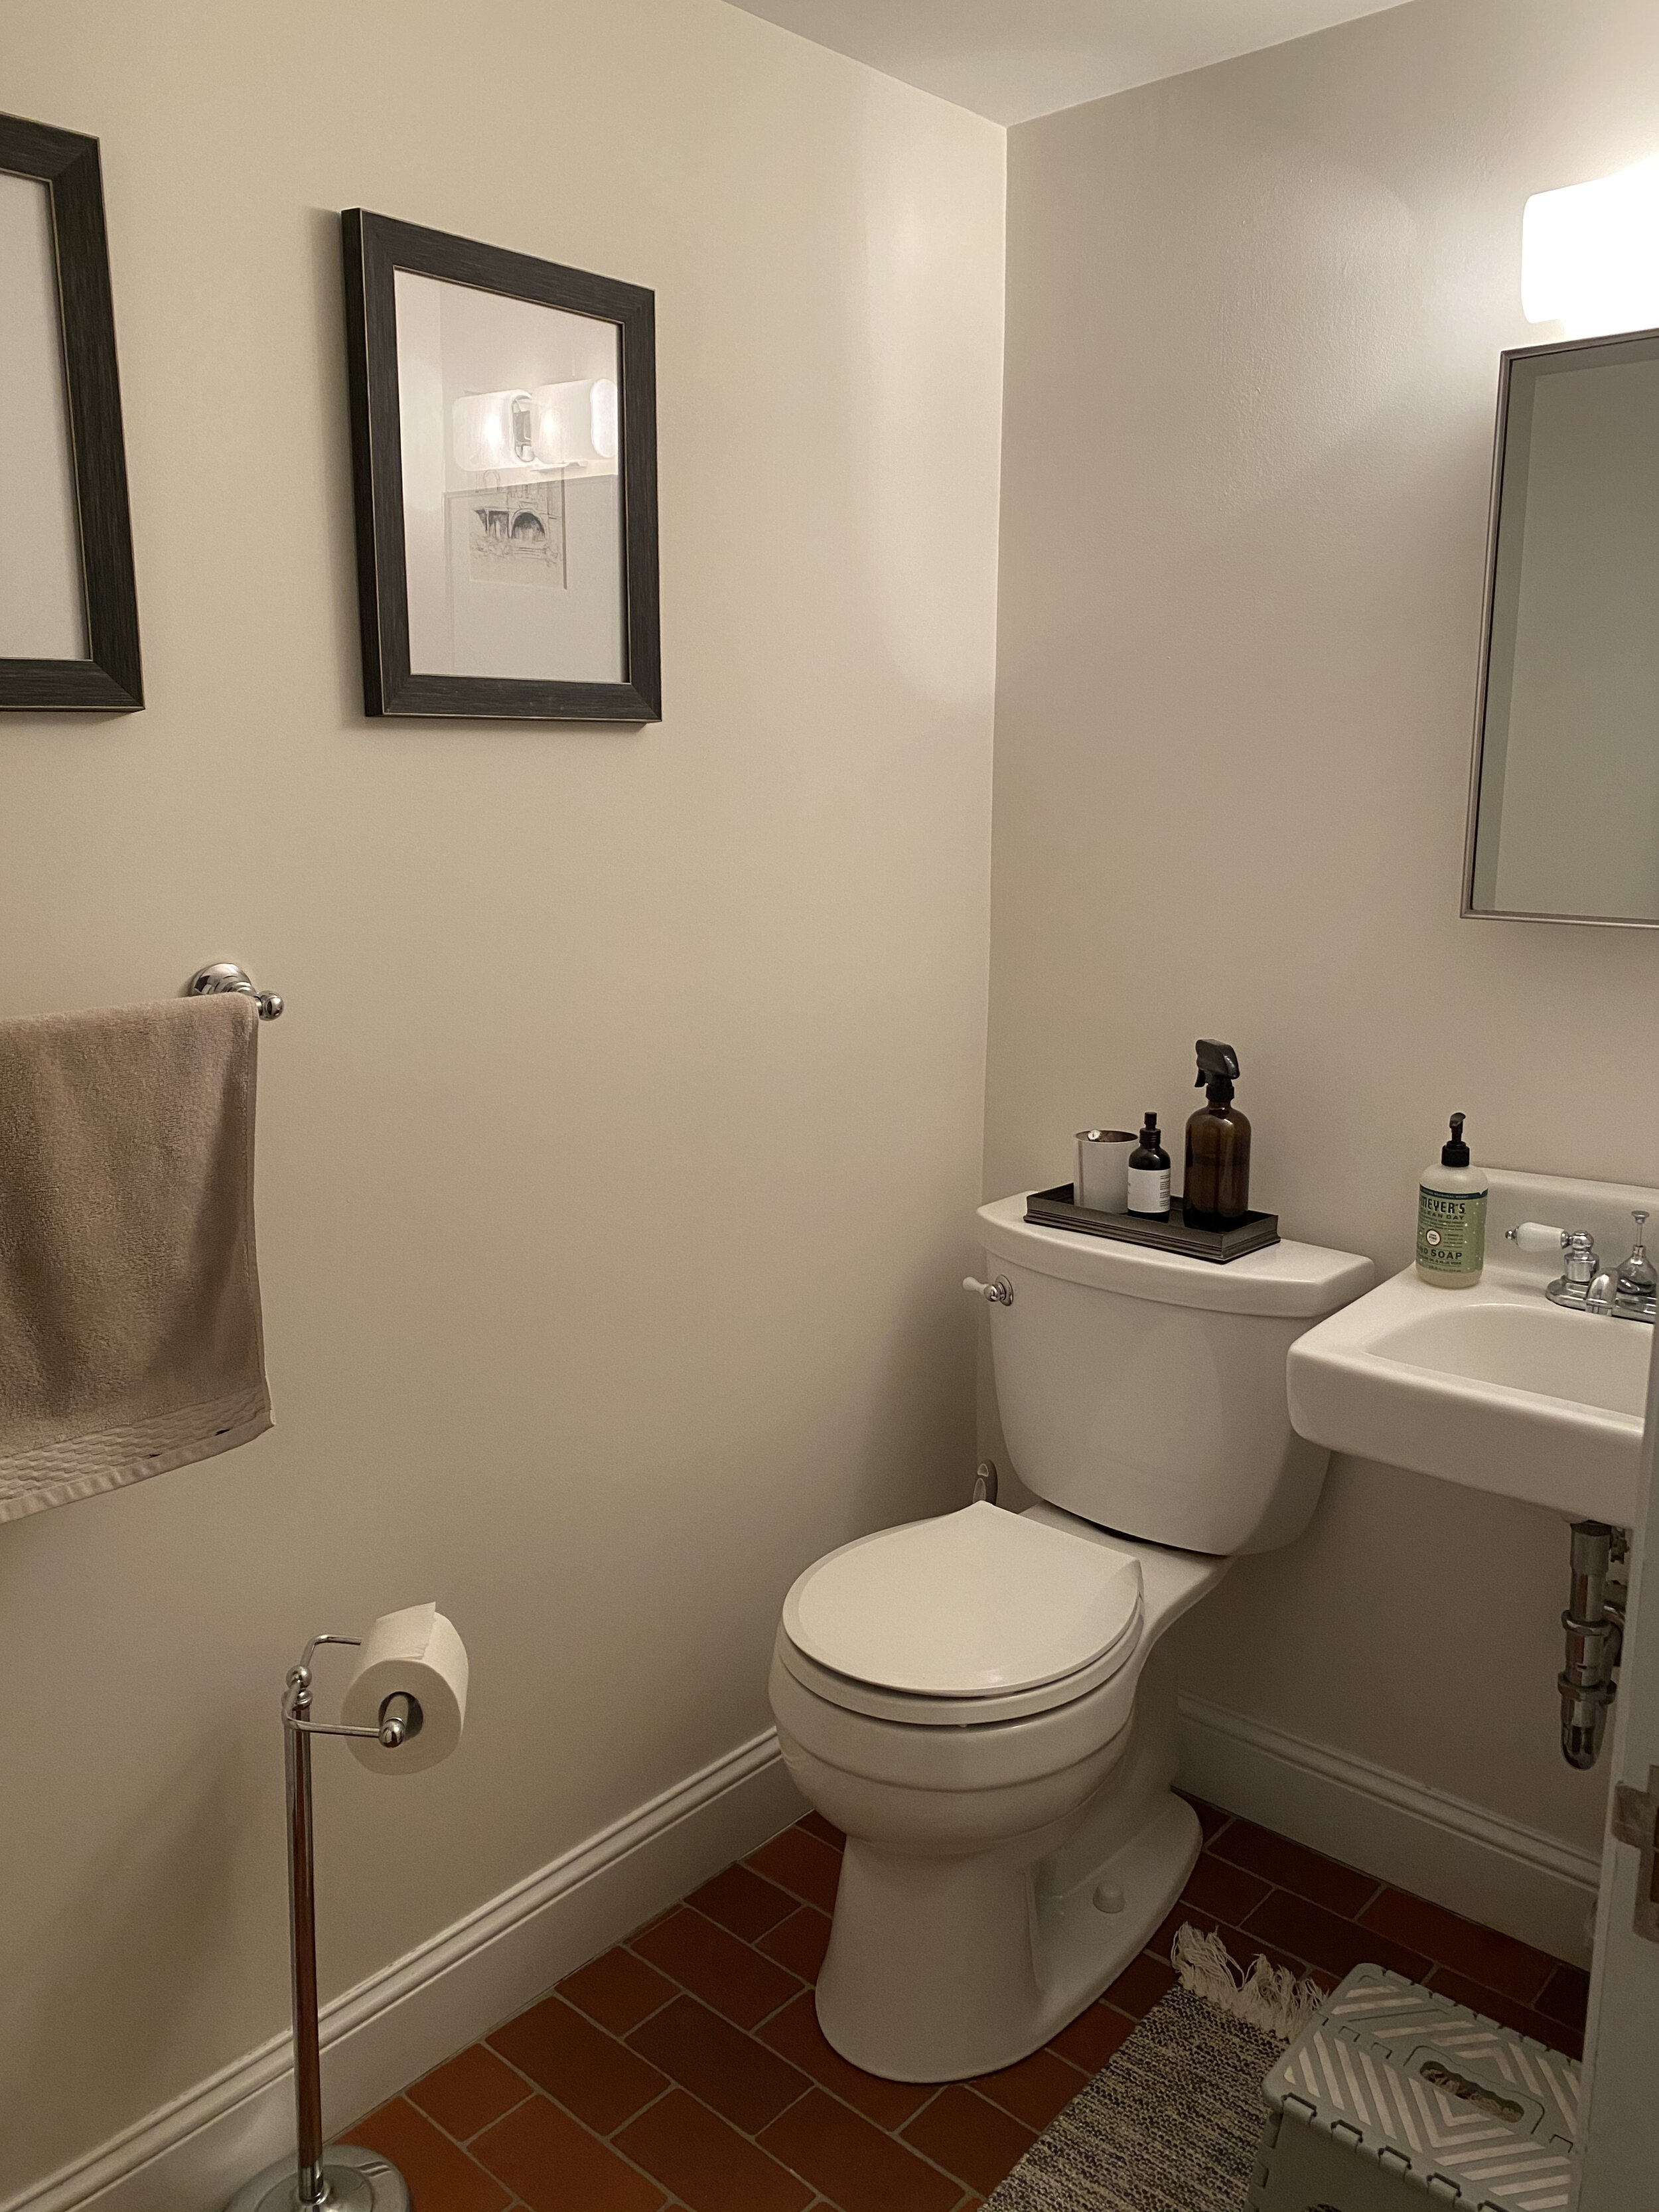
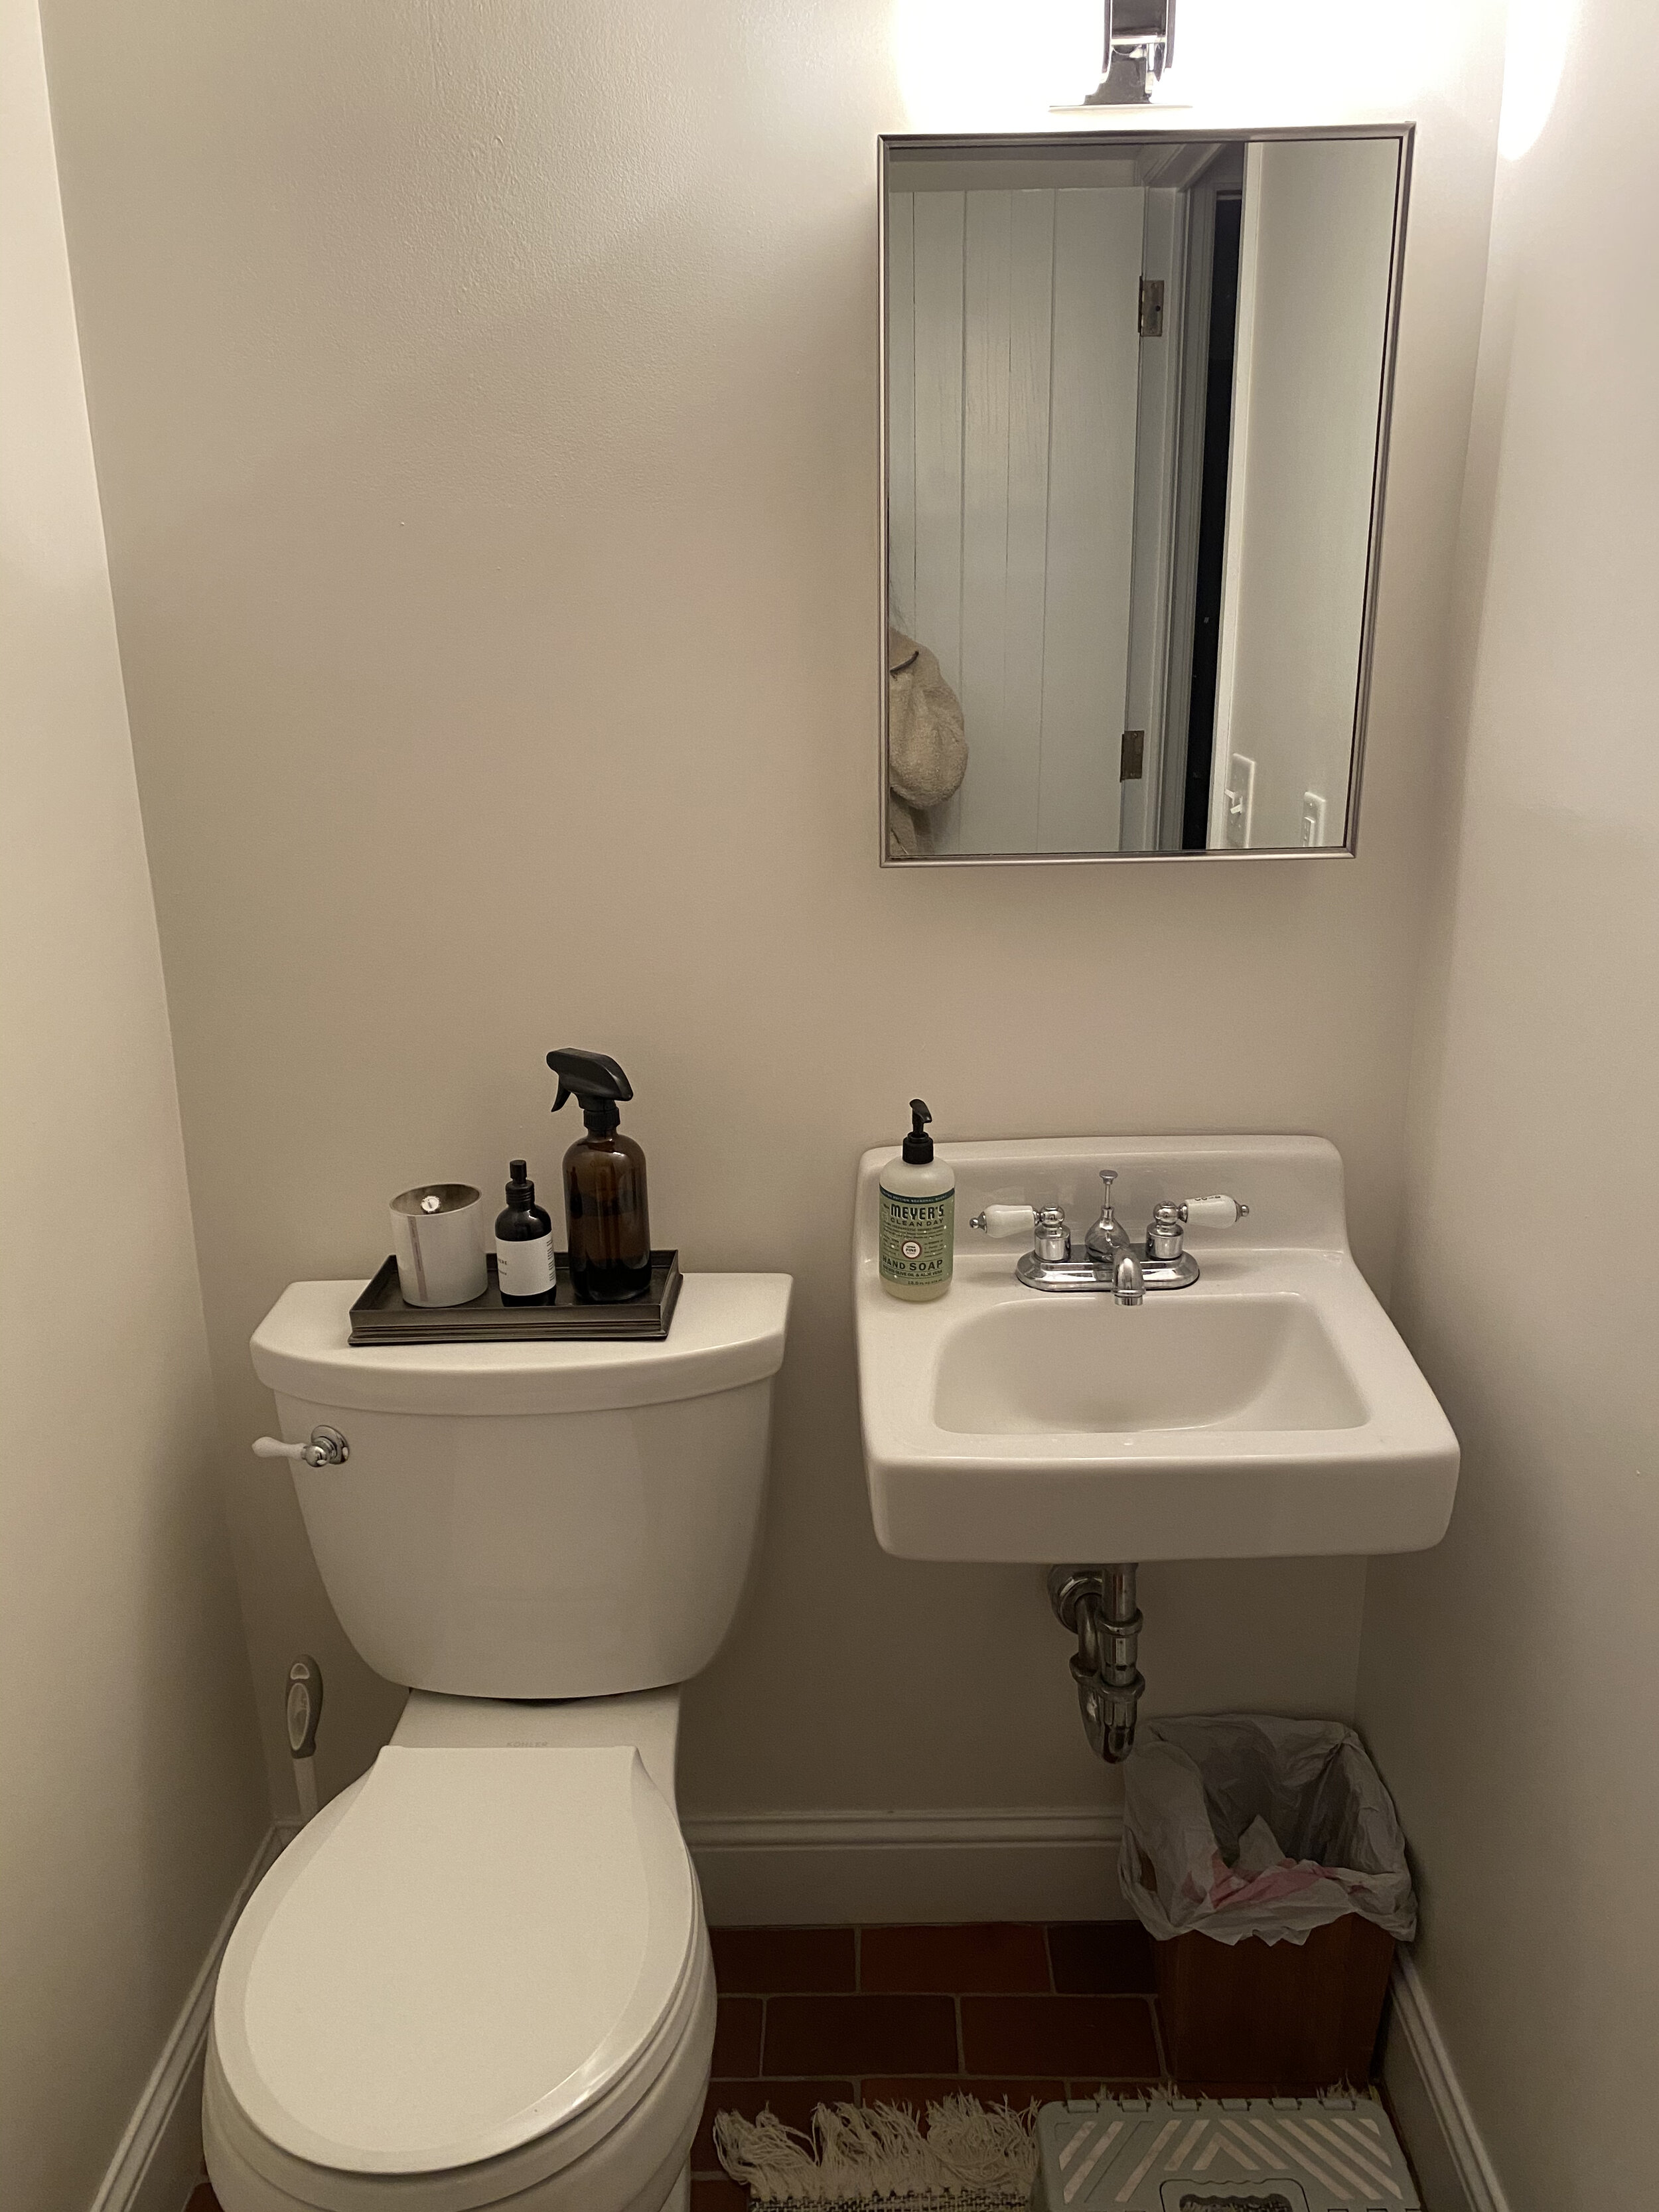
A little background on our powder room. It used to be the size of a telephone booth and during our first renovation phase in 2013, we bumped out the wall bringing the dimensions to roughly 45” x 77″ with a height of 85” tall. We didn’t want the added cost of moving the sink to the other side (relocating the plumbing and adding a pocket door) so the max sink size had to remain at 17” x 19”. Tiny right??? This layout is grandfathered in for our home but the distance between the sink and toilet wouldn’t meet today’s code!
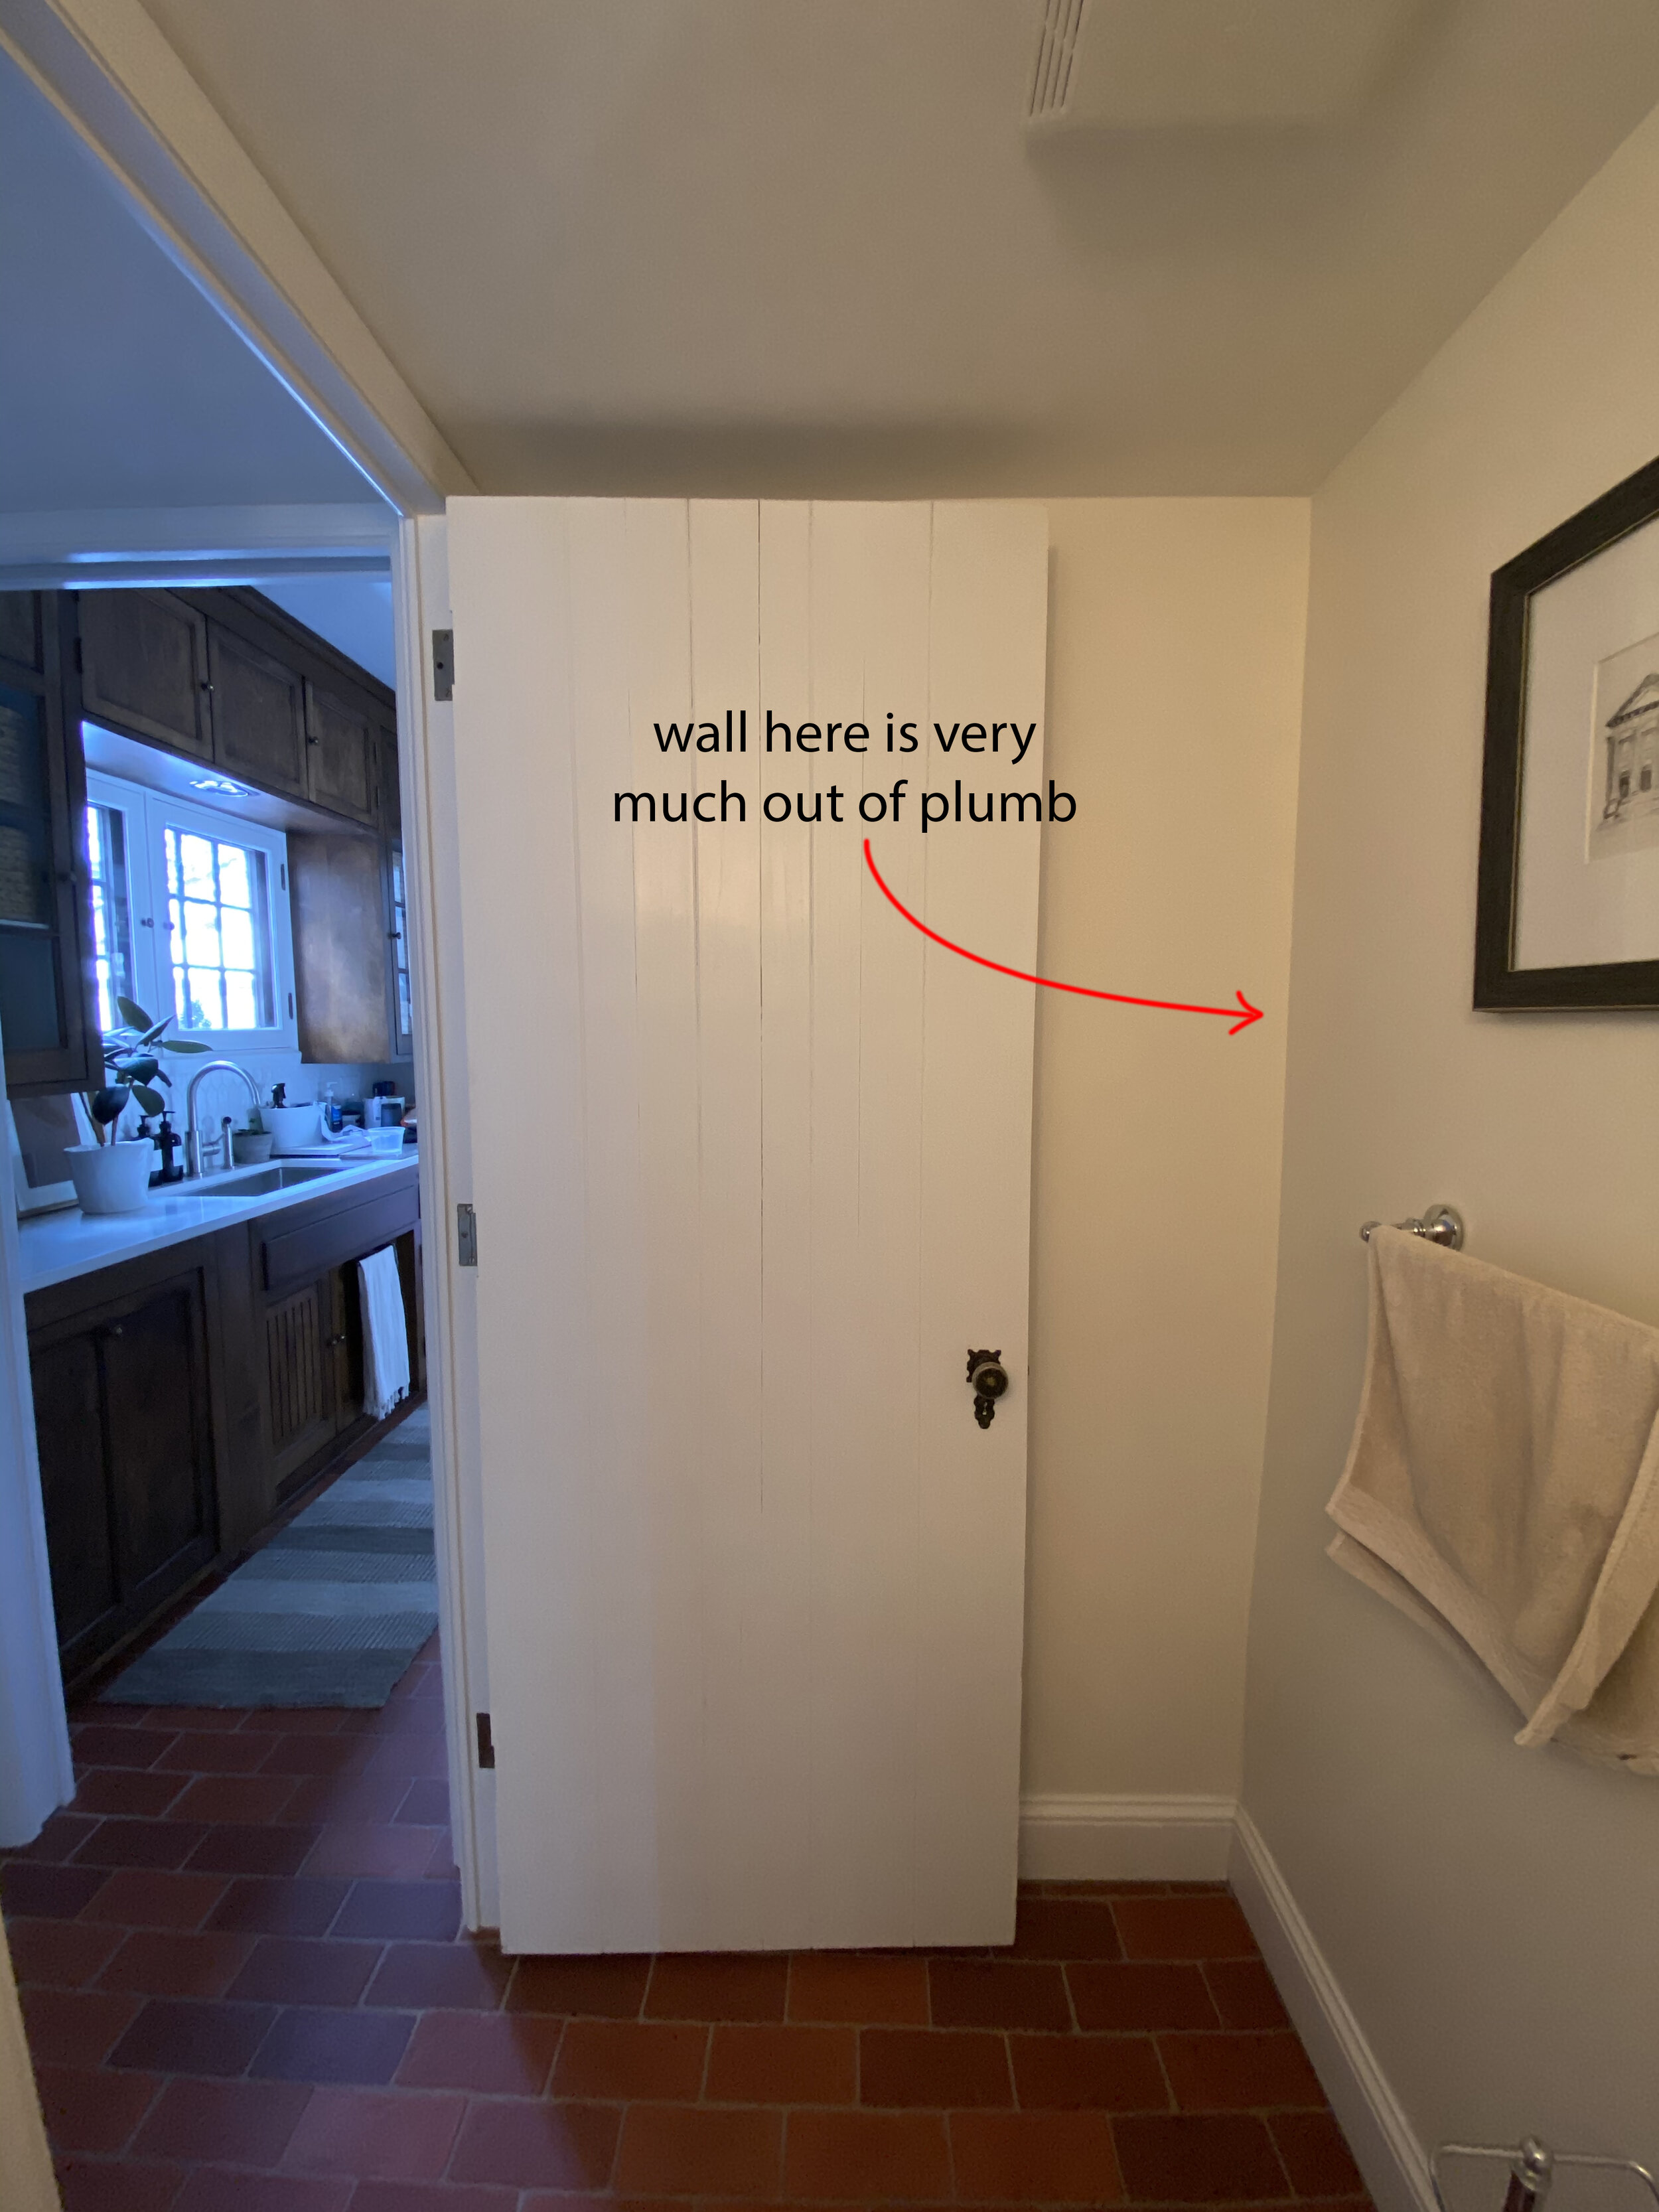
Also, we didn’t realize the wall was very out of plumb after the work was completed until later. All of this, along with the plumbing are challenges we have anticipated for the remodel.
DESIGN DIRECTION
Here’s a little bit about my design process. I break it out into two phases which I adopted from my 13 years as a product designer.
Phase 1 is about the concept + mood. I pull together visuals to spark a “feeling” for my vision. This part is really fun for me and all about piecing together inspiration and taking notes. I do believe design should be fun in general.
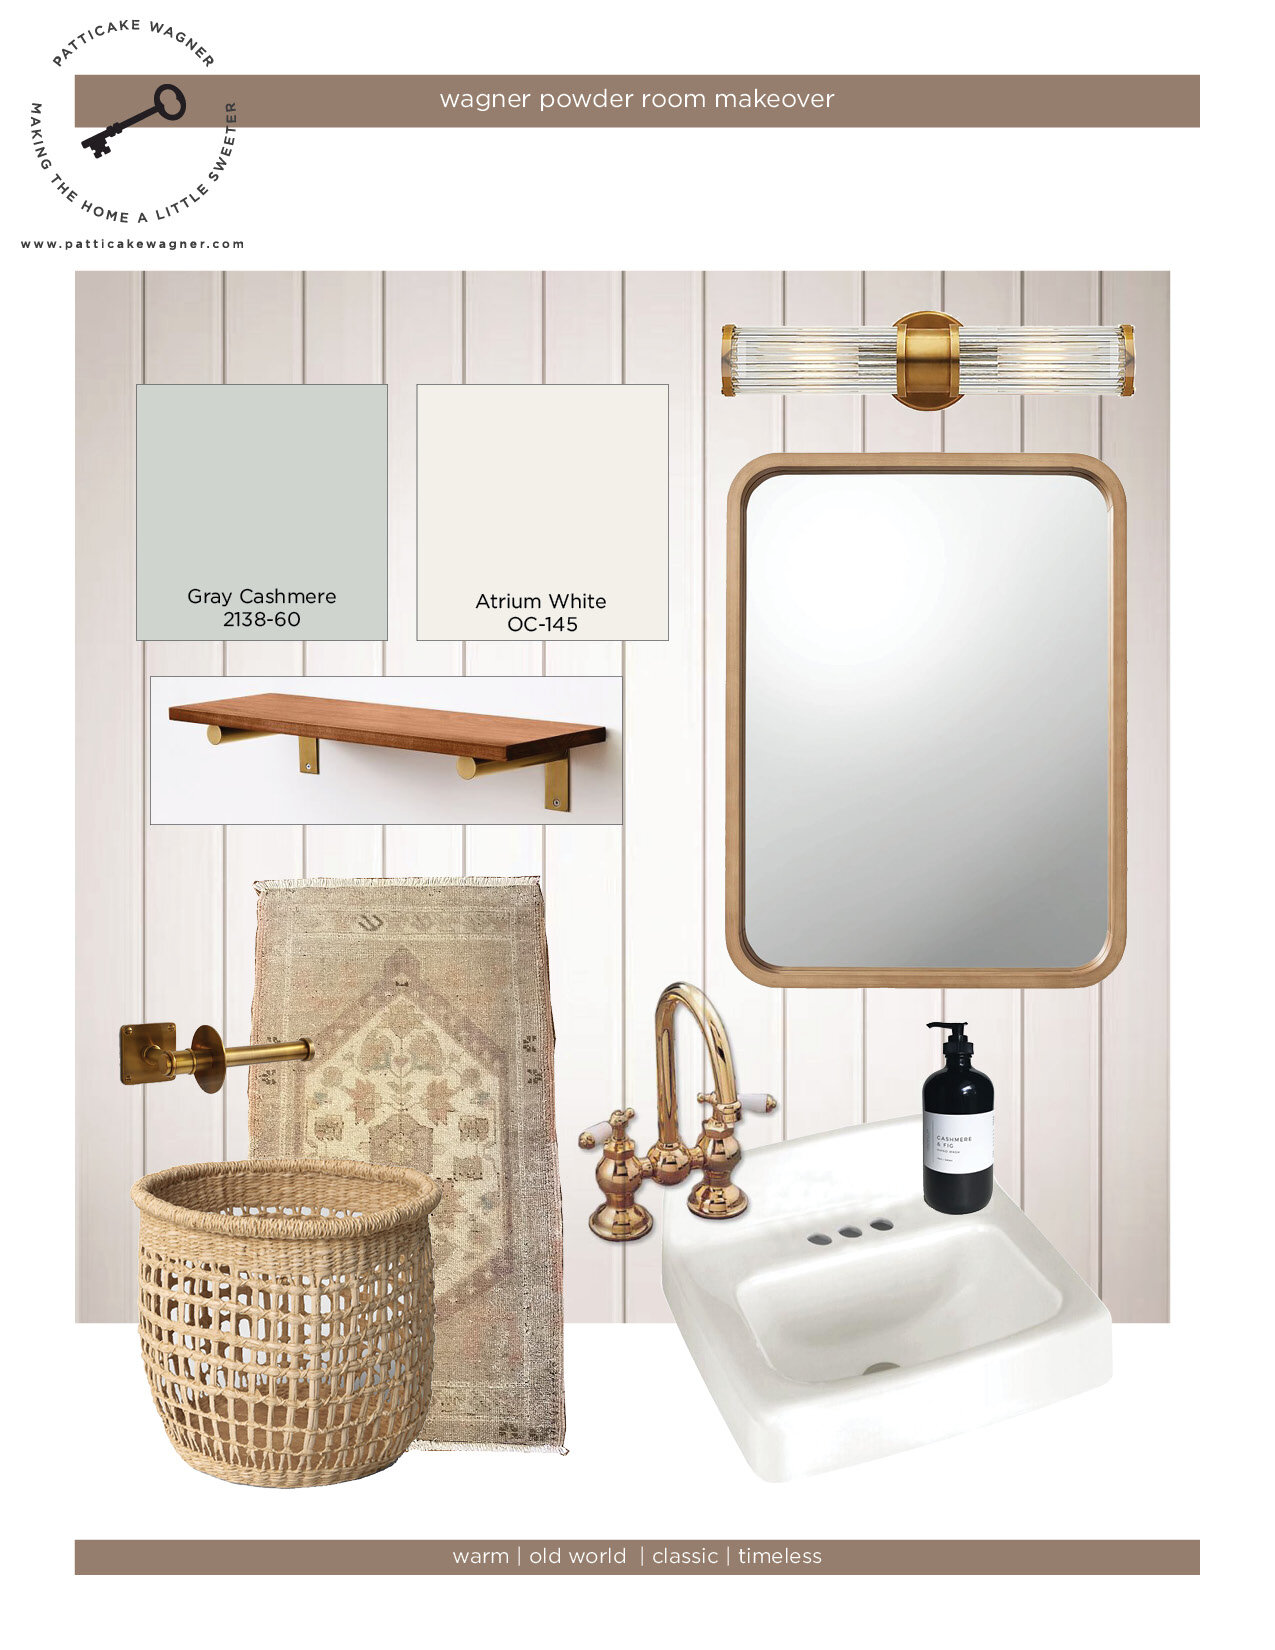
Phase 2 is about the design direction, the actual development of the space. This is where I start pulling products, patterns, color palette, materials, etc to create what I call a style guide or design board (see below). It helps me hone in on the style and where to source, even if it’s not the exact ones on the board. Once this is at a good place, I’ll start ordering products and keep my eyes out for vintage finds.

TIP: One important thing to note, is that we planned out the design months in advance to source fixtures and hardware to have on hand during the remodel. Before you start, try to nail down your design direction. Then make sure to order all fixtures, hardware and any product needed to arrive during your window of work. Expect some long lead times in this environment. Shipping time can vary and will impact your timeline!
Here’s what’s going on in my head:
-
We’re working with a very small space so definitely want to do some kind of wall treatment to make it feel special and have decided on paneling. At first, I wanted to think outside of this idea because I’ve seen so many paneling projects lately BUT, we truly love the look for this space and want to do what feels right to us.
-
I played around with mixing metals but with such a small space, it looked too busy so we’re sticking with all brass.
-
We were considering between two paint colors but have since made up our minds. Can you guess which color?
-
I’m leaning towards the mirror in my style guide but did order two styles which we won’t make a final decision until the end.
Wish us luck and hopefully we don’t have too many unexpected surprises or setbacks!


So much inspiration here. We have the same sink in our tiny “wheat” half-bath. I call it the “wheat”
Bath because it has 1950s wall paper with bunches of bailed wheat.
Such a tiny sink! Can’t wait to share it all dressed up! Thank you
So much inspiration here. We have the same sink in our tiny “wheat” half-bath. I call it the “wheat”
Bath because it has 1950s wall paper with bunches of bailed wheat.
Such a tiny sink! Can’t wait to share it all dressed up! Thank you
I’m so excited to see the results! The tiny bathrooms in older houses can be so beautiful if done correctly! Yours will be amazing, as usual!
Thank you Tera! I agree that tiny bathrooms in older houses can be beautiful!