Lifestyle
February 5, 2024
January Favorites
January Favorites: The most loved items from last month.
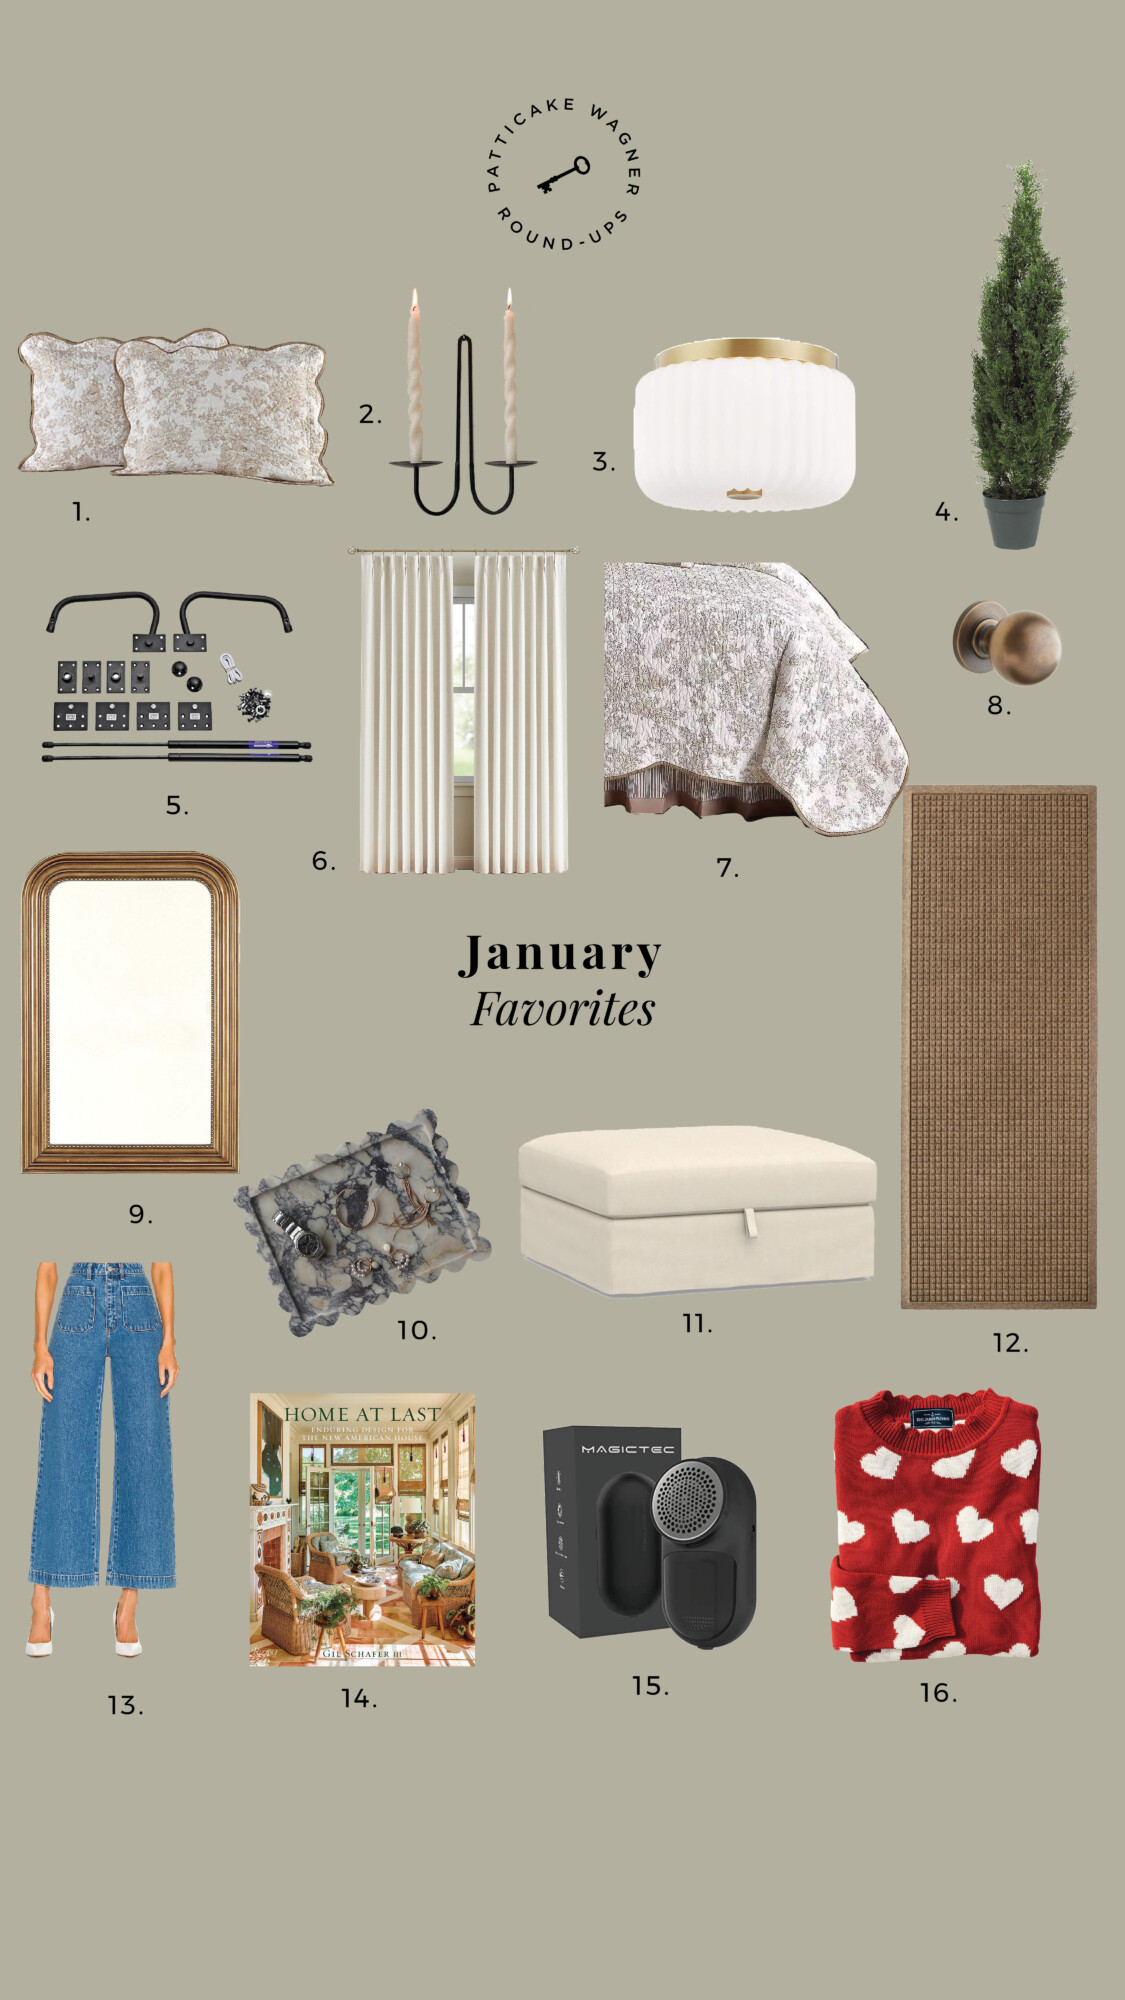
Directly Click on Image or Scroll Below to Shop the Favorites

Sweetest Regards, Patti

January Favorites: The most loved items from last month.
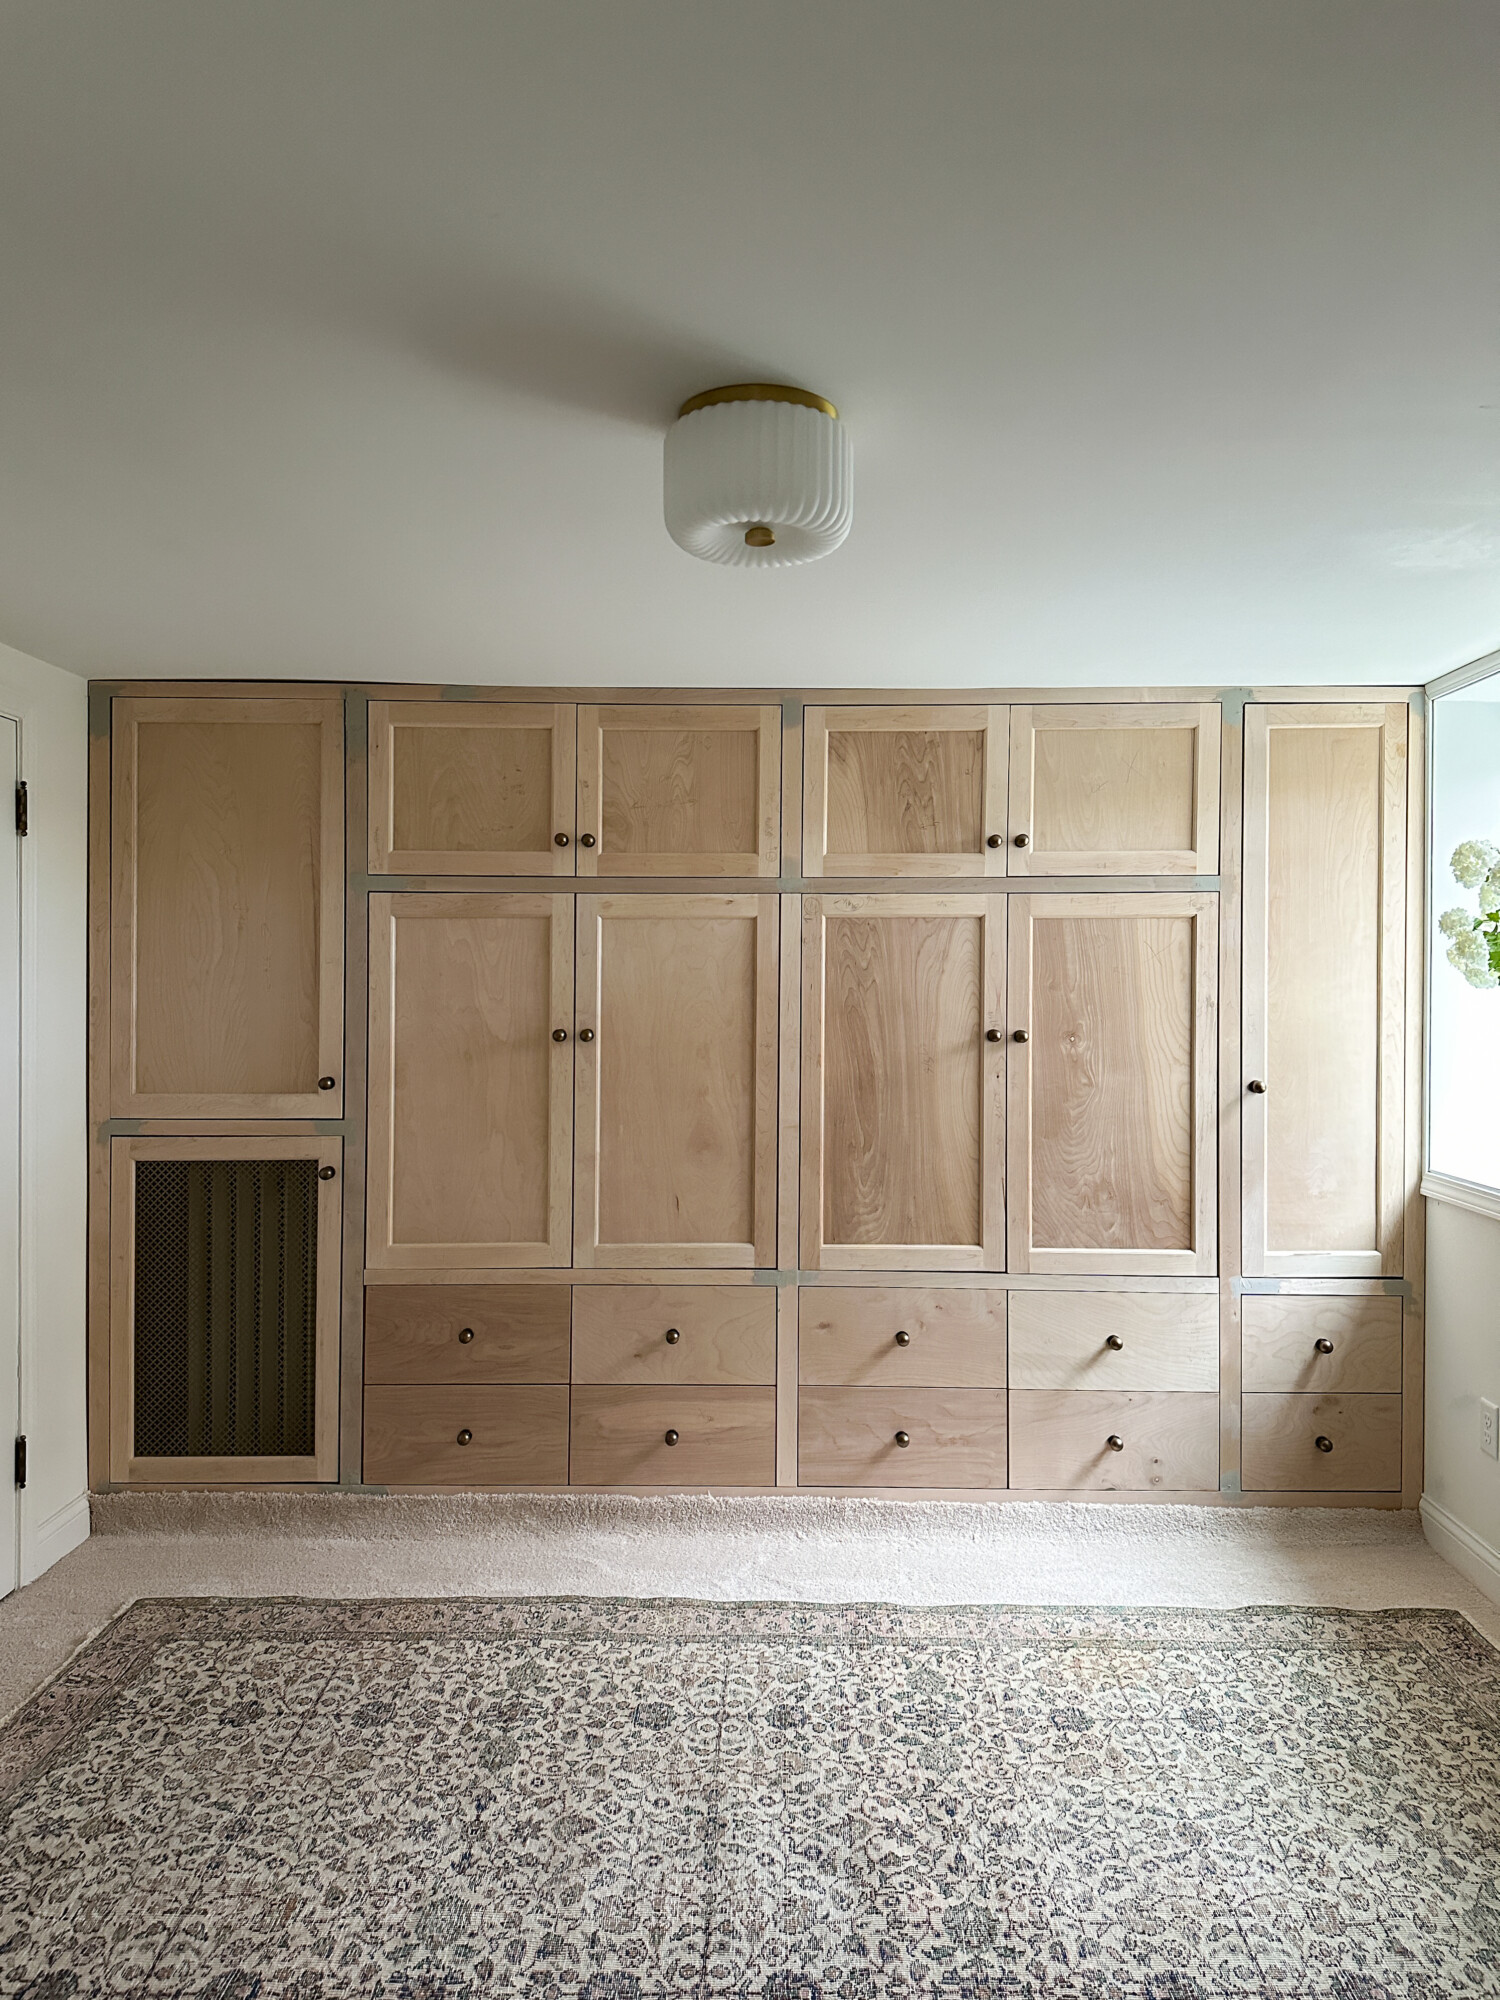
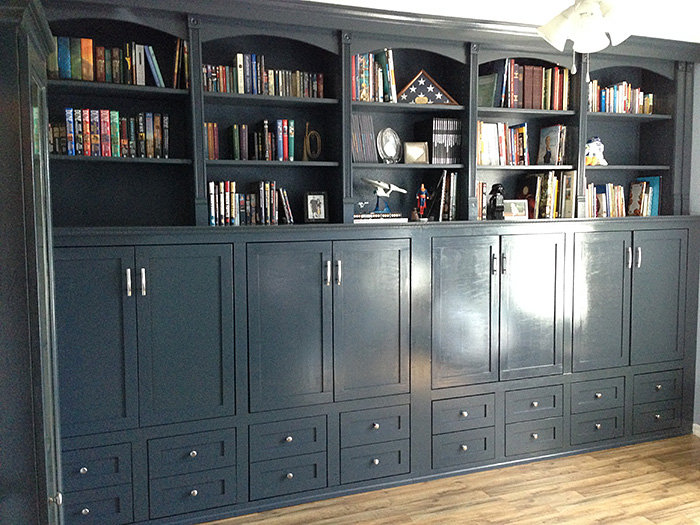
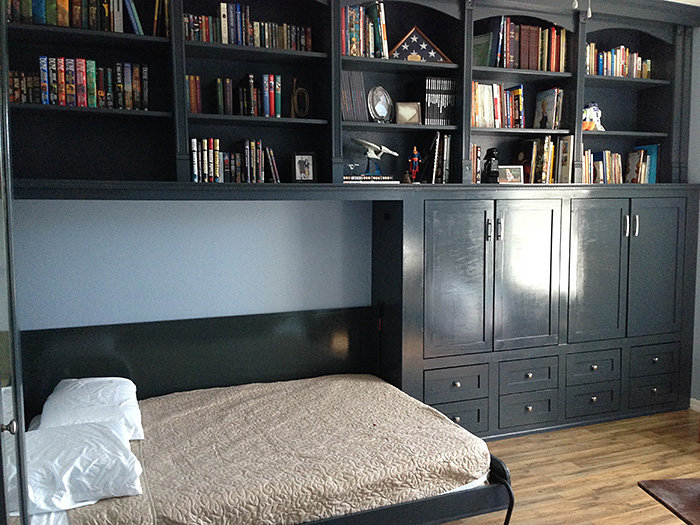
We finished building the DIY horizontal Murphy bed for our guest bedroom & office earlier this month. It looks amazing! There were a few setbacks. In addition to uneven walls and ceiling, the Murphy bed and custom built-in cabinets were beyond Brian’s carpentry skillset. But he persevered and did an incredible job with the seamless design in this 7′ tall room in our basement.
* Update: see the fully painted guest bedroom & office here
*Read more about our basement family room that is adjacent to the guest bedroom
Project & Room Sources
The hard part is done (hopefully) and next up is choosing the paint color! Before I jump into my next blog post with color options, I want to share the resources for the Murphy bed and built-in cabinets to give some guidance to those who are eager to tackle it.
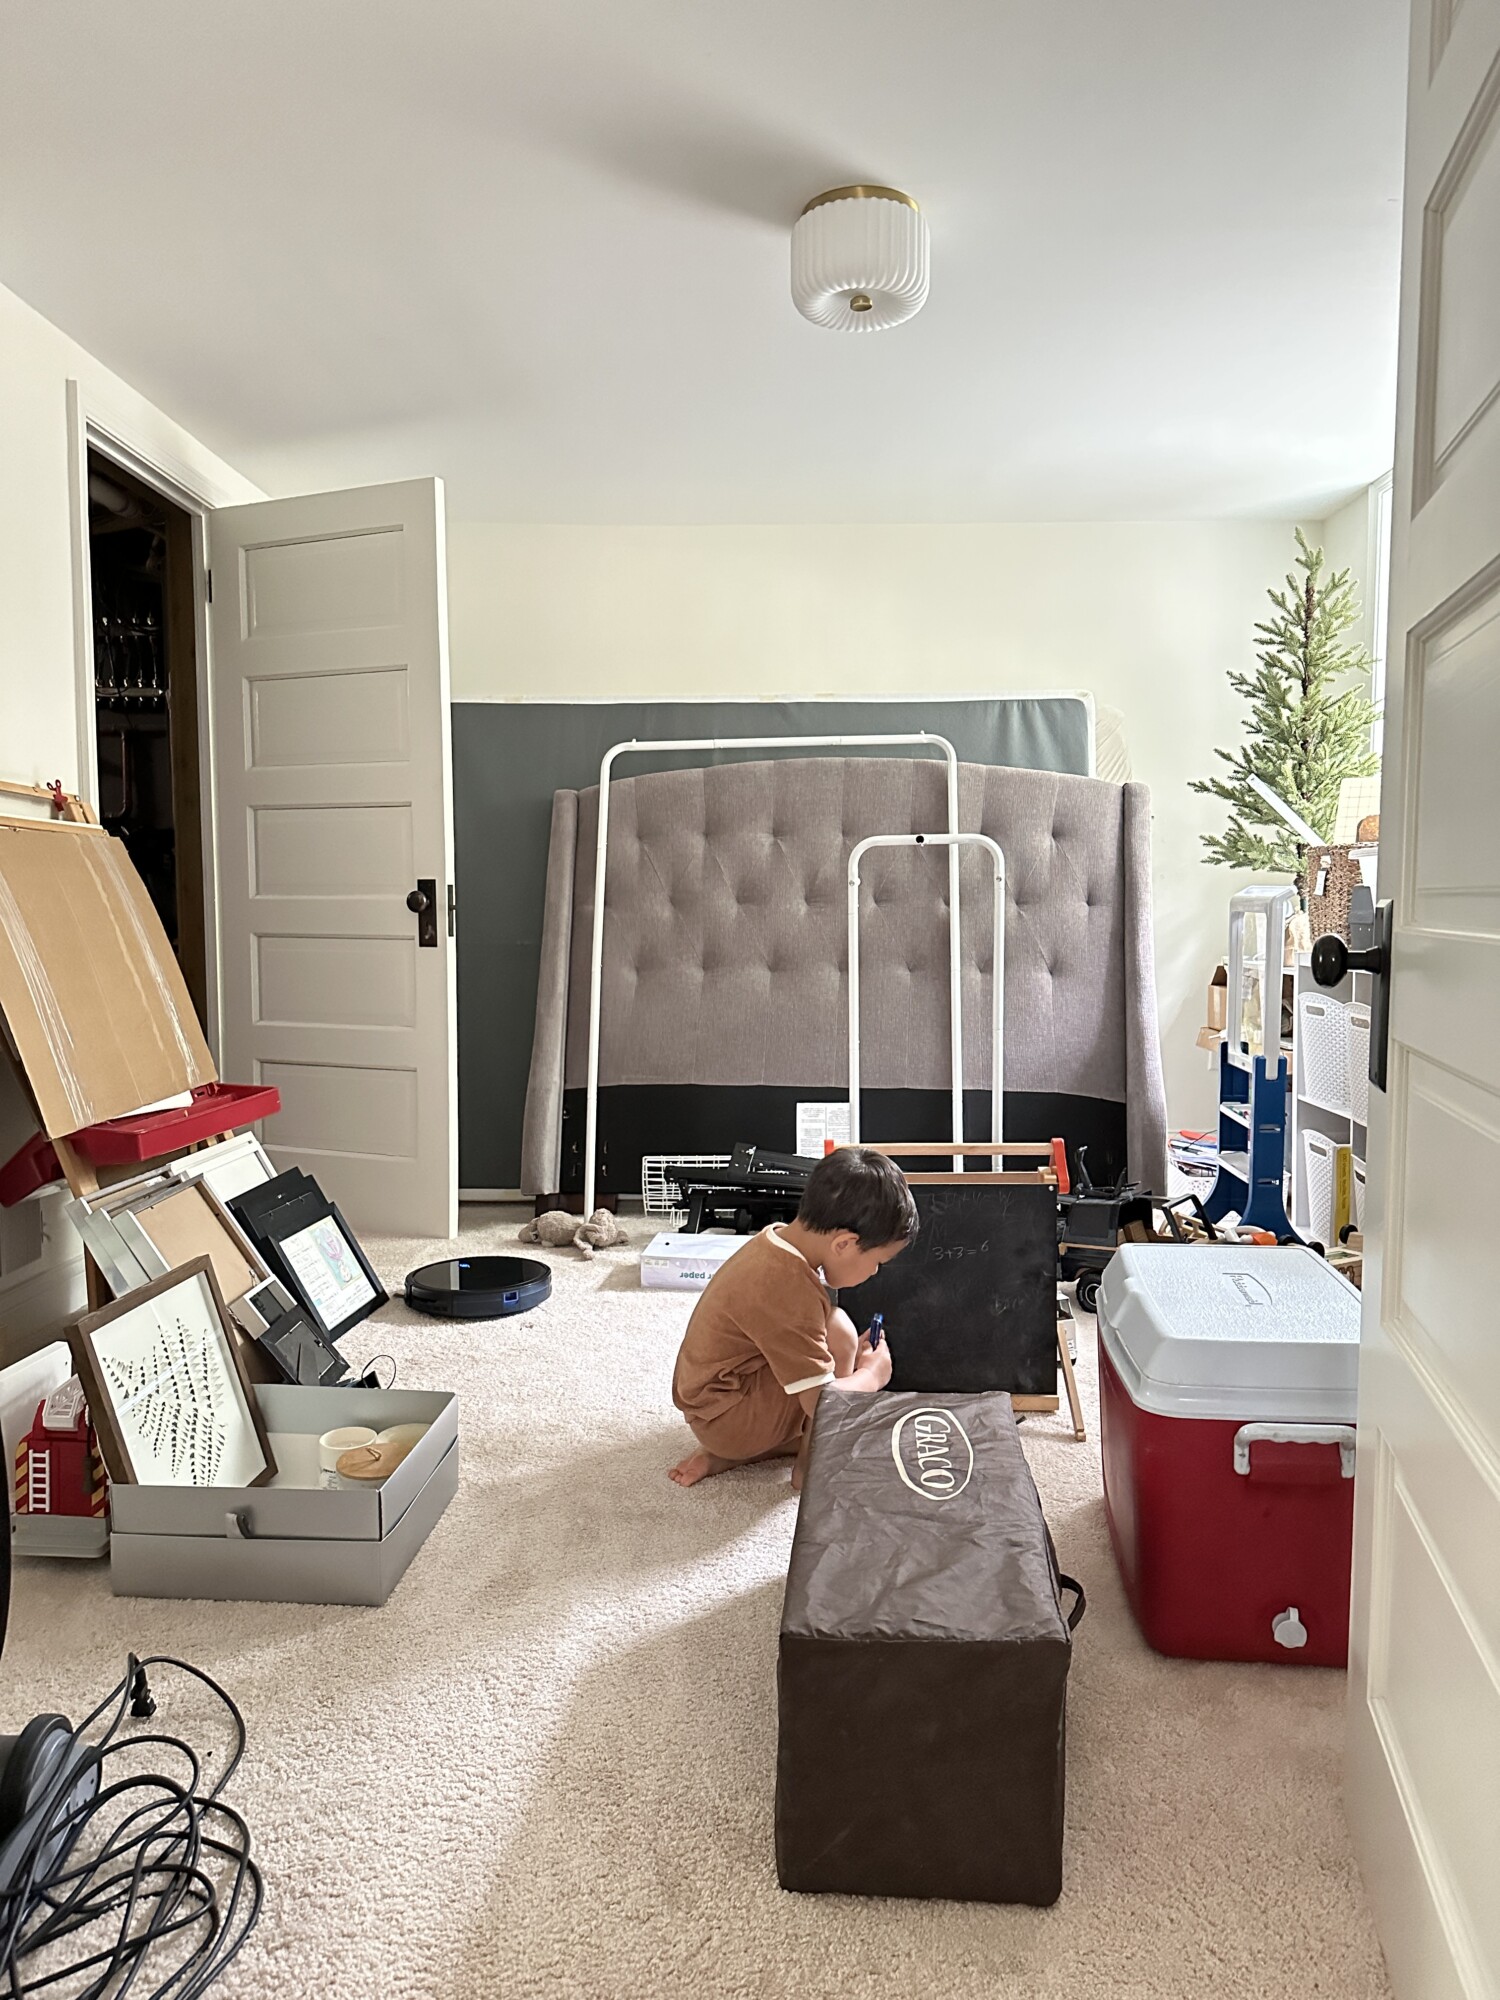
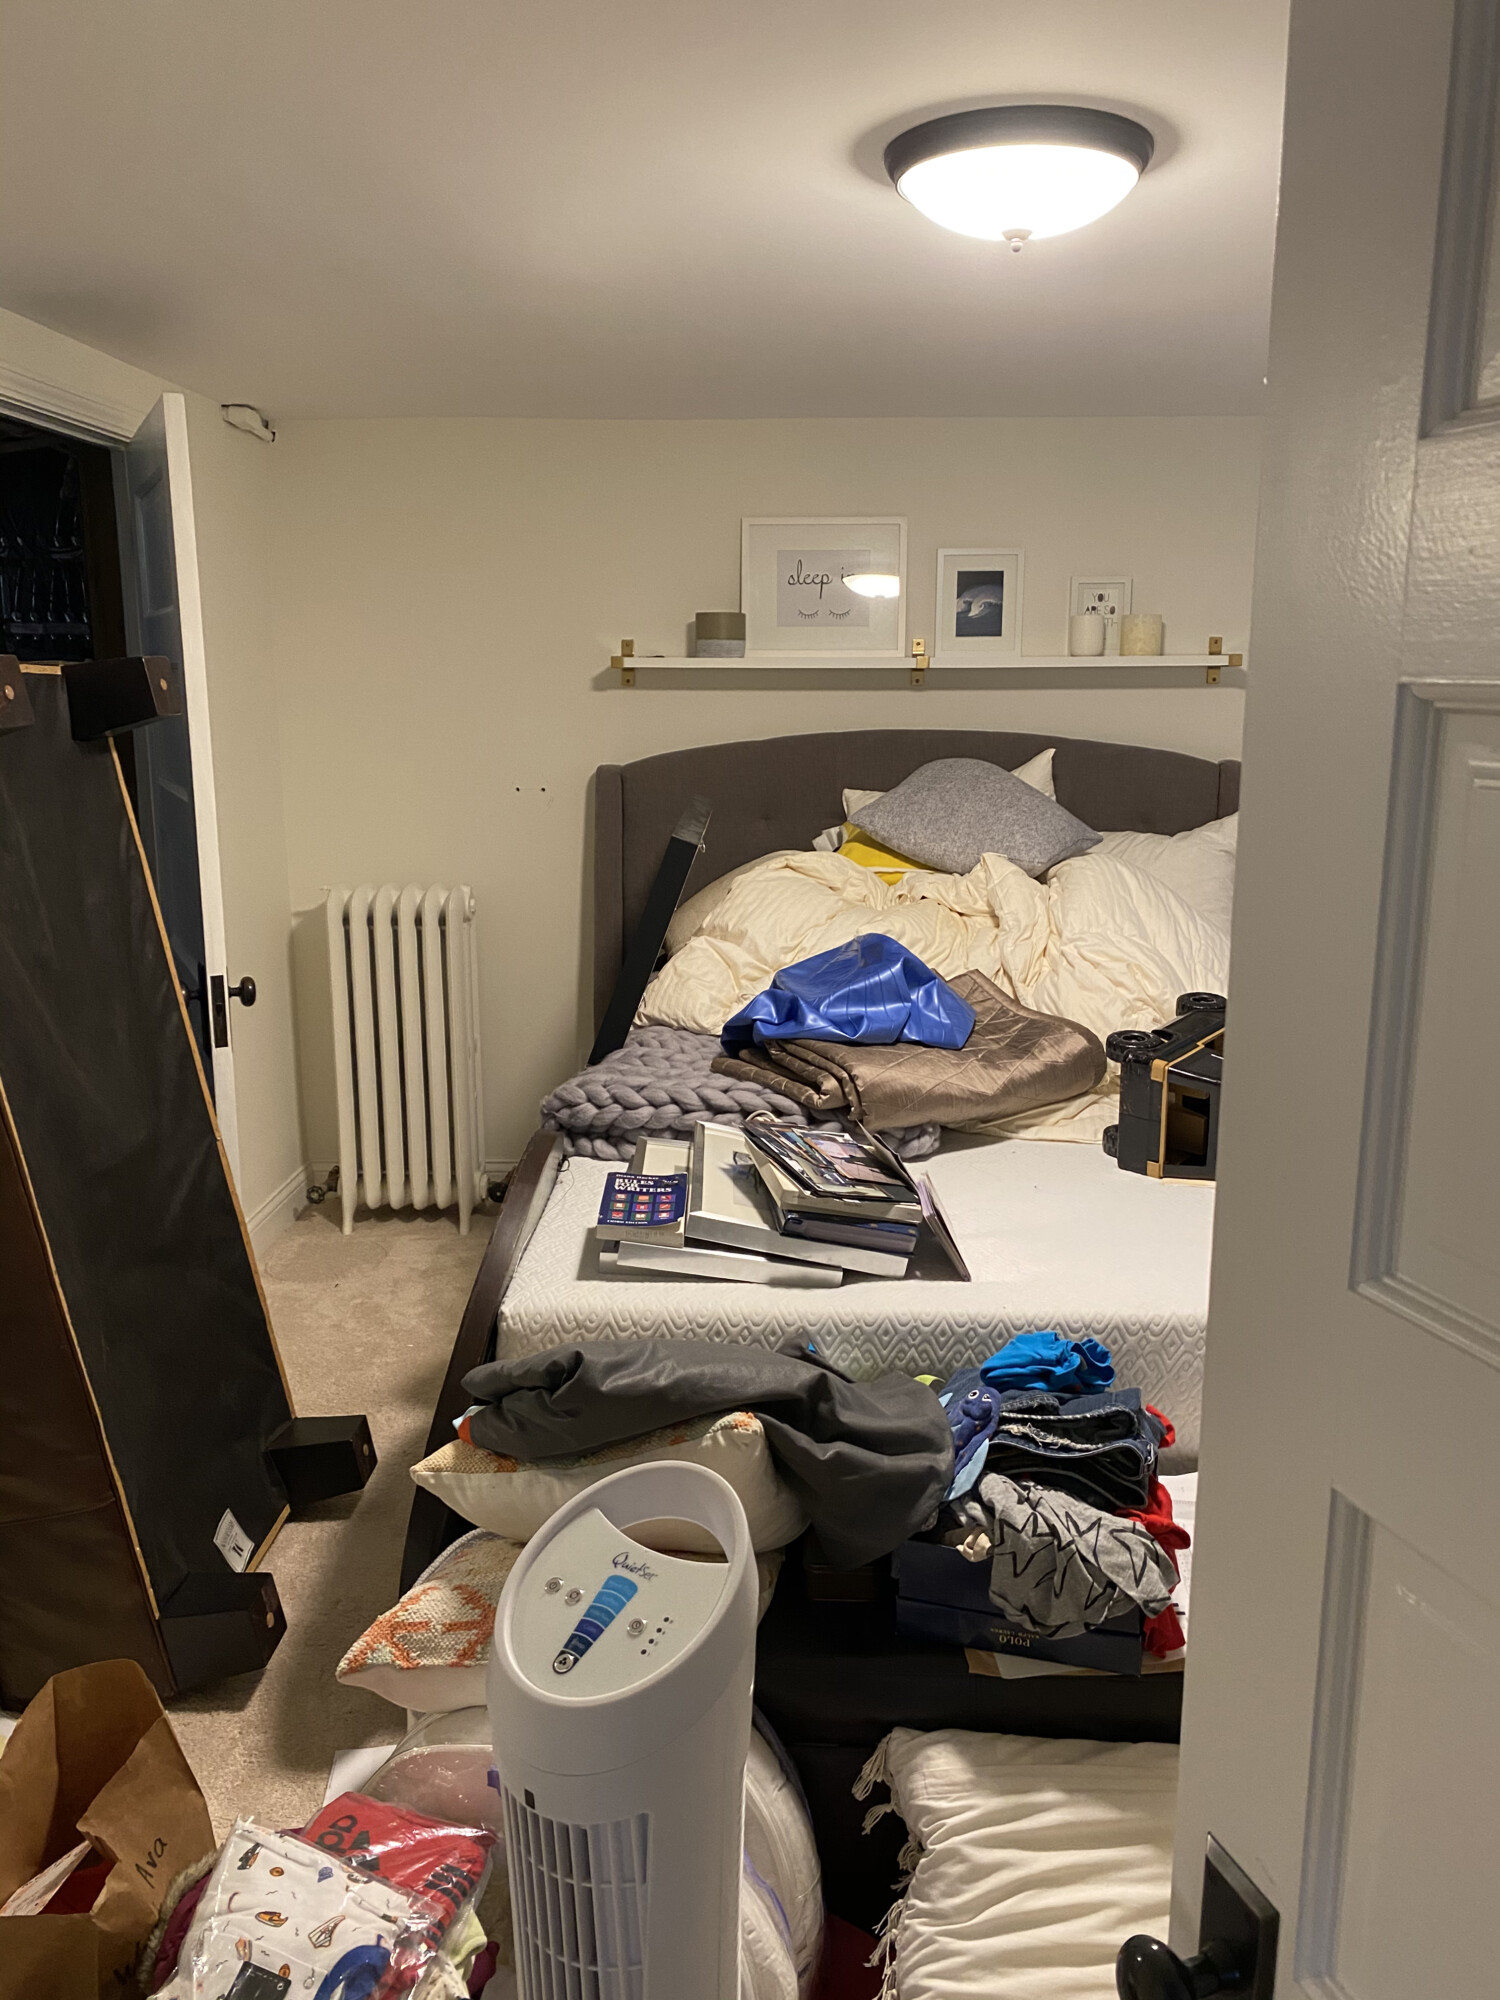
The bed constantly became a dumping ground taking up unnecessary space when we weren’t hosting. We would tidy up when guests stayed over and as soon as they left, it was an invitation to collect things.

One day, Brian was tired of his office space looking like a cluttered mess and impulsively took the bed apart to commit himself to building a Murphy bed. That’s how the wheels were set in motion!
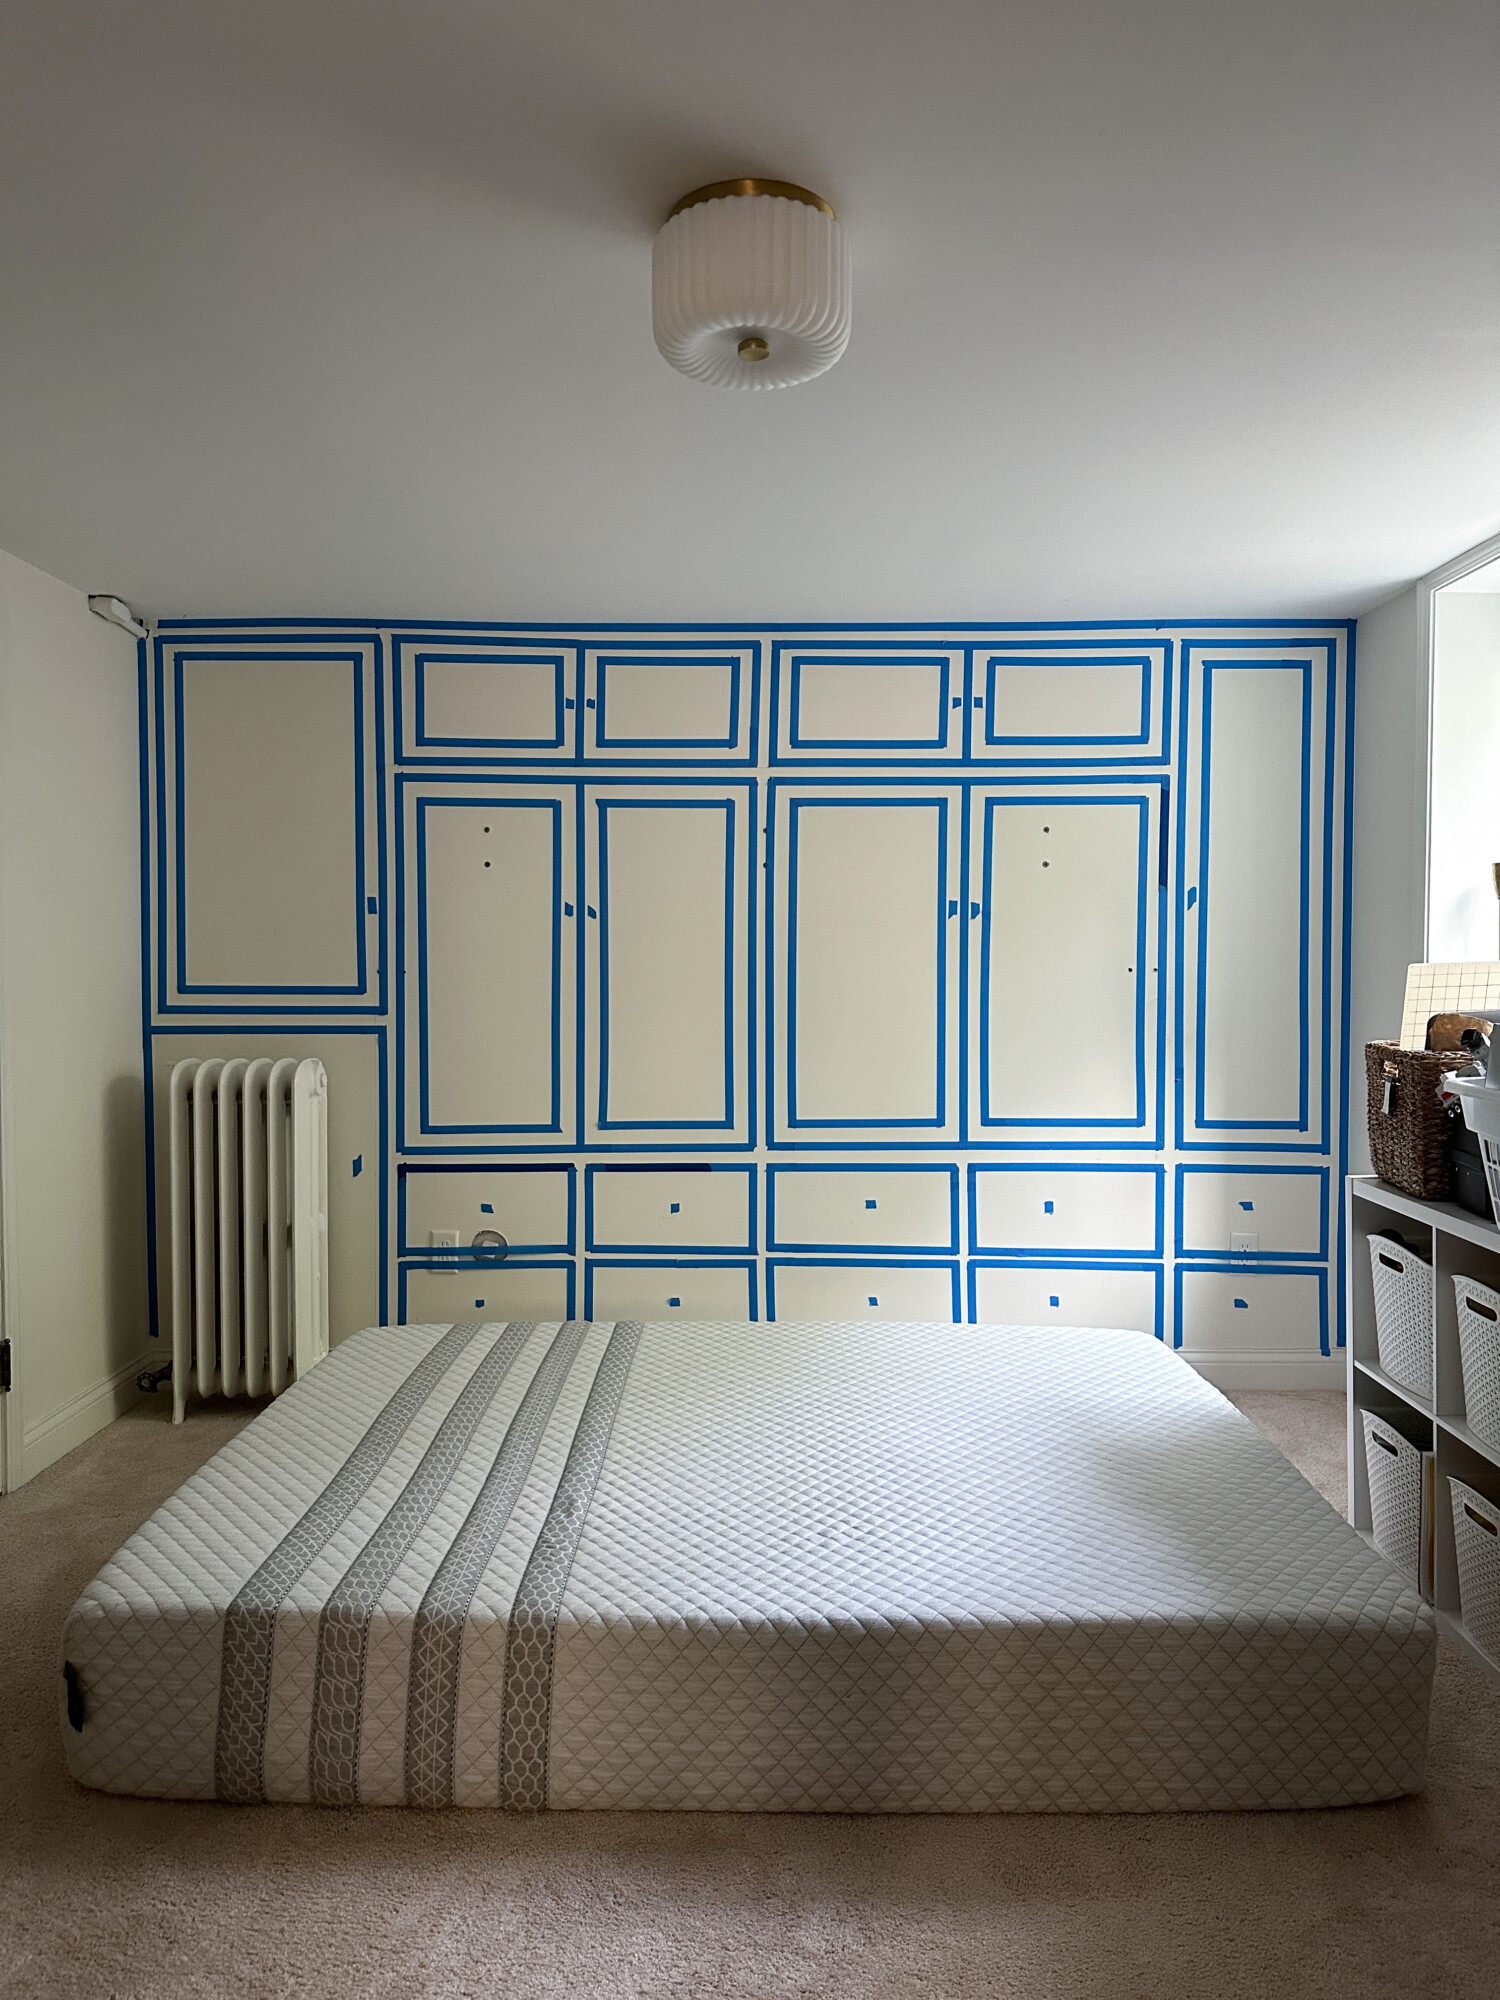
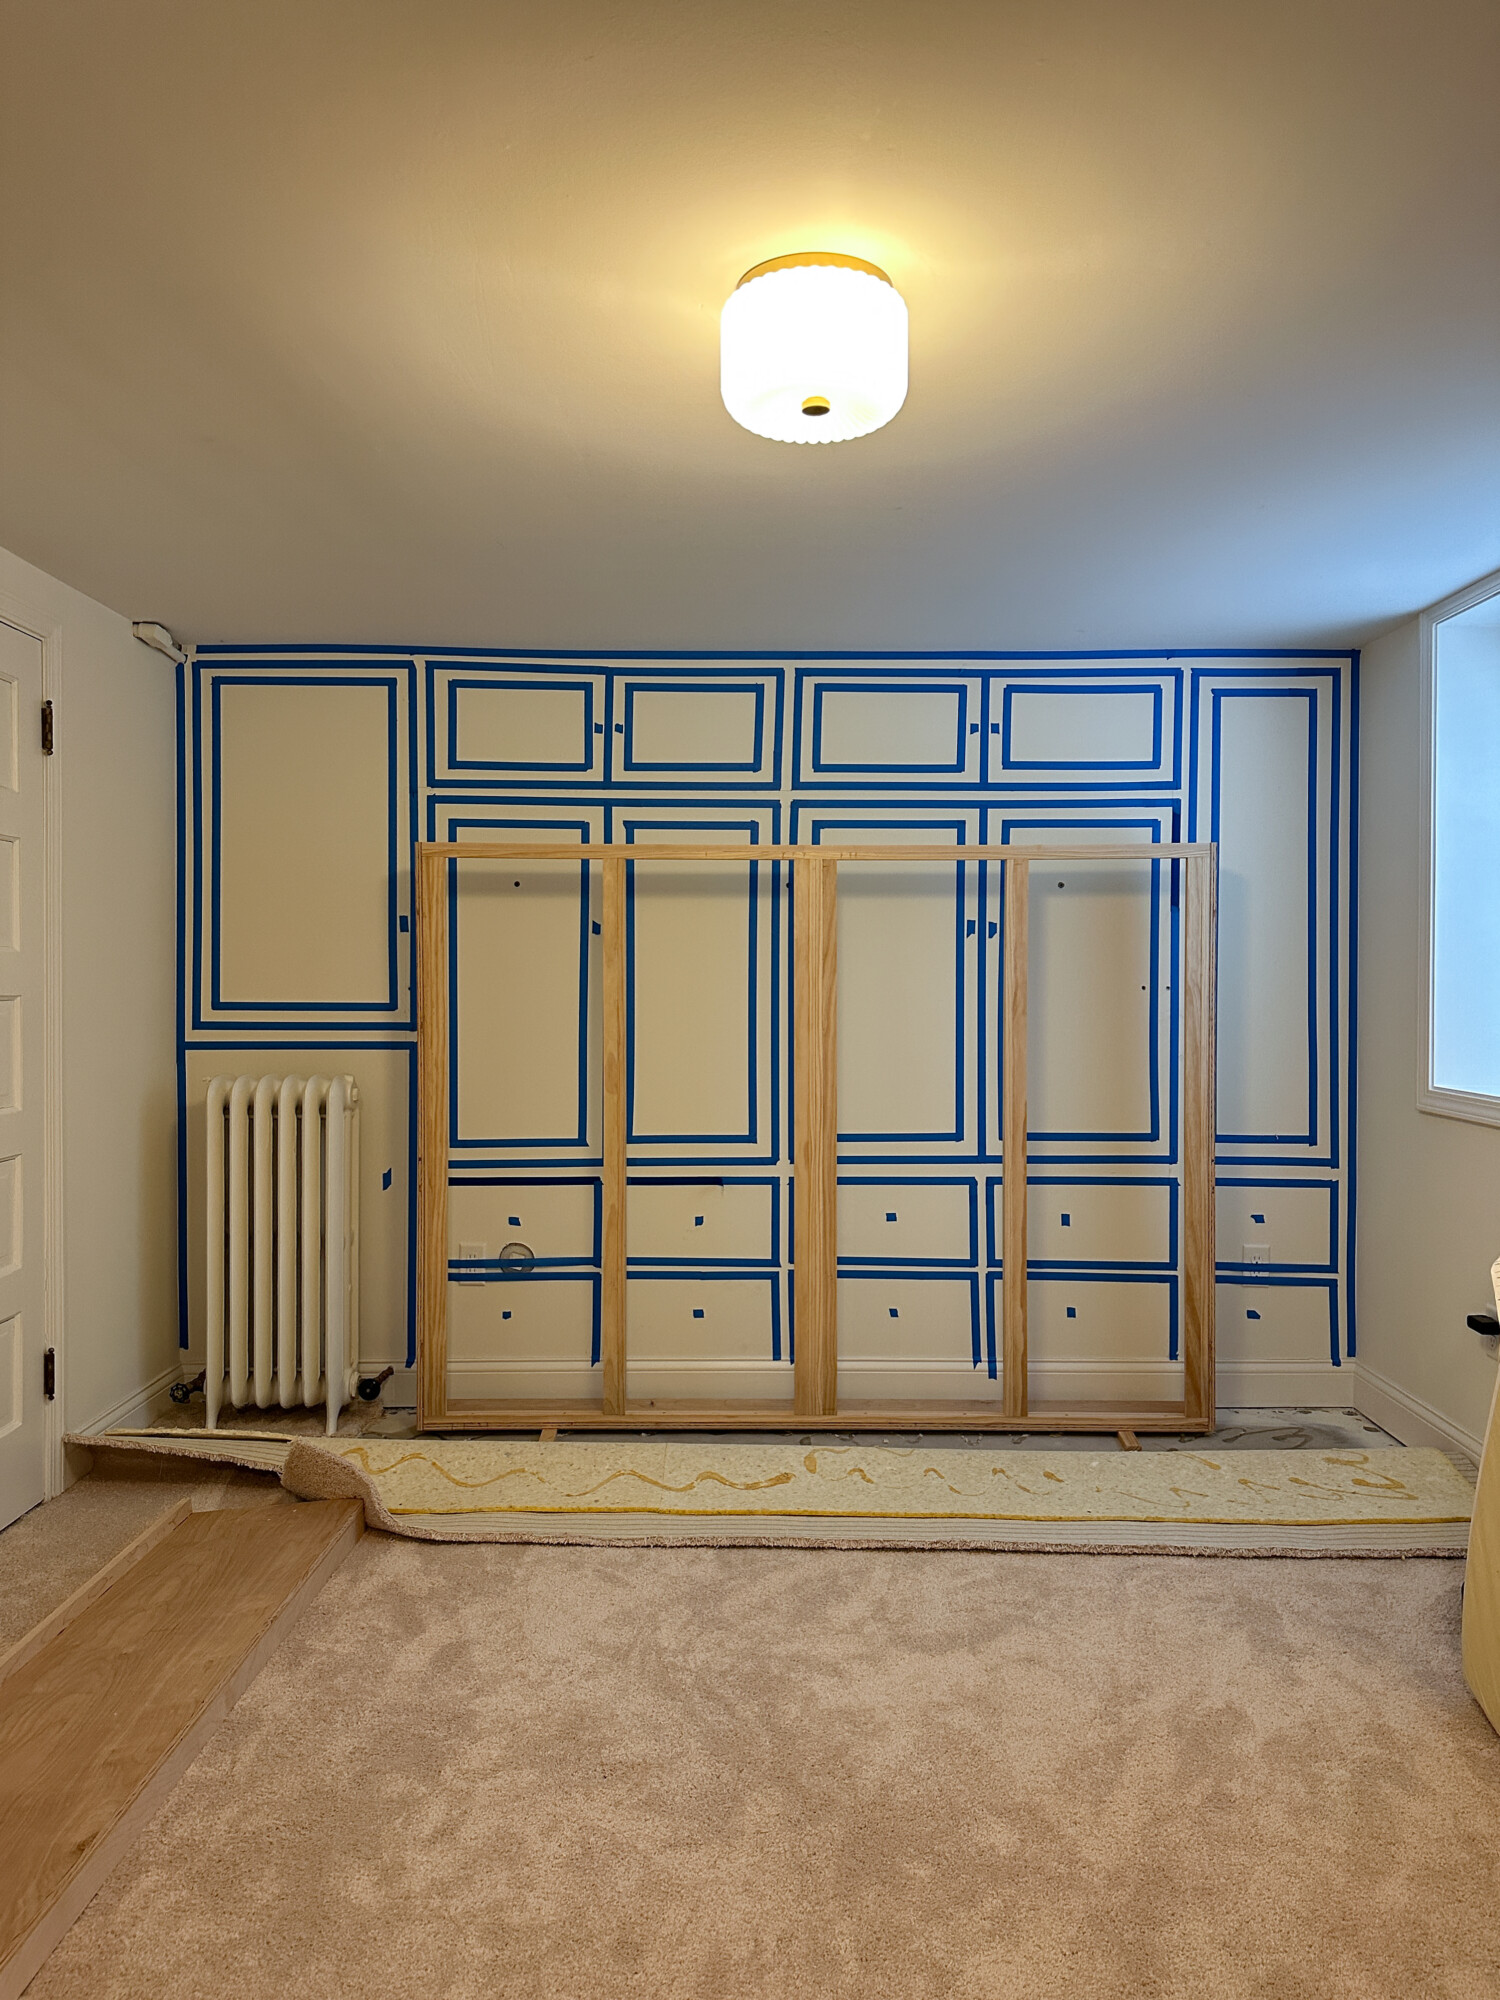
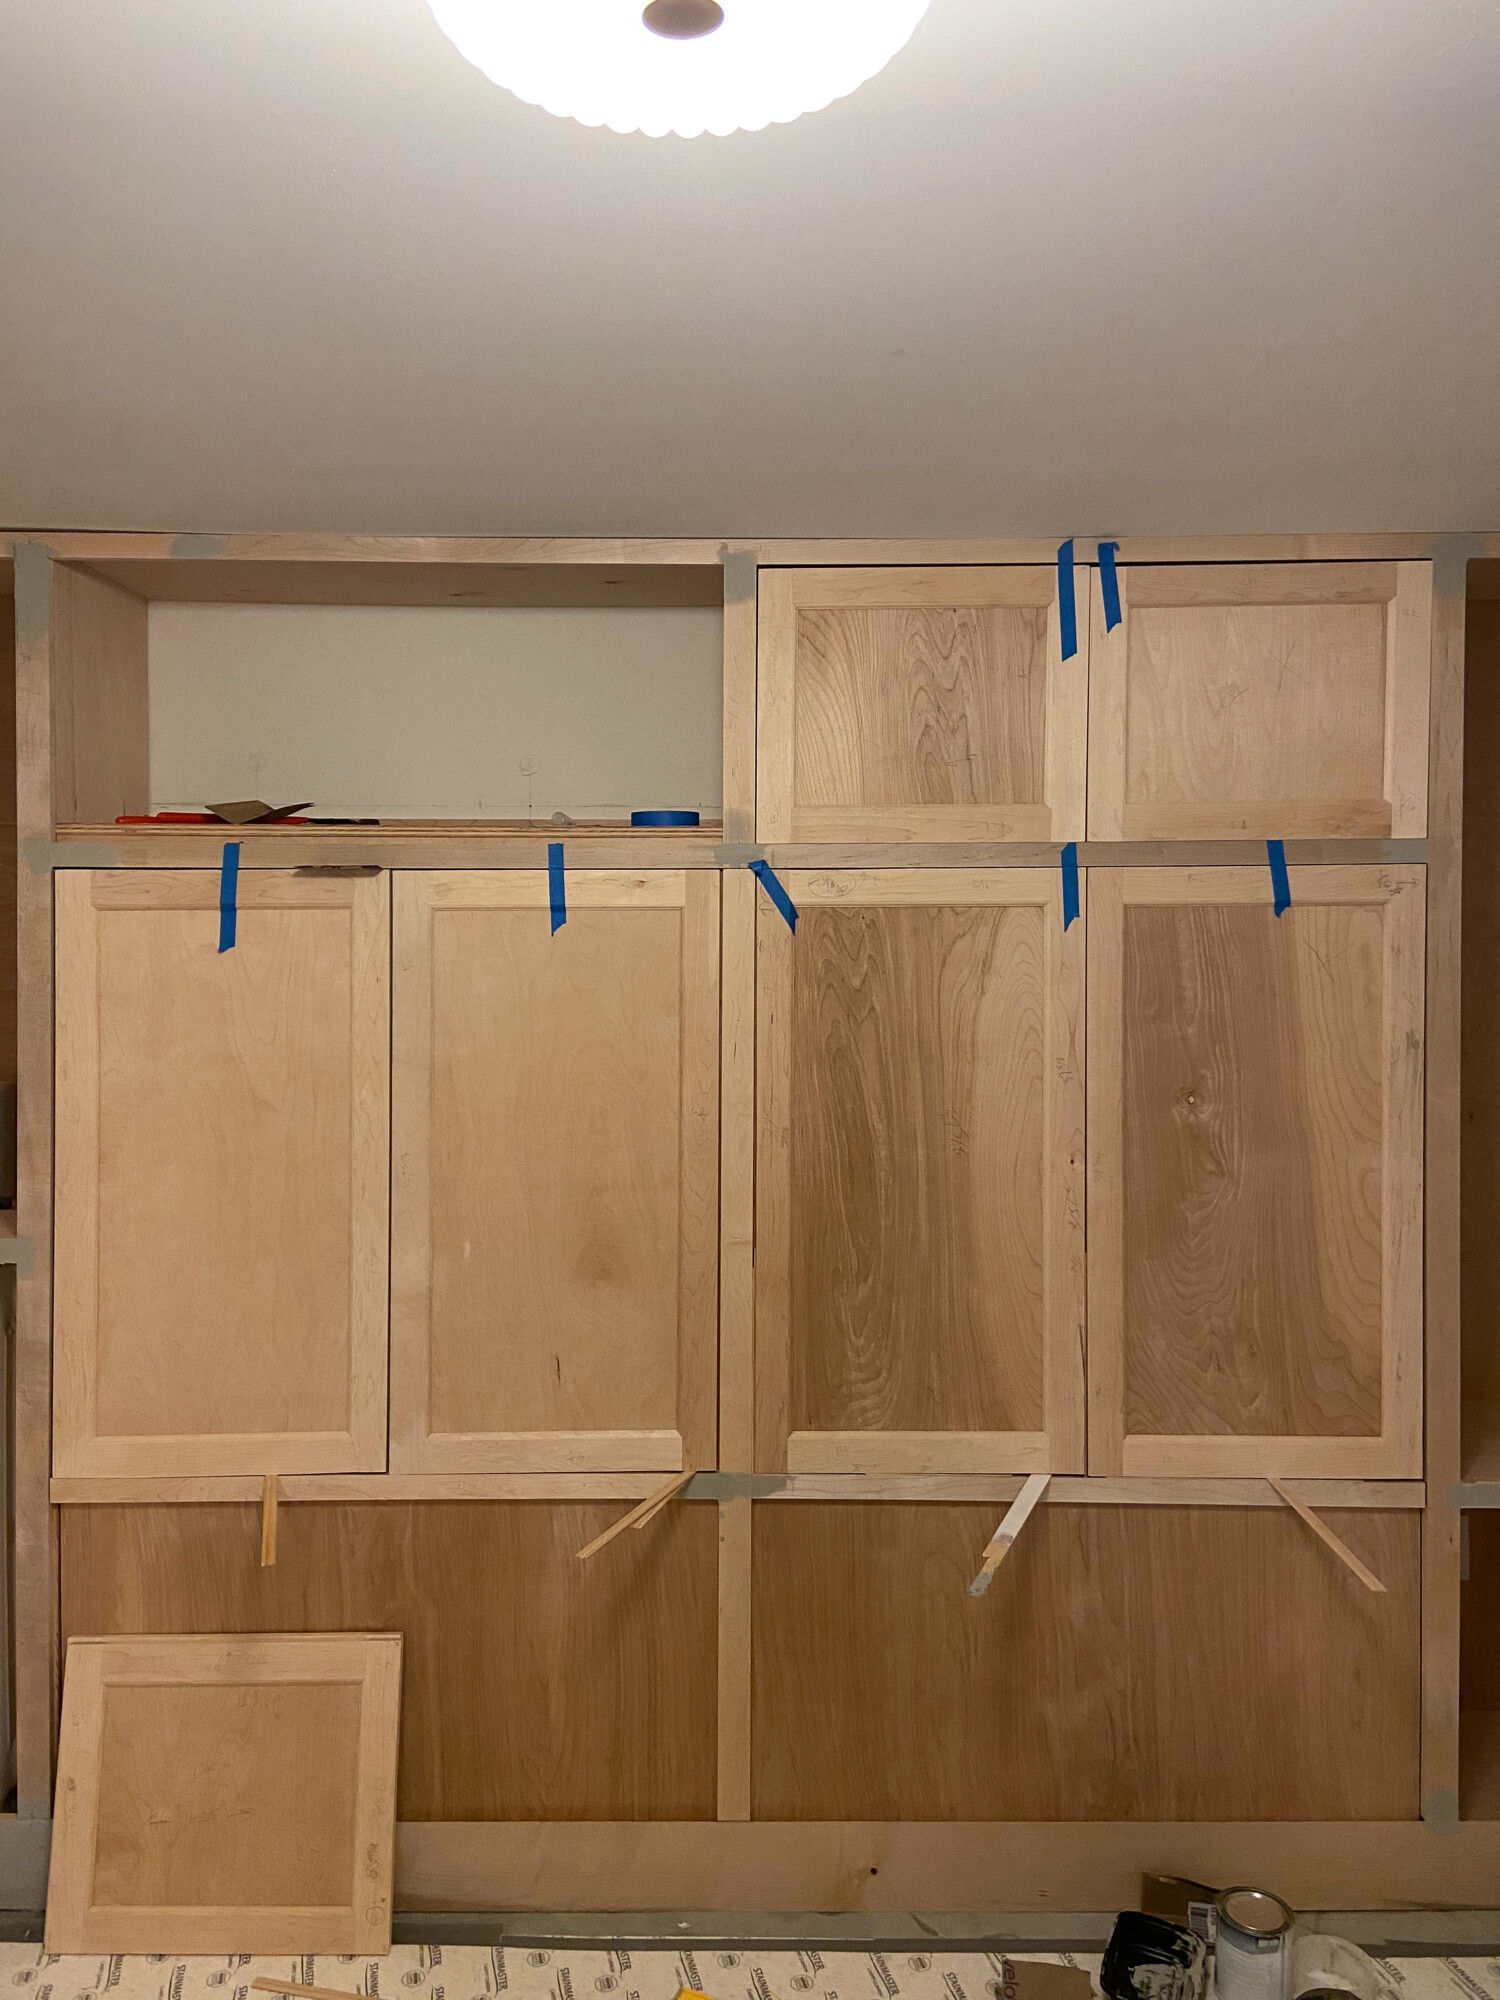
When we started planning out the Murphy bed and built-in cabinets, we taped off the design to help visualize. I highly recommend doing this to solidify your design before the build phase.
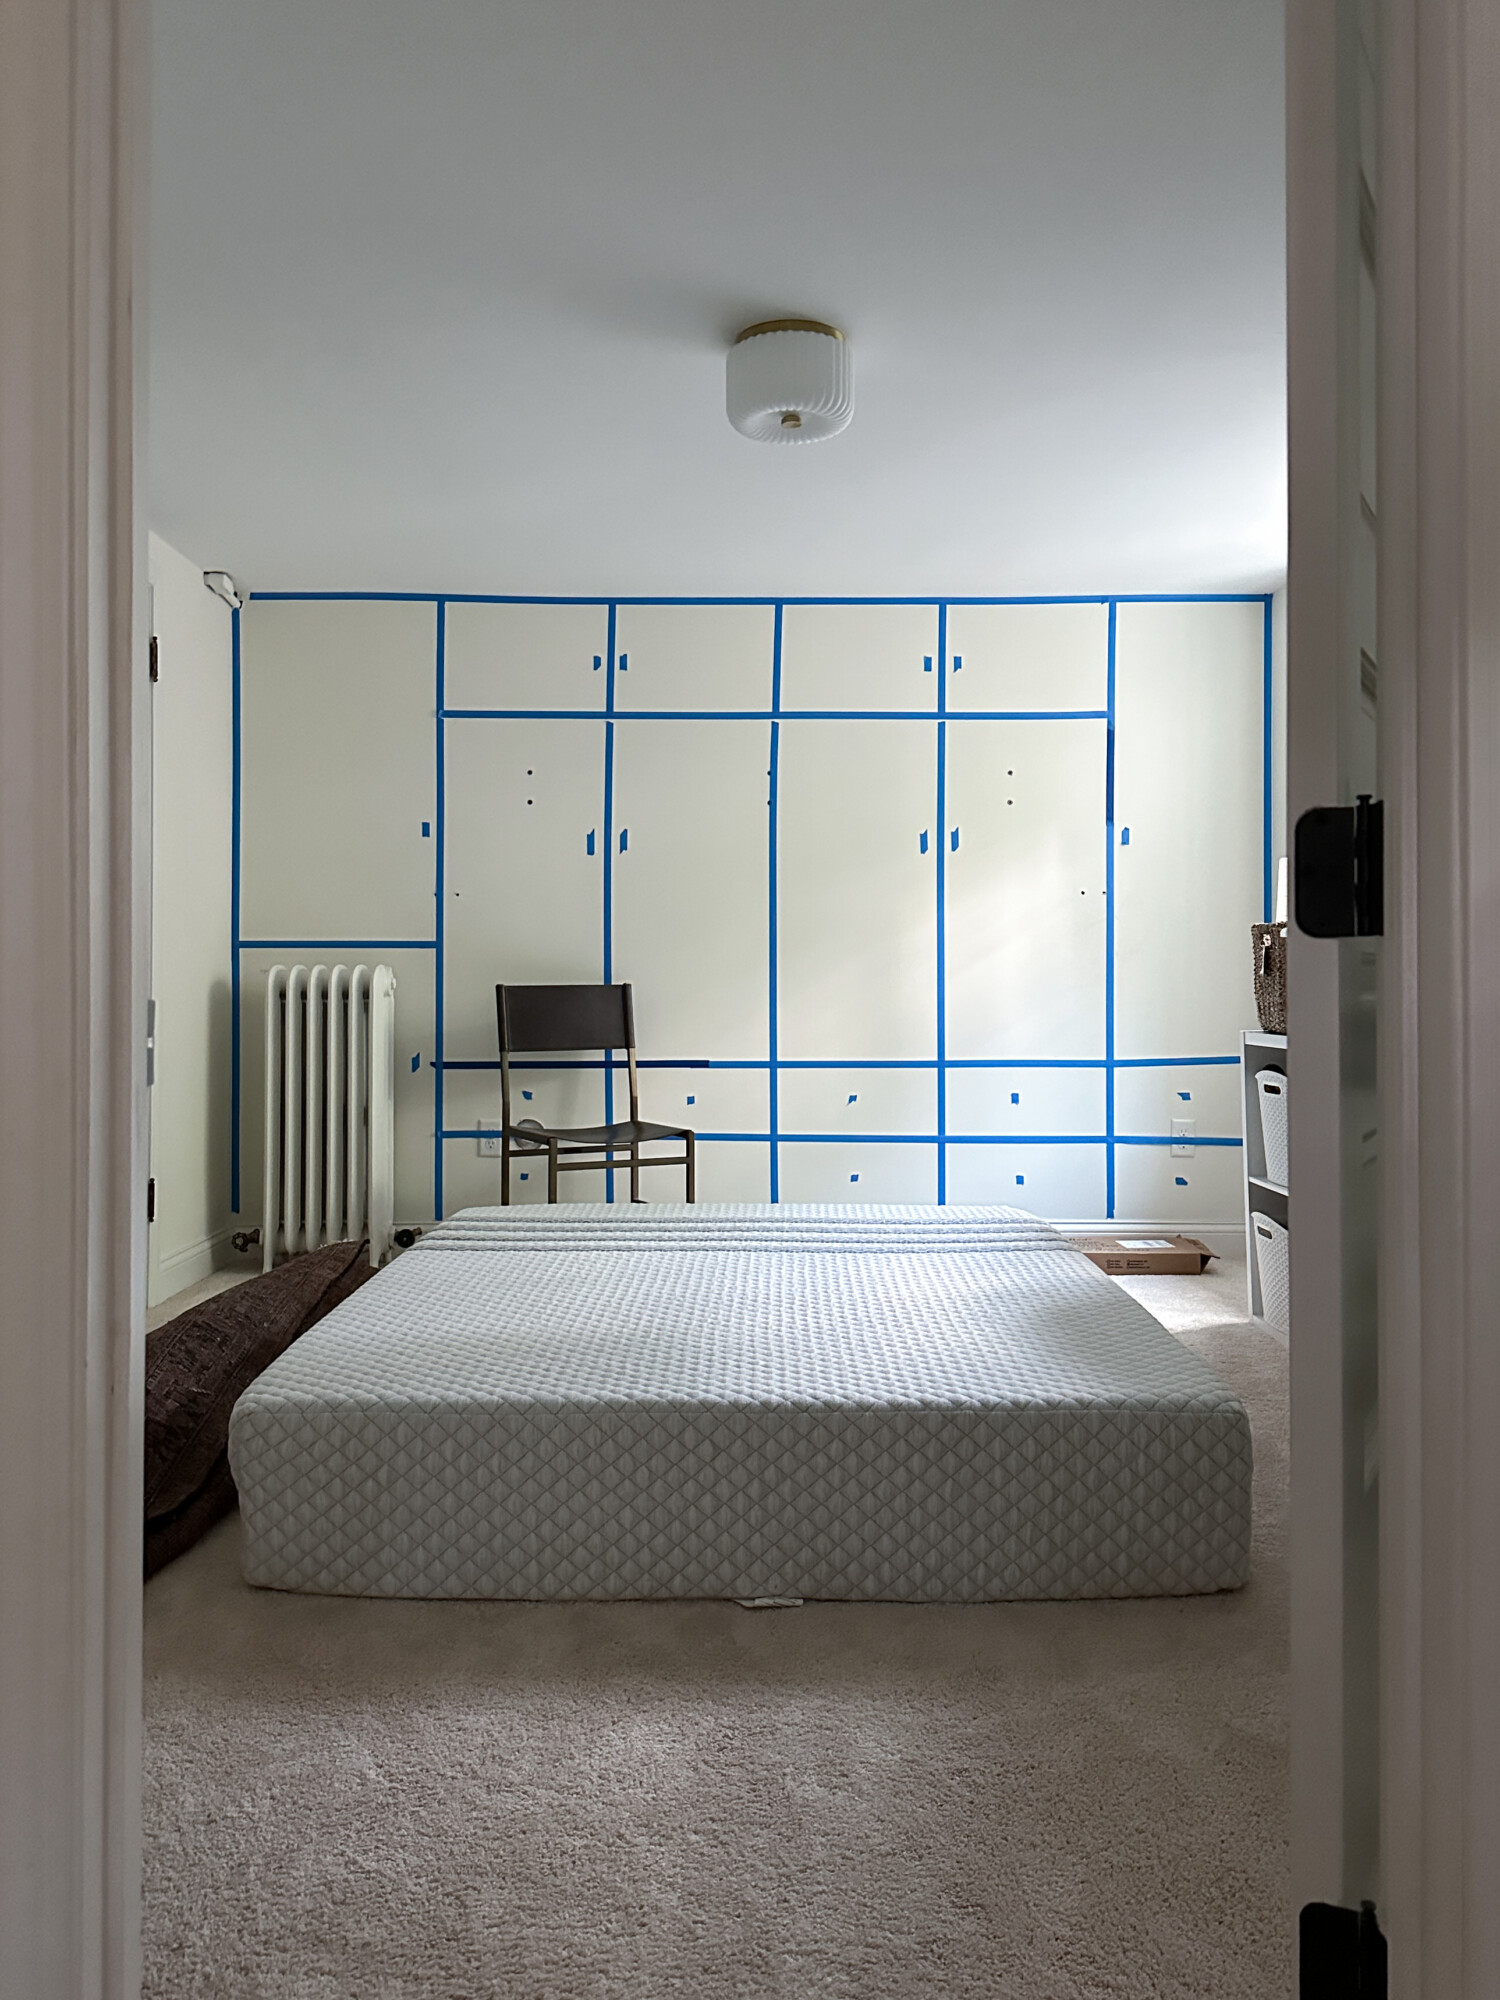
This room’s ceiling is about 7′ high which is why the Murphy bed had to be mounted horizontally. There are lots of inspiration/examples for the typical Murphy bed vertical setups but not much for horizontal setups. However, we came across this one from Lumber Jocks that sparked an idea for the inset cabinet design.
Images via Lumber Jocks
We knew the inset design would be the most challenging but agreed it was the right look for our home. Once we decided, Brian started researching for the best DIY Murphy bed kit. We landed on this one. It had amazing reviews and excellent customer service by answering all of our questions.
Murphy Bed and Built-in Cabinet Tools and Materials
The kit has really great instructions. A lot more informative than what I can share here so I’d recommend following their plan for safety and structural support.
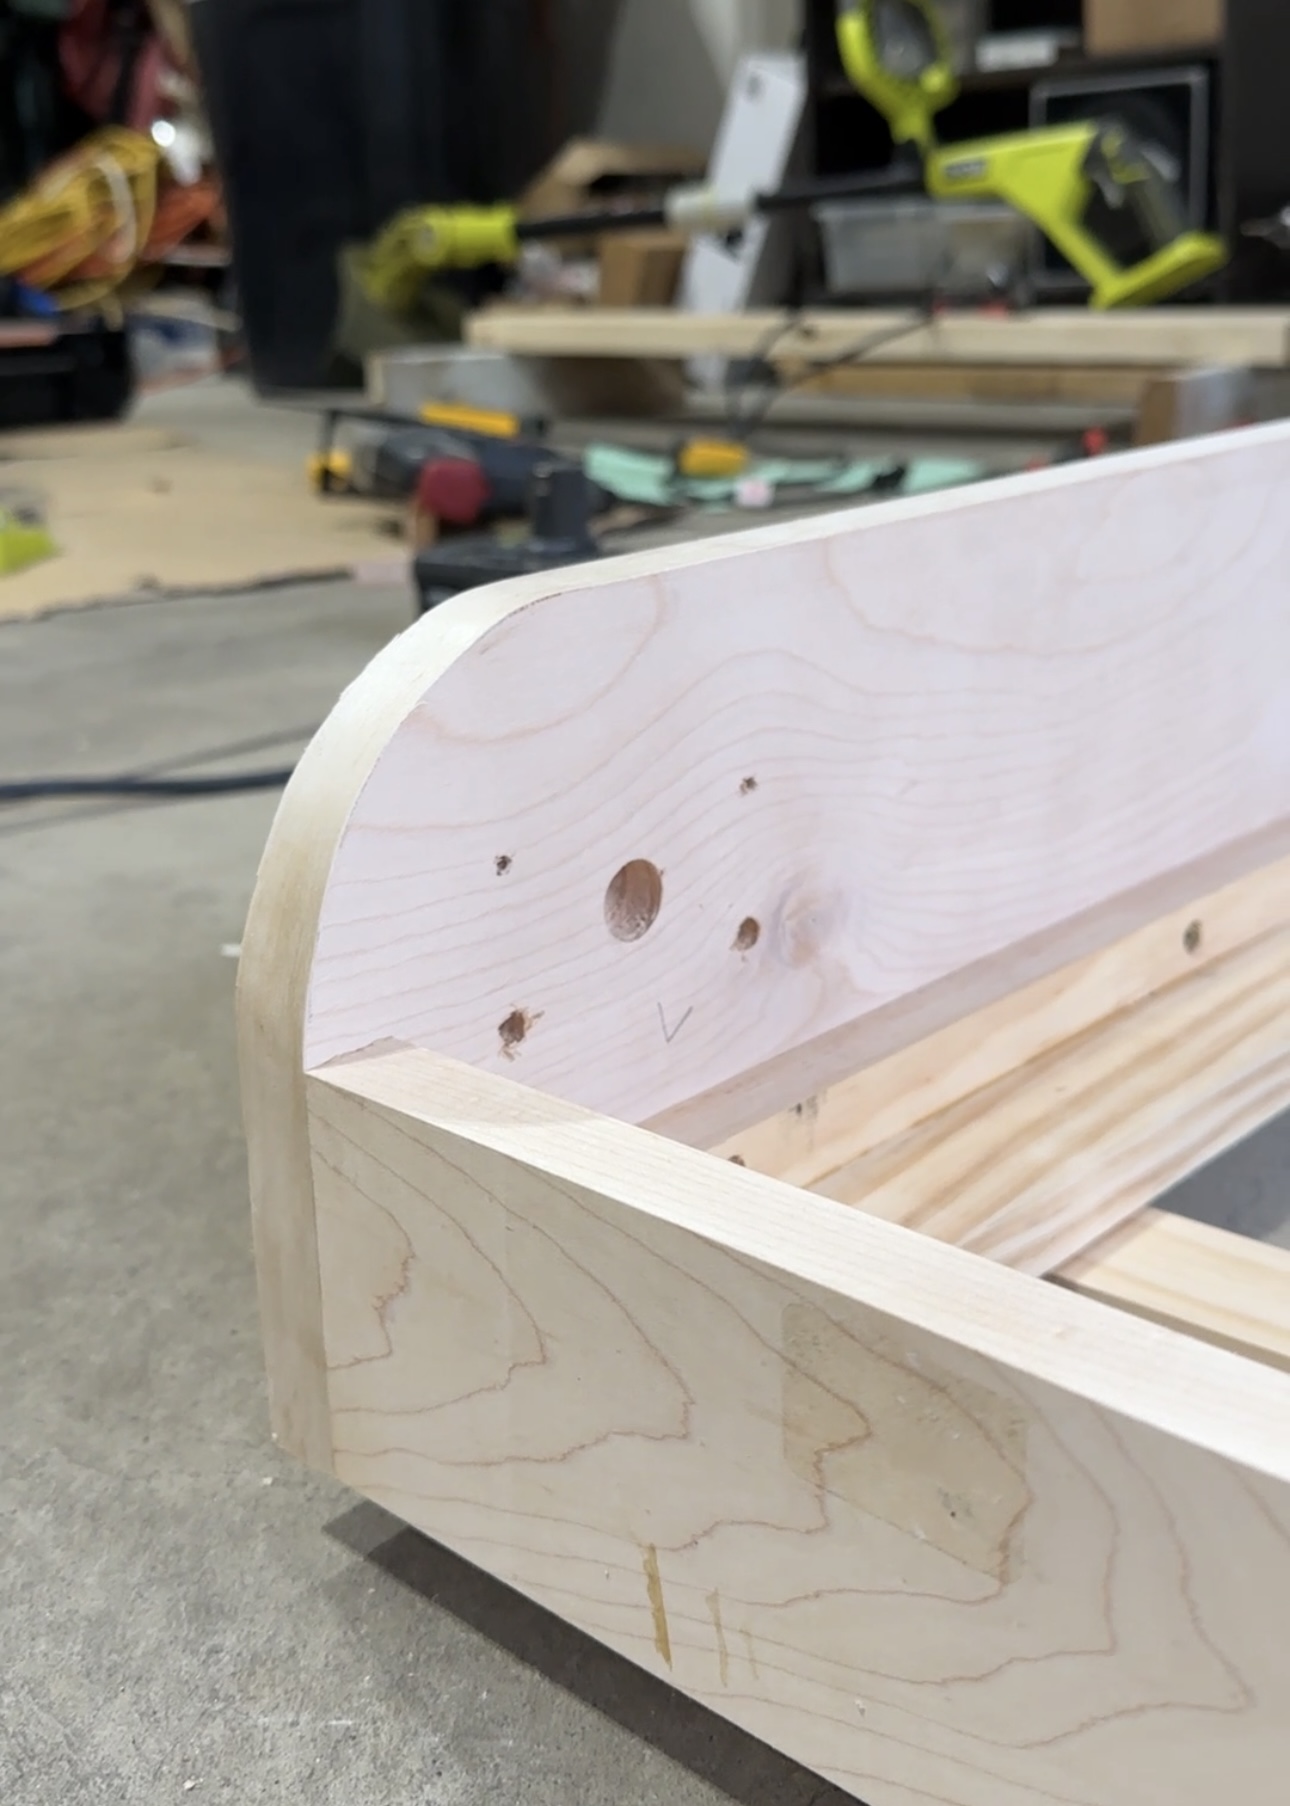
Step 1: Build the Murphy bed frame
We used pine lumber following the plan in the Murphy bed kit.
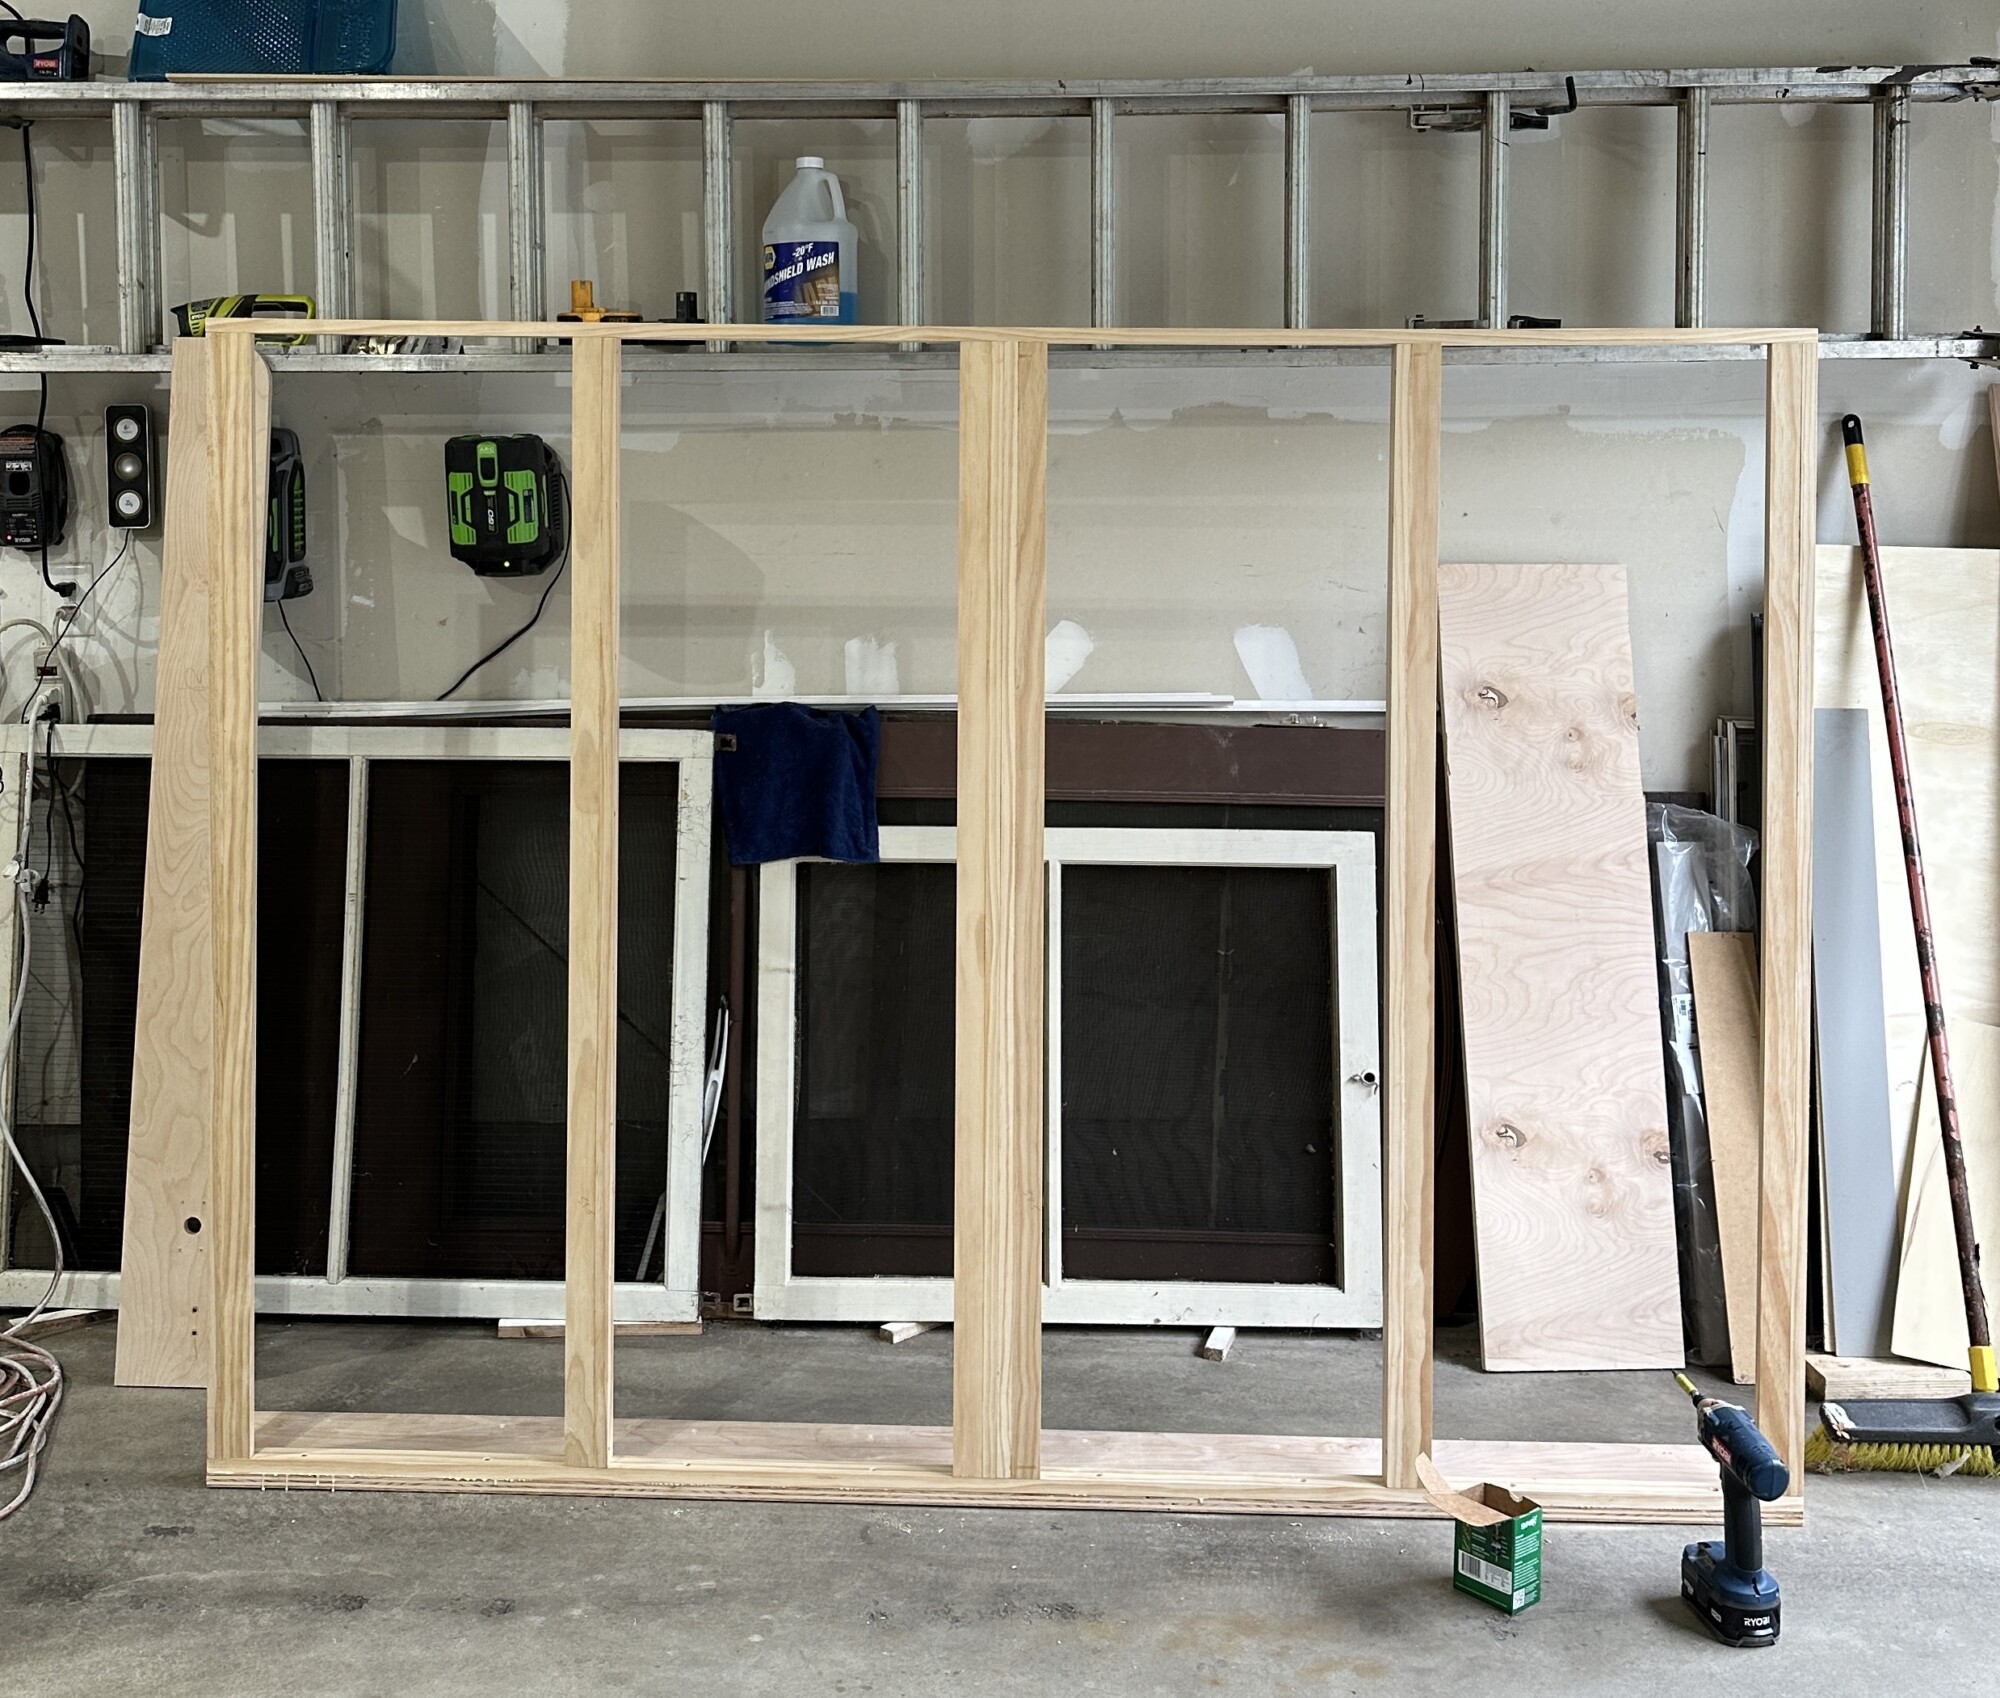
*Tip: you’ll want some clamps on hand to make the job easier

Use preglued wood veneer edgebanding to finish off the wood edges by simply ironing on.
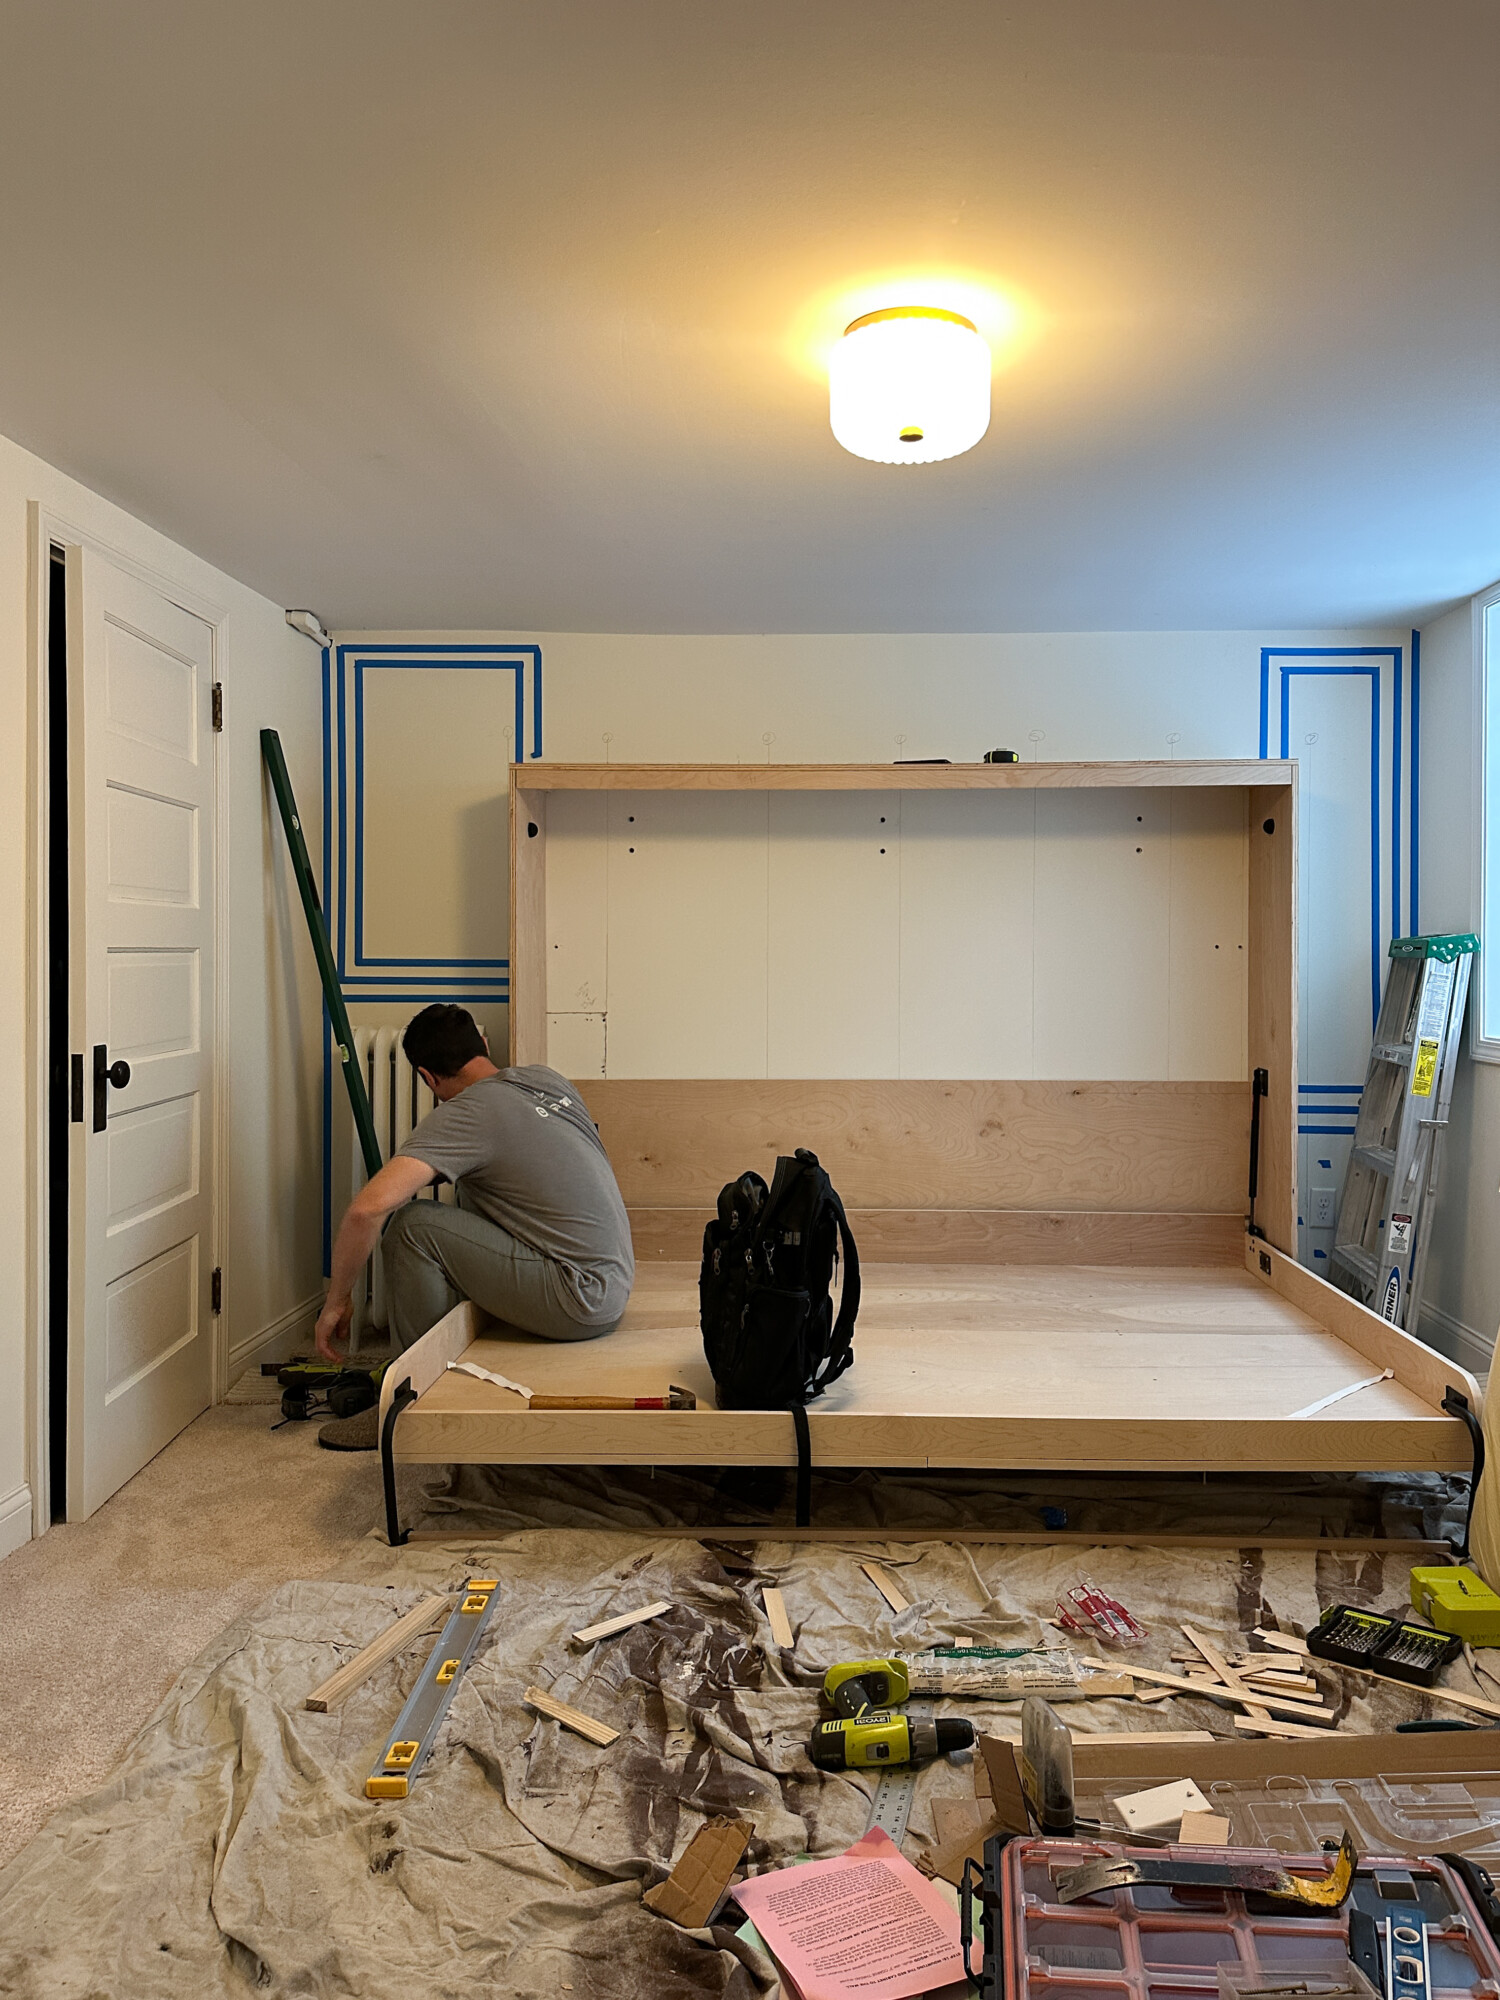
Step 2: Mount the Murphy Bed Frame

If you’re building offsite, like we did in our garage, make sure you’re able to transport your bed frame to the room you plan on mounting it in. We had a tough time maneuvering it down our tight basement steps – queue the pivot scene from the show, Friends! We eventually got it down.
*Tip: Re-locate any outlet that may be obstructed by the Murphy bed or cabinets. Use a license electrician.

Locate and mark wall studs for securing the bed. Follow the detailed instructions on the Murphy bed kit to mount into place.
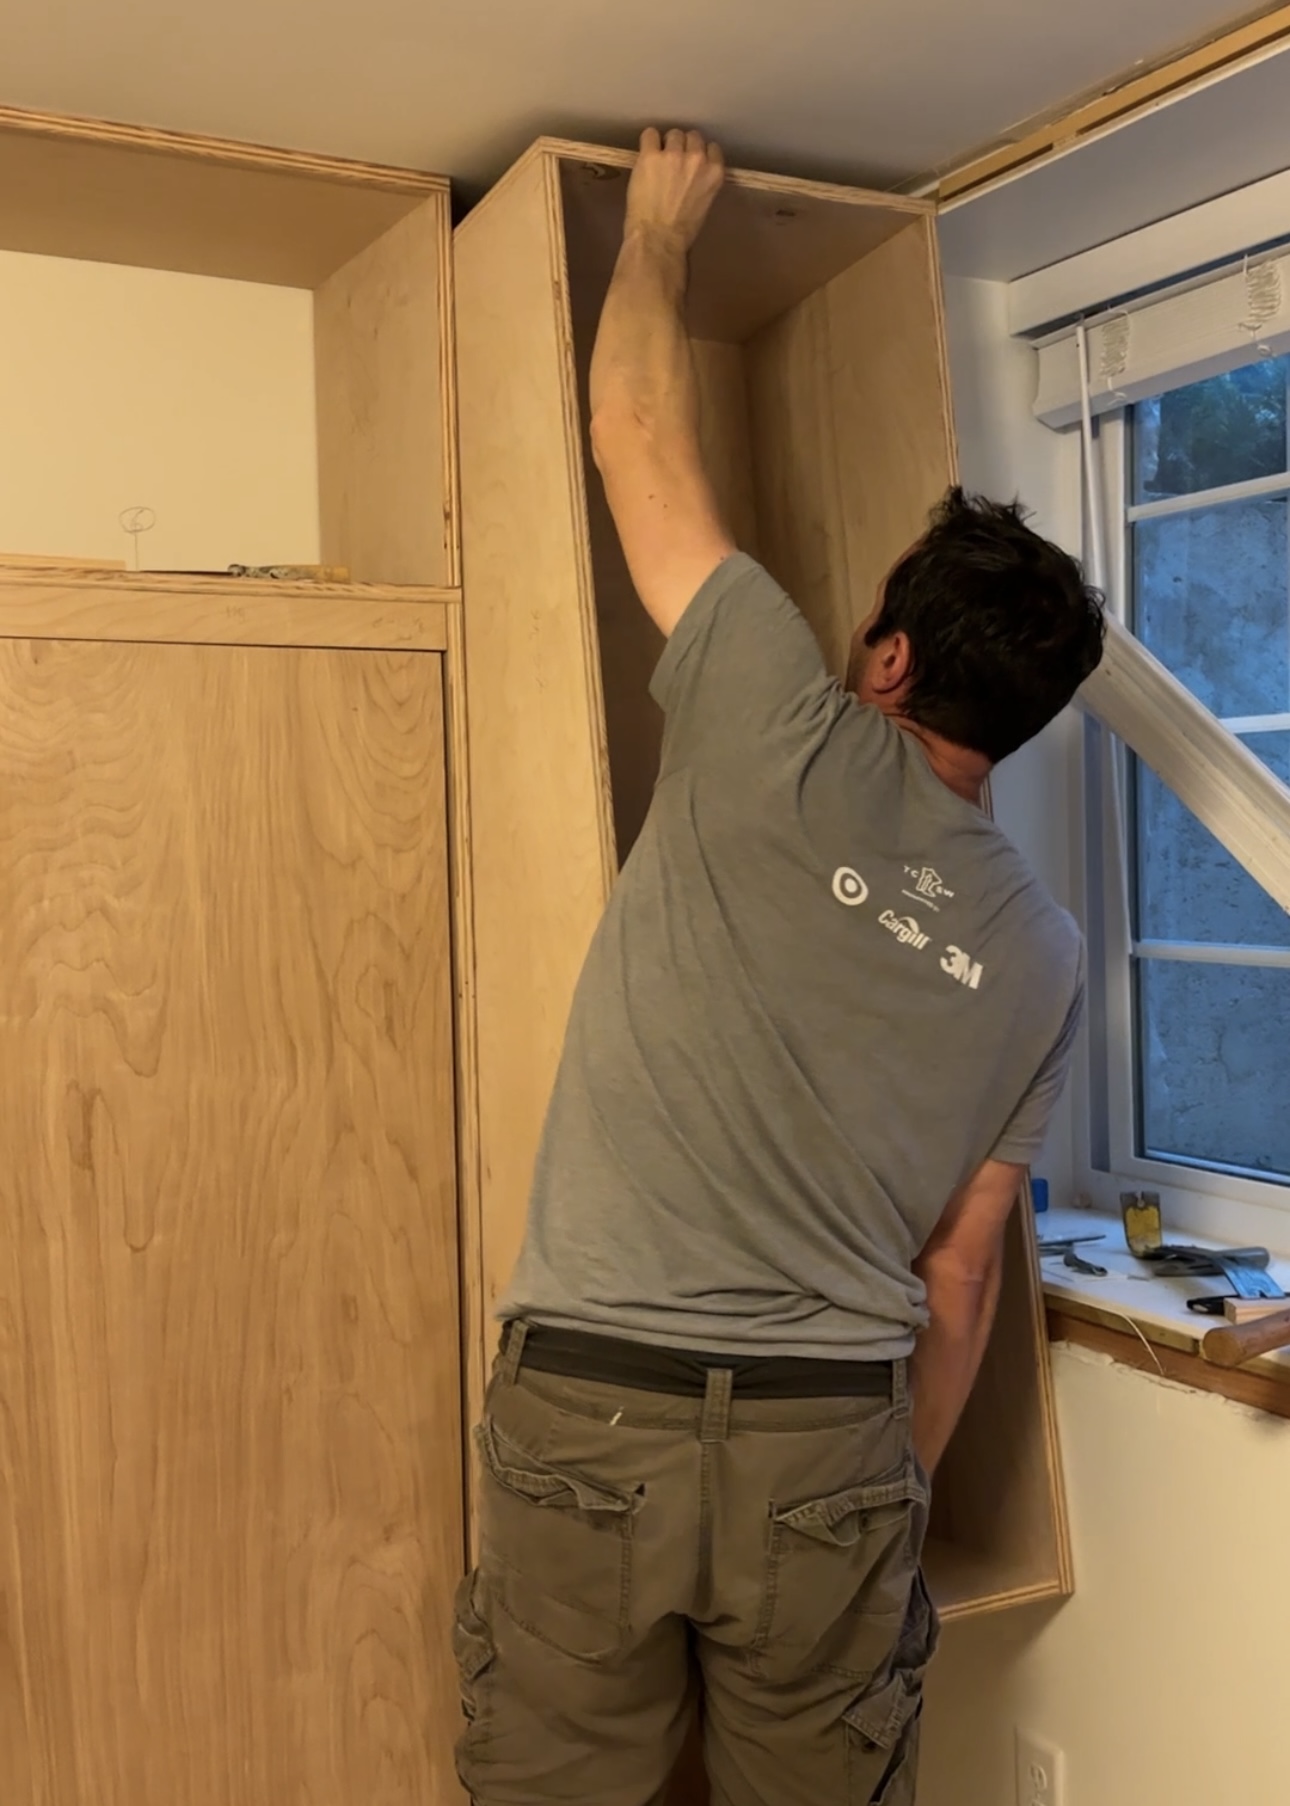
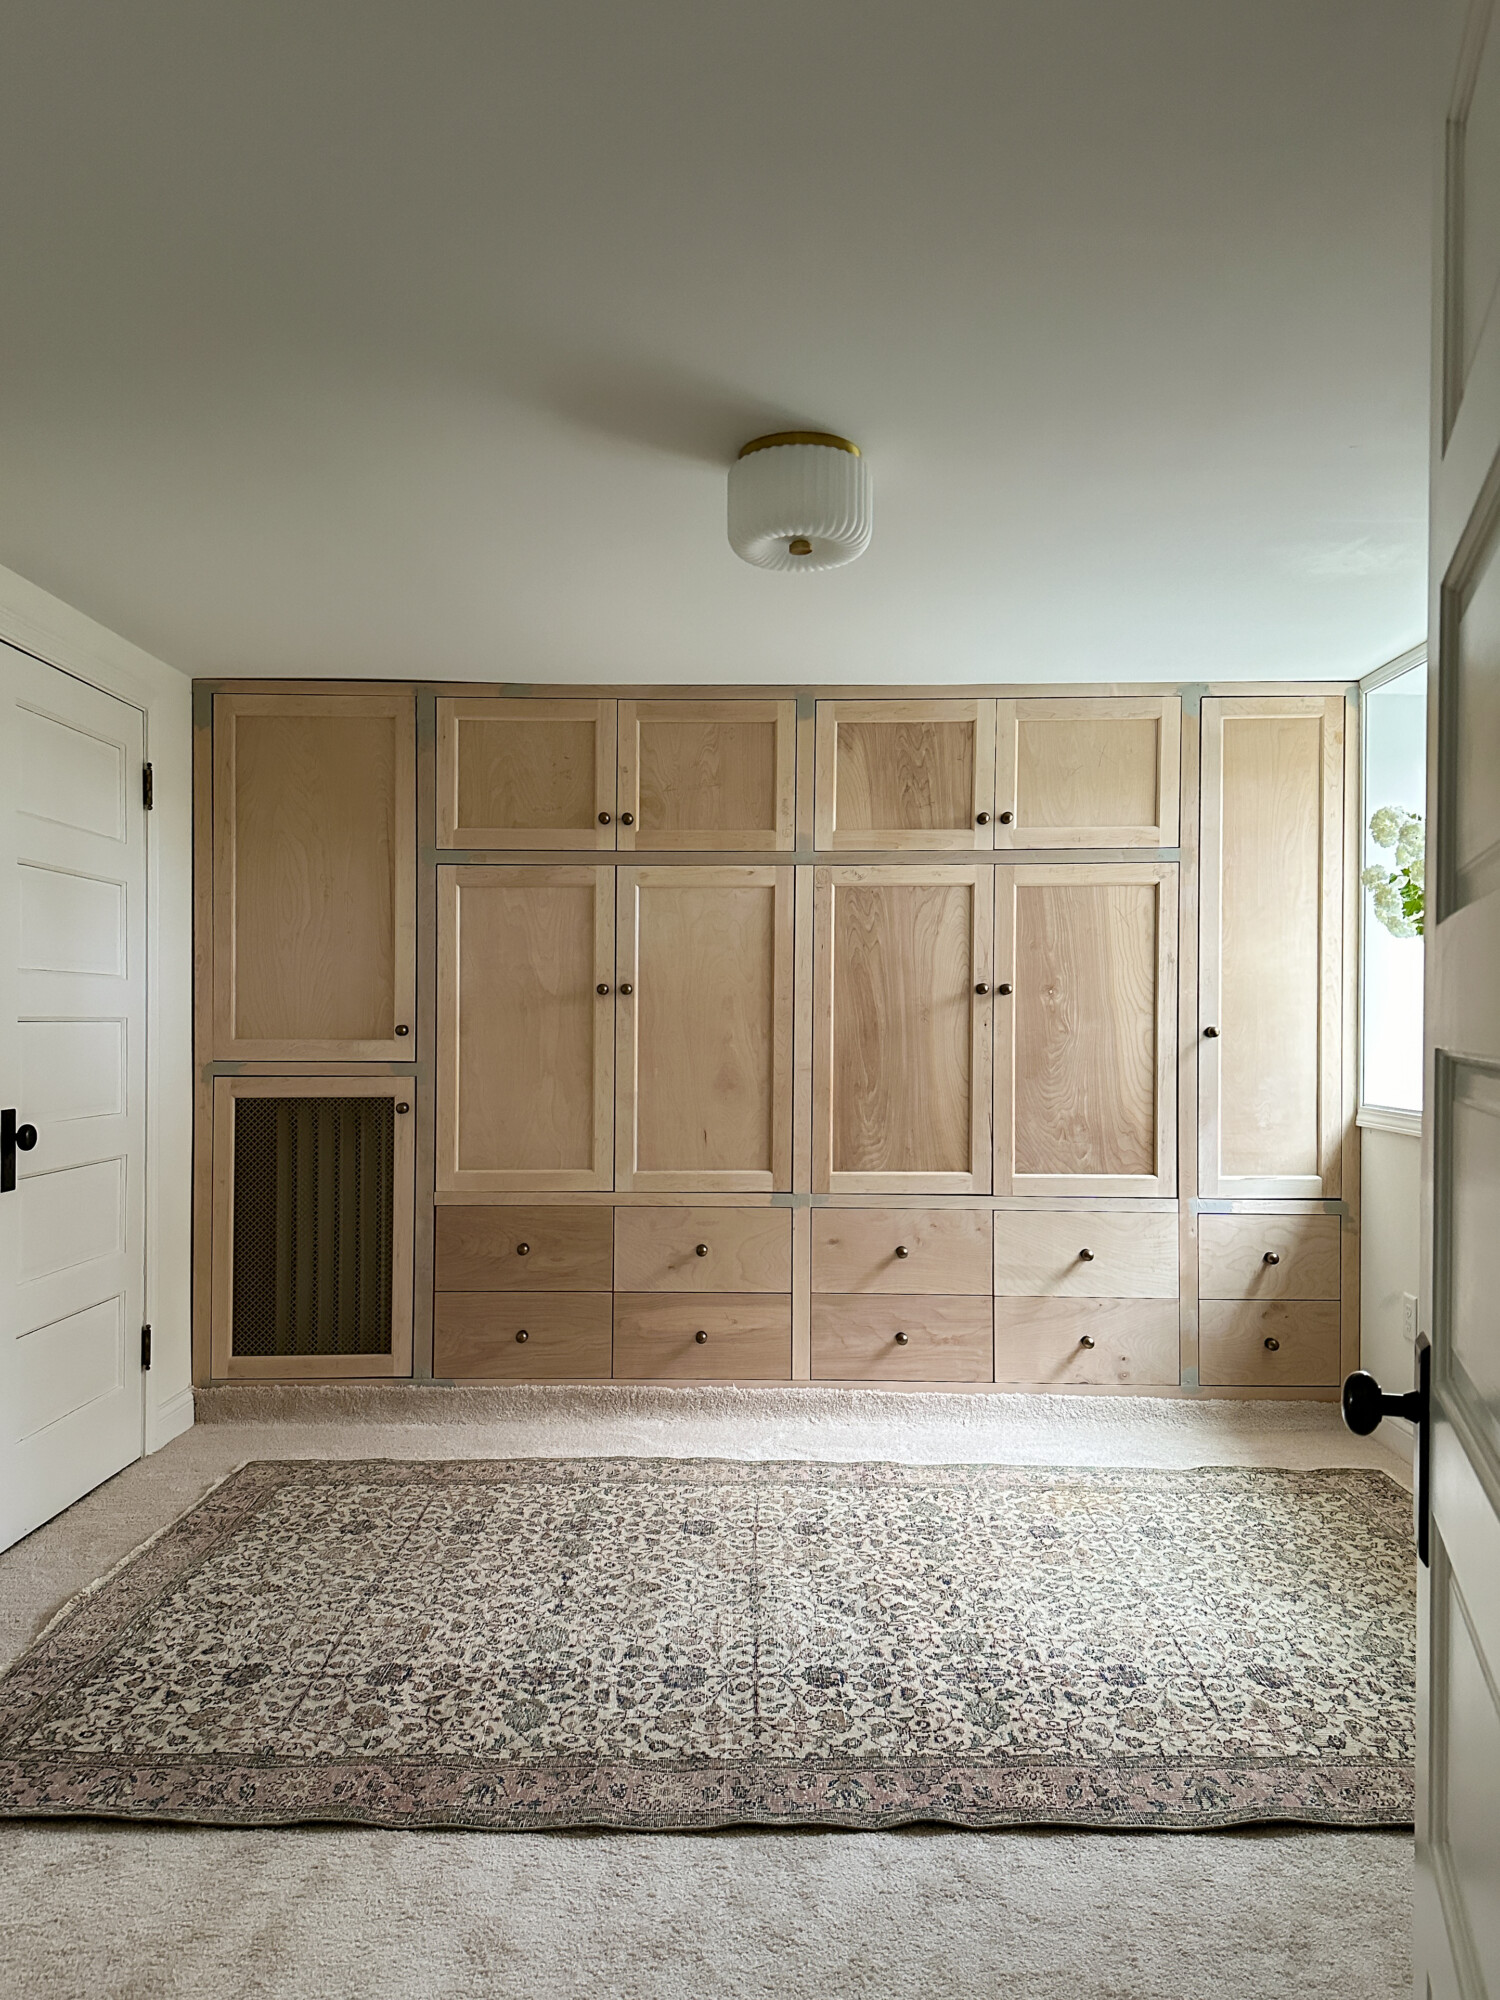
Step 1: Build cabinet boxes
We used a mix of maple and birch wood – whatever was available at the local home improvement stores since we knew we were going to paint the Murphy bed and built-ins. There’s a lot of stain wood throughout our old home so this is a great opportunity to incorporate color. Also, cabinetry of this level is beyond Brian’s skillset. He’s a perfectionist but couldn’t get certain parts to the standards of a professional woodworker and used wood filler to achieve the look he wanted.
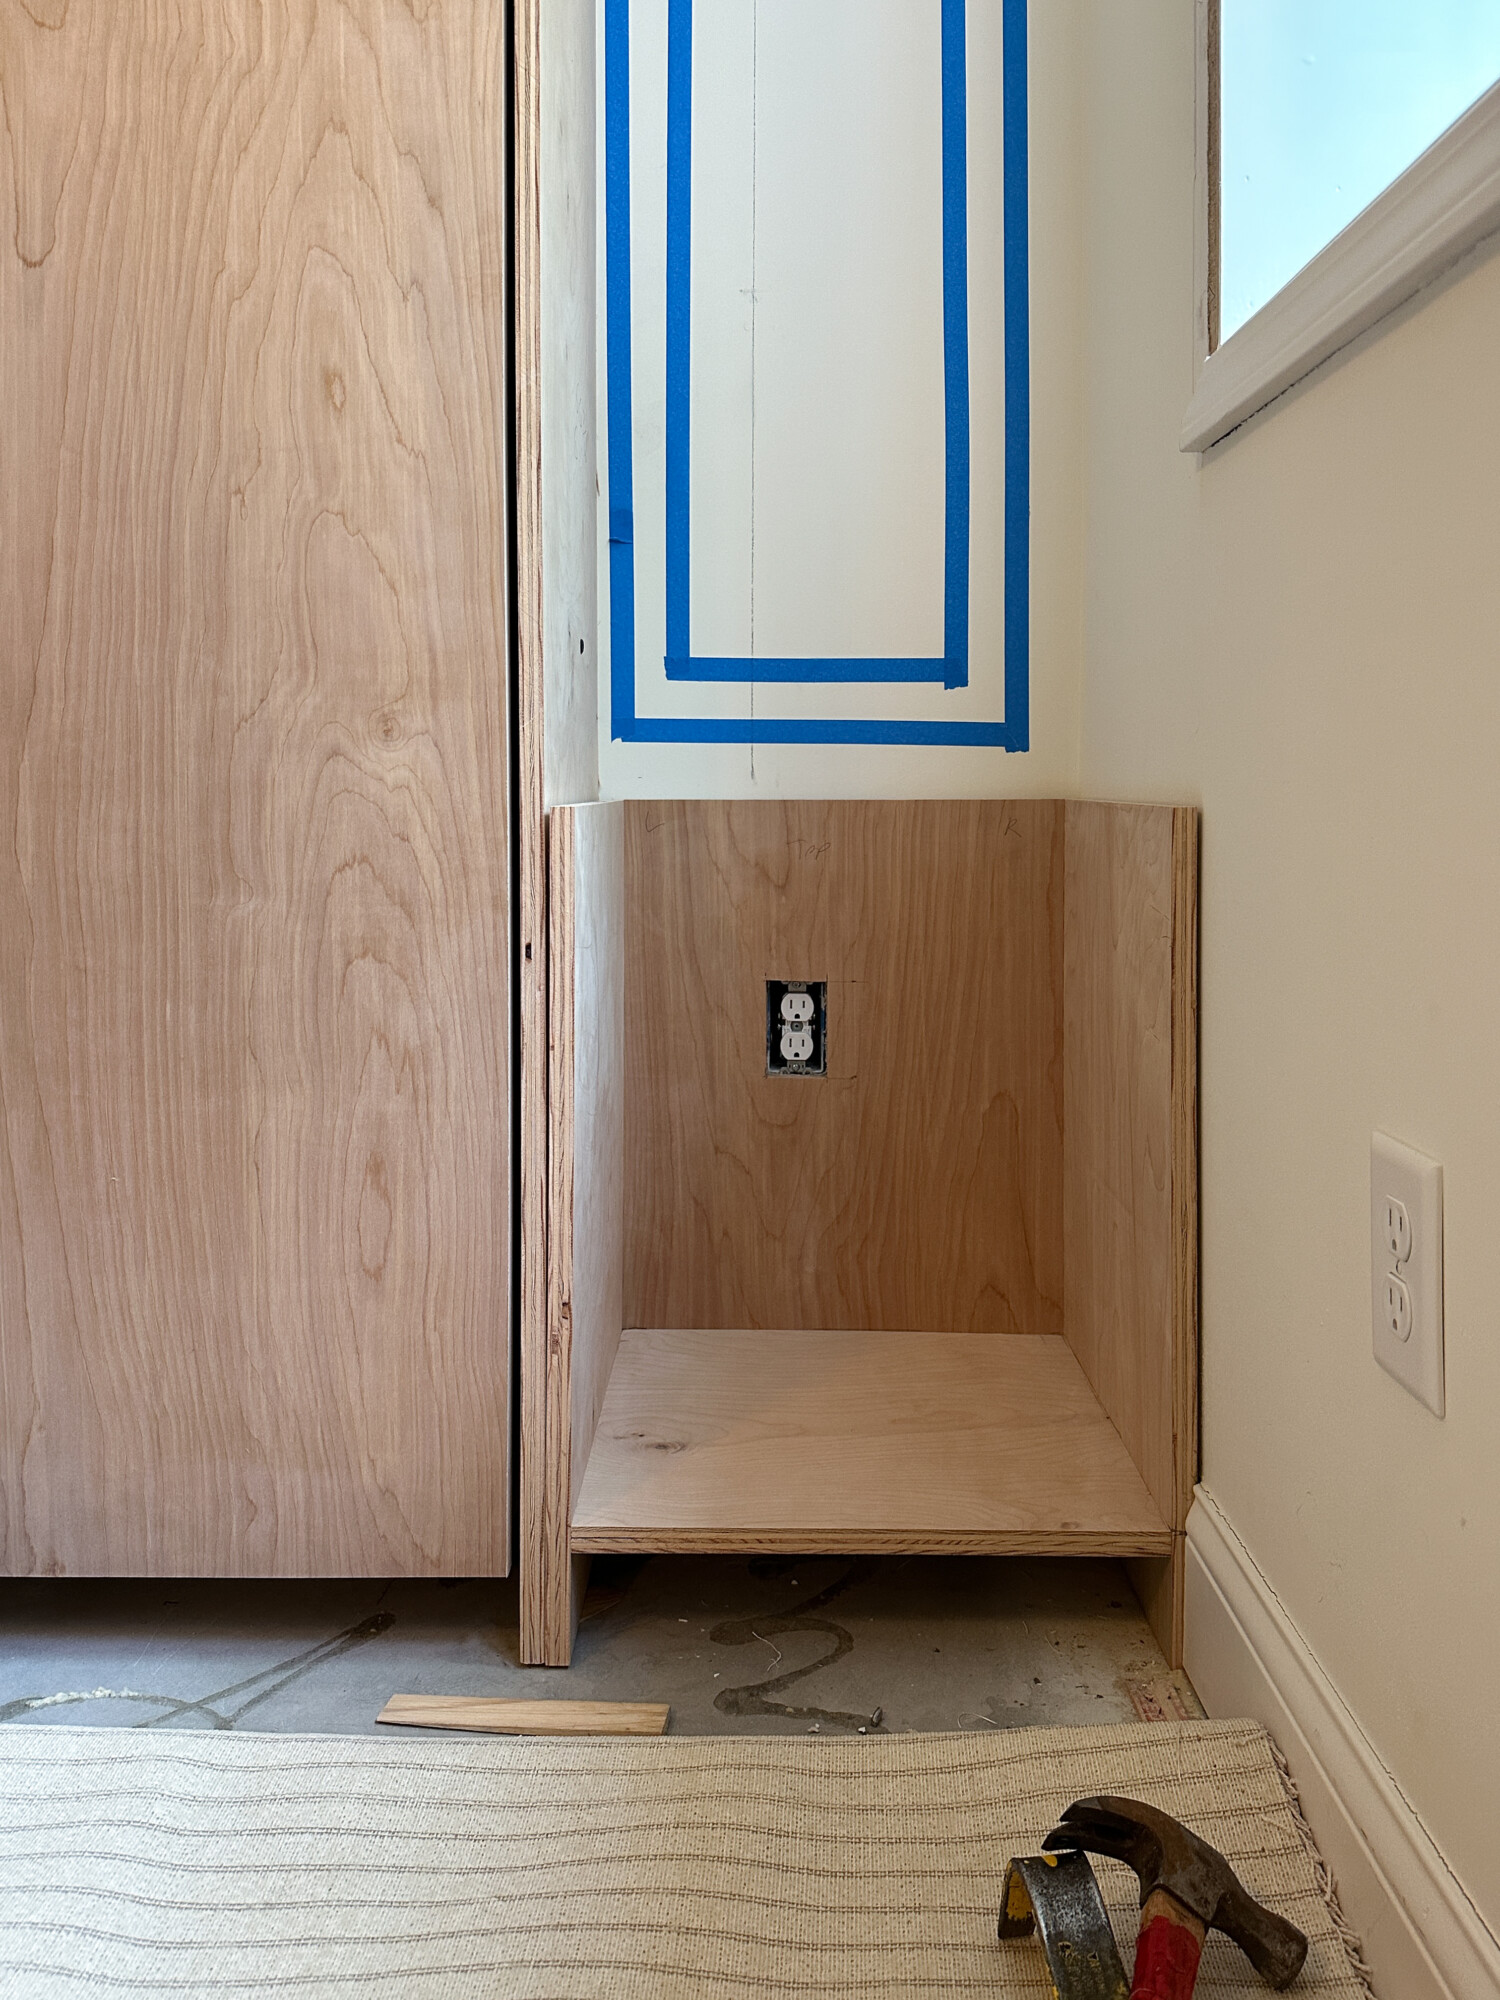
*Tip: you may need to remove nearby trim to slide the cabinet boxes into place. We had to remove our window trim to squeeze in this upper one.
Trying to get the boxes to fit as perfectly as possible was very challenging. Brian had to do a lot of re-cuts so don’t be discouraged if you experience the same.
*Tip: use a long level to check that boxes are level and plumb
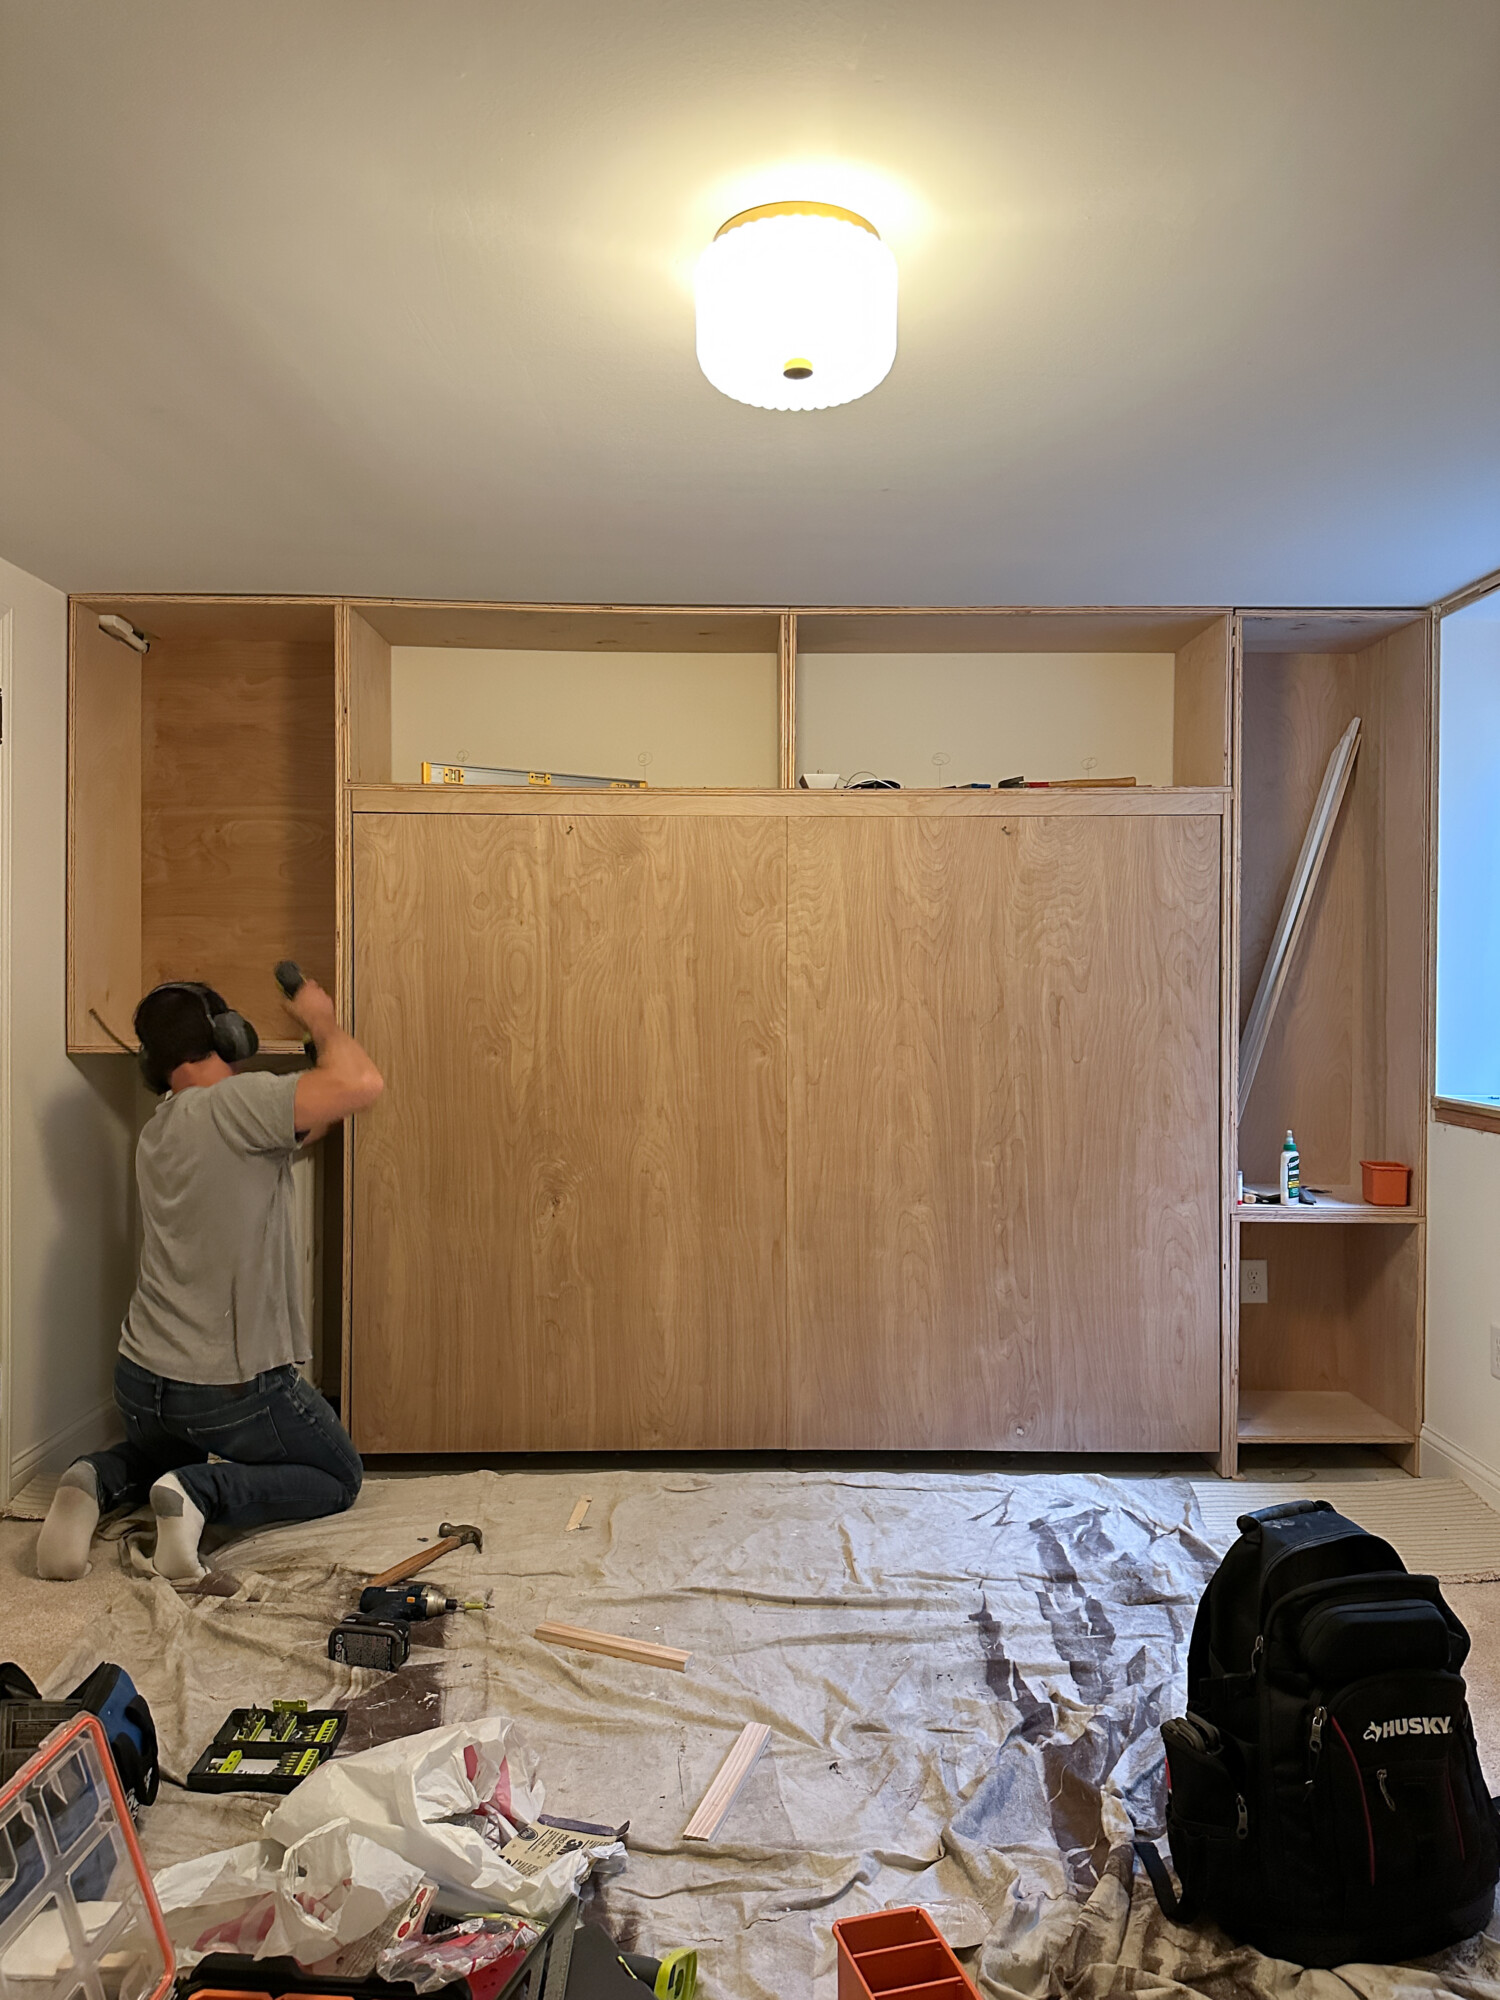
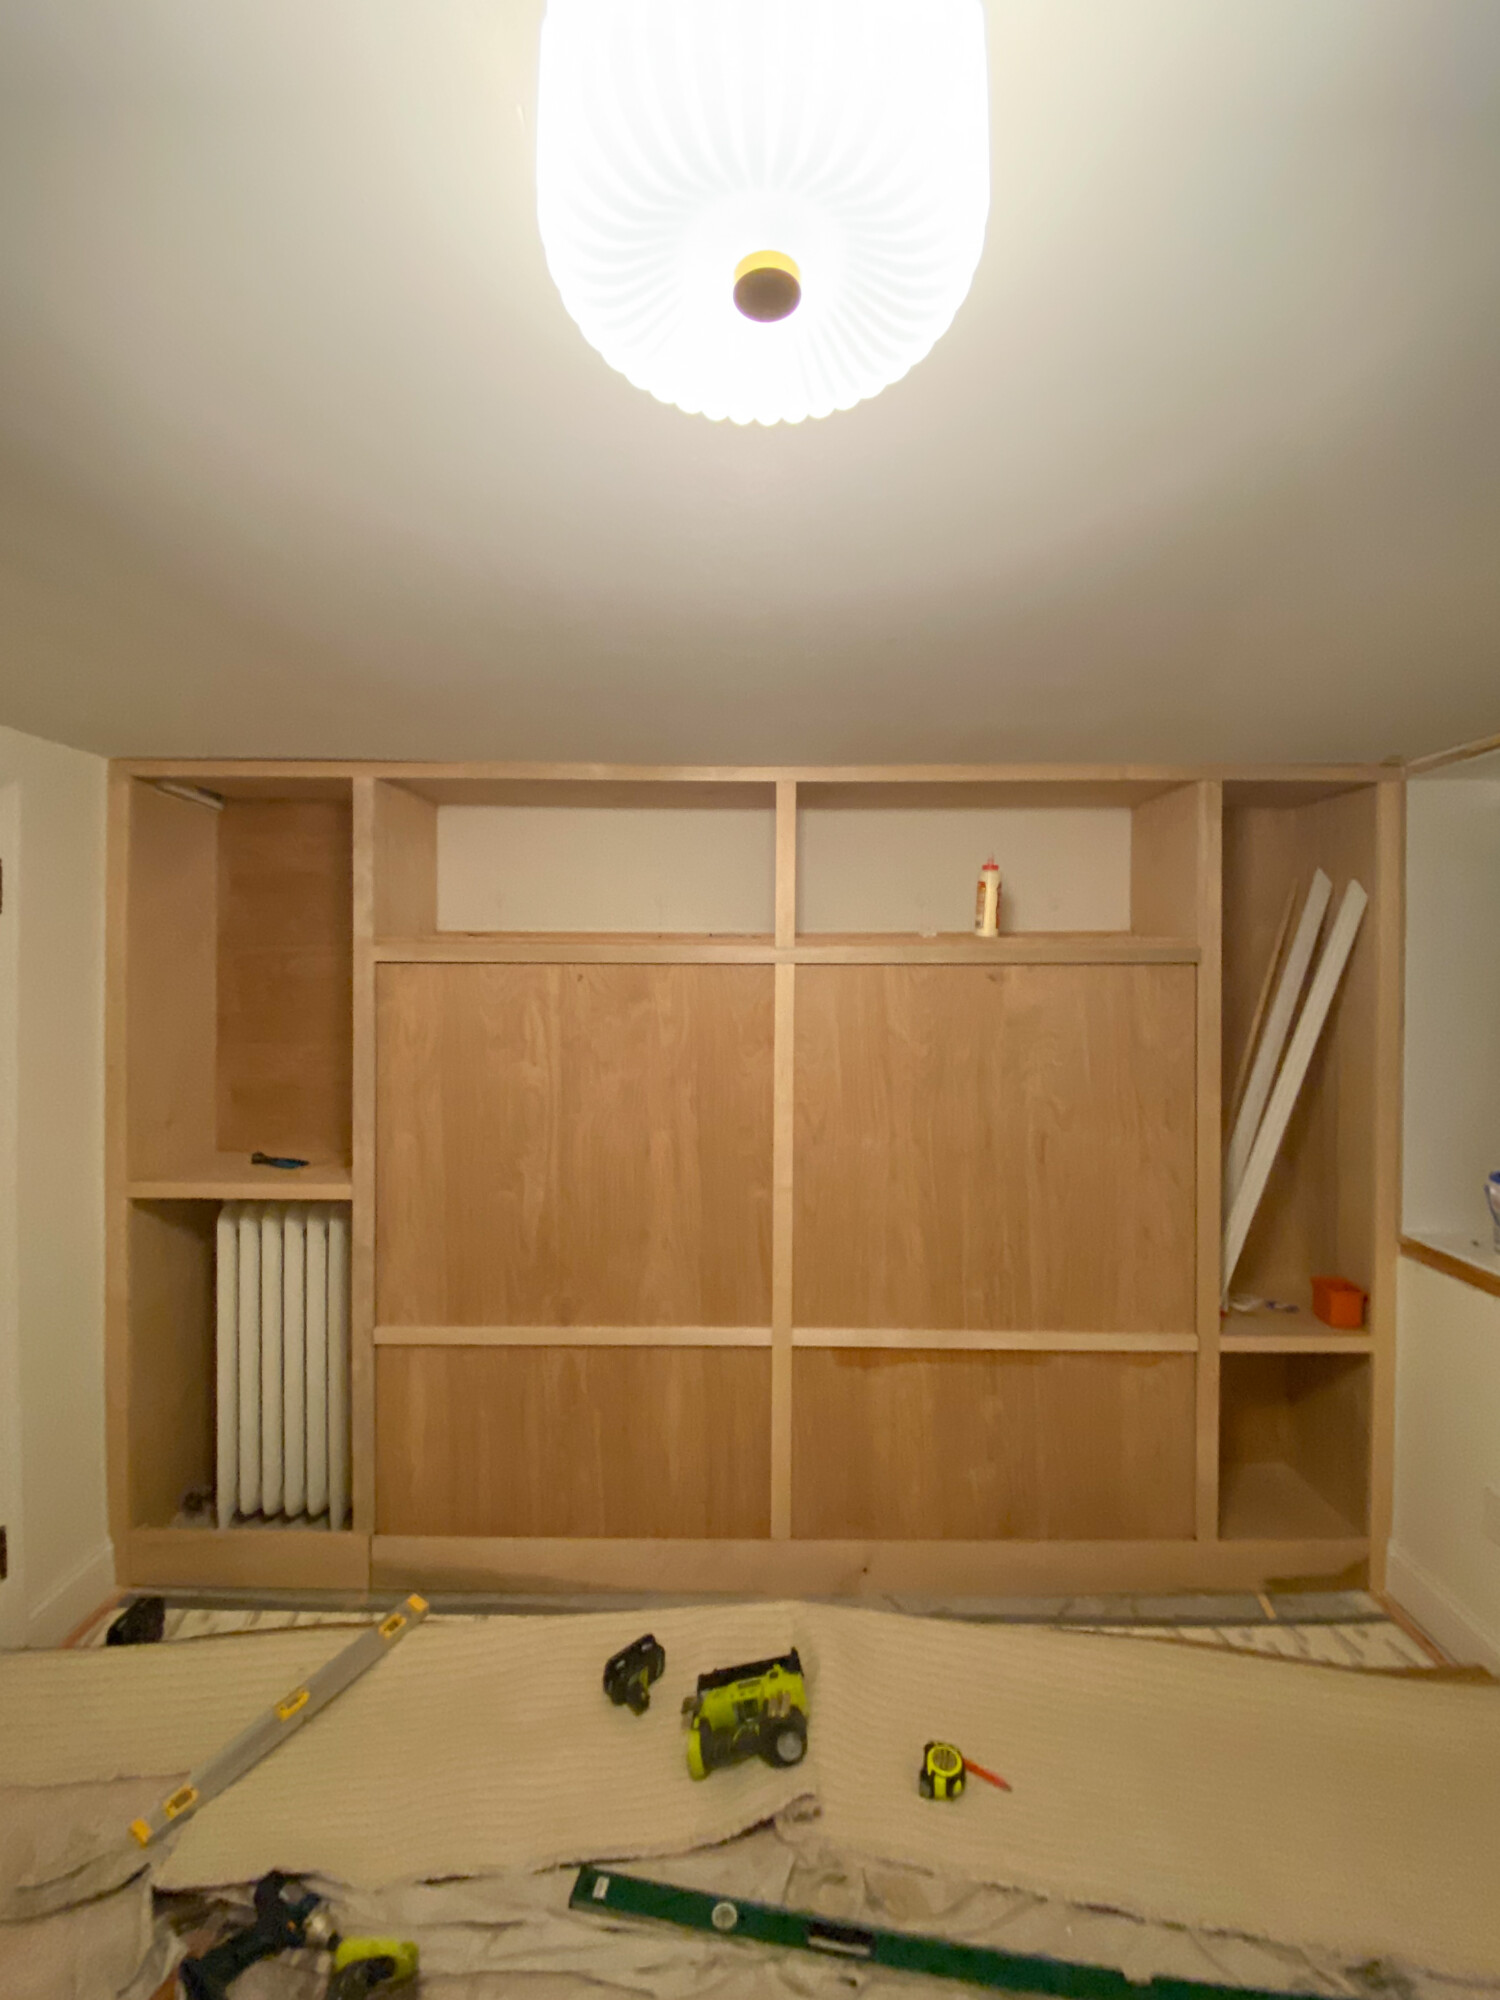
Step 2: Install face frames
After boxes are installed, for inset cabinets, you need to include face frames.
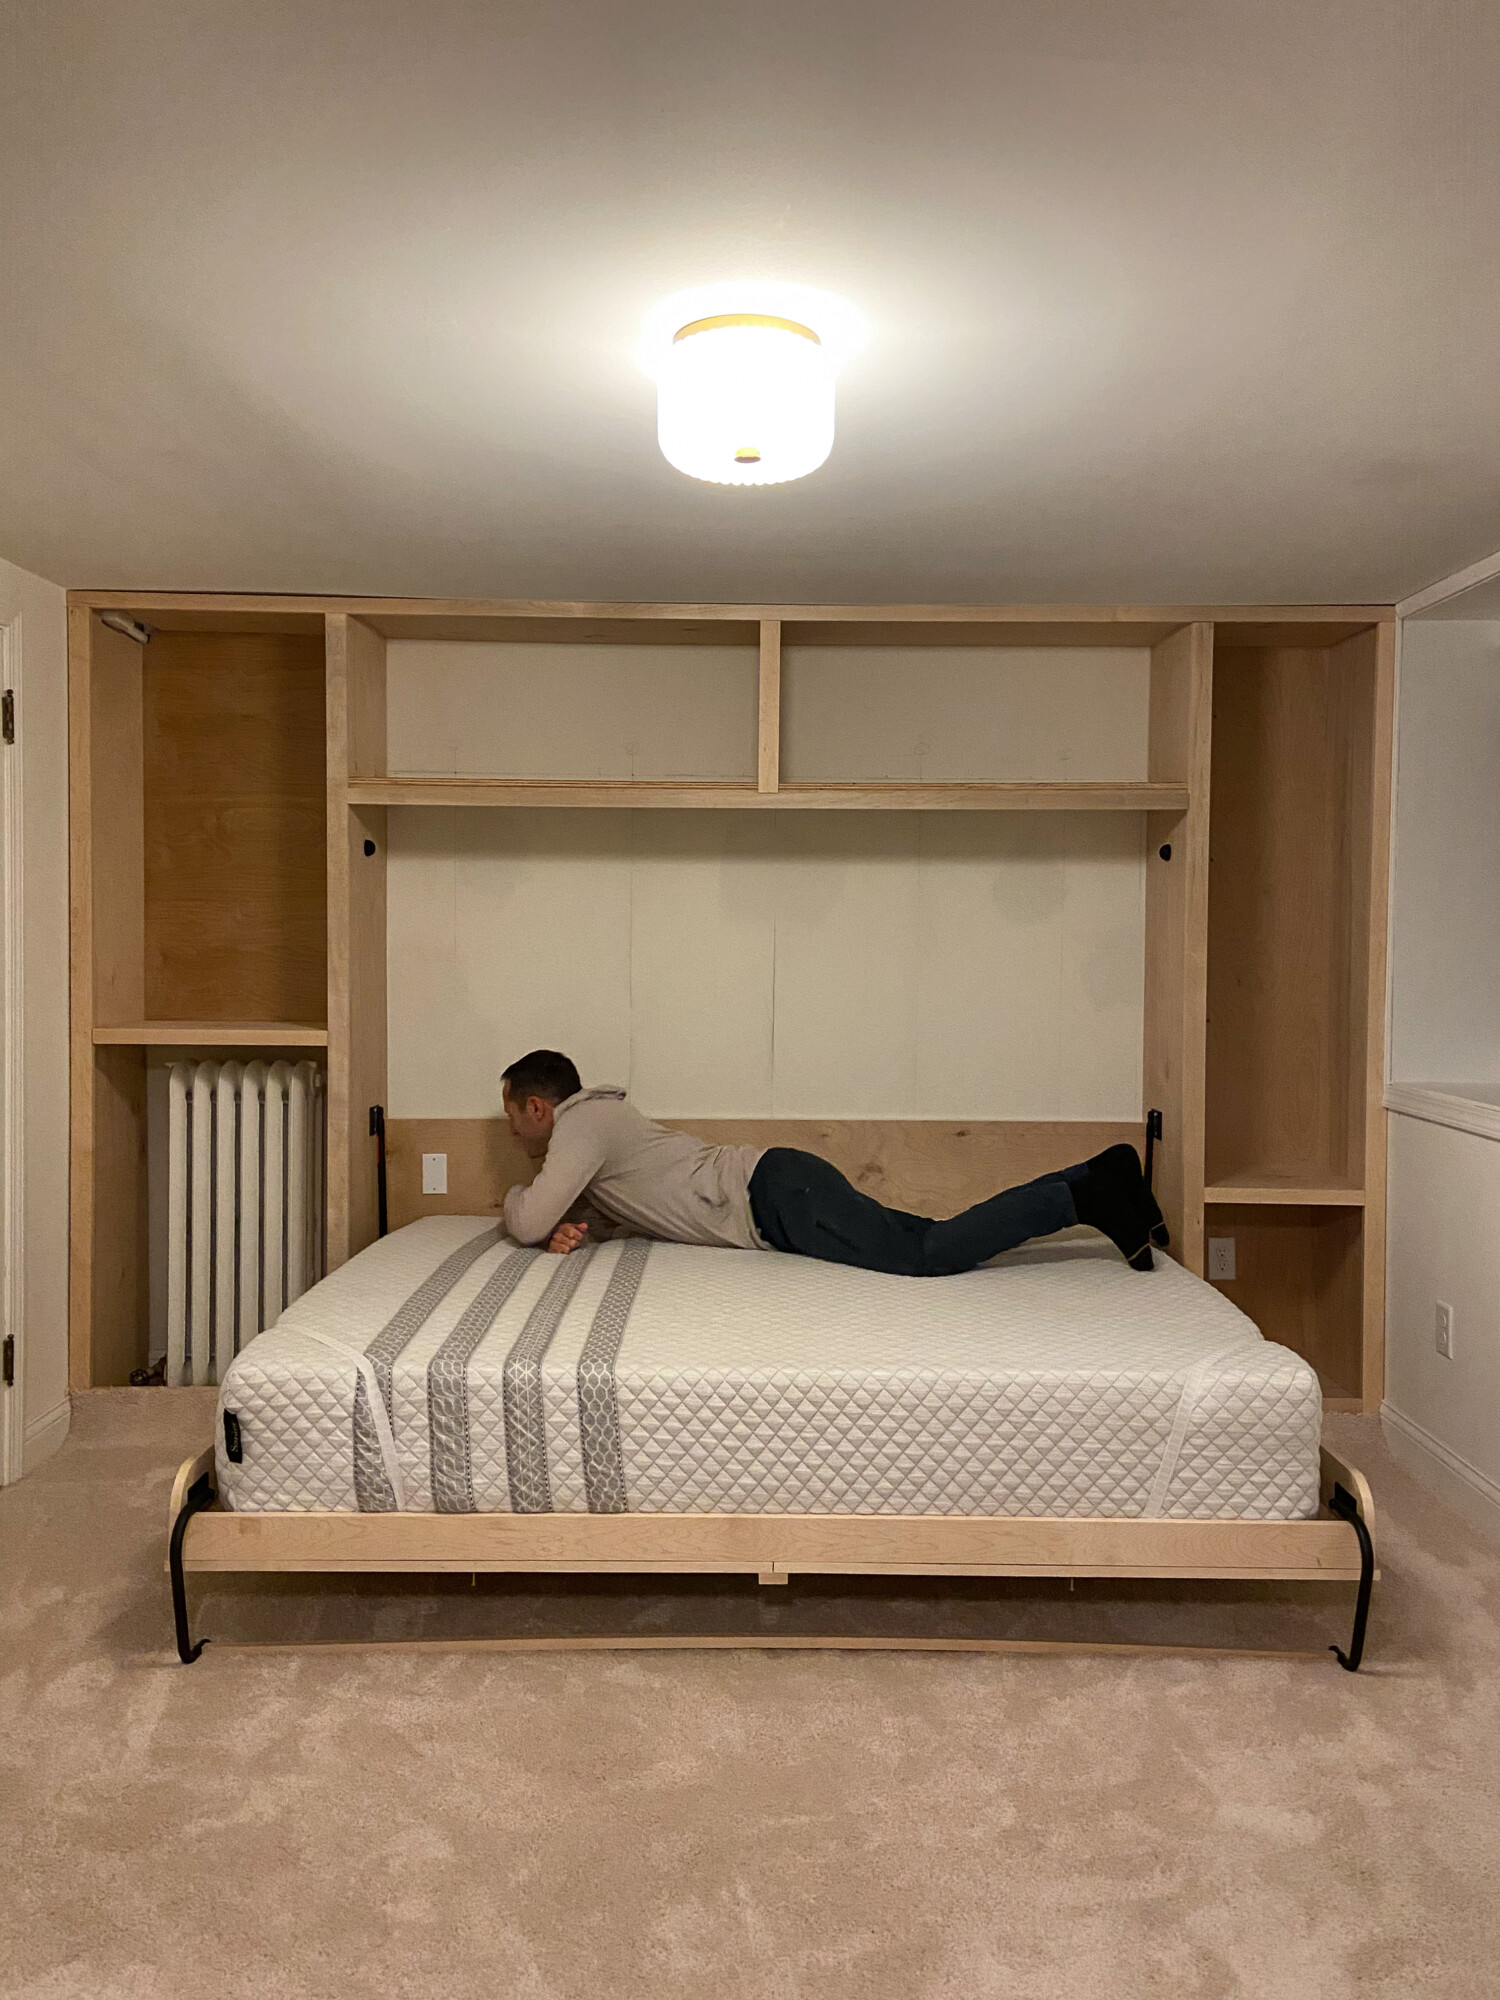
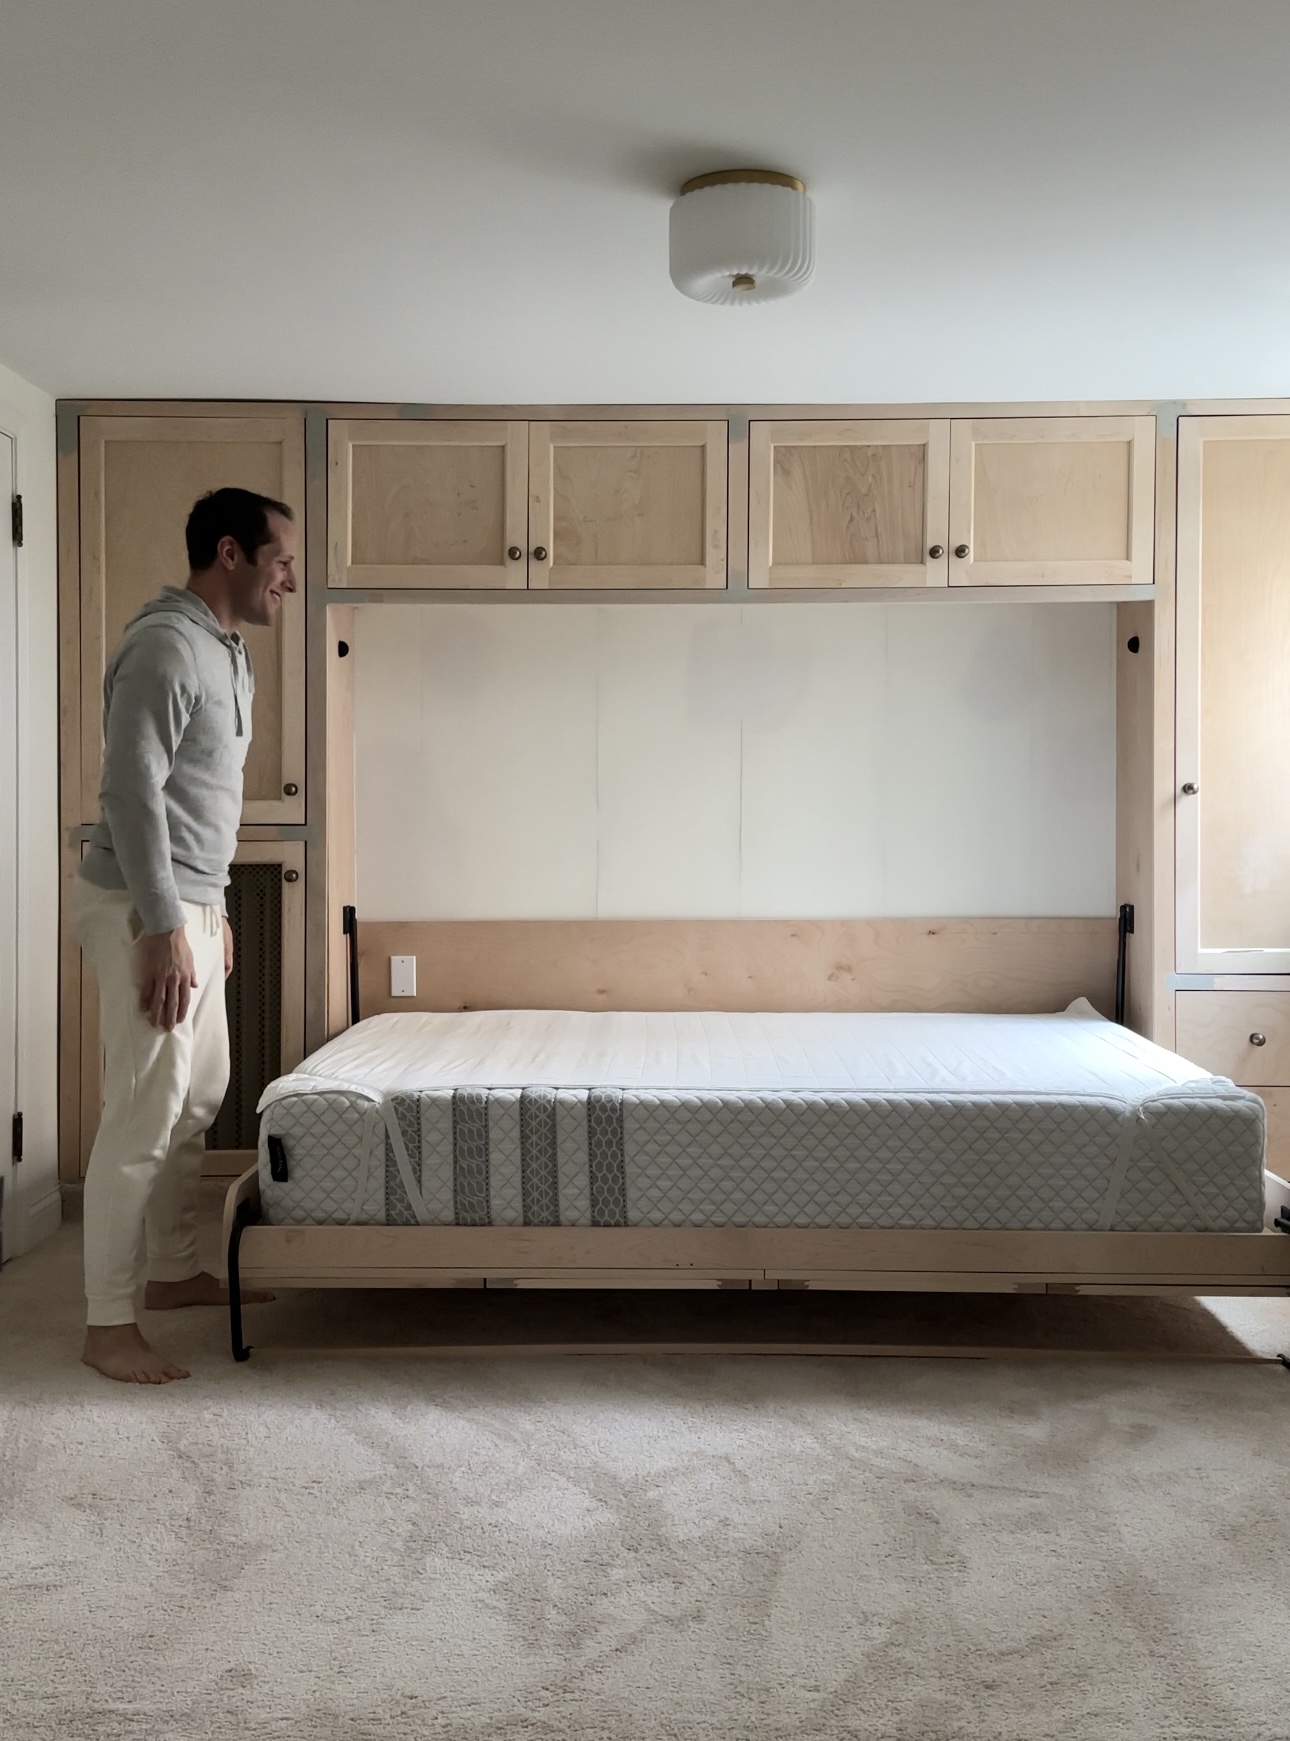
Brian testing out the Murphy bed 🙂
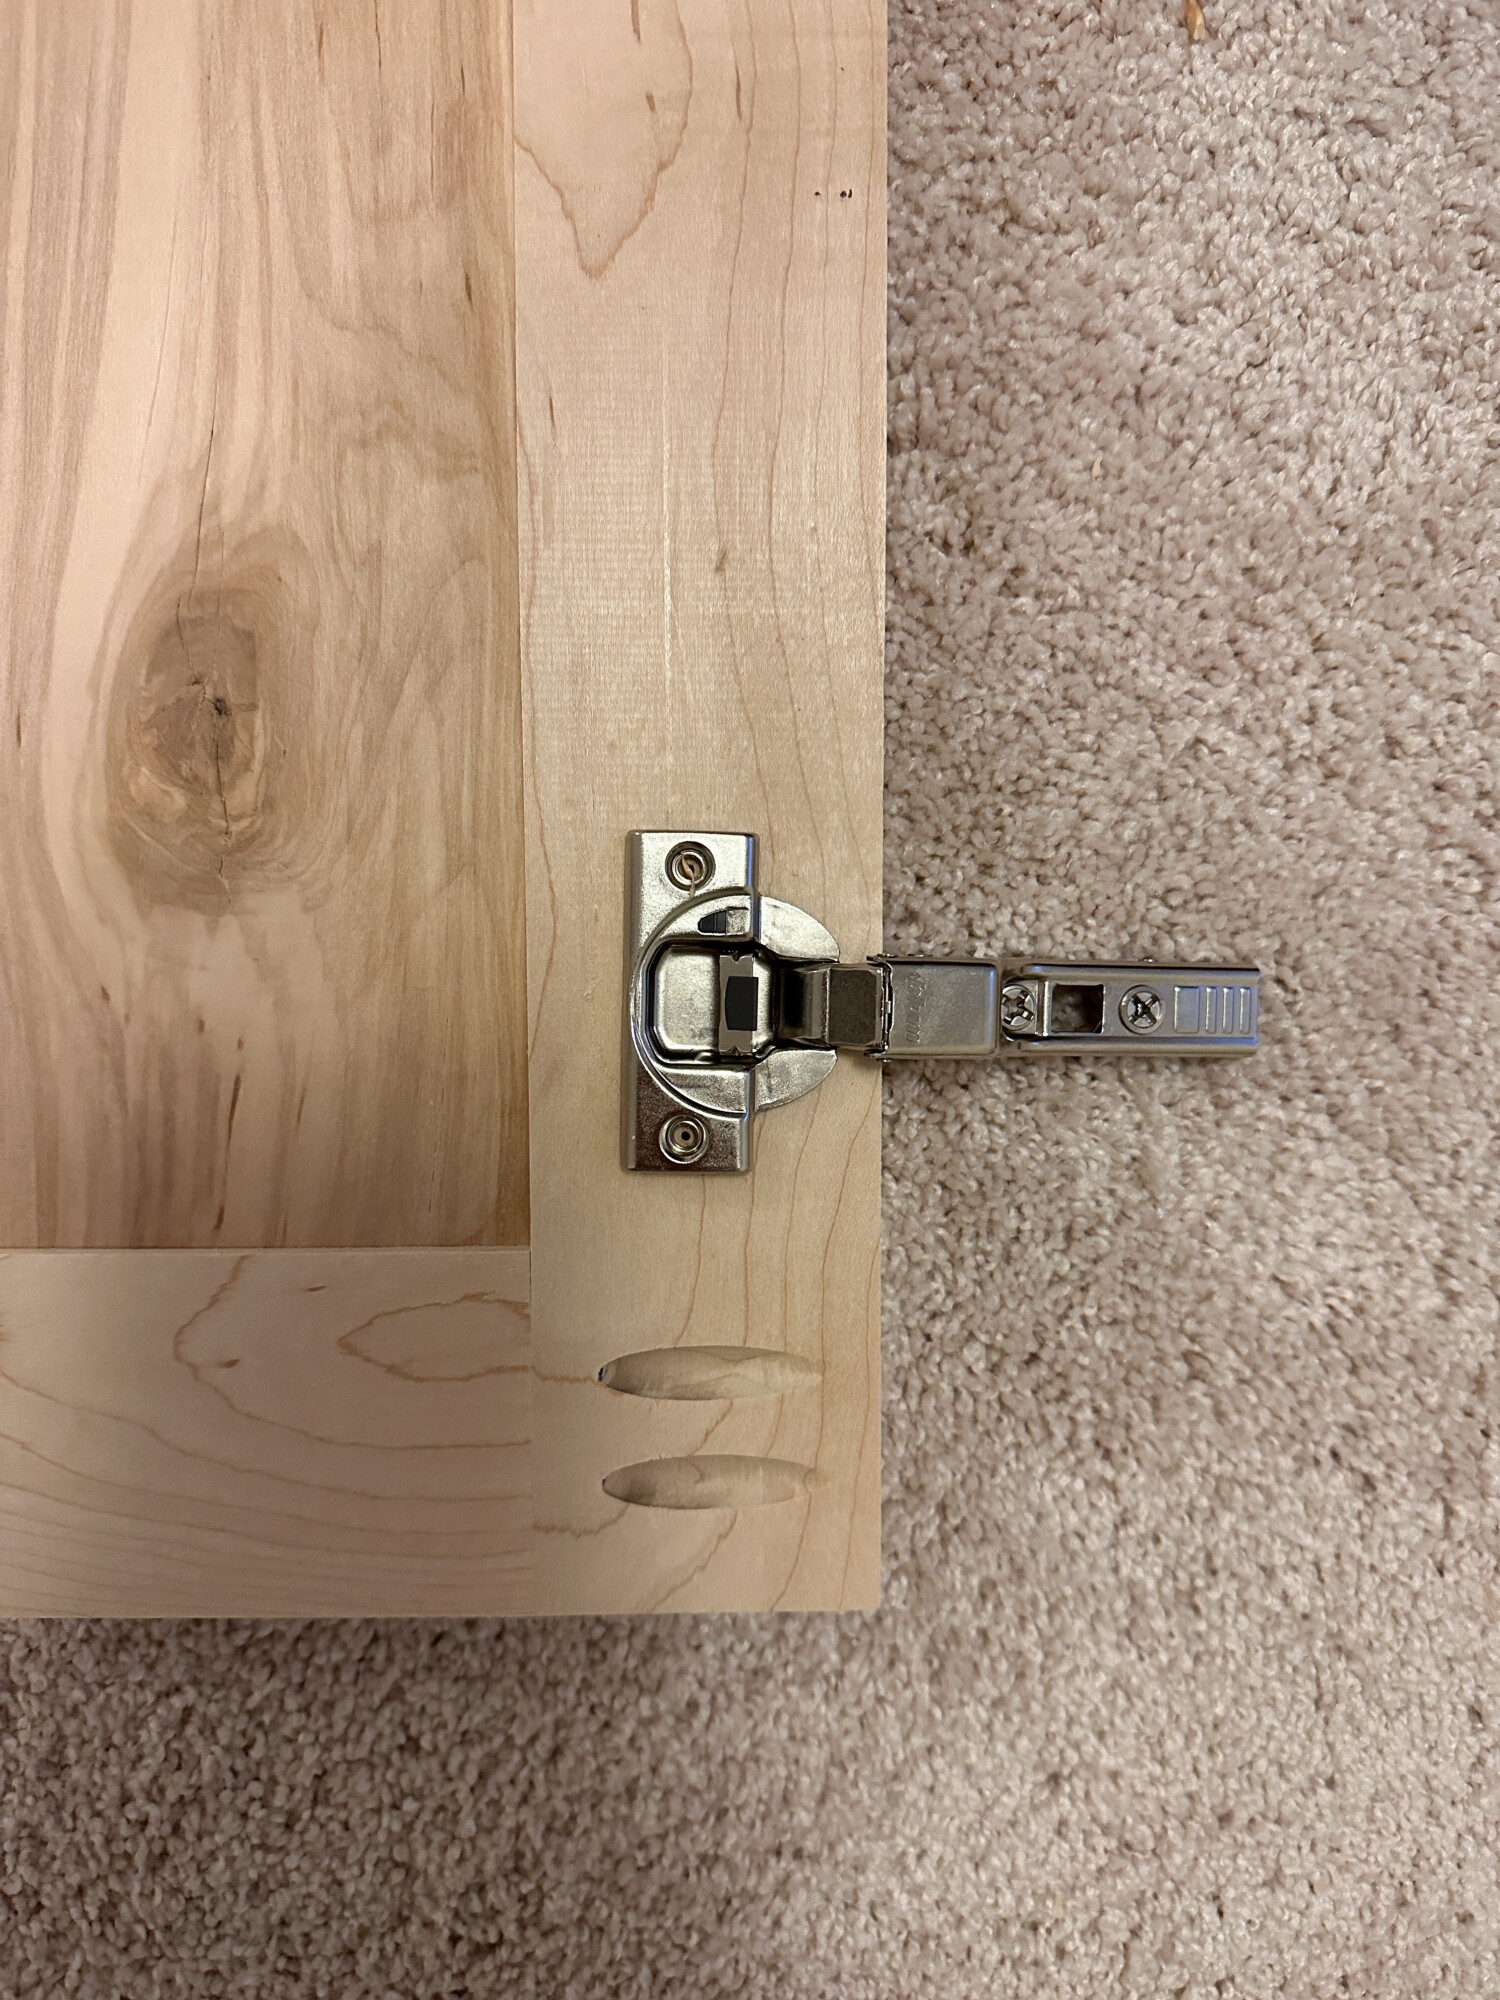
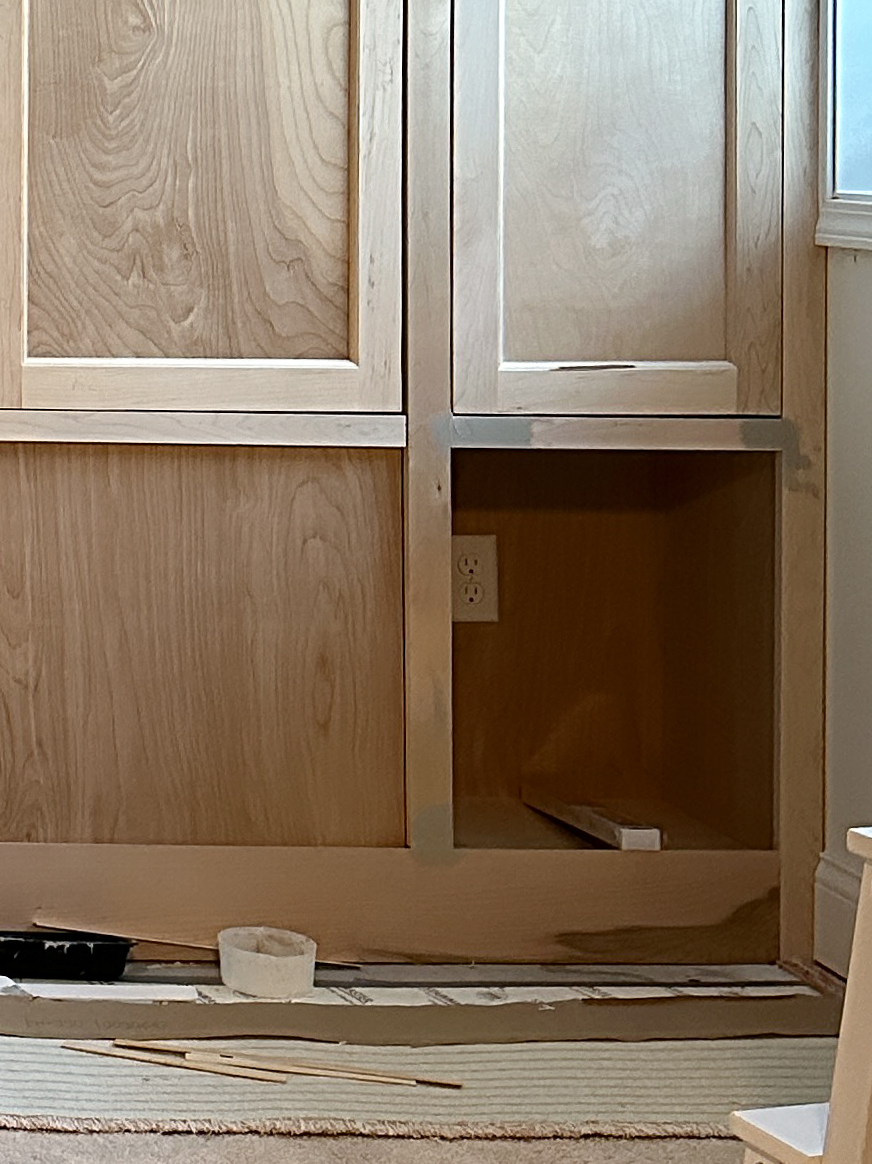
Step 3: Install doors, faux doors + drawers
Once the cabinet boxes and face frames are installed, you’ll need to cut doors, faux doors + drawers to size. Be prepared for several rounds of tweaks.
Install doors. Like Brian’s band practice space, we used the Kreg Concealed Hinge Jig to make perfect circles for the hinges.
Product Sources
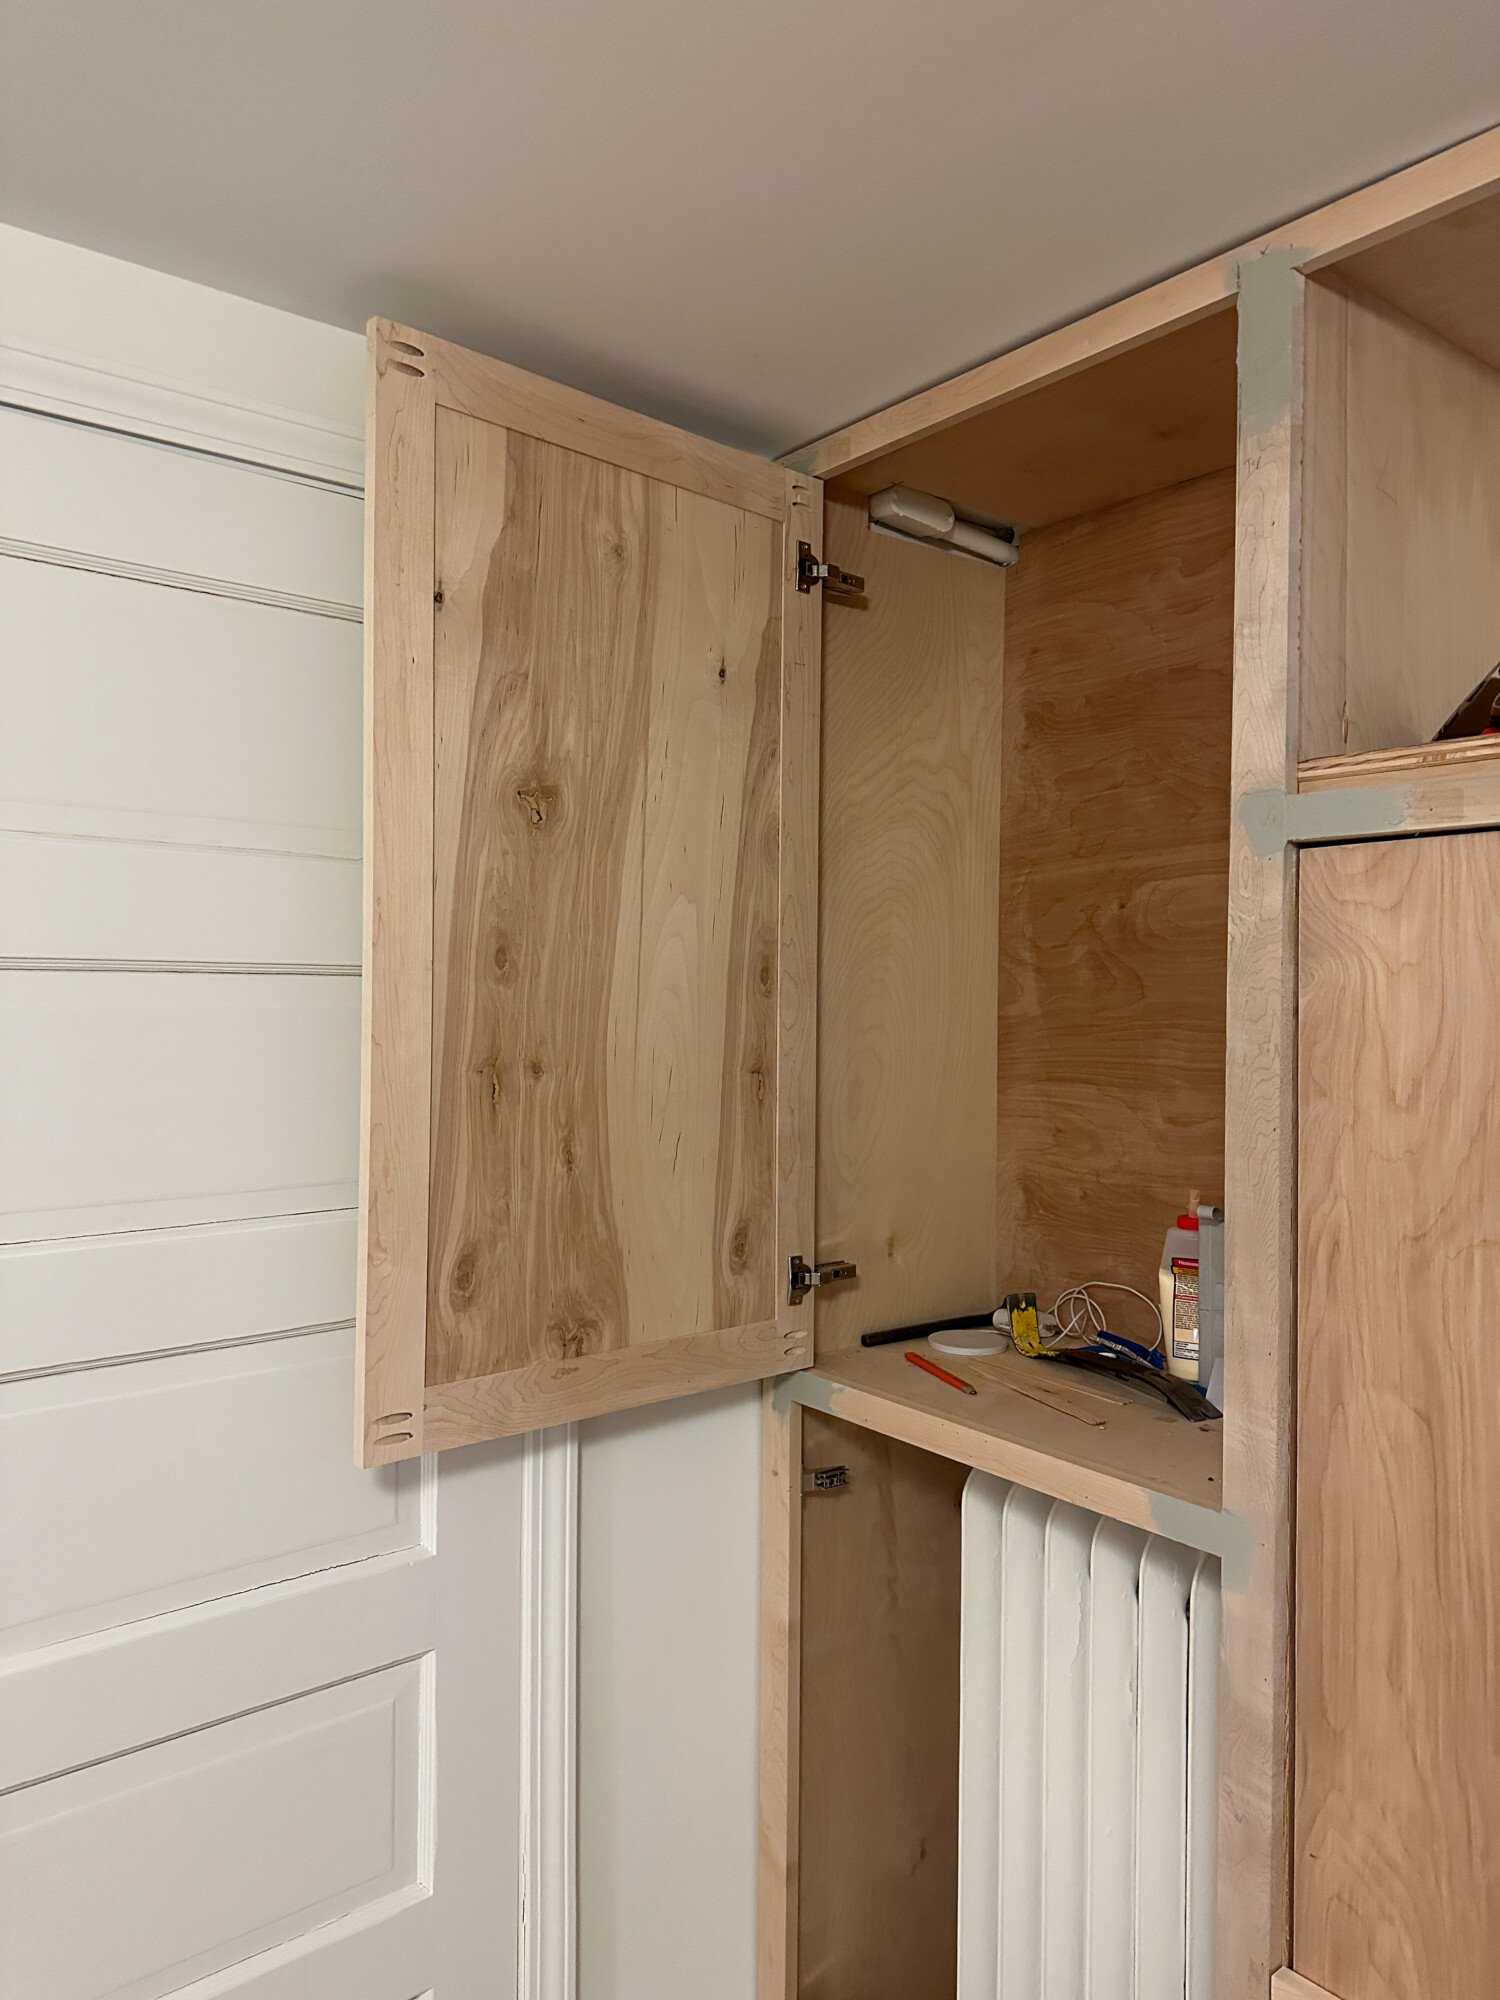
It took a lot of patience to cut the doors. You can see wood filler where we had to touch up. We also decided to cover the radiator which I’ll touch on in another post.
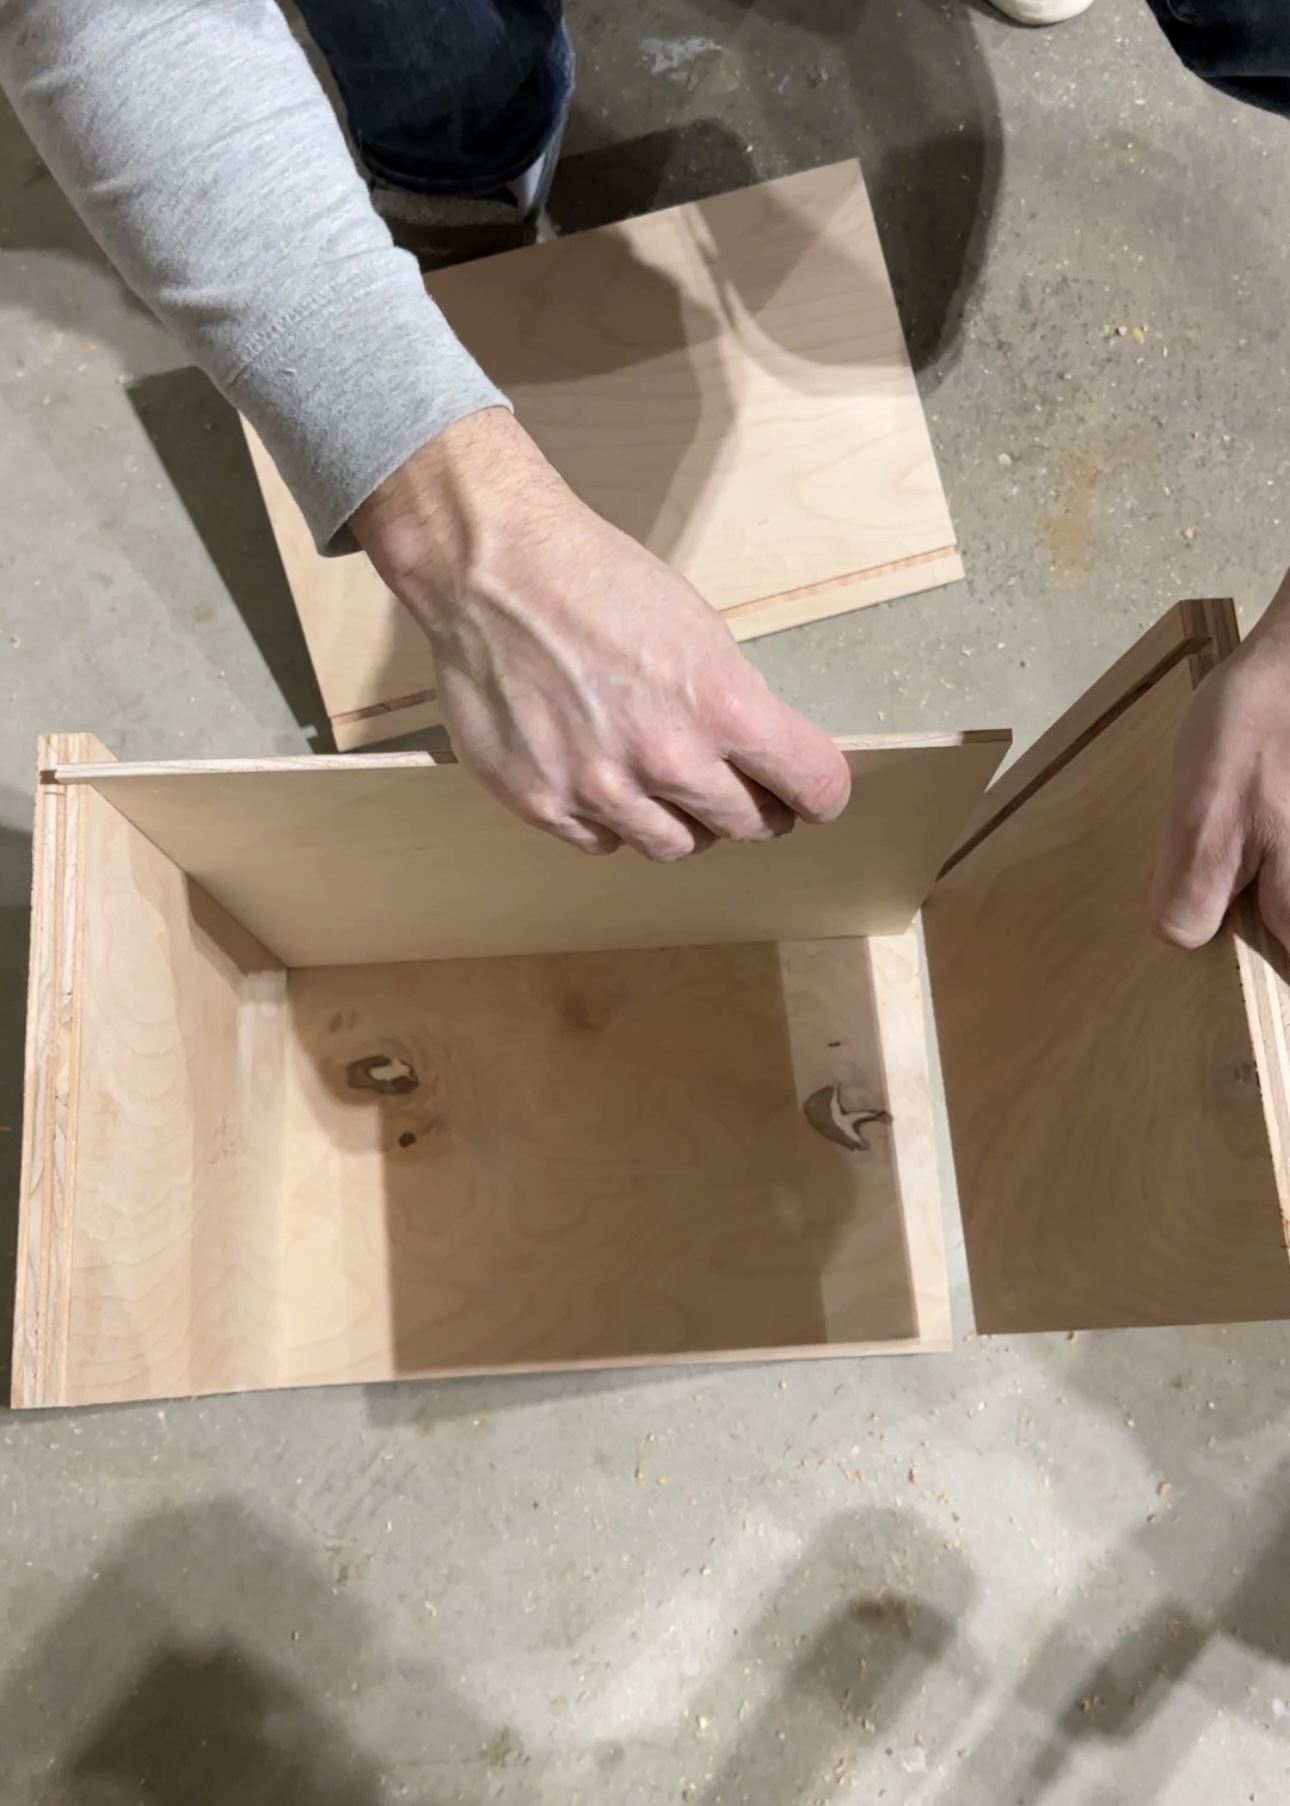
Step 4: Build drawers
Time to build the drawers. Brian has been very happy with his new table saw and highly recommends it for this project.
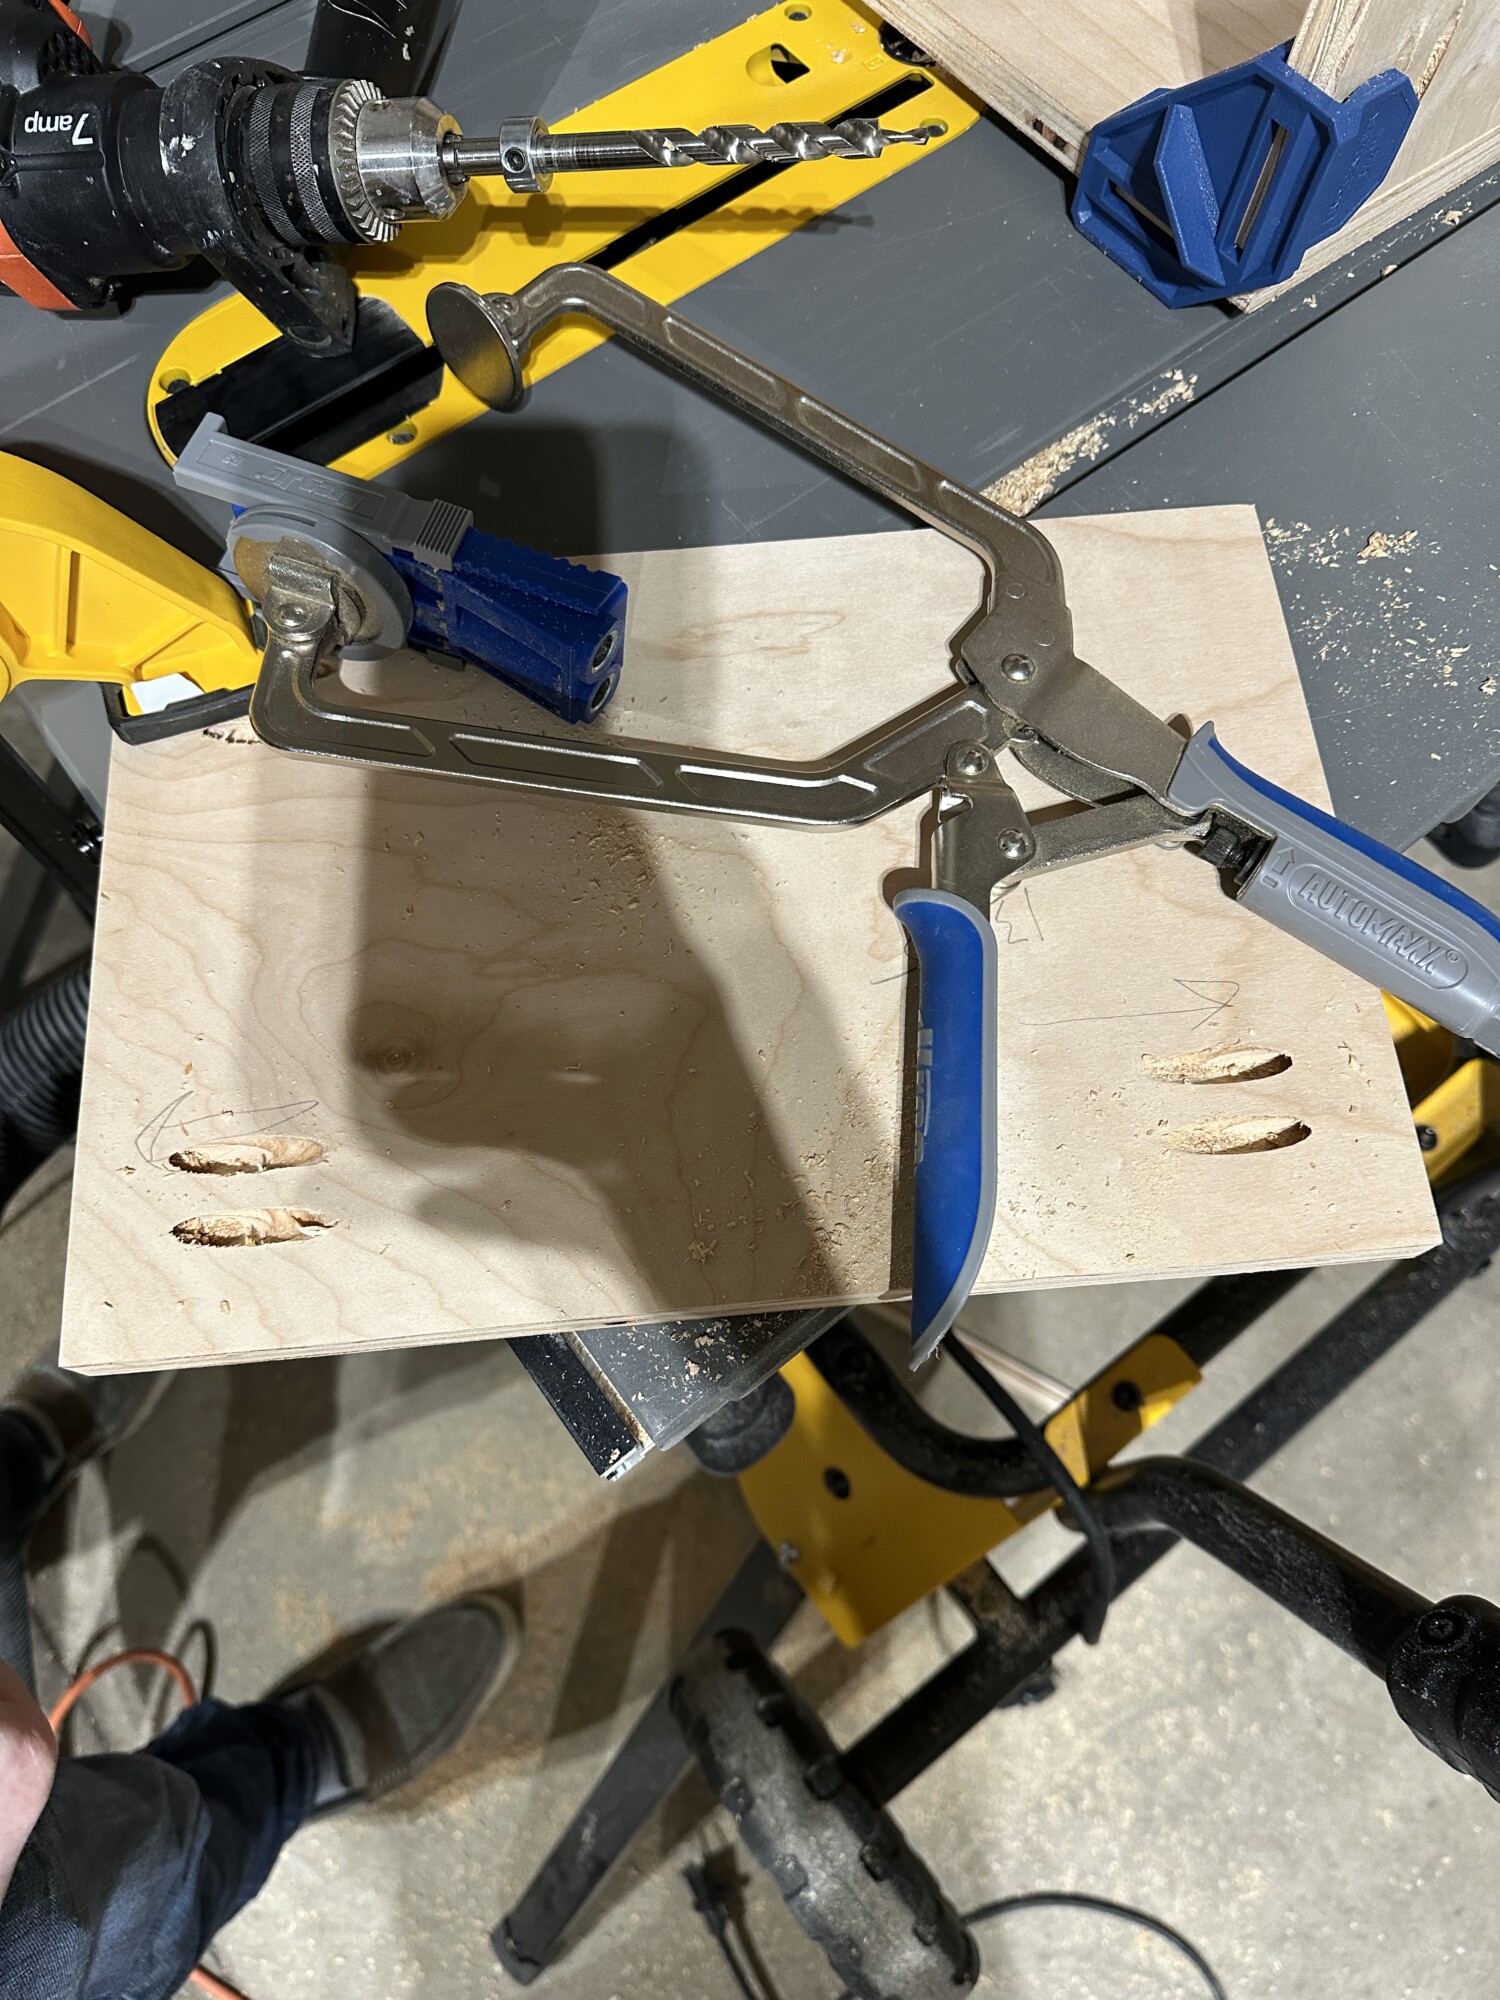

Pocket screws and dado were used to construct the drawers.
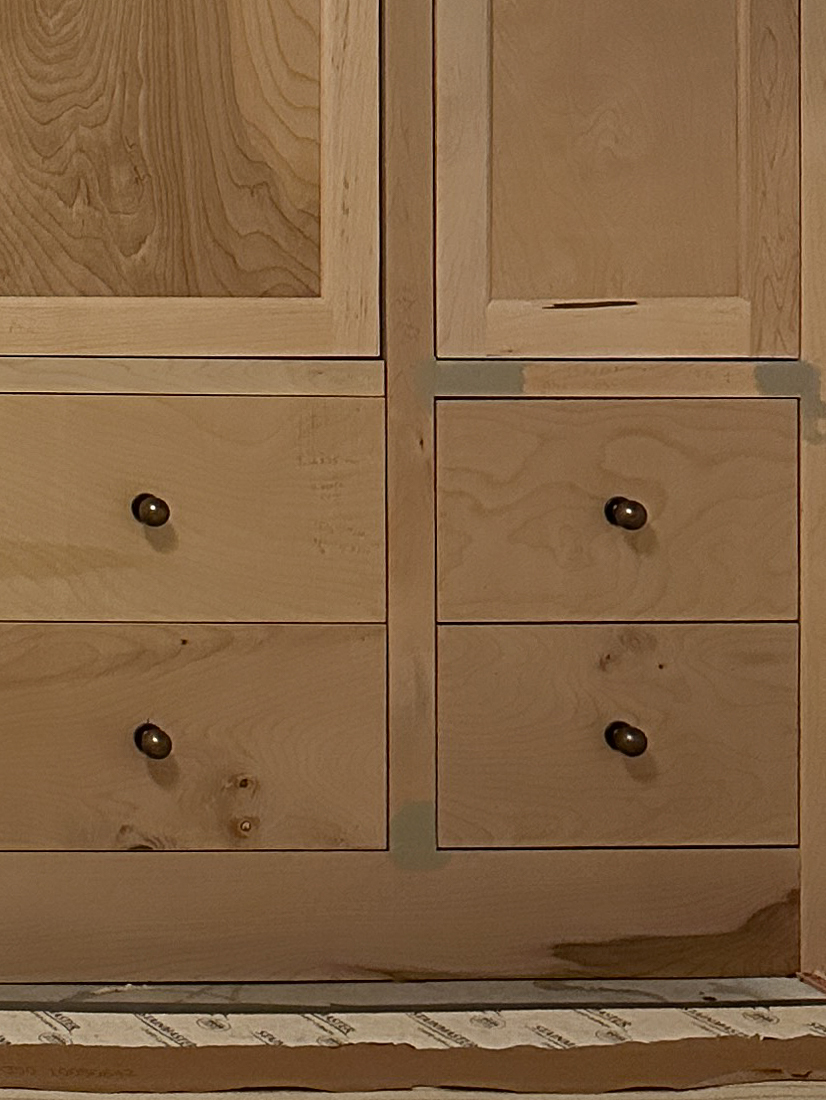
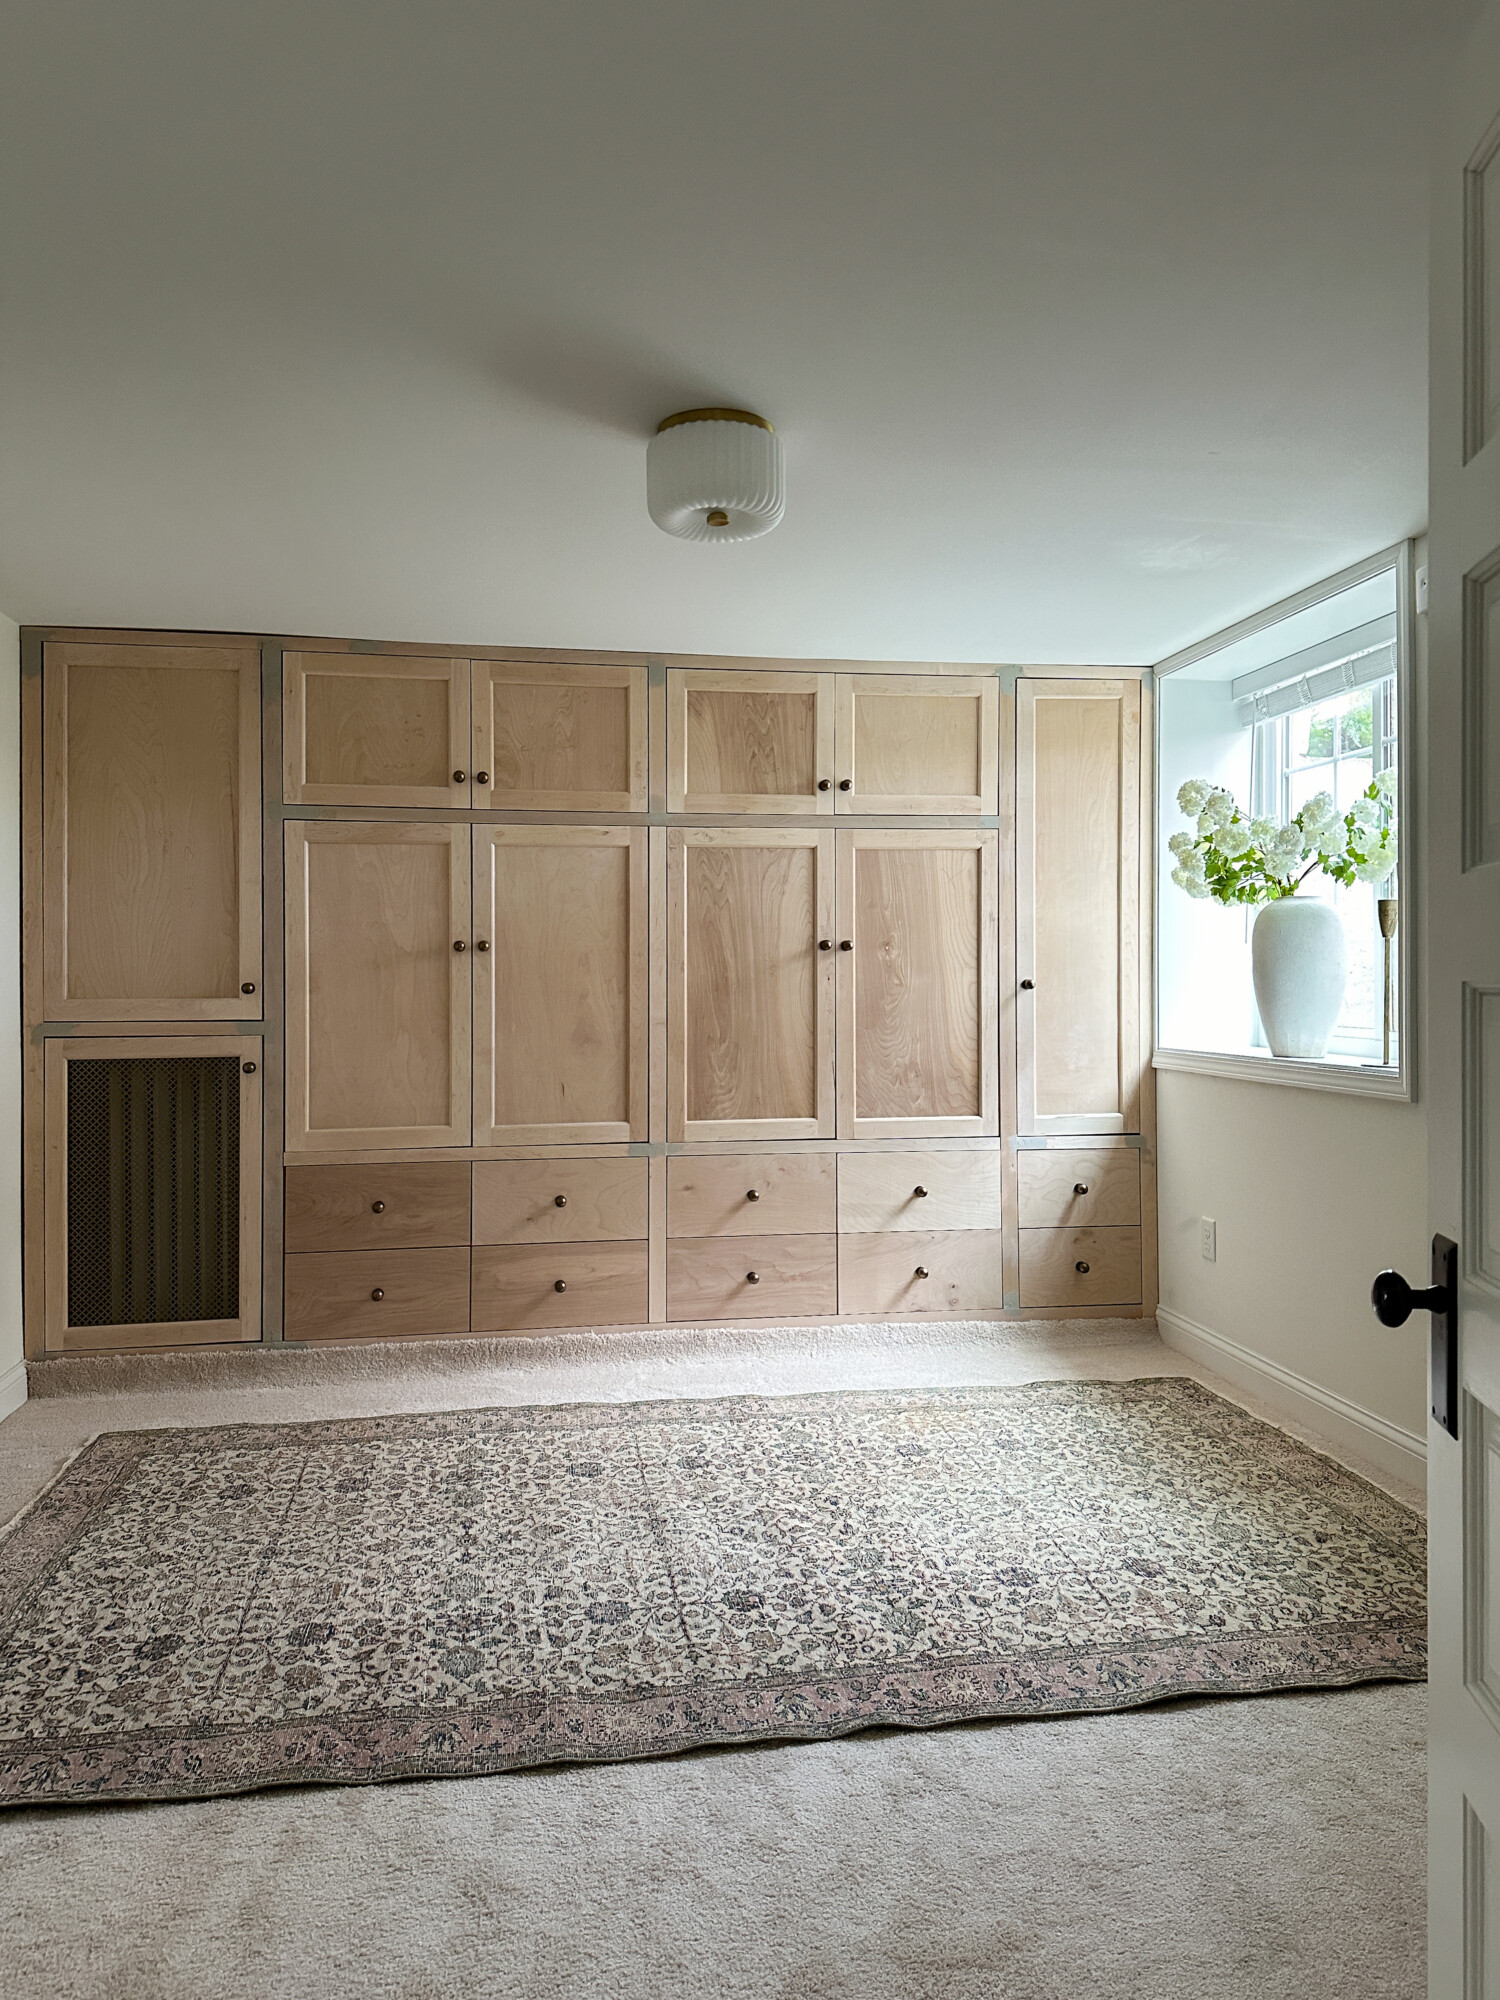
Step 5: Install drawers and hardware
We opted for soft close drawer slides and installed these antique brass knobs which are the same as our ensuite bathroom vanity but in a larger size.
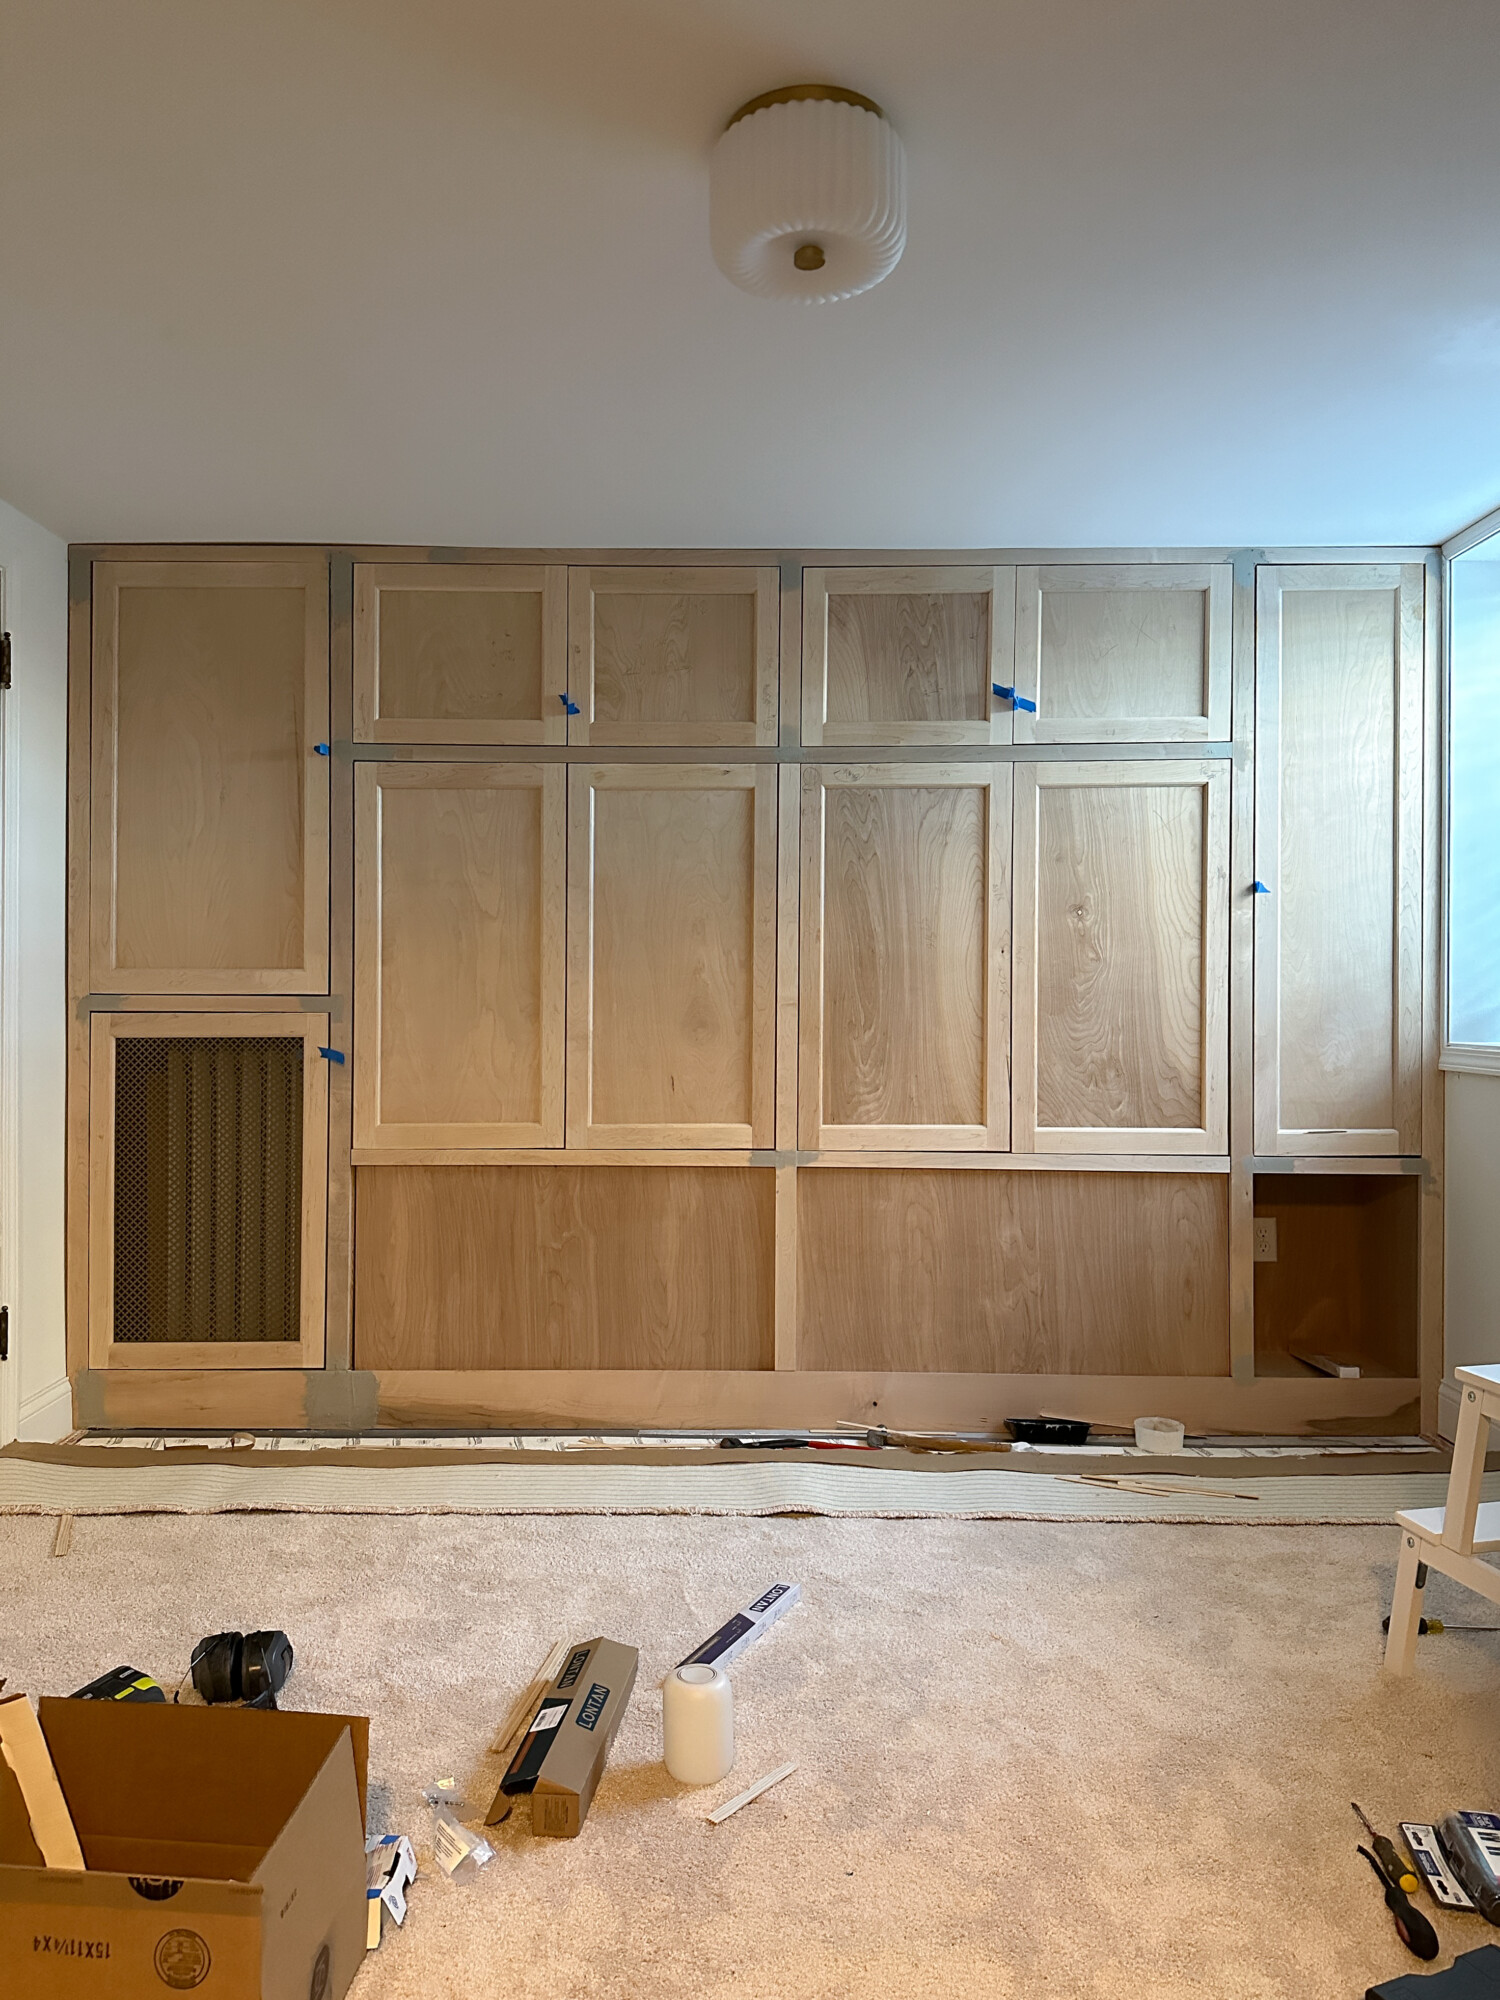
Not only does this built-in design look amazing, but love that we can fold away the bed and created extra storage space to help minimize clutter. The best marriage of form and function!

View this post on Instagram
We are very happy with how it’s turning out so far. Next step is to paint it. We have tested nine paint swatches and reviewing them throughout the day. I think we have a winner but want to wait a few more days to finalize our decision. Make sure to head to my Instagram to cast your vote! * Update: see the fully painted guest bedroom & office here
If you liked this post, you may also enjoy reading:
How we build our knee wall cabinets in our garage attic
How we transformed our basement into our dream family room
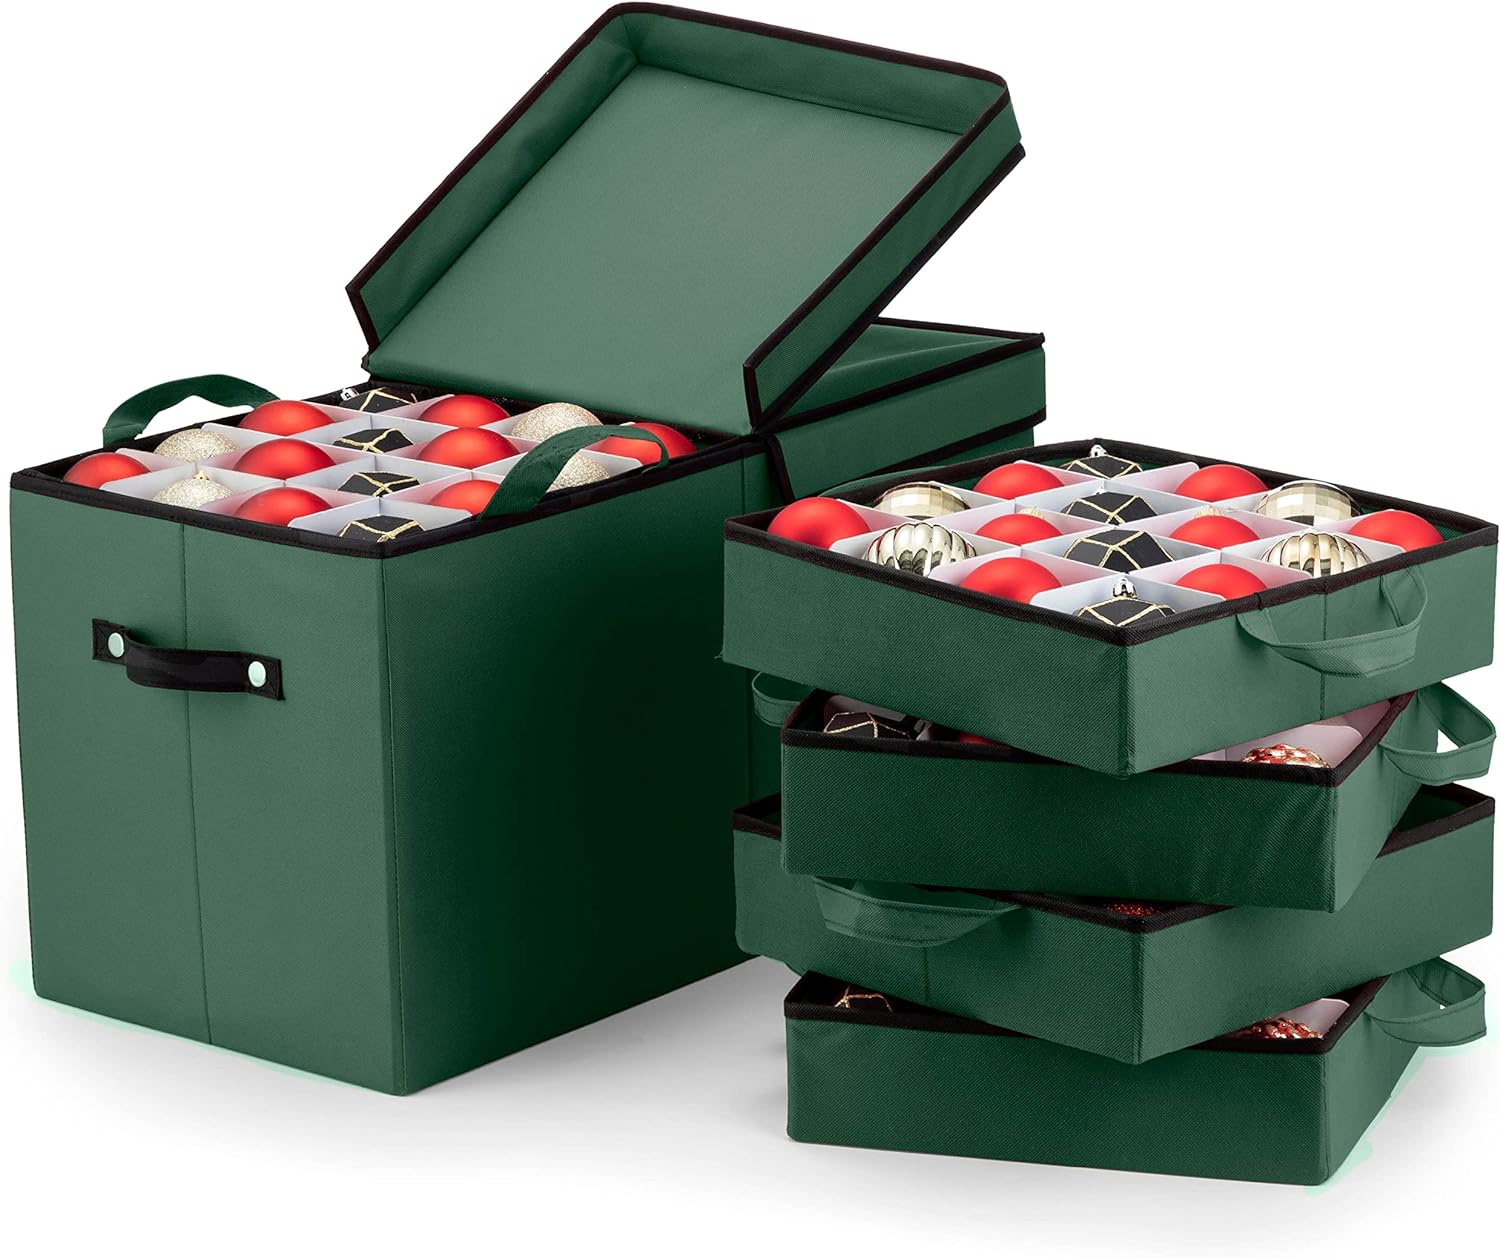
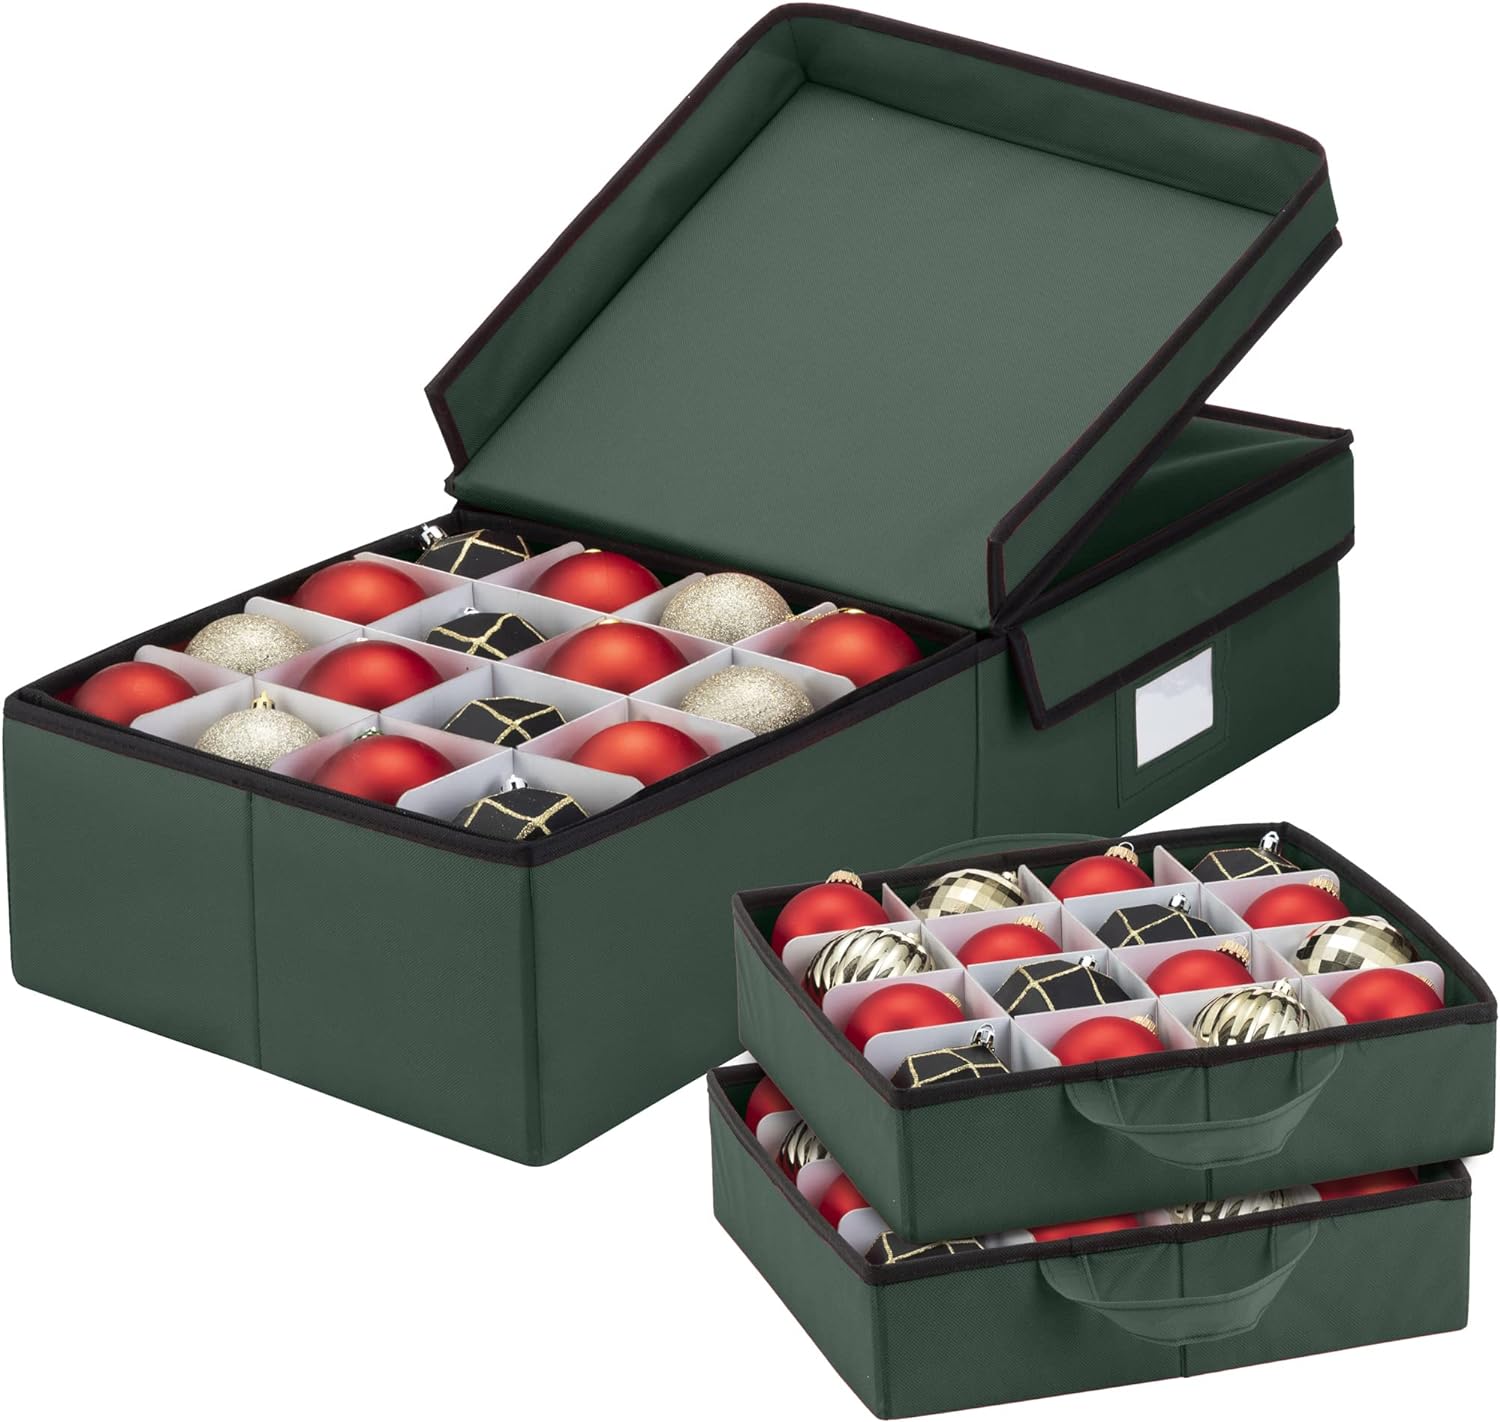
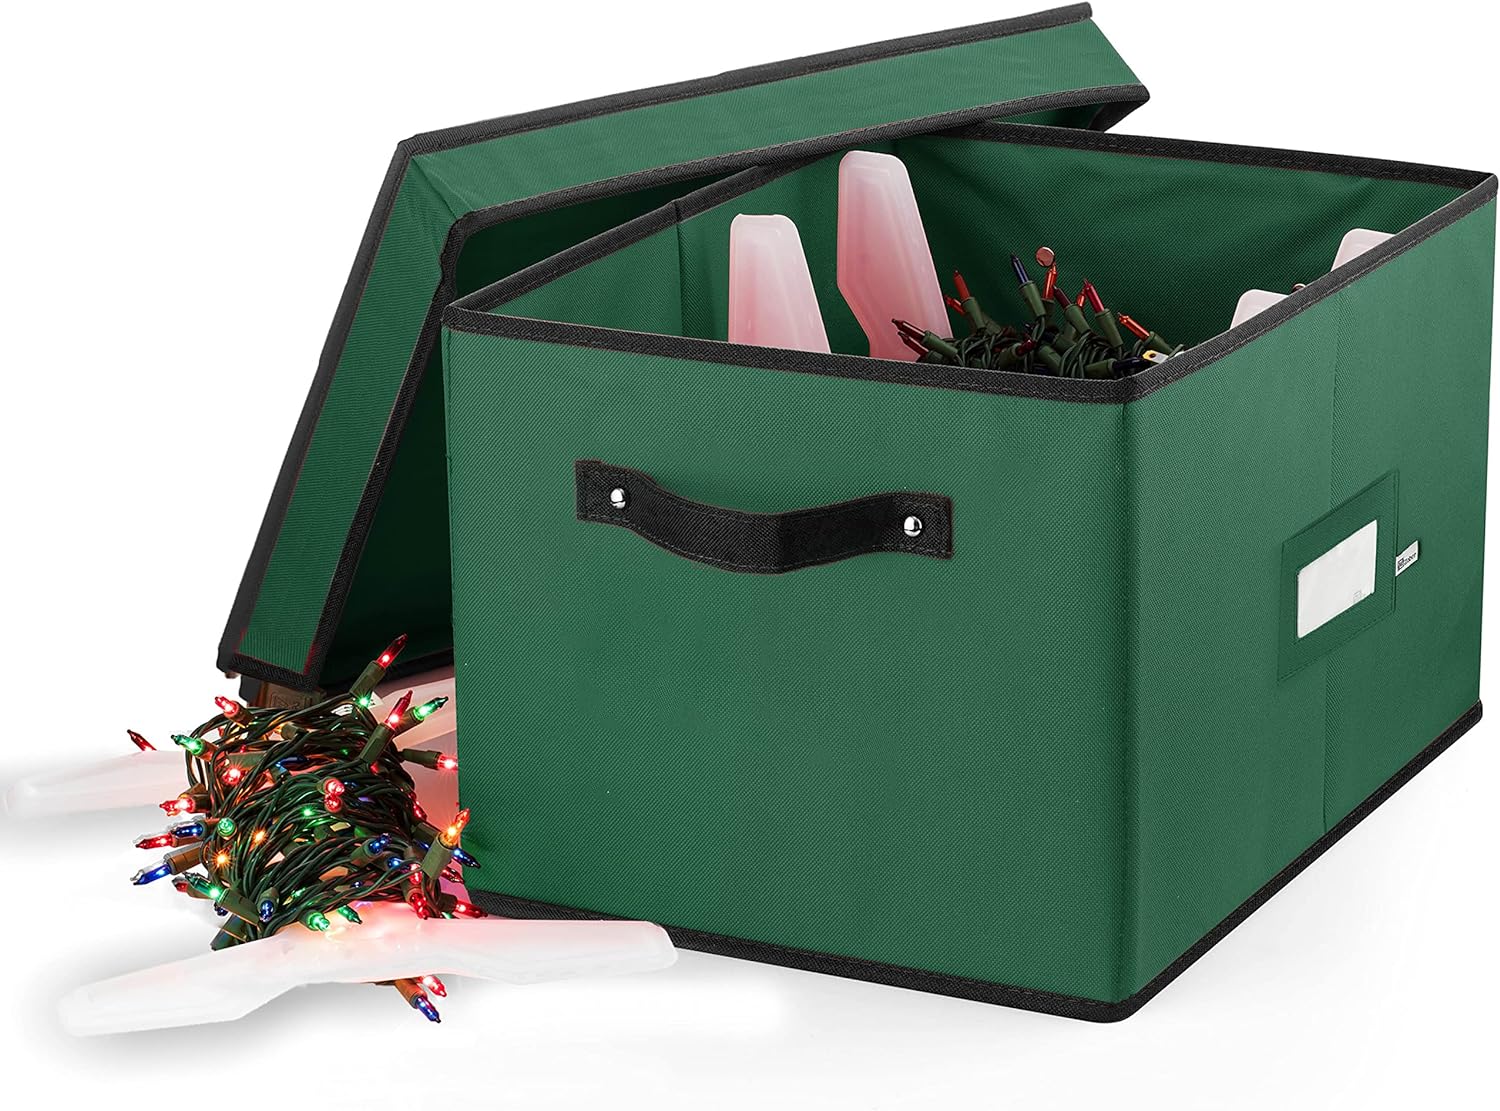
If you’re like me, you look forward to decorating your home for the holidays but don’t want the stress of storing them away after. Having good holiday decor storage and organizing solutions are key to making clean-up less stressful. Here all the essentials that I recommend. Coordinating color is a bonus for those who fancy form and function!
See here for my 2023 Holiday Round-ups
See here for my Holiday Movie List

wide opening tree storage (available in 7.5 ft and 9 ft)

tree storage w/ wheels (available in 7.5 ft and 9 ft)


double wreath/garland storage (various sizes)
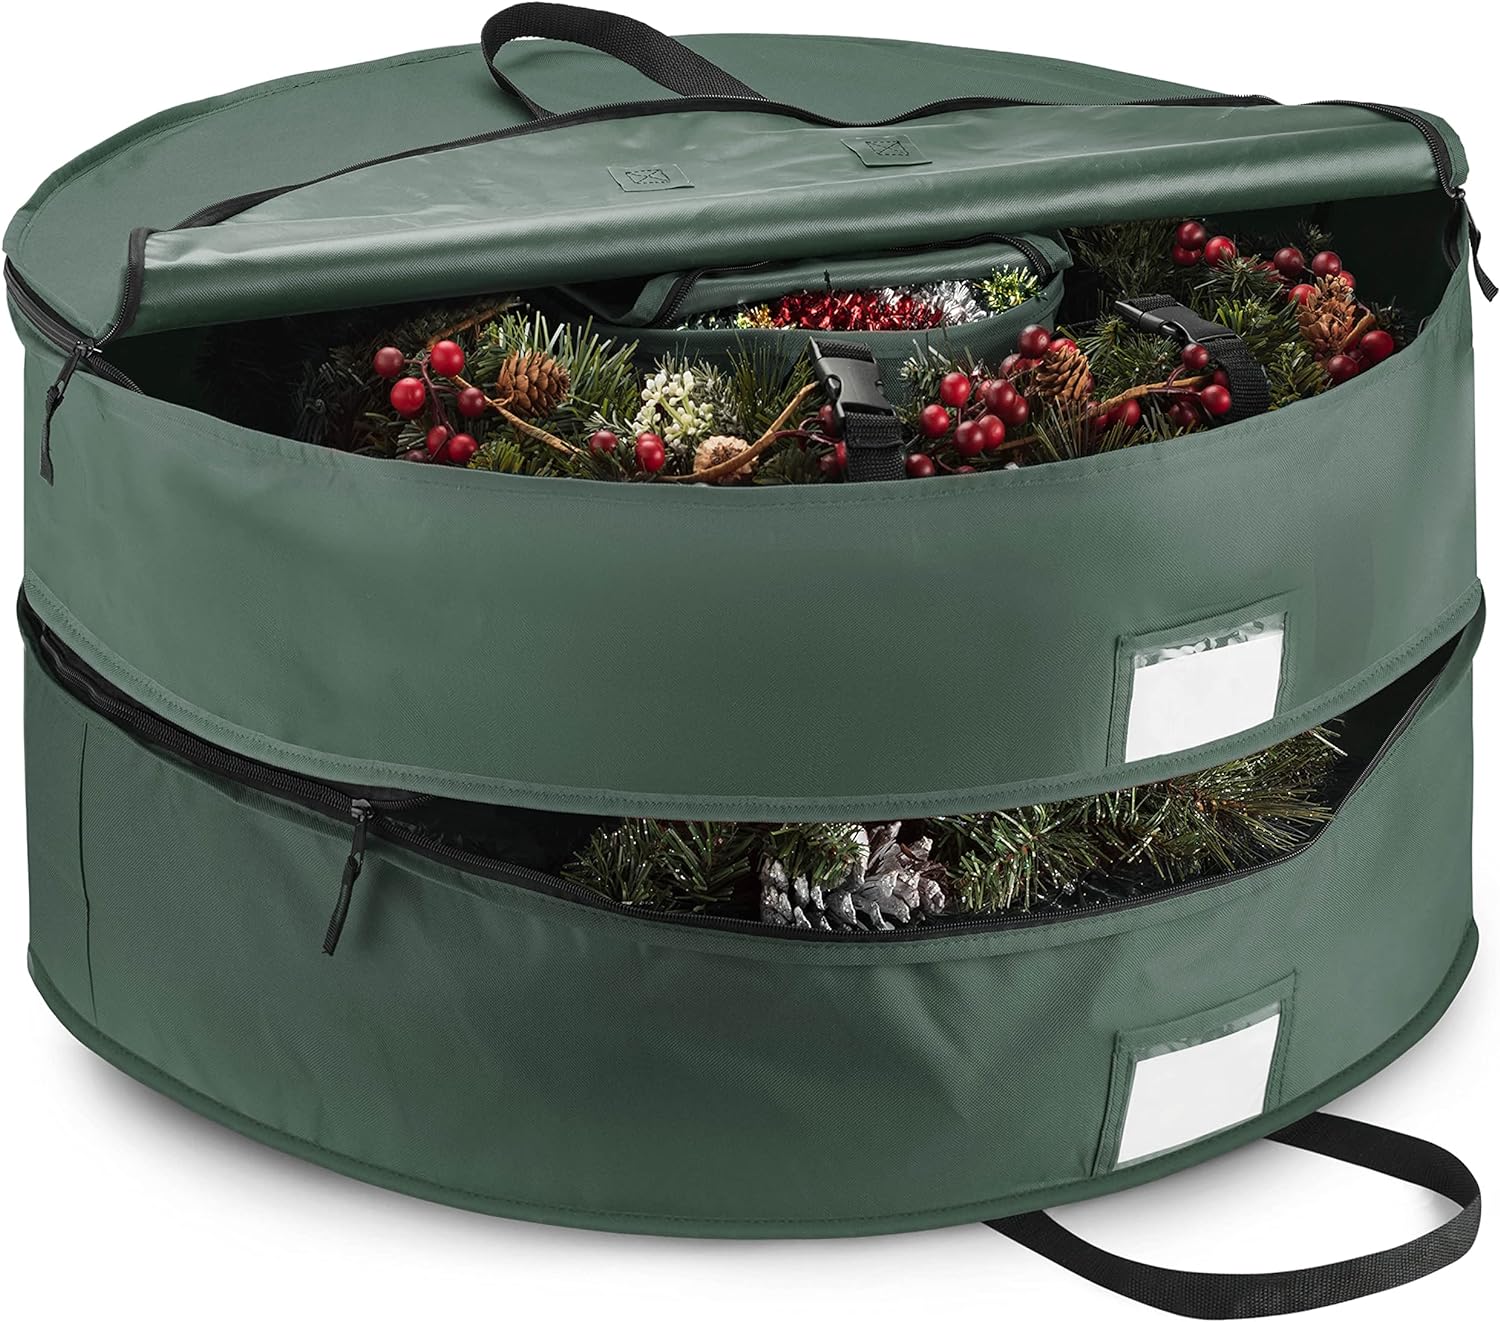
wreath/garland storage (various sizes)

Happy organizing and wishing you the best for the new year!
If you want to shop small and looking for gift ideas (or want to spruce up your space) for under $25, I rounded up some awesome items from Market by Modern Nest. They gave me a code for my readers – good through December 18th so you have just a few days left! Use code: PATTI10 to get 10% off your total purchase at check out. It applies to everything, even their furniture items! That’s a big saving for bigger ticket items. For this post, I rounded up some awesome gift ideas for under $25 – Scroll down to see!
See this post for my Christmas Kitchen featuring some items from Market by Modern Nest.

Remember to keep small and local shops in mind for those unique one of a kind gifts. Happy shopping and wishing you a wonderful holiday season!
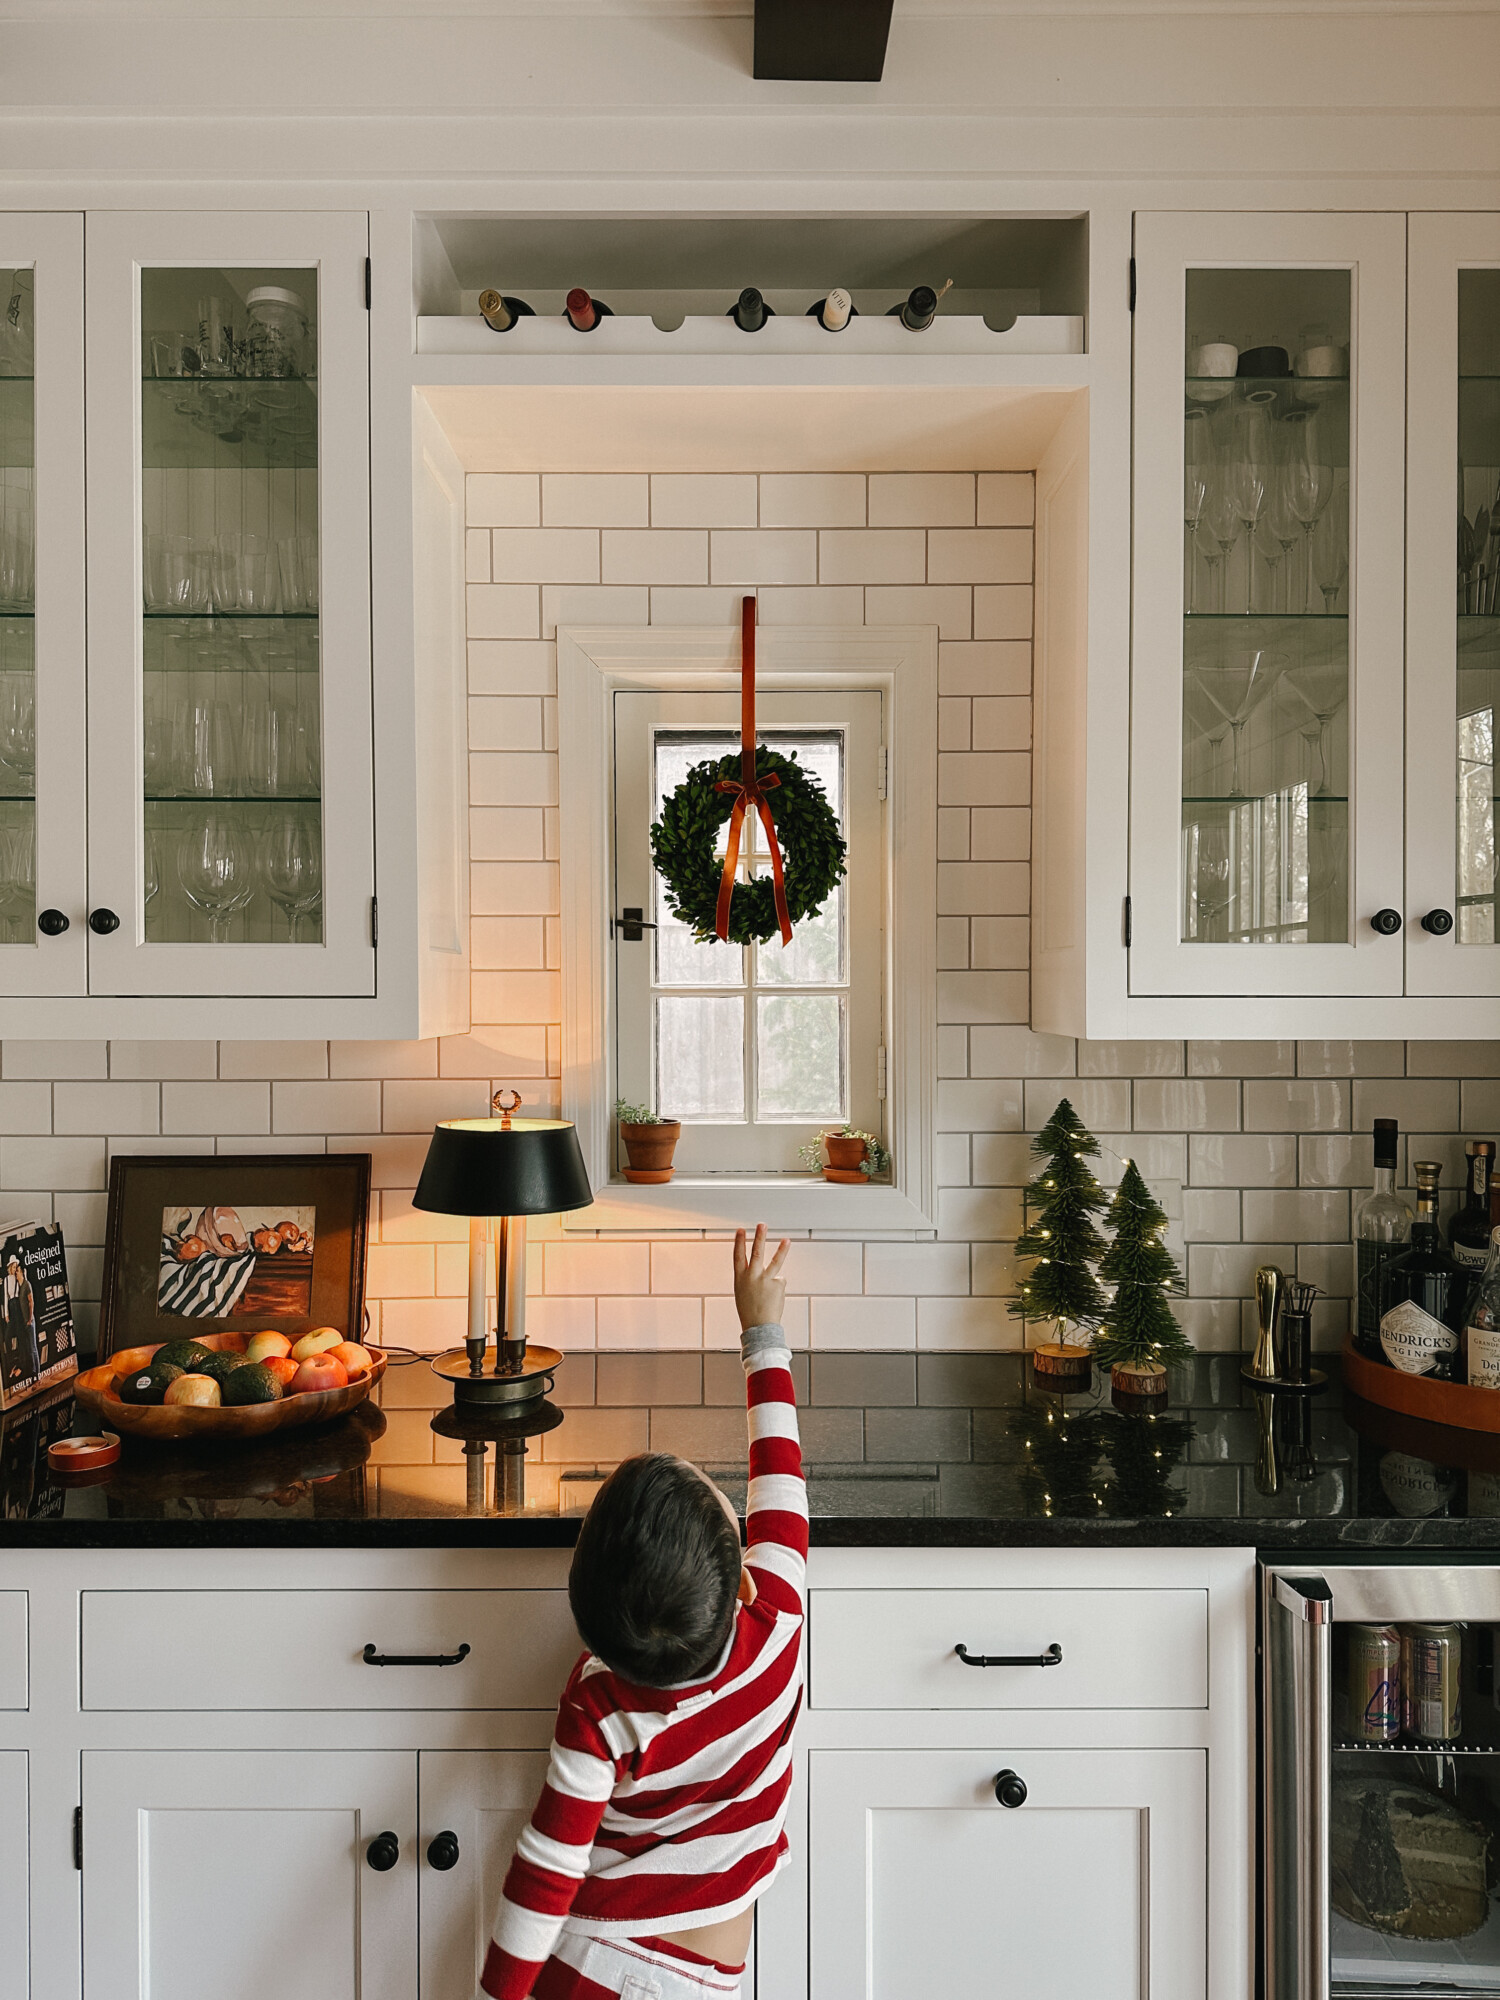
I just added some Christmas magic to our kitchen and sharing all the sources here with you! You can watch the reel here:
View this post on Instagram
From the garlands to my newest kitchen items that were kindly gifted to me from one of my new favorite shops, Market by Modern Nest, scroll below for sources. Market by Modern Nest is an amazing decor & home shop curated by the design build firm, Modern Nest, with swoon-worthy projects based in Scottsdale, AZ. They were also gracious to give me a code for my followers. If you like something you see from their shop, use my affiliate code: PATTI10 for 10% off your entire purchase (good until December 18th so don’t wait)!

(Use Code “PATTI10” for 10% off Your Entire Purchase until December 18th)
Austin Austin Hand Soap + Hand Cream Set (smells amazing!)
Medium Recycled Glass – Set of Two
Large Recycled Glass – Set of Two
Mini Terracotta Vessel (only $12)
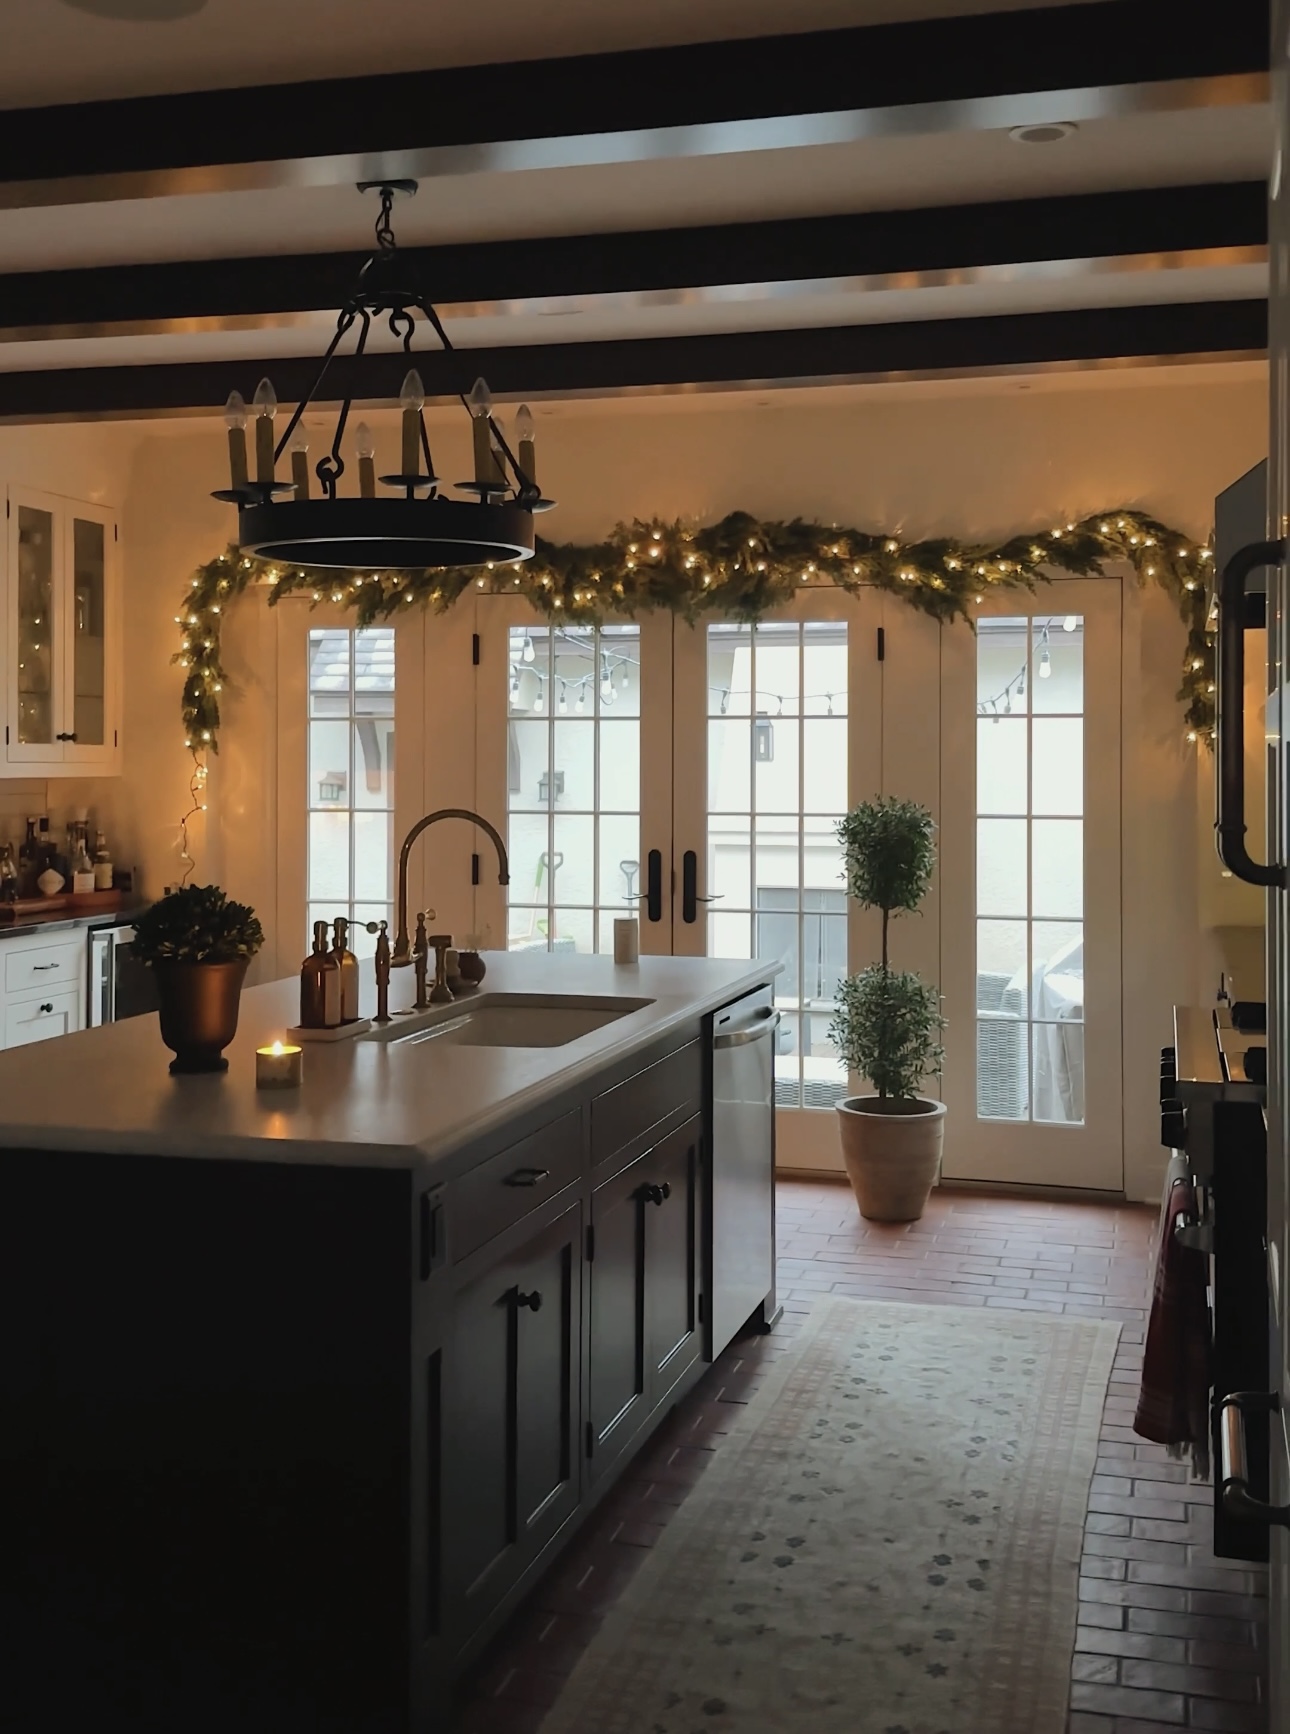
Garlands here and here (see garland round-up here for more options) | Mini Wreaths | Rohl Brass Faucet | Amber Glass Soap Pumps
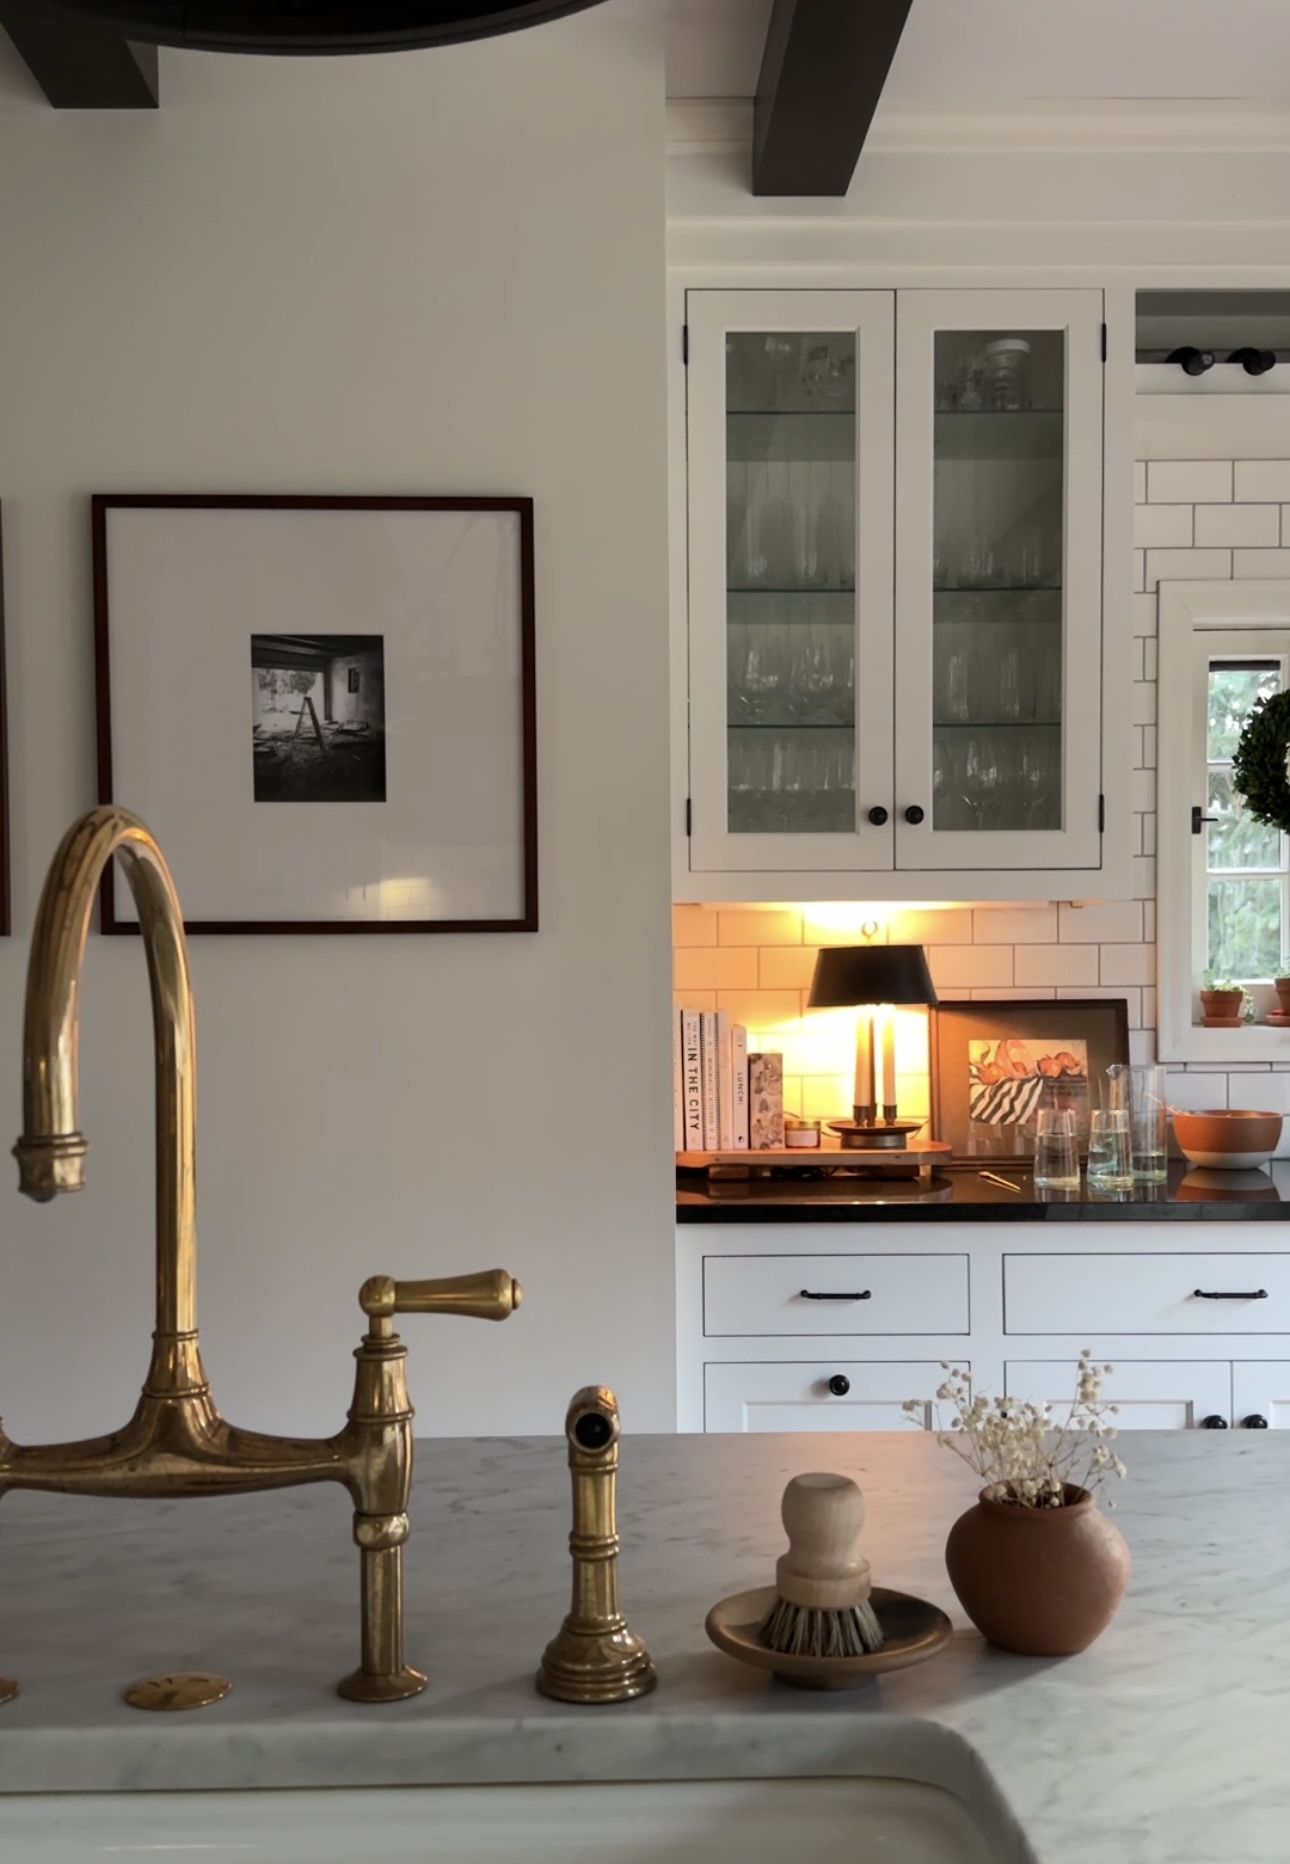
Dish Brush | Palo Santo Tiny Plate | Mini Terracotta Vessel | Rohl Brass Faucet
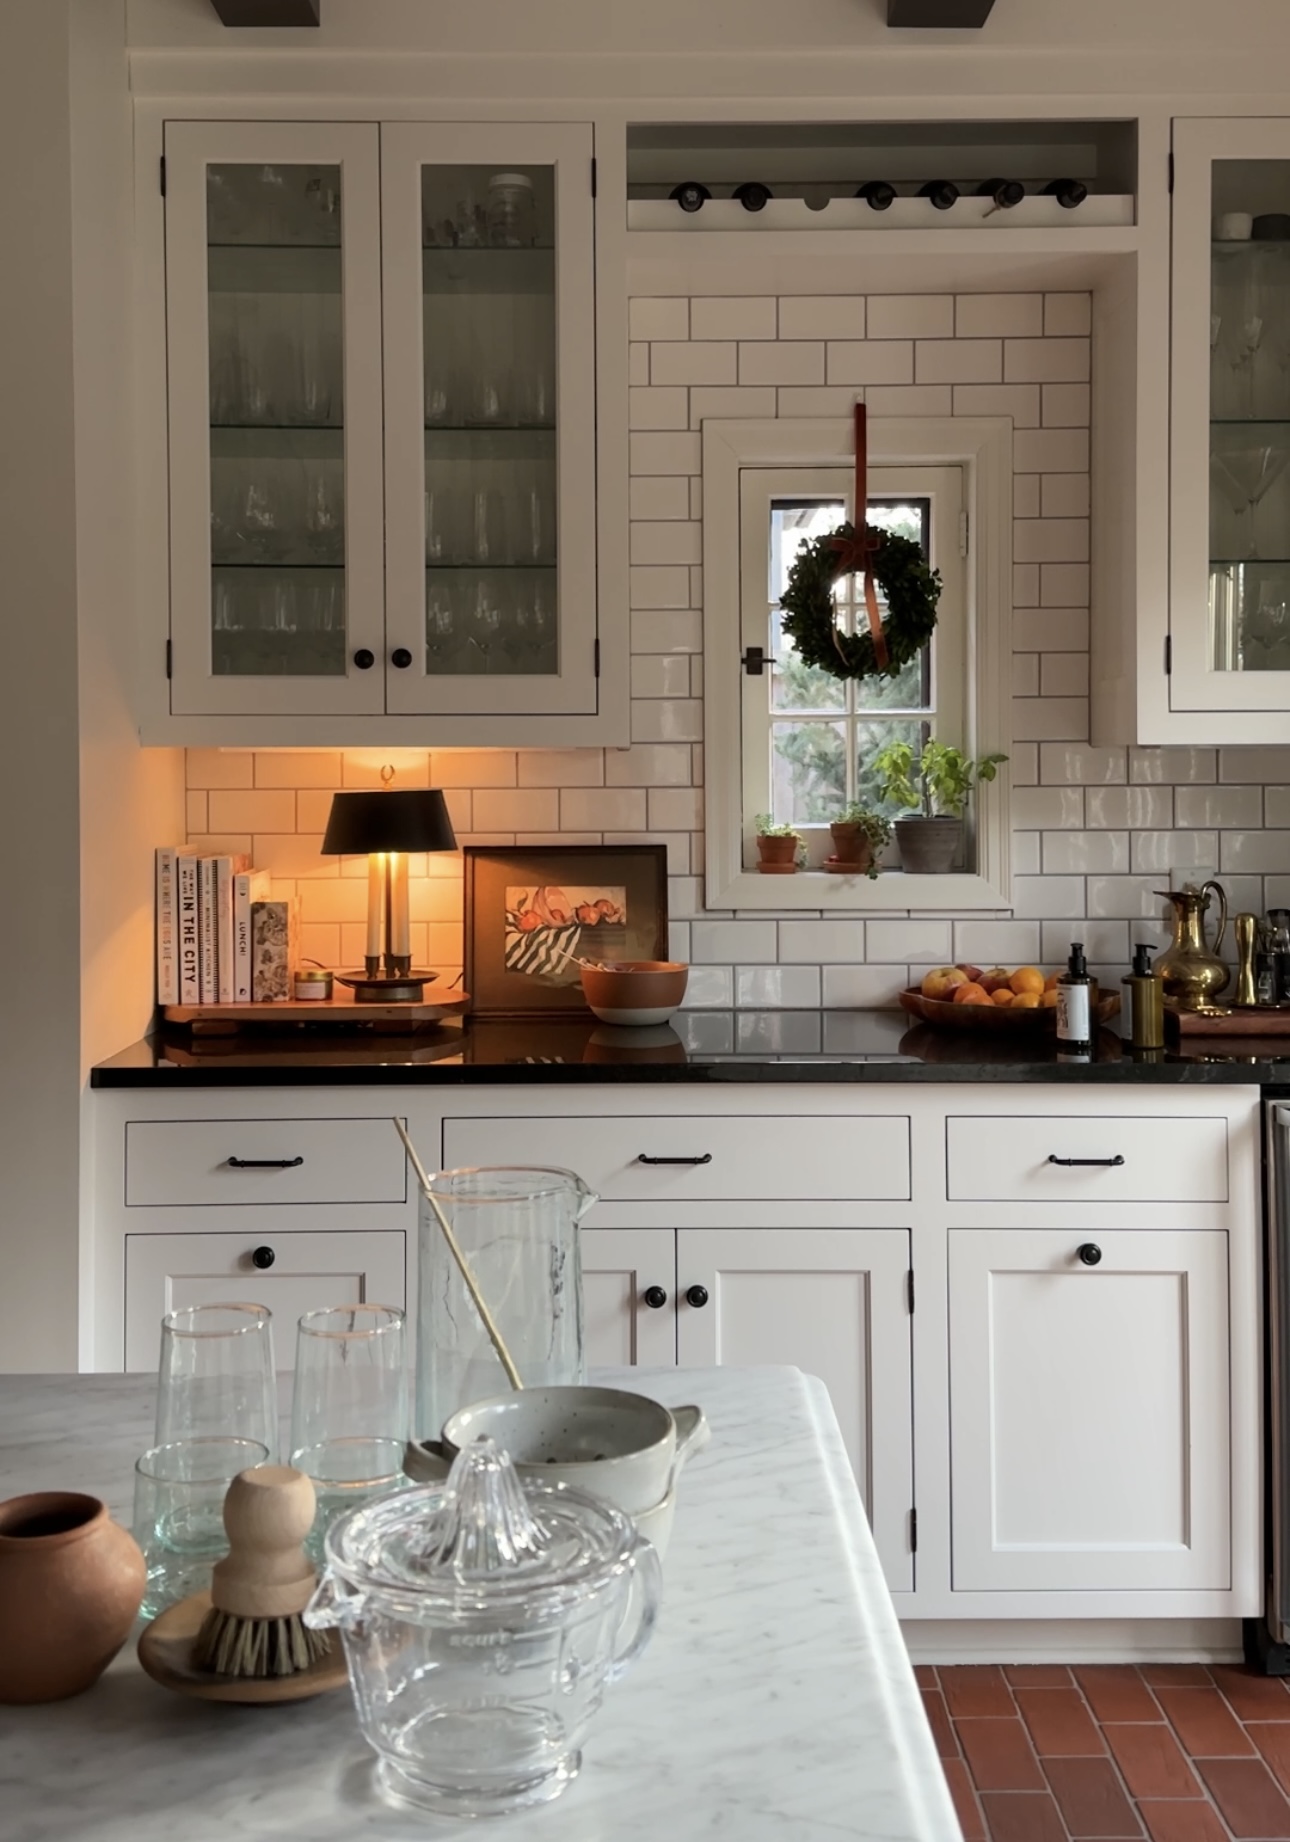
Mini Wreaths | Copper Ribbons | Dish Brush | Palo Santo Tiny Plate | Mini Terracotta Vessel | Berry Bowl – Set of Two | Citrus Juicer |Recycled Glass Pitcher |Medium Recycled Glass – Set of Two | Large Recycled Glass – Set of Two | Brass Cocktail Spoon
Garland are from two sources, here and here (if these are sold out, check my garland round-up here for other options).
For more kitchen sources like paint color, click here.
November Favorites: The most loved items from last month.

Sharing my holiday movie list for your viewing pleasure.
(Click here for this year’s holiday shop)
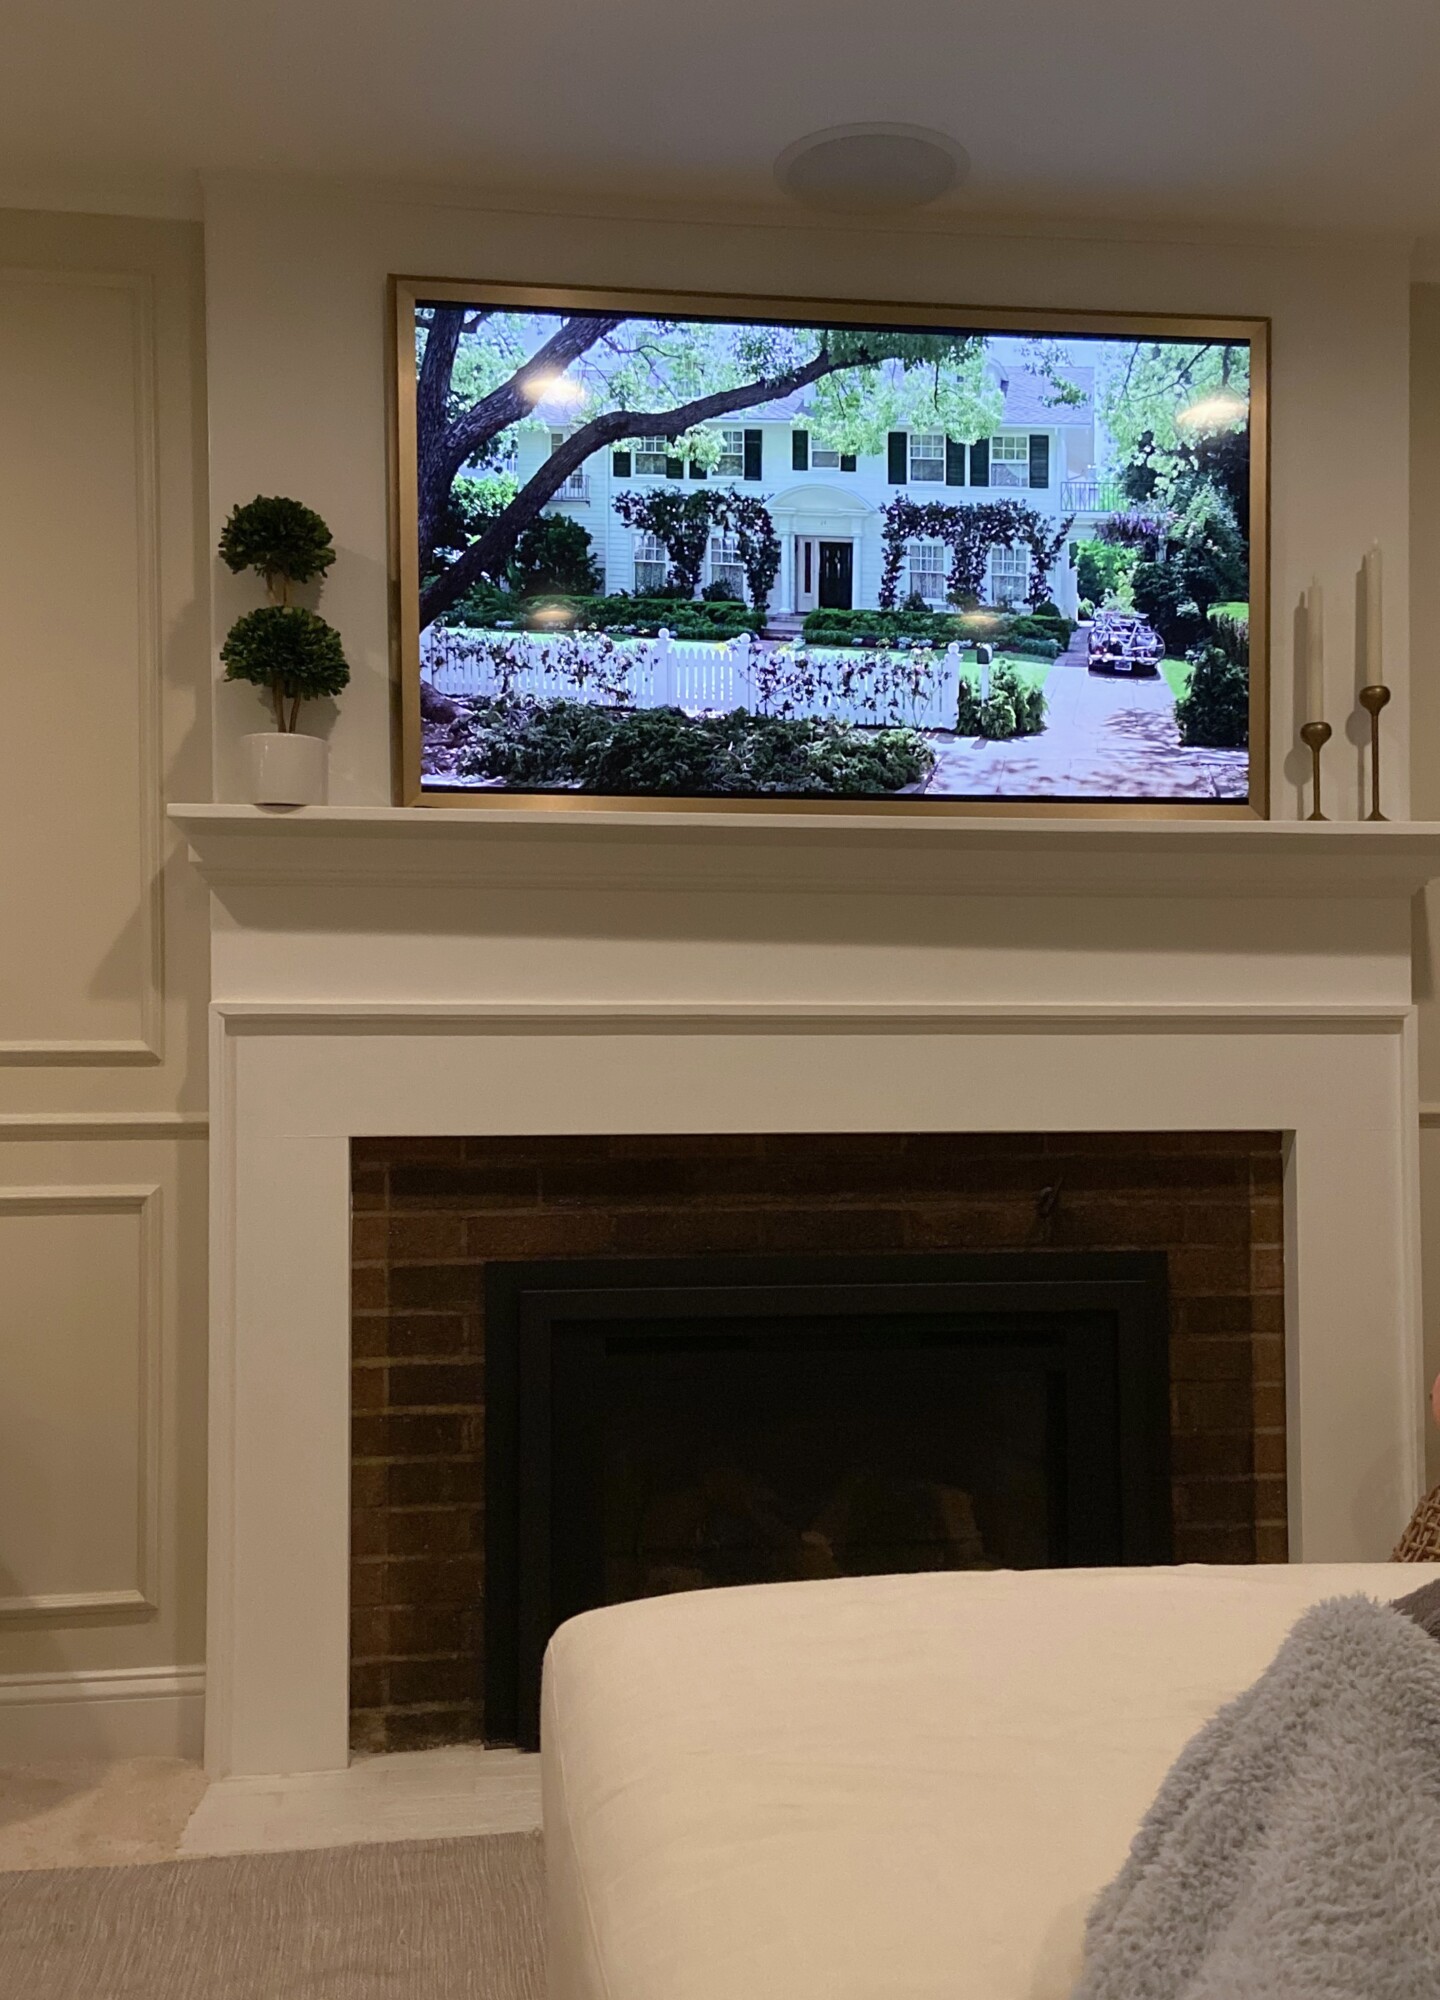
Last month, I watched Father of the Bride for the very first time! I didn’t grow up watching movies and never really got into movies as an adult. “I’m not a movie person,” I declared to Brian. But after watching FOTB and LOVING it, something clicked. Perhaps, I haven’t been watching the right movies!
I shared my FOTB moment on my Instagram stories and hundreds of messages flooded in with classic movie recommendations! Cue all the Nancy Meyers references. Can you believe that I had no idea who she was before this?! Simultaneously, I had messages from others who wanted me to share the movie list because they, too, felt the same as I did towards movies. Thank you to everyone for making holiday movie nights a thing for me. If you’re looking for some good holiday movie recommendations, see the list below.
Please note: I have not looked up ratings or researched these movies, yet. This list encompasses all of the recommendations from my Instagram community.
**Indicates multiple recommendations
Grab some popcorn and enjoy! Wishing you the happiest of holidays!
This is where you can find my holiday round ups for 2023 to give ideas and inspiration for when you’re ready to decorate. Hopefully, you can use what you already have but if you’re looking for new items, I’d advise to not wait too long to order. Two years ago, I ordered my copper velvet ribbon right after Thanksgiving and it arrived two days before Christmas. After using only real garlands for years, I ordered some faux ones two years ago but could only get my hands on a few because they sold out when I was ready to order.
However and whenever you choose to decorate, may the holiday seasons bring you the true meaning of joy, appreciation and thankfulness.

I’m starting off my Holiday 2023 Round Ups with ribbons. I’ll update frequently so check back often for ideas and inspiration!


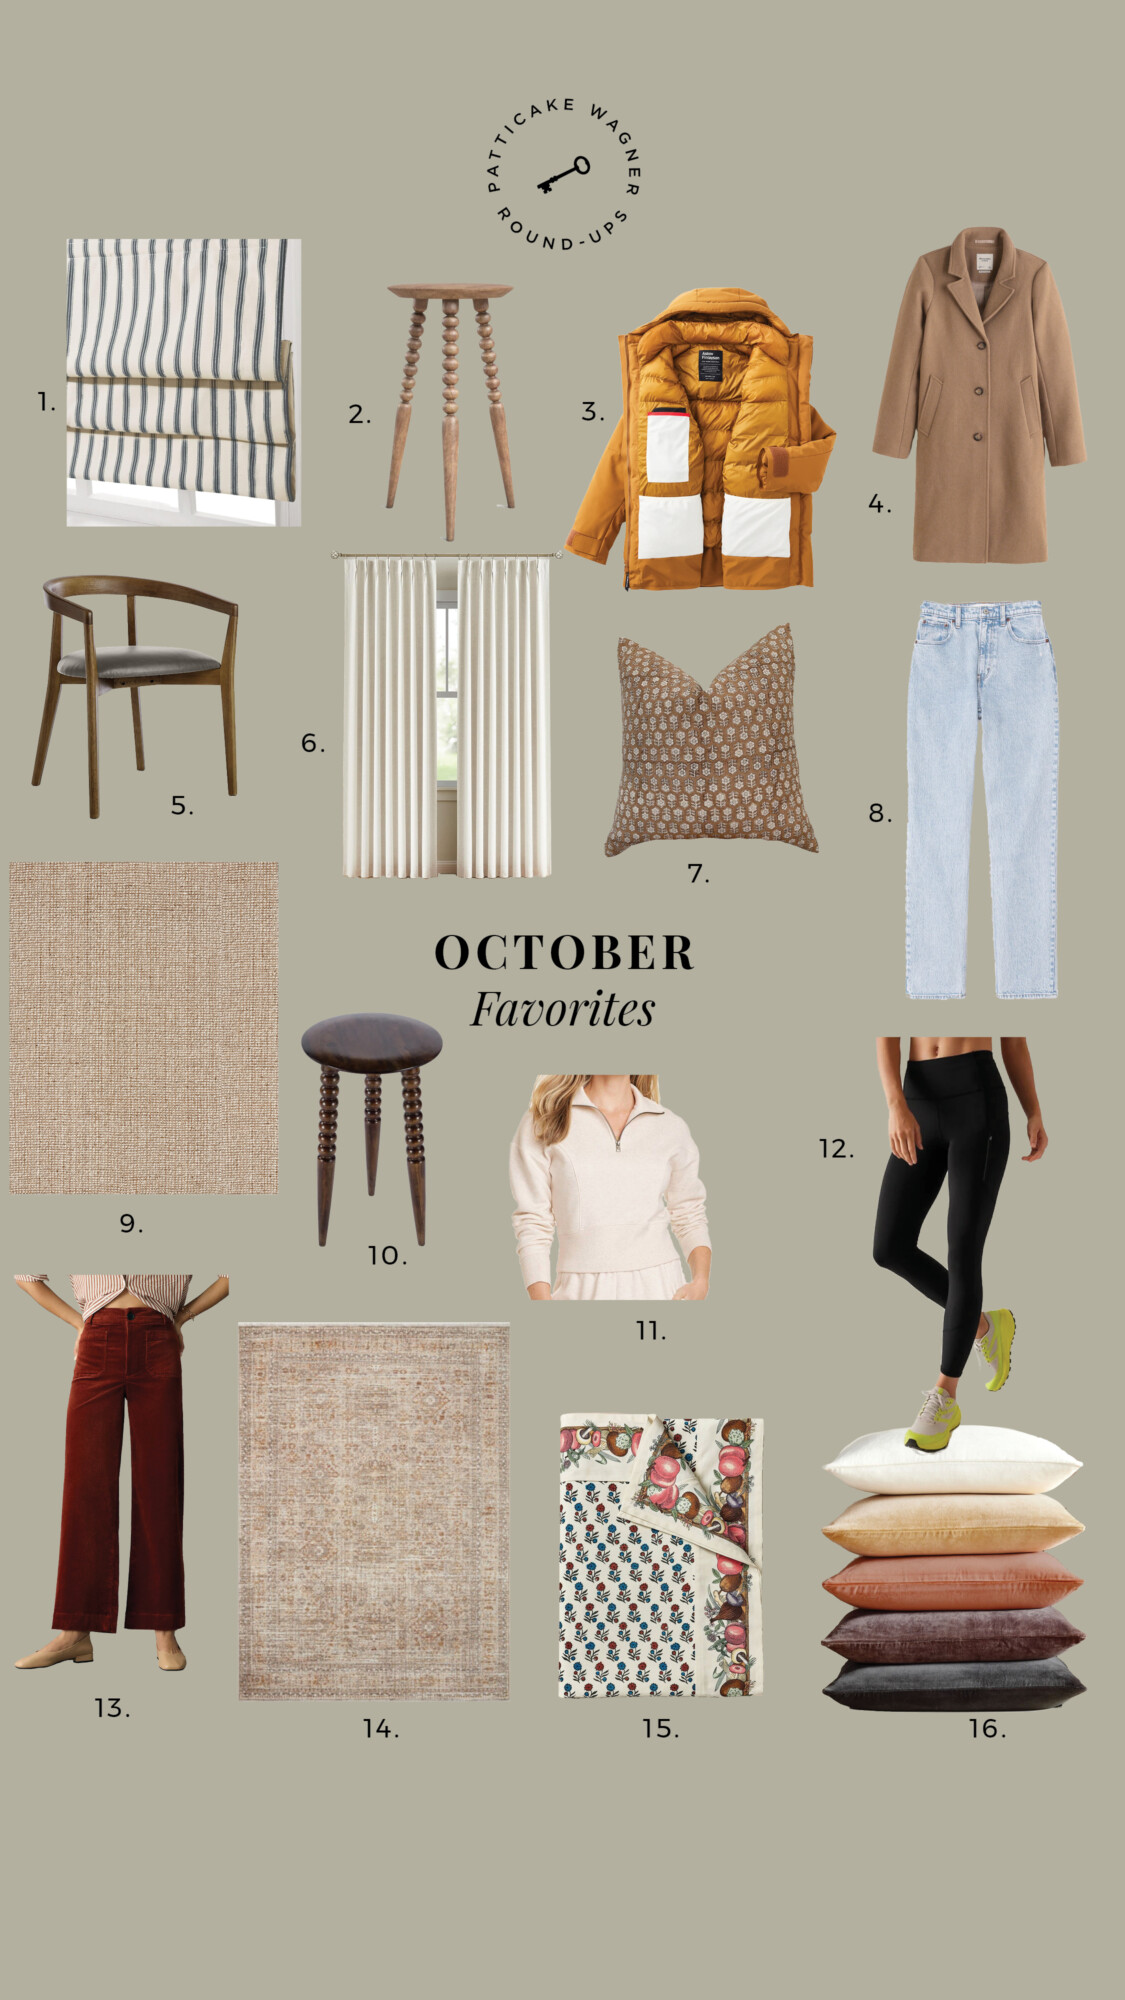
October 2023 Favorites: The most loved items from last month.
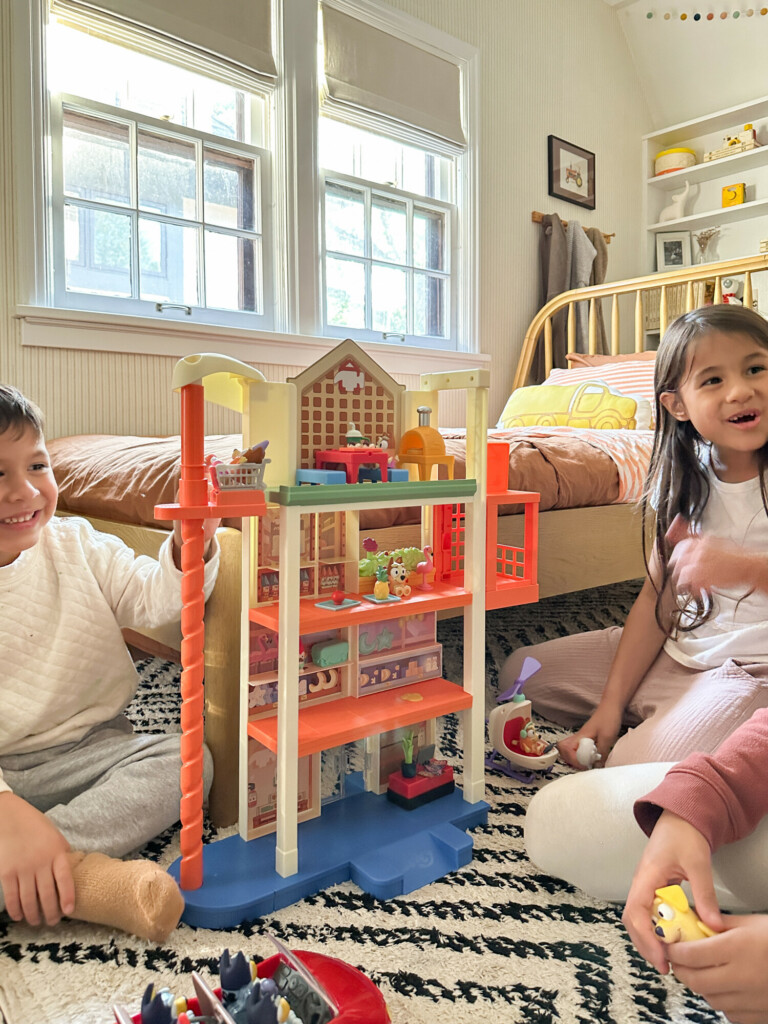
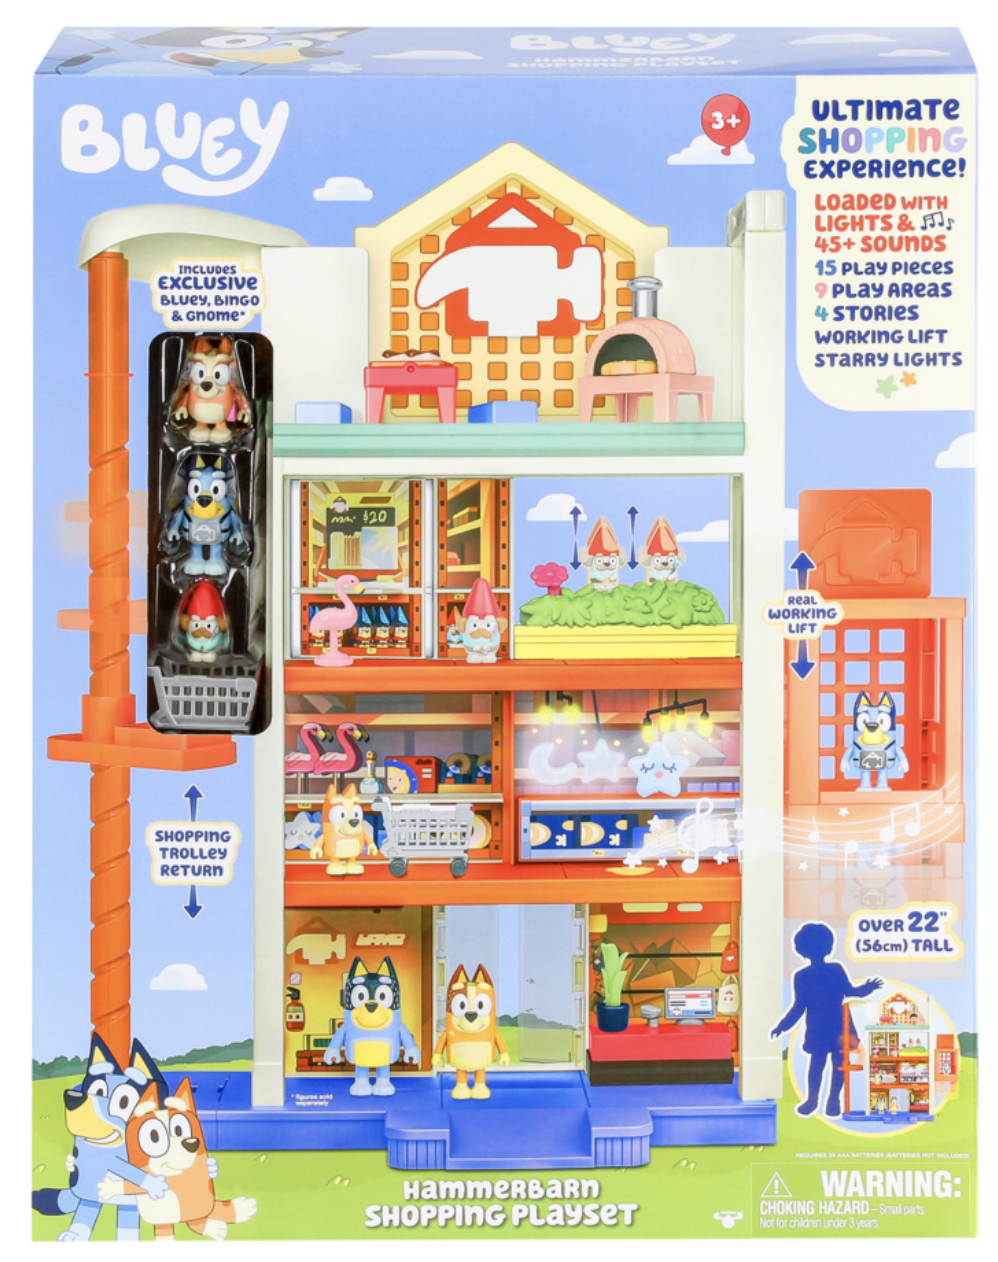
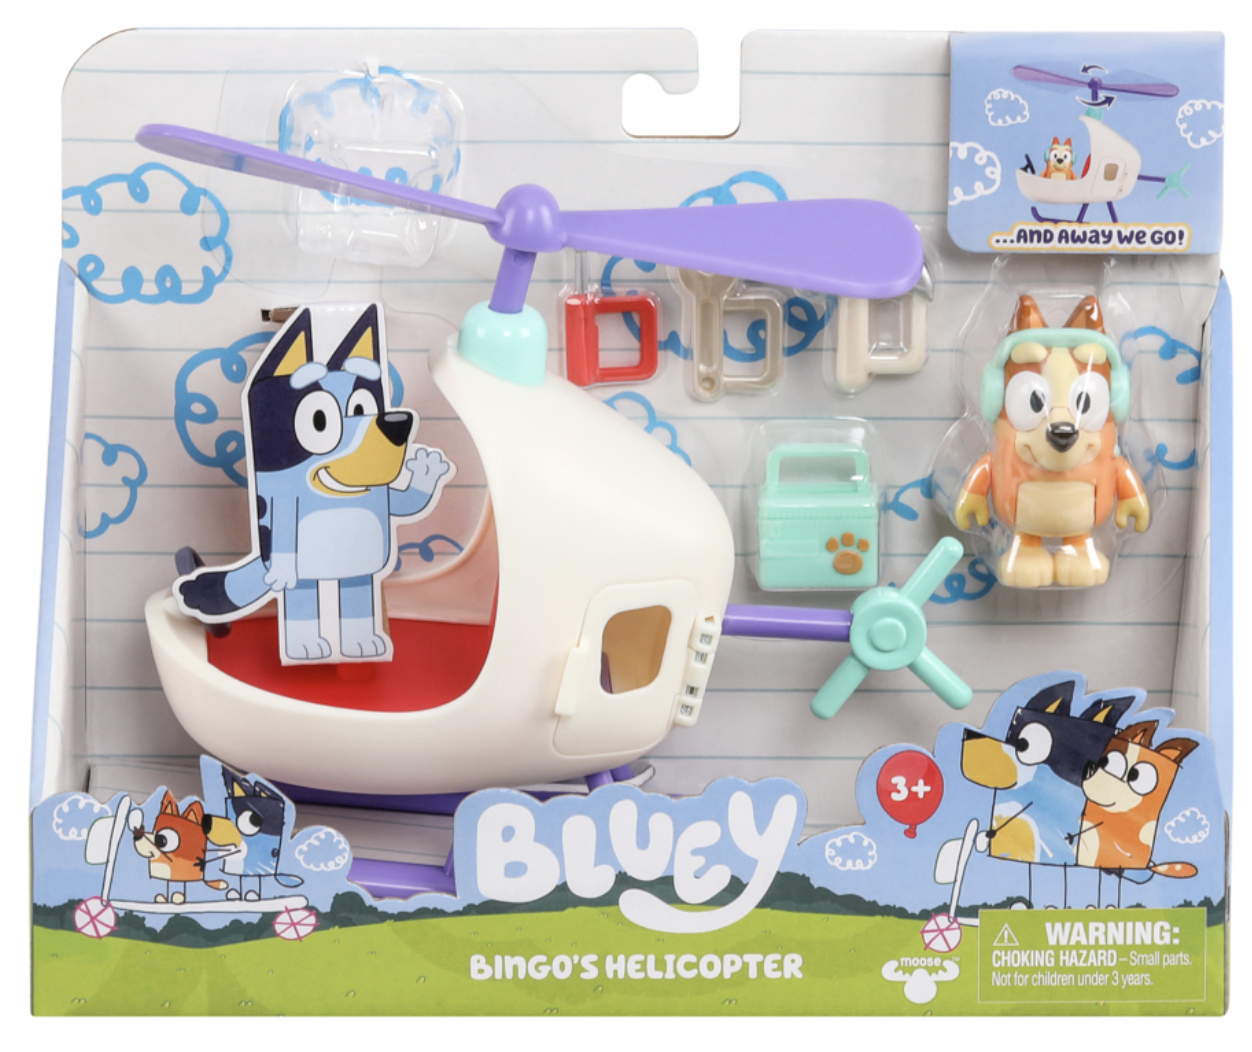
Our kids’ current favorite show is Bluey. It’s also my favorite to watch with them. And I know I’m not the only parent that enjoys this lovable family-friendly cartoon. On my last girls’ trip, my mom friends all declared their adoration for Bluey. Moose Toys just released their brand-new Bluey Hammerbarn Shopping Playset and it’s the perfect kid’s gift for the little Bluey fans in your life. But basically, it’s also a gift of quiet time for you!
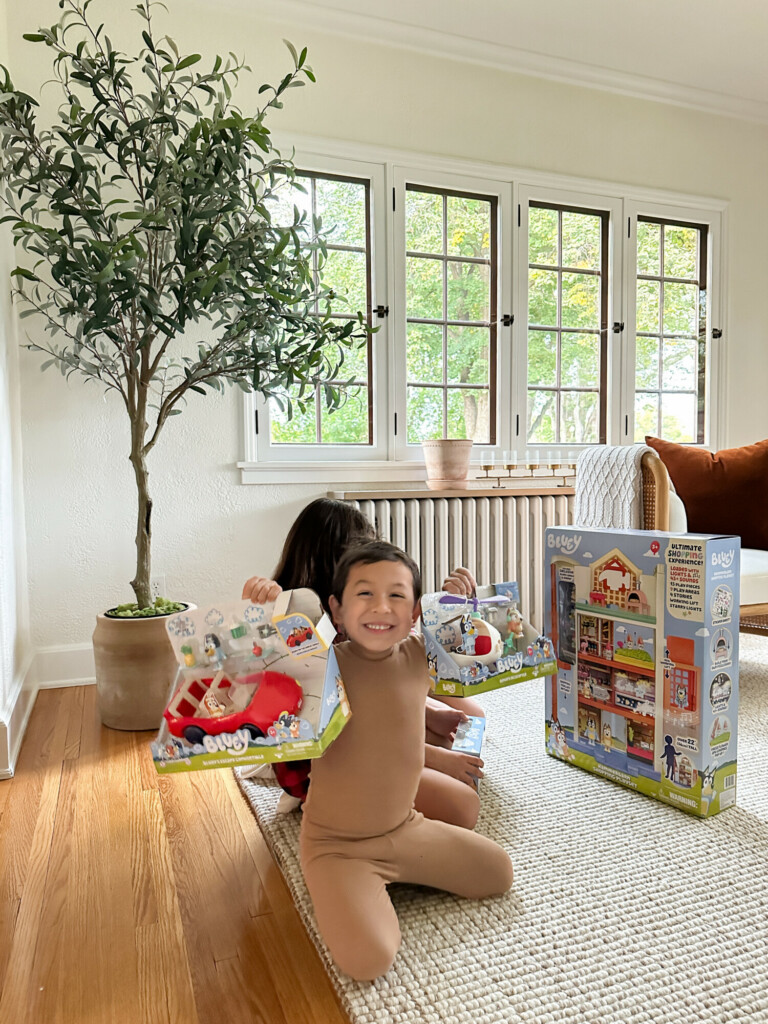
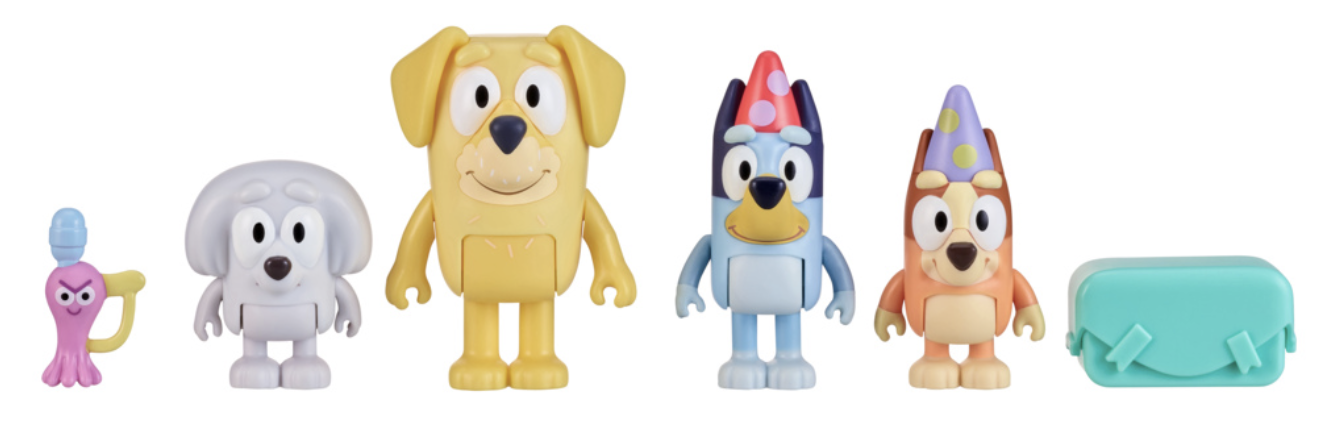
Brian and I are very selective with what our children watch on screen and Bluey checks all the boxes for being on our watch list. It’s relatable, teaches them empathy and addresses some difficult topics in a light-hearted way. If you’re looking for some great kid’s gift ideas for your little Bluey fan, I’m so excited to partner with Moose Toys to share some new product details, including the Bluey Hammerbarn Shopping Playset! I’ve also included some activity ideas, too, so keep on reading for all the details!
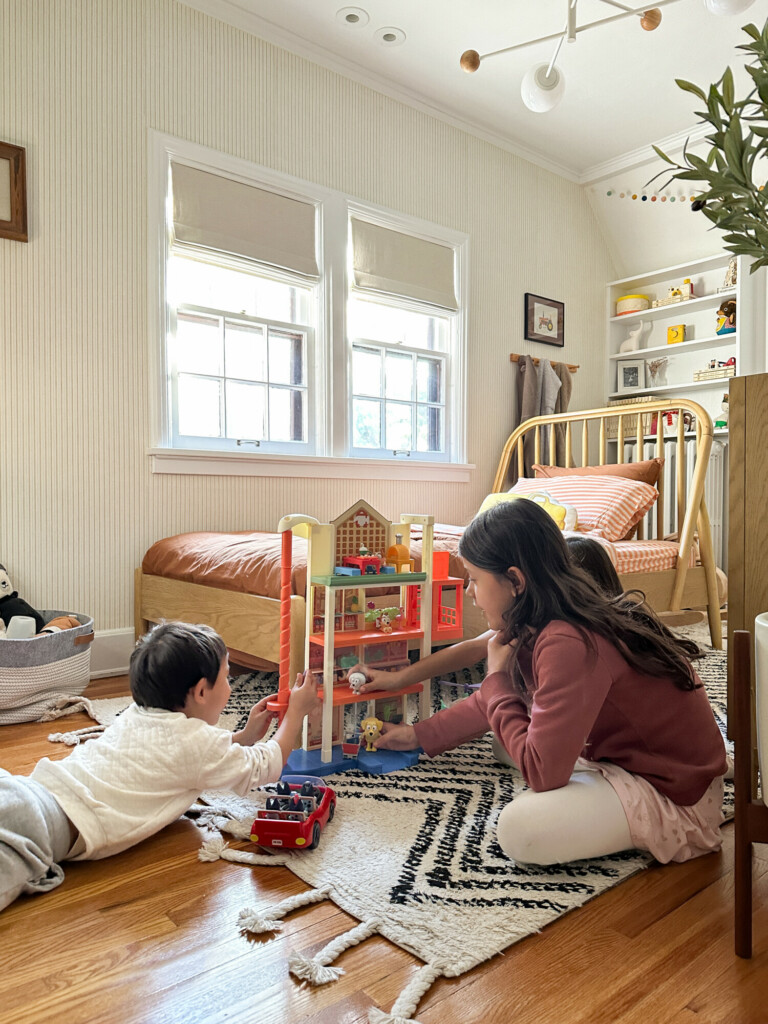
Jack is not the best with independent play. But he also has a hard time participating in the things his big sisters are interested in. Often times they end up arguing and I find myself facilitating what they can play with, together. However, since receiving the new Bluey toys, they have played with it for 30 min to 1.5 hrs! I love that not only are they getting along, but they’re also using their imaginations.
(Read about Jack’s Nursery Transition into a Big Kid Bedroom Here)

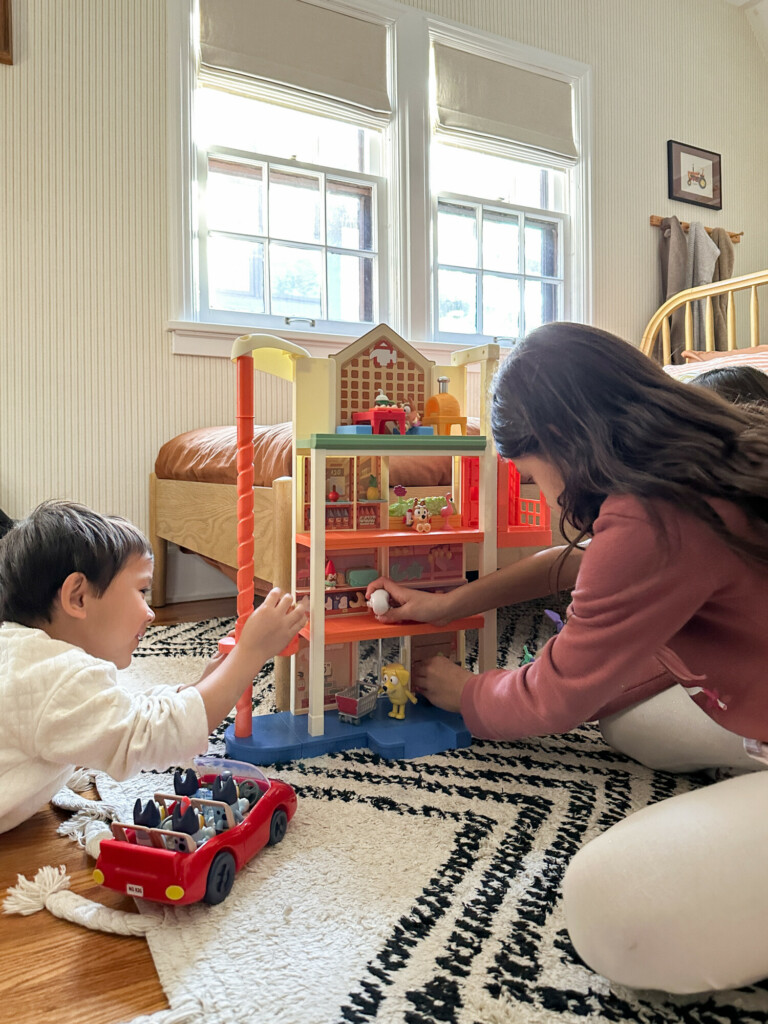
The best part is that Jack will actually play with the Bluey toys on his own! The toys are currently stationed in his room and he enjoys playing with them when he gets up. His cousin, who’s a year younger, was over the other day and he was so excited to show him!
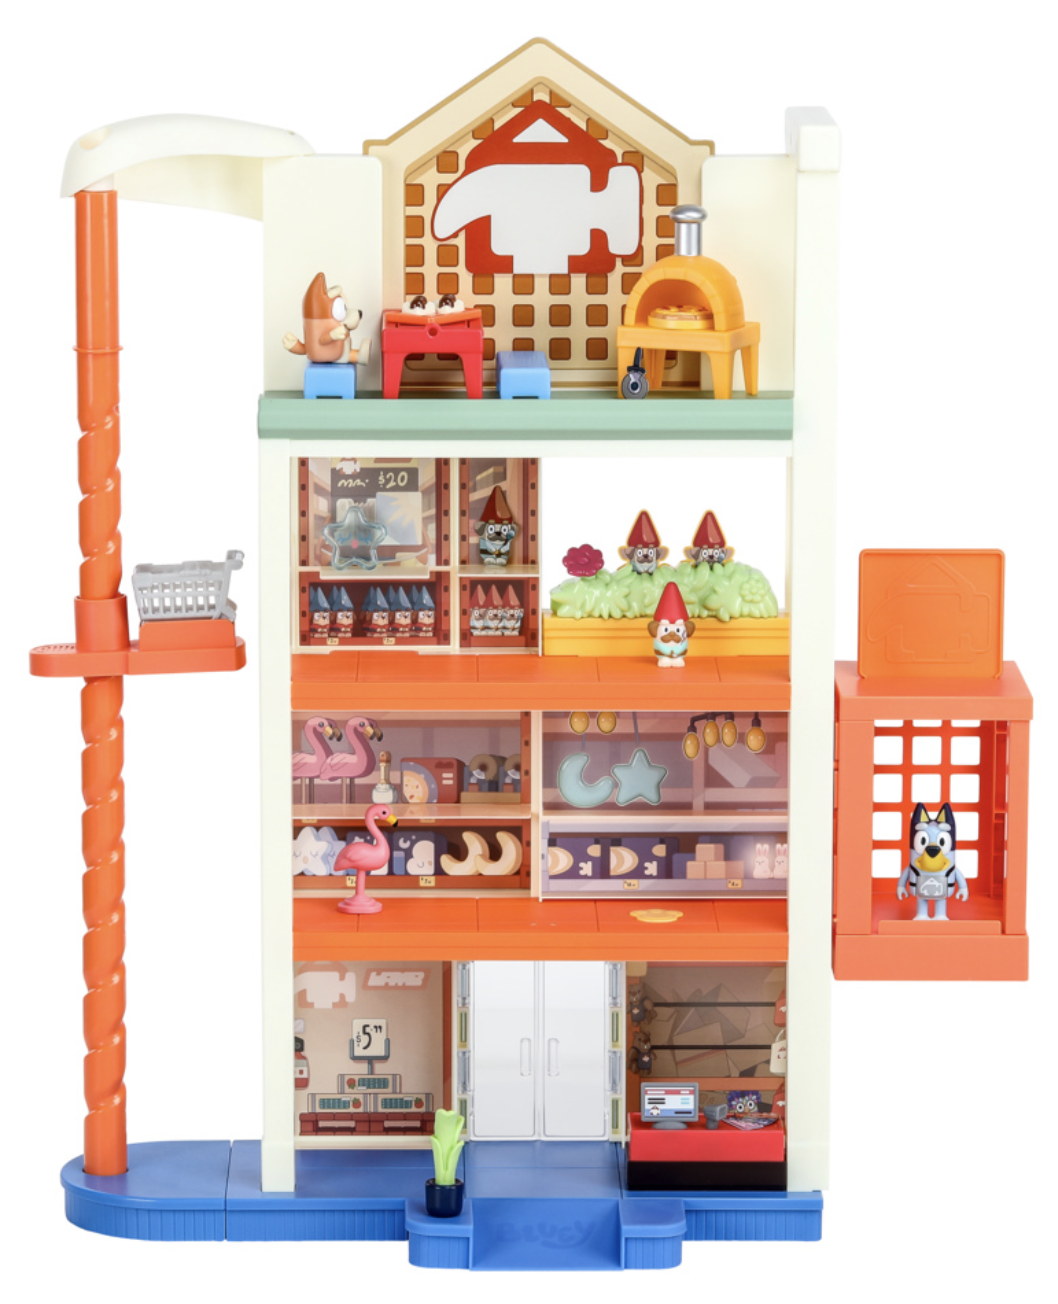


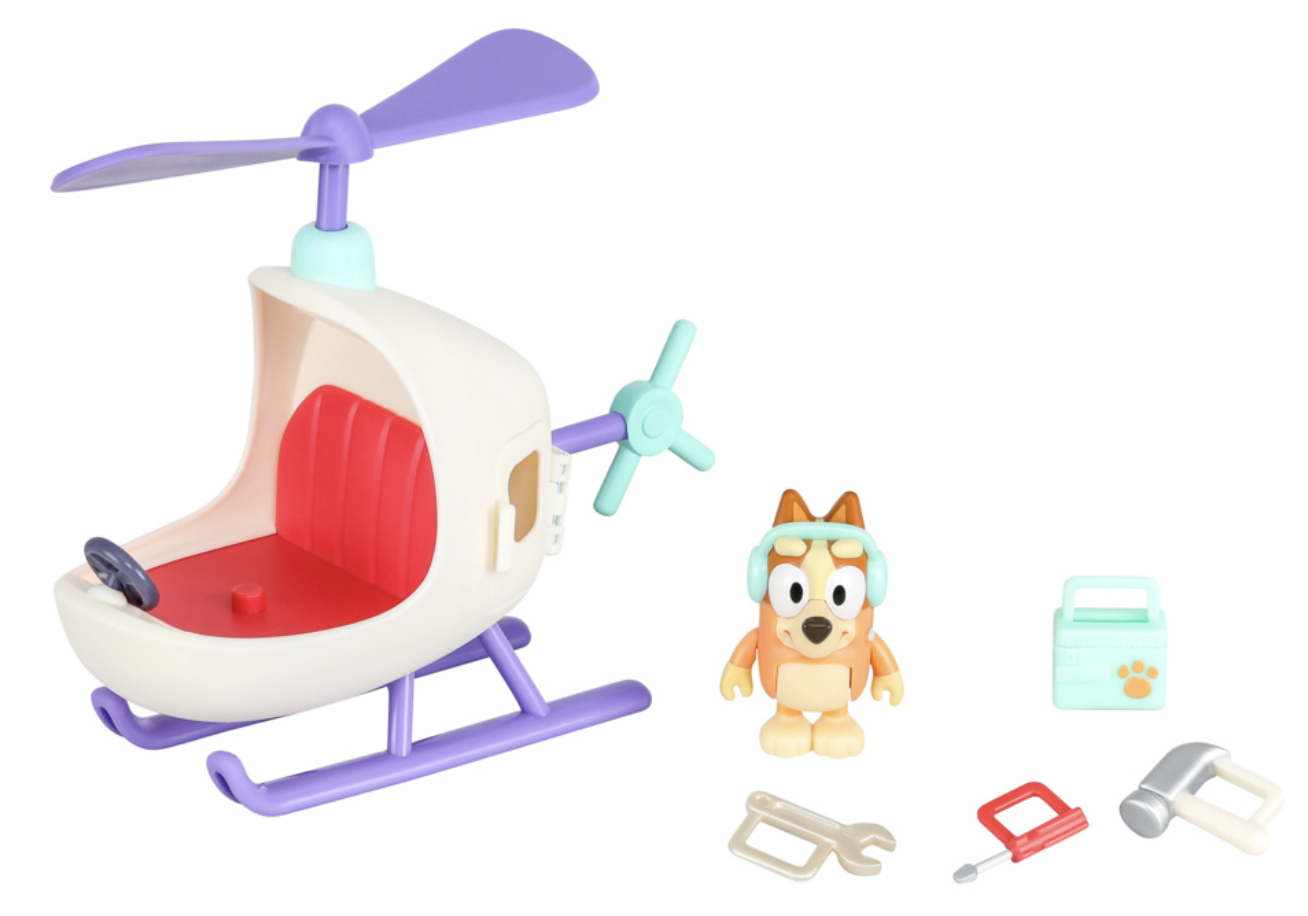

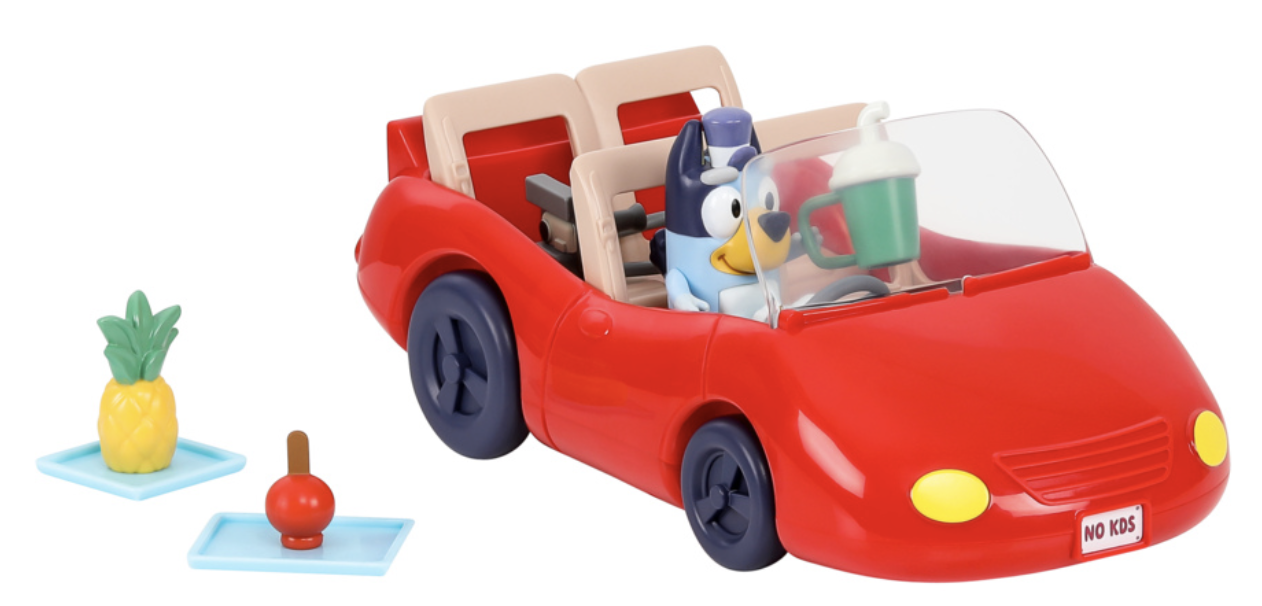
The playsets are also great for kids to build off their imagination and create their own activities. Here are some ideas:

Are these not the perfect kid’s gift idea for your little Bluey Fans? These toys will surely keep them busy. Being a parent is a full-time job and sometimes we just need a moment of peace. That gift of quiet time is priceless and you deserve it!
September Favorites: The most loved items from last month.

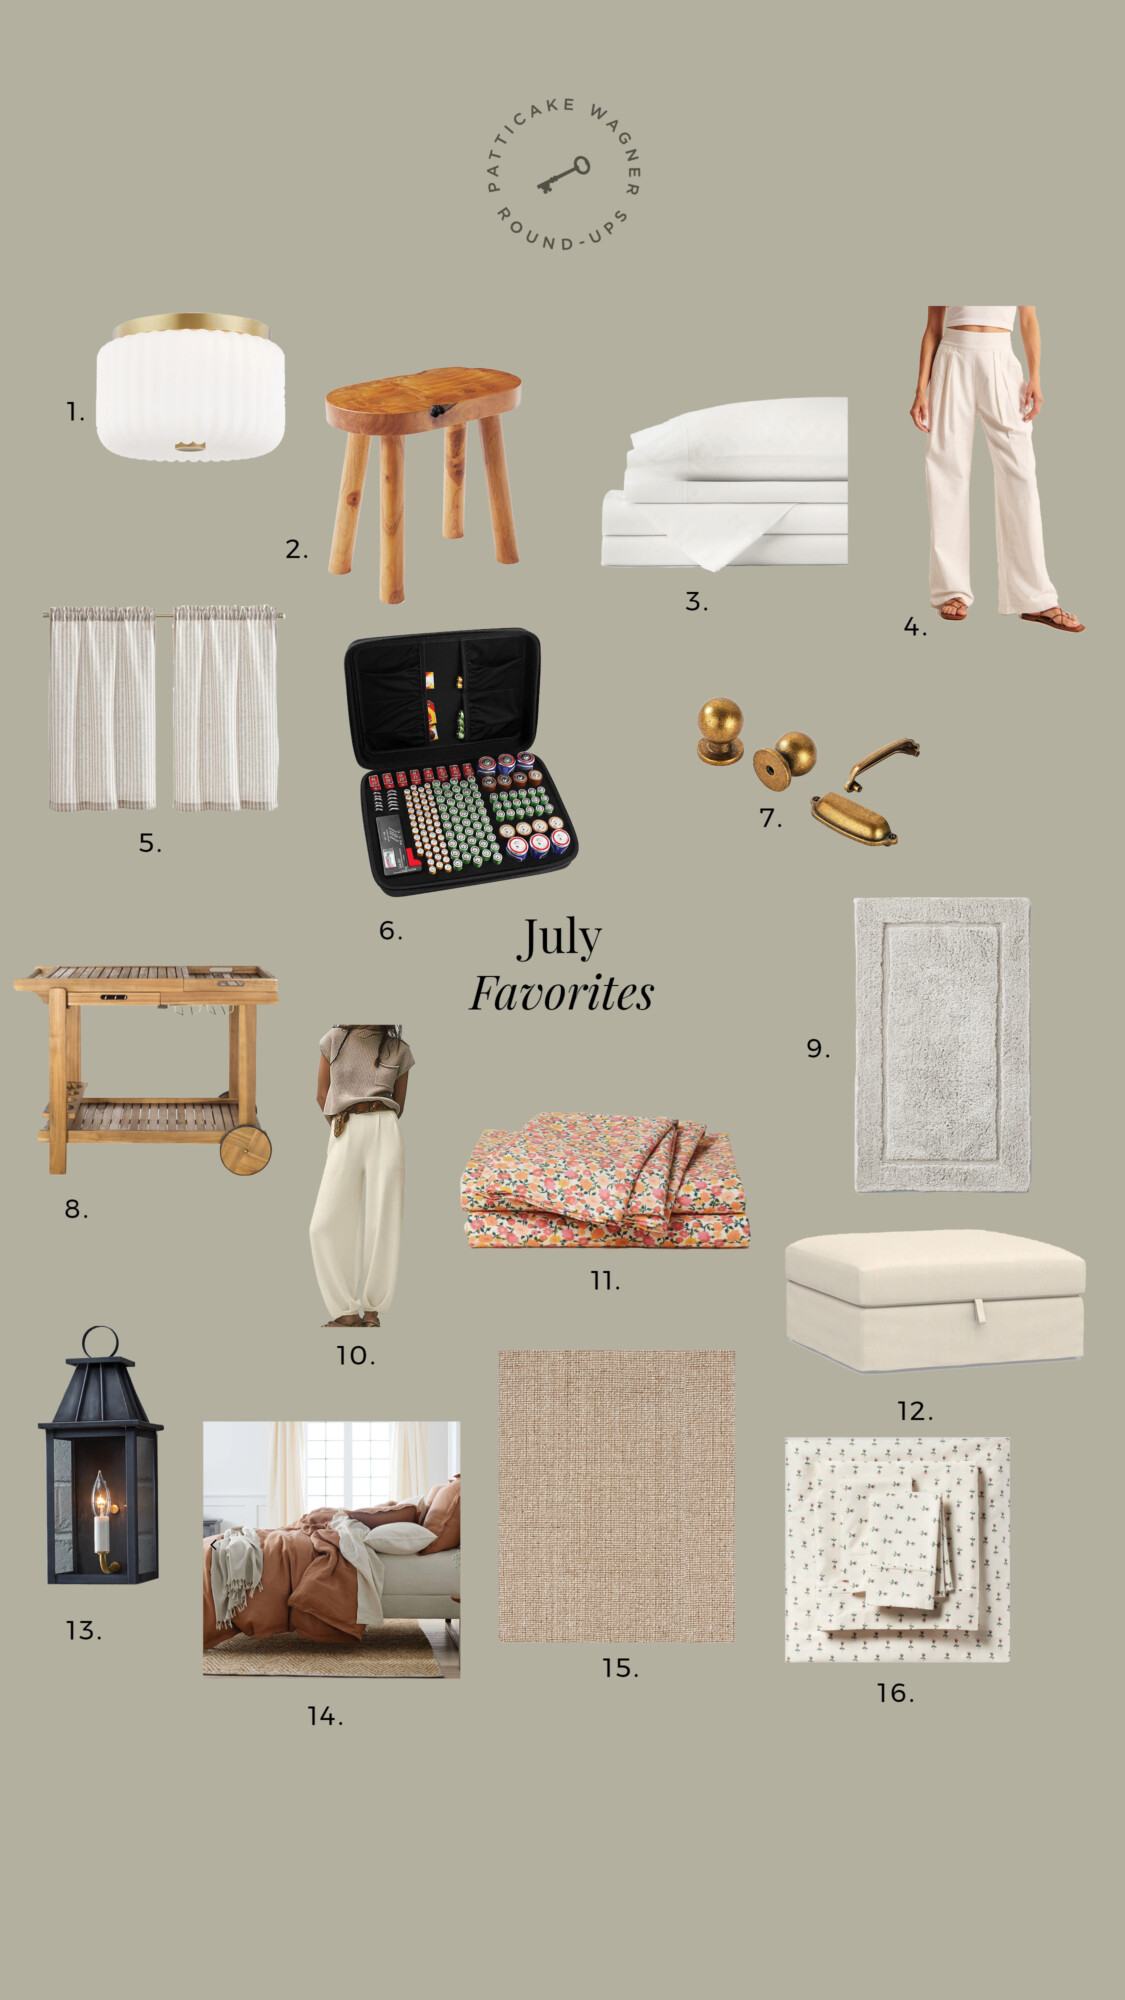
July Favorites: The most loved items from last month.

